Introducing The Mega Console System!
The Mega Console Project was designed to help make learning more fun. This very neat and clean solution gives the student a compact kit for
design and creation of just about anything imagineable. Through experience with the other offerings out there, we set out to make ours better.
Since this is all about Learning Arduino Programming, Robotics, Electronics and all of the related wonders, we wanted a Starter Console that
gives you:
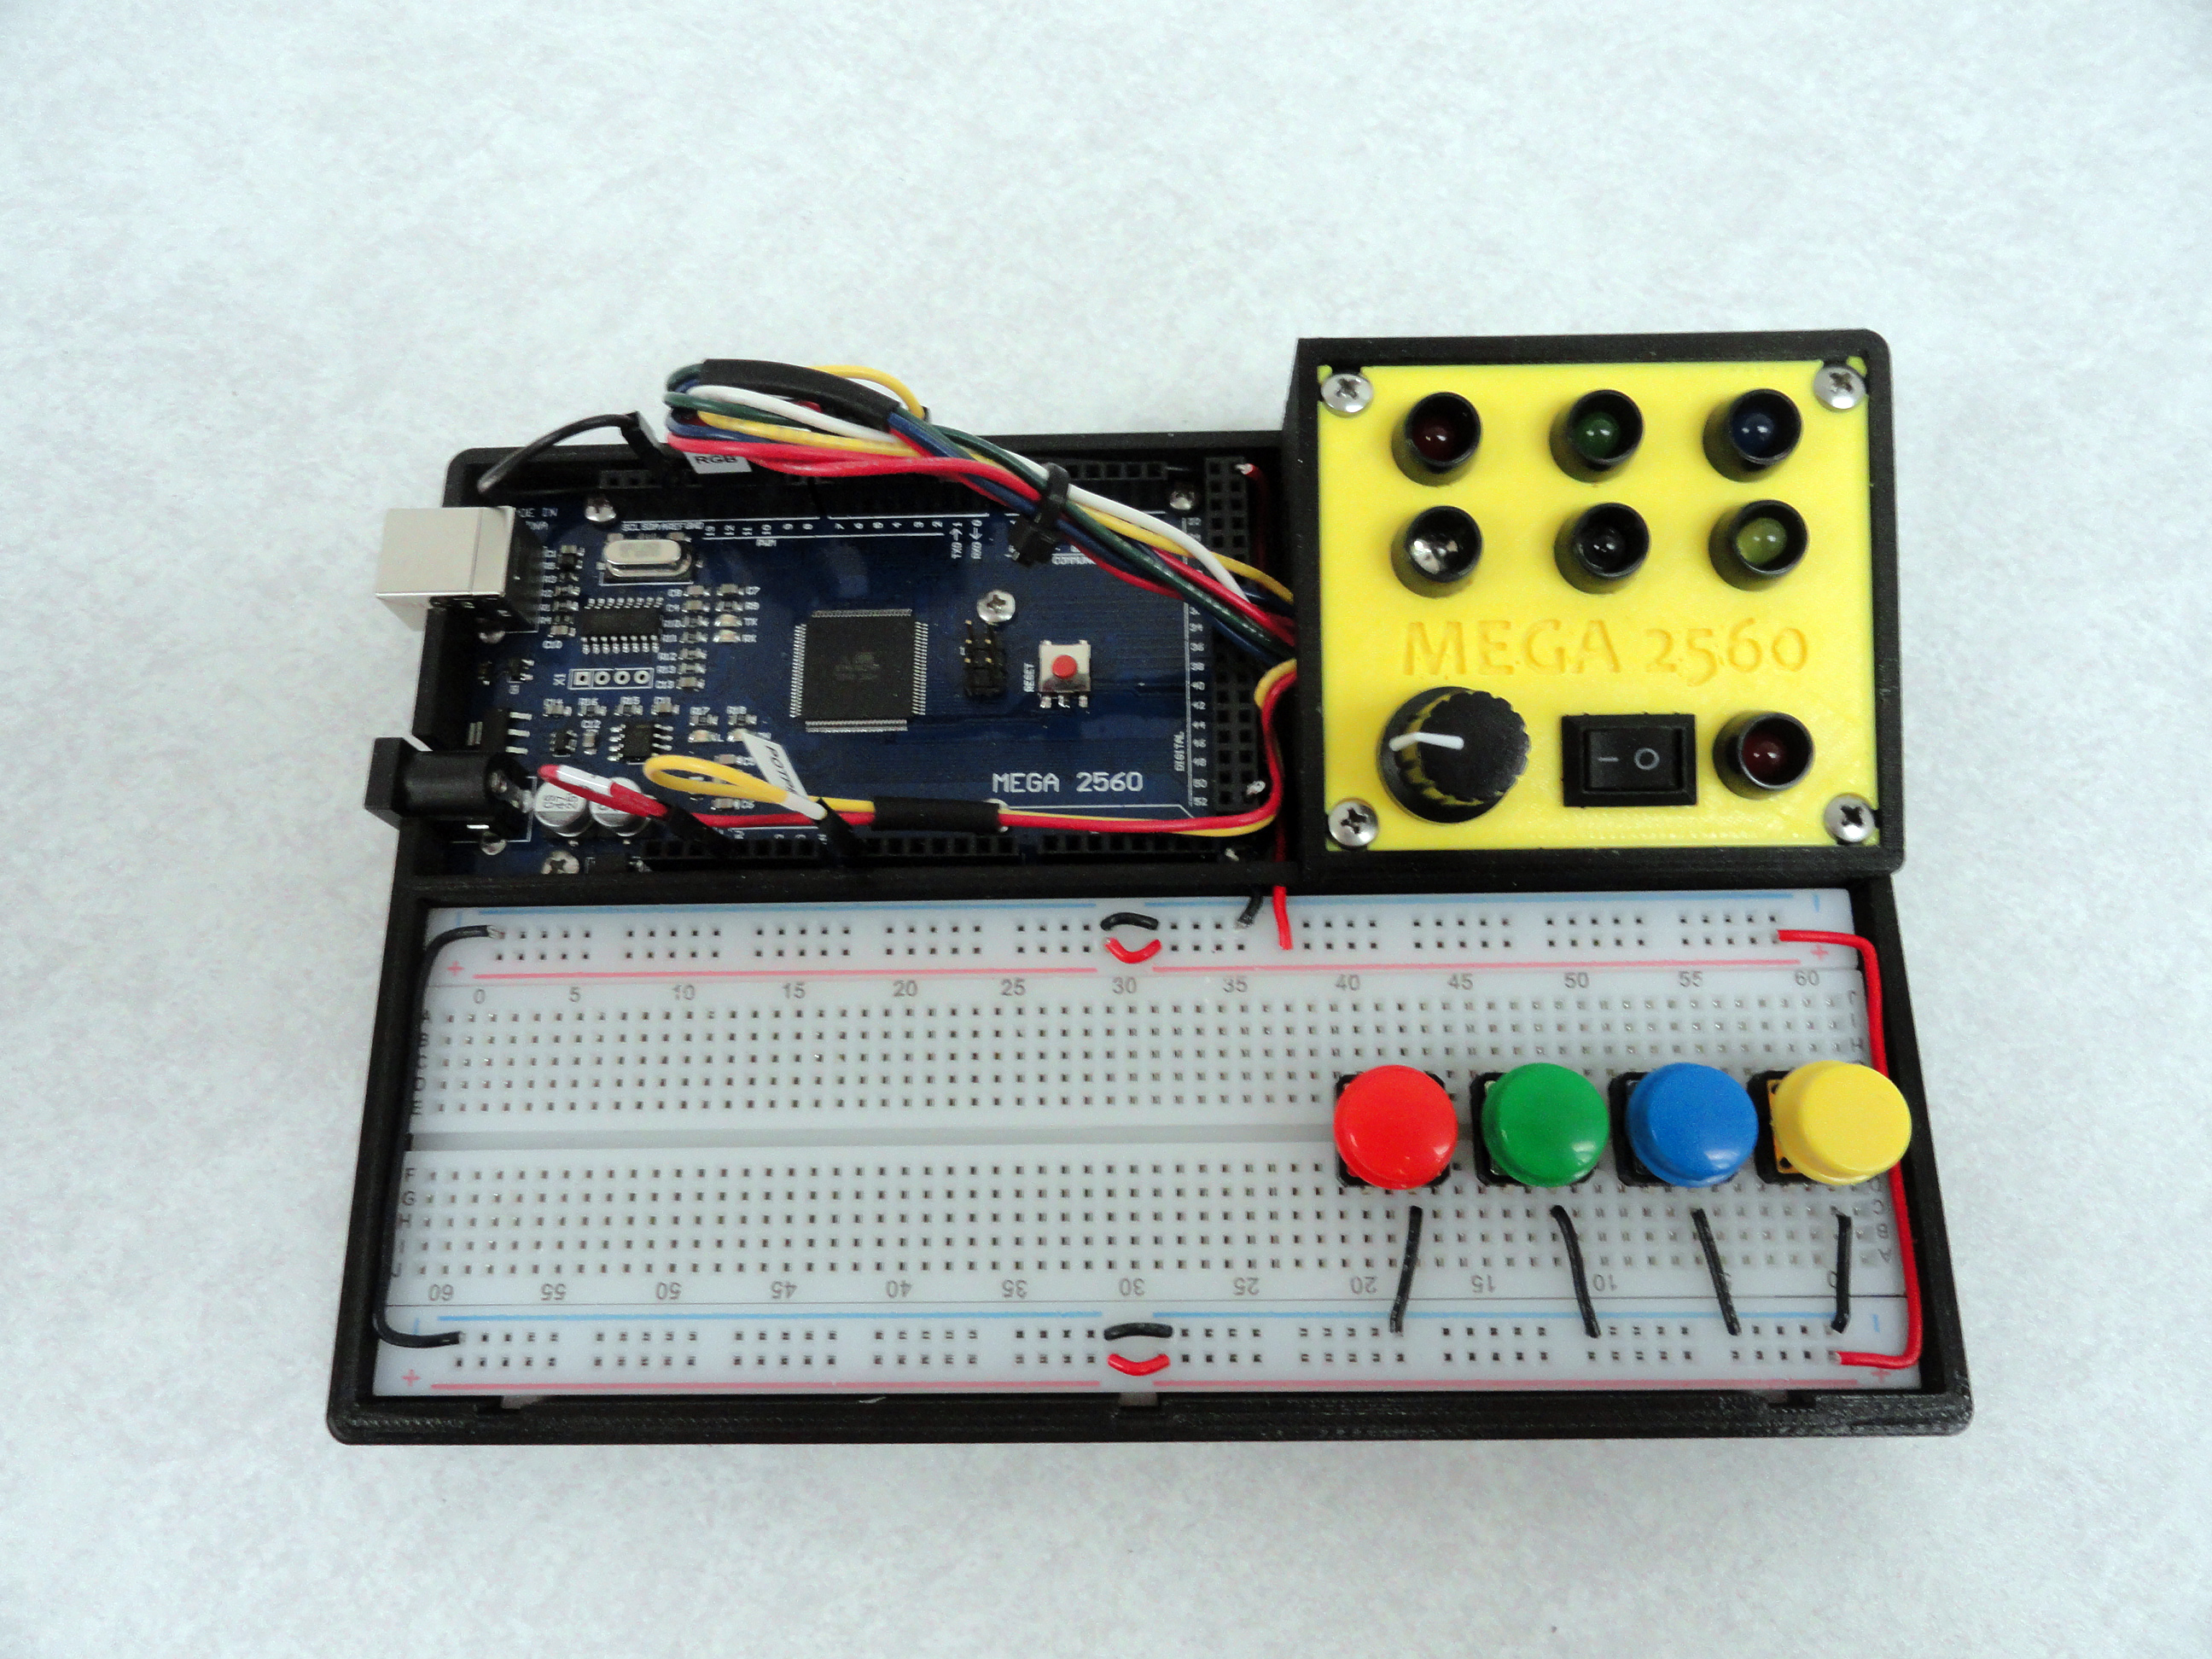
- The more powerful Arduino Mega 2560 R3. This choice is to give the student a very expandable, very powerful micro-controller to get comfortable with. This choice allows us to use more complex programming code without running out of resources.
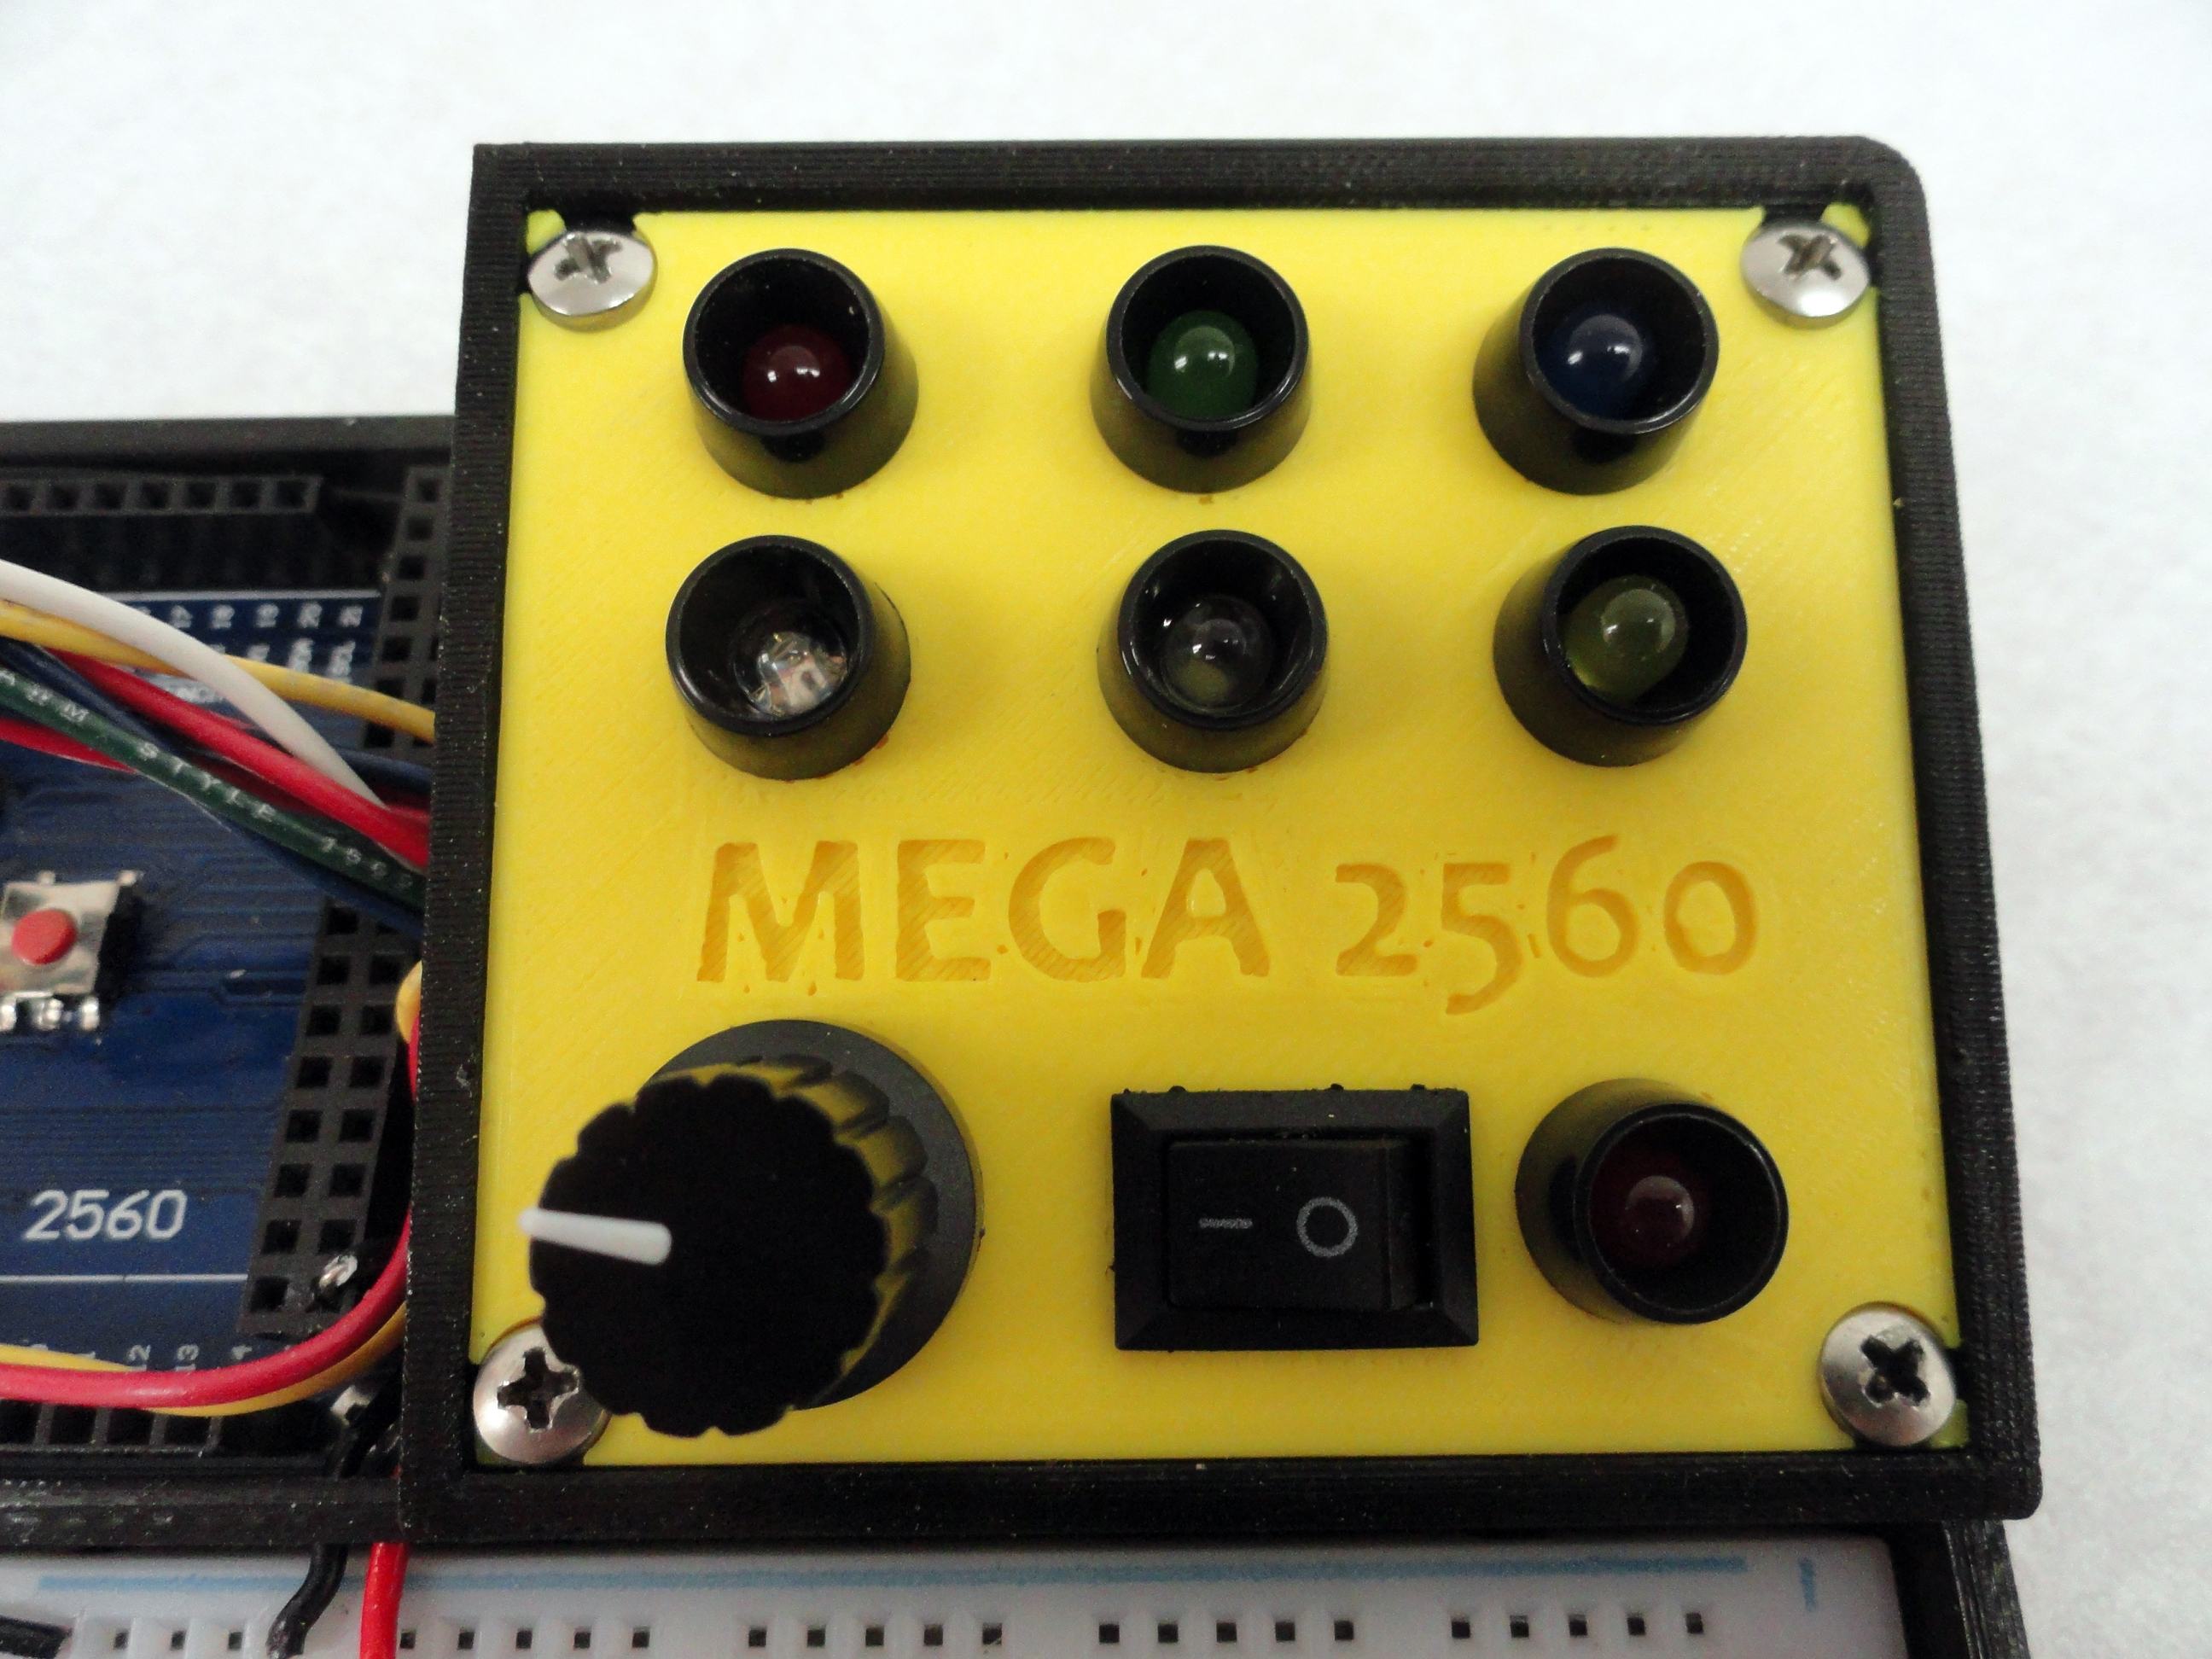
- Six 5mm colored LEDs and One 5mm RGB LED make up the lighting system. This is to give the student practice on how to control the lights individually, together, with/without Potentiometer Control, and much more. The RGB Led is capable of 256 colors!
- A 100K Potentiometer allows us to control the lights, or any other project the student is working on that requires analog control of the Arduino's digital resources.
- A toggle switch that turns the Consoles resources ON or OFF. This kills ground to the console quickly.
- 4 momentary buttons affixed to the breadboard allow the student to learn all about button control of their creations.
- MOST importantly, we have created Console Add-on Modules as explained below!
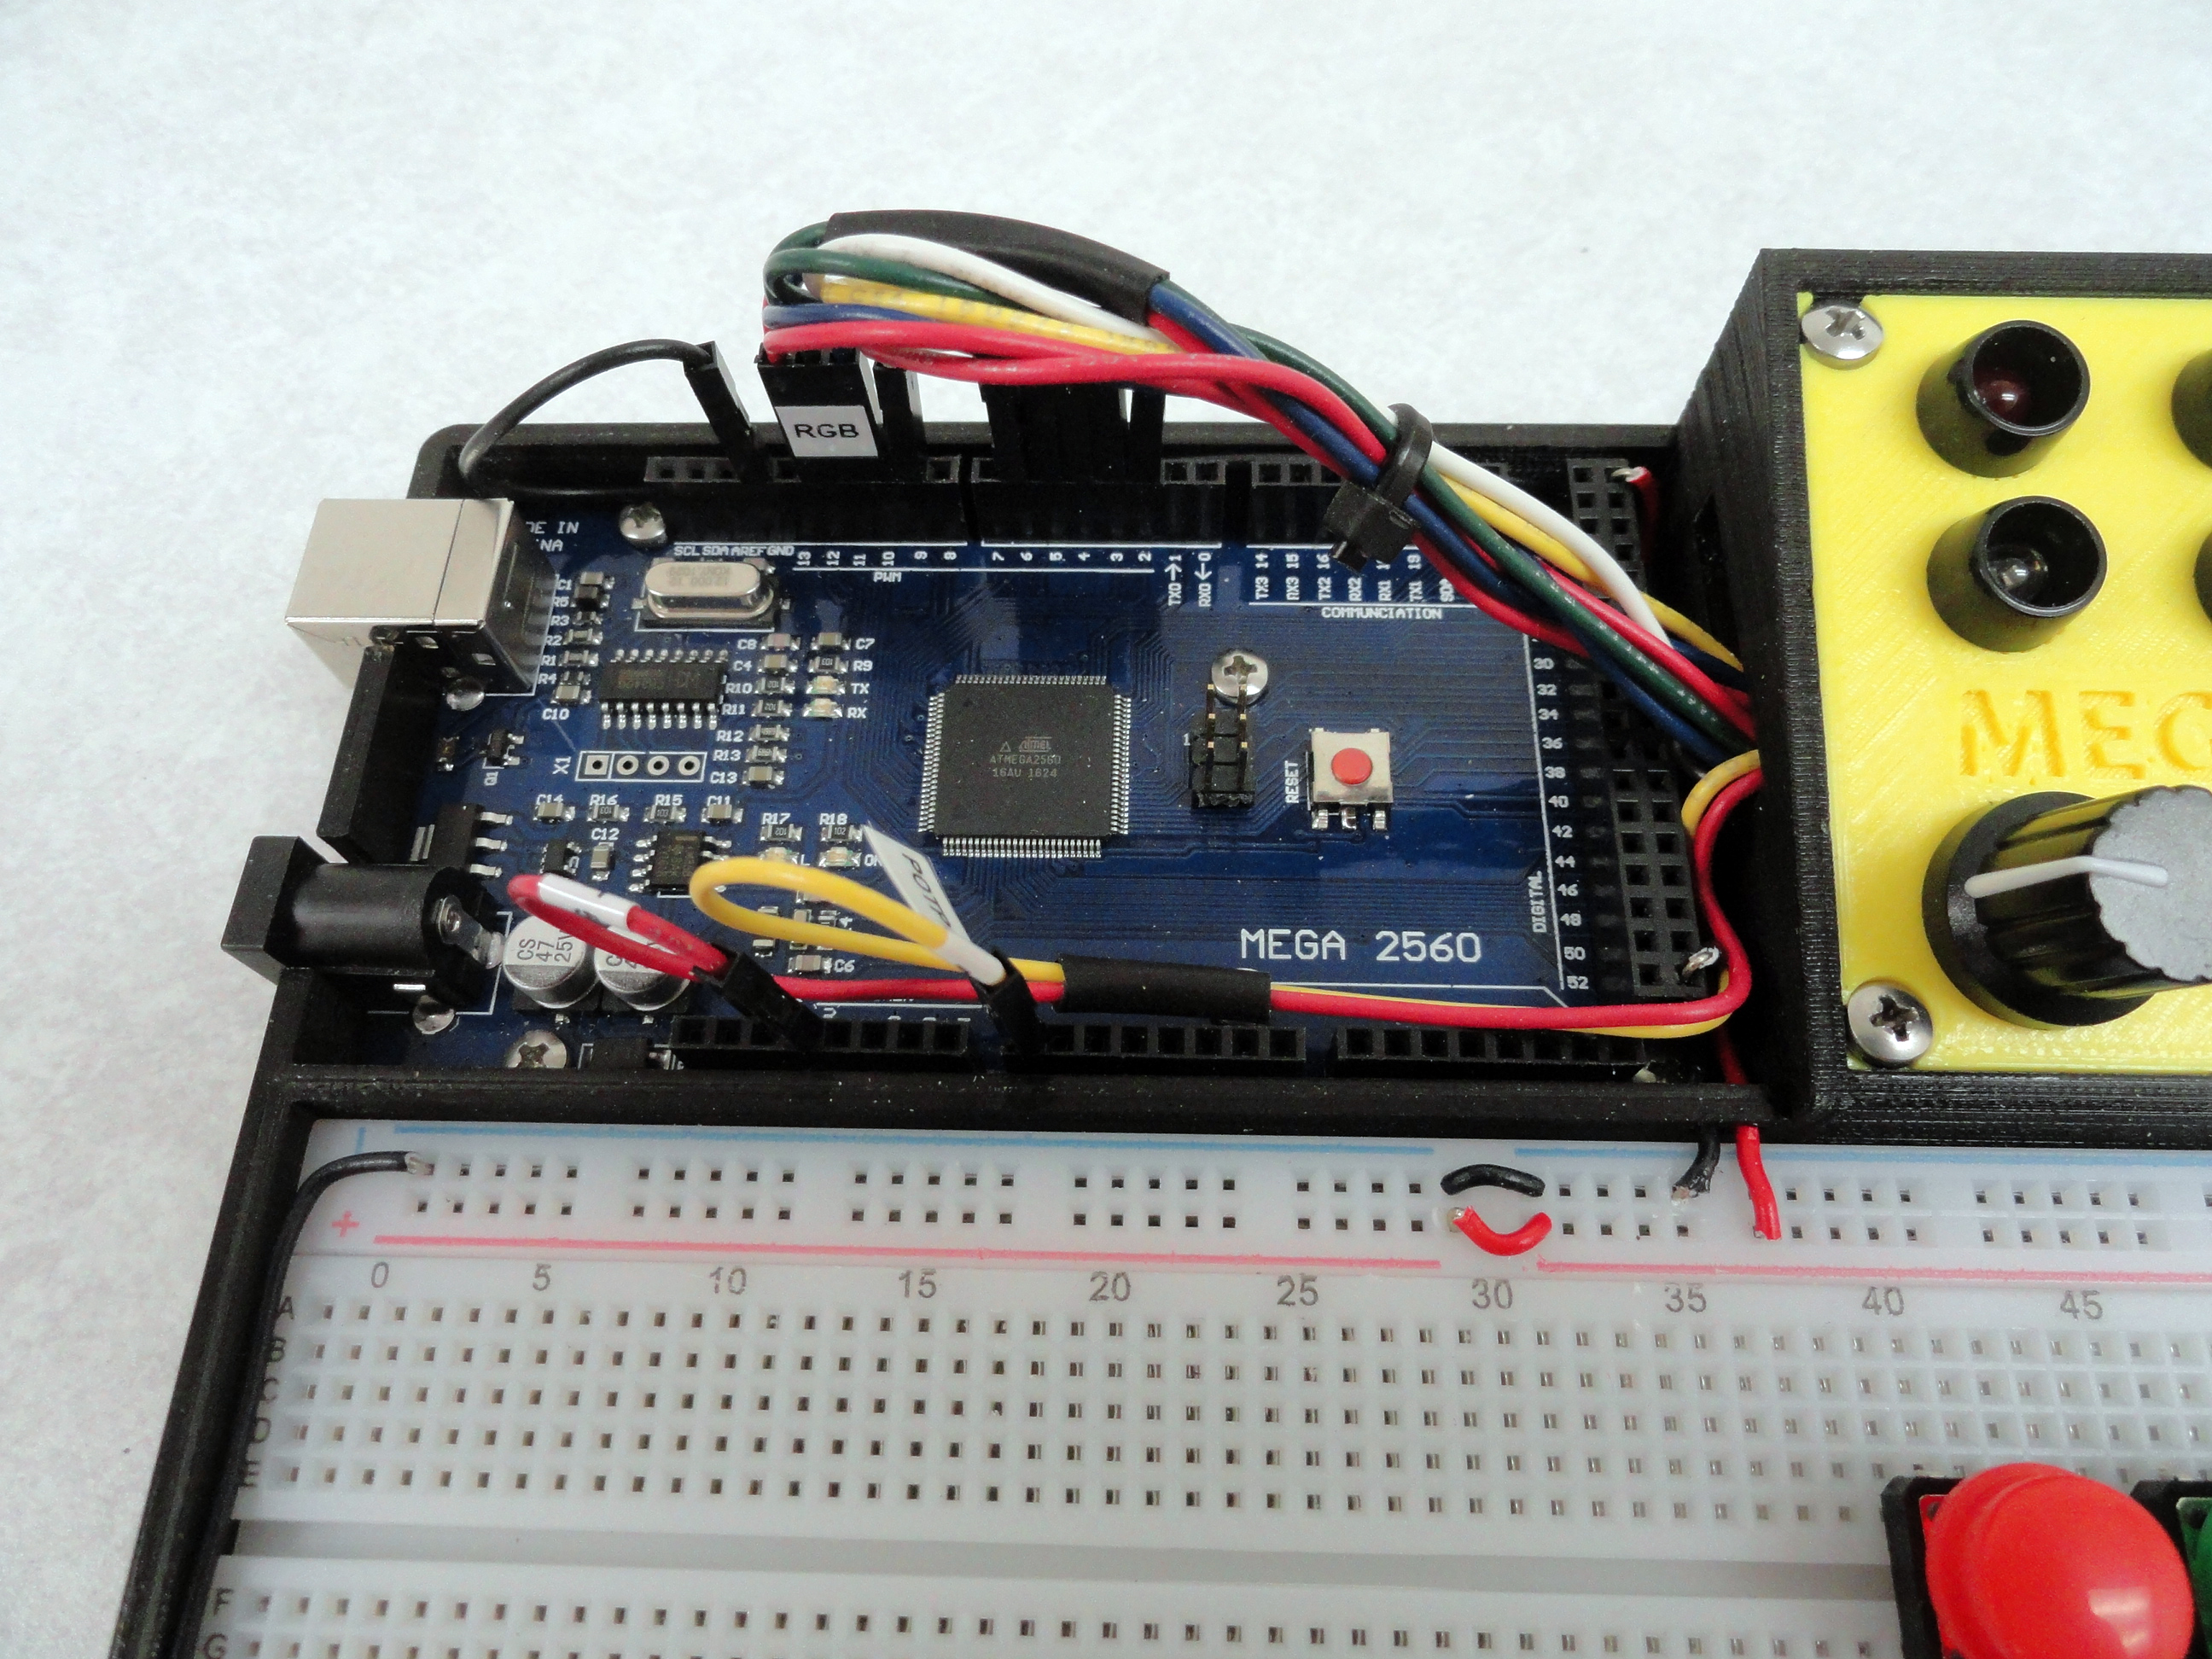
The reason we chose the Mega 2560 R3 is because it didn't take very long in our own learning journey to run out of memory and resources like
interrupts, timers, and analog/digital inputs. Many of the projects you will encounter on the internet require more resources than the Arduino
Uno can provide, so we felt that skipping the step of purchasing an additional Micro-controller was just more efficient.
The console LEDs, Potentiometer, and Toggle Switch all share the same common ground. This allows us to kill power to the console using the
Toggle switch in case a student wires something wrong. That never happens right? The 100K Potentiometer was chosen to lessen the power burden
on the Mega 2560 while providing the same analog capability as the less expensive 10K models. The LED's were chosen for variety with Red/Green/Blue
on the top row, RGB/White/Amber on the bottom row. A red LED beside the switch can be configured in the same manner.
The RGB LED just below the Red LED above is a Common Cathode, 256 Color RGB LED capable of any of the colors in the spectrum. If a student
gets bored with a color, they can learn to change it through coding!
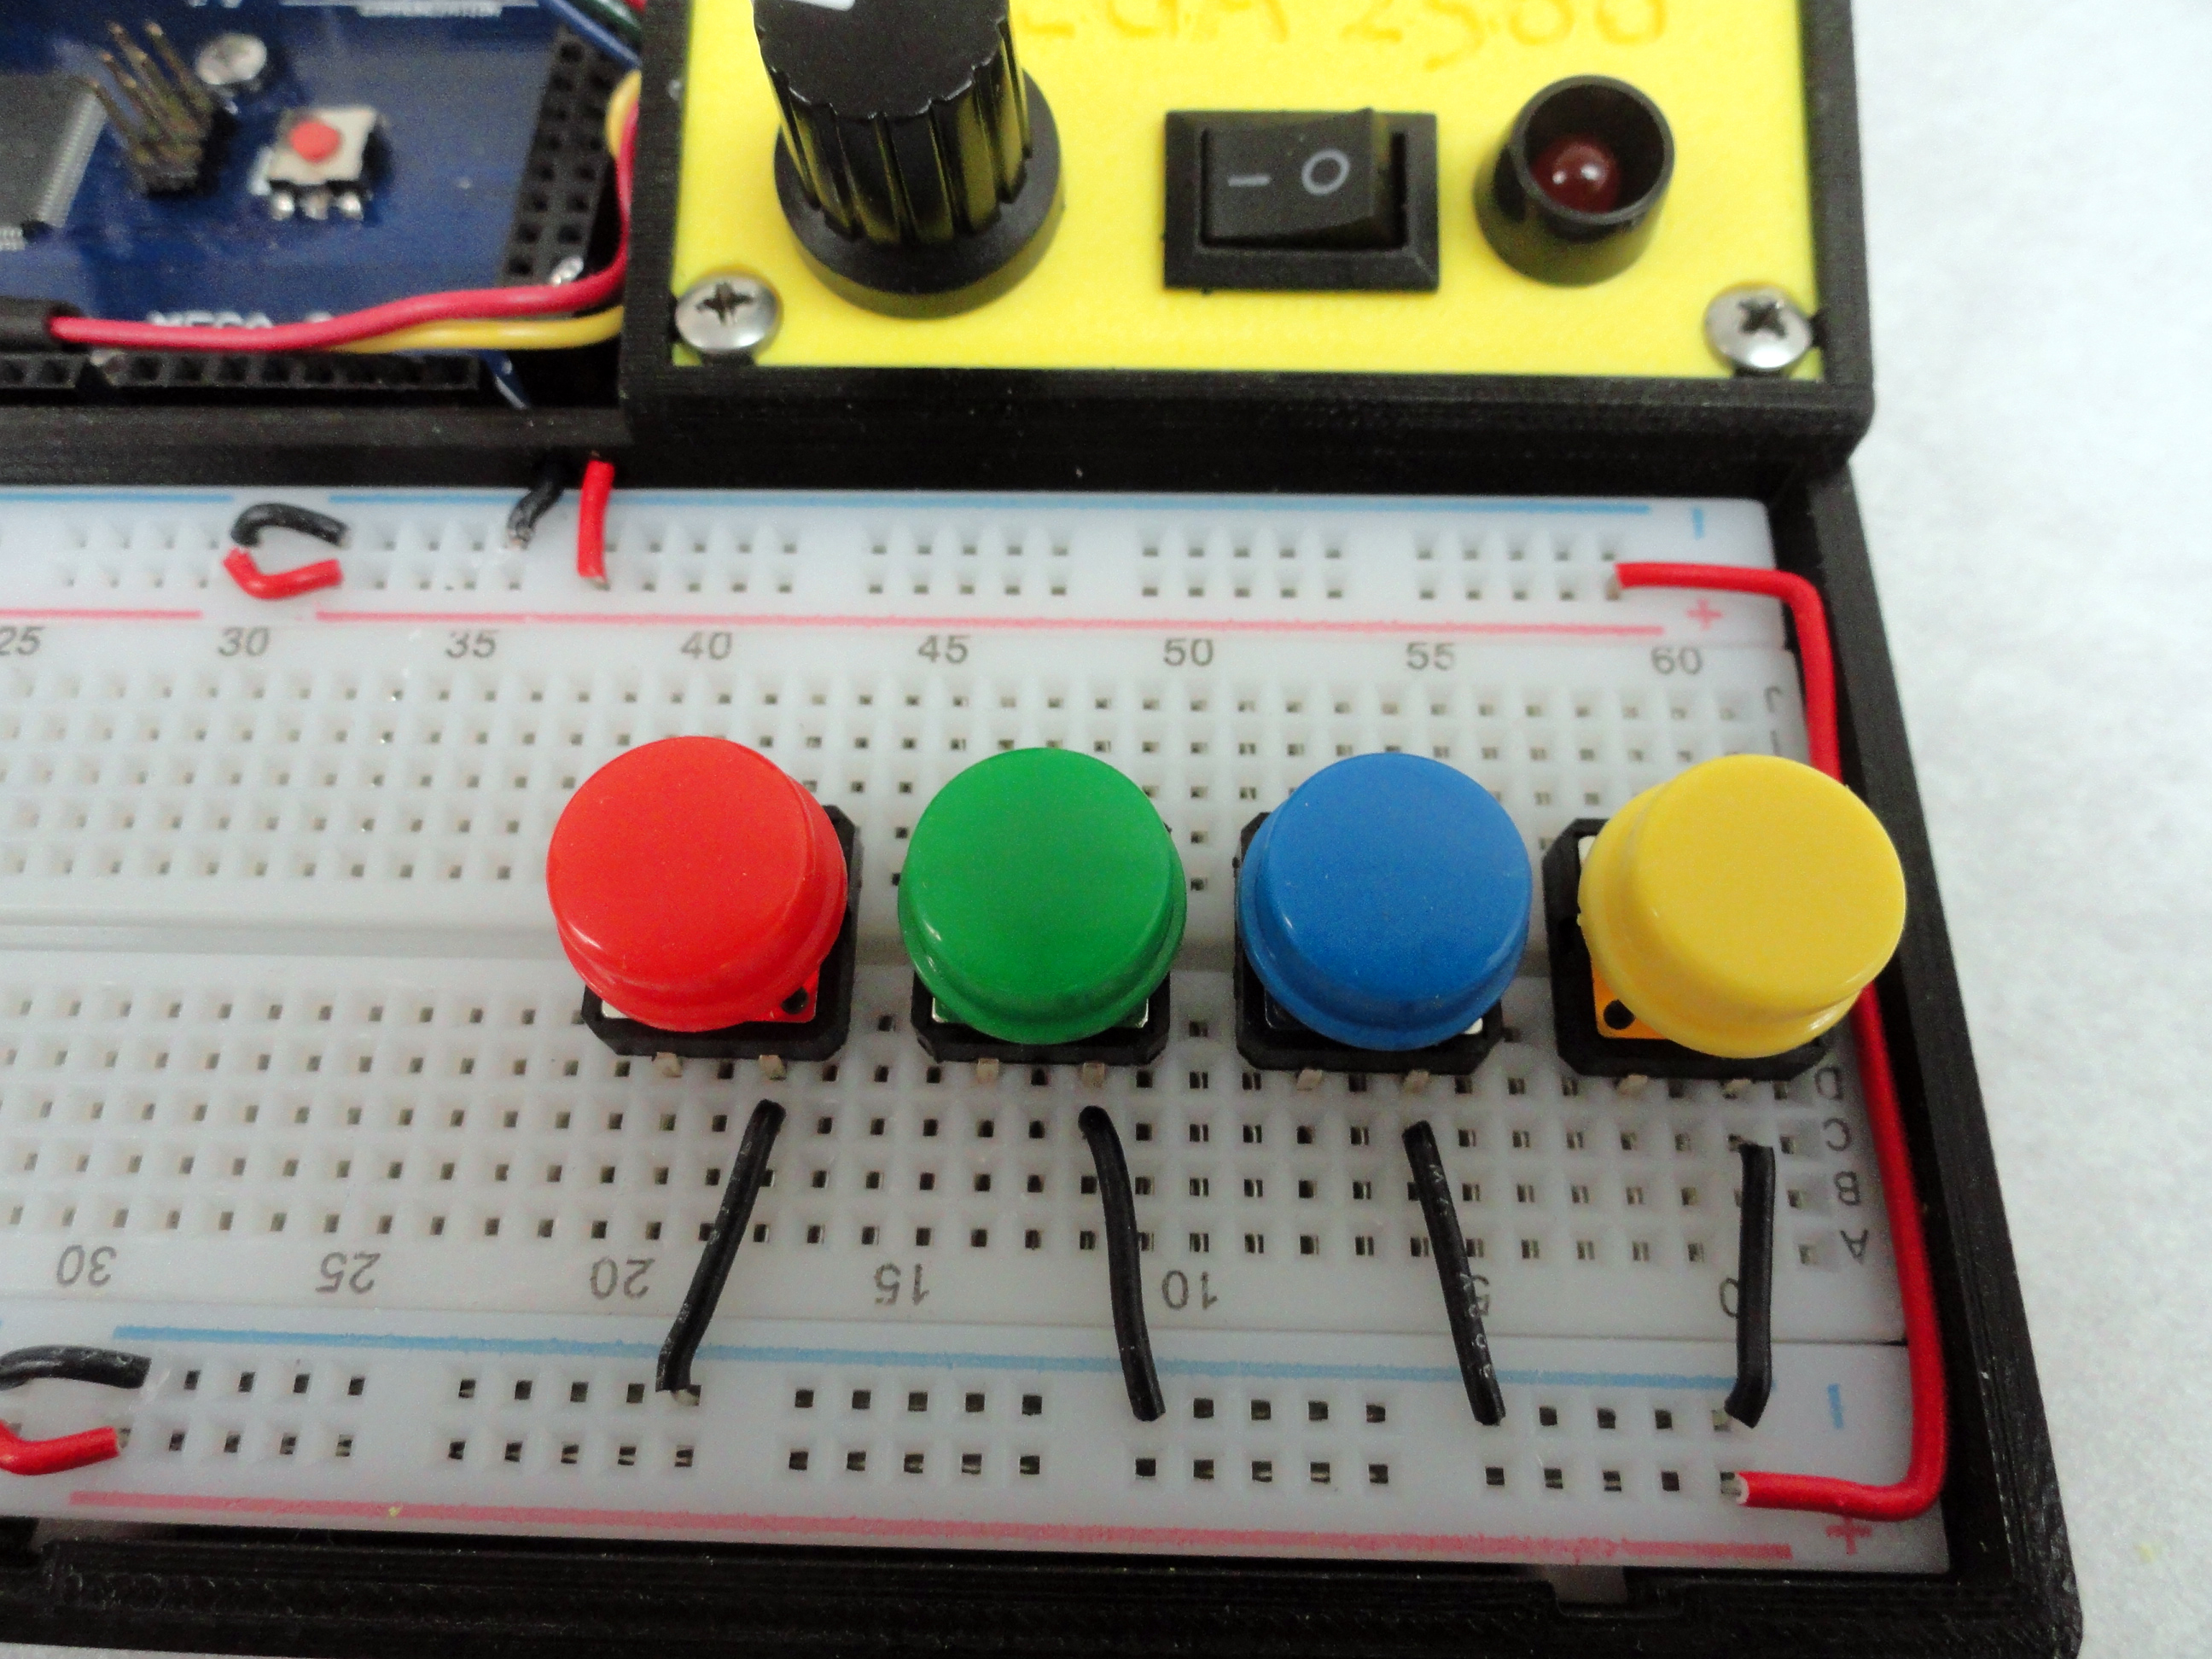
The four buttons that are Super Glued to the Breadboard so they cannot work themselves out of the sockets are Red/Green/Blue (RGB) and another
color so as to differentiate themselves. Each button is a Momentary (ON) button (which means it is OFF by nature) which enables the student to
program each button for many things. Through coding, we can program a momentary to become a toggle among other things. Each button through
programming can control single LED's or many other add-on devices and sensors.
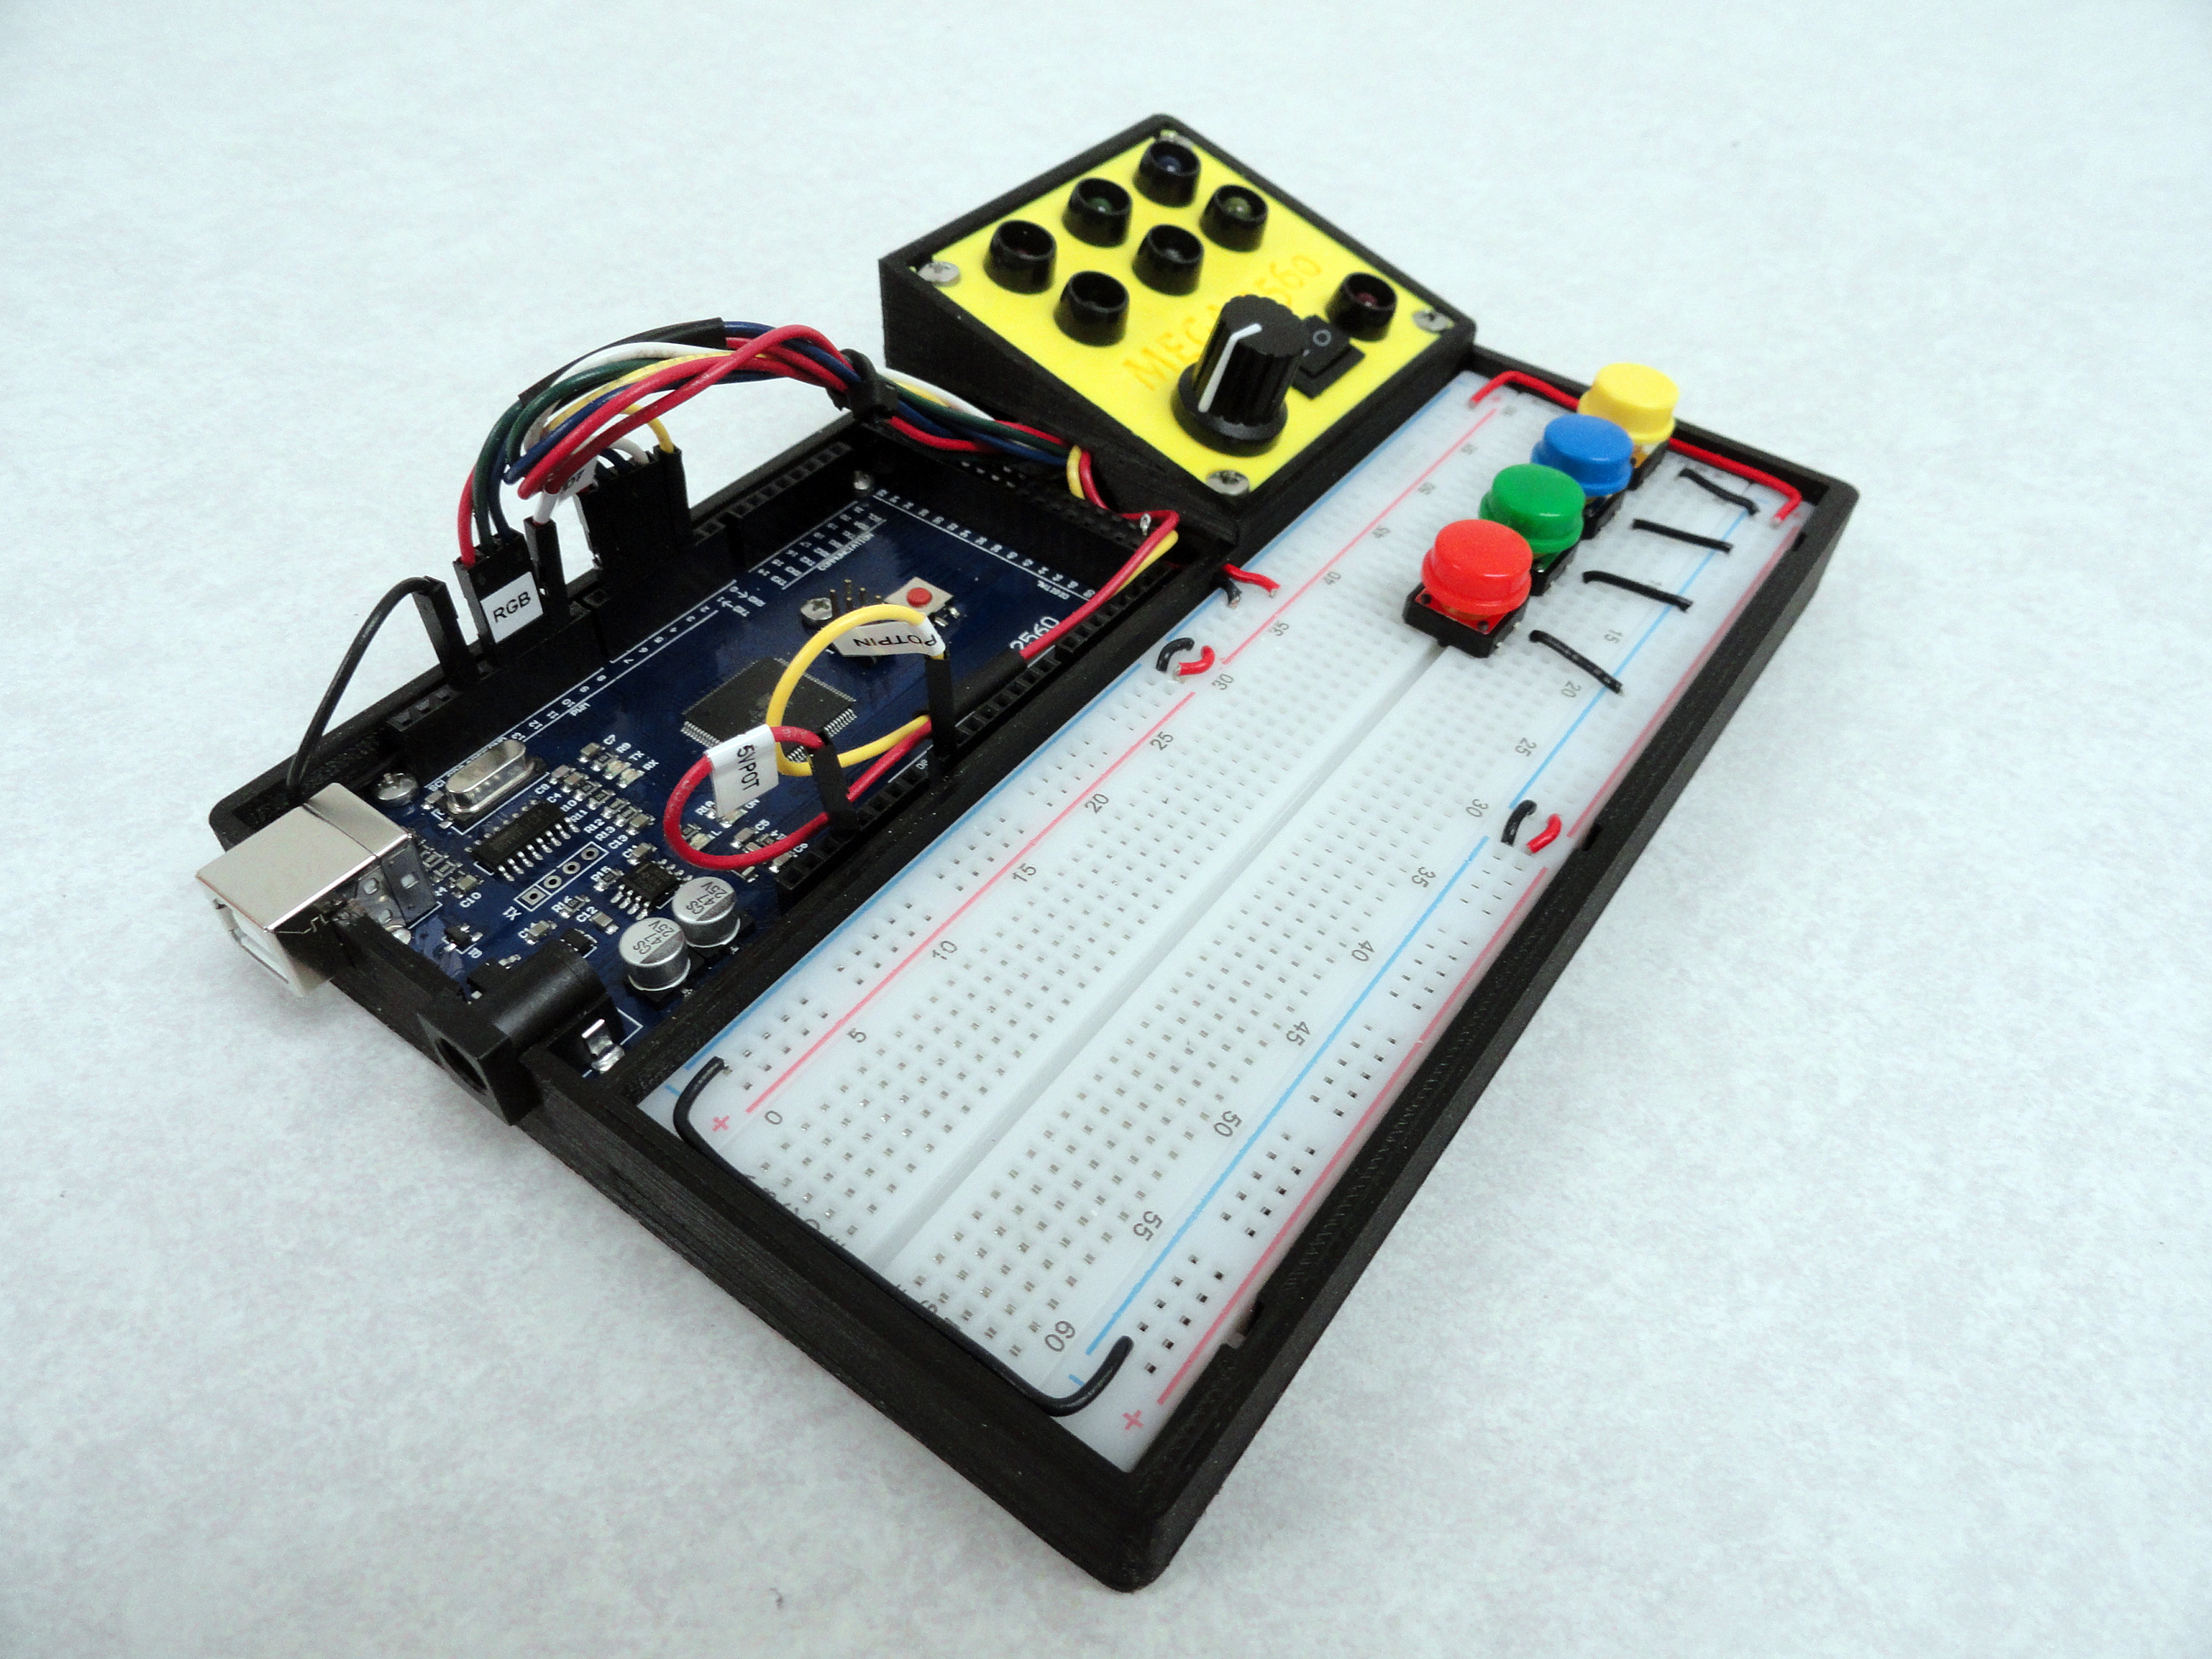
This console is made sturdy! It is 3D Printed using PLA filament and the design uses 3/32" or roughly 3mm thick walls. Another nice thing about
it is, it comes in any color choice you can imagine as long as that choice is Black! The breadboard is of high quality and is considered a full
size breadboard at 164 x 54mm or 6-7/16 x 2-1/8". The wiring is 24 gauge and uses the preferred Dupont connector system. Each wire is either
clearly labeled or colored the same as the LED that connects it.
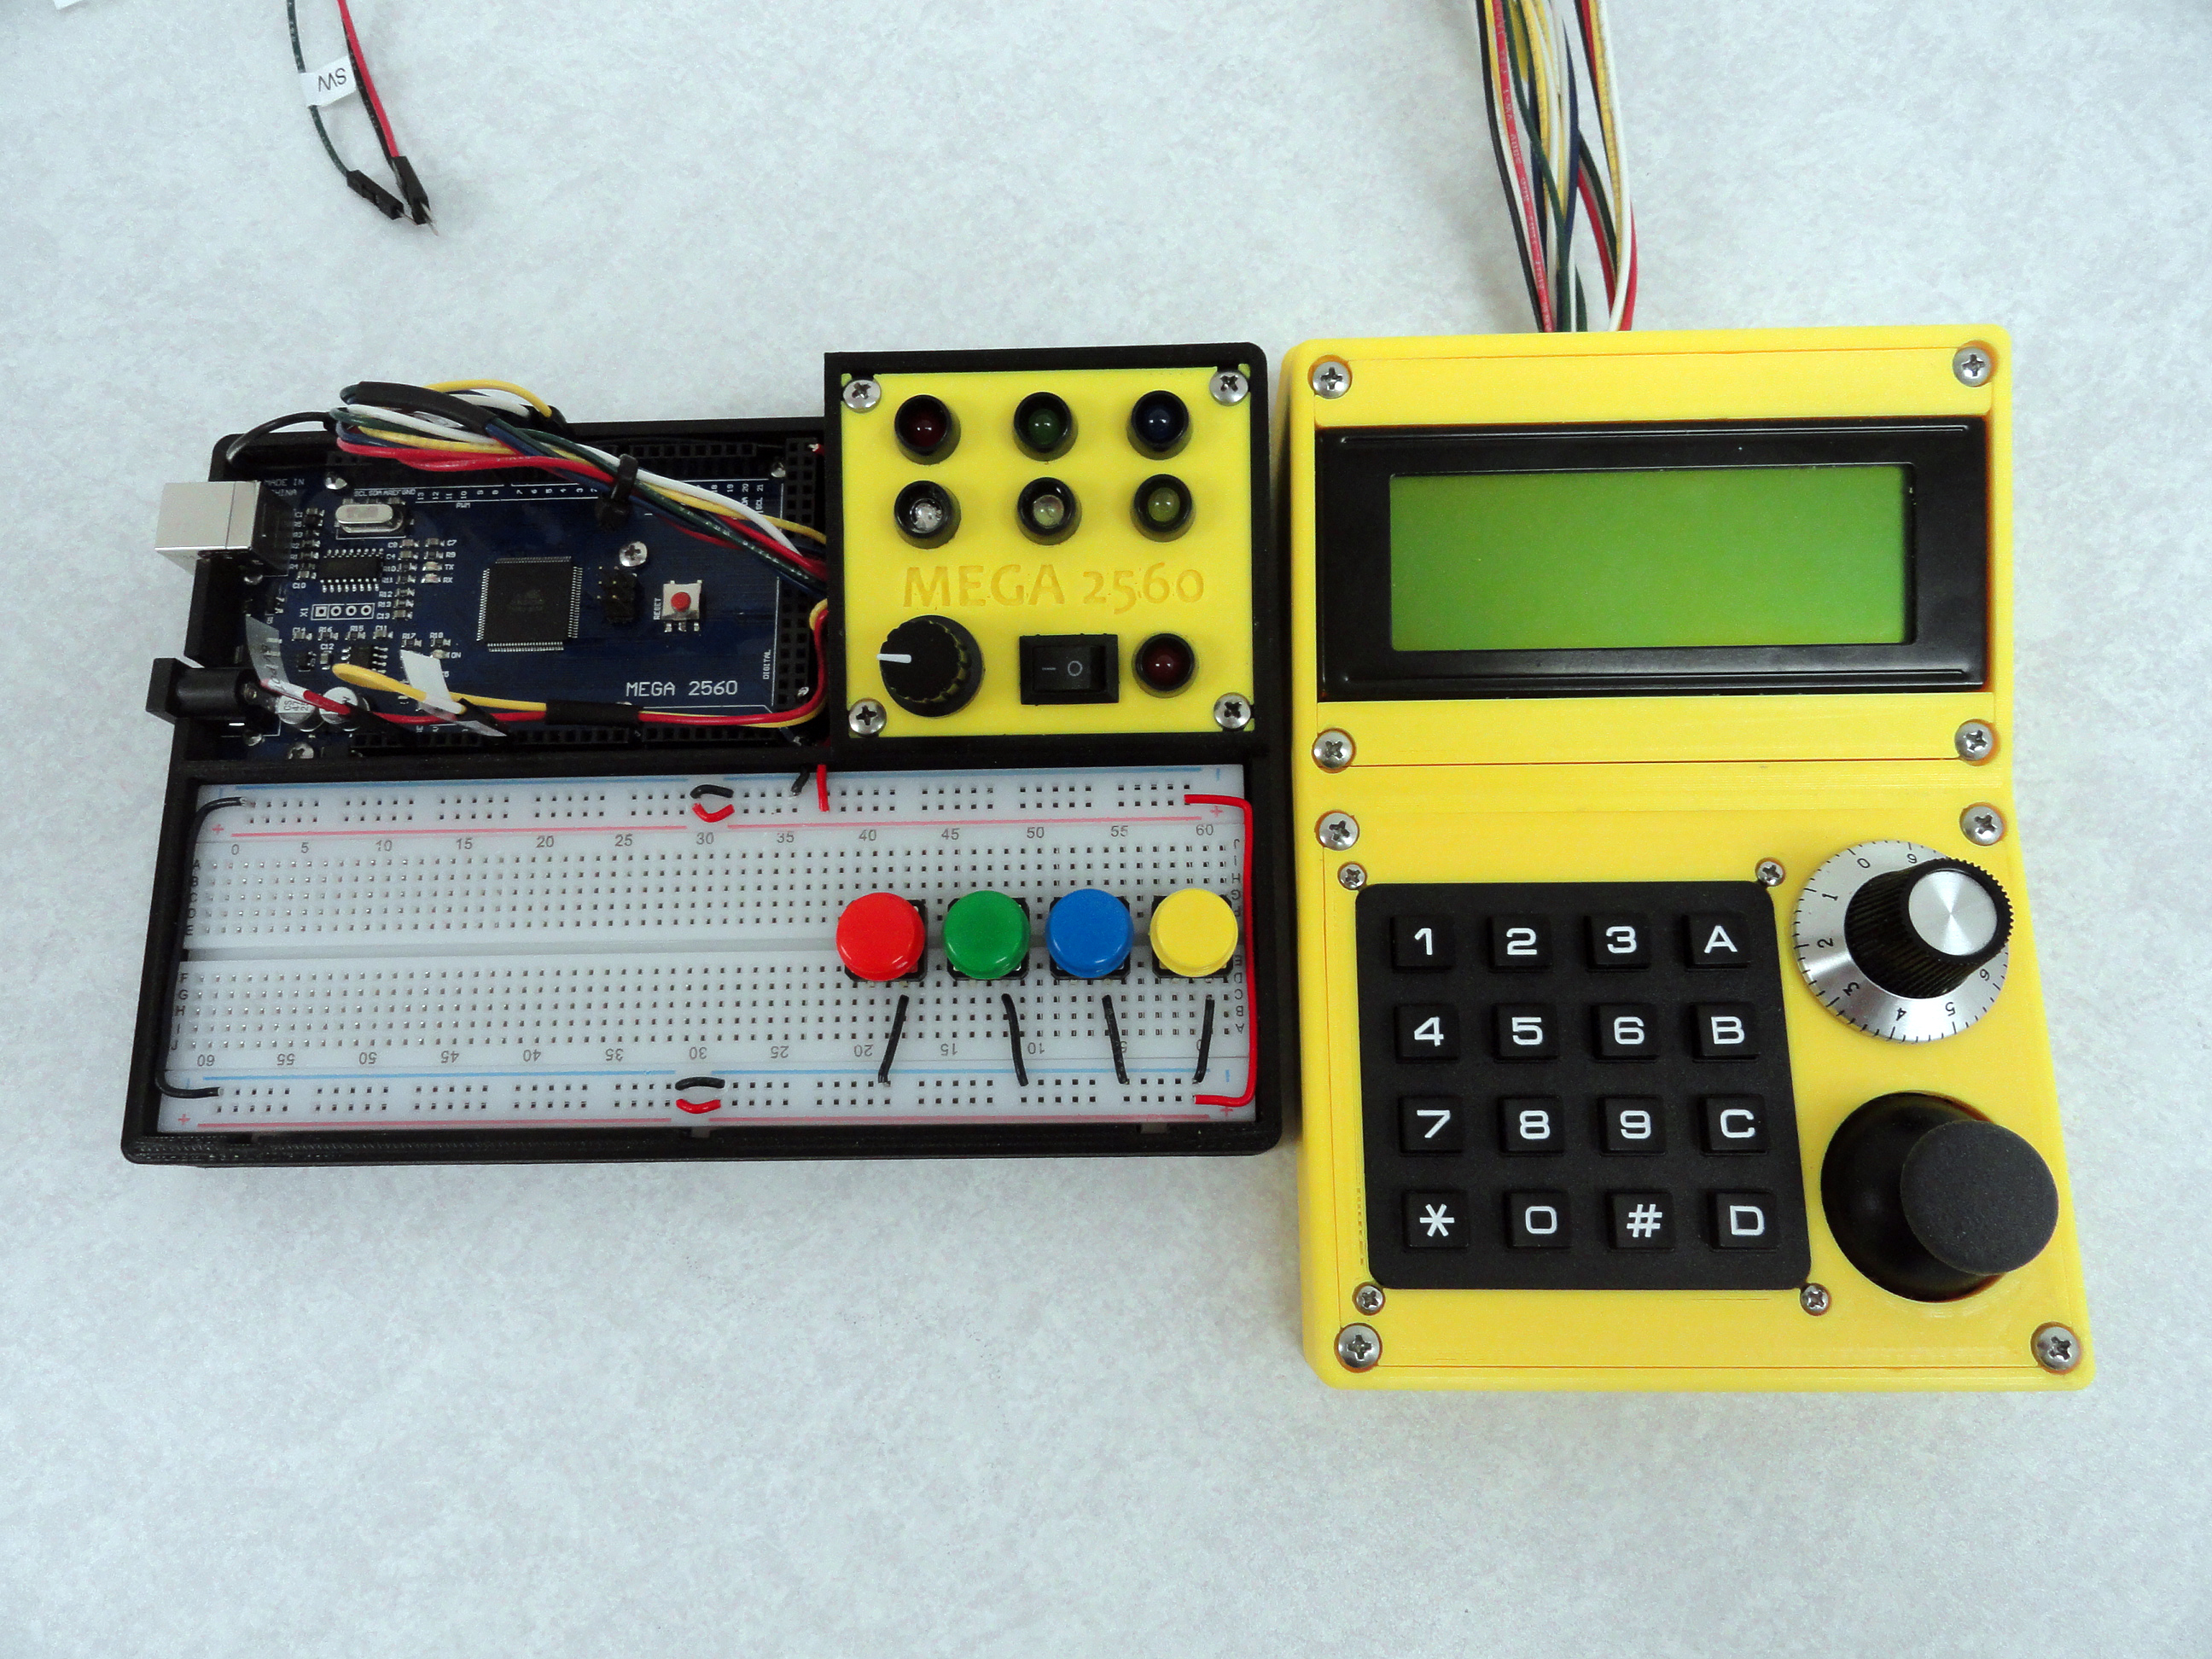
But there is MORE! Introducing our first Add-on Module!
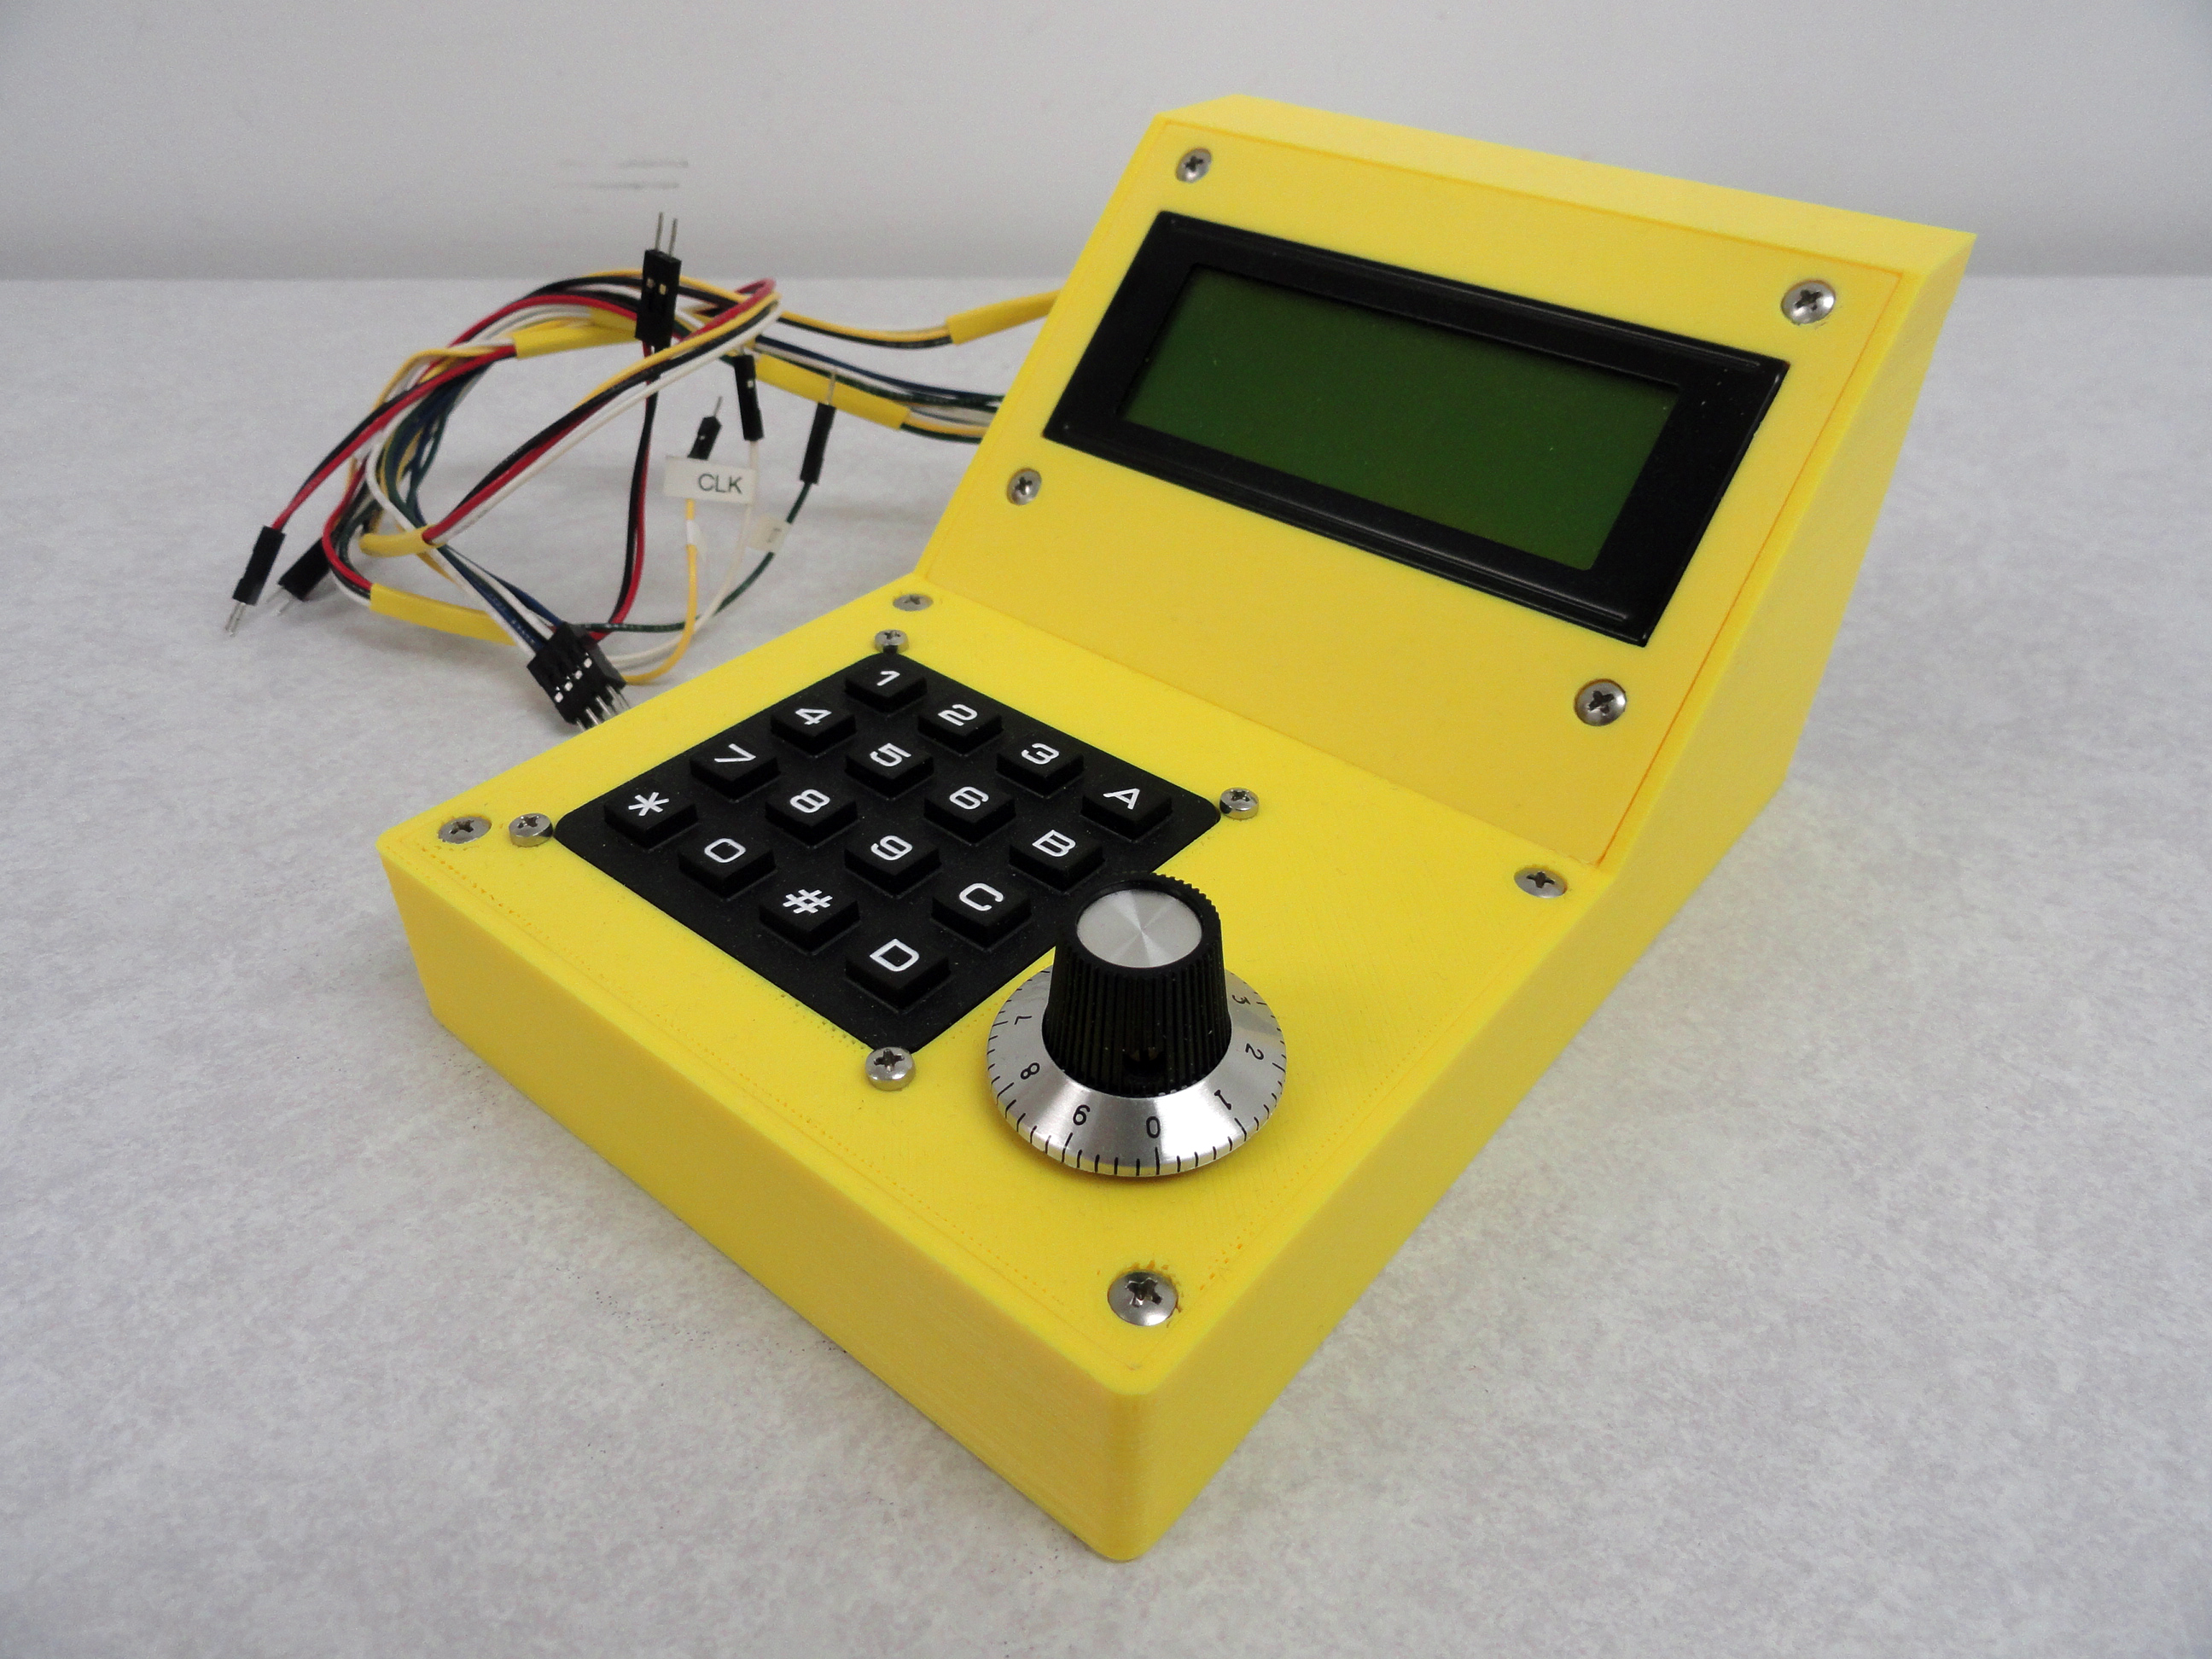
We didn't stop at designing a simple starter console. The student will eventually graduate to more advanced projects. Many of these projects will require more than just a single Potentiometer to control them. Many will also require a Display of some sort. Introducing our first add-on Console Module! This simple plug-in module contains:
- A 20 column by 4 row I2C LCD Screen. This LCD is the more deluxe larger size and is connected with only 4 wires.
- A Rotary Encoder. This knob rotates infinitely and is used in many modern devices including vehicles. It has detents that allow for a very large capacity menu system with many levels. Lots of possibilities for controlling advanced robotics.
- A 4 x 4 (16 key) keypad with real buttons. This can be used for learning about password protection, control, or anything requiring sequential keypresses.
- A Thumbstick with Switch. This is for learning about control using the X and Y coordinate system. Many possibilities here.
This Add-On Module is pre-wired and tested and connects directly to the Mega Console using the Digital/Analog Pins of your choice. The wires are labeled for easy attachment. There are more modules under development but we would like to hear from our students as to what they would like to see next!
Accompanying Lessons!
Our desire is to eventually develop downloadable Lessons that use this console from the most Basic to the more Advanced levels of coding. As we develop these lessons, we will make them available here. We feel a good time to introduce this system to a student is at about the Middle School level and some students even earlier.
Prerequisite: Basic Electronics Refresher.
Lesson One: Blinking an LED at the interval of your choice.
Lesson Materials: Schematic Diagram of the Console Wiring and how the LEDs/Parts are pre-wired.
(more to come)