Introducing The Porta-Power System!
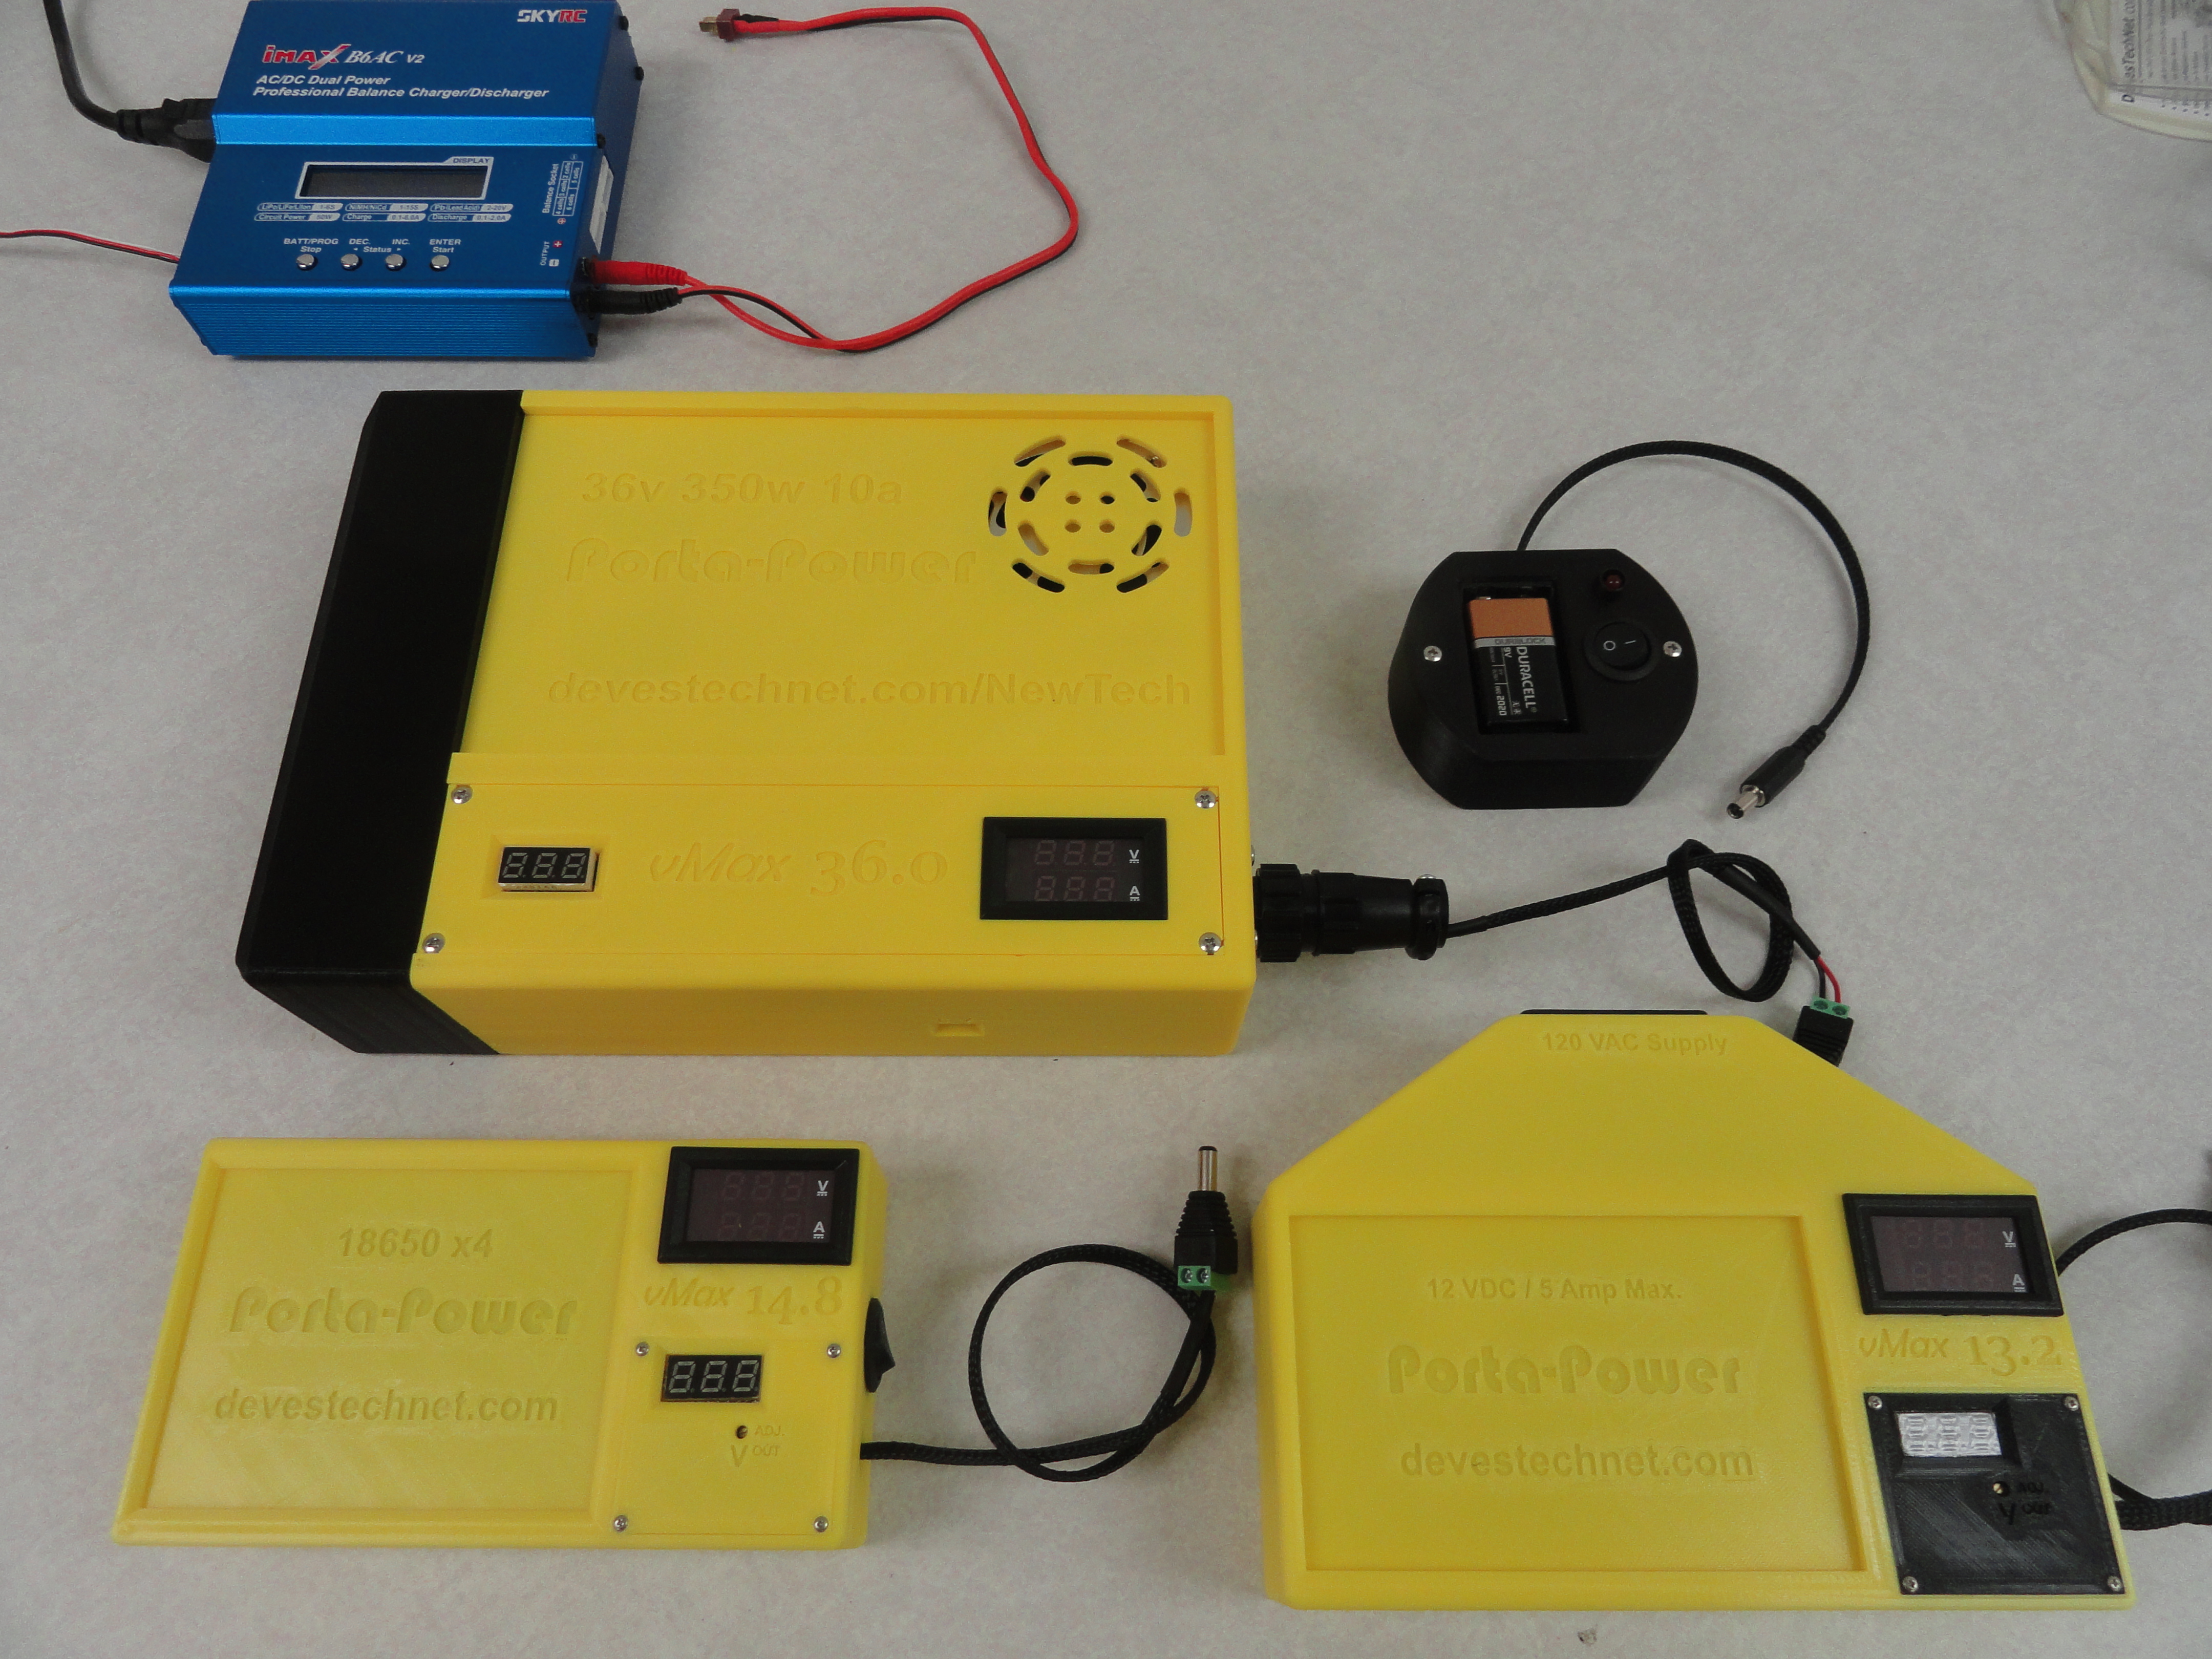
I wanted to resolve power issues around the Lab. Example: The 8 port Hub that powers the LAN uses a 3.8 volt power supply (i.e. wall charger). One day, I didn't have internet access and discovered the 'wall wort' was bad. I do not HAVE another 3.8 volt wall wort! (Do you?) Luckily for me, I made the Porta Power System. Porta Power was born to allow you easy access to all common voltages using either AC Wall Outlet power OR high energy Lithium Ion 18650 Rechargeable Batteries. Simply adjust the Potentiometer to change to the desired voltage and just plug it in!
Porta-Power uses stout power supplies that are not variable, then we add a Buck (DC to DC Step-Down) Converter with adjustable power OUT. Of course we do not want to plug a multimeter in to see the voltage/current, so we add two voltage meters (input and output) and a single current meter so you can make sure your system is operating nominally. We then add a switch to turn the 'brick' off and on.
So far, we have designed three main flavors. The first one uses 4 18650 Rechargeable Lithium Ion batteries (4S) 5000 mAH and this allows for 14.8 available volts and depending on what you use it for, VERY long lasting power. We designed it for very easy Balanced Recharging. Using a SkyRC IMAX B6AC AC/DC Dual Power Professional Balance Charger/Discharger capable of 1S to 6S Balance Charging, we wired the system to connect it directly for fast, easy recharging. This Rechargeable system allows you to use any voltage from 1.6 to 14 volts and with a maximum current of 3 amps. This is a great asset when it comes to prototyping new projects!
The next flavor is direct AC wall power using a 12 volt, 5 amp power supply with adjustable step down converter. This one provides constant and very reliable power in any voltage from 1.6 to 12 volts with a 3 amp max current. This is the one I used for a week before a 3.8 volt wall wort that died arrived. Simply plug it in, adjust the voltage on the meter to the desired voltage and plug it in. Every household needs one of these!
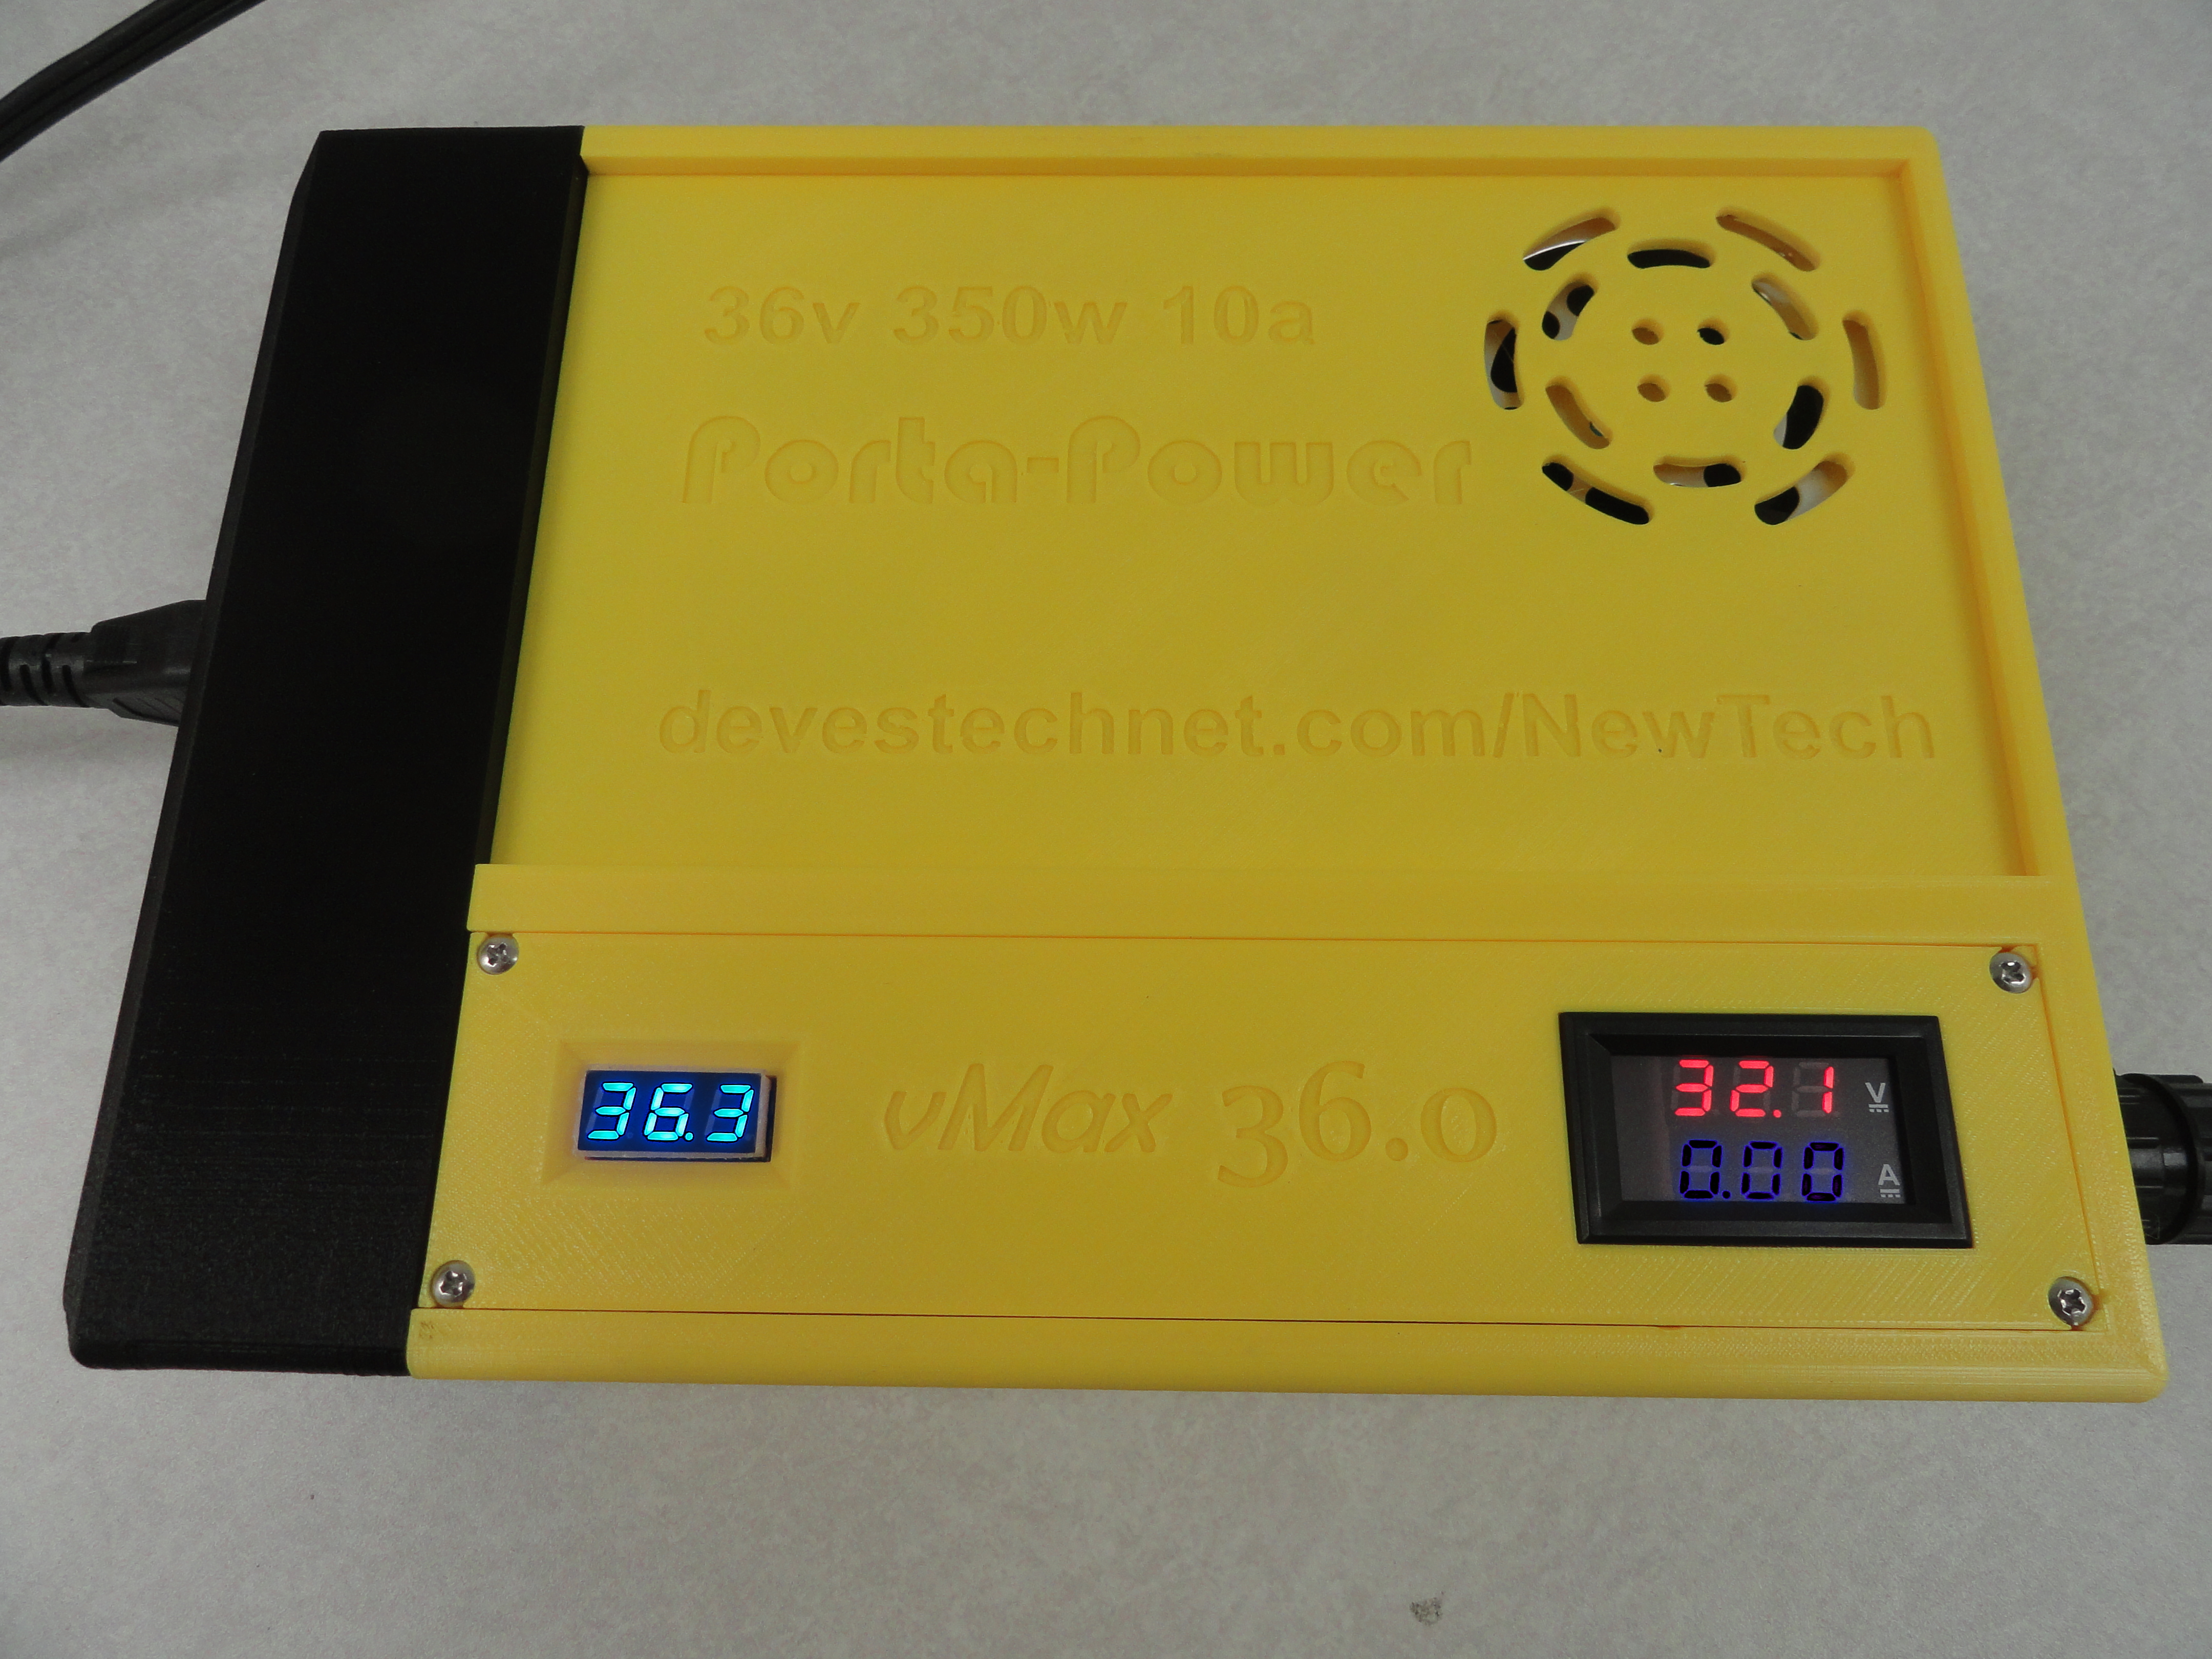
Recently, I had the need for a 36 volt power supply for our Robotic Arm system and it was a great opportunity to make another Porta-Power. This one also plugs into the 110v AC Wall outlet and uses a powerful, full size 350 Watt, 36 Volt, 10 Amp Power Supply. We then added a 20 Amp Stepdown Converter and the associated meters to make a very strong, 10 amp power solution adjustable from 1.6 to 32 volts. I use this one (adjusted to 12 volts) to troubleshoot the electricals on my antique truck projects. It also does a fine job doing what it was intended for... the Robotic Arm System.
Make Yourself a Porta-Power!
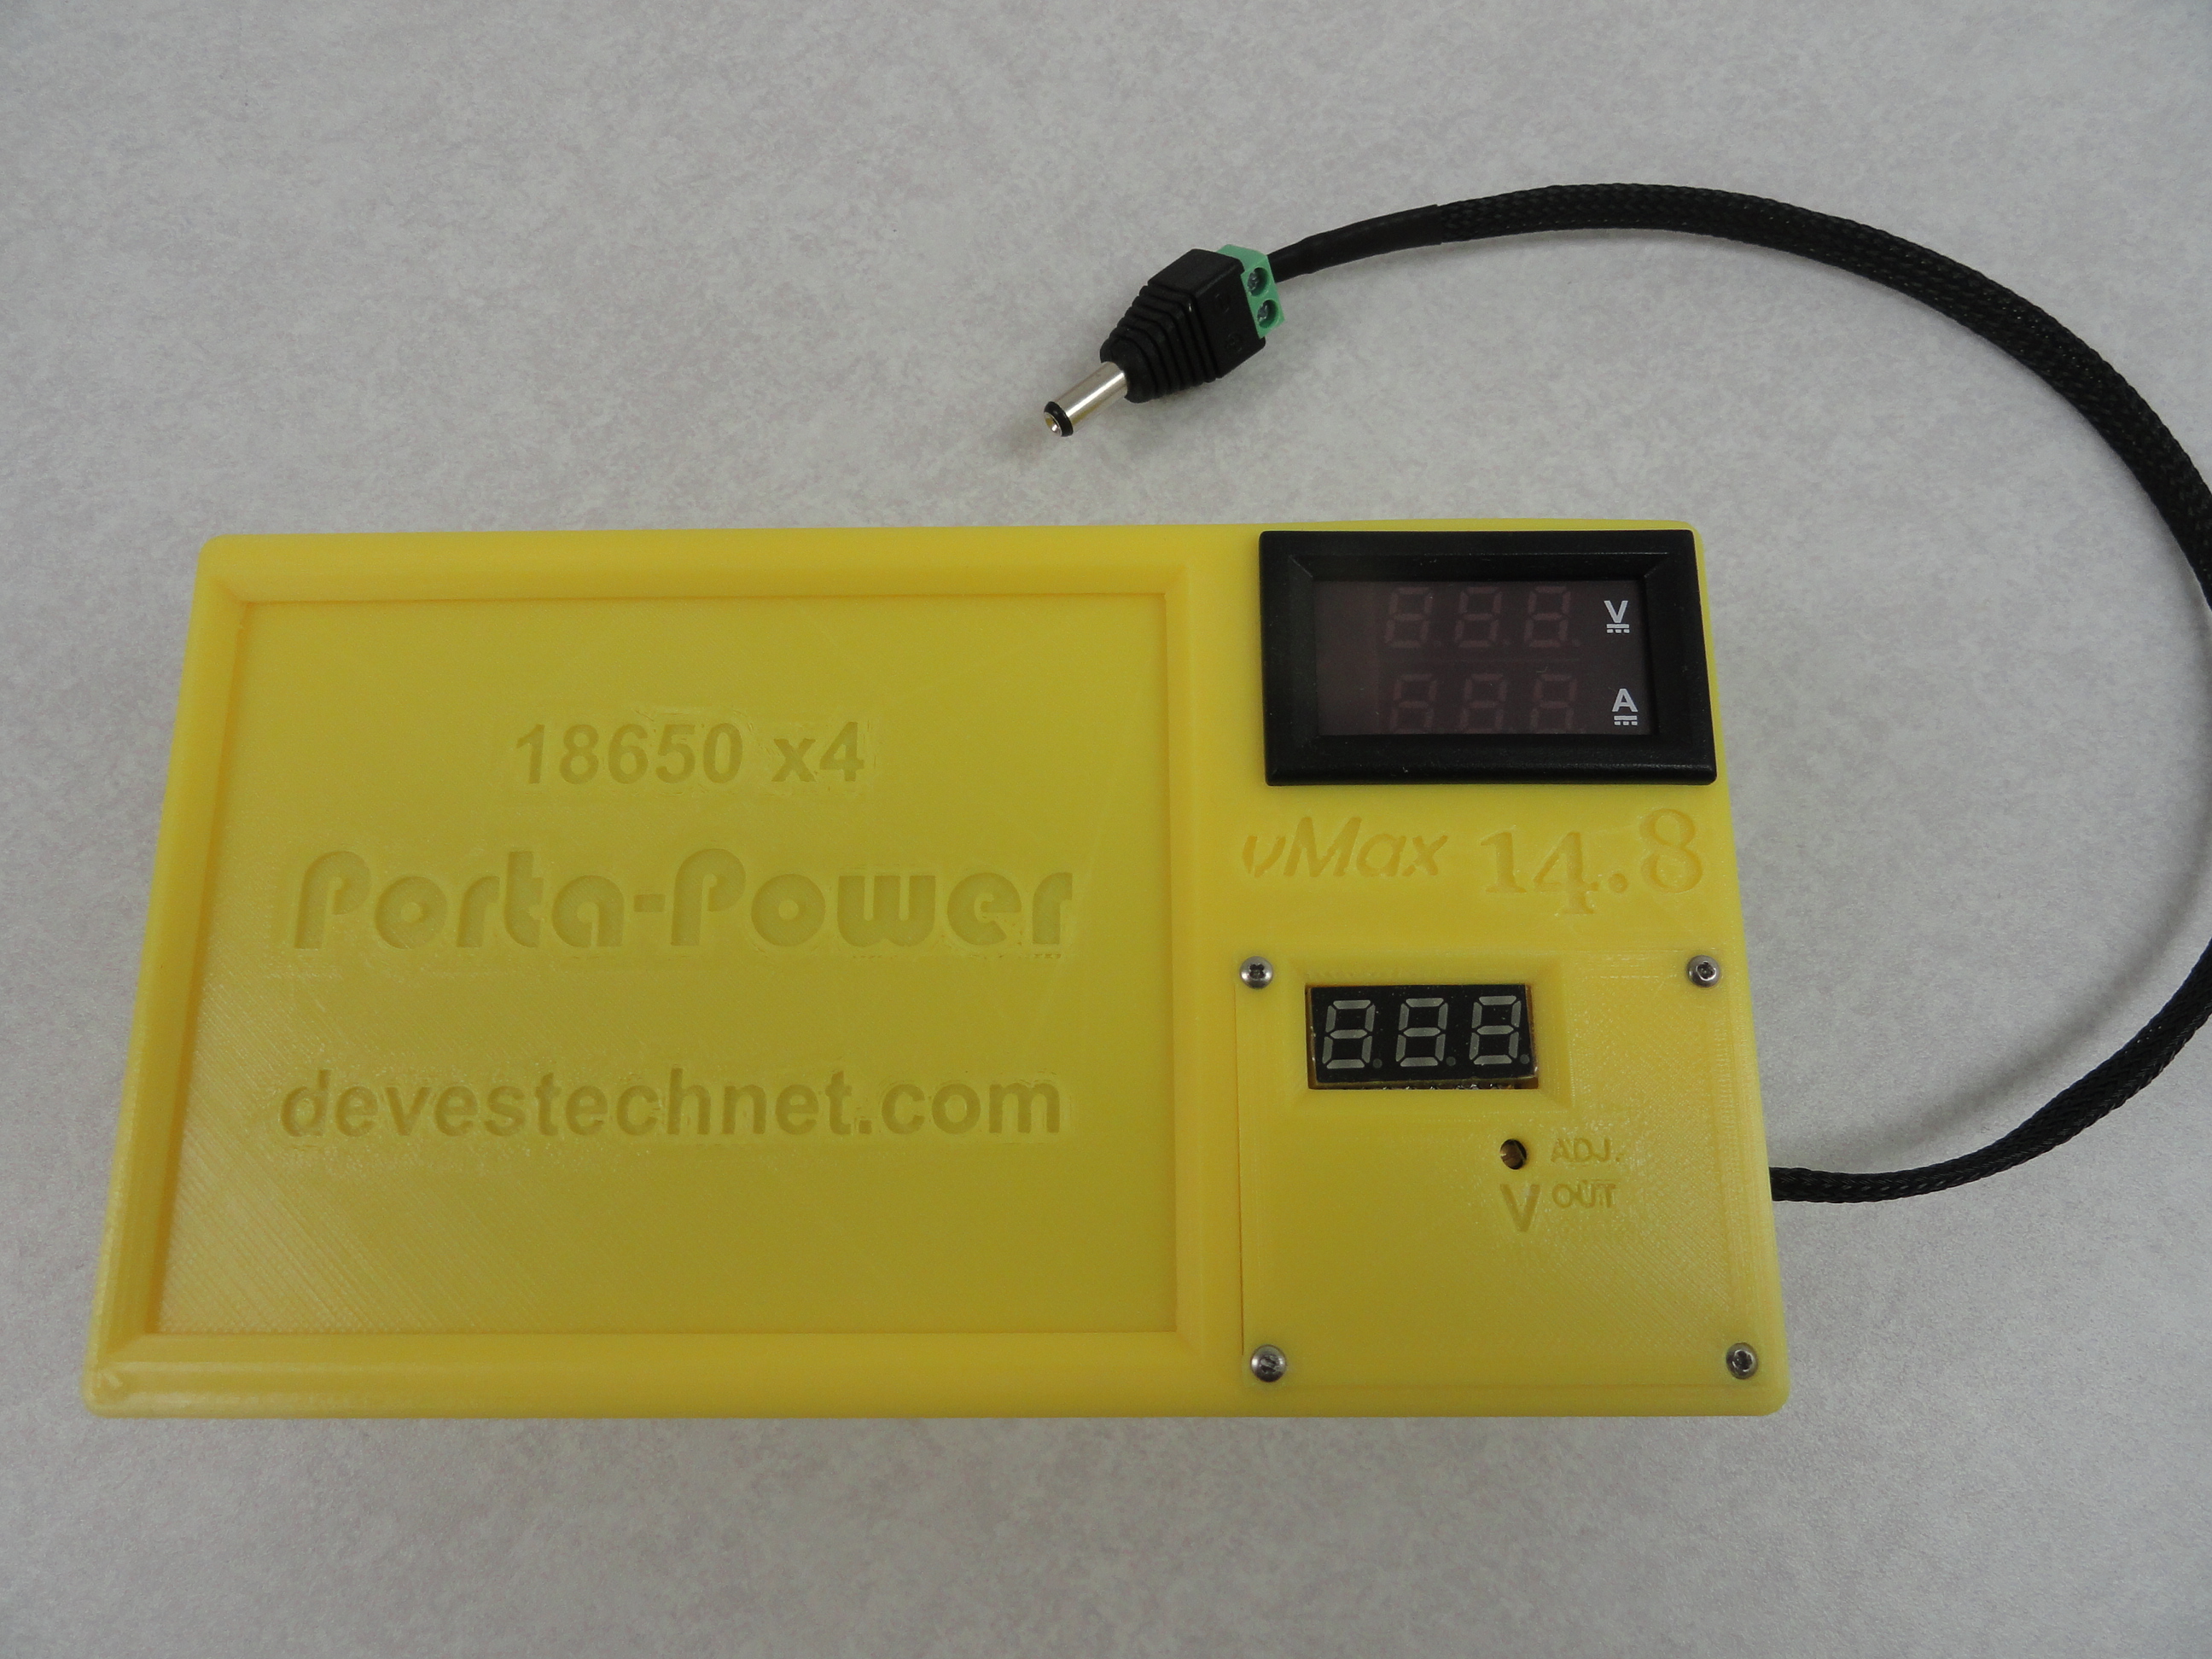
The 14.8 Volt Battery Version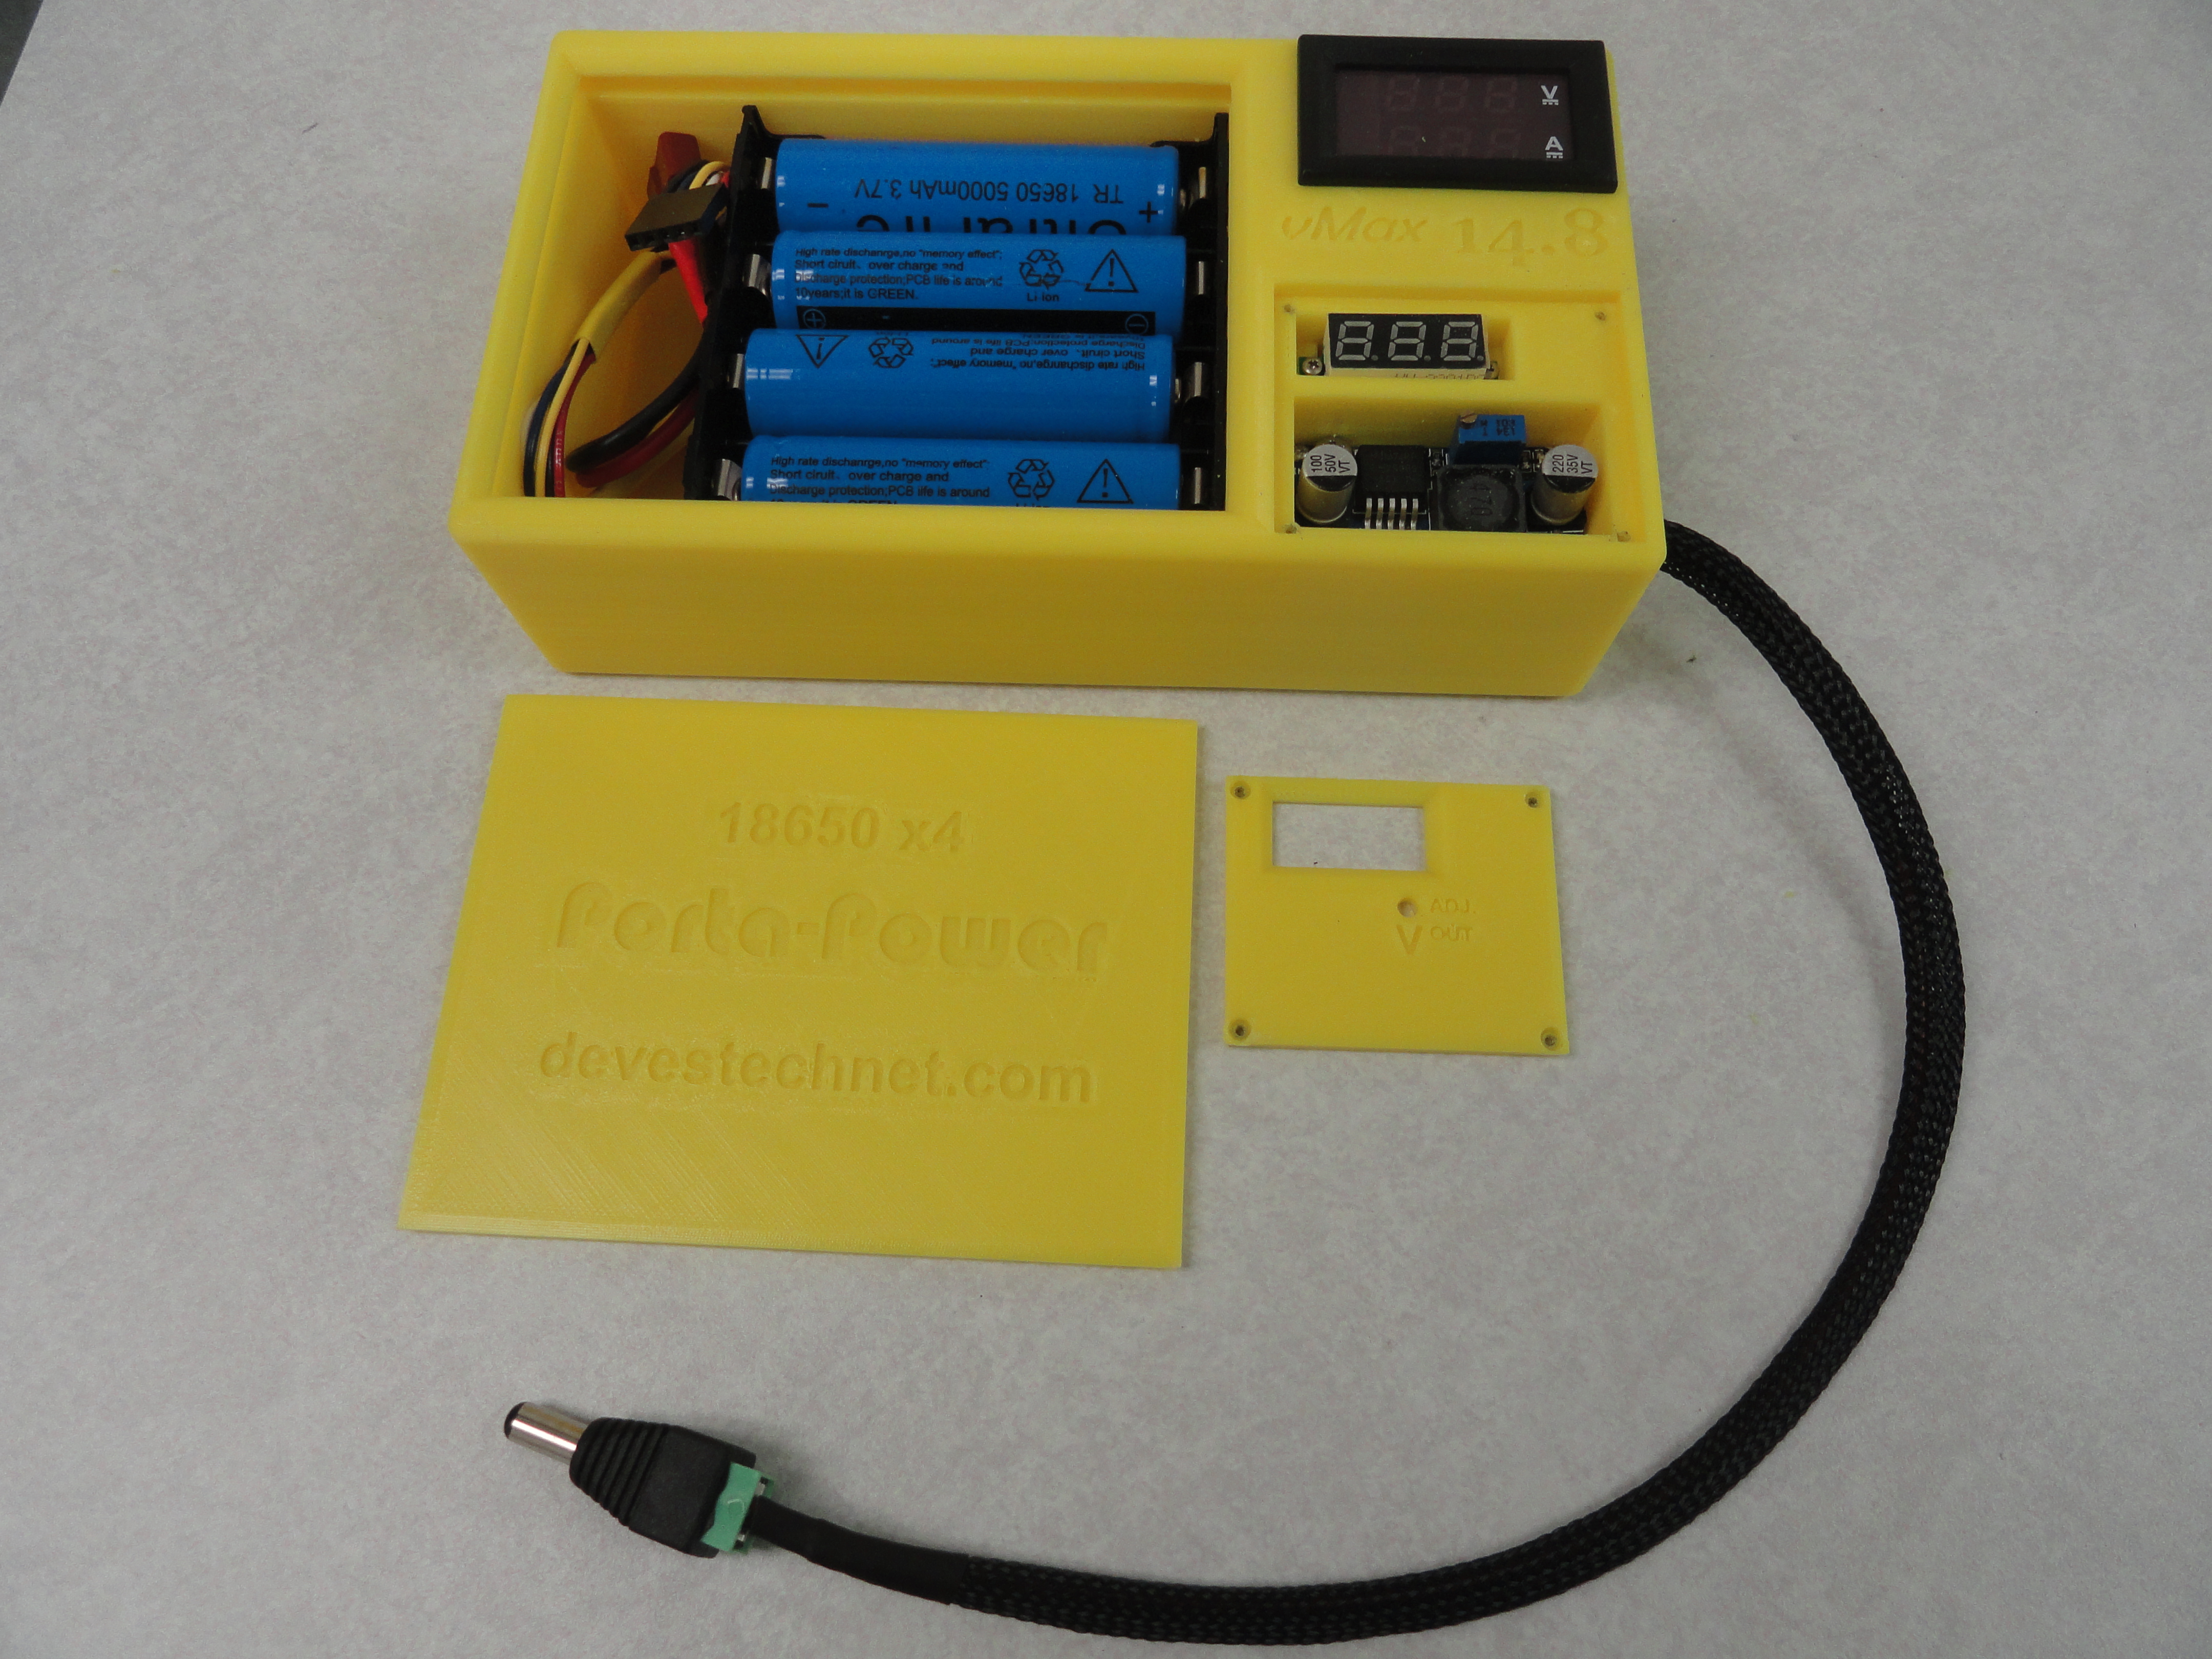
Why should we have all the fun! If you have a 3D Printer and Fusion 360 (it's free you know!) you can make your very own. Let's go through all of the particulars.
Complete Parts List for Battery Version
The links given may or may not be active, but if you do a search for the part, you will find it. I use Ebay for most of these parts. I will list each Porta-Power
version separately.
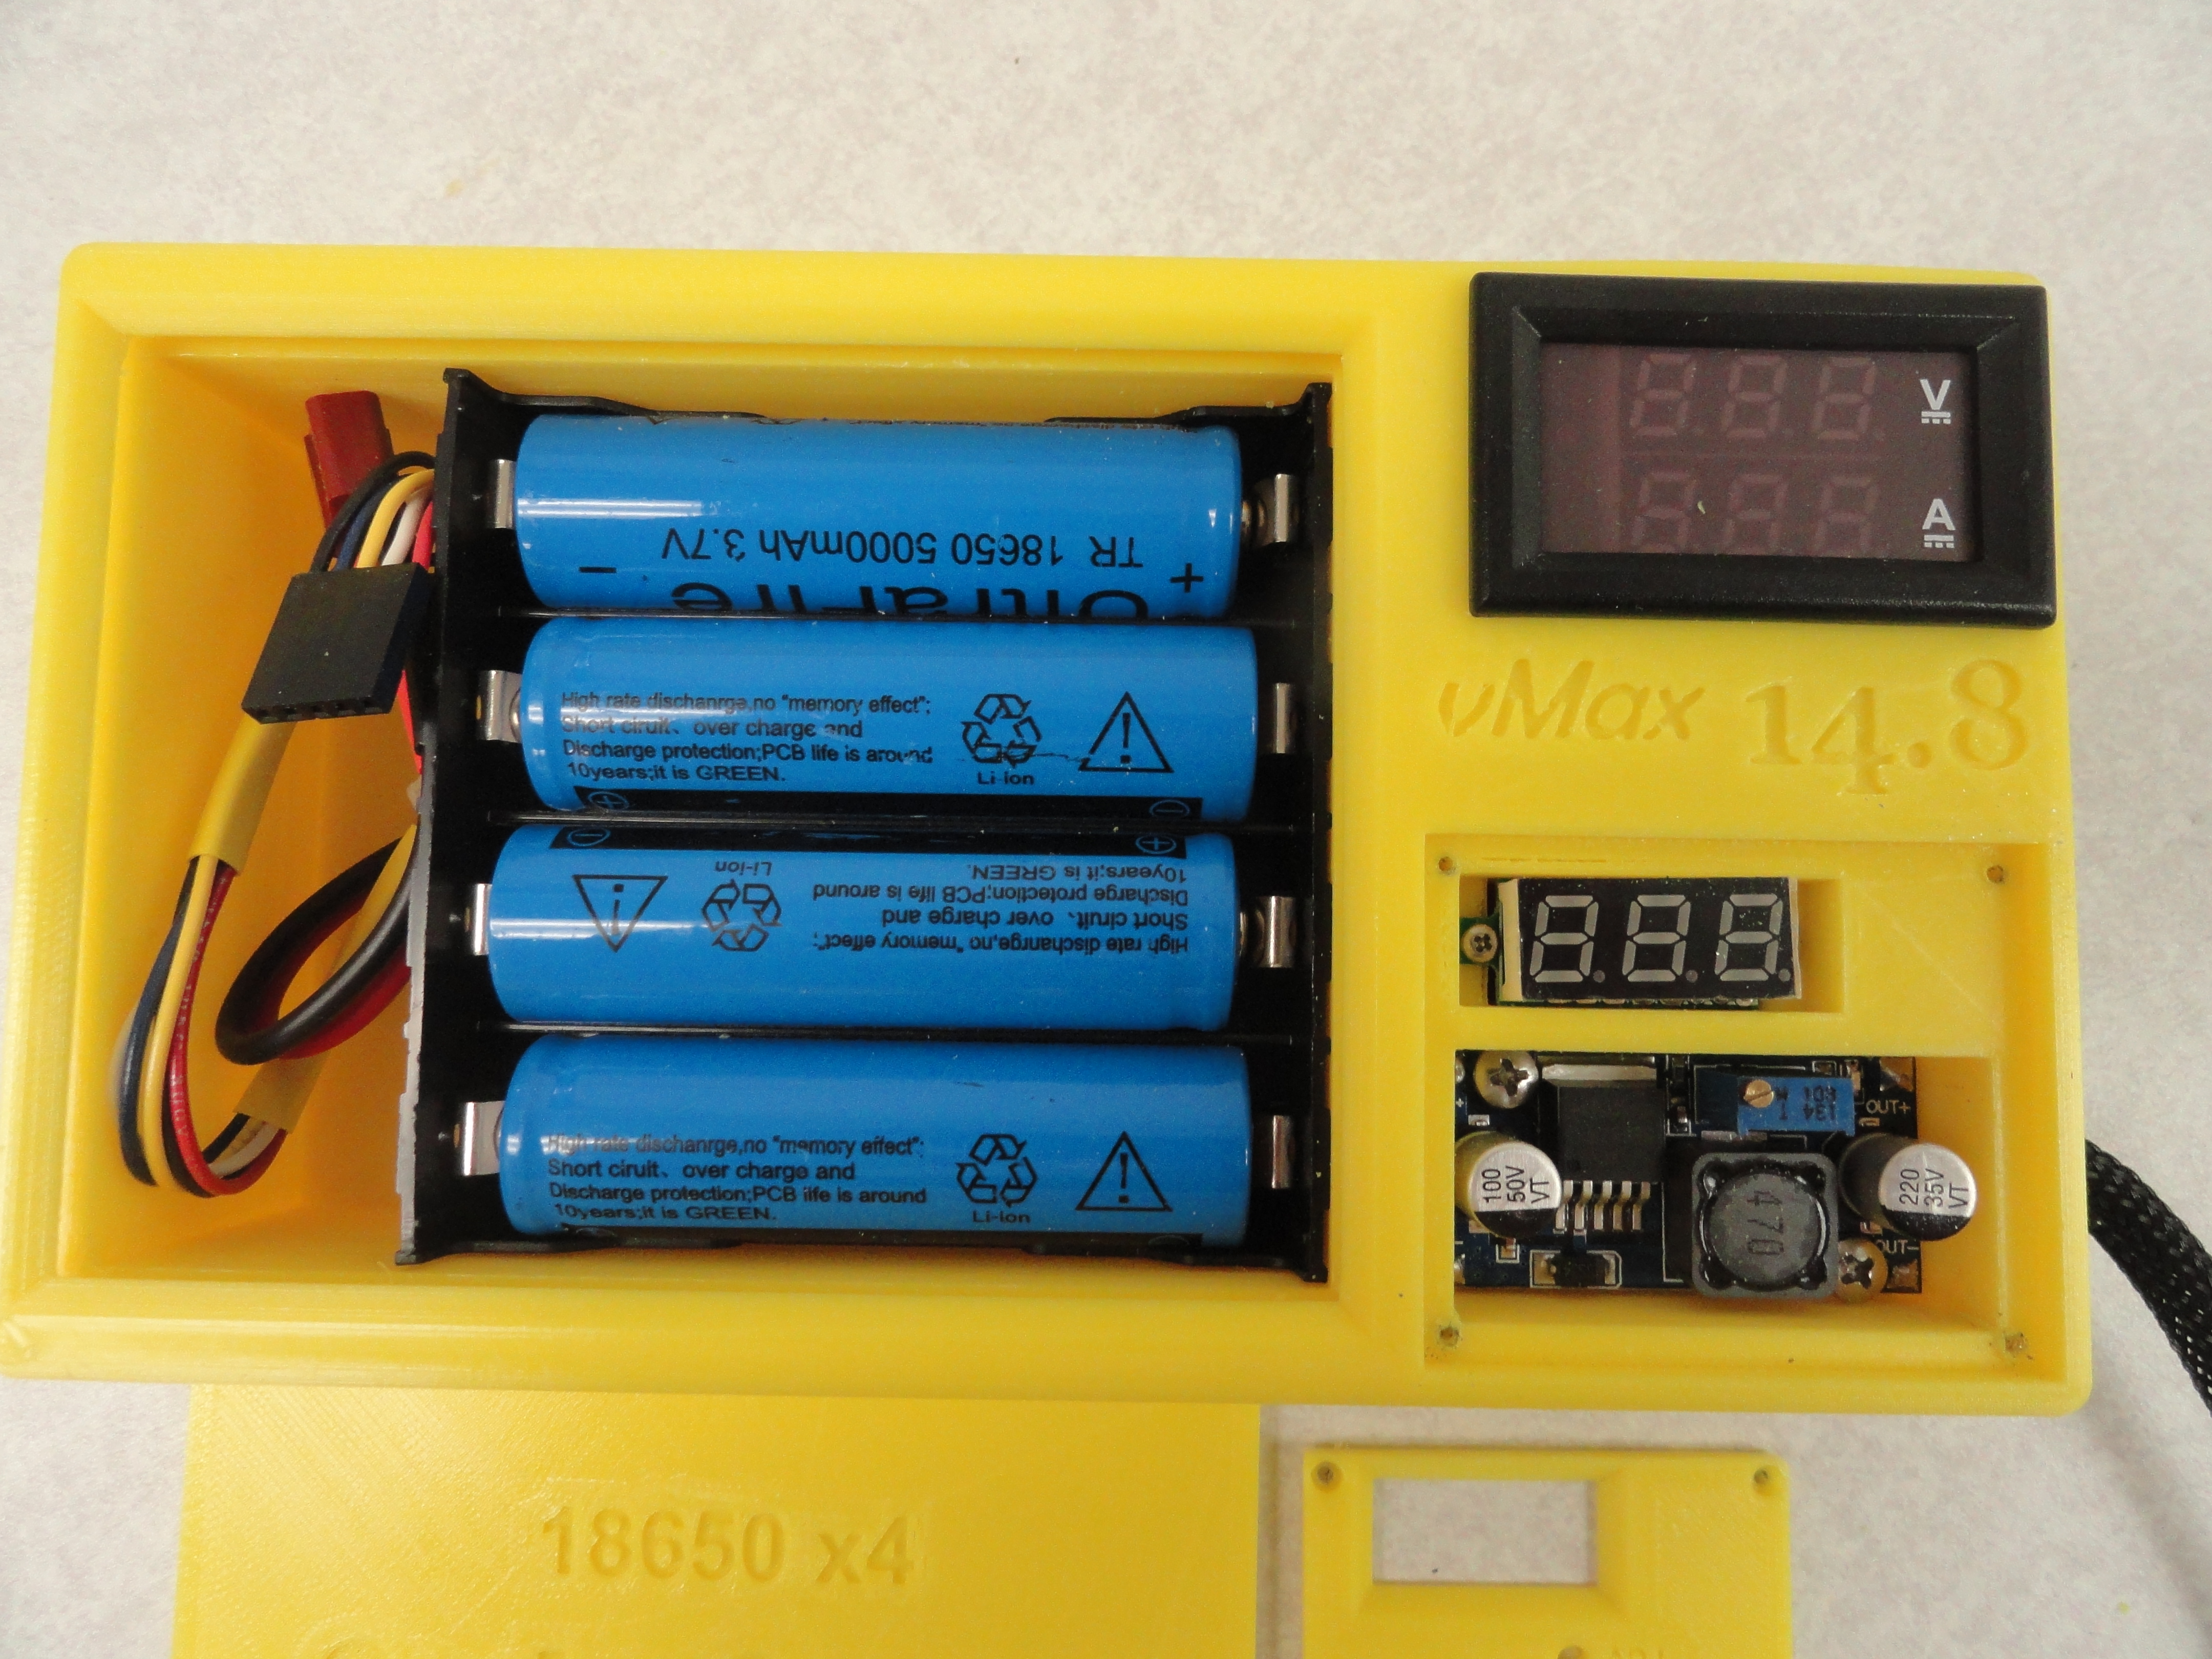
- 18650 5000mAH Rechargable Lithium Ion Batteries - Get 8 of them so you have a backup set.
- 18650 4 Battery Holder - Use this particular style so you can balance charge.
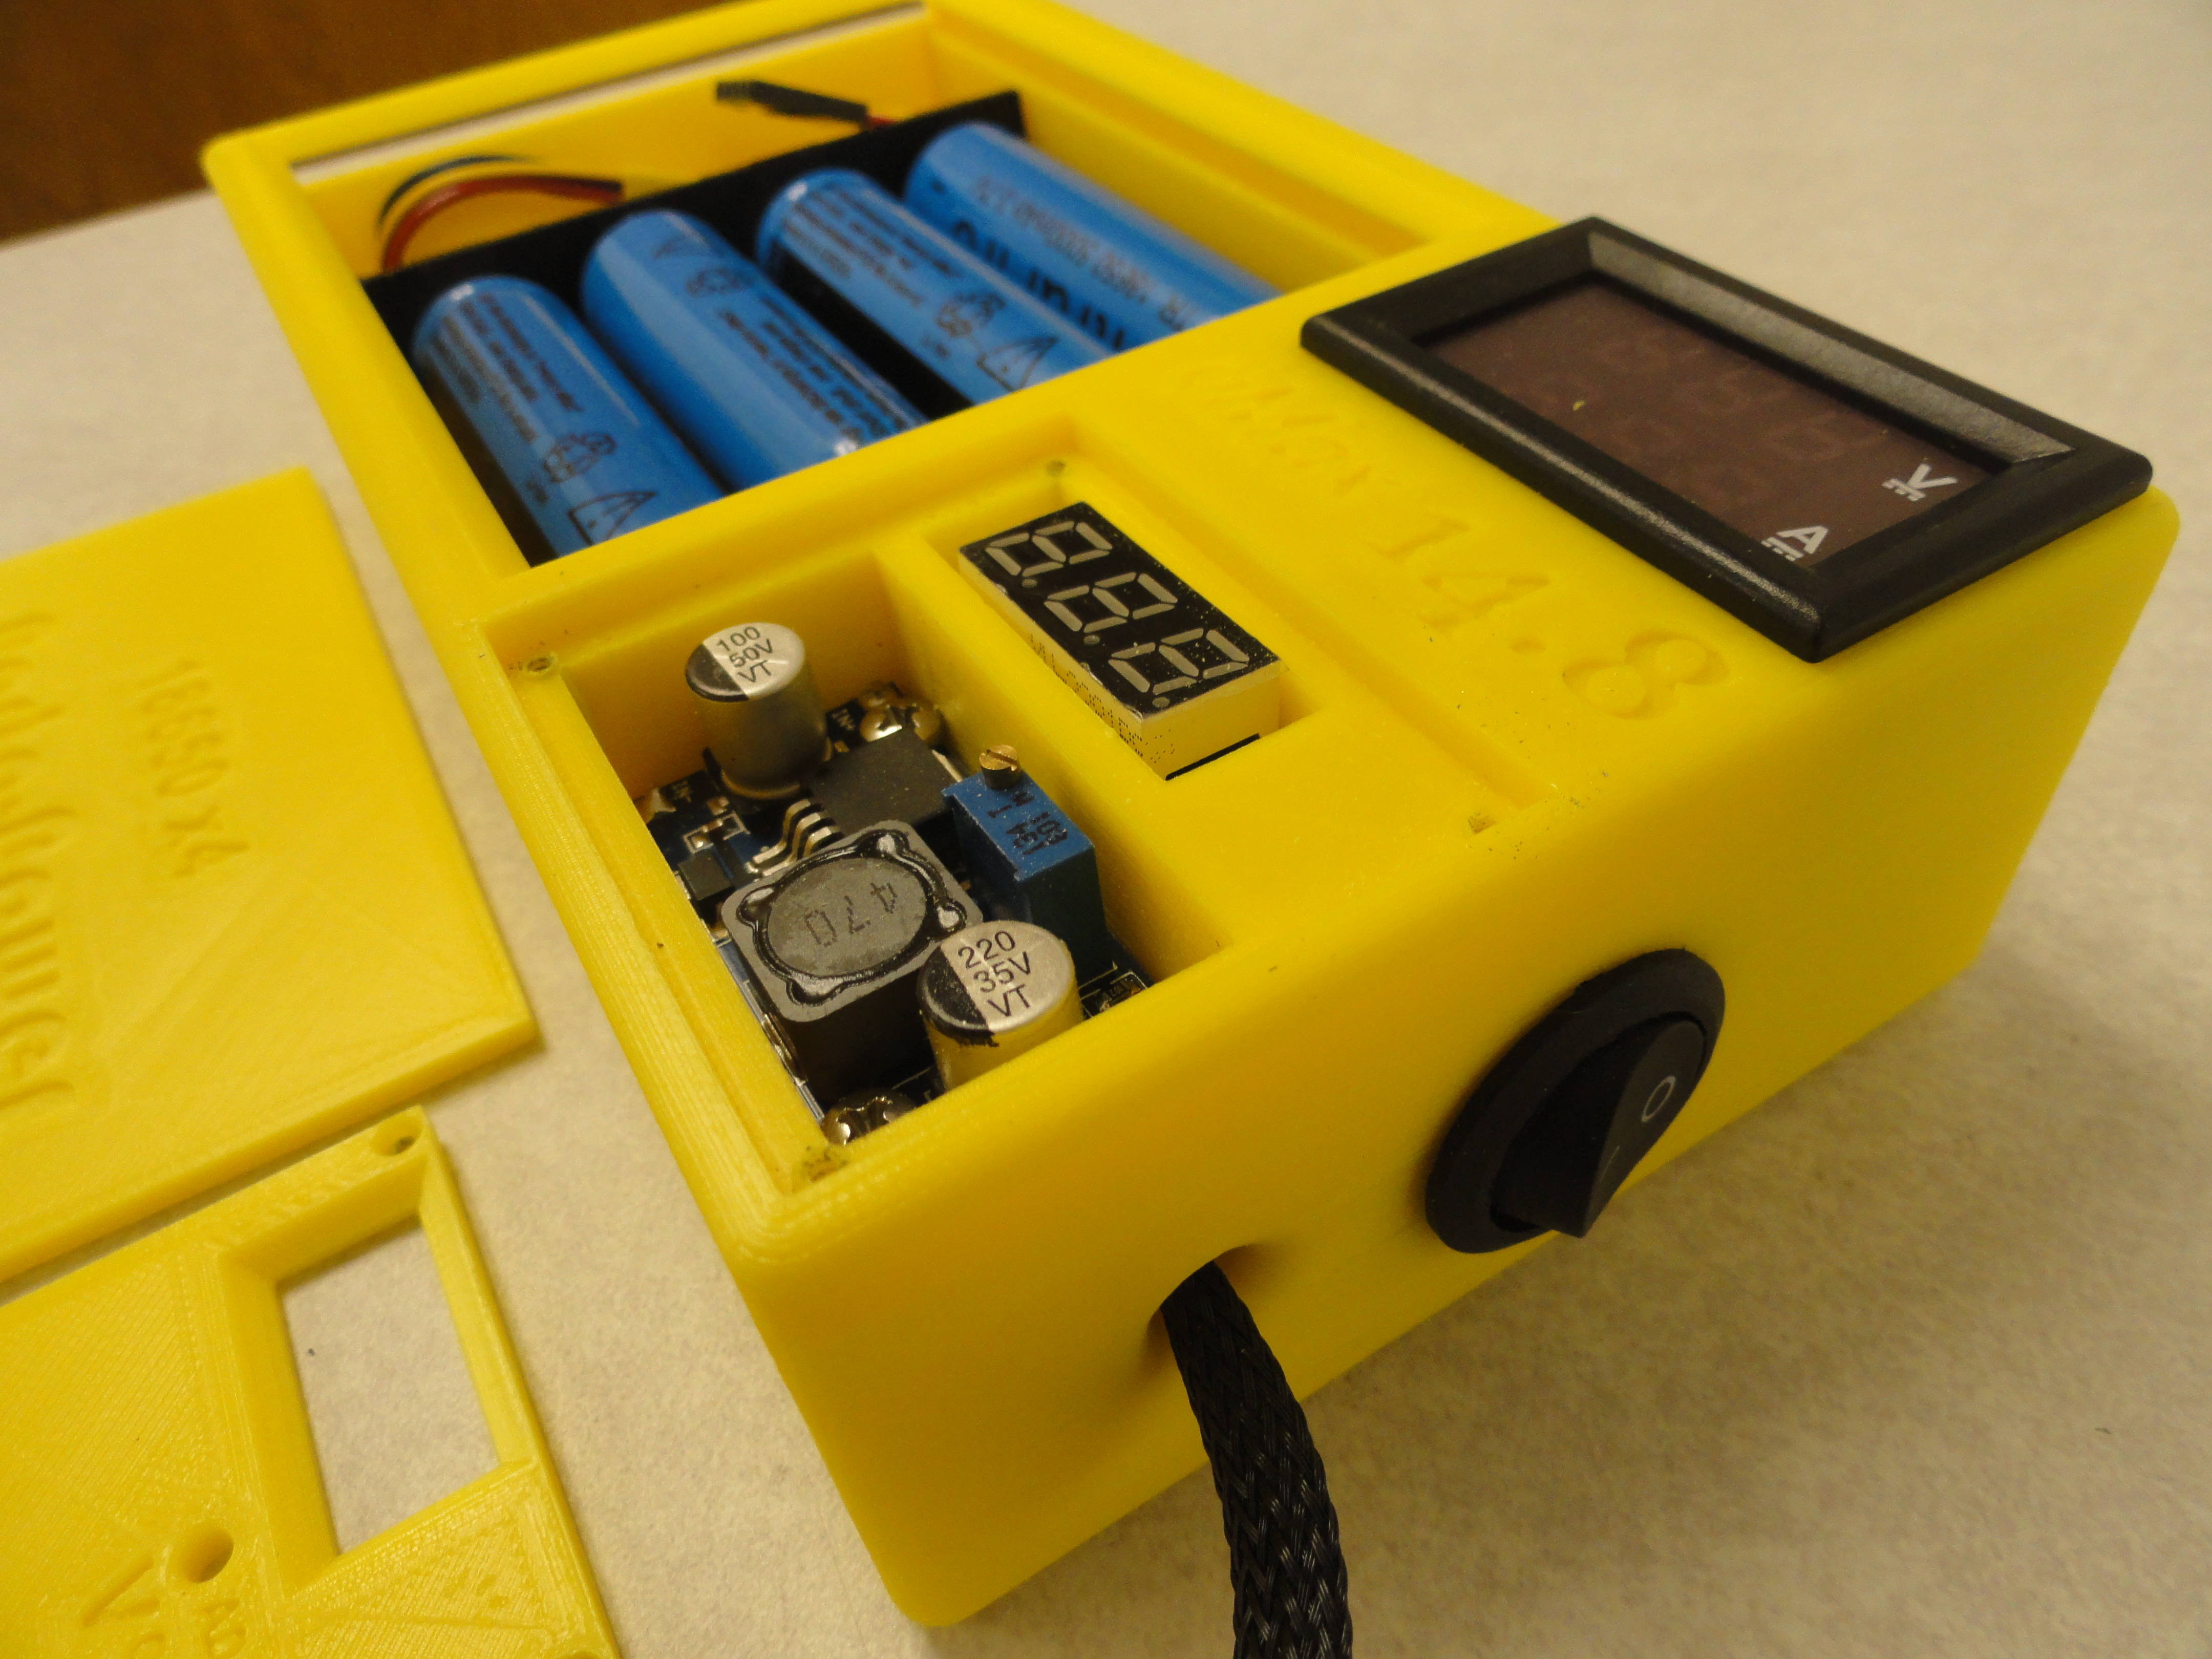
- SPST Switch - This round style fits nicely on the end of the box.
- DC-DC Stepdown Converter - This is what allows us to vary the voltage.
- Small 3 digit Volt Meter - This smaller one reads the end voltage going to the power plug.
- Dual Display Current/Volt Meter - This will give you the current used and the voltage of the battery.
- Special connector for using the Skynet BA6AC Battery Charger
- Dupont Connector Kit - An essential kit for doing this kind of work. Uses the Engineer PA-09 Crimper (1.6).
- Power Connector - I use ones that plug directly into an Arduino with screw terminals for connections.
- 1/4" Braided Loom - Makes things look nicer and keeps all the wires together. Use 1/4 inch heat shrink on the ends to secure.
Zipped Fusion 360/STL Files for your 3D Printer - Print with 35% infill, .1 resolution, 7% support for best results. Wiring for the 14.8 Volt Battery Version
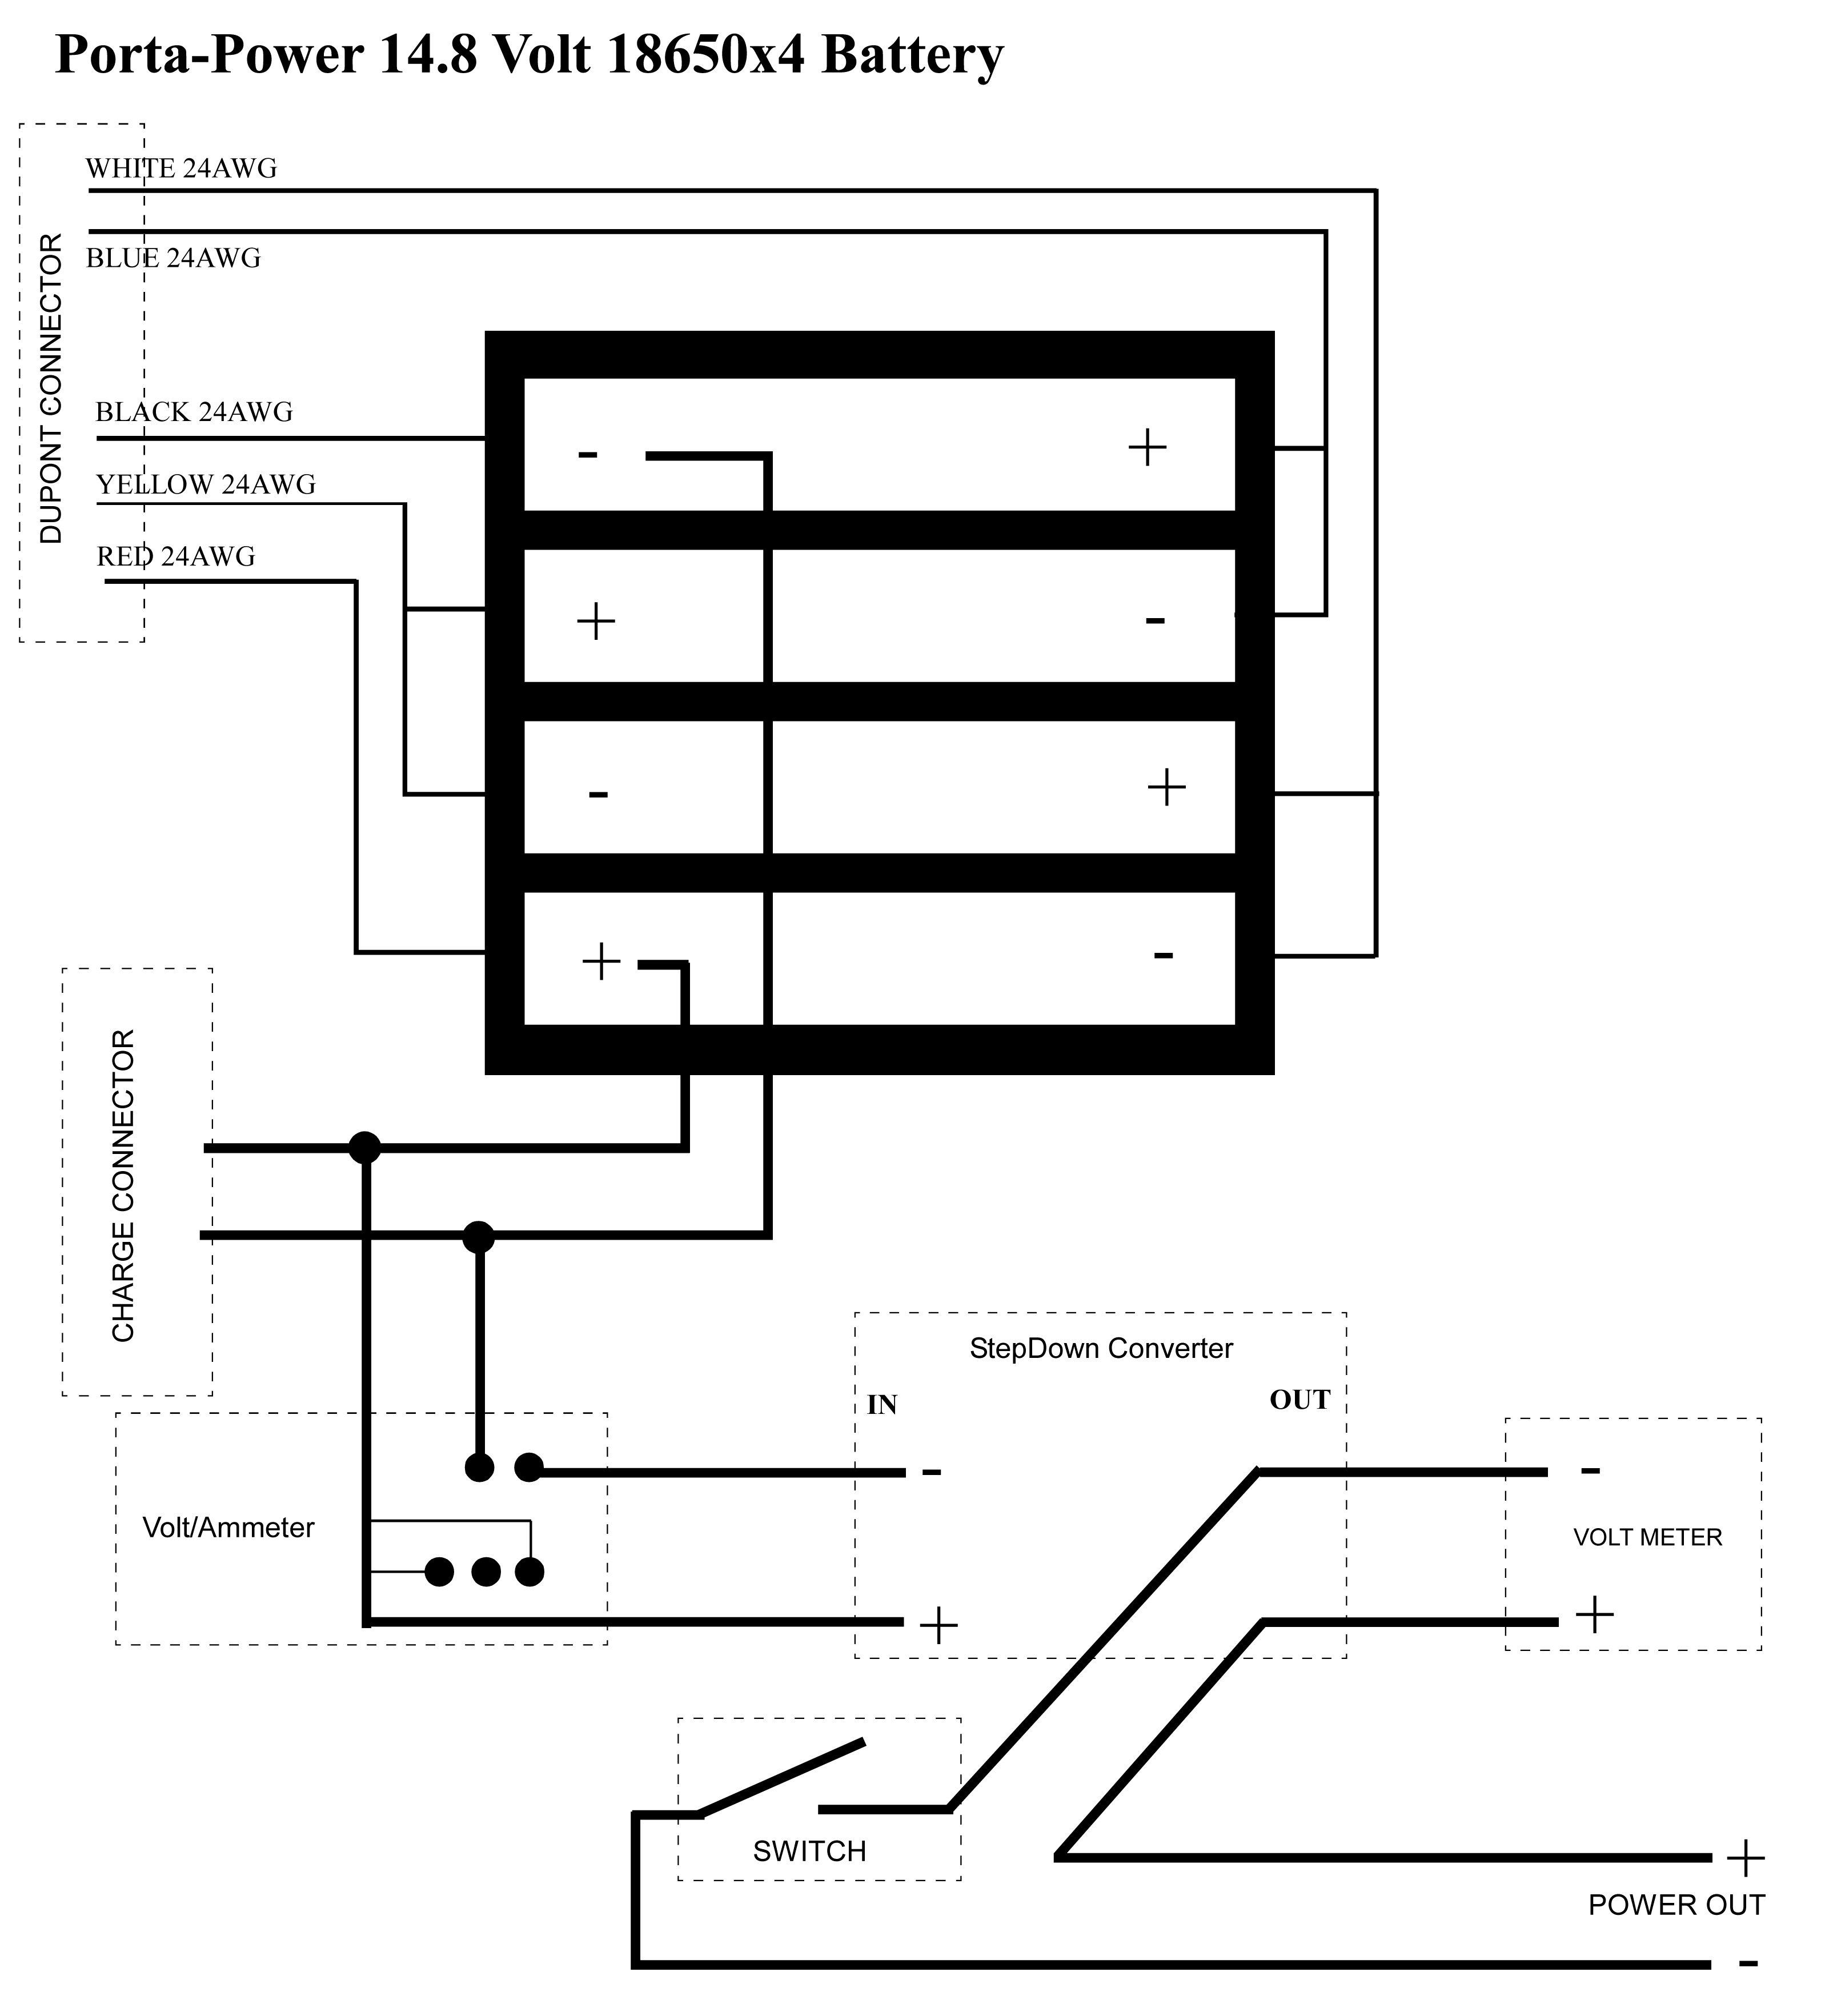
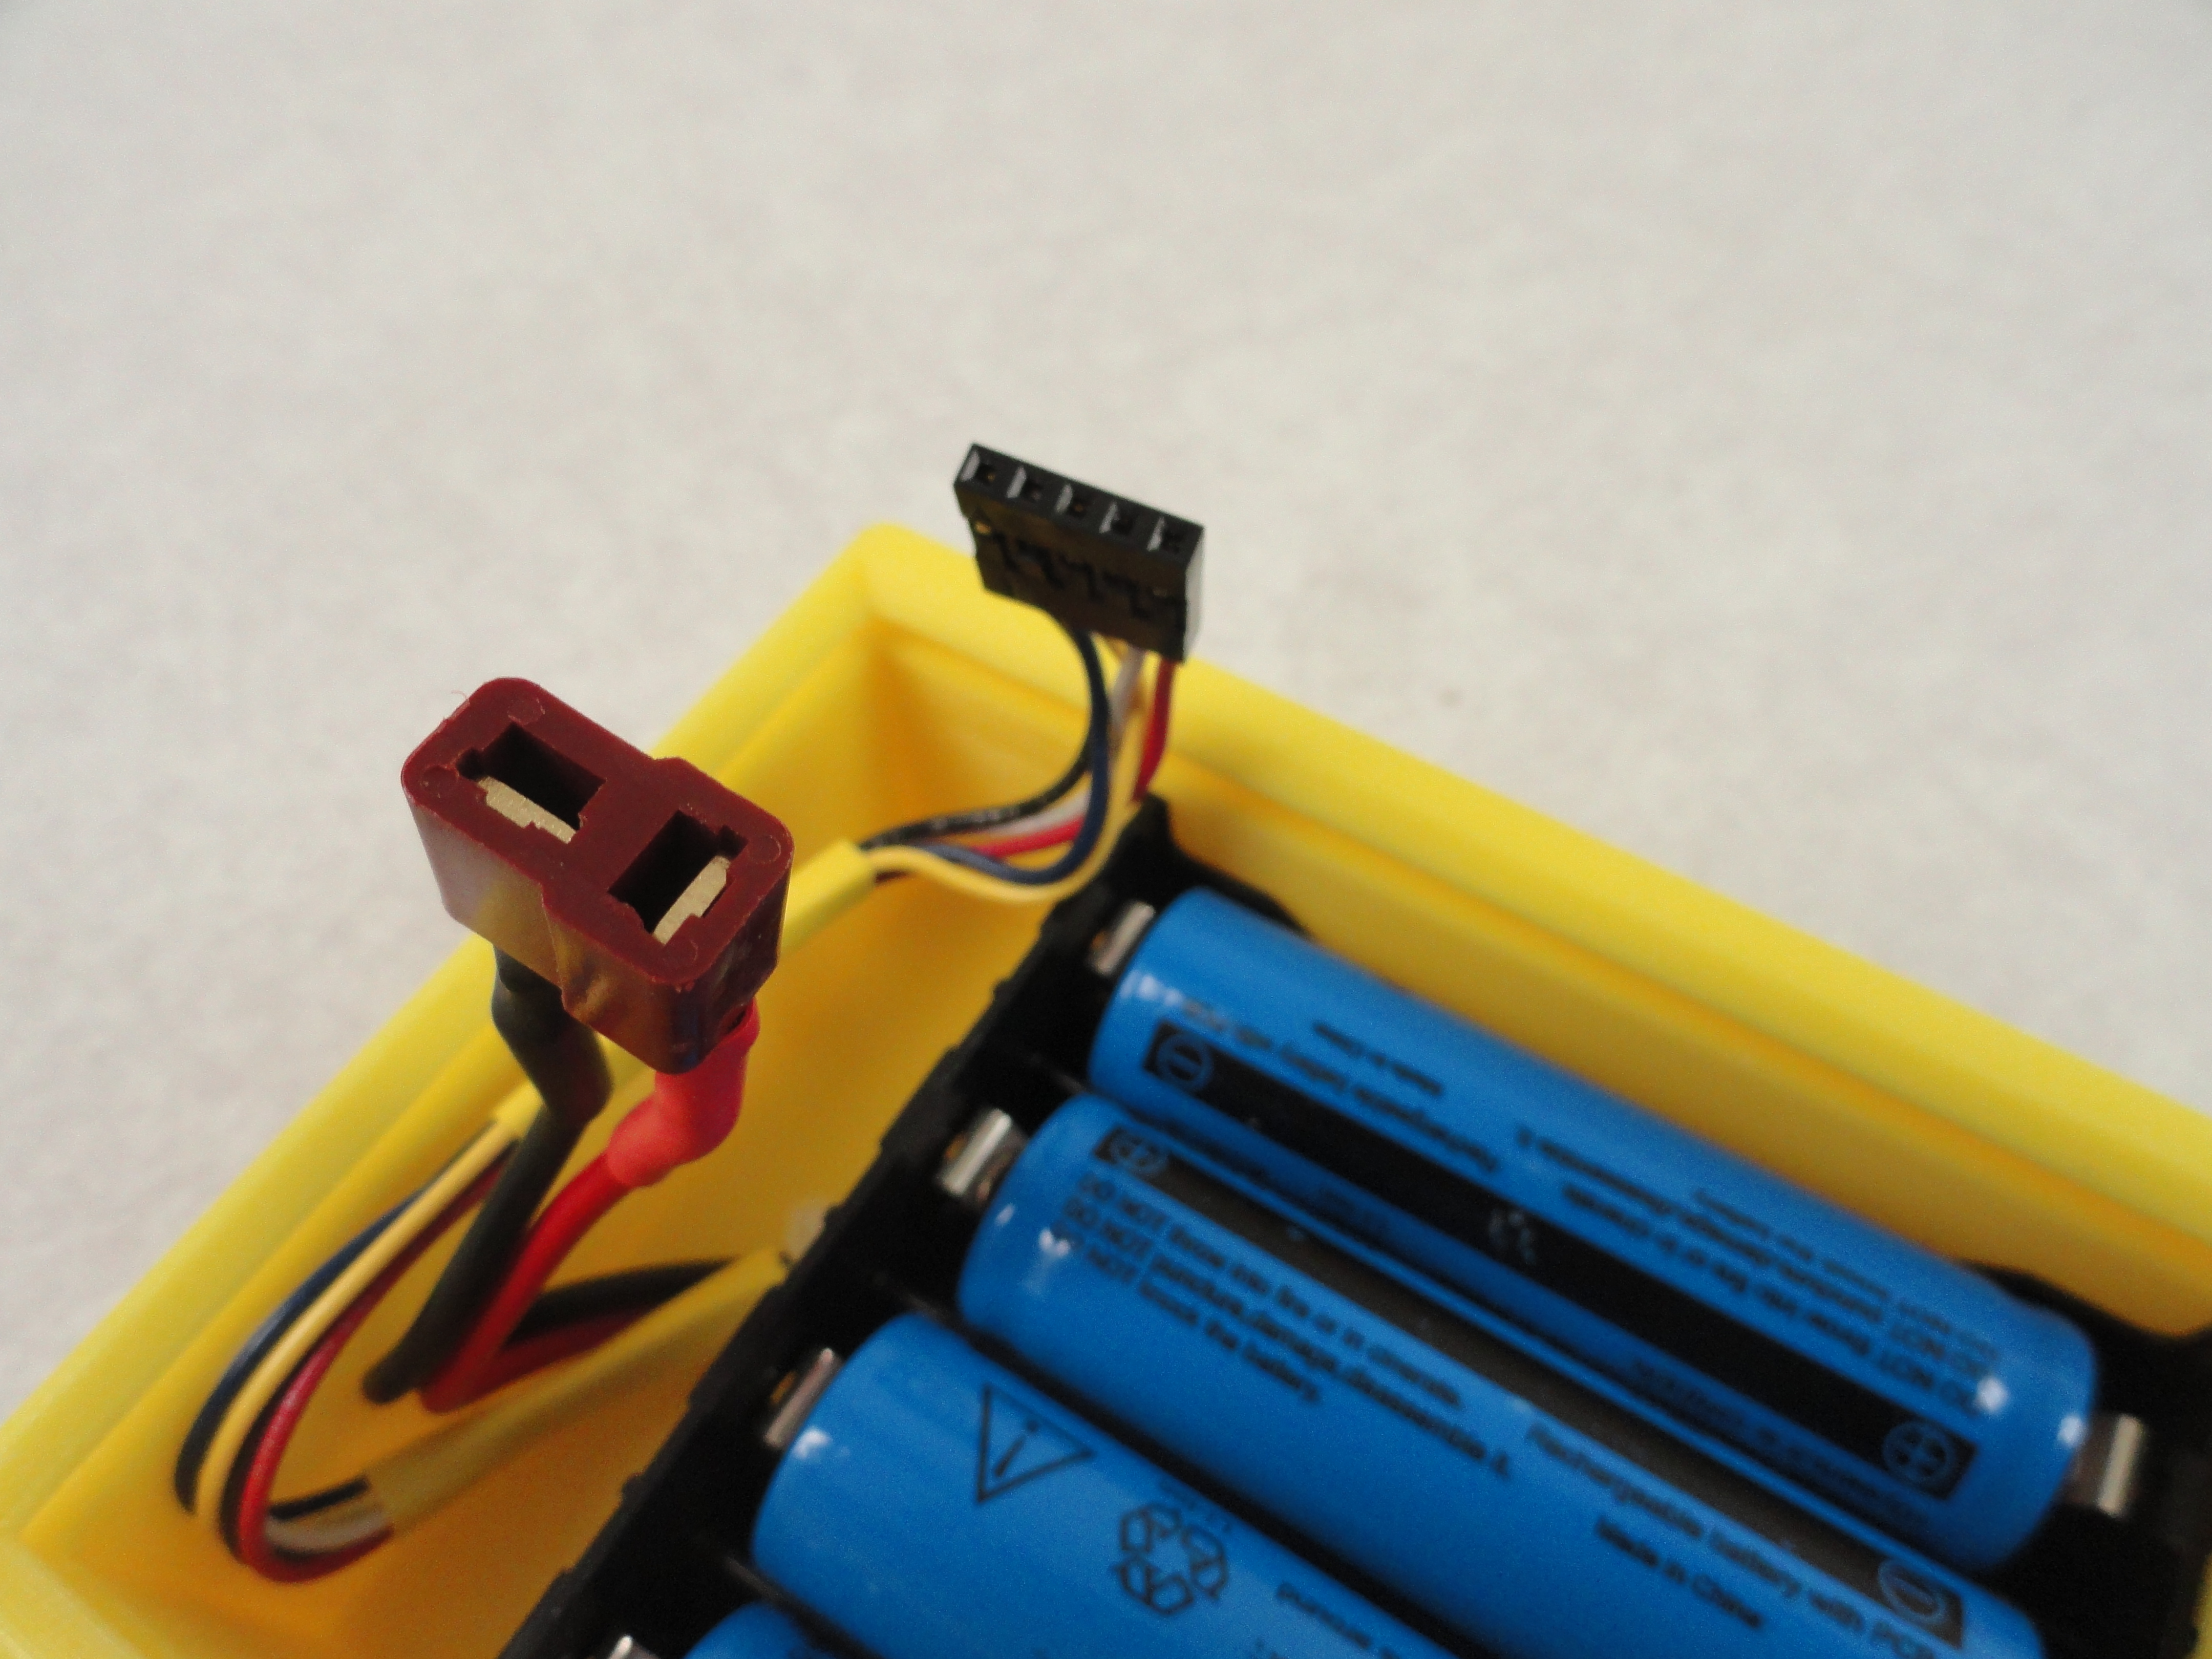
If you want to do this right, you need to set this up for balance charging. This is where each battery is independently charged and compared to each other to ensure all batteries are getting an even charge. The Skynet Imax B6AC v2 is a really good choice for a charger. This works for most Lithium Ion batteries and is more than sufficient for hobby use. It takes a little more work in the wiring process, but it will ensure you have good batteries for a long time. Follow the above wiring diagram and you will have the ability to charge the batteries and provide plenty of power for most small hobby jobs.
Each of the five pickoffs from the underside of the battery box give the charger the ability to send power to each battery individually. Be sure to observe the diagram where it comes to placing the batteries in the correct orientation as viewed from overhead. Before hooking up anything to the power connector after wiring, adjust the potentiometer to your desired output voltage! To charge, simply pull out the pigtails and plug them directly into the charger. If you wired it correctly, the Charger will work perfectly. If not the charger will tell you that something isn't right.
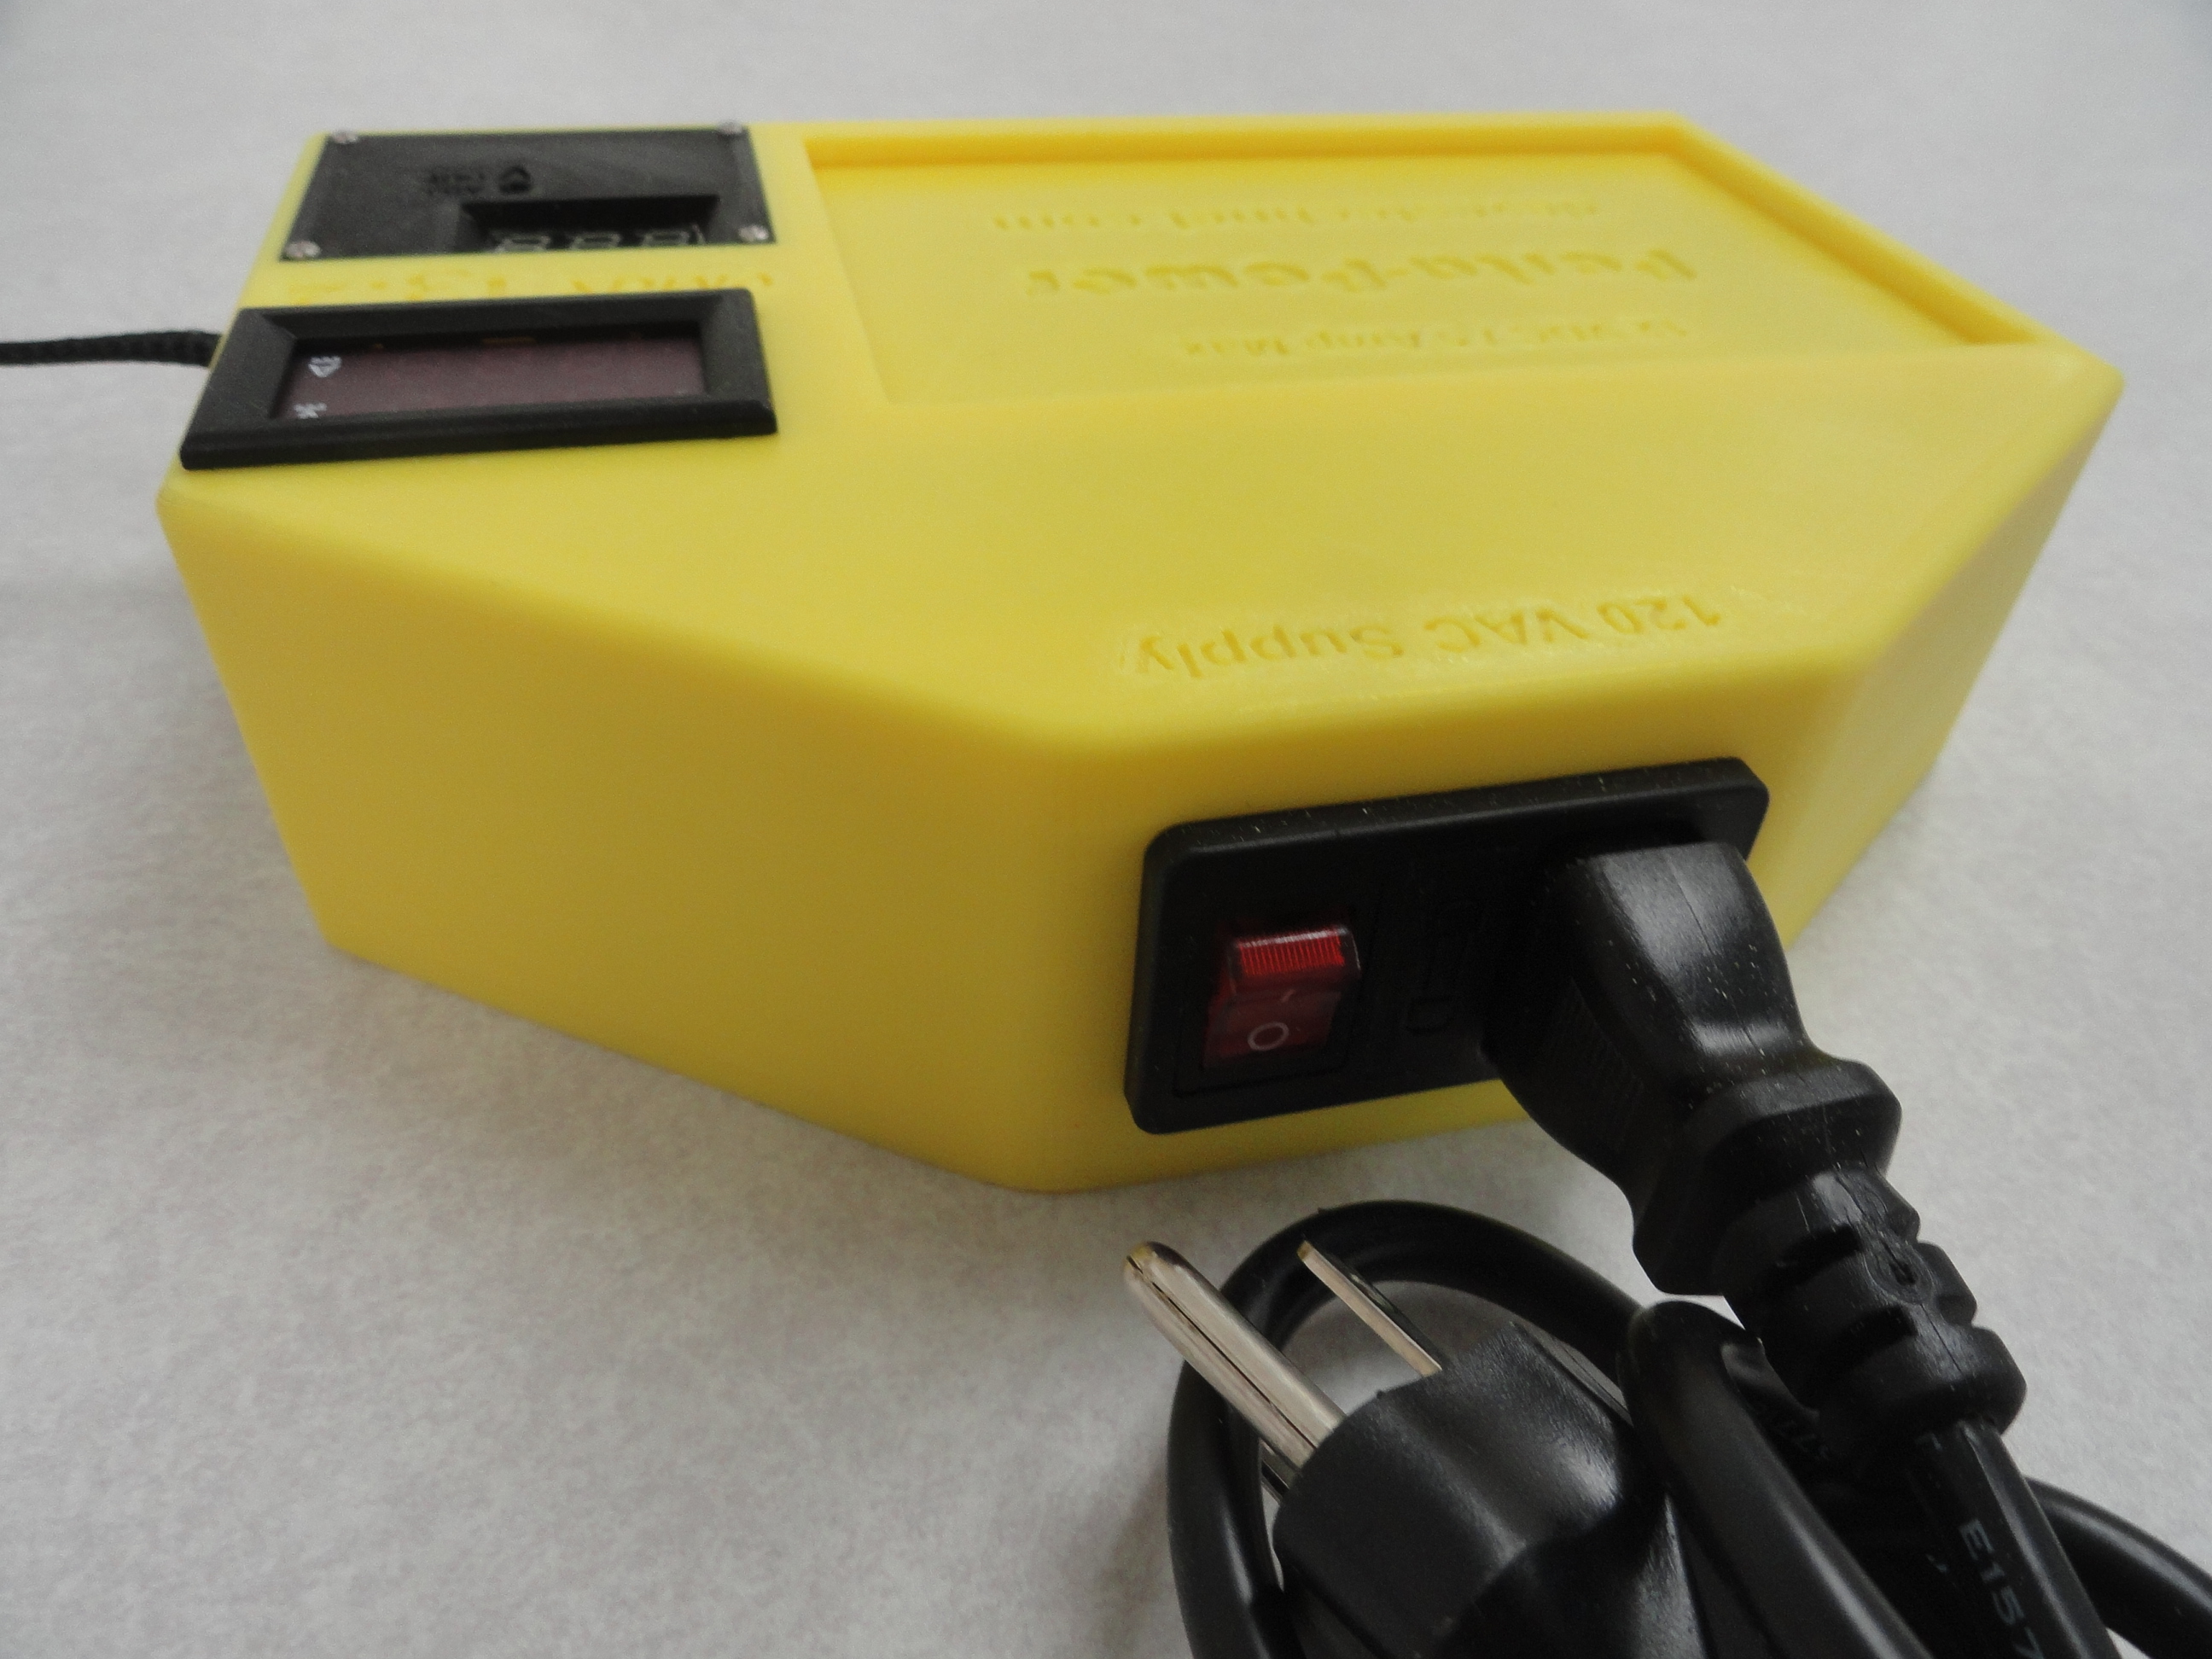
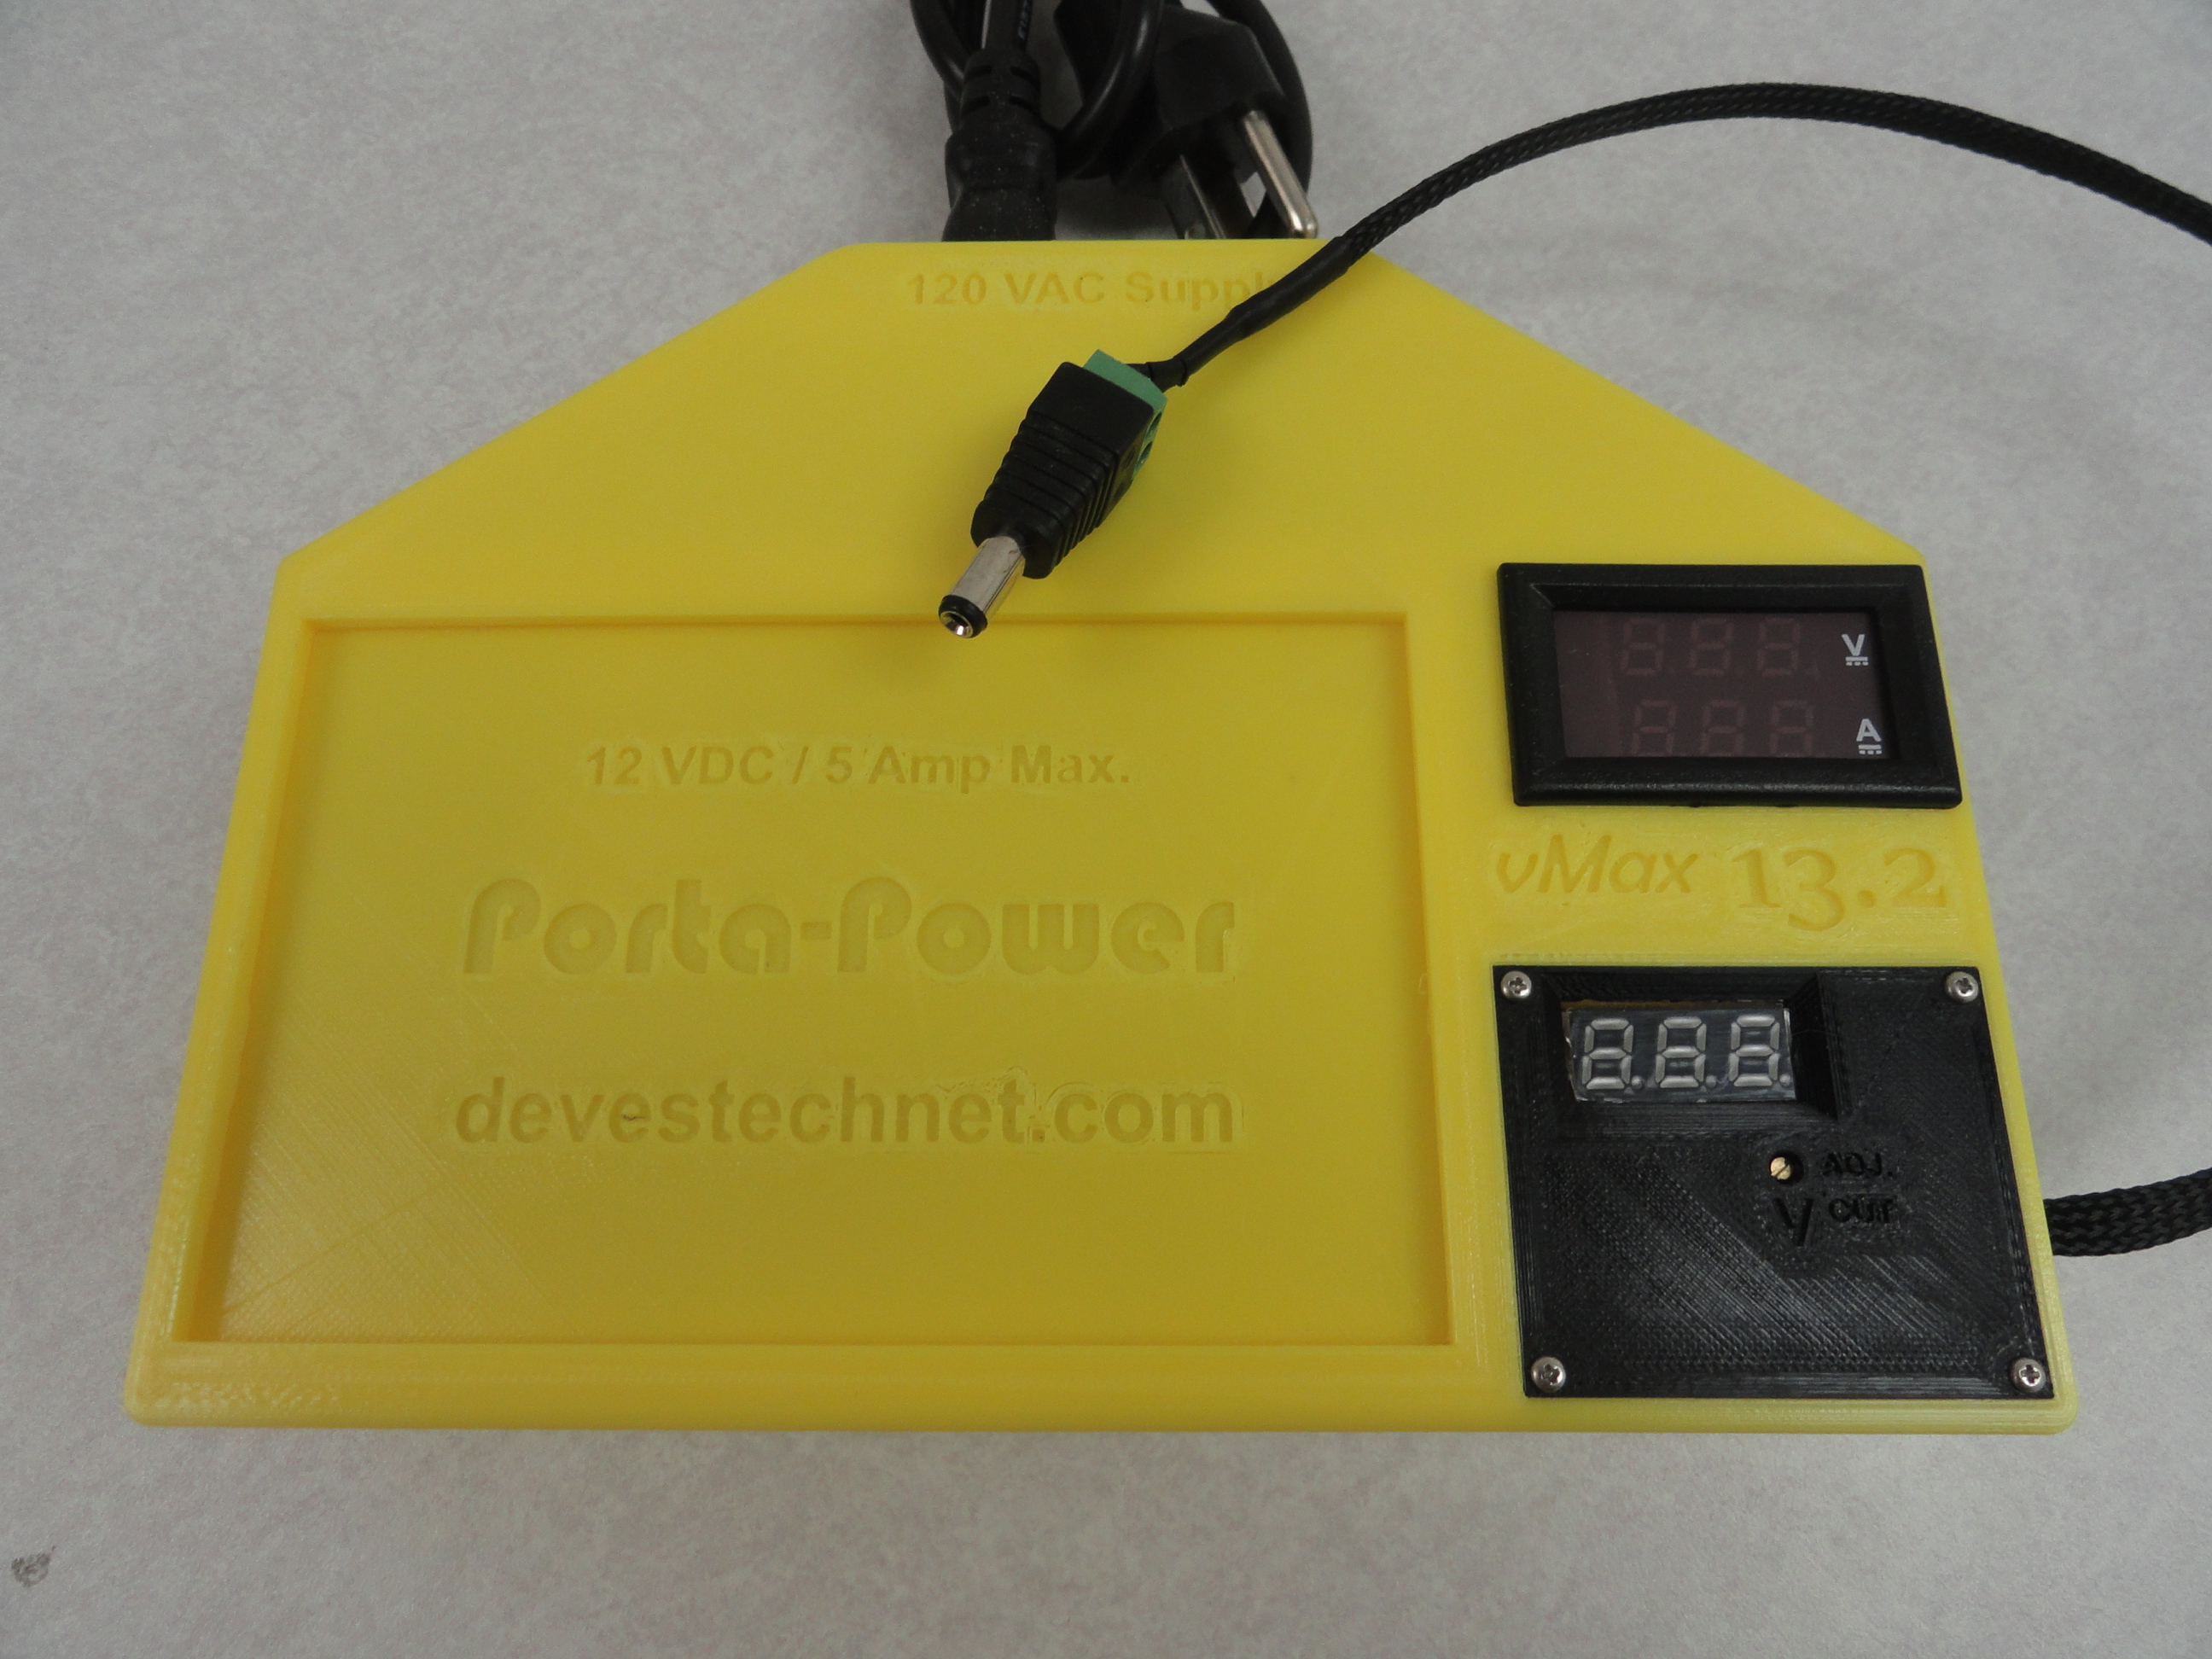
The 110 VAC to 12 VDC Version
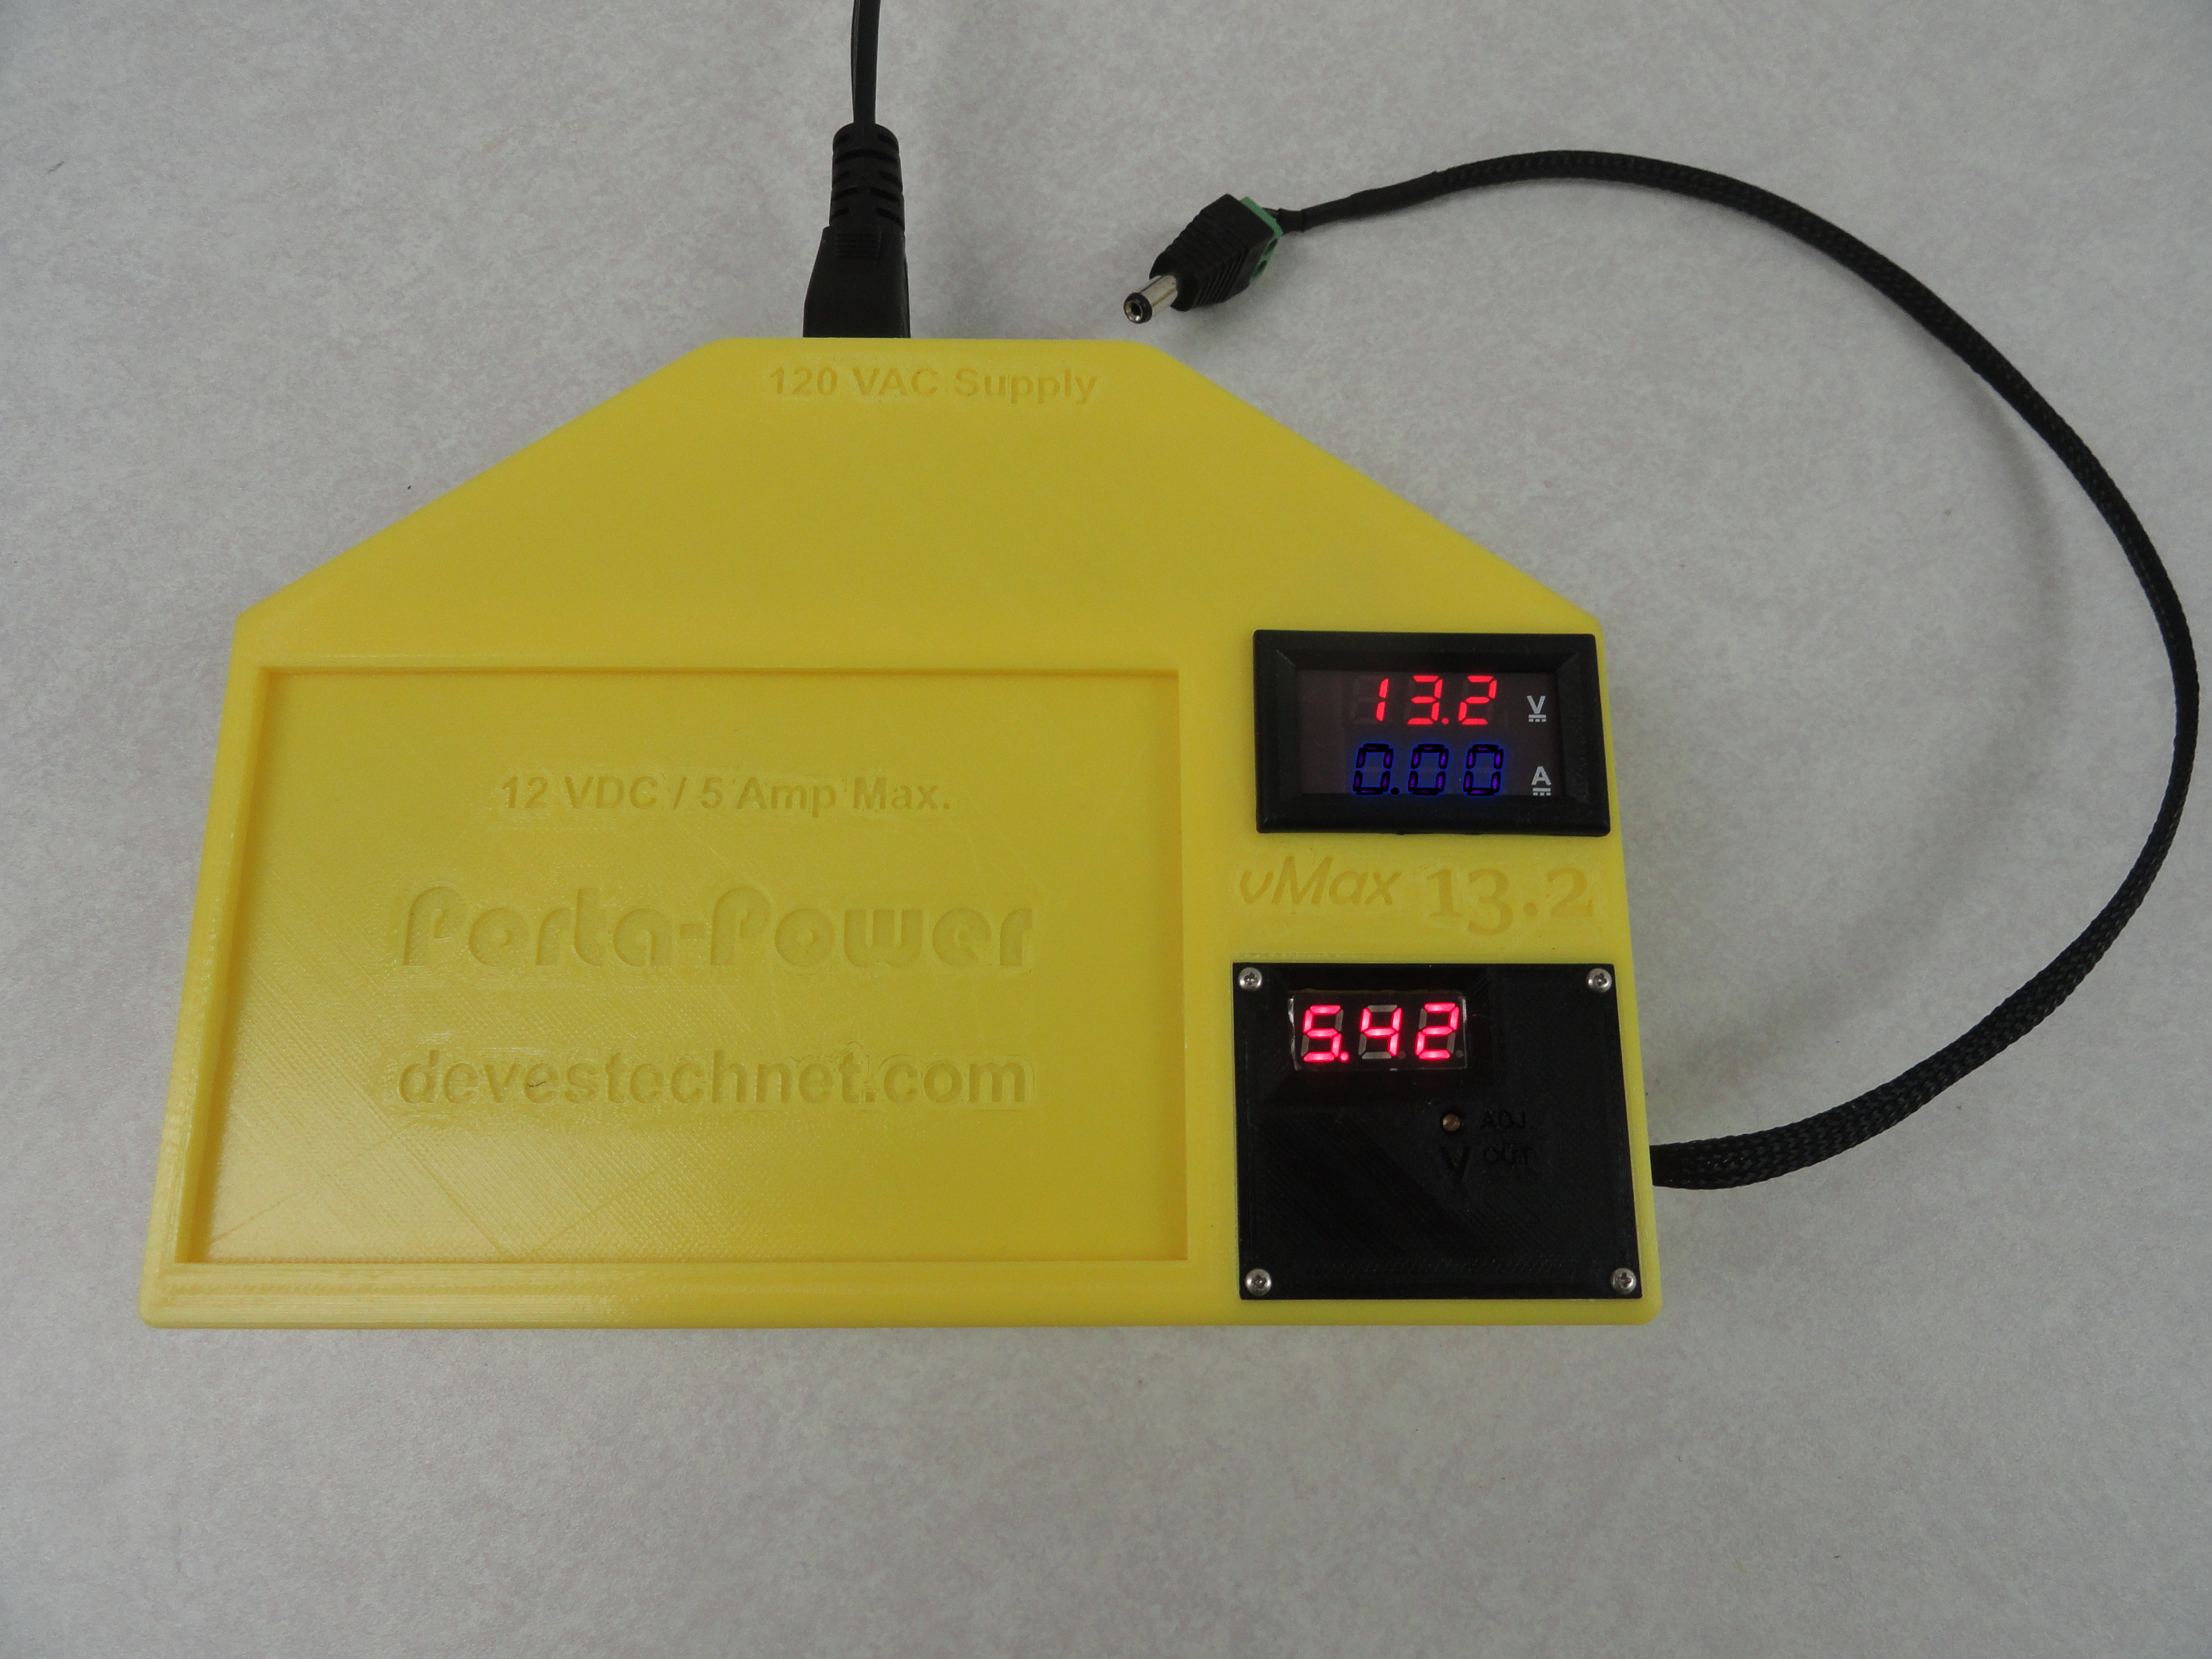
This one uses a small 110VAC to 12 VDC power supply that is very useful for most hobby projects. It simply plugs into the wall outlet and provides steady 12 volt (or less) power. We use the same converter, meters and switch as in the Battery version. It can handle as much as 3 amps of adjustable power. The output can be adjusted from 13.2 down to 1.6 VDC.
Parts List for 110VAC to 12VDC Version
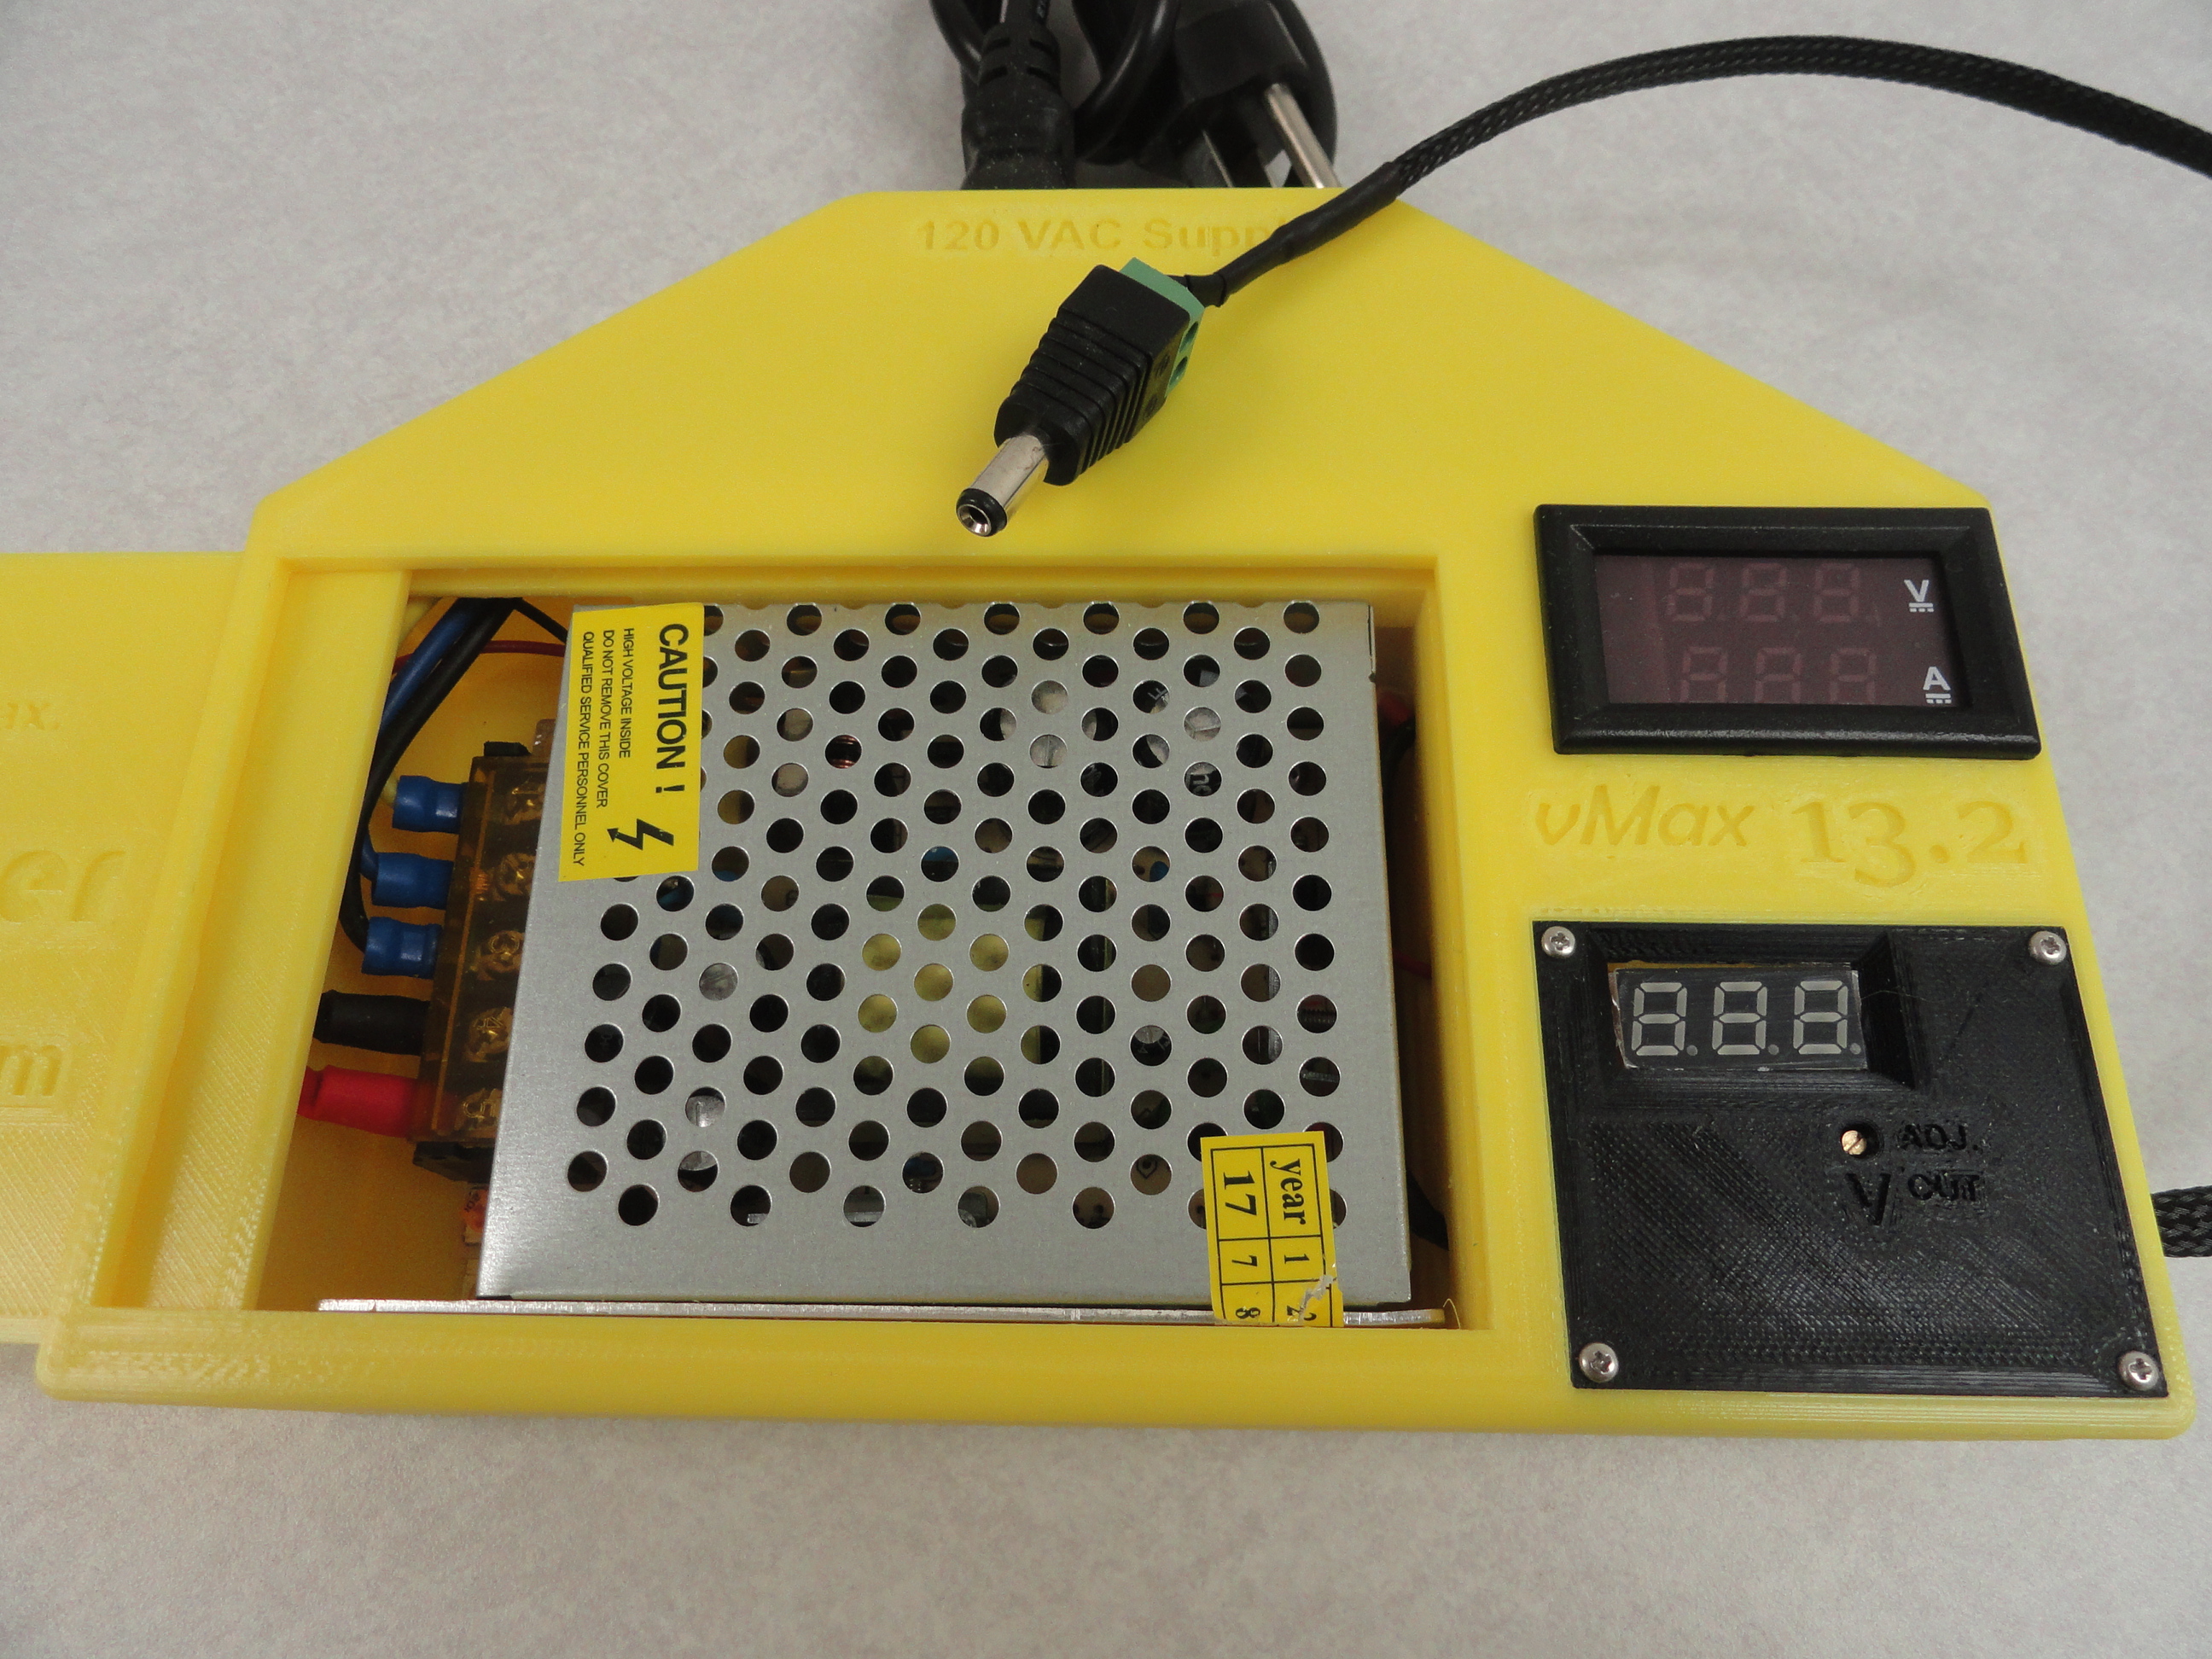
- Sodial AC Fused Male Power Socket - Use a standard computer power cord. 10 amp fused and has an on/off switch.
- S-60-12 12 Volt DC Power Supply at 5 Amps/60W - This is a decent little supply that doesn't get hot and fits nicely in its spot.
- SPST Switch - This round style fits nicely on the end of the box.
- DC-DC Stepdown Converter - This is what allows us to vary the voltage.
- Small 3 digit Volt Meter - This smaller one reads the end voltage going to the power plug.
- Dual Display Current/Volt Meter - This will give you the current used and the voltage of the battery.
- Dupont Connector Kit - An essential kit for doing this kind of work. Uses the Engineer PA-09 Crimper (1.6).
- Power Connector - I use ones that plug directly into an Arduino with screw terminals for connections.
- 1/4" Braided Loom - Makes things look nicer and keeps all the wires together. Use 1/4 inch heat shrink on the ends to secure.
Zipped Fusion 360/STL Files for your 3D Printer - Print with 35% infill, .1 resolution, 7% support for best results. Wiring for the 13.2 Volt Version
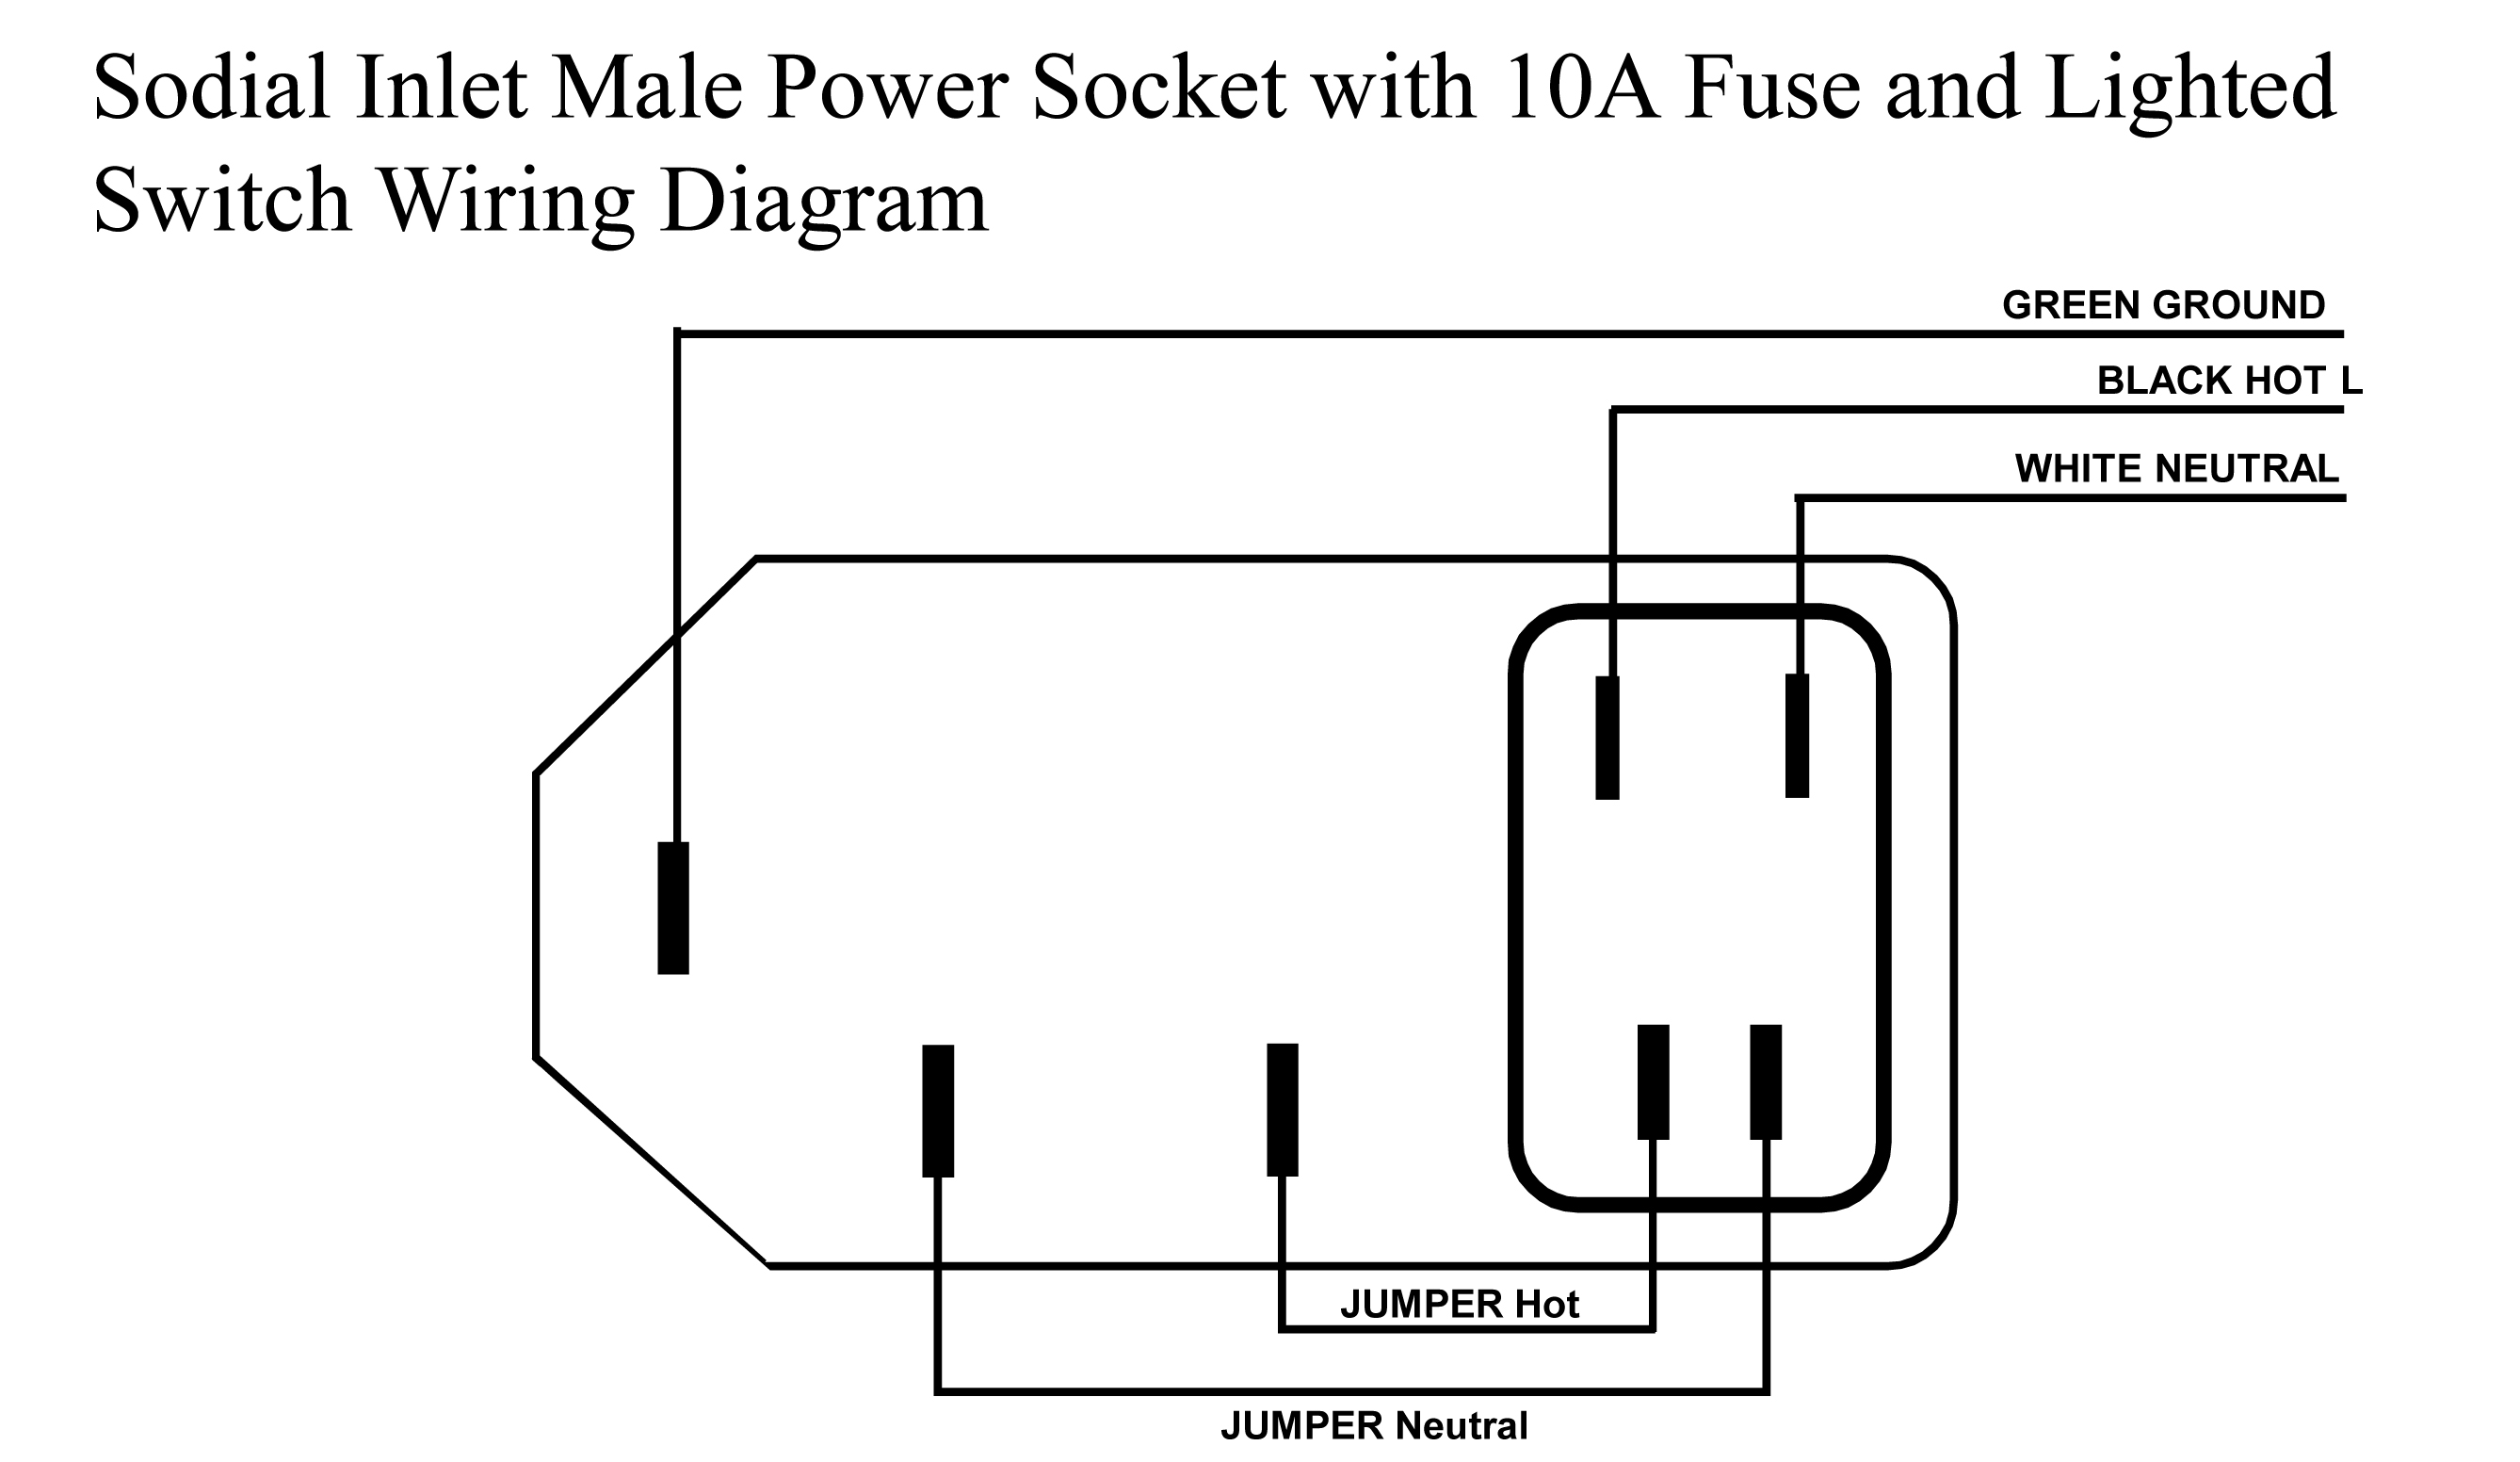
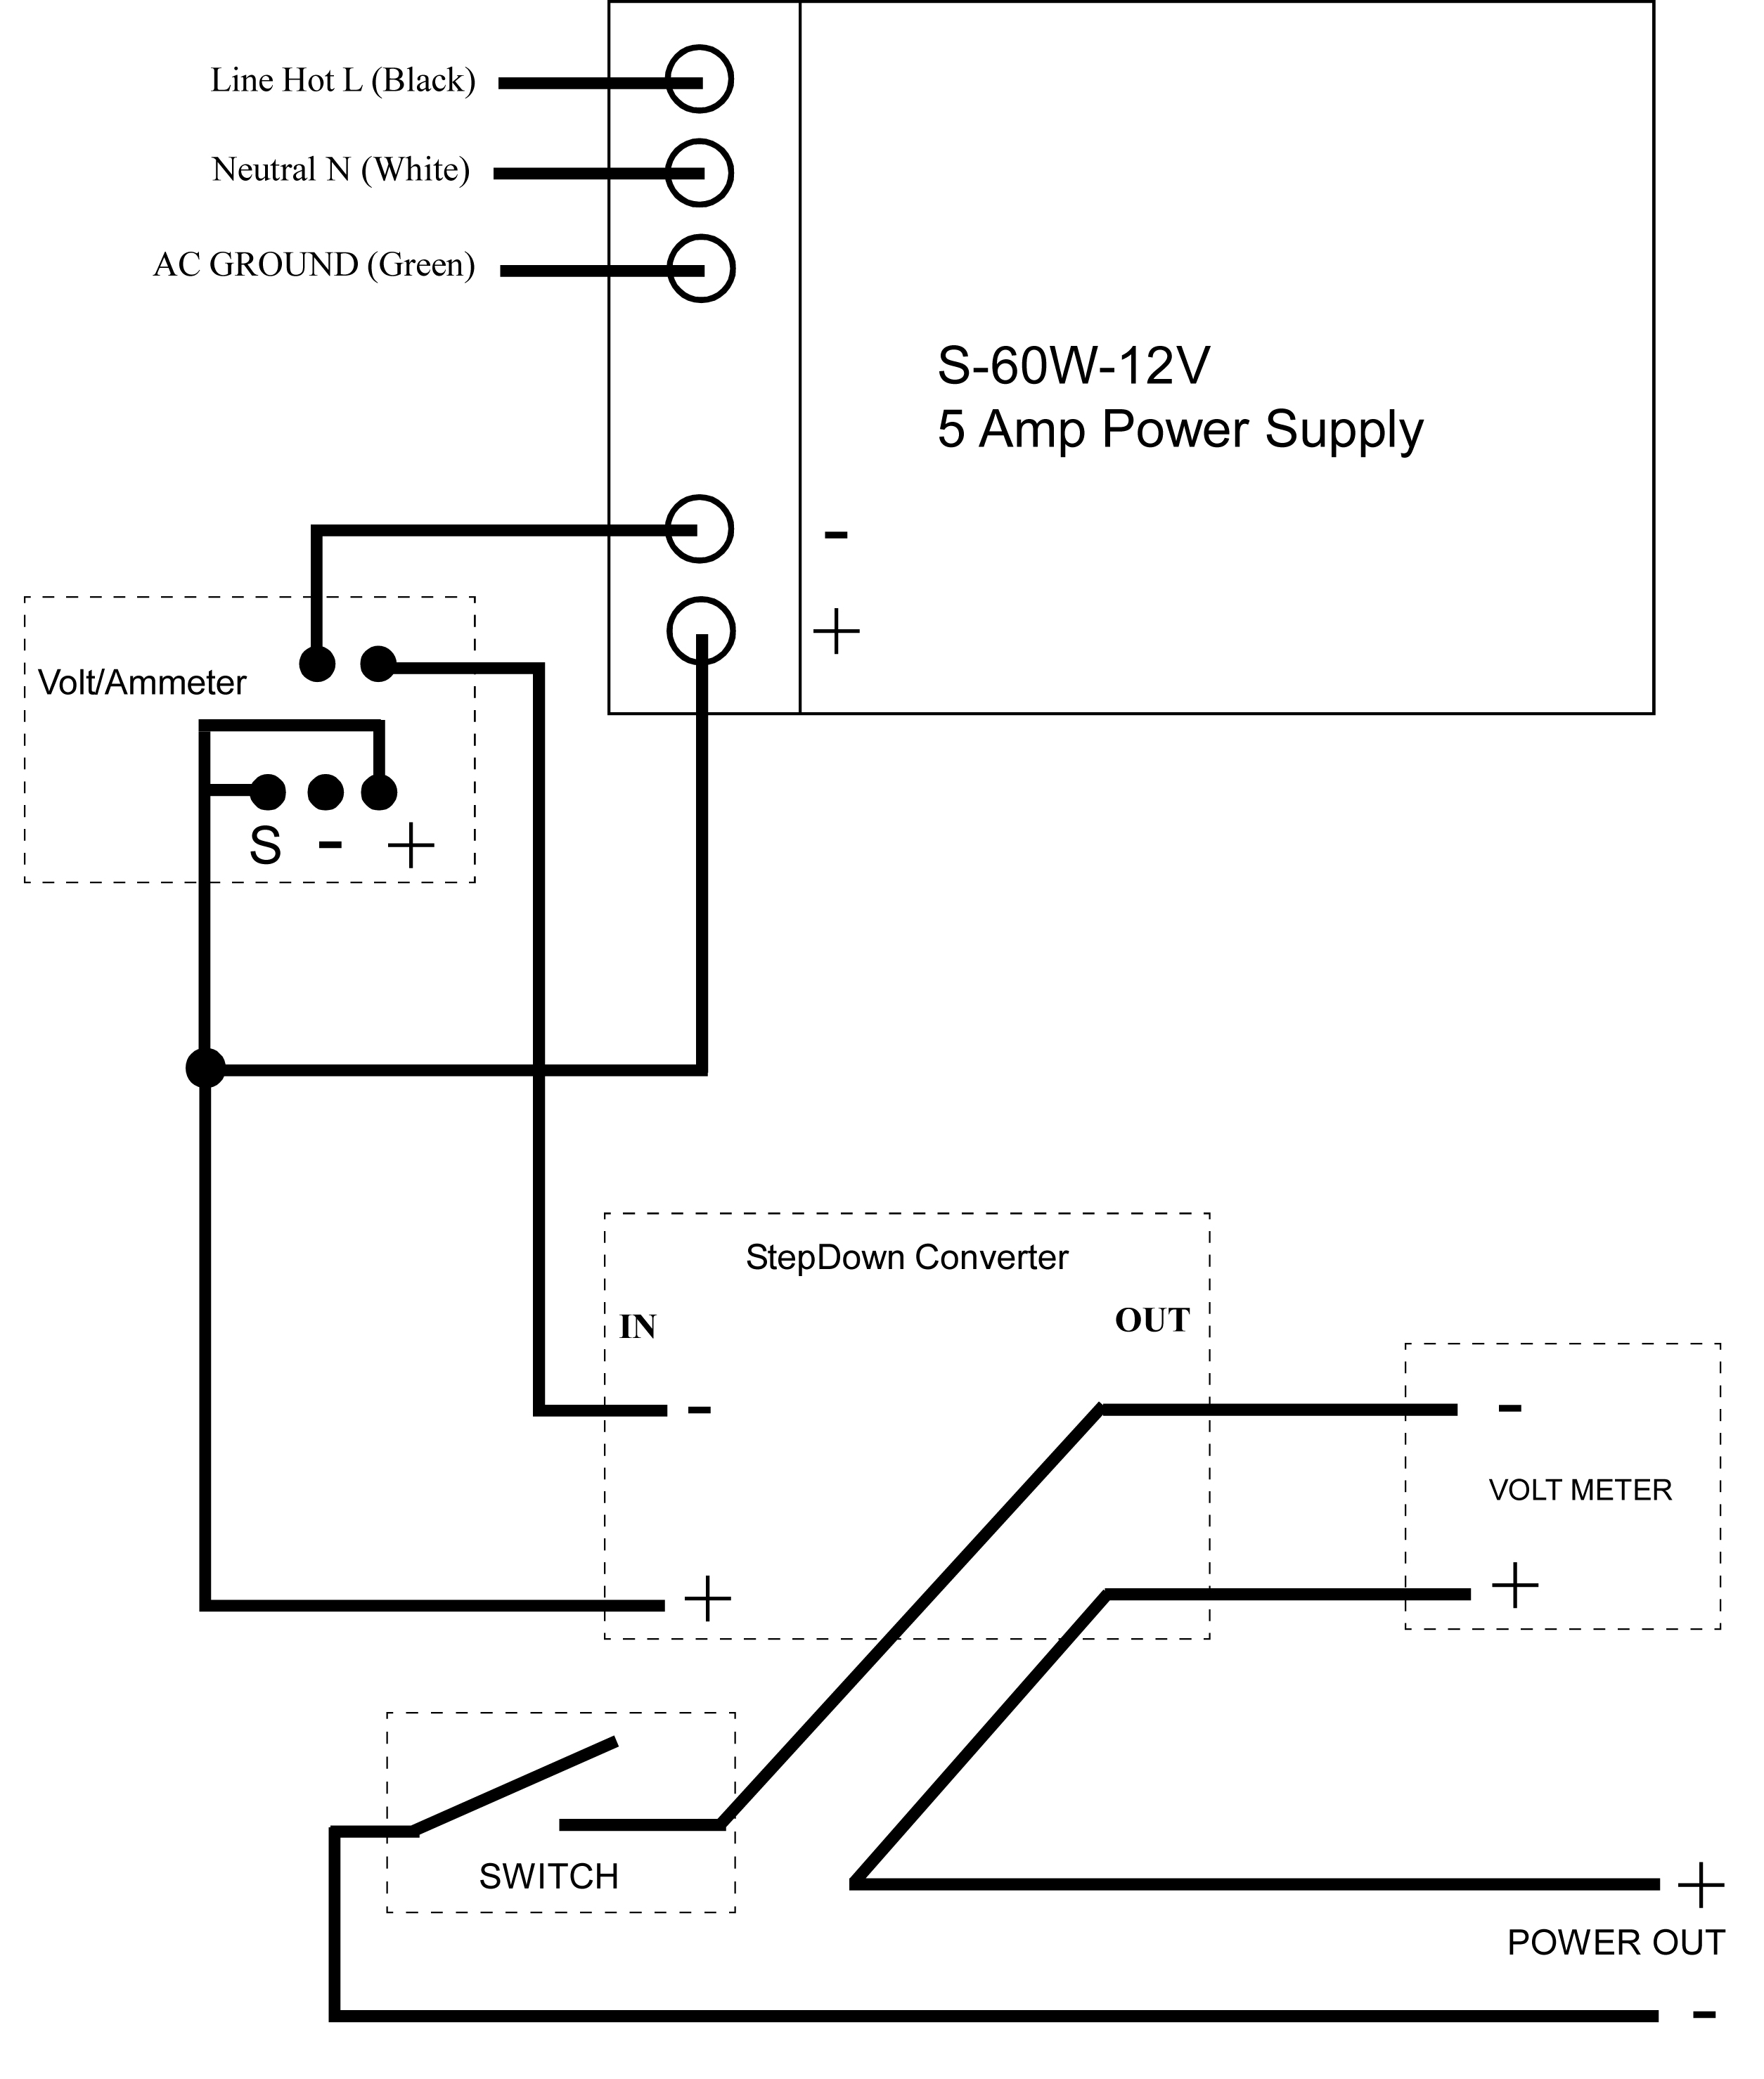
The first of the two diagrams is how to hook up the Sodial AC Connector. We will wire it so when you flip the switch, it provides power and the lighted switch is illuminated only in the ON position. The second diagram is how to hook the whole thing up after that. With this information, you can go to any larger power supply and have even more capabilities as we will explain when we go to the 36VDC supply.
The 110 VAC to 36 VDC Version
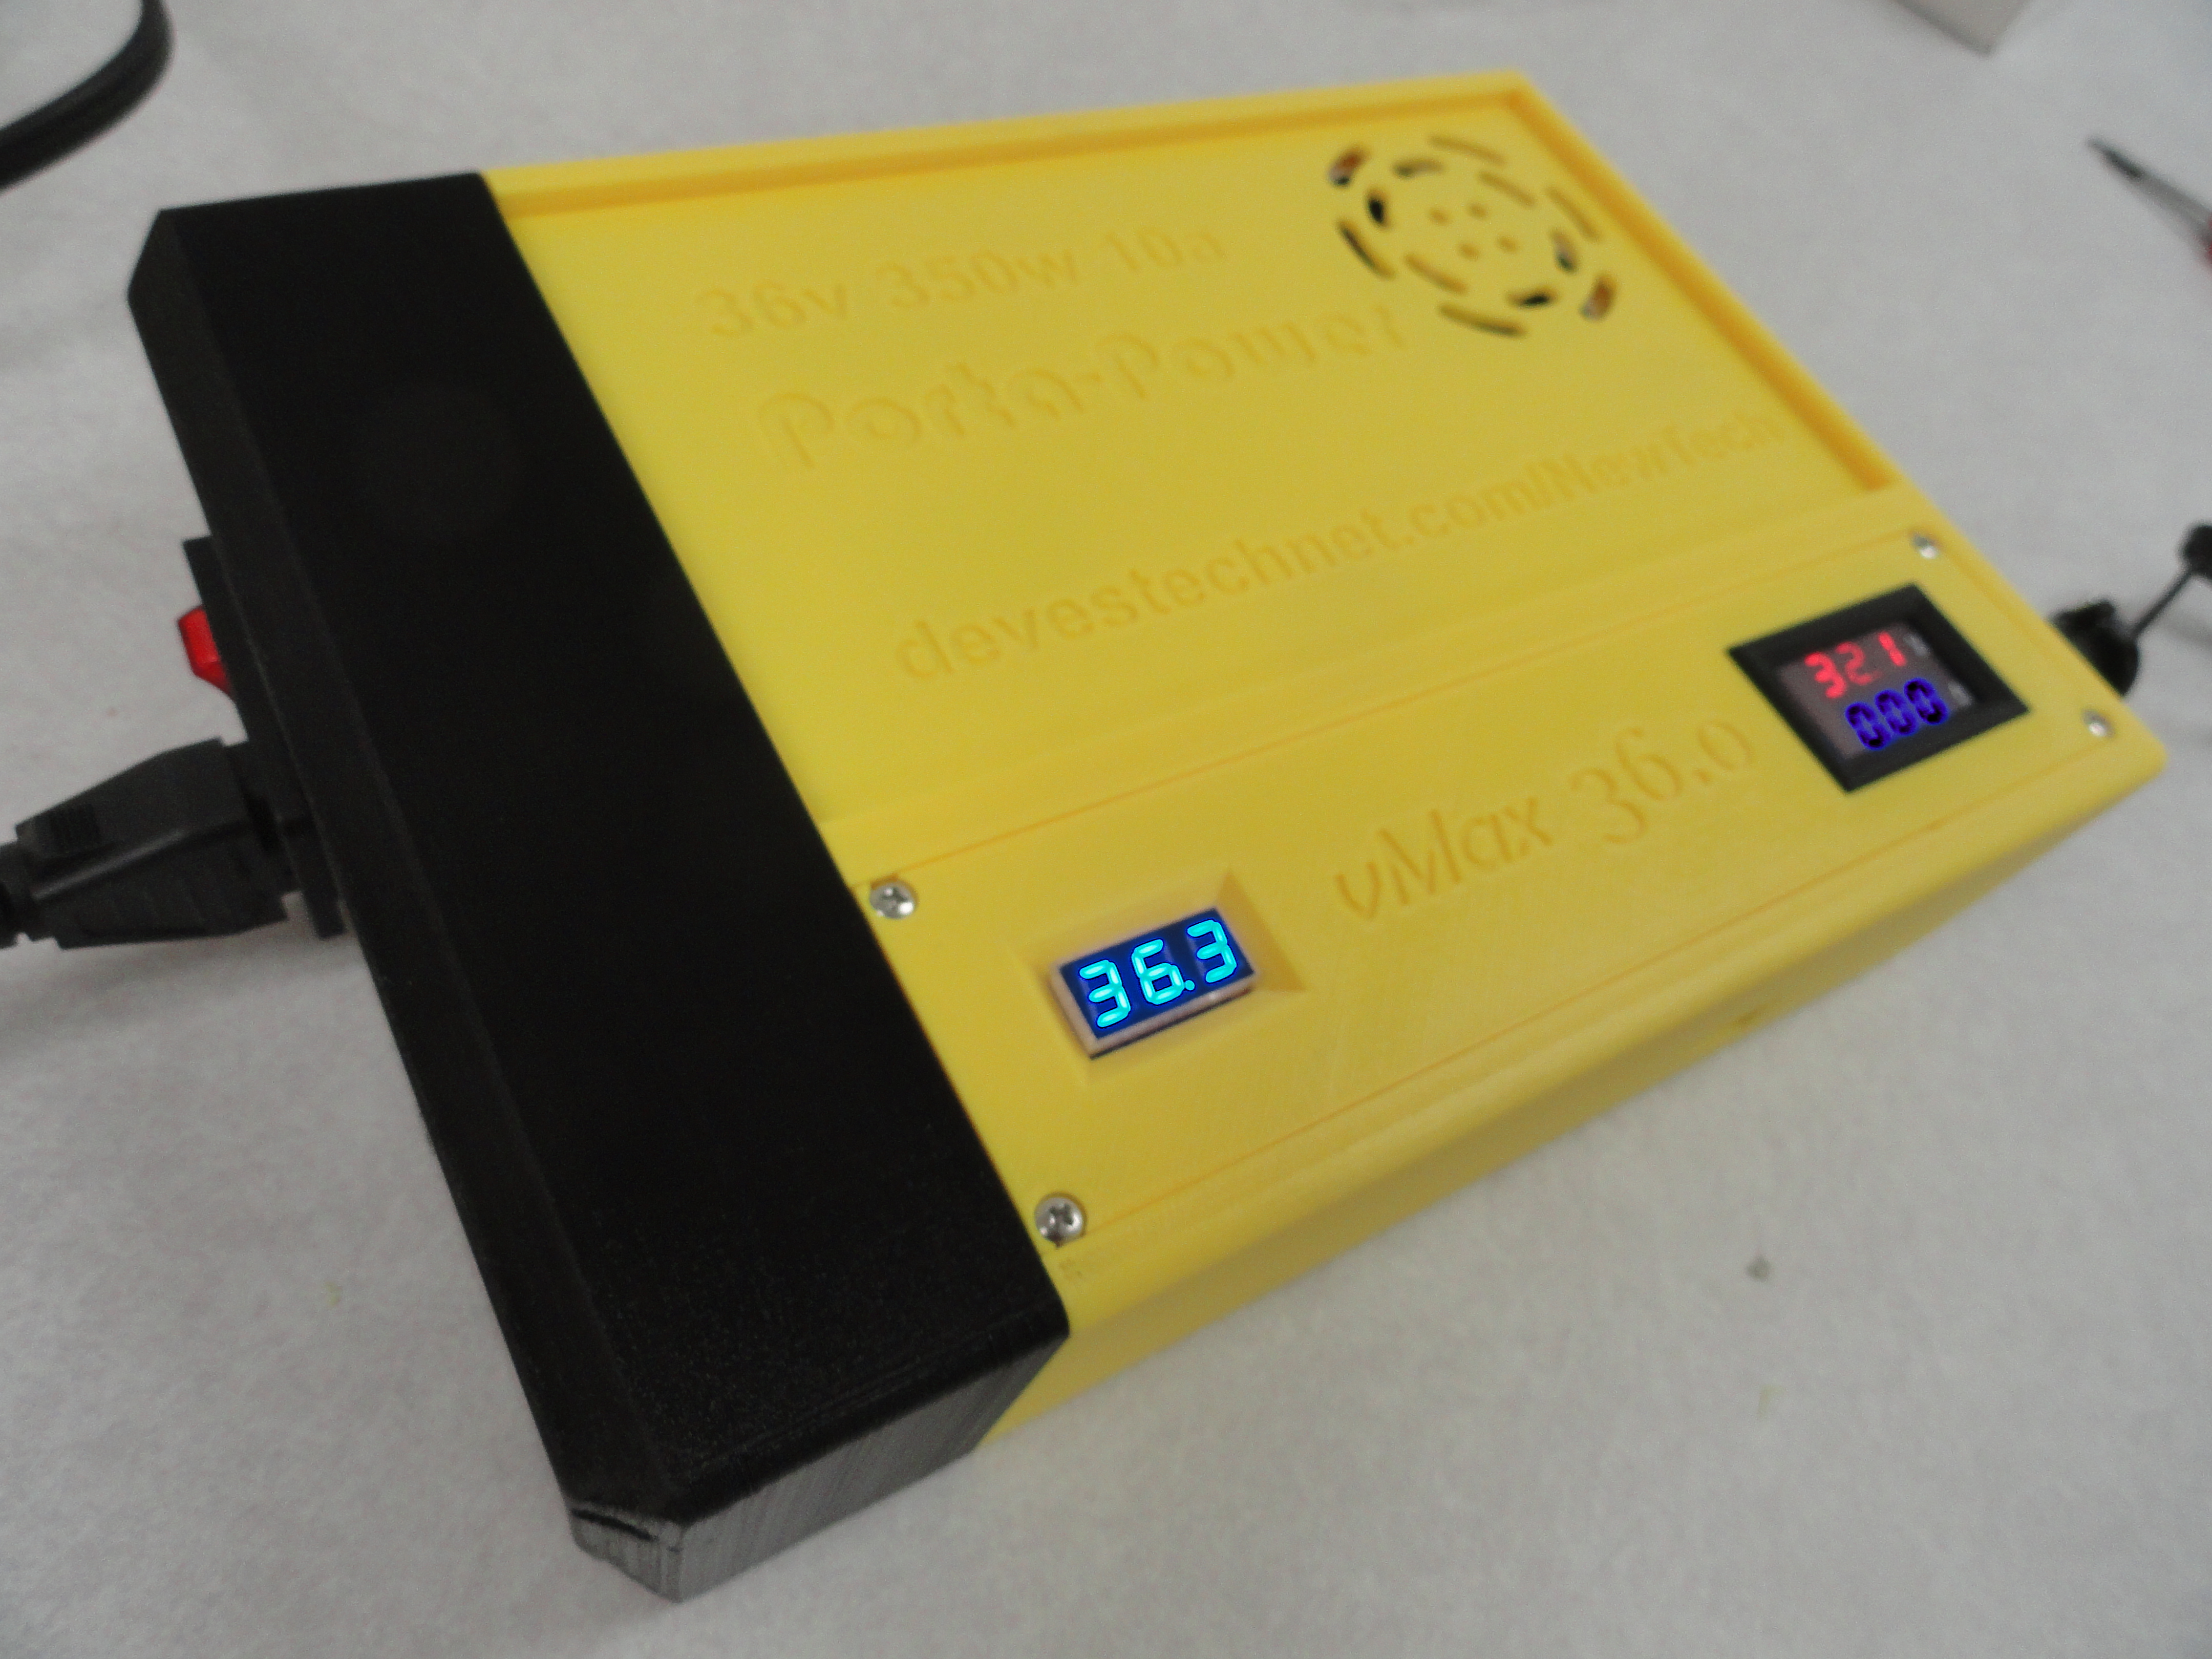
This one uses a full size 110VAC to 36 VDC power supply that is very useful for most hobby projects. It simply plugs into the wall outlet and provides steady 36 volt (or less) power. We use the same converter, meters and switch as in the Battery version. It can handle as much as 10 amps of adjustable power. The output can be adjusted from 32.0 down to 1.6 VDC.
Parts List for 110VAC to 36VDC Version
- Sodial AC Fused Male Power Socket - Use a standard computer power cord. 10 amp fused and has an on/off switch.
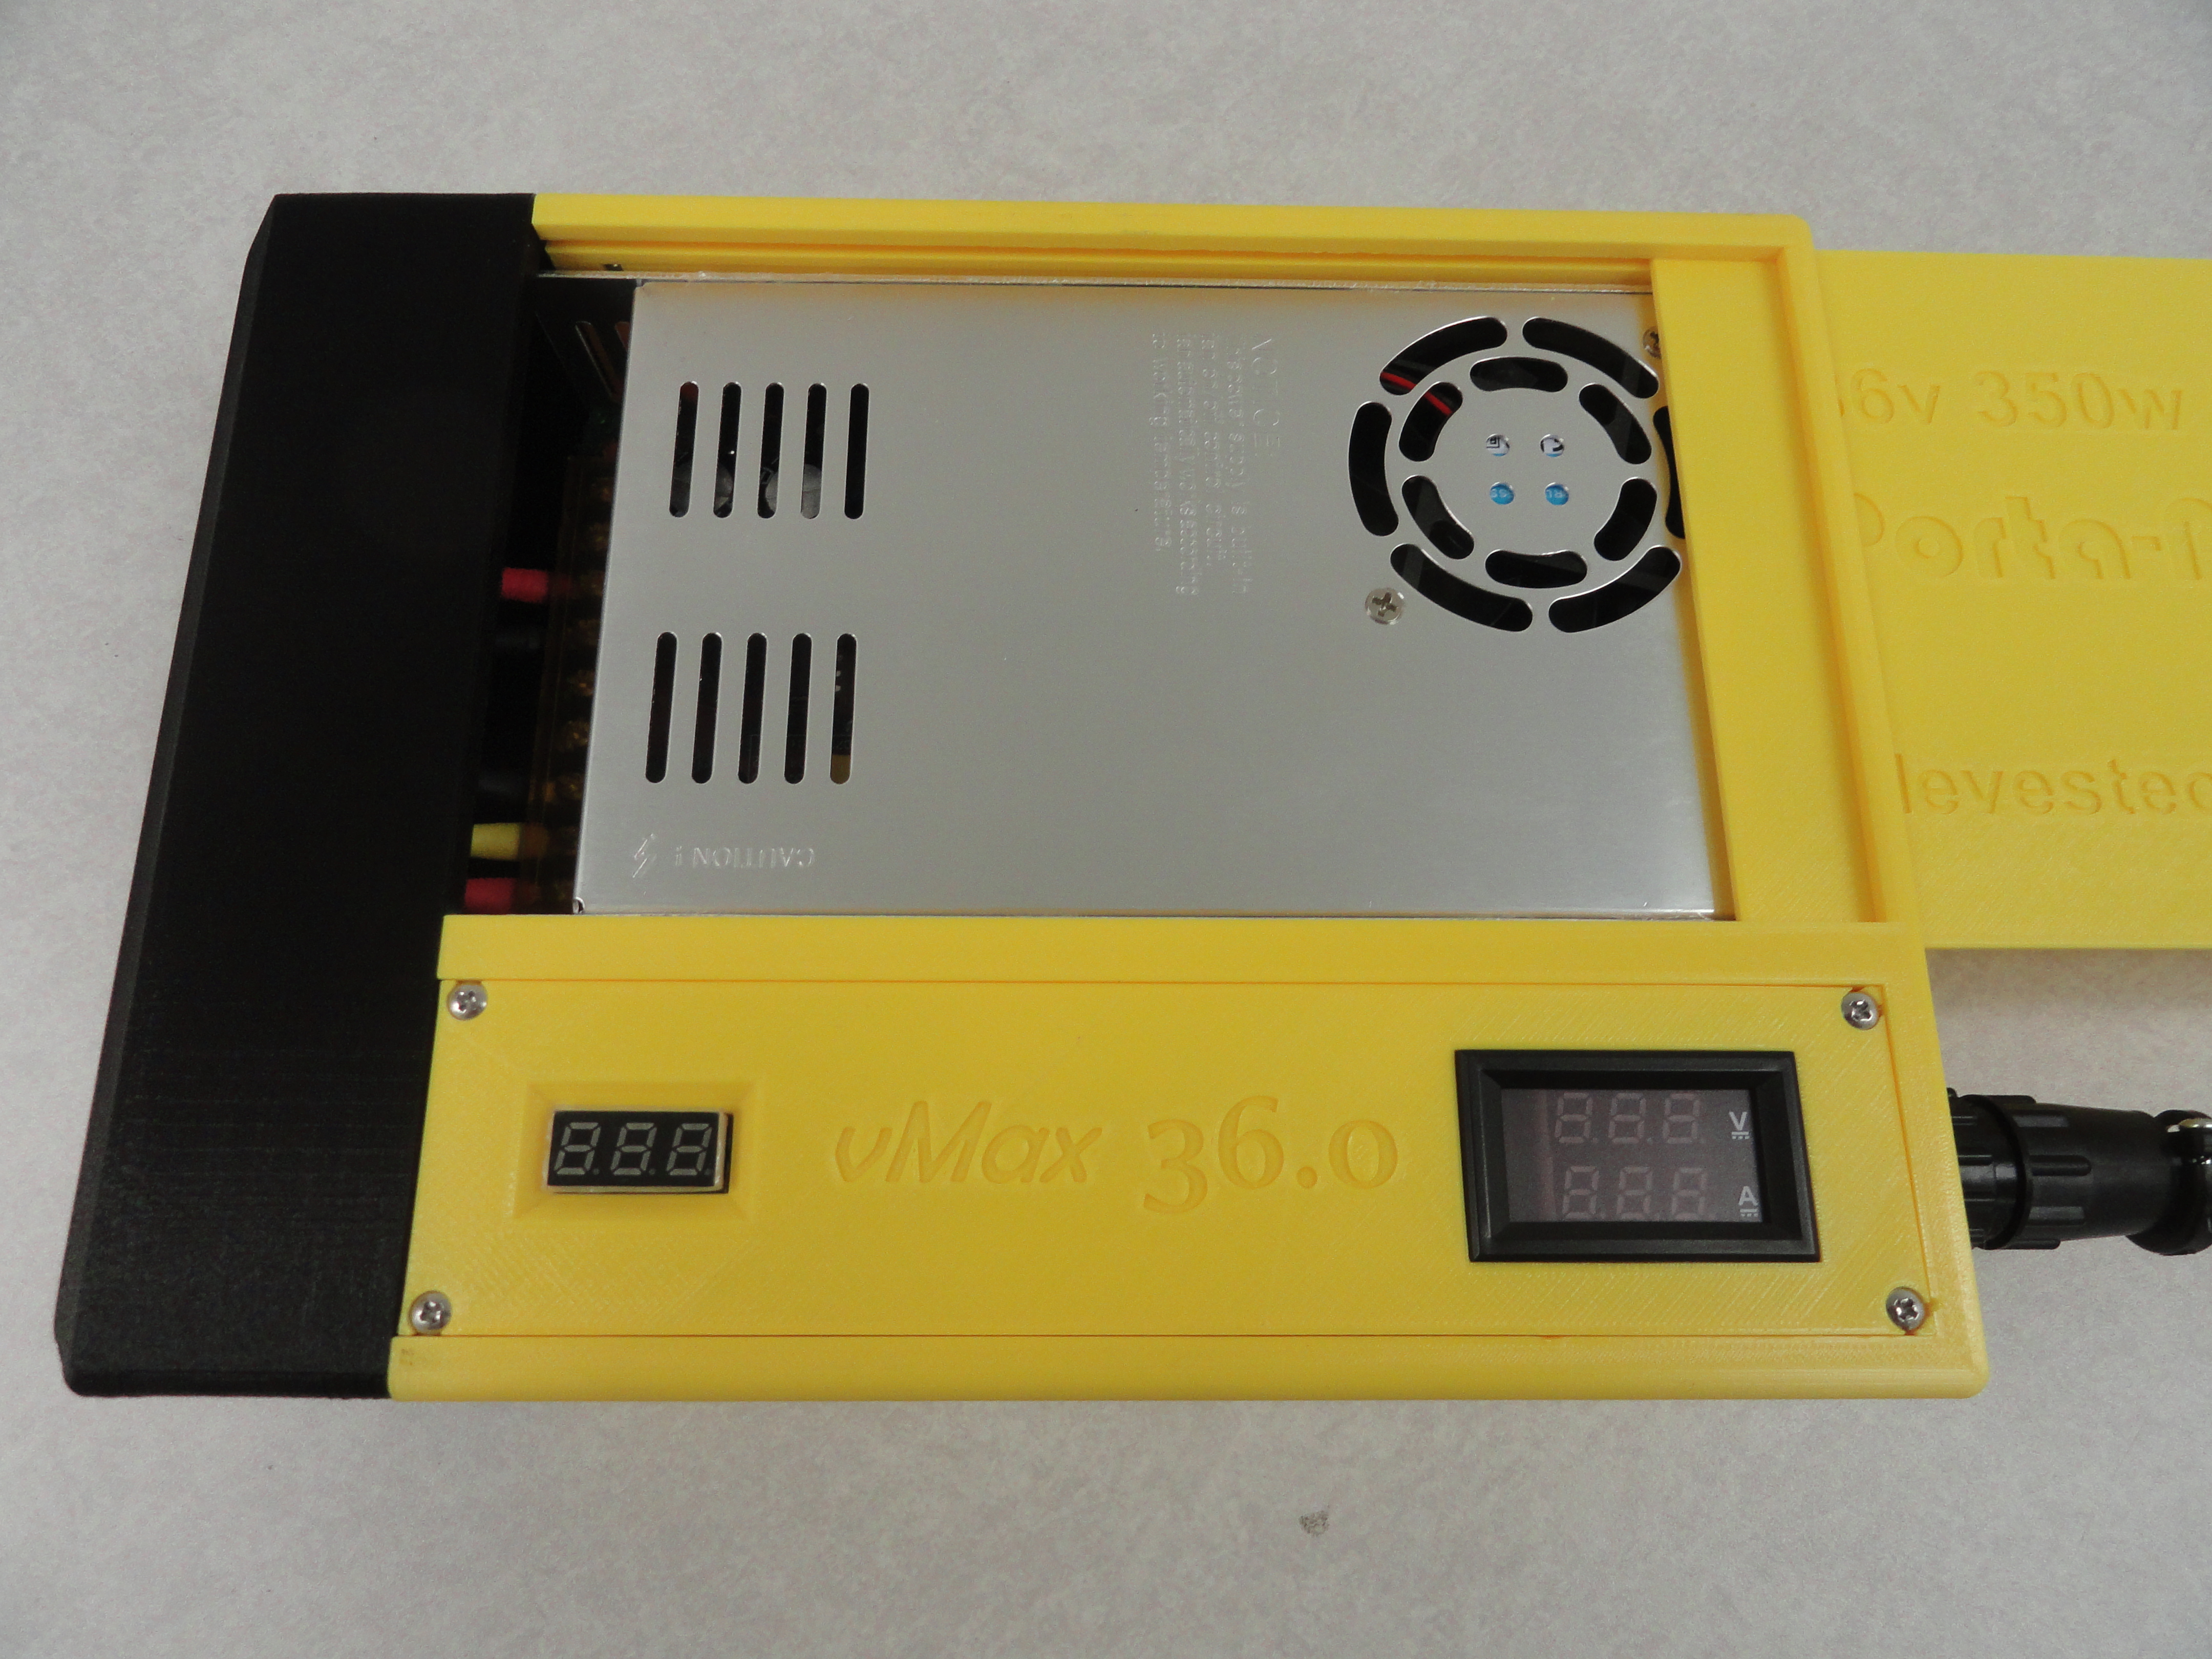
- S-350-36 36 Volt DC Power Supply at 10 Amps/350W - This is a full size supply with built in fan and fits nicely in its spot.
- DC-DC Stepdown Converter - 300W/20A more powerful unit used to adjust the voltage between 1.2 and 32 volts.
- Small 3 digit Volt Meter - This smaller one reads the end voltage going to the power plug.
- Dual Display Current/Volt Meter - This will give you the current used and the voltage of the battery.
- Dupont Connector Kit - An essential kit for doing this kind of work. Uses the Engineer PA-09 Crimper (1.6).
- Power Connector - I use ones that plug directly into an Arduino with screw terminals for connections.
- 1/4" Braided Loom - Makes things look nicer and keeps all the wires together. Use 1/4 inch heat shrink on the ends to secure.
- TE-Connectivity CPC Series 1 206708-1 9 pin Connector - An elegant solution for an output connector system.
- TE-Connectivity CPC Series 1 206705-1 9 pin Connector Receptacle Panel Mount
- TE-Connectivity CPC Series 1 206966-7 9 pin Connector Backshell
- TE-Connectivity CPC Series 1 66105-1 Female Pins 20-24AWG
- TE-Connectivity CPC Series 1 66103-4 Male Pins 20-24AWG
Zipped Fusion 360/STL Files for your 3D Printer - Print with 35% infill, .1 resolution, 7% support for best results. Must have at least a 220x220mm Bed! Wiring for the 36 Volt Version
Use the 12VDC wiring diagram for this one as well. Different sizing, same wiring. This one is actually easier because the more powerful DC-DC converter has nice screw terminals. The converter is rated for a max of 40 volt input so 36 volts is really the max you can go using this converter. This one will easily power Nema 11, 17 and 23 Stepper Motors and power at least 4 of them at the same time along with all associated systems.