Deve's Technical Network
1947-1955 1st Chevy Trucks
216/235/261 Engine Solutions & More
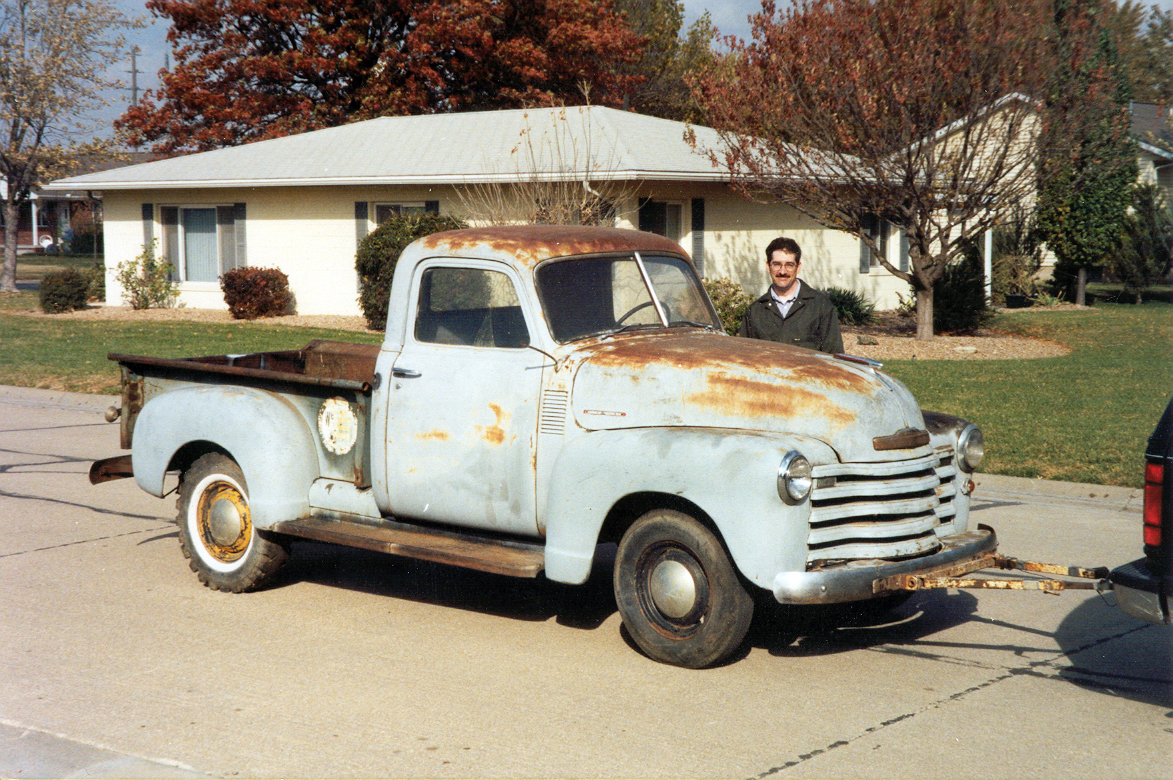
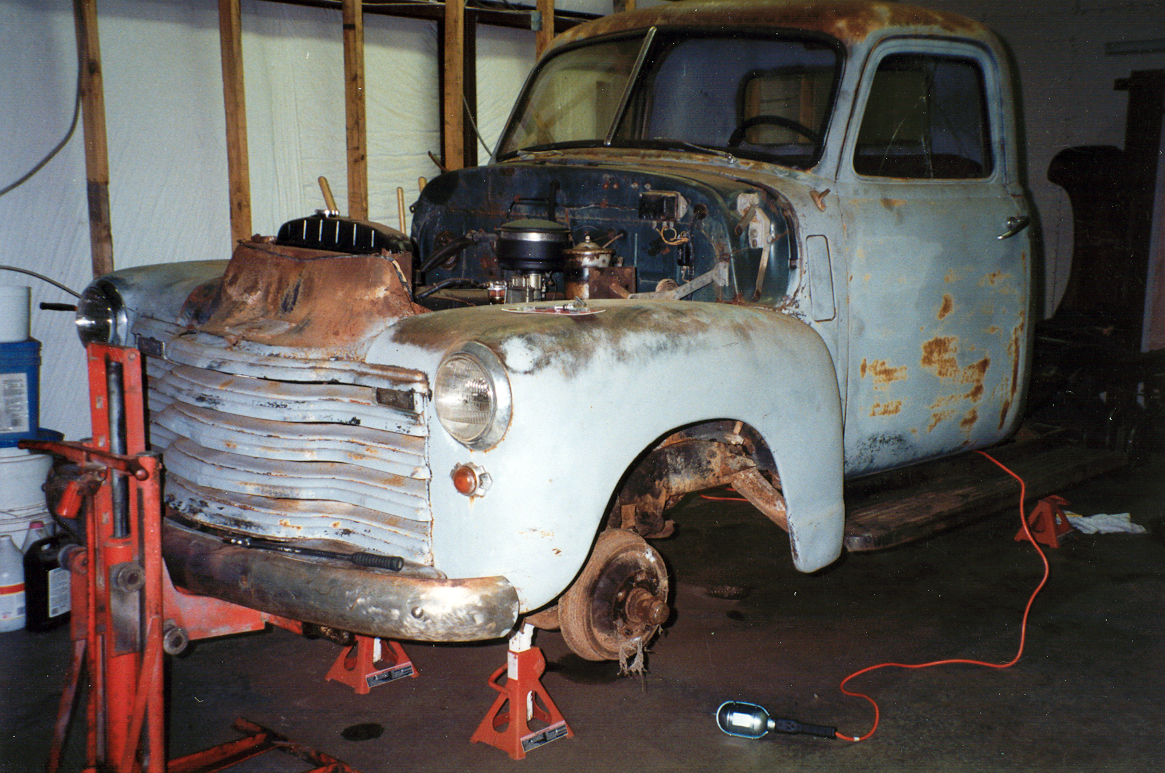
October, 1999. The Big Before. Am I ever glad I don't have to start this one over. I have zigged when I should have zagged too many times on this first project! It's a good idea to really cherish the time you have with the pre-restoration truck. Things will never be the same again, and you have just committed to several thousand hours of free labor! Will it be worth it in the long run? Only if you do it right. That, in itself is elusive. Good Luck!

First order of business: let's see if we can get the engine running. After replacing the fuel pump, putting on new plug wires (in the right order), removing the valve cover and changing the oil just for good measure, adding water and a battery (6 volts), it doesn't start!! My good friend and master AD man John Erb volunteers to sit in the cab whilst I tow the truck behind my Explorer hoping to tow start it. Guess what? It started right up! It runs smoothly and with no smoke or telltale problems. This tells us the engine may be a good candidate for a full rebuild.

Let's fix the rusted-out floor. All three panels were replaced with the reproduction panels currently available. I ran into only one glitch - the center screw-in panel is about 3/8 of an inch too wide and it won't screw down properly. The job was done very professionally by master welder Gene Swartzendruber, and there is no doubt about it being done right. We will have to cut the center panel to make it fit properly. This is only one small example of oddities encountered! It was after this, I discovered I really needed to learn to weld myself, so I got the proper equipment and dove right in. Many mistakes, but worth the effort. You can always fix what you break!
With the bed removed, it's obvious the need for rust removal. How about let's not do this and say we did!?
Doesn't look too bad after weeks of wire brushing! I had never done anything like this before, but this turned
out to be totally unnecessary and a colossal waste of time. About 300 hours of it! Had I decided to do a frame-up
in the first place, I would have known that sandblasting is the only way. Lesson learned!

More shots during rust removal, but entertaining to look at. I normally don't do anything half fast, so I spent many hours inhaling rust particulate in the air even with a mask, it can't be a good thing. This is NOT the way to remove rust. A drill with a wire brush on the end may work, but it's way too messy for the result.
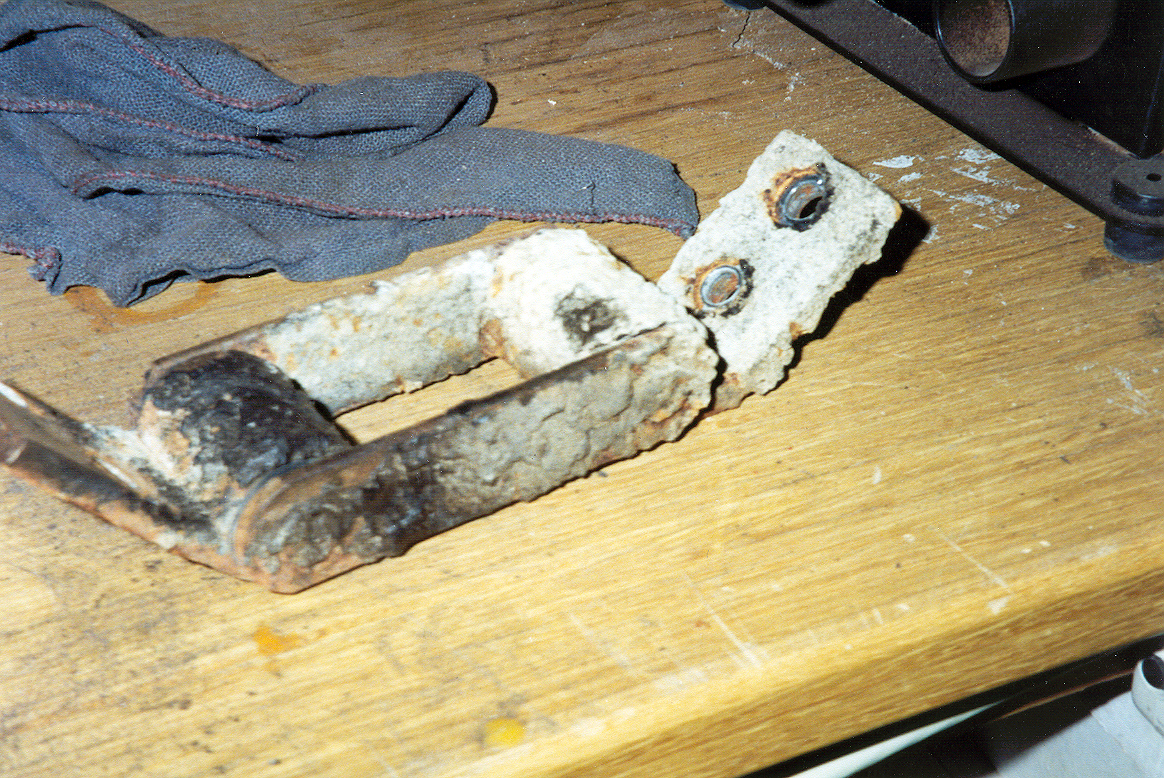
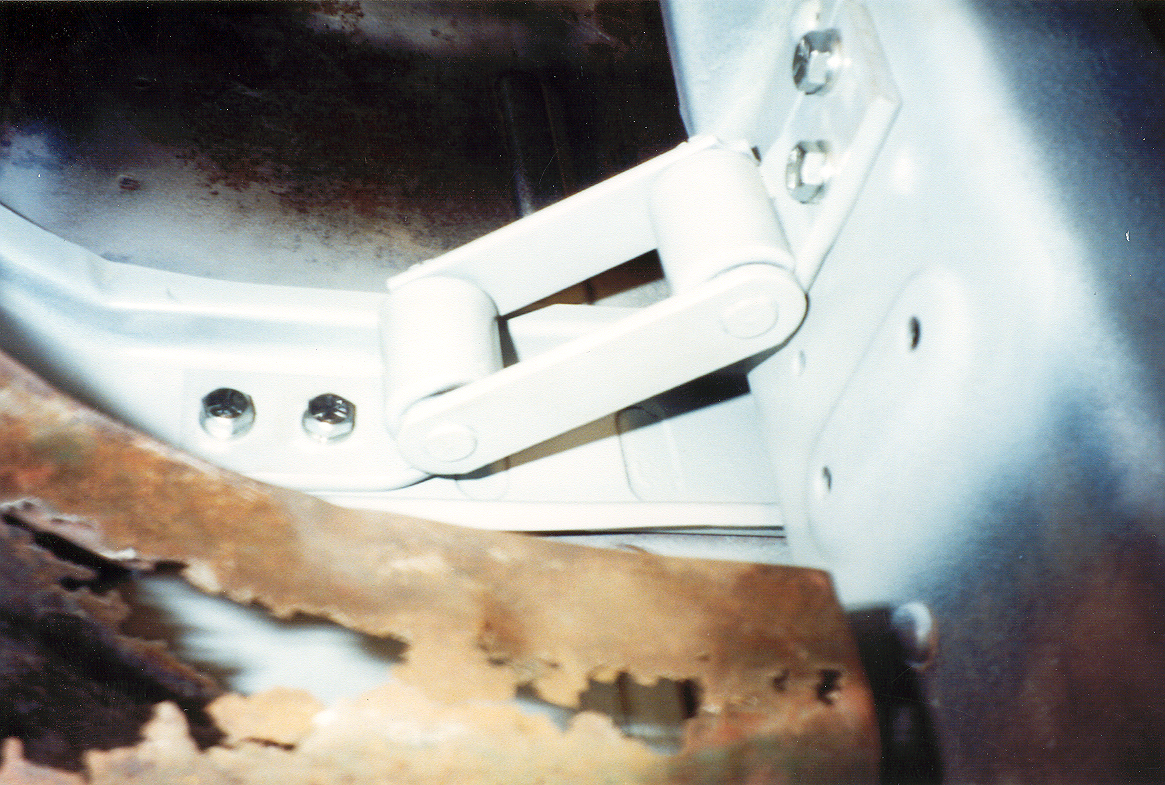
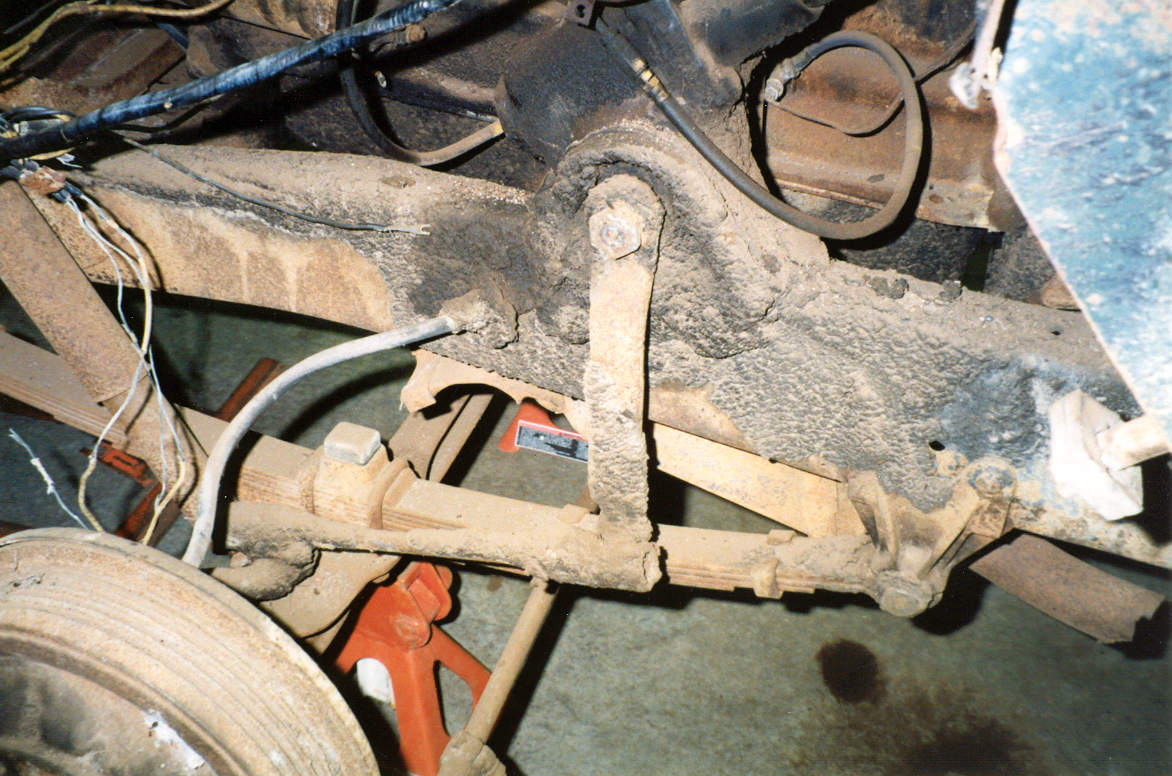
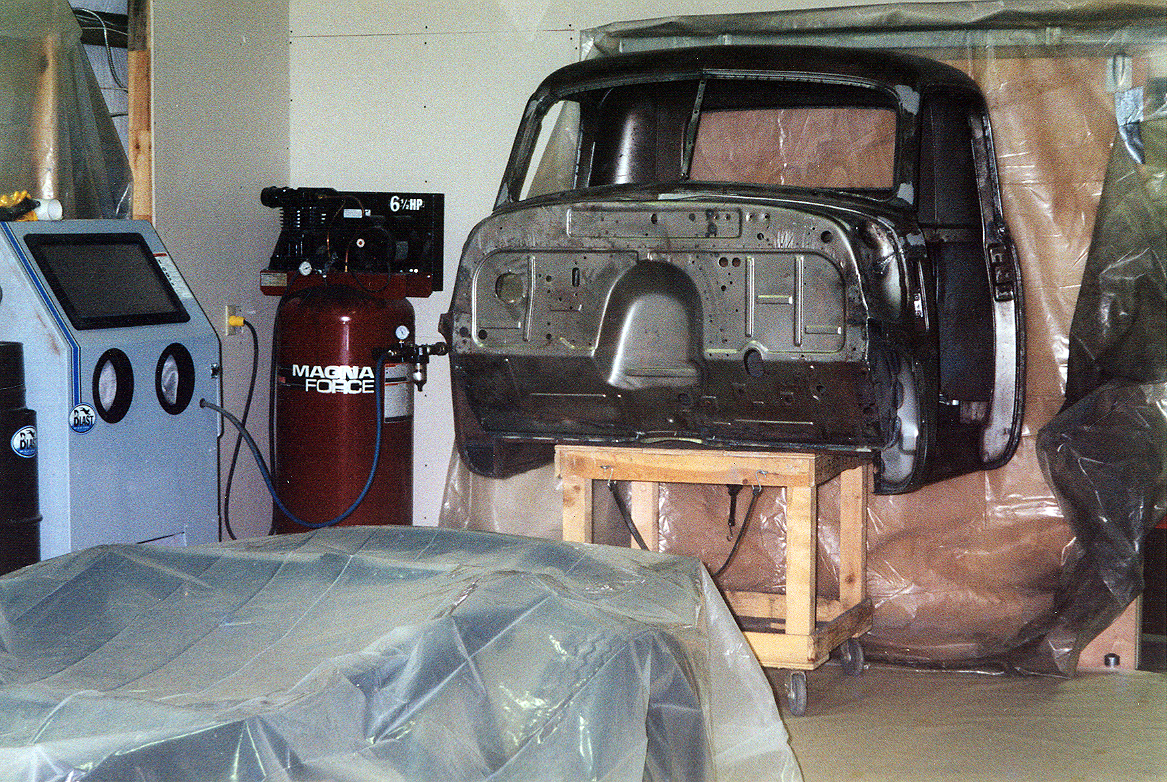
Before and after example of the rear cab mounts. After taking these pics, I tore the cab mounts apart again, sand blasted and replaced the rubber bushings inside the mounts. I then re-primed and painted them black awaiting installation at some far later date! This was my first thought of getting an in-shop Blast Cabinet. I did and I use it almost every day. One of the best shop purchases I have made for this kind of work.

The wire brush manufacturer came out pretty good in all this! I only have so much patience however. So, after trashing a drill or two due to side load on the bearings, I had a few decisions to make.
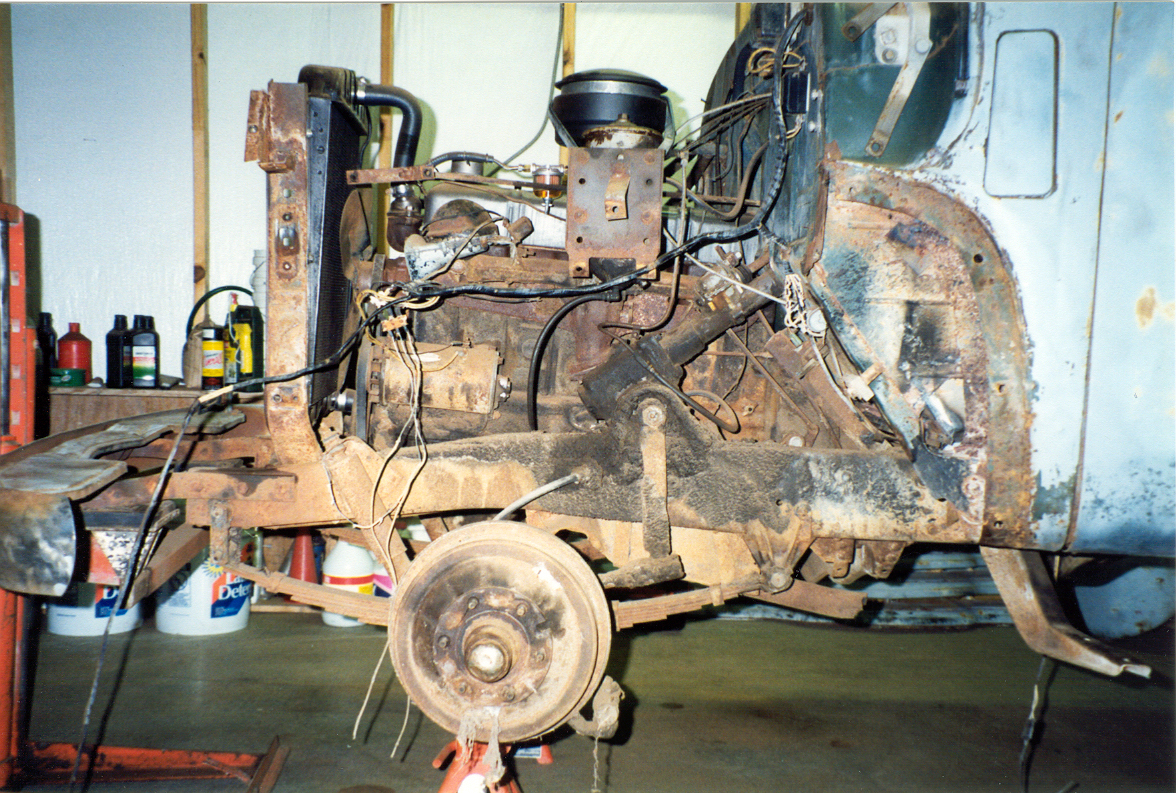
Here is where one thing really leads to another. To get all that nasty dirt and rust, time to remove the fenders. Do you see where all this is going yet? I had never tried any of this before, so back in 1999 I wasn't so sure where this was going! Now, one look and I know instinctively what to do!
In my defense, it was really dirty. 50 years of crud just had to go! For most people, the reply to this is probably, "quit your bitching and scrape and clean it all off", but therein lies a personality quirk where one mans clean is another mans not-so-much.

Looking better. Maybe this wire brushing thing isn't so bad after-all! Then again....
It looks worse in reality than here on film. The dirt was unreal. I know, a pressure washer, right? Well, I don't have one! I DO have a scraper and some wire brushes though! I am including all of these shots so you fully understand what you are up against if your goal is a pristine, fully restored truck. It's rather comical now, but at the time, I do not recall thinking it was funny.
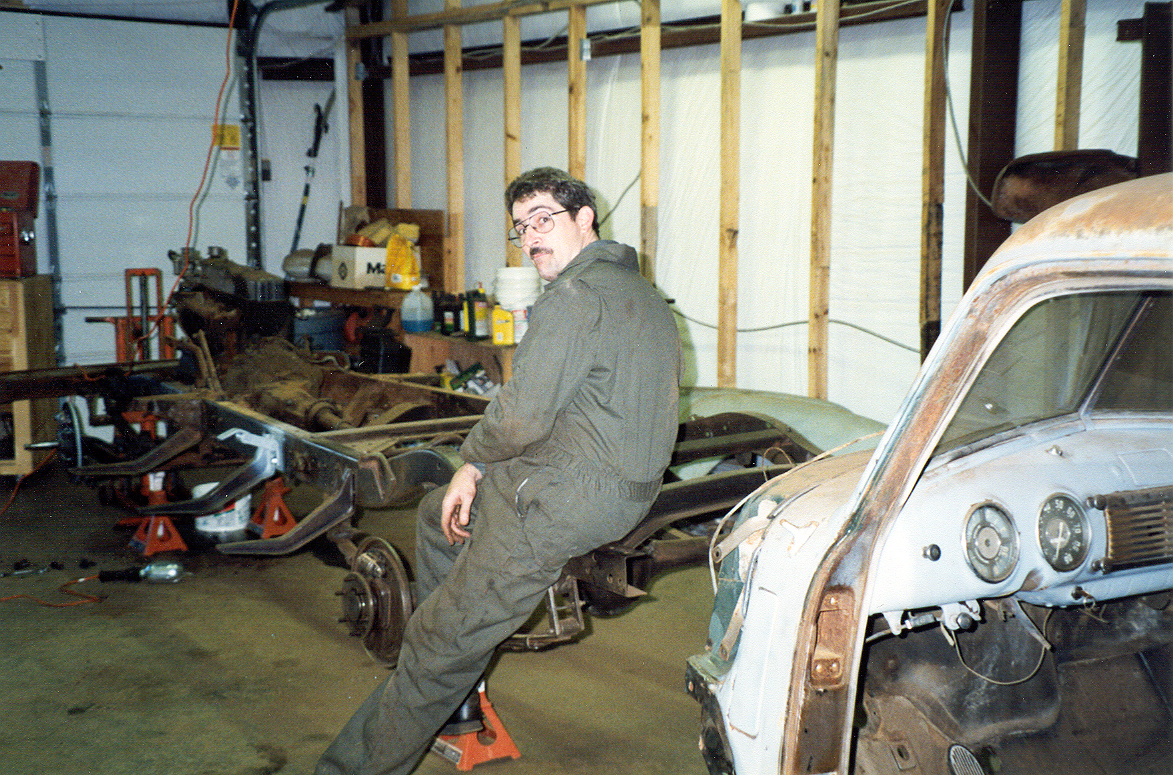
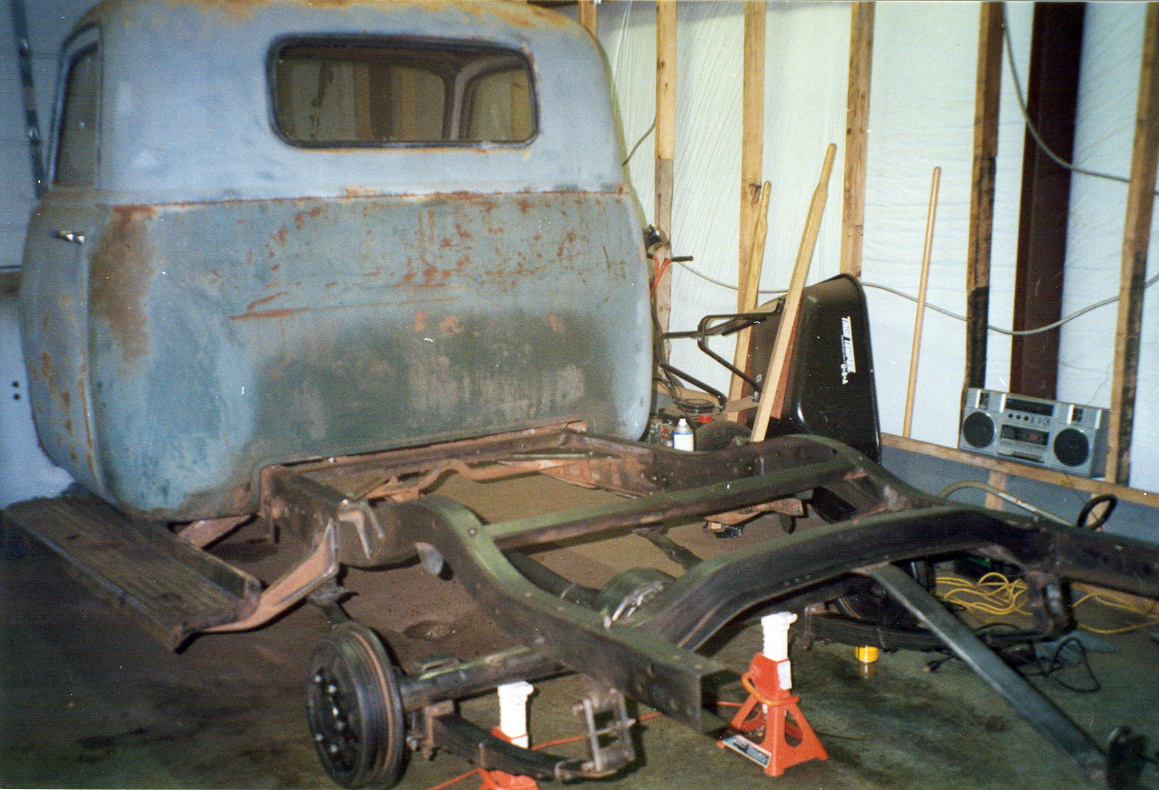
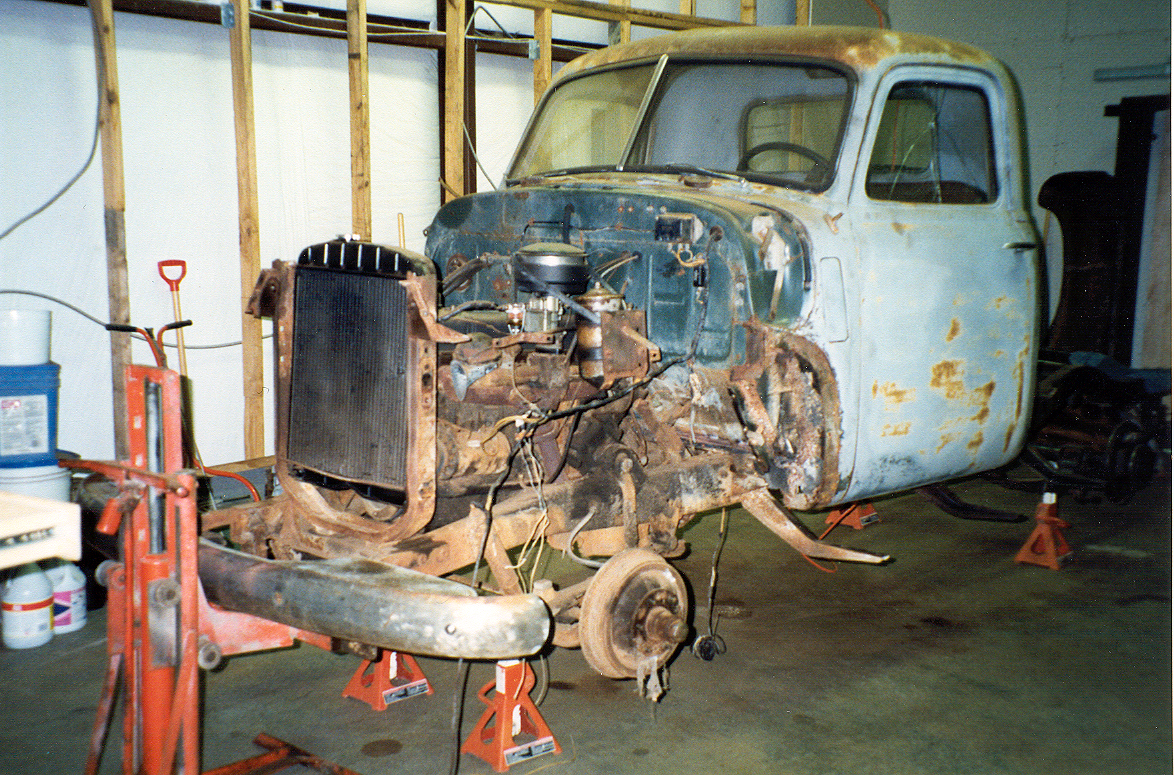
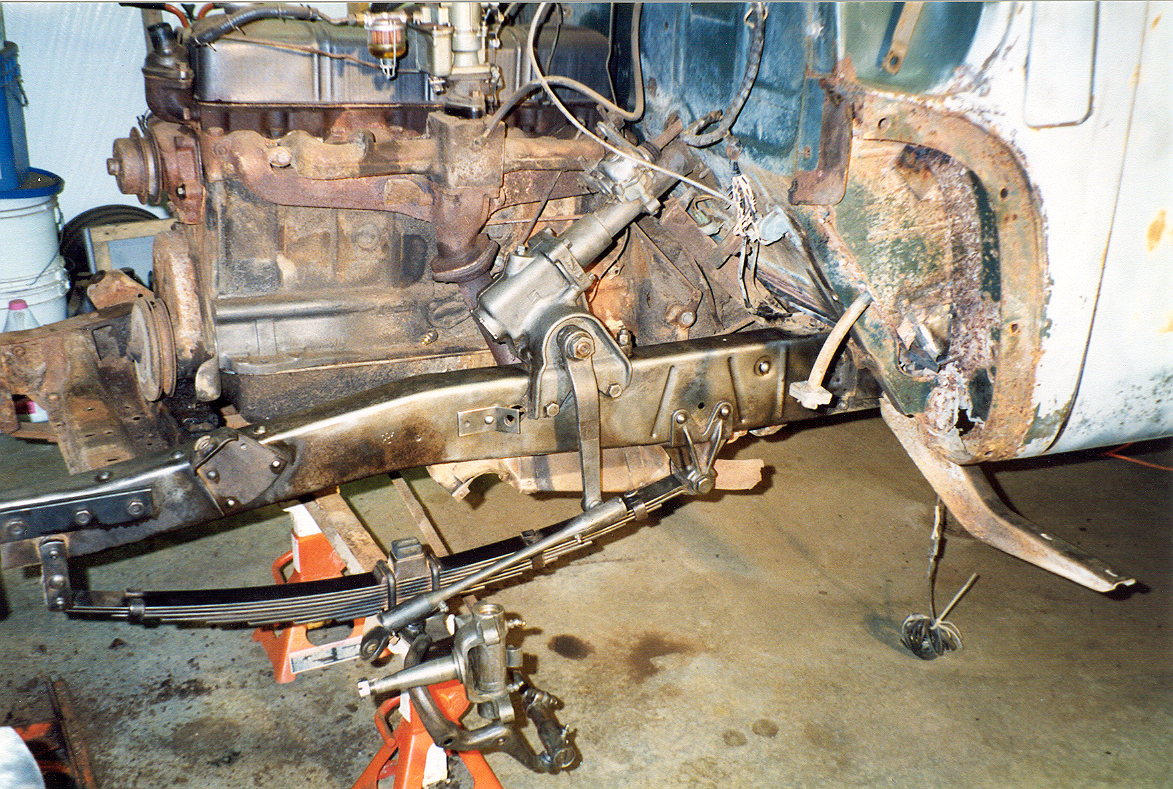
Okay... enuf of this cab getting in my way... there is dirt and rust under there! Since the floor was replaced, the bolts are new, so it's really only 6 bolts, a steering column and a hernia away from removal. Let's do it!

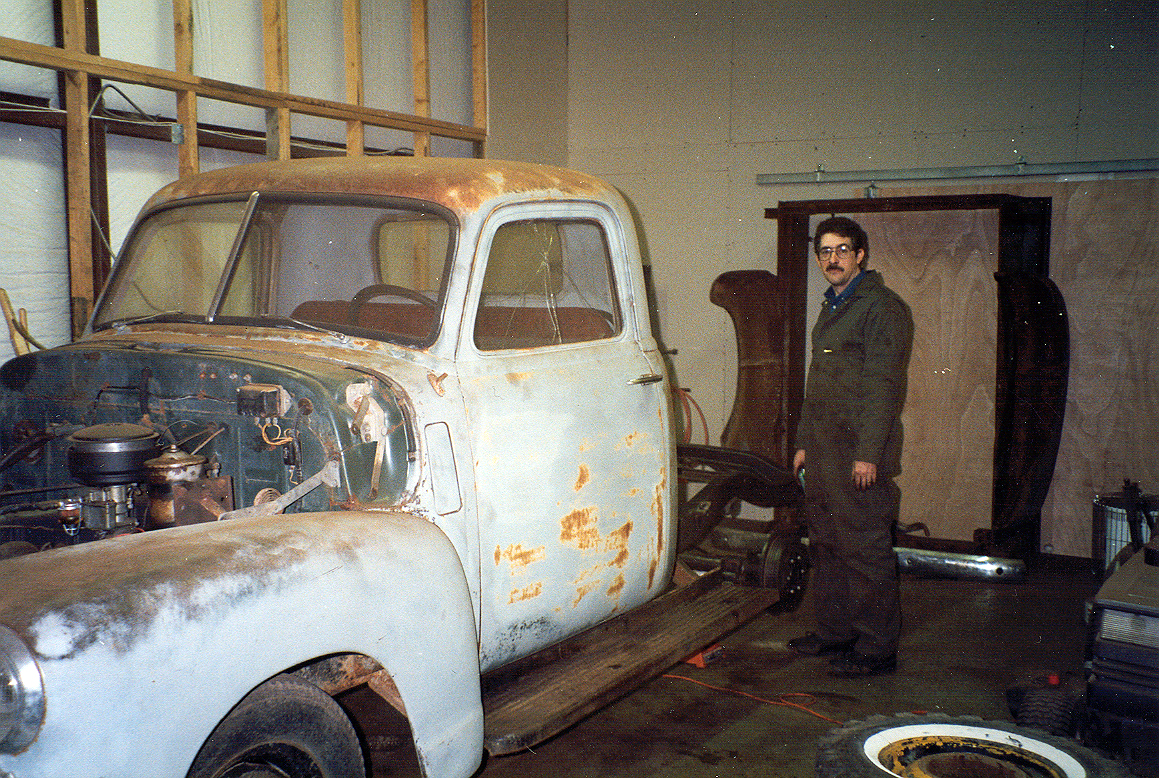
Welcome to my humble abode. Since my wife took a look at the bill for this project, I have a new home! Happy guys? Really though, there was some substantial damage to the left outside cowl, cab corners rusted out, and a few other places that were questionable. Since I had decided at this point it would be a frame-up restoration, it was time to completely strip the cab, prepping it for sand blasting, welding and body finishing.
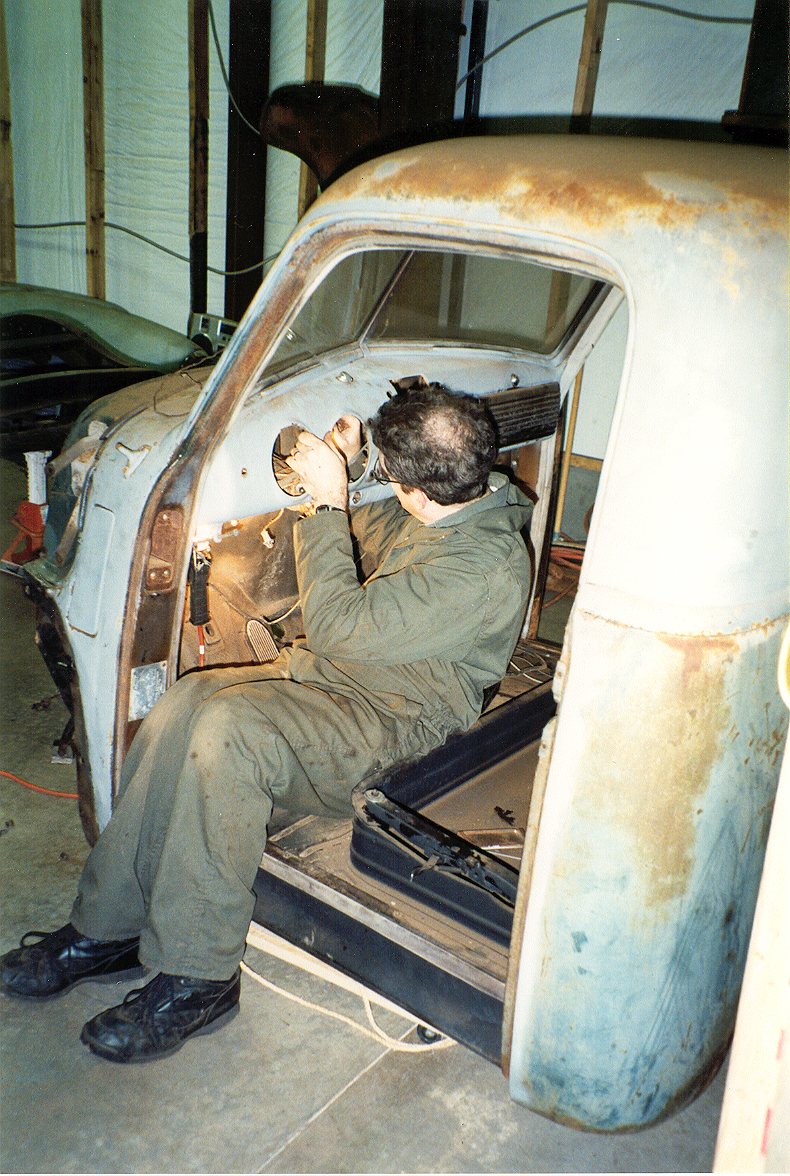

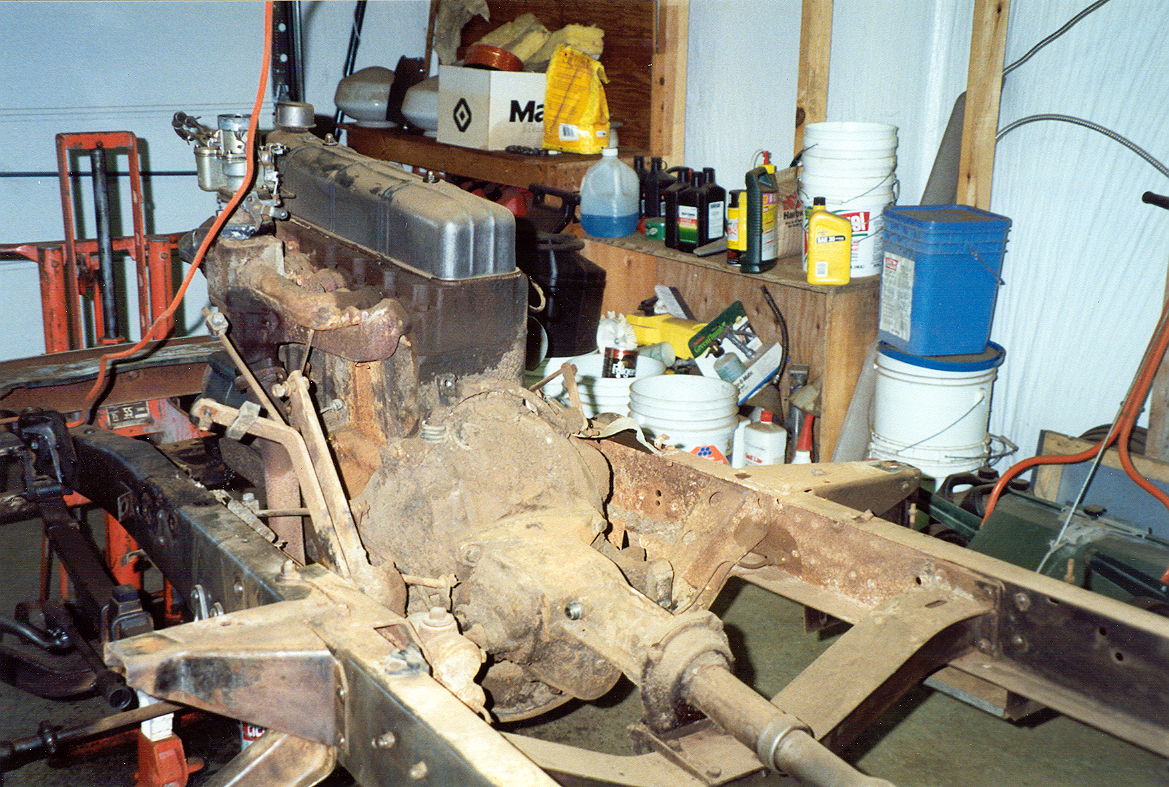
Stripping the cab down to a shell took me about one day. Next task... pulling the engine. No problem with my new engine hoist. A must-have for this sort of work. It moves heavy torque tube rear ends around quite nicely, too!
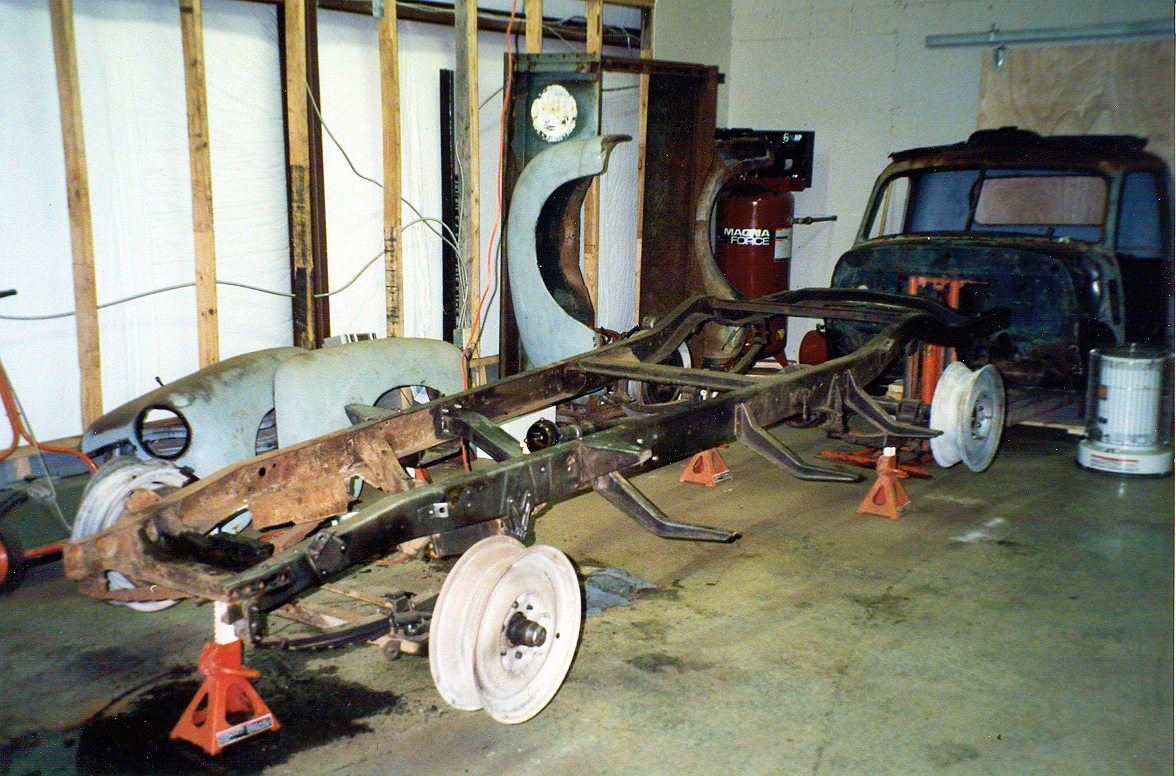
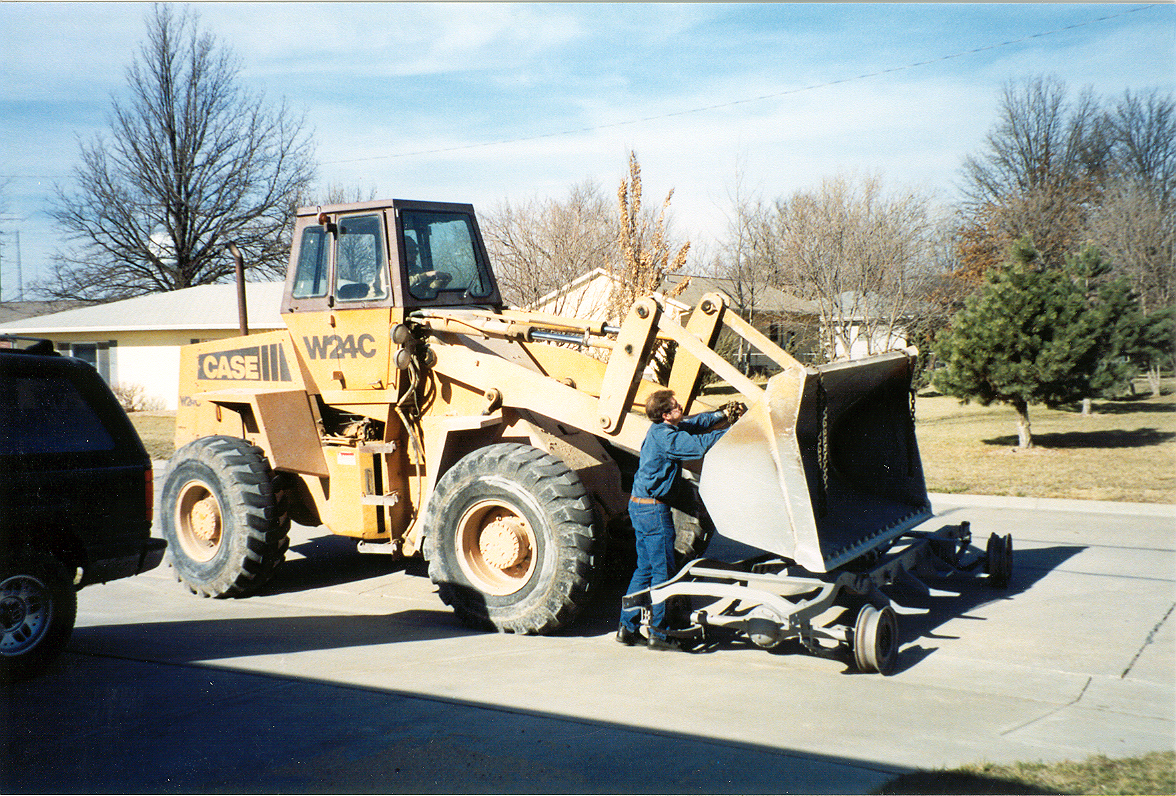
Here is the frame before sandblasting and then after. Hesston Concrete is where I sandblasted it and they returned the frame. I had no idea they would bring it via a high loader, but whatever works! This whole sandblasting thing was a serious education all in itself! The sandblaster used a huge, heavy fire hose and a big diesel engine to power the compressor. After 4 55-gallon drums of sand and 4 hours of blasting, I felt the job was over. Not easy, but worth every bit of the headache! Every small nook and cranny is now free from rust. That felt good in 1999 having it done that way, but fast forward to 2014 and I can tell you, the sand used for this was WAY too harsh and made for a lot of smoothing and prep work that could have been avoided had I use a MUCH less aggressive blaster.

This after papering the floor and prepping the garage for a makeshift painting booth. Time to remove the front and rear assemblies! The lesson to learn here is, this is NOT enough garage preparation by a long shot! Urethane paint is nasty and requires proper ventilation and cover the walls (and door opener) while you are at it!

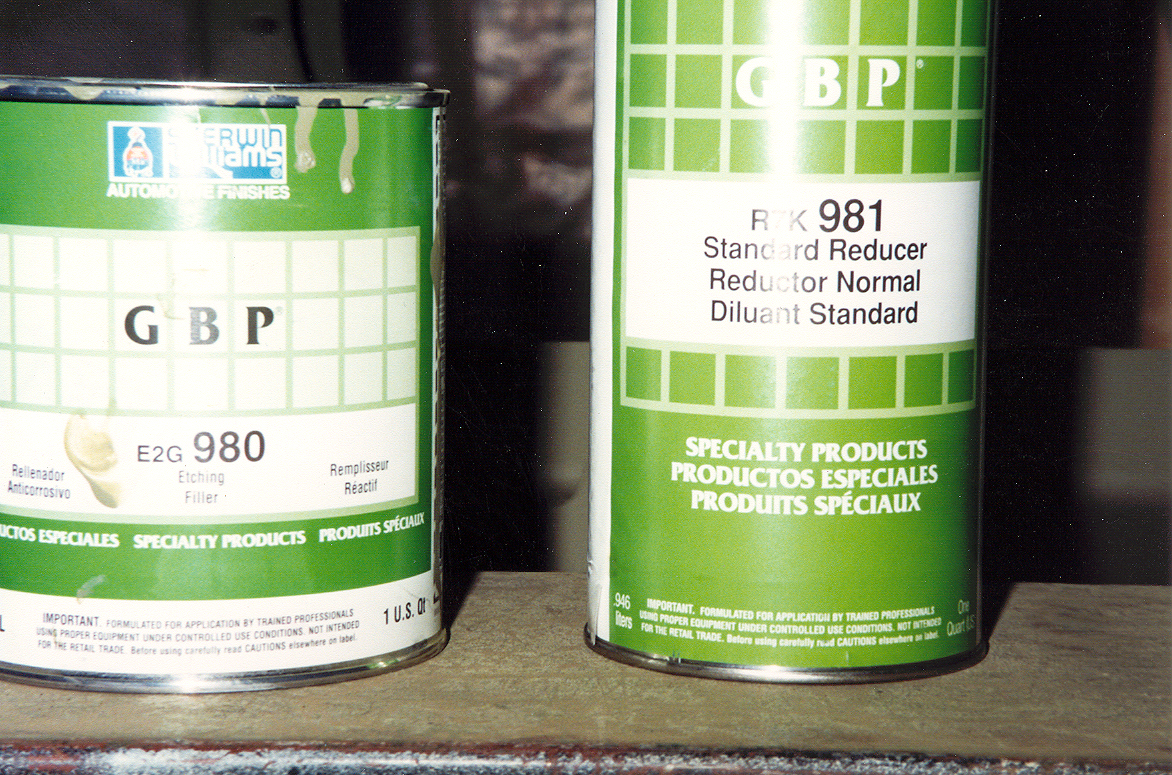
Here is the bare frame, sandblasted and waiting for paint. At this point I have learned about reactionary tactics and am planning each step carefully. After sandblasting, the frame has a rough texture, so I will apply 3 coats of Sherwin Williams 980 Etching Primer/Filler to the frame first. It's a MIL-Spec item, so it's green. This is my very first attempt to use a spray gun attached to an air compressor. It went very well and although I had lots of sanding to do, I got a very smooth and incredibly fine result. This is in no small part thanks to the guys on the OleTrucks list for providing insight on how to paint with a spray gun.
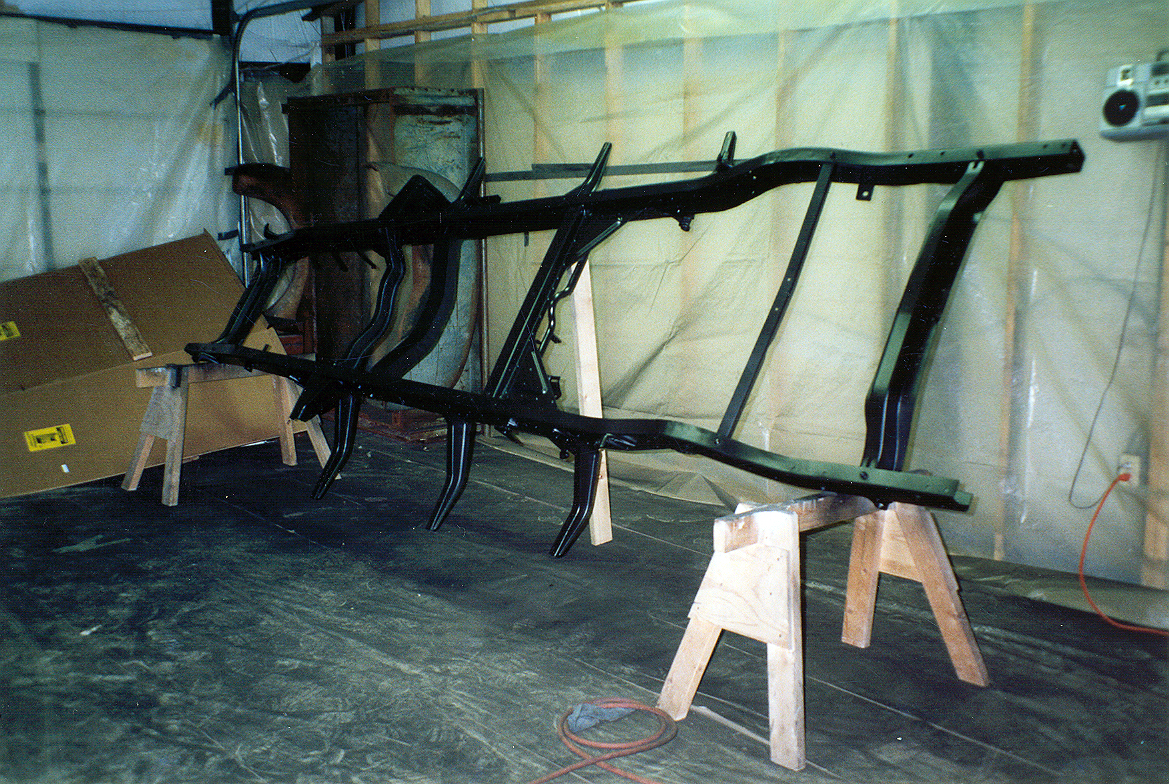
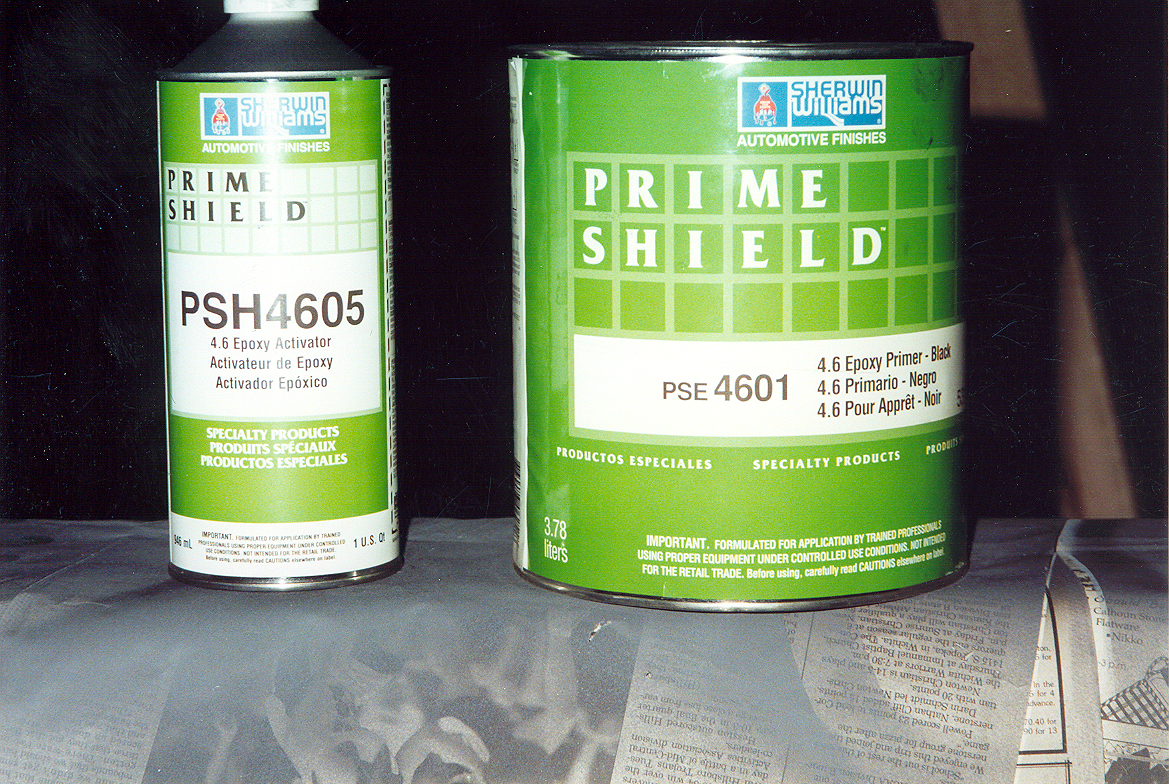
This is the frame after 3 coats of Epoxy primer (above the etching primer applied earlier.) The Epoxy Primer is again Sherwin Williams 4601. A safety note: Be very careful propping up the frame in this manner. It fell on me and I am lucky to be alive since it crushed me under it! No broken bones, but it conked me on the head pretty good, so be careful! (This was the birth of the frame rotisserie idea in the How-To section!)
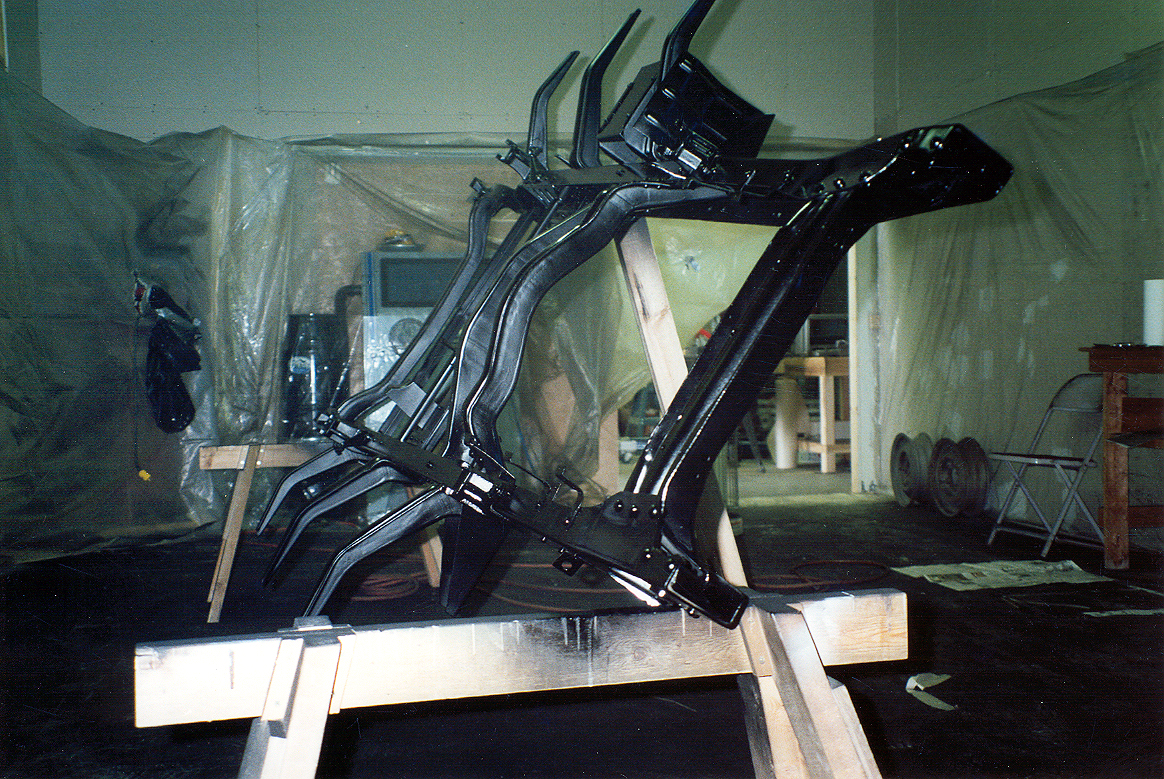

This is after 3 coats of Urethane Top Coat. I AM getting the hang of that paint sprayer! Use a respirator and plenty of ventilation, especially on the Urethane. Ventilation those days was box fans under the garage door! The Urethane is Sherwin Williams 1738 Ultra.

My bead blast cabinet is essential in this project. Many hours spent here and worth every minute. Small to medium sized parts are cleaned to factory original. This process is essential to getting the primer to stick well and allows you to inspect each part for wear.
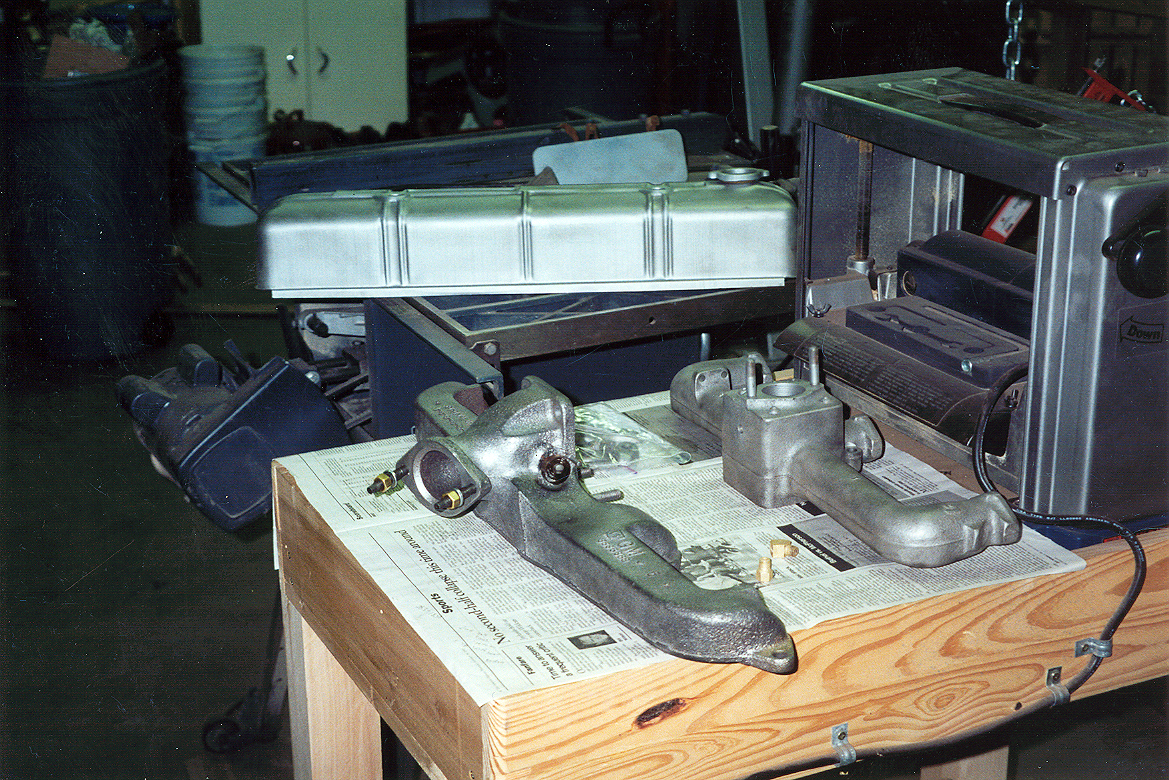
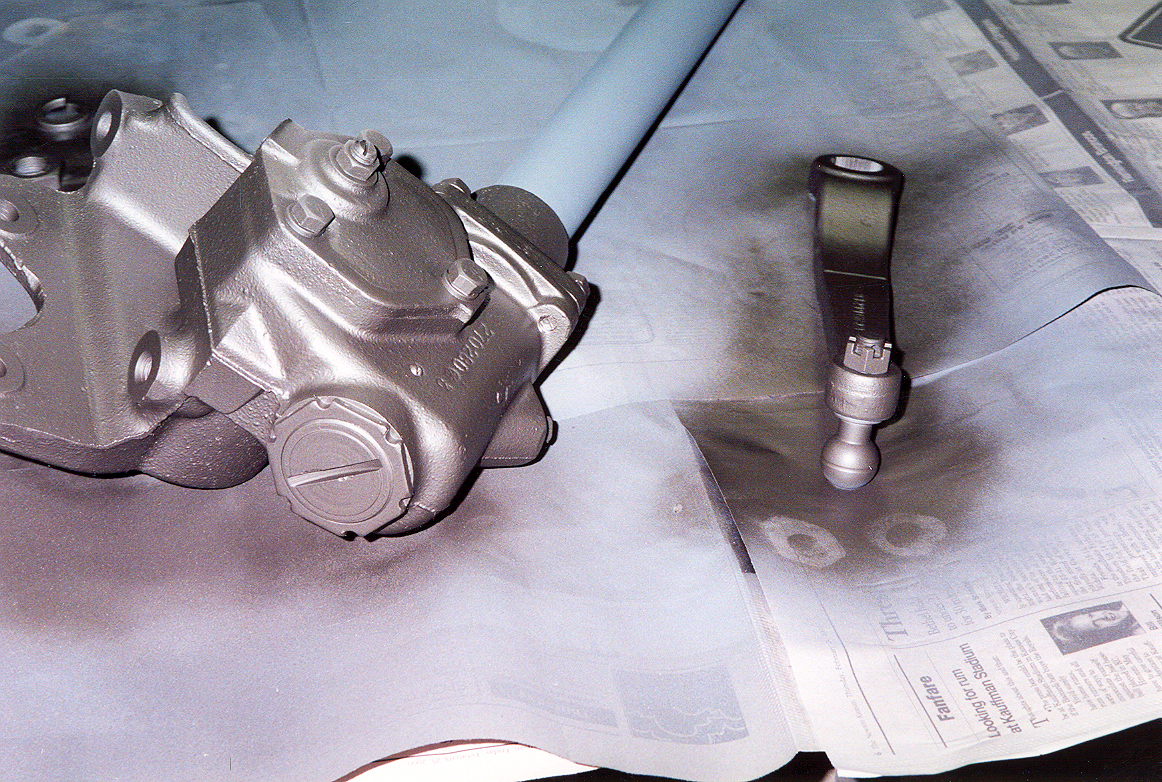
Here are some results before and after painting. The manifolds got new studs and will be painted soon. The front end parts as all the rest are etching primed and then painted with acrylic enamel.
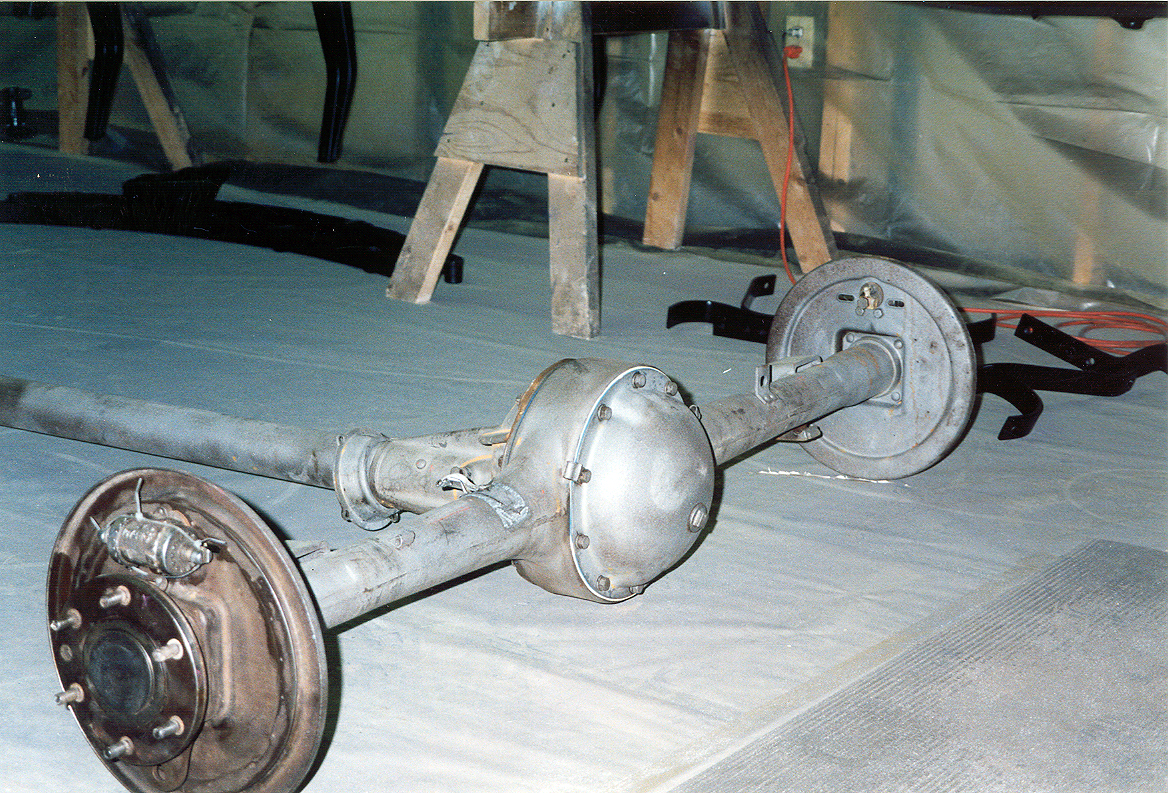
To break up the monotony, I decided to refurbish the Fram Oil Filter canister. I will show the pics of the done deal later, but with the decals and the clear coat, WOW!!! Meanwhile, the rear end is back from the mechanic and ready for a good cleaning and then primer/paint. Inspecting and replacing the Oakie Bushing was beyond me at the time.

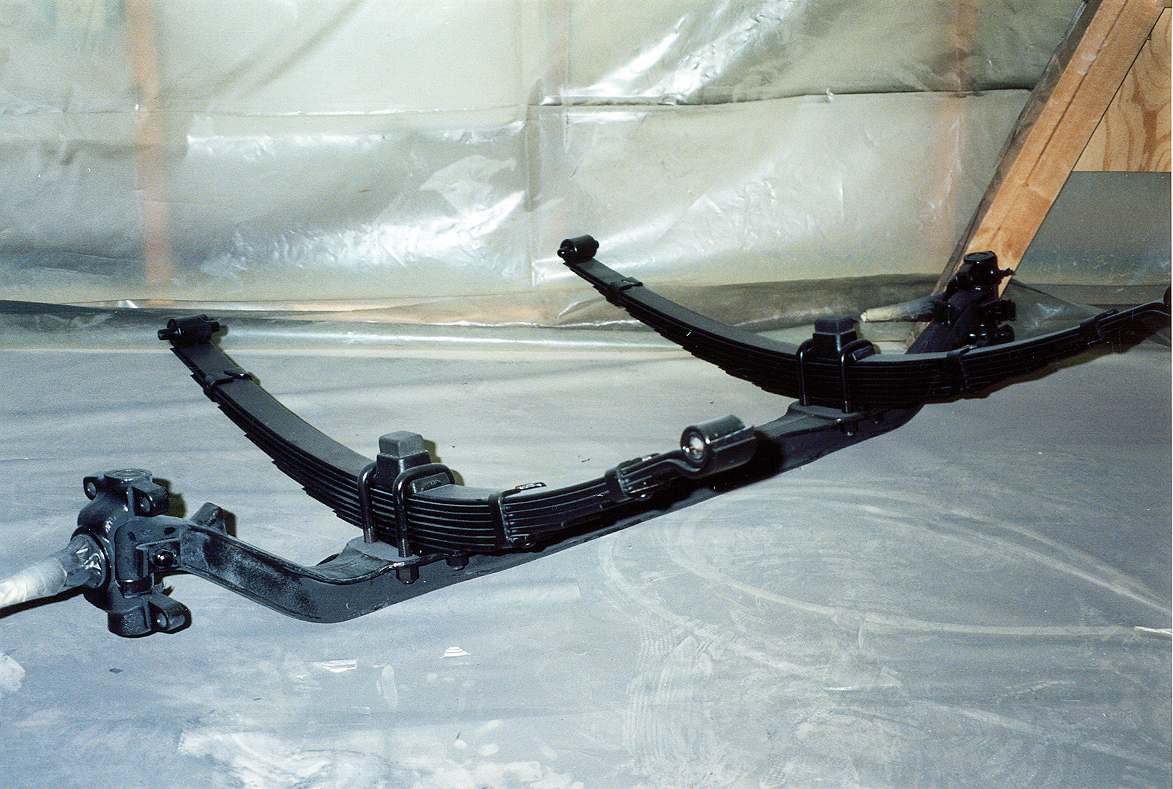
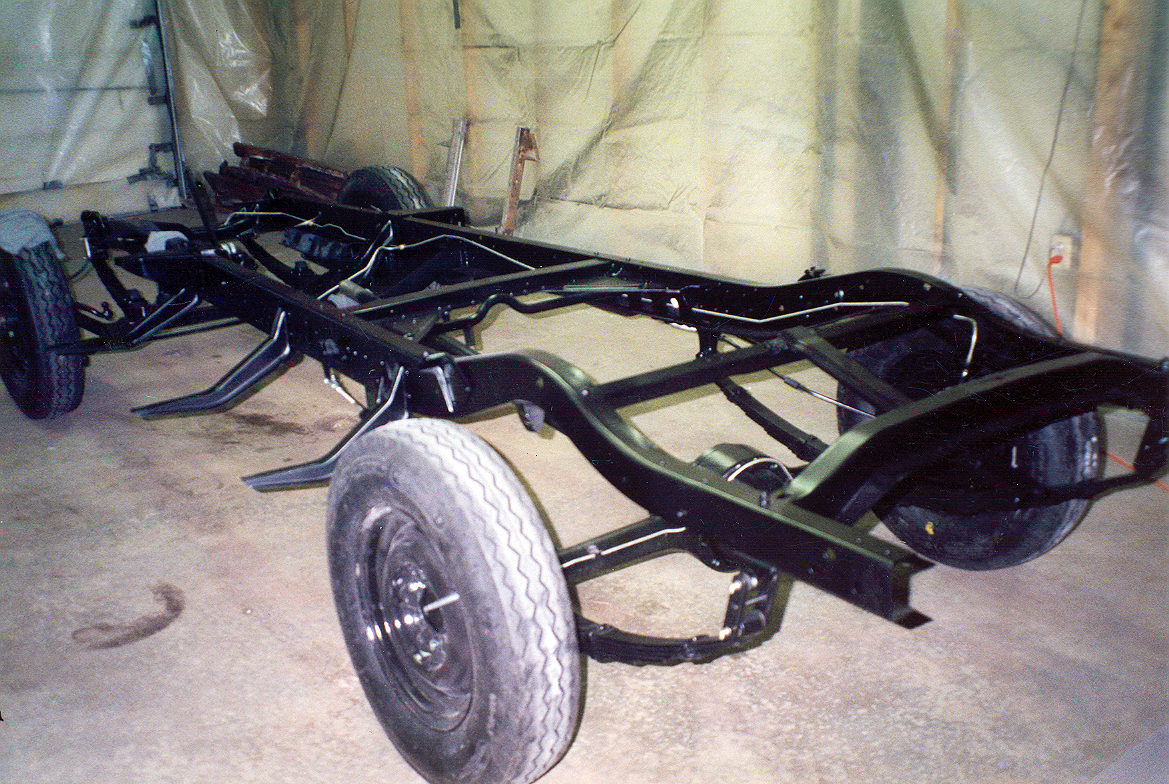
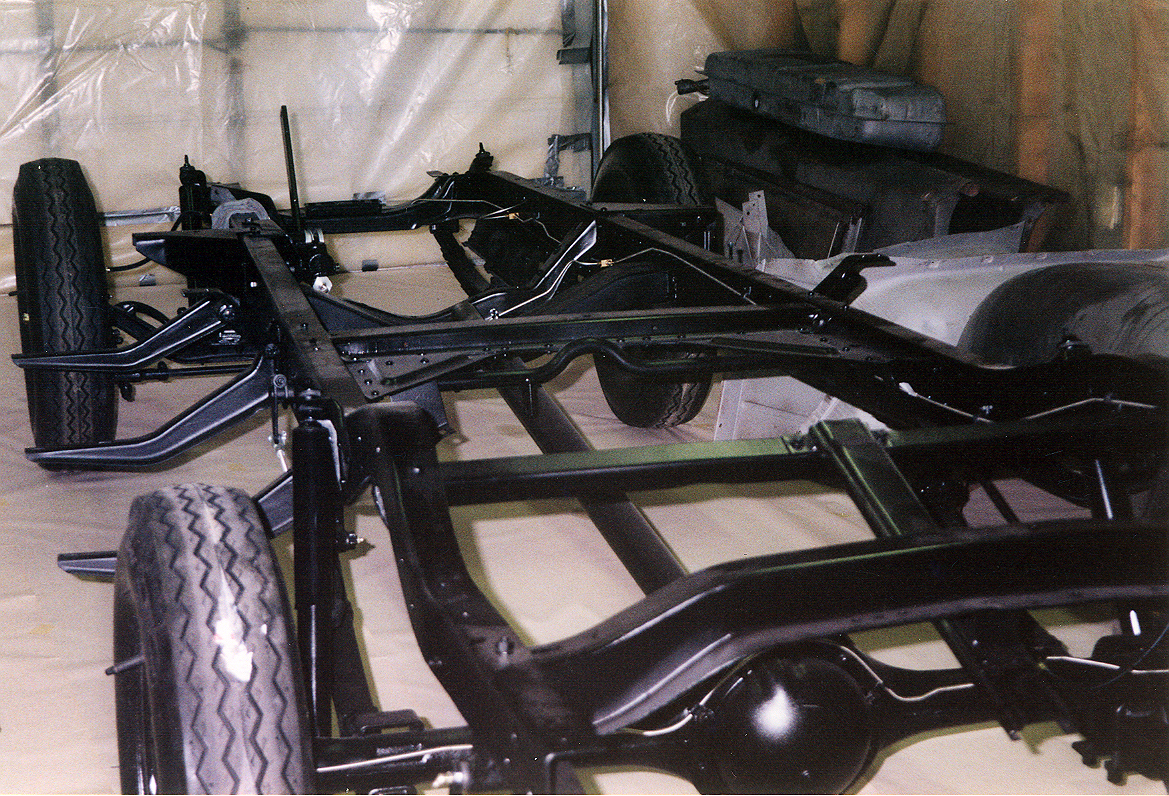
Here is the completed frame up against the wall out of the way so I can assemble the front end and prepare to paint the rear end. Things are looking up! Each leaf was primed and painted separately and a piece of Teflon strip inserted between each one.

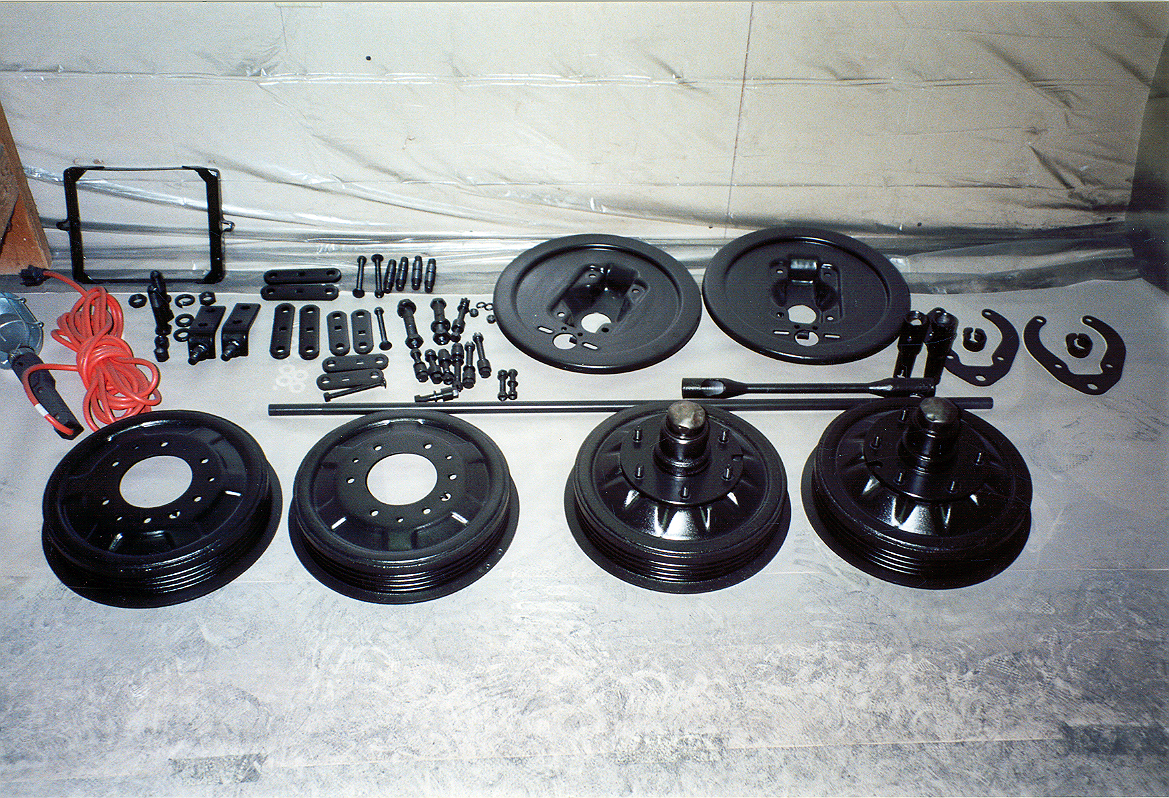
Here are a few shots of the completed rear end assembly. I am awaiting new U-Bolts and as soon as they are in, I will ready the front and rear ends for the frame. Should be up on wheels soon!
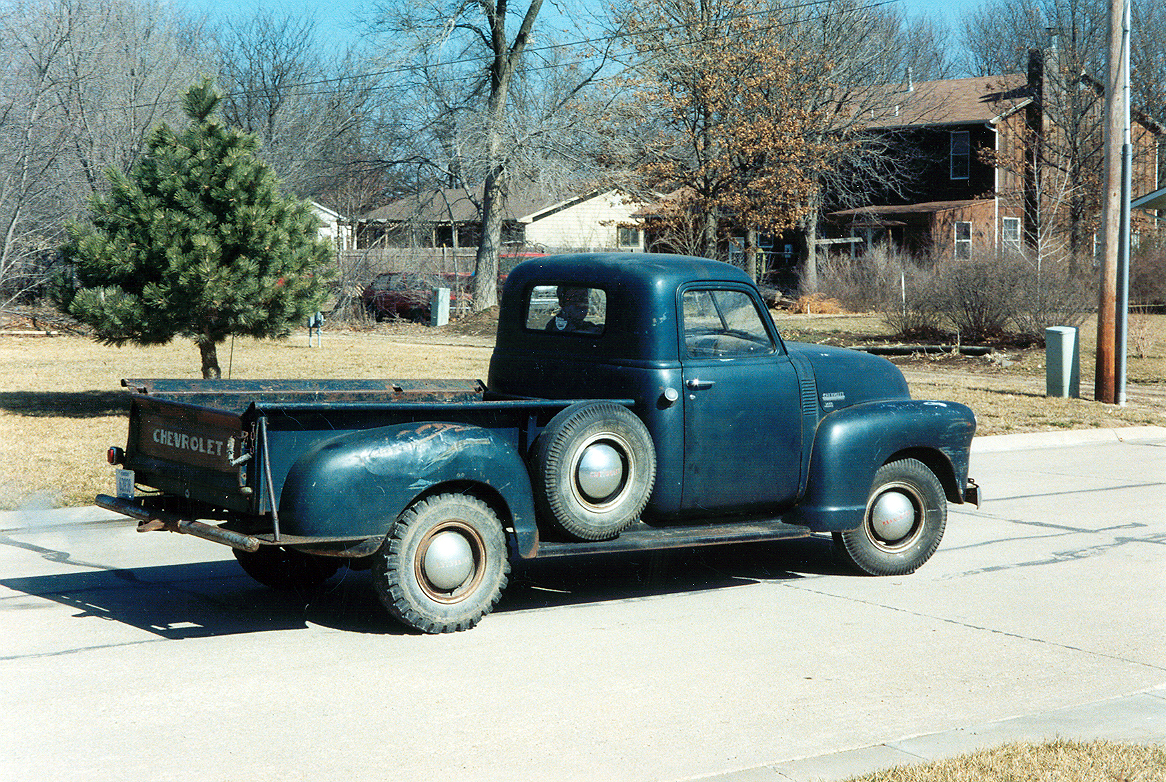
Here is my new acquisition... a 1949 3/4 ton. It has already proven really helpful in running around for parts for this project... and that's it for now, folks! More pics to come. I will let everyone know when the next batch comes in, but this is pretty much where I am in this project to date (02 February 2000.) Since then, I have sold that truck. It was an awesome truck and one my son even drove to work, but it needed to go since I only have limited space.


These are shots of the repaired cab. It isn't finished being dressed yet, but an amazing difference from the heavy damage that was there before. Seems the AD's had door hinge problems (the springs broke easily) allowing the wind to take the door and bend the cab structure pretty badly. You see this sort of damage a lot. Good news is, I have replaced the door hinge pivot pins and springs with new reproduction stock so at least for a while, this won't be a problem.

These are parts of the donor cab left over from the cab sheet metal project. Looks like good stock to play with in my quest to learn how to weld. As I stated earlier, the welding thus far has been done by Gene Swartzendruber. After noticing all of the welding that is in my future on this project, I decided to purchase a MIG welder and do the work myself under Gene's supervision (at least for awhile). Meanwhile, back to the task at hand... assembling the chassis. This shot is of the completed rear end (brakes and all.)
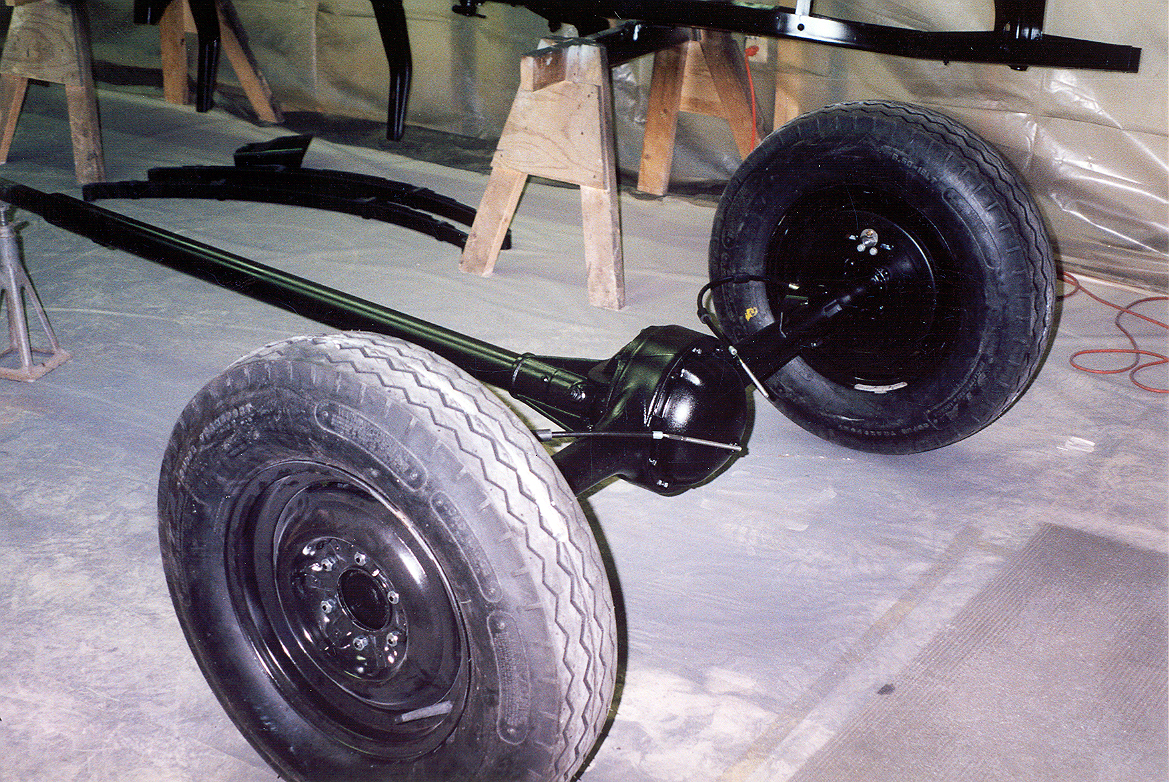
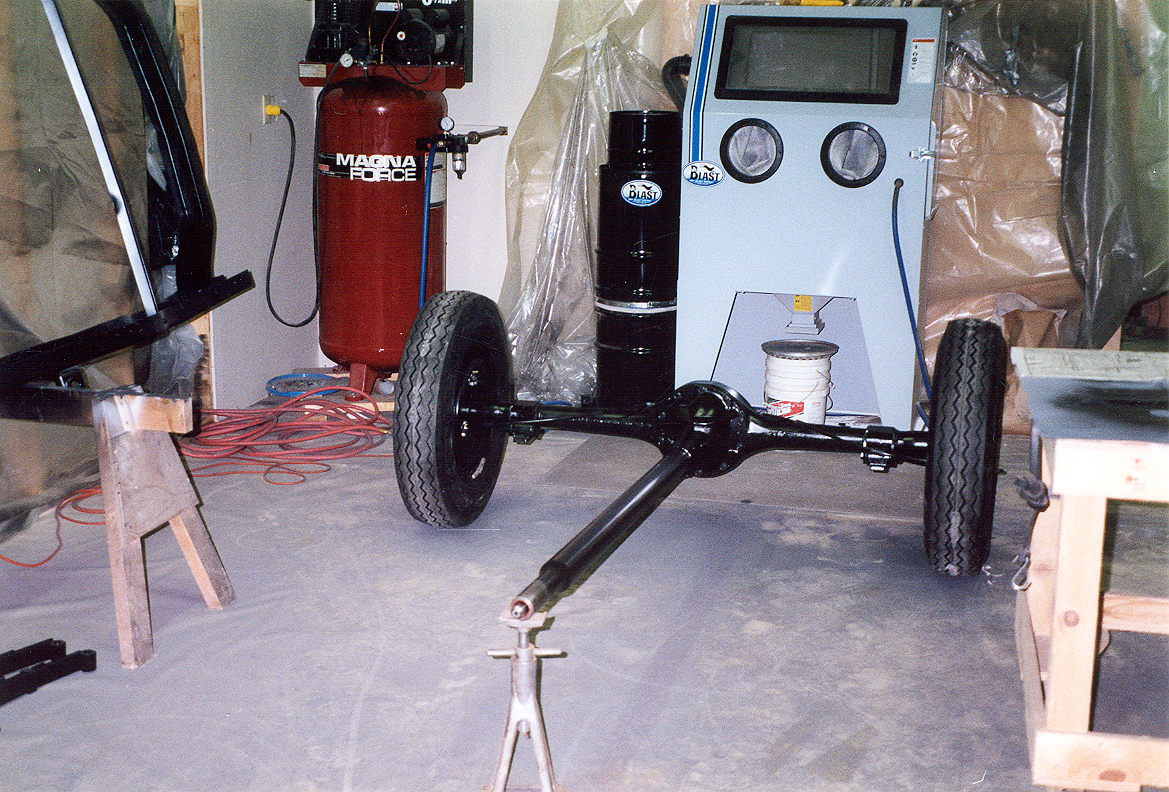
Another shot of the rear end. We are getting close to having this frame on wheels! The front end is getting it's finishing touches. Both front and rear ends sport all new rubber, new wheel cylinders, springs, and new brake shoes.

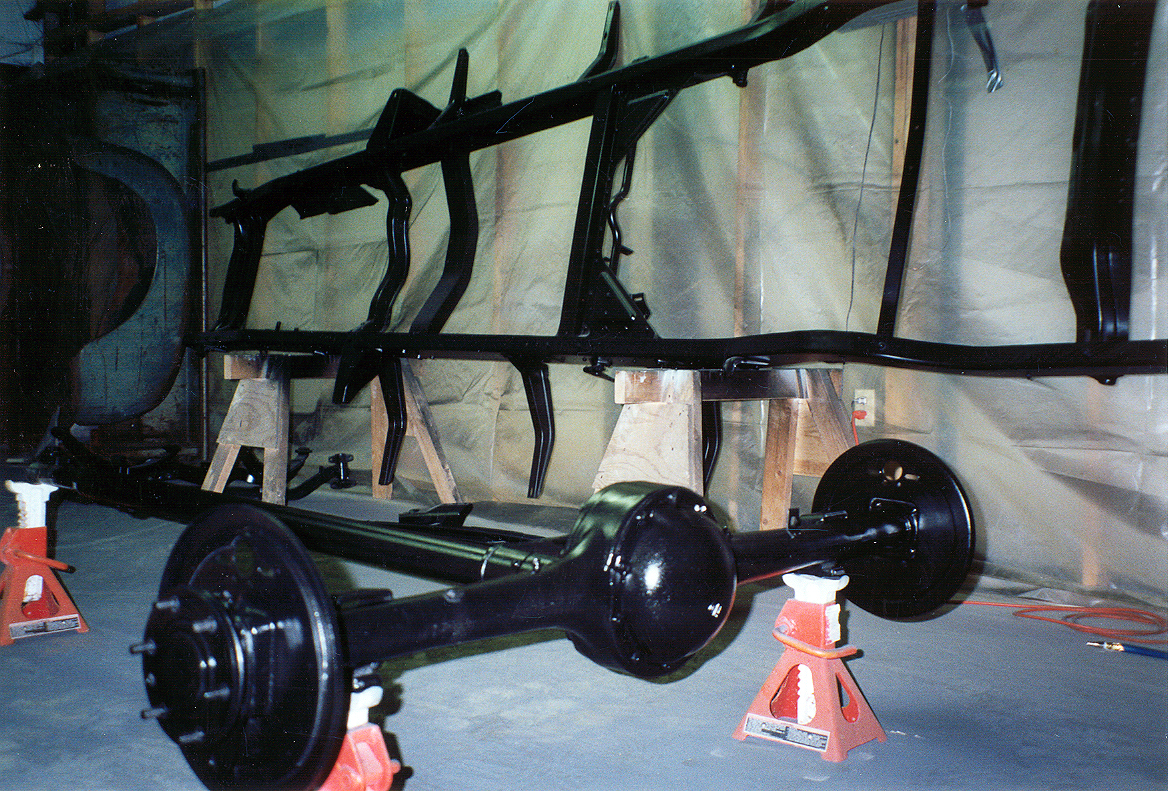
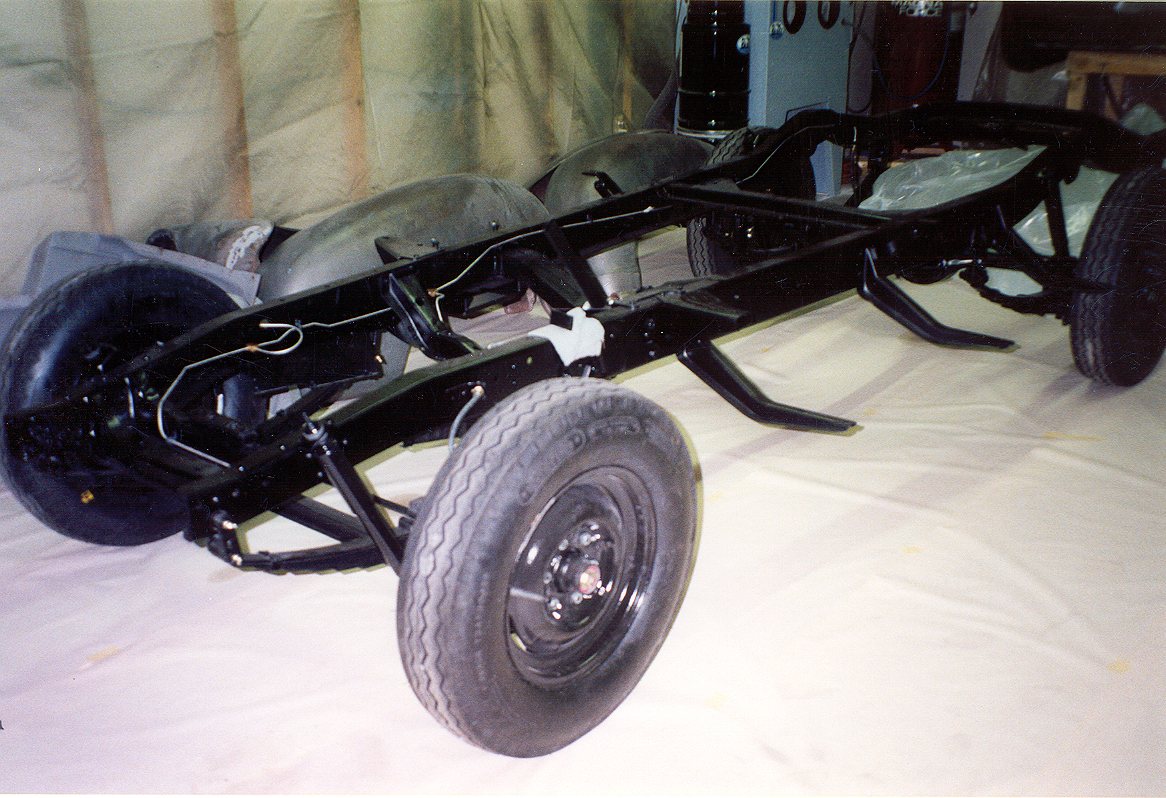
In these two shots, the frame is sitting on sawhorses and the floor jack. I am working on aligning the running gear to the frame. This really wasn't all that difficult, but with all new rubber and spring bushings, I wanted to take care to do it right..
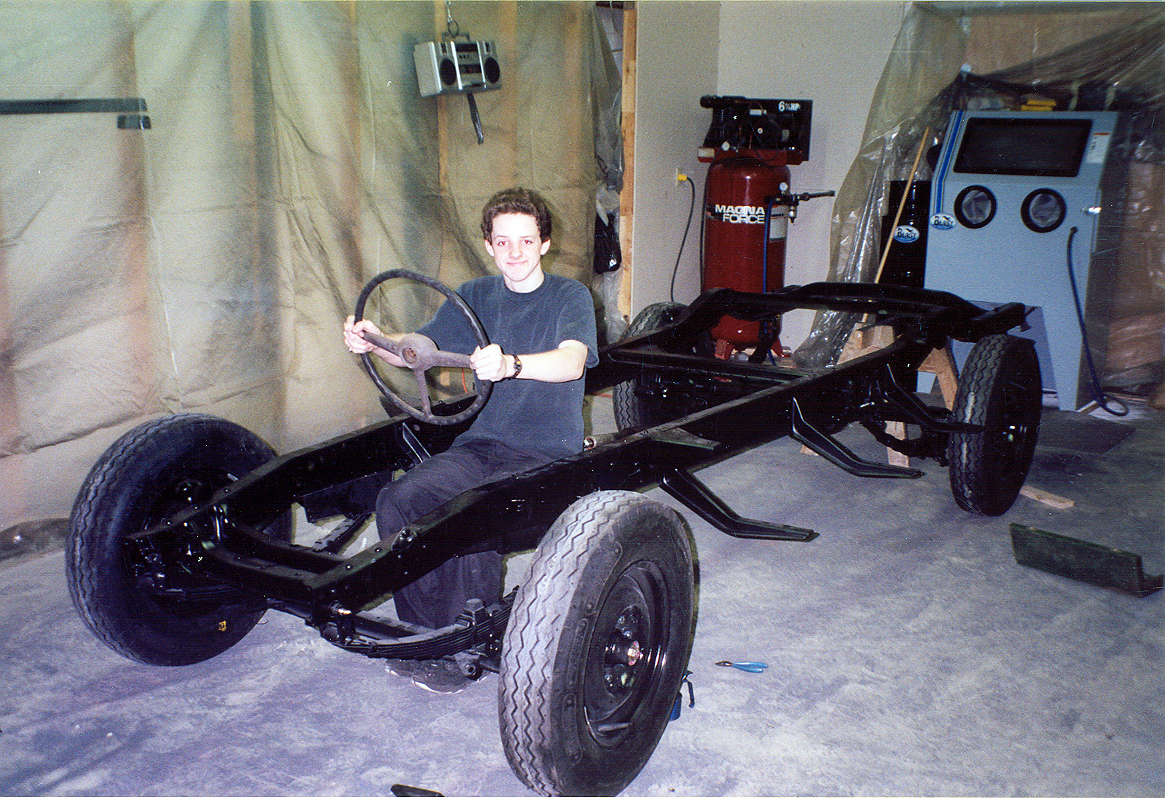
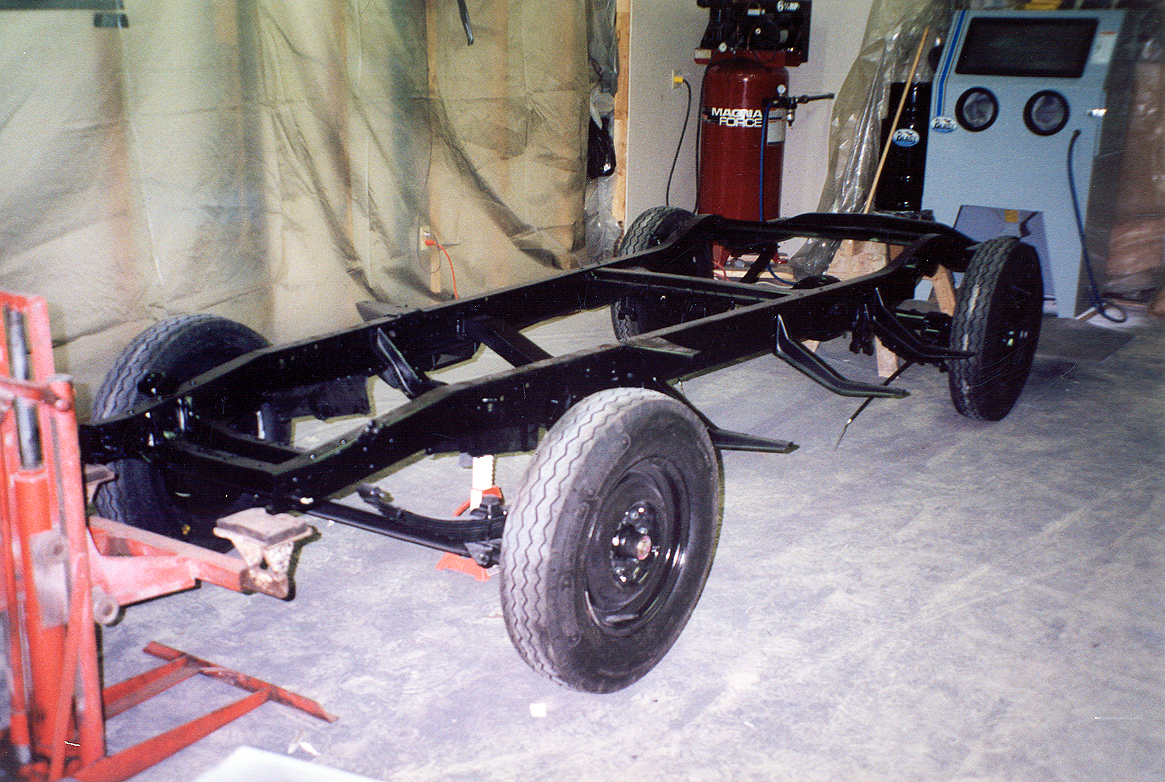
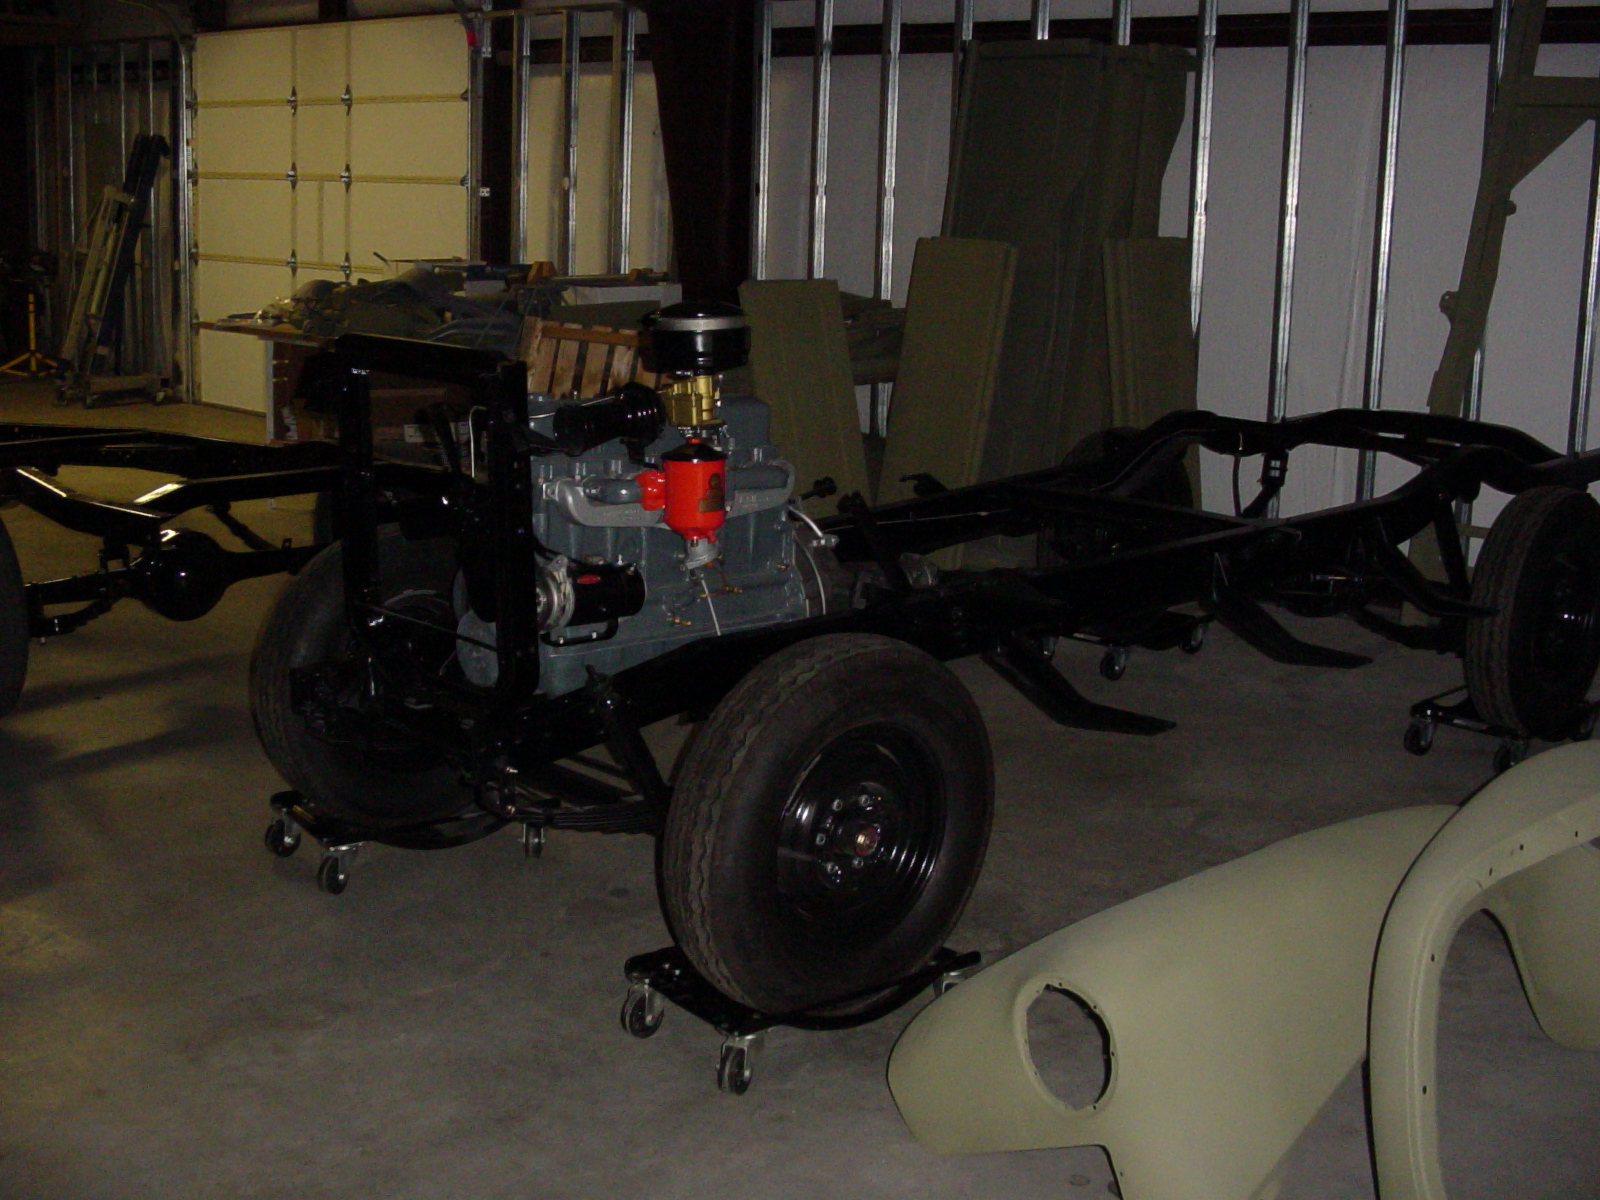
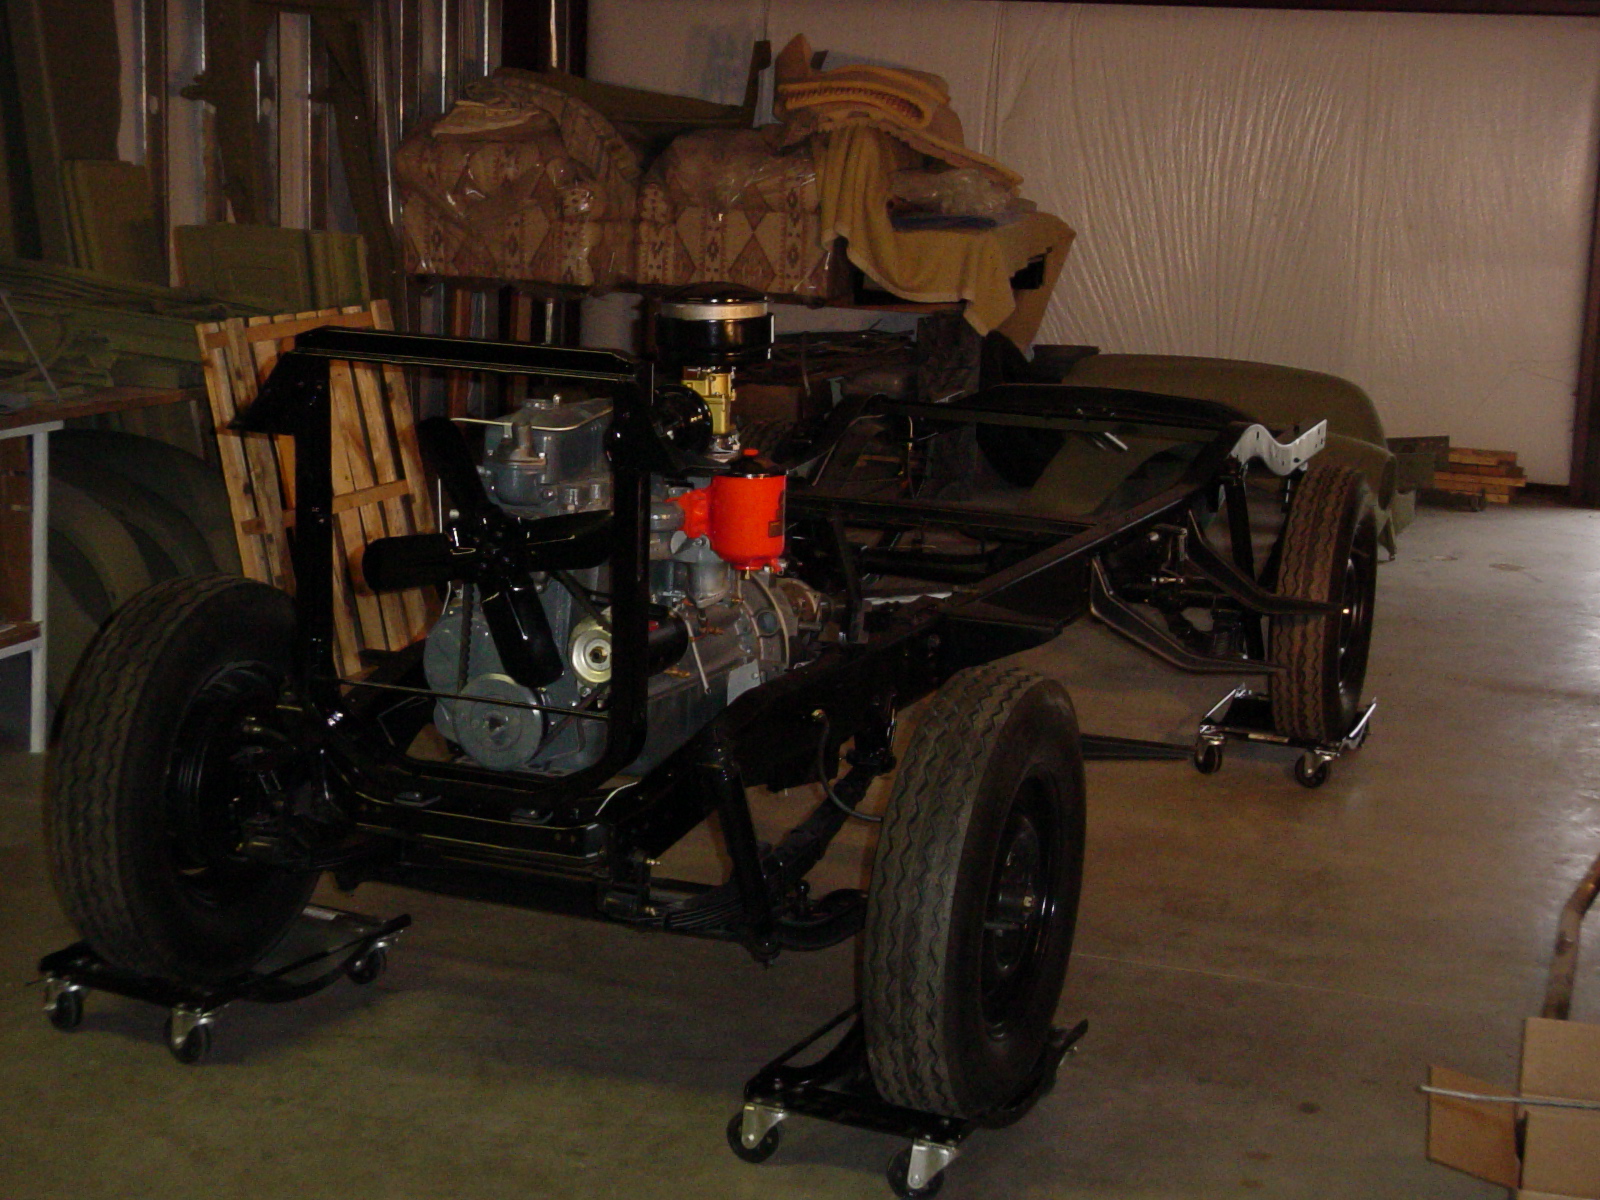
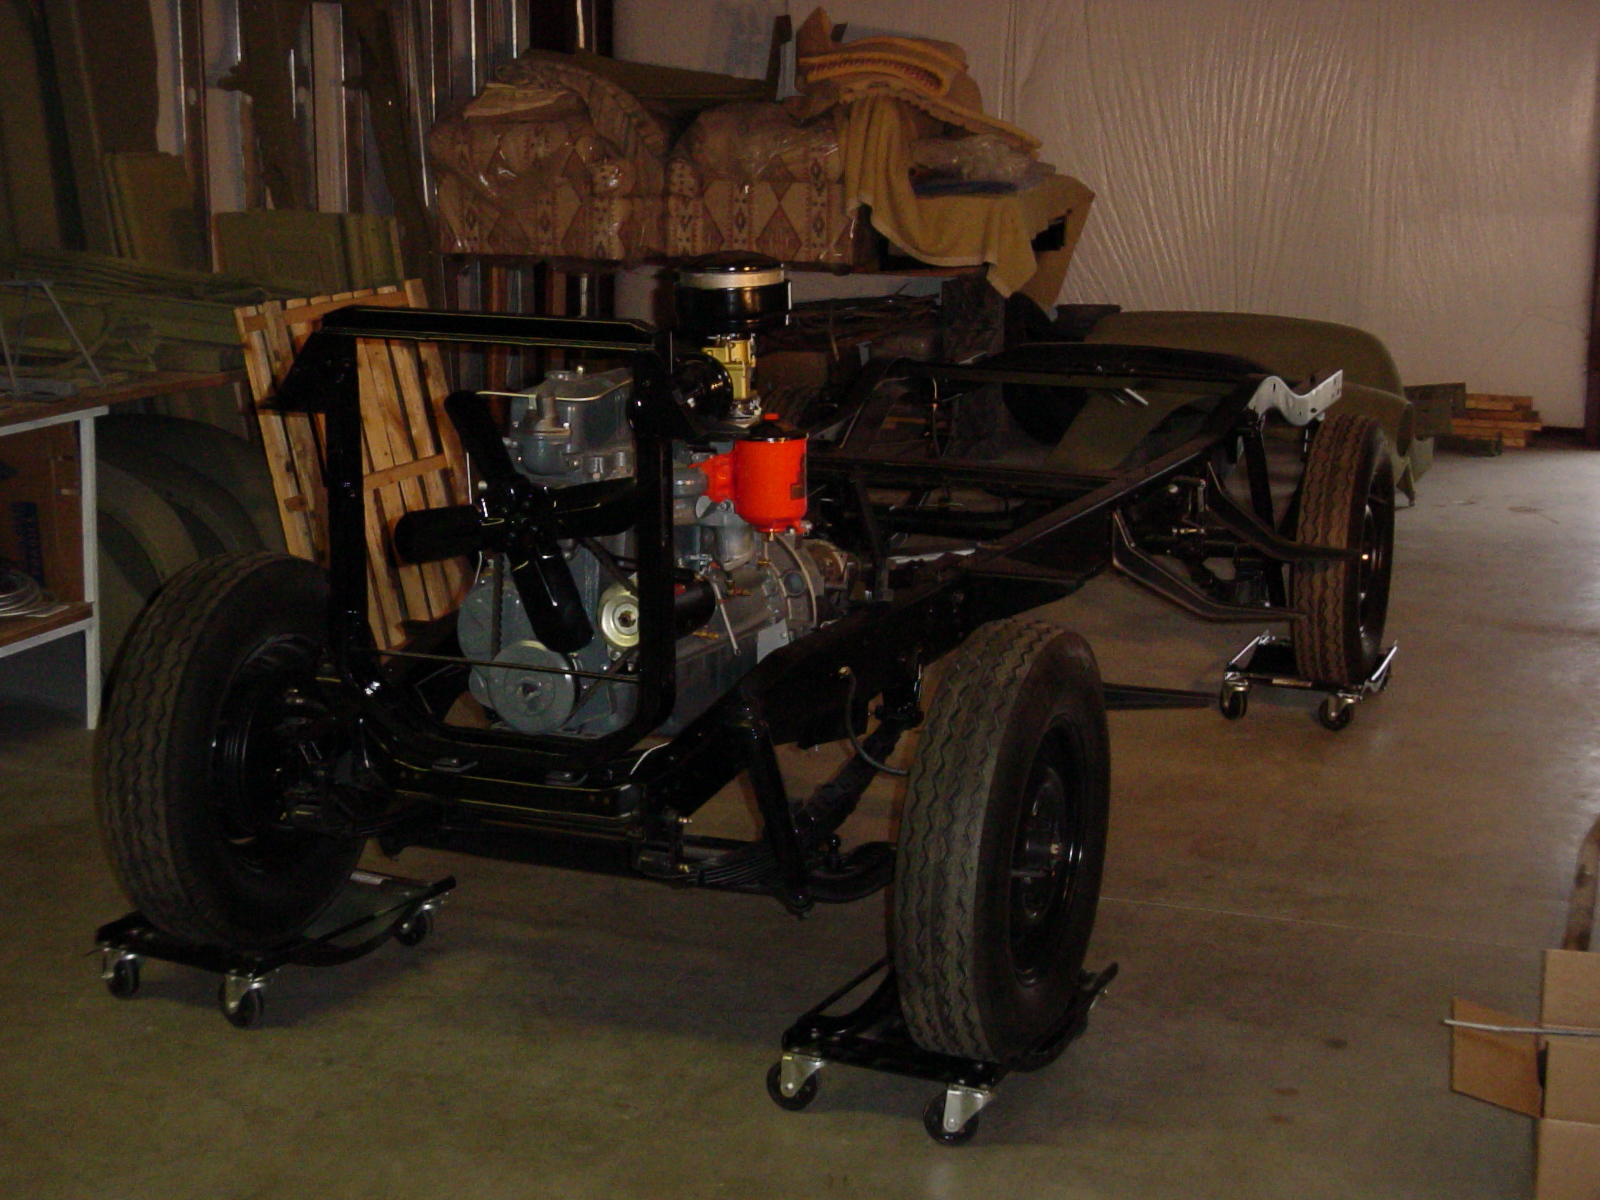
My son helps me now and then so I gave him the honors of being in the first picture of the frame on wheels. Of course he needed his props! ;) At last, the frame is finally back on wheels! This is indeed a major milestone!

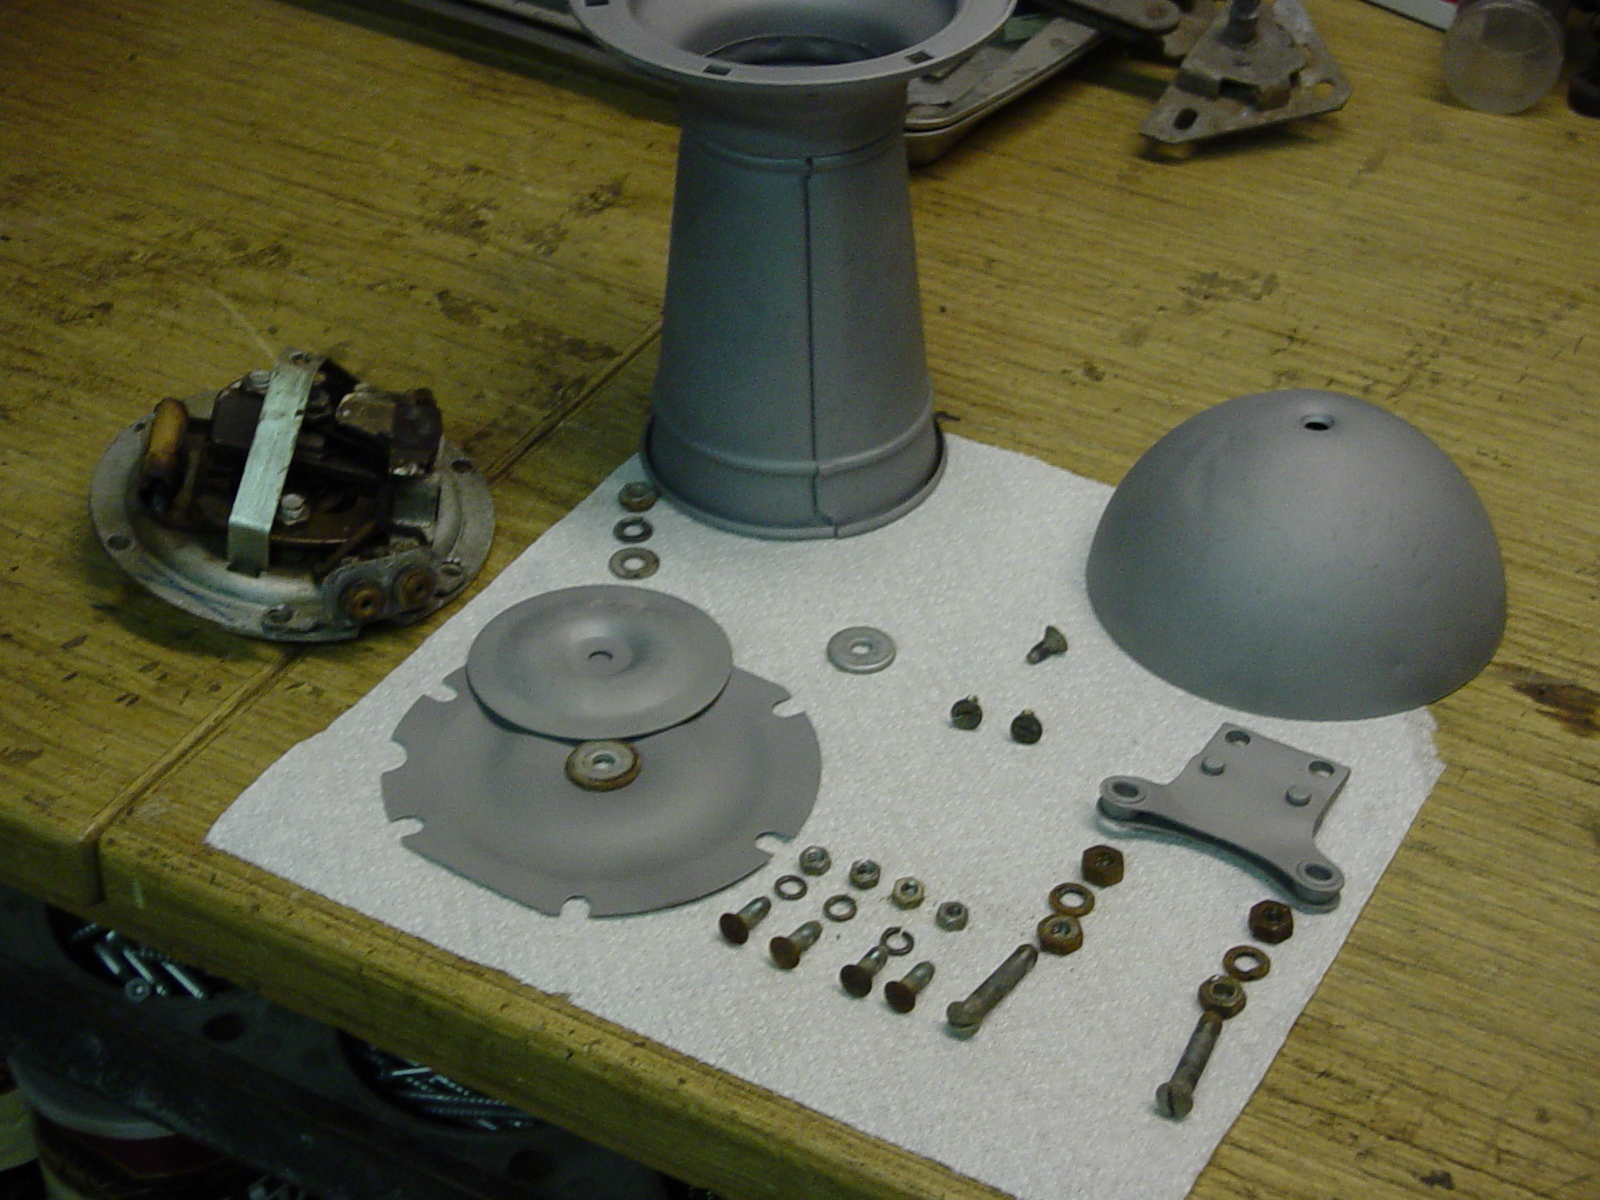
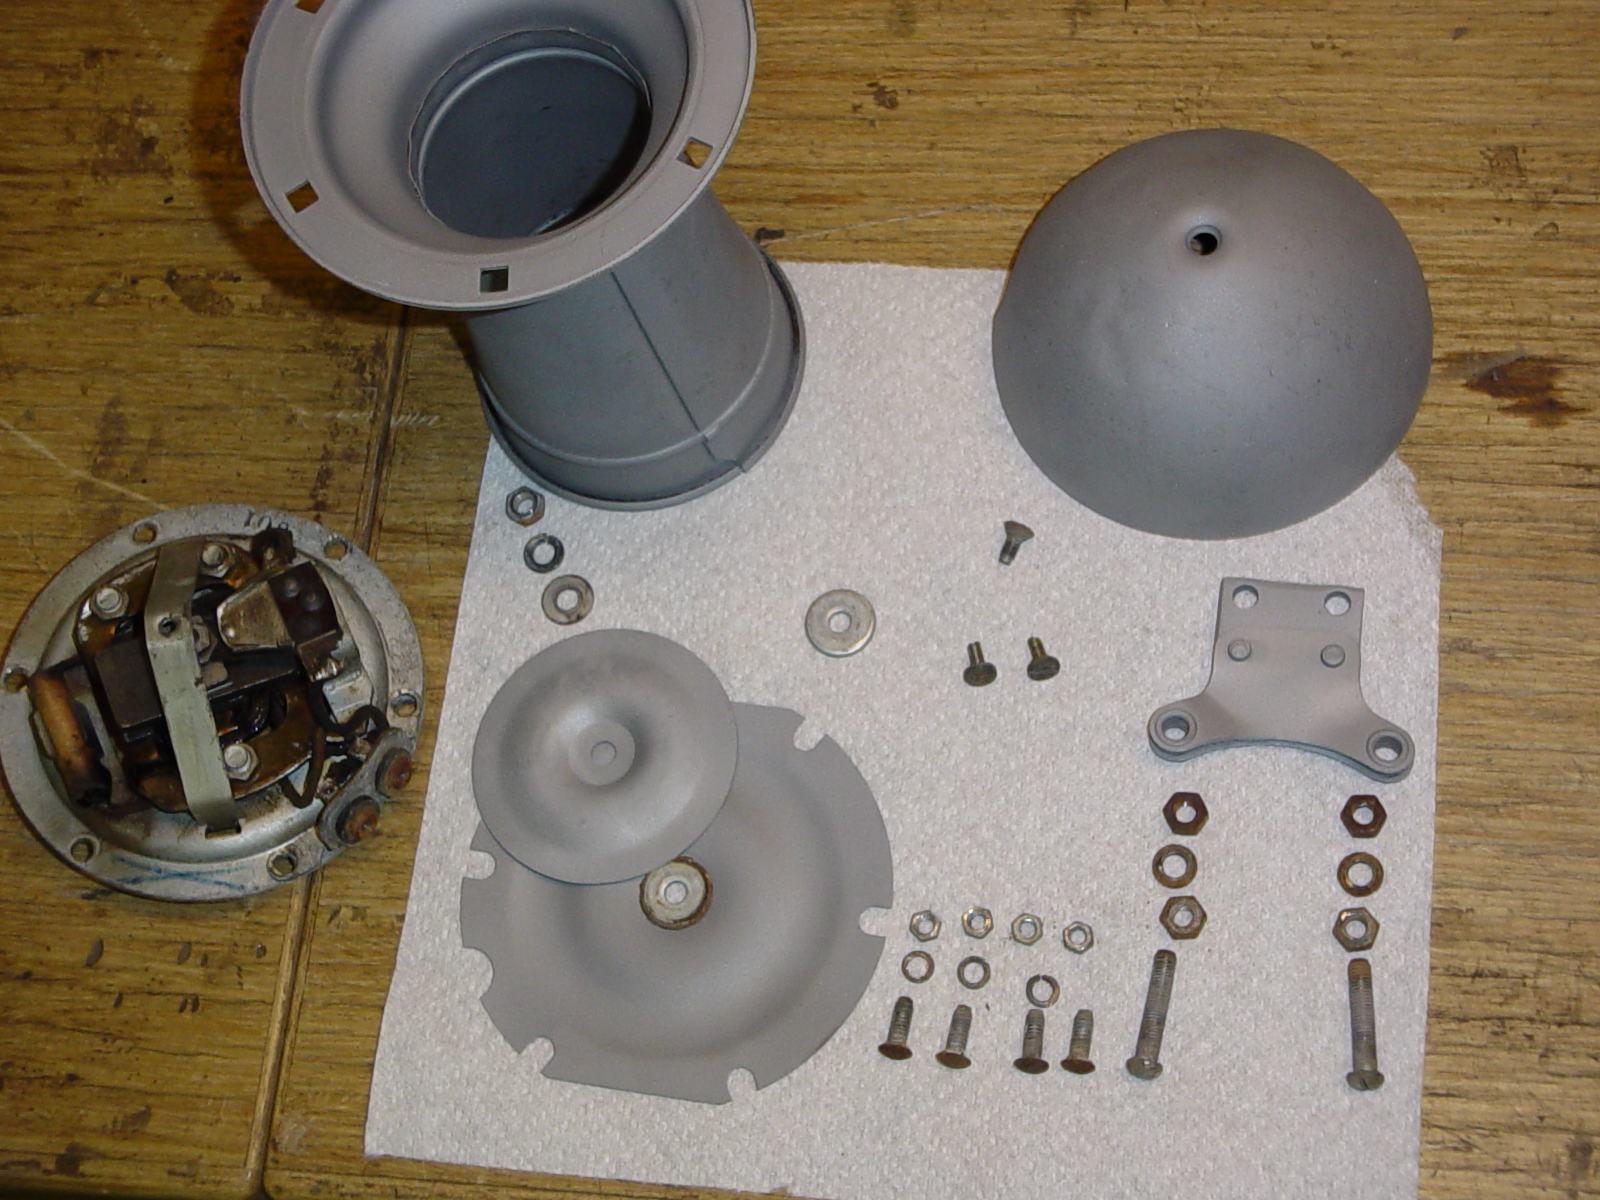
To break the monotony (like there IS any!) I move around to other things that need doing anyway. Here the original horn was being prepped for the black high temp (high gloss) engine paint it received shortly after. The next shot is the final coat of cast iron paint used to restore the original look on the steering column. I maintain that primer and paint on everything is a must. Especially after seeing what 50 years has done to the bare parts. This cast iron paint looks exactly as if nothing was done at all to a new part.

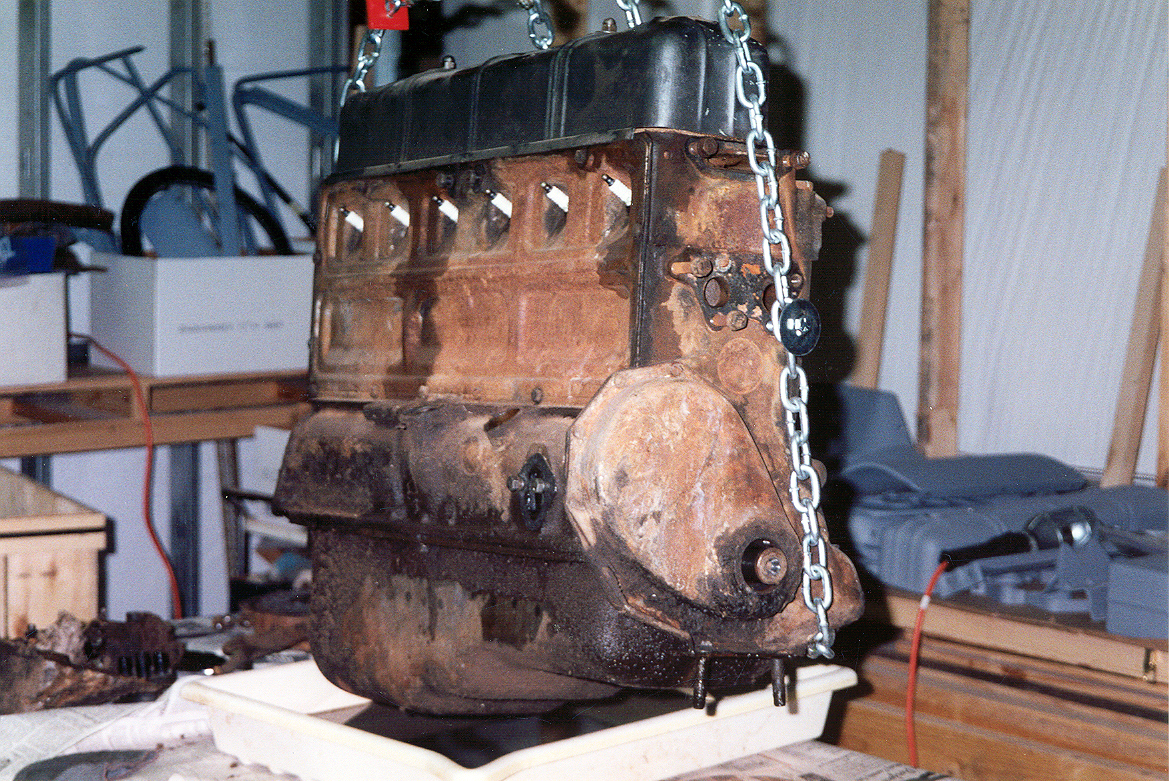
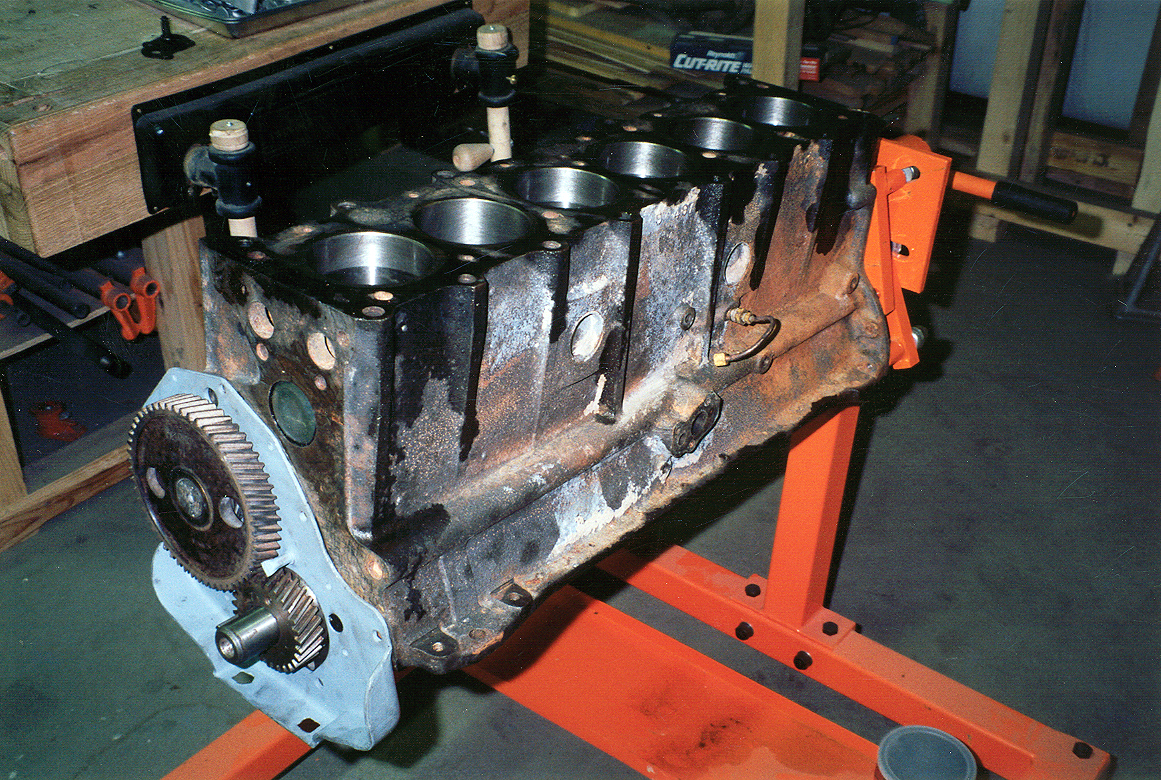
This is another example of what I found when I started taking this truck apart. The bell housing cover is toast! Apparently water sat in it (with other various and sundry items) for many years and rotted it out. I will have to find another cover worthy of this project. The engine is now ready to be torn down and rebuilt. This picture is so I know what it looks like when it's back together! ;)
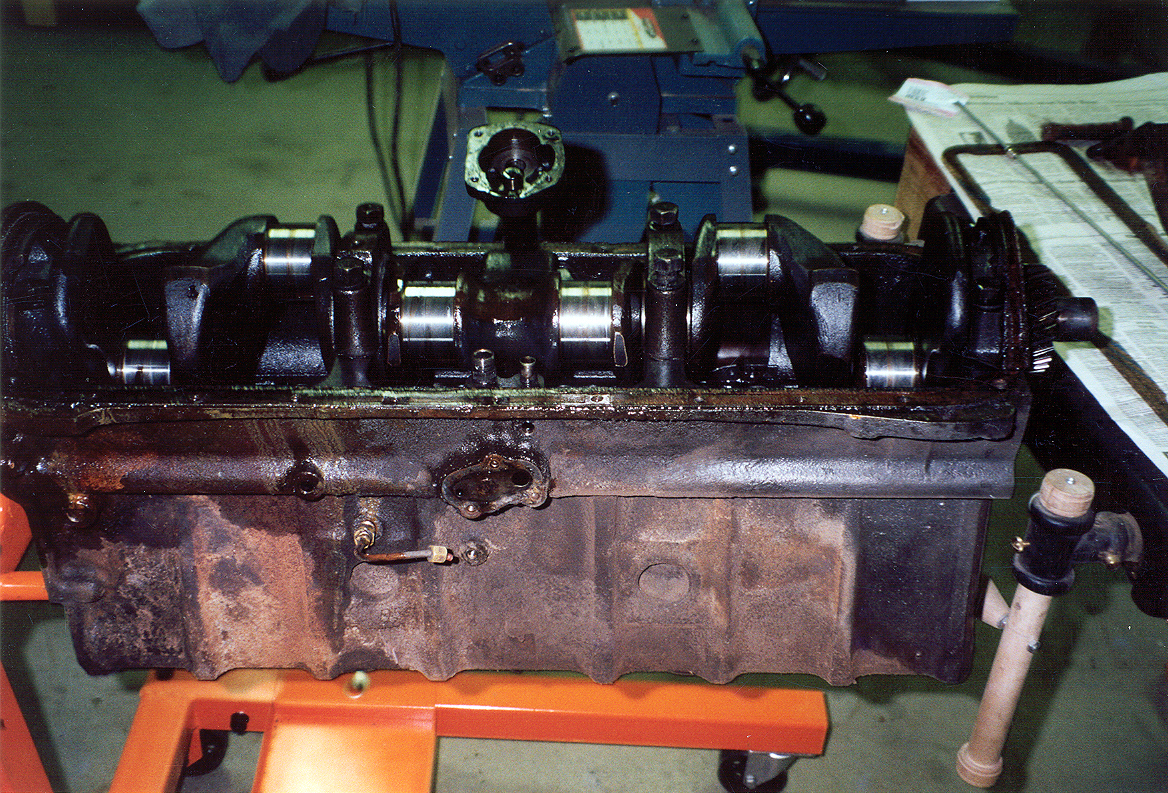
I needed an excuse to buy an engine stand and it's proven very useful. Here the oil pan is removed and I am preparing to remove the guts. After carefully laying out each part to ensure I know what goes where, I shot this one. I then numbered each part with its exact location so all rods, lifters, etc go in the exact hole they came out of.
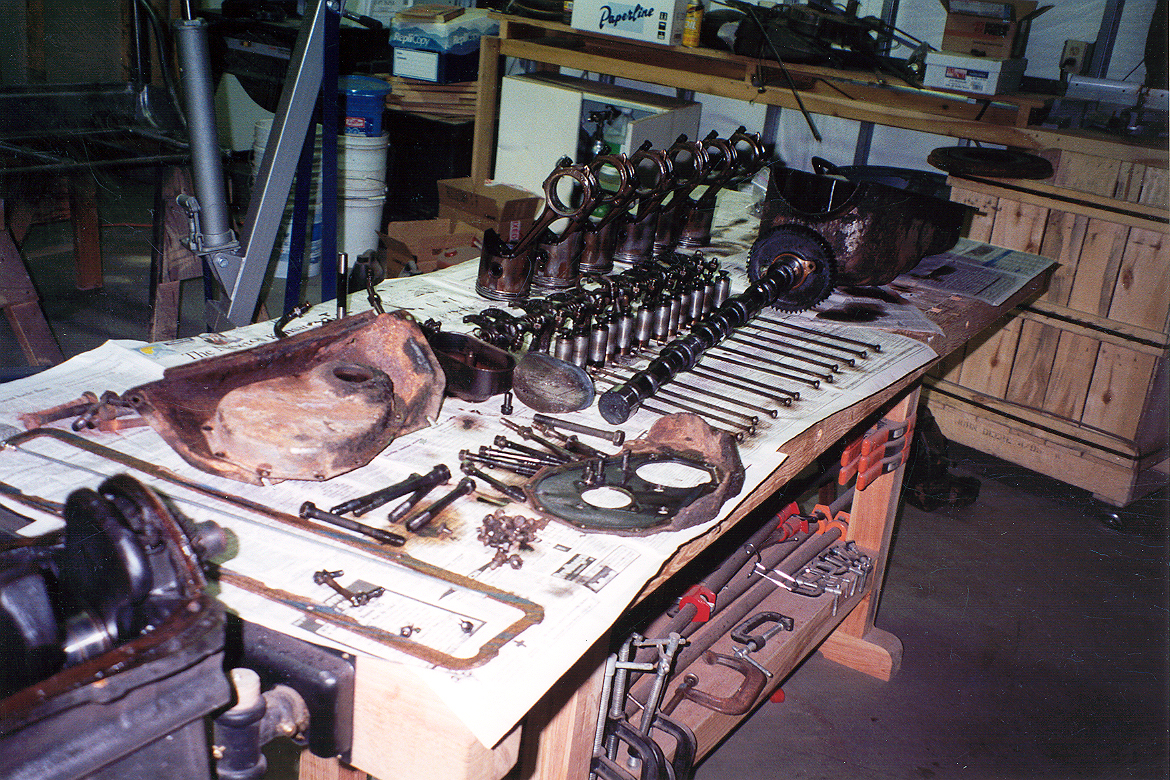
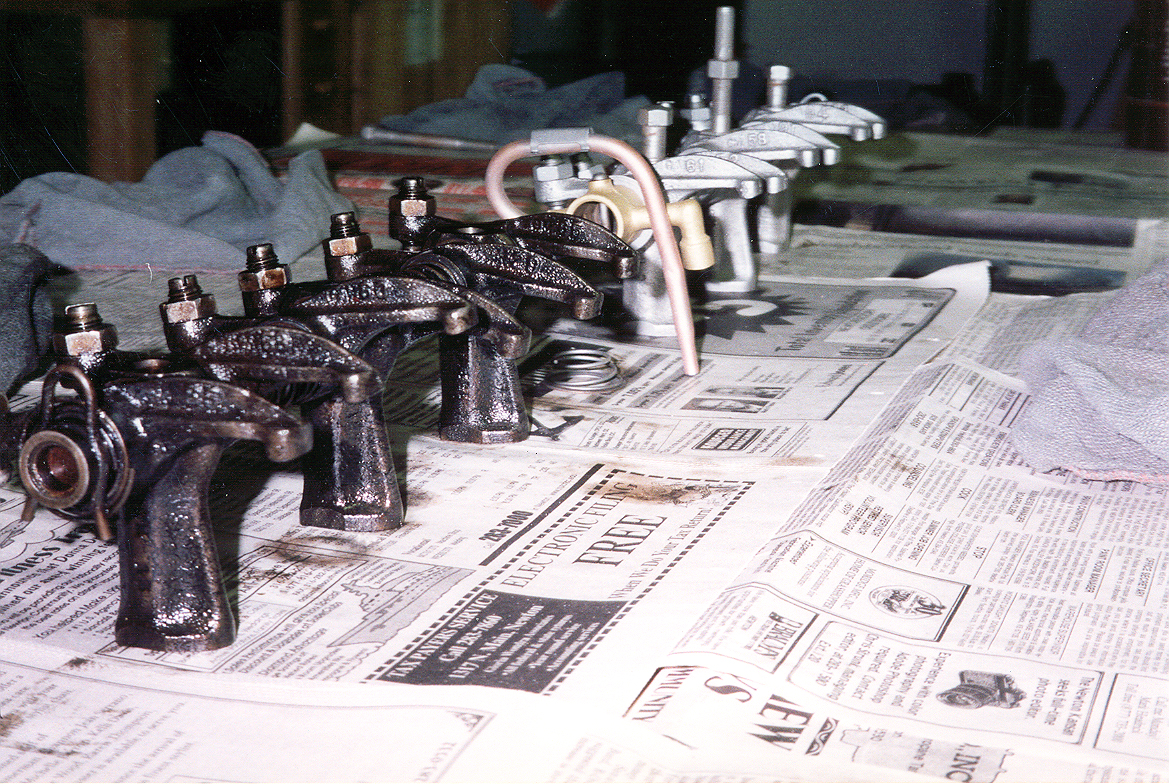
Yet another example of what the blast cabinet can do. Again, I made sure to assemble in the correct order after cleaning. The polished parts get cleaned with steel wool then everything is blown (with compressed air) to ensure no sand or steel wool particles are present. Biggest danger with sand blasting mechanical parts is the threat of sand getting into the moving parts on assembly. A very thorough job of cleaning is essential.

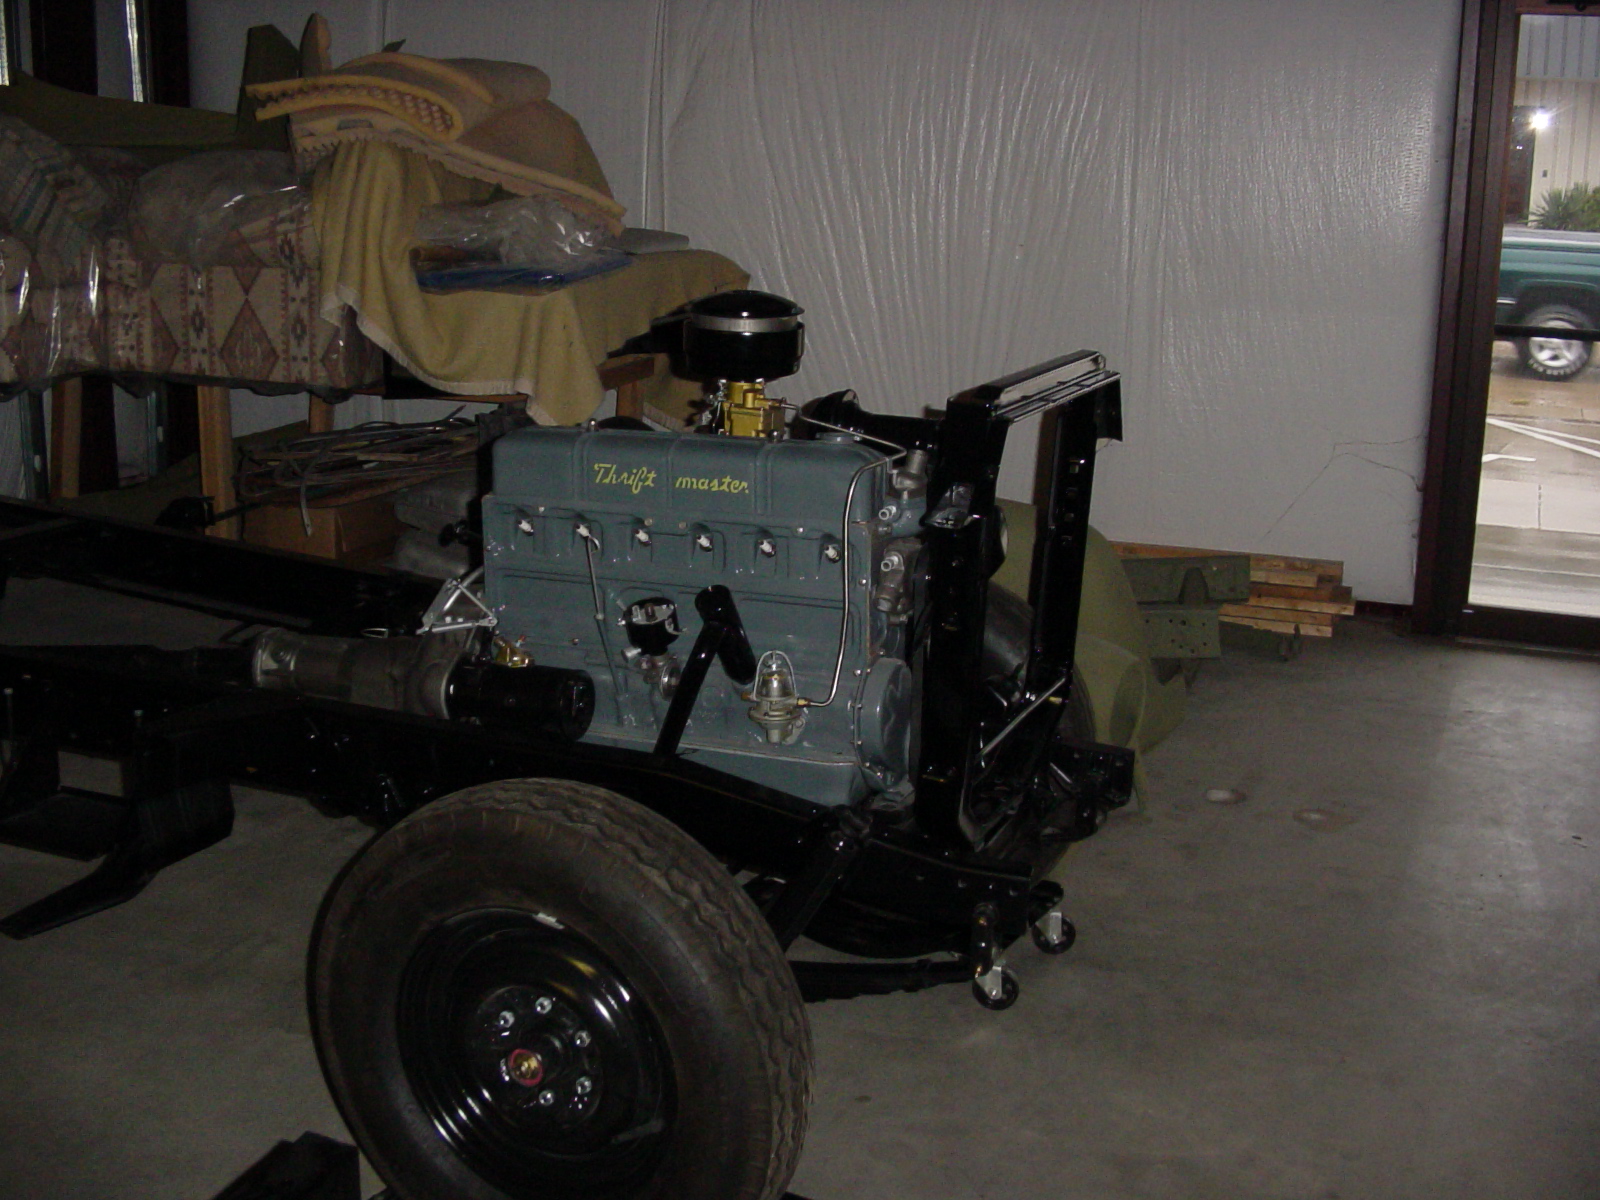
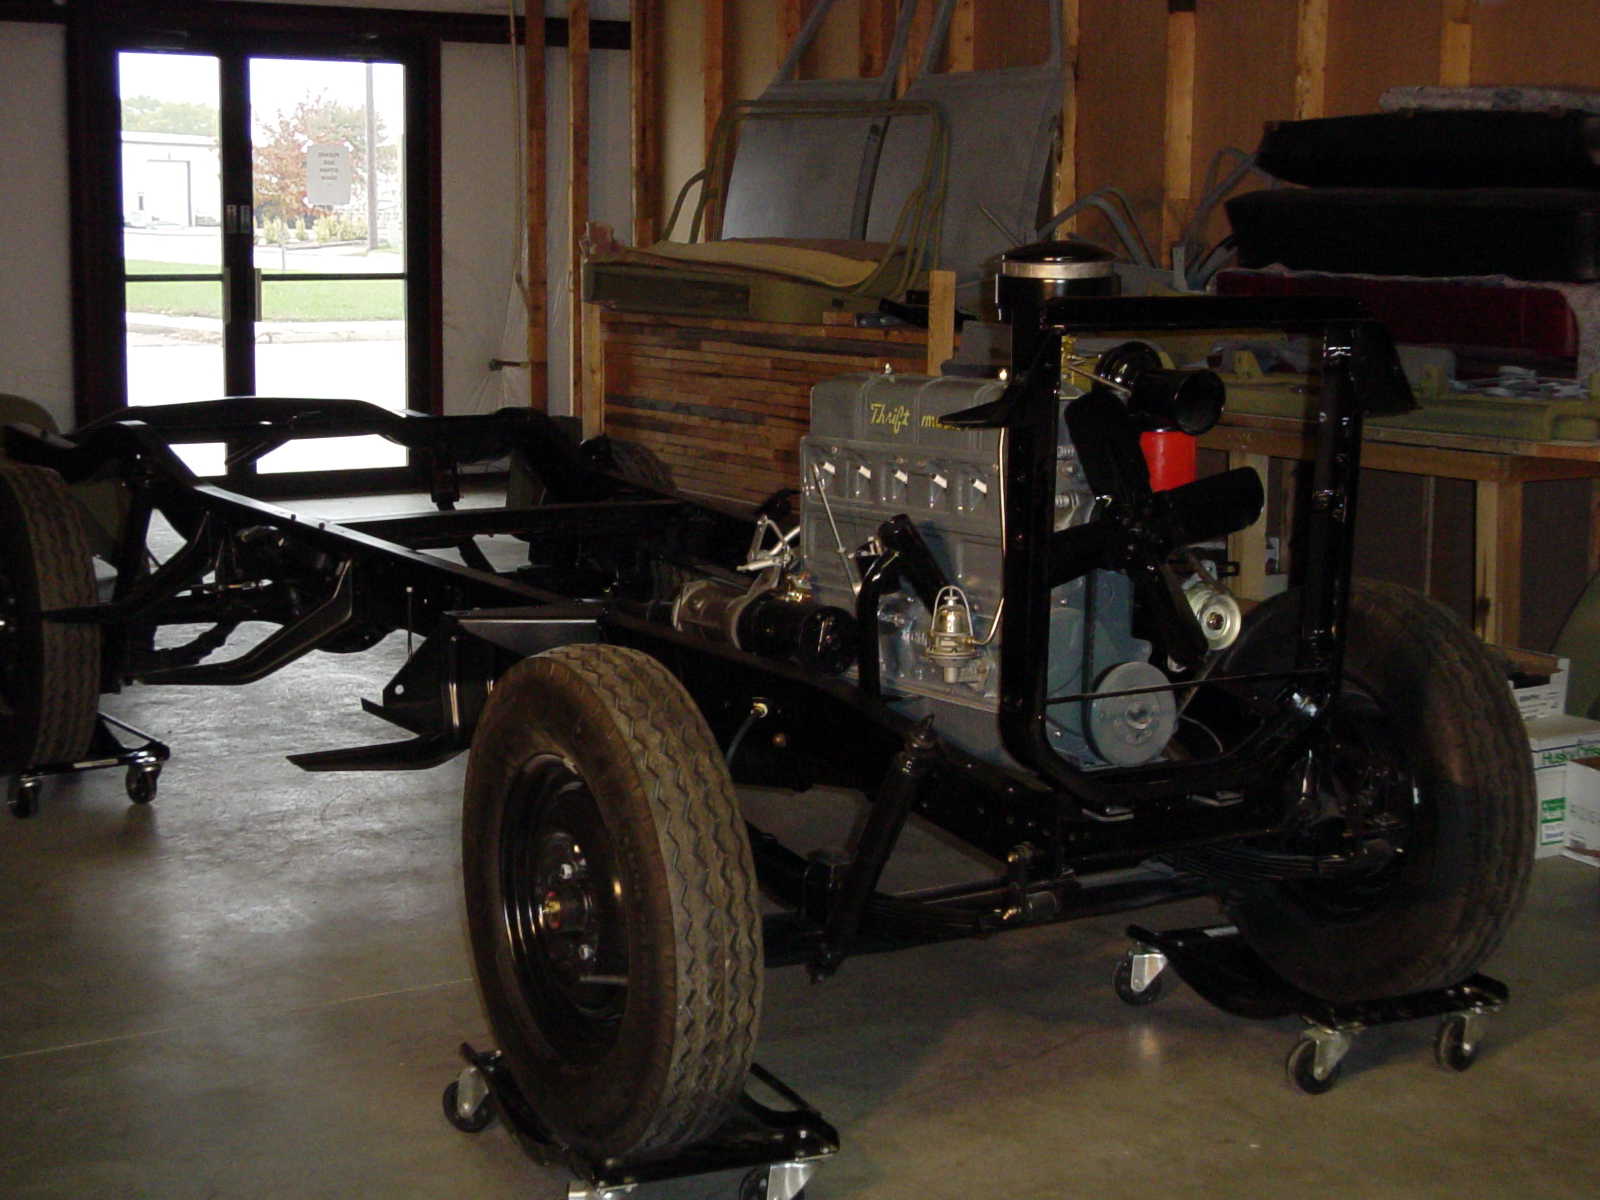
These shots are after the stainless steel brake lines have been installed and tested, the shocks are installed, and other small details are complete. The shocks were a bit hard to find because stock shocks are not long enough to mount once the leaf spring strips and the re-arching is done. I wanted the shocks to have a decent amount of movement in both directions afterwards. These are new Monroe gas shocks (blue) that were stripped and repainted black. The brake lines were installed with mounting clips that have rubber inserts to keep the lines from chafing against metal (something GM forgot to do in 1950.)
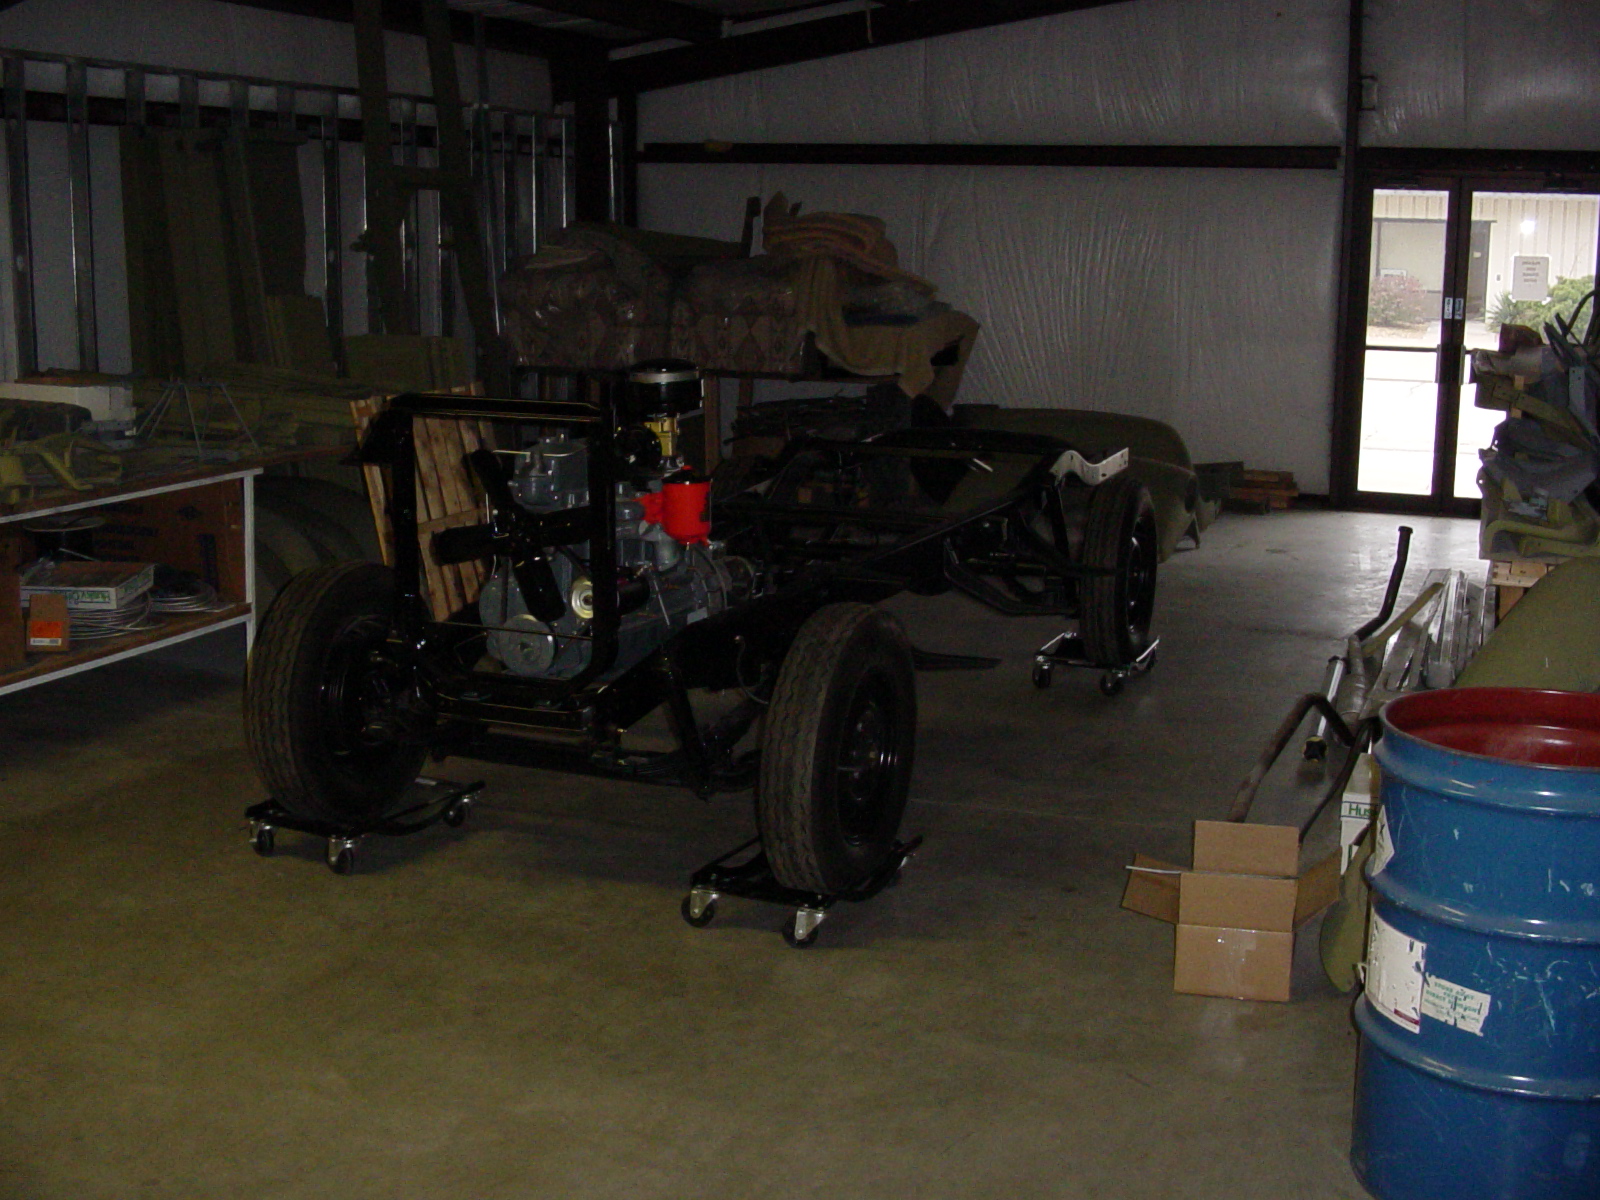
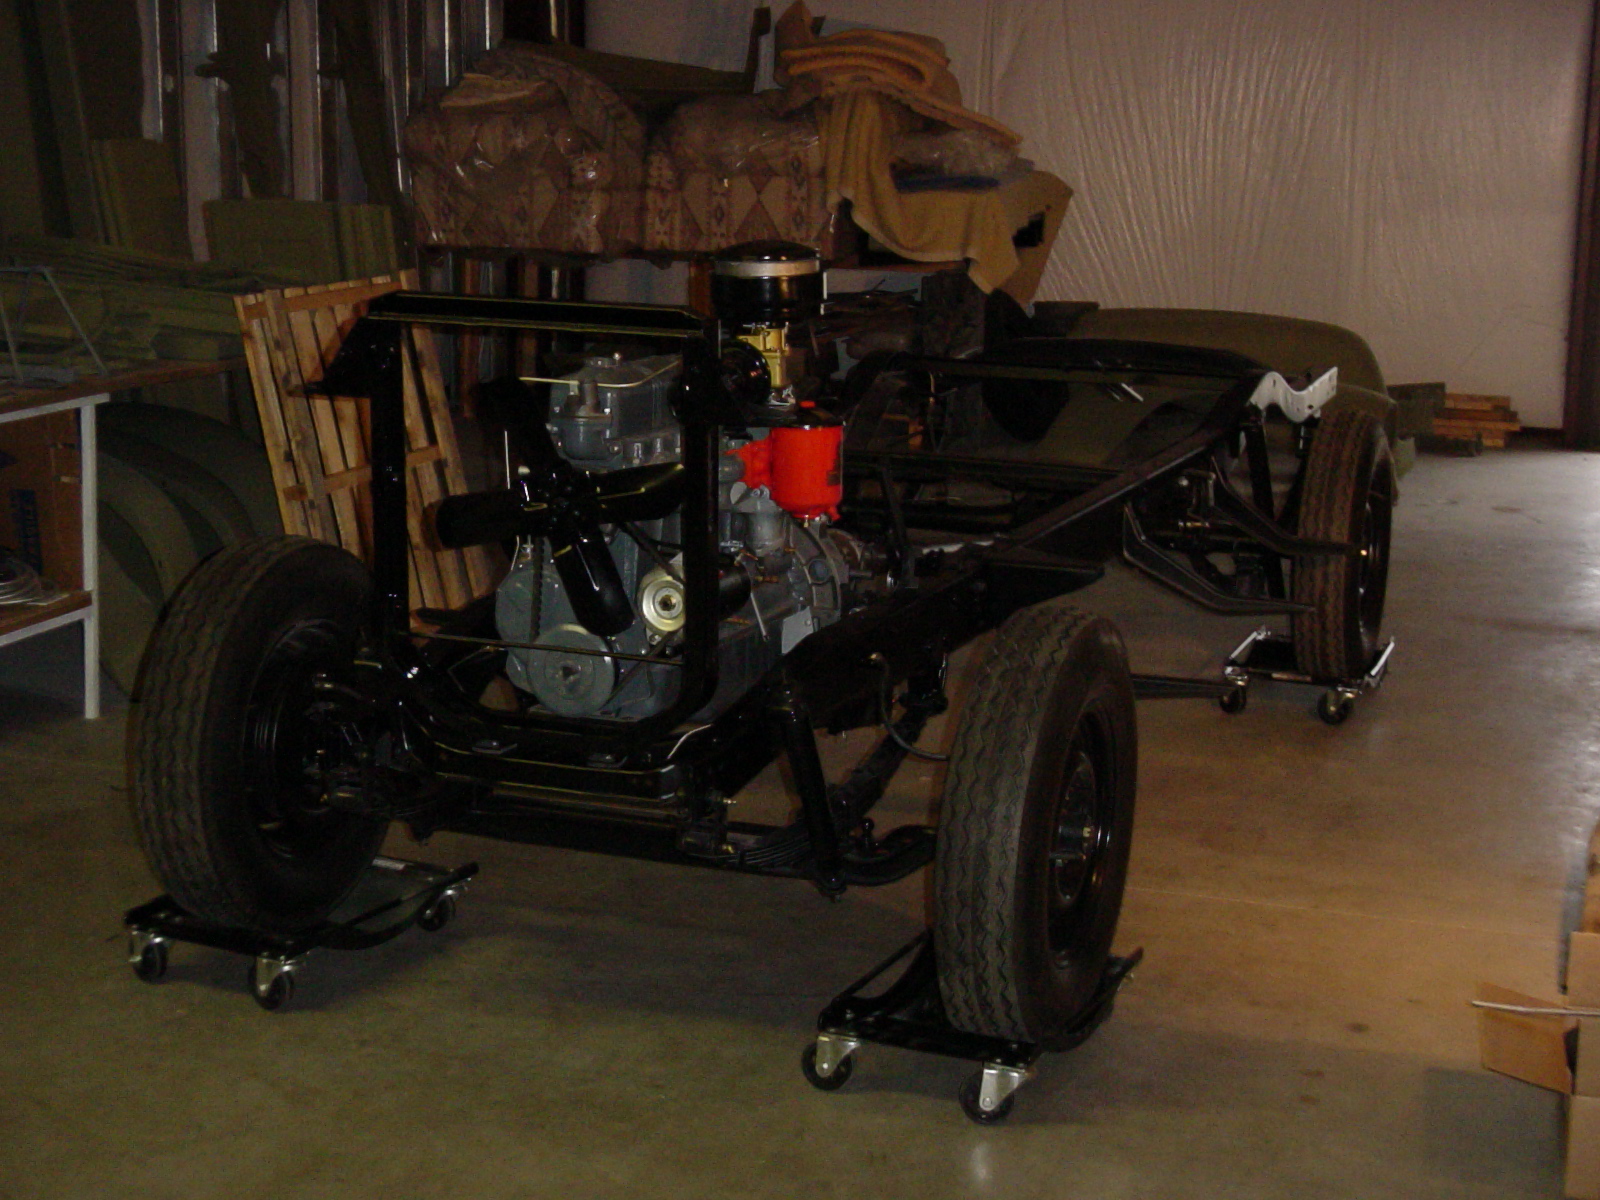
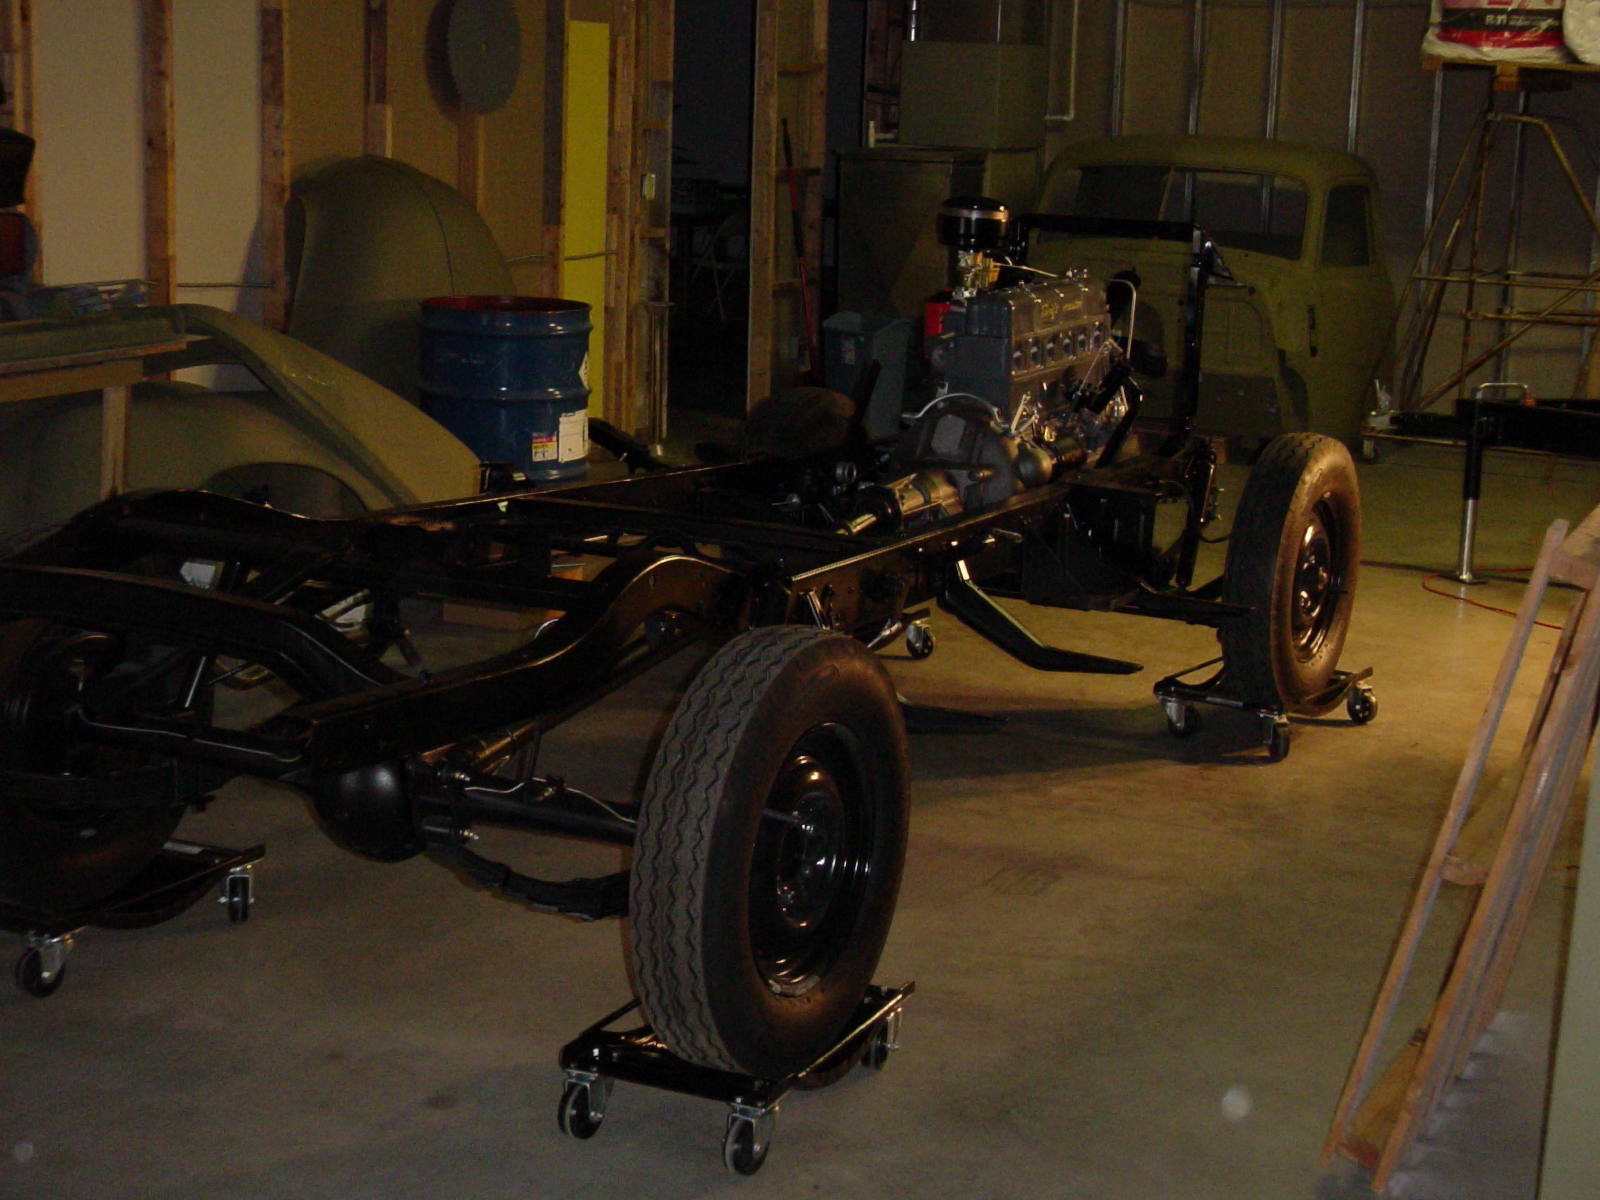
Last shot I will bore you with of the completed frame. With the frame in plastic and the cab sitting on the cart, I can move on to other things.
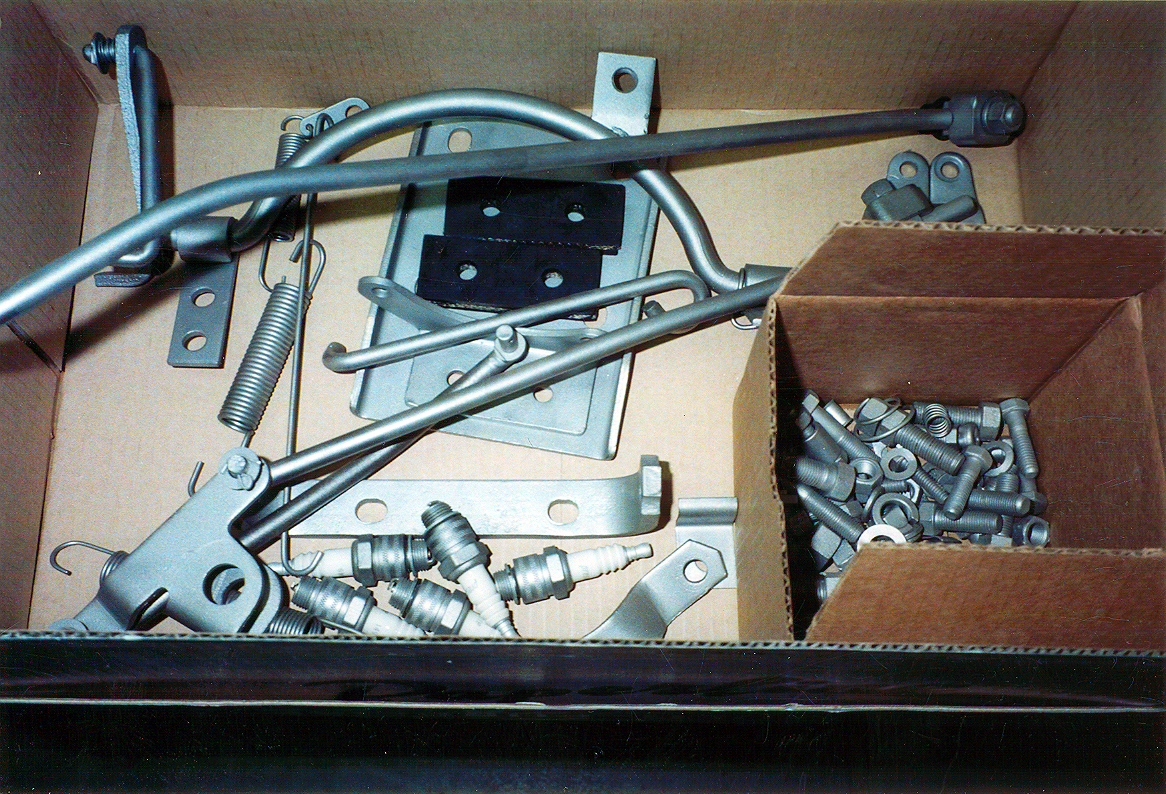
These are misc parts in various stages of restoration. All parts associated with this truck are sandblasted and primed with high grade etching primer for preservation.
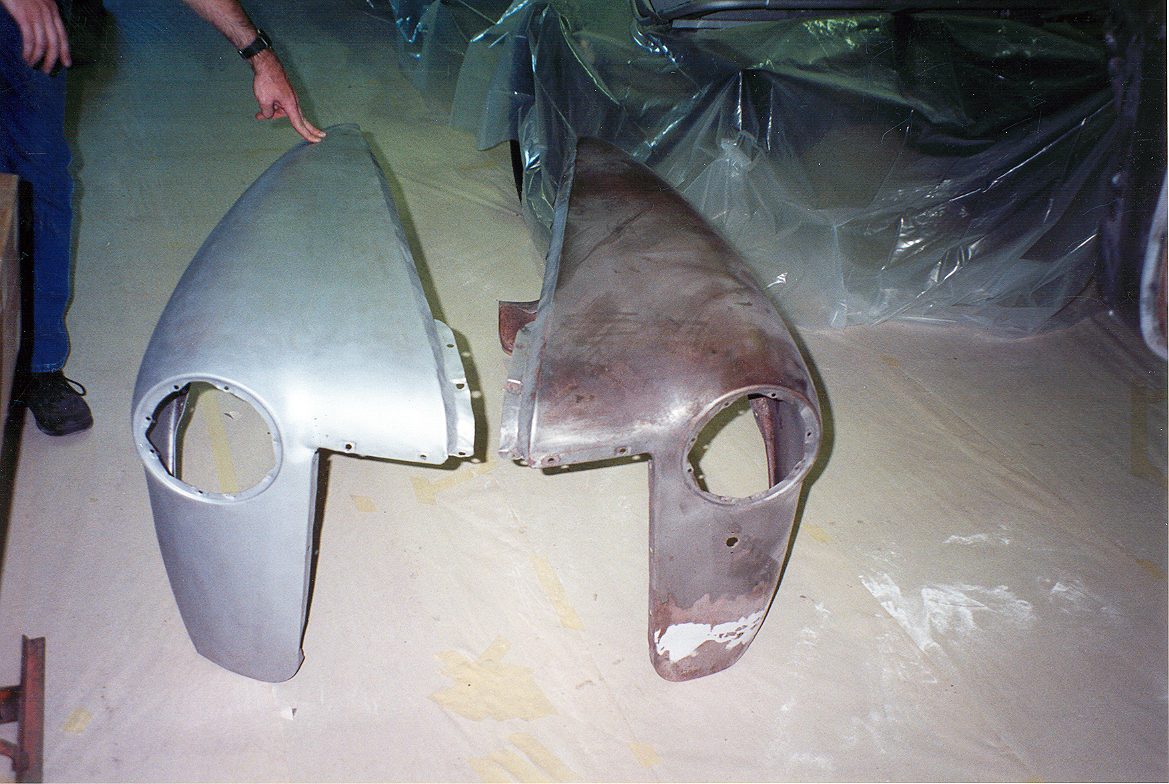
This is one of my peeve issues. I took all parts to a professional dry stripper and went out of my way to tell them many times that I would pay extra to have the job done right. After keeping my parts for two weeks, I get back what you see of the darker color. This is NOT a before I took it to the strippers picture... it's the after!! What you see of the lighter, brighter color (in each picture) is what I personally did with my cheap Sears siphon sandblaster. Moral of the story: Spread out a tarp to catch the sand, hook up your $35.00 siphon blaster and do the job yourself. You can do it in the same amount of time (a few weeks) and do THIS much better!! Let's not talk about the $650 I gave them for the privilege of me getting to do it over!
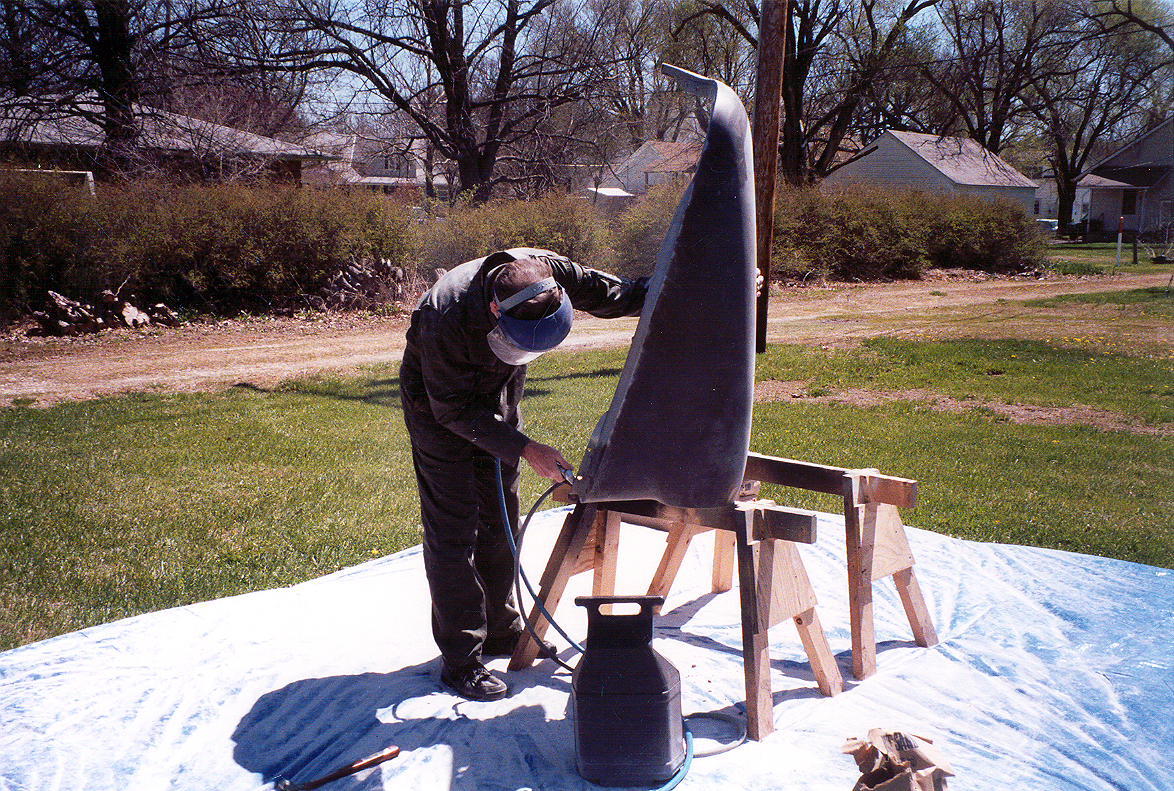
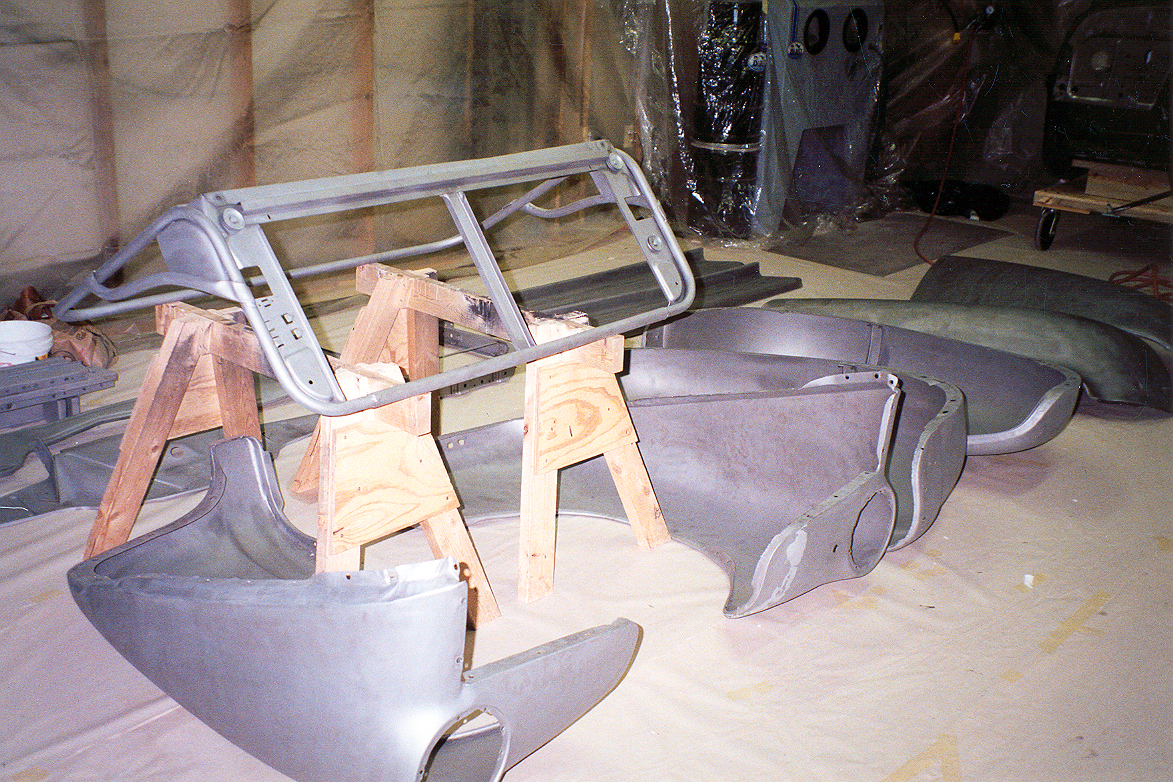
This is how I sandblasted all the sheet metal. Was pretty efficient really. I was able to re-collect and re-use most of the sand. The finished results are amazing.


More shots of the finished product. It was a lot of work taking about 4 hours per piece (at 60 psi with a siphon blaster) but was worth every minute!
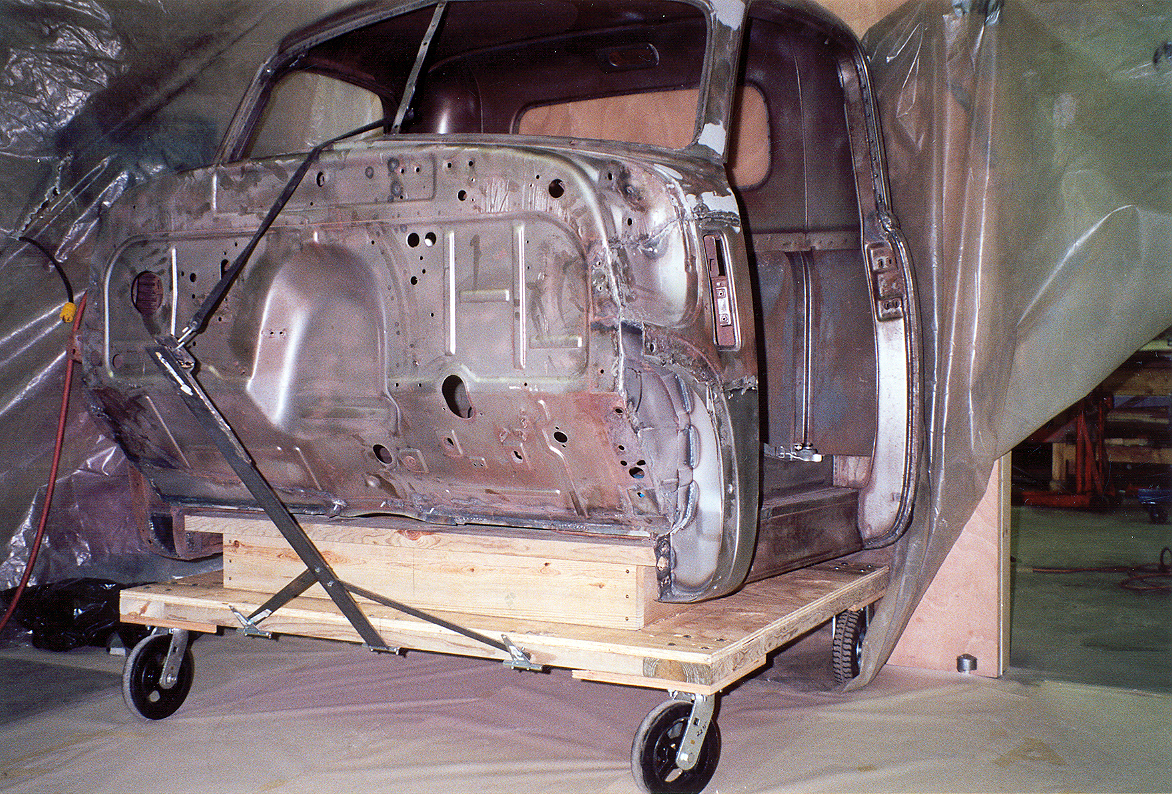
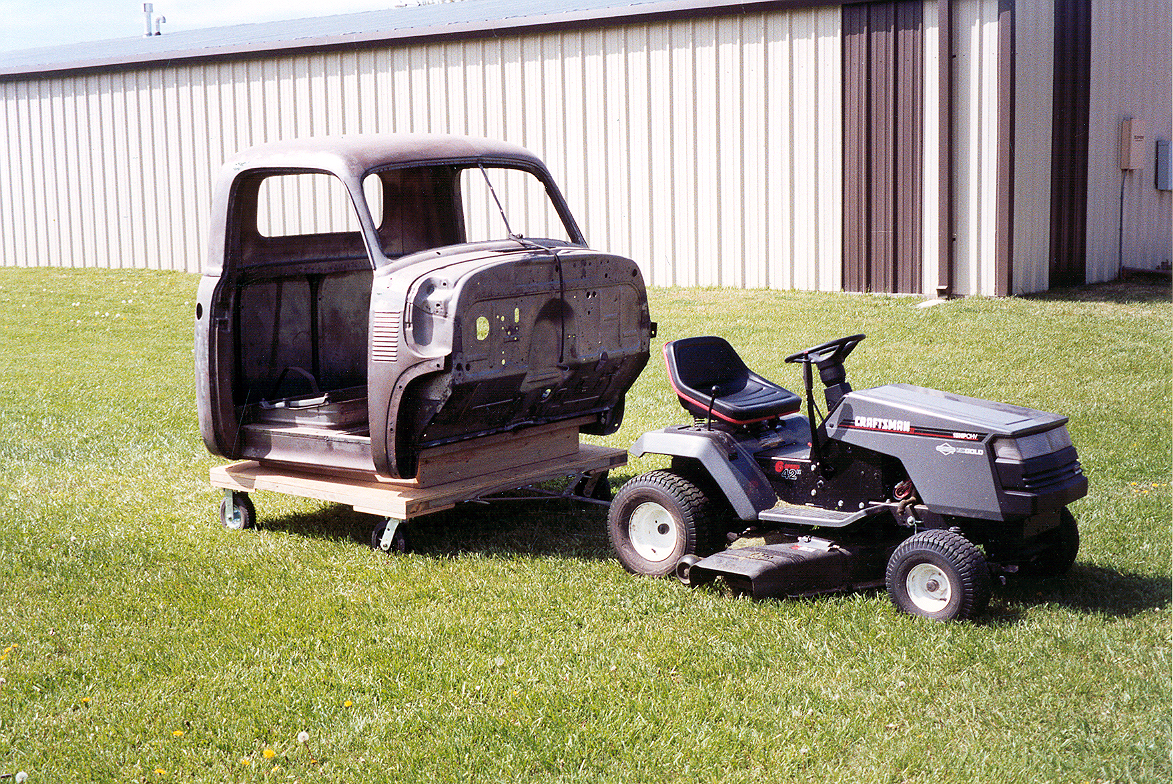
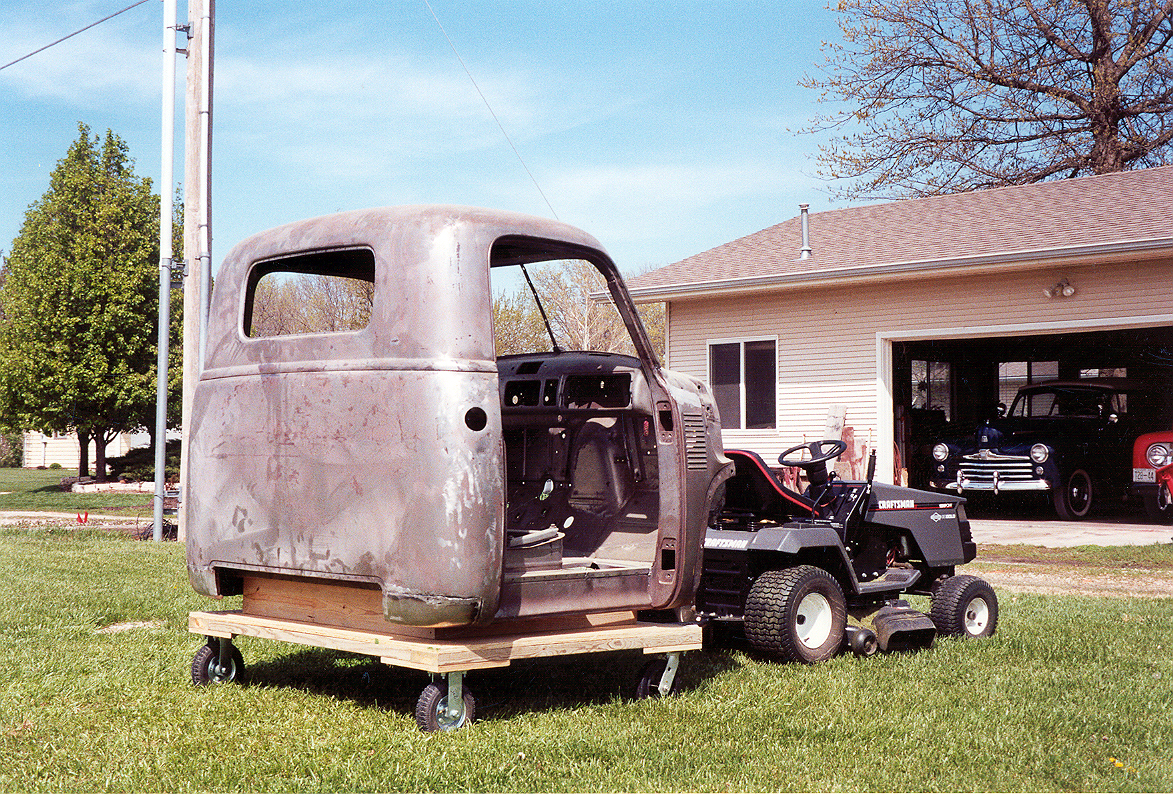
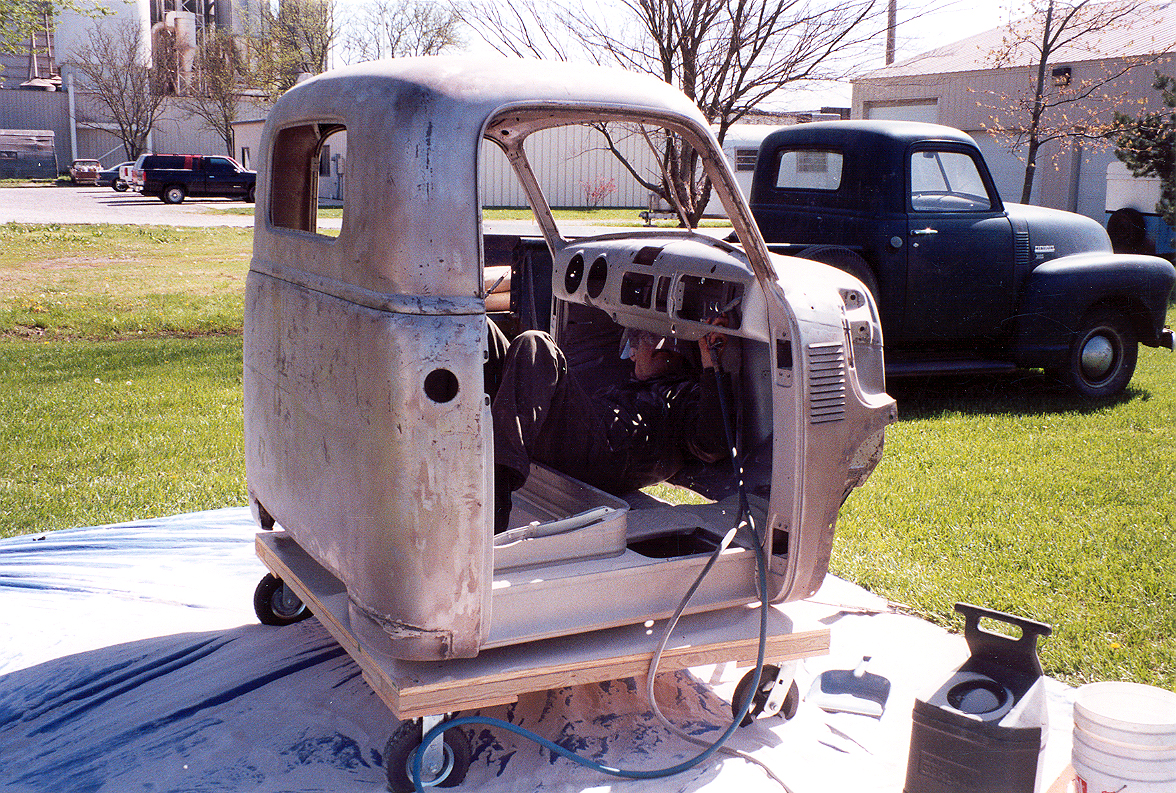
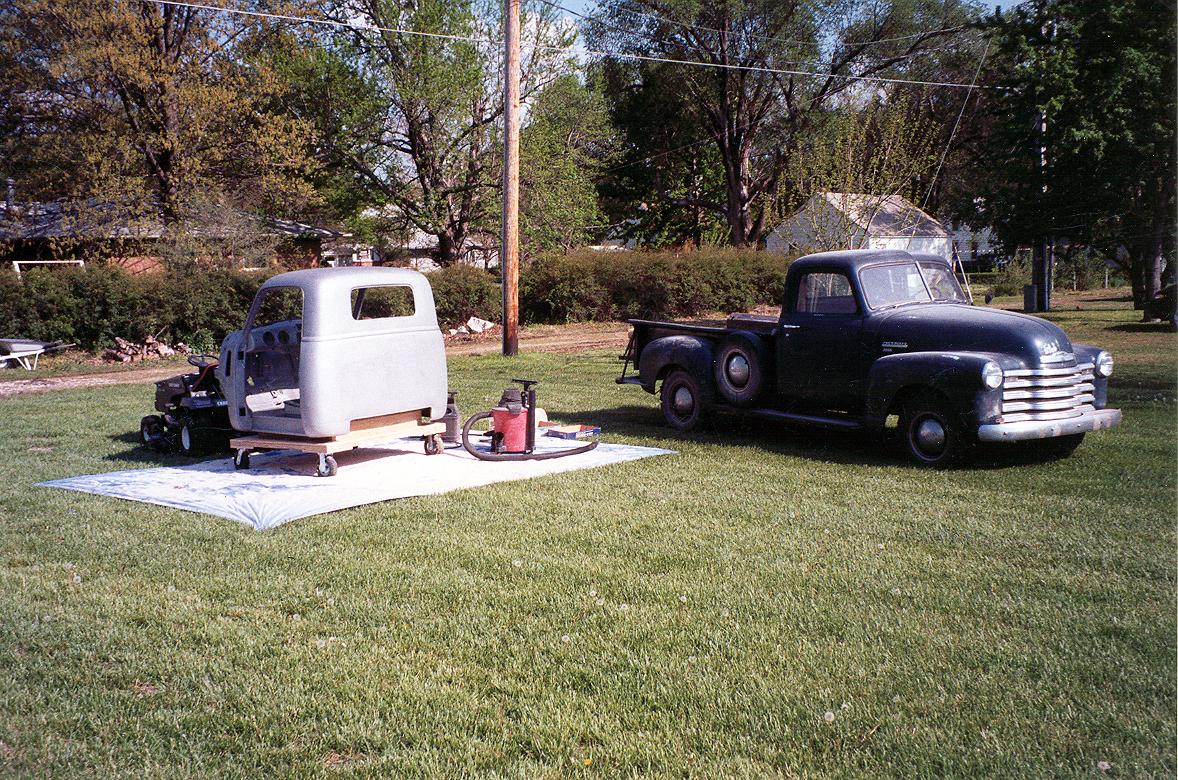
An invaluable tool... the Cab Cart! My dad made this for me and it took a lot of the misery out of moving it around. If you do this very often, you need one of these! It even has a hitch and can be easily moved with a lawn tractor. There is a pedestal on the flat cart that even has holes for the actual cab mountings. This custom made cart is a perfect fit for AD Cabs.
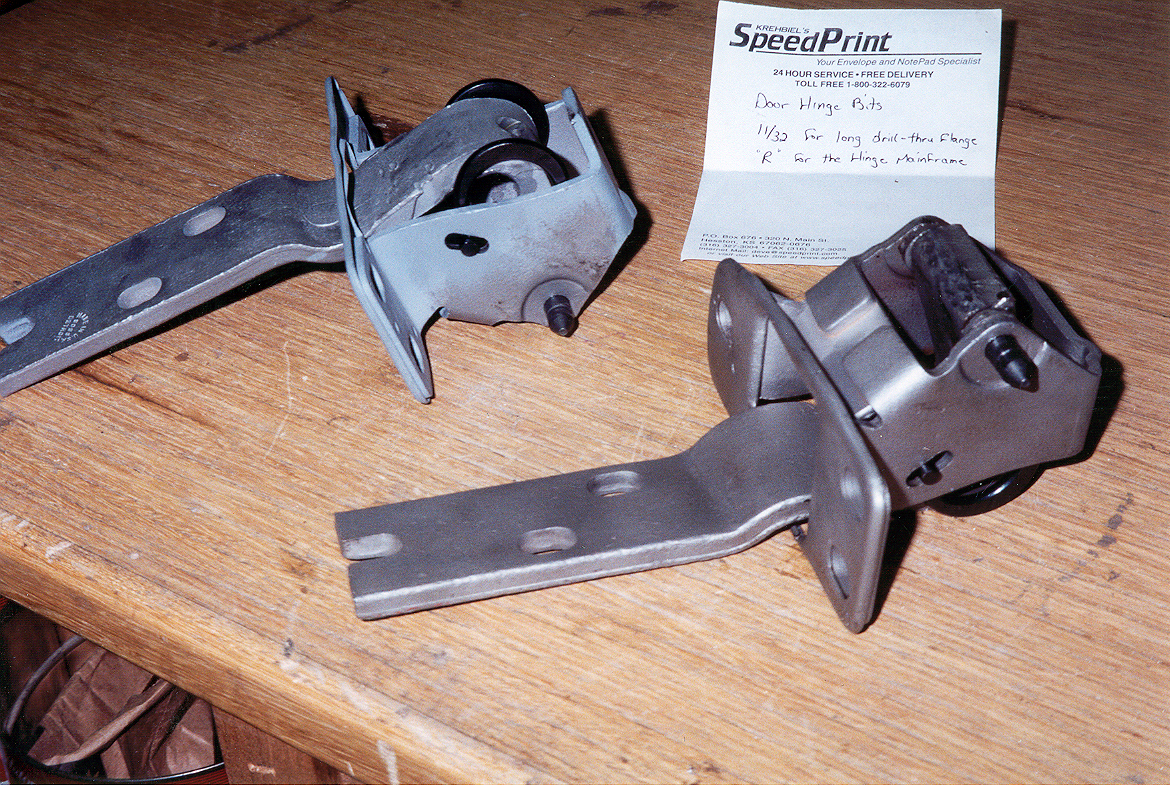
A shot of the already dry stripped cab. Not very clean and by the time I am through, the cab will shine like the rest of the sheet metal. The next shot is of the repaired top door hinges on each side. They usually have broken springs but thanks to reproduction spring and pin kits, we can rebuild them. For the perfect fit, use an 11/32 bit to drill out the hinge and a letter R bit to drill the hinge frame.

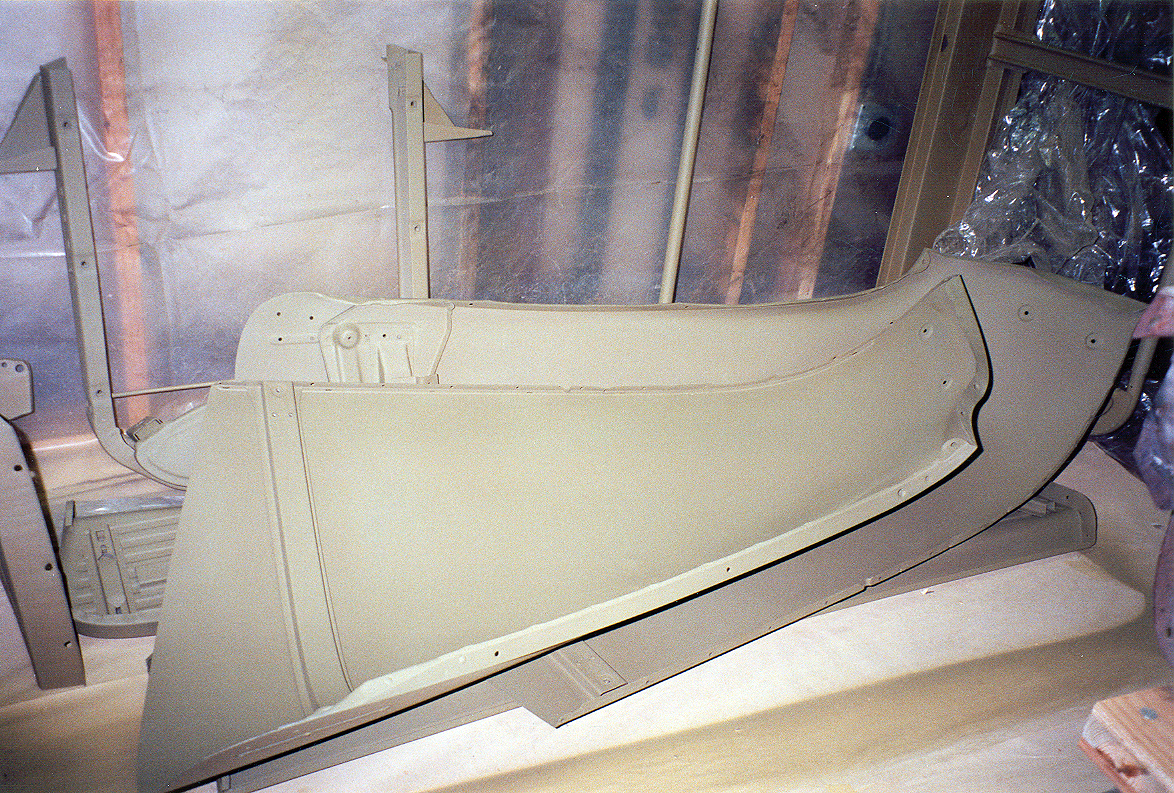
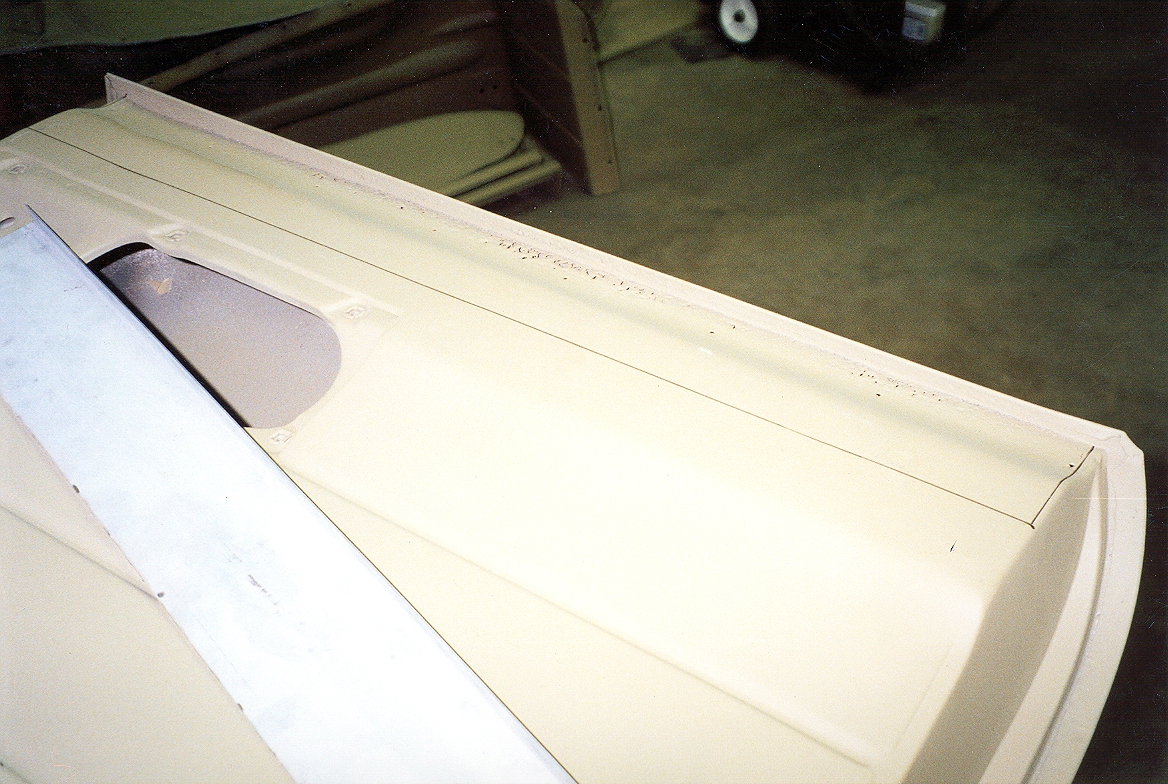
Sheet metal after priming with SW 980 etching primer filler to protect the metal until I can get around to repairing each piece. Every single piece of sheet metal on this truck has a dent or a ding or a hole in it somewhere that isn't supposed to be there. Lots to do!
Here we go... sandblasting the cab. I am in this picture, upside down under the dash blasting the inside of the dash. Nothing was left out. This proved to be a 6 day operation (10 hours a day). It wasn't pleasant, but necessary. Suggestion... use sunscreen! 10 hour days in the sun without sunscreen make for a rather painful lesson in logic! I went through quite a few face shields and ceramic nozzles too. The entire project (all sheet metal and the cab) took approx. 30 bags of sand (about $150.00.) Even though I had pretty good luck reclaiming the sand, wind, a smaller tarp than the distance the sand can travel, and poor aim took its toll as well. Still that 30 bags of sand represents about 140 hours of sandblasting. The dry strip place charged me $650 to do an inadequate job, so this is way more economical and you have the benefit of it being done to your standards.
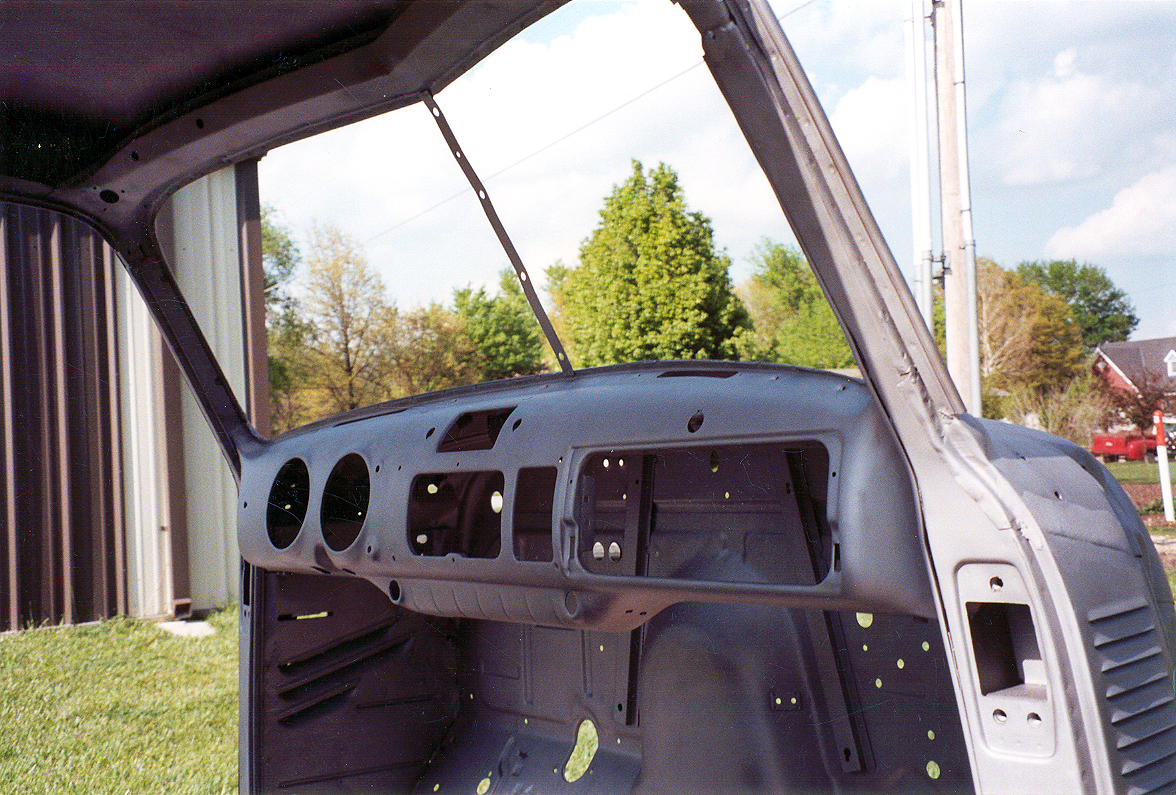
These are shots of the sandblasting after completion. Every nook and cranny was hit as best as is possible. If you are gonna do it, might as well do it right. Under the dash, inside the door hinge recesses, heater recess, between the dual walls of the inside back as best as possible, everywhere. The advantage of doing it yourself is you have total control over the quality of the end result.
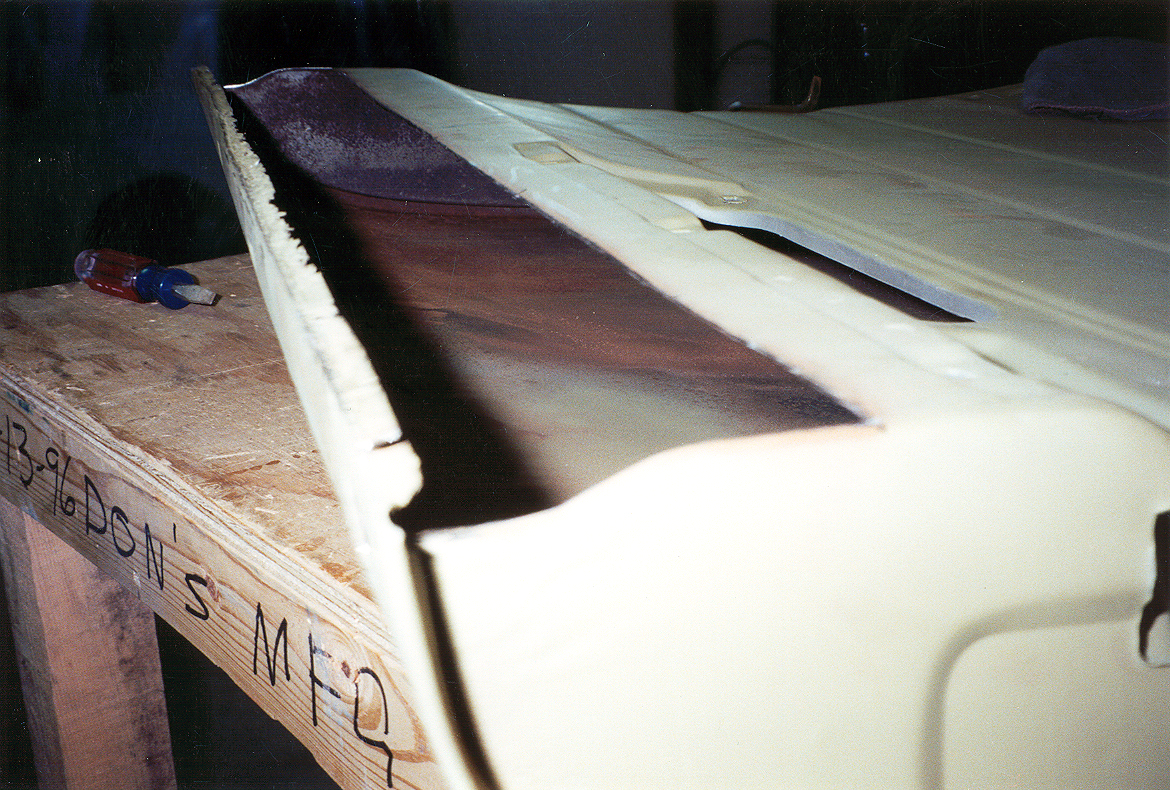
Both doors had substantial rust through damage on the bottom inside. Chevy Duty sells patch panels for this... all you have to do is put them in! Hahaha! If there was ever a reason to worry about warp-age, this is it. The distance across these doors is just not very stable. I added a piece of angle iron the length of the patch panel to use as a flange under the panel and then welded the panel in. This added the stability needed to keep the panel from warping. I learned this the hard way. I had to remove my first attempt due to warp-age and I followed the rules! It's tricky so be careful. I did BOTH doors and in the end, they came out looking absolutely perfect. You simply can't tell where the panels were patched and without using Bondo. Time and patience is key. I would have preferred a bit more experience before tackling it too!

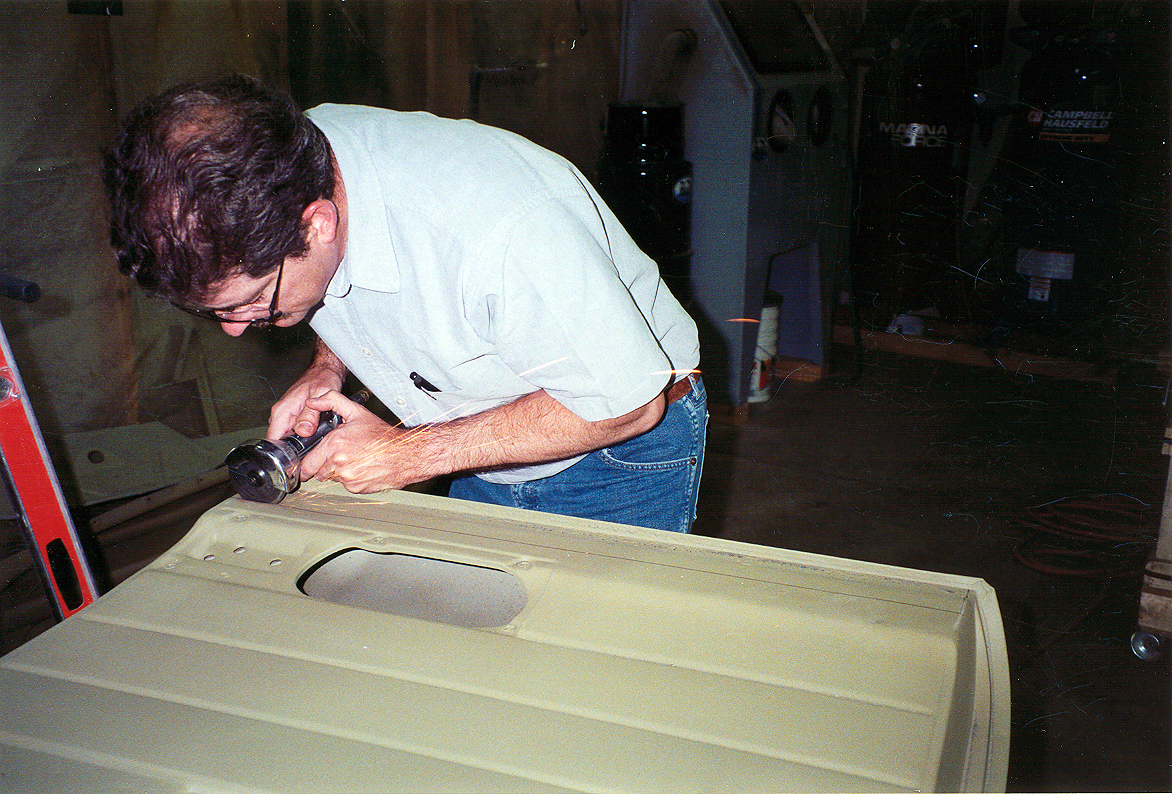
The die grinder I bought at Harbor Freight for $19.95 was the perfect tool for the job. Nice straight cuts that left the edges nice and smooth. Bending the crimp-over was a bit tricky (at the bottom of the door) but was necessary to get the patch panel under it. I ended up cutting that crimp-over off completely and welding a strip back on after the panel was installed. The job came out looking really good and removed all the rust-through and pitting.
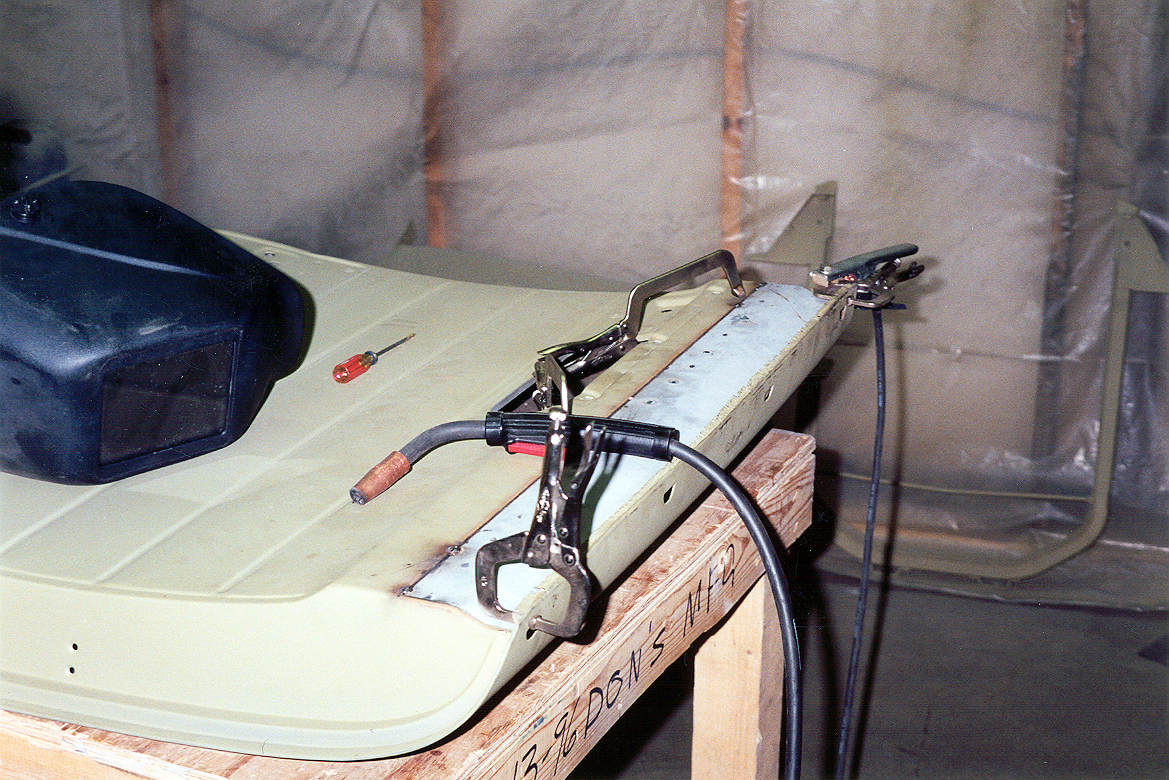
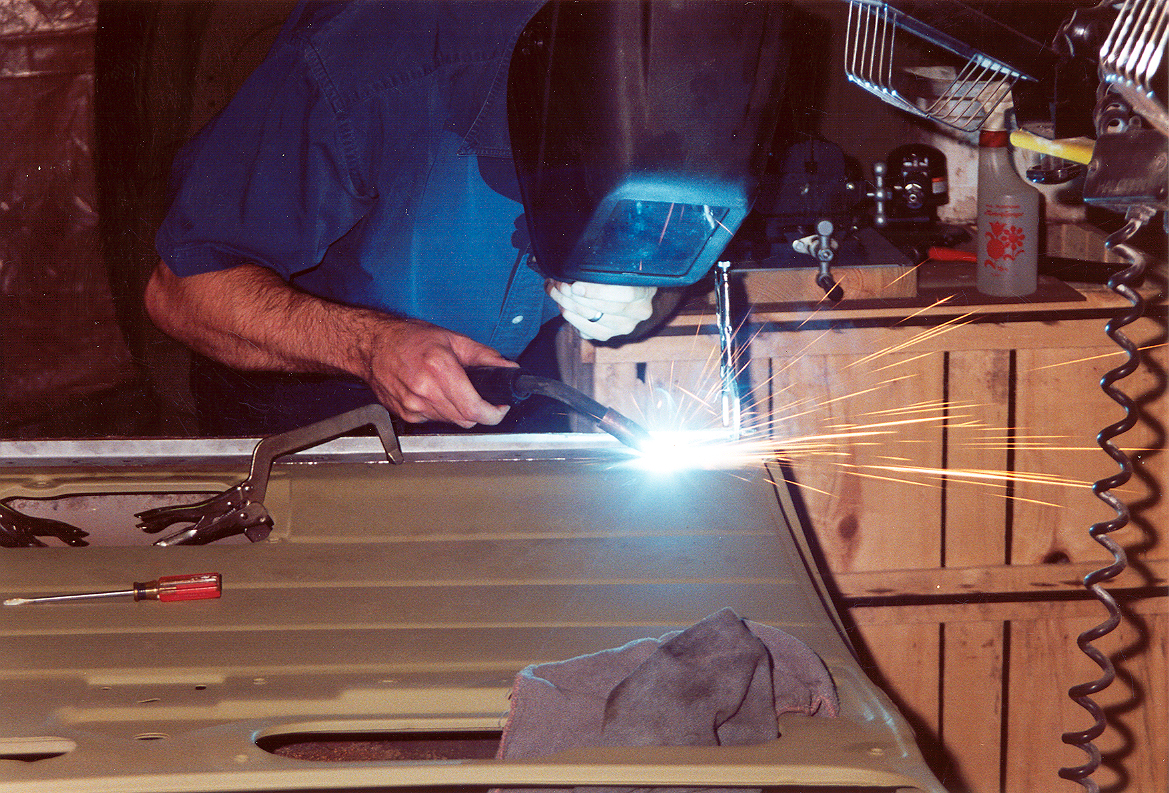
Patch panel is installed and fitted. After clamping there is nothing left to do but weld it in. Tacking it on opposite ends until the weld is complete isn't all... you also have to be careful how much heat you use when grinding the welds smooth. You can warp the metal during the grinding process just as easily!
Well, I will be kind here and say that after 5 months and $400.00 over what was estimated, the engine shop finally finished re-babbitting my 216 engine. Needless to say I won't be using that shop again. But at least it's back and now ready to super-clean the outside of the block for priming and painting.
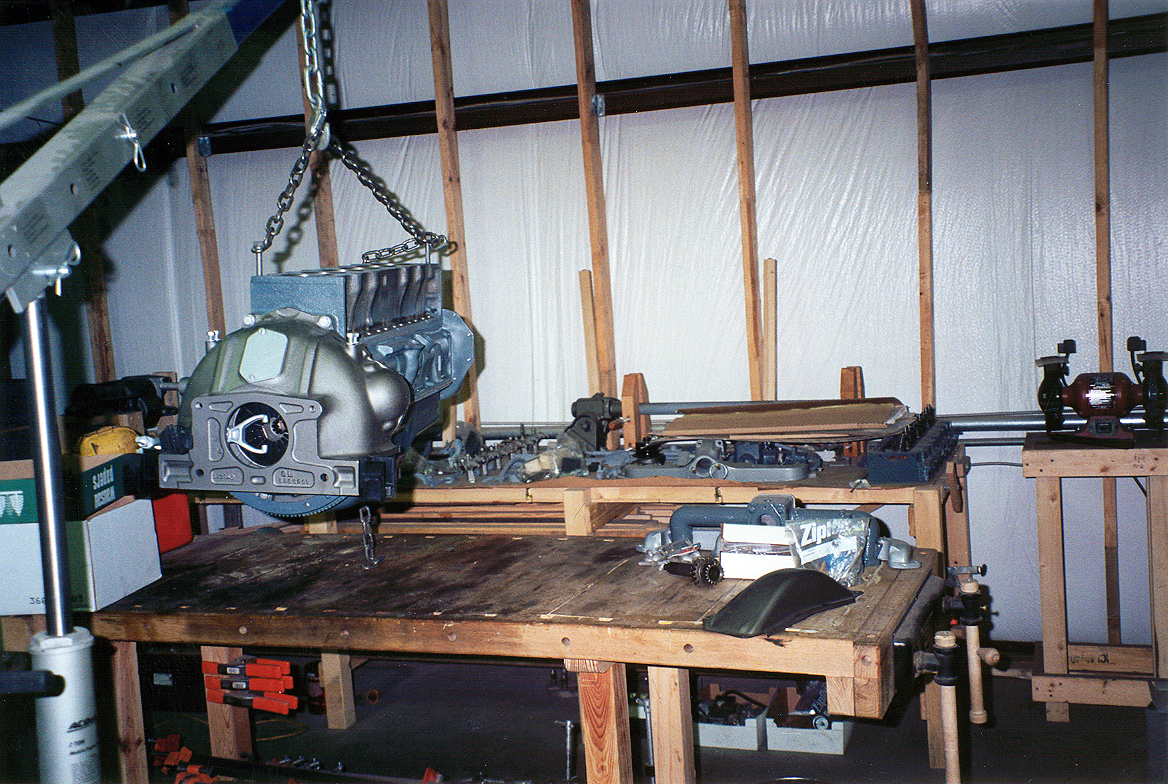
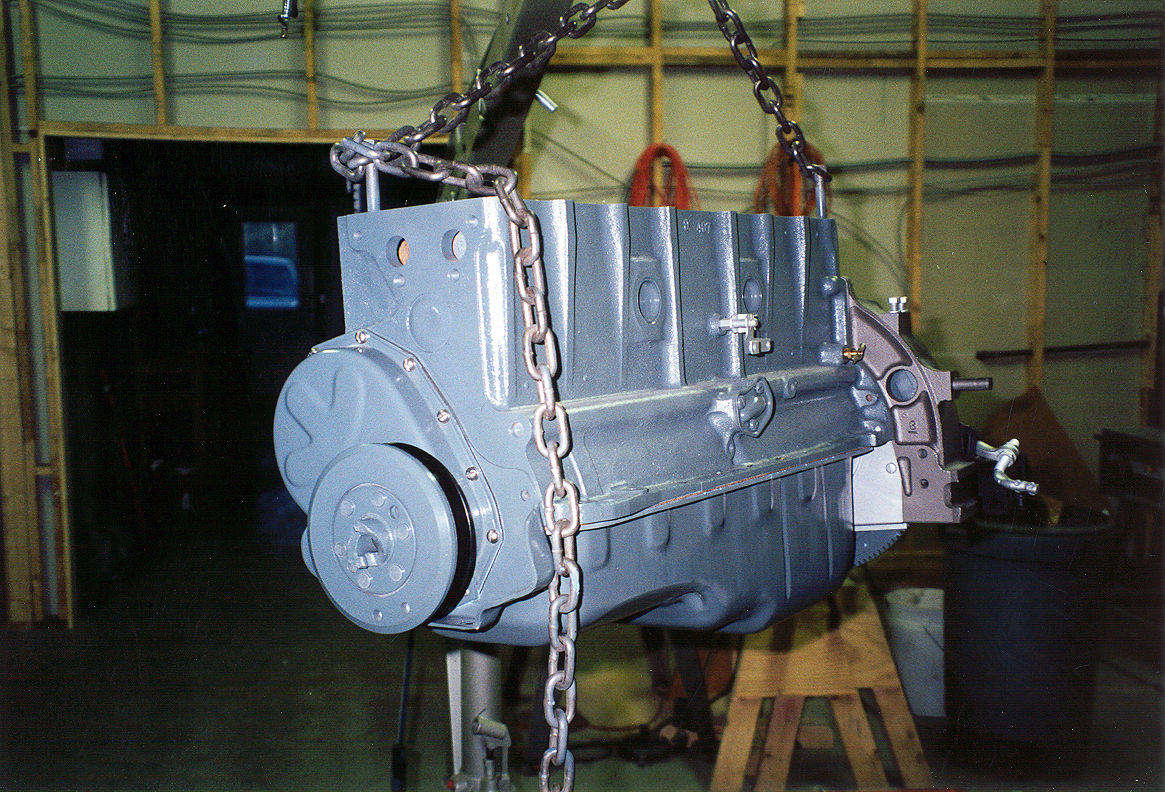
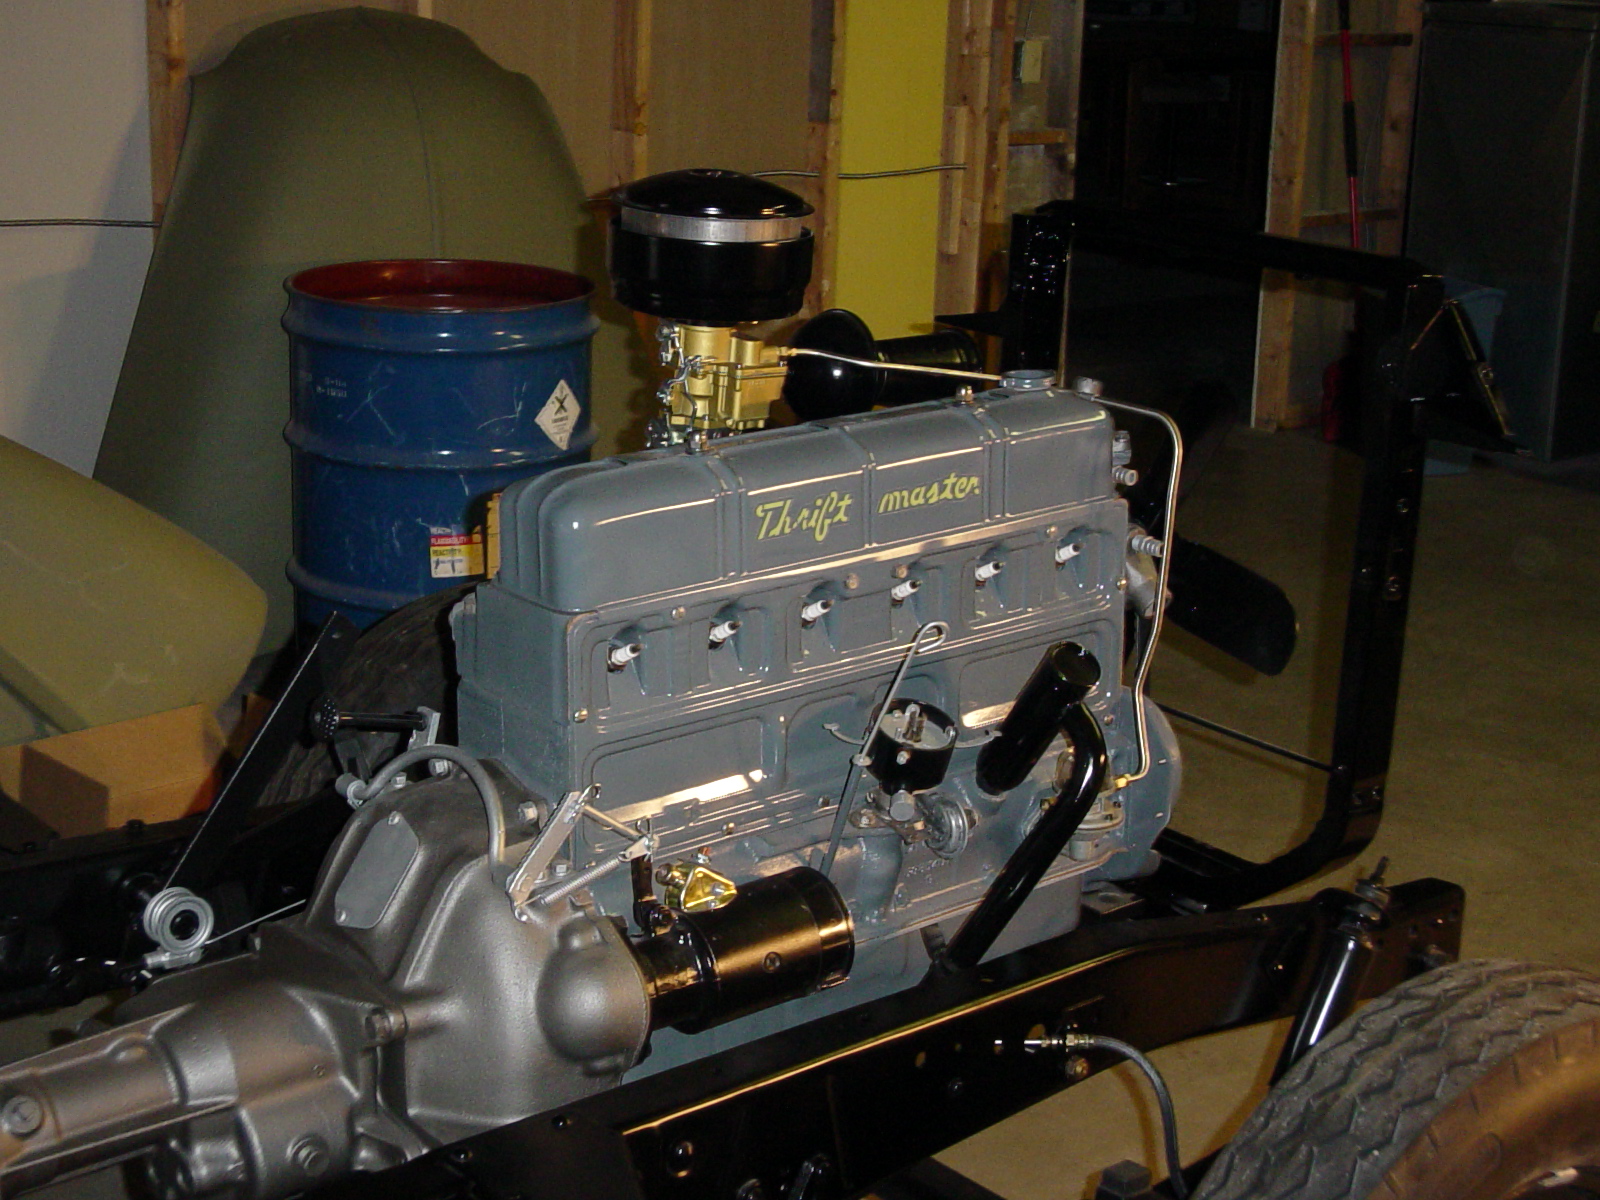
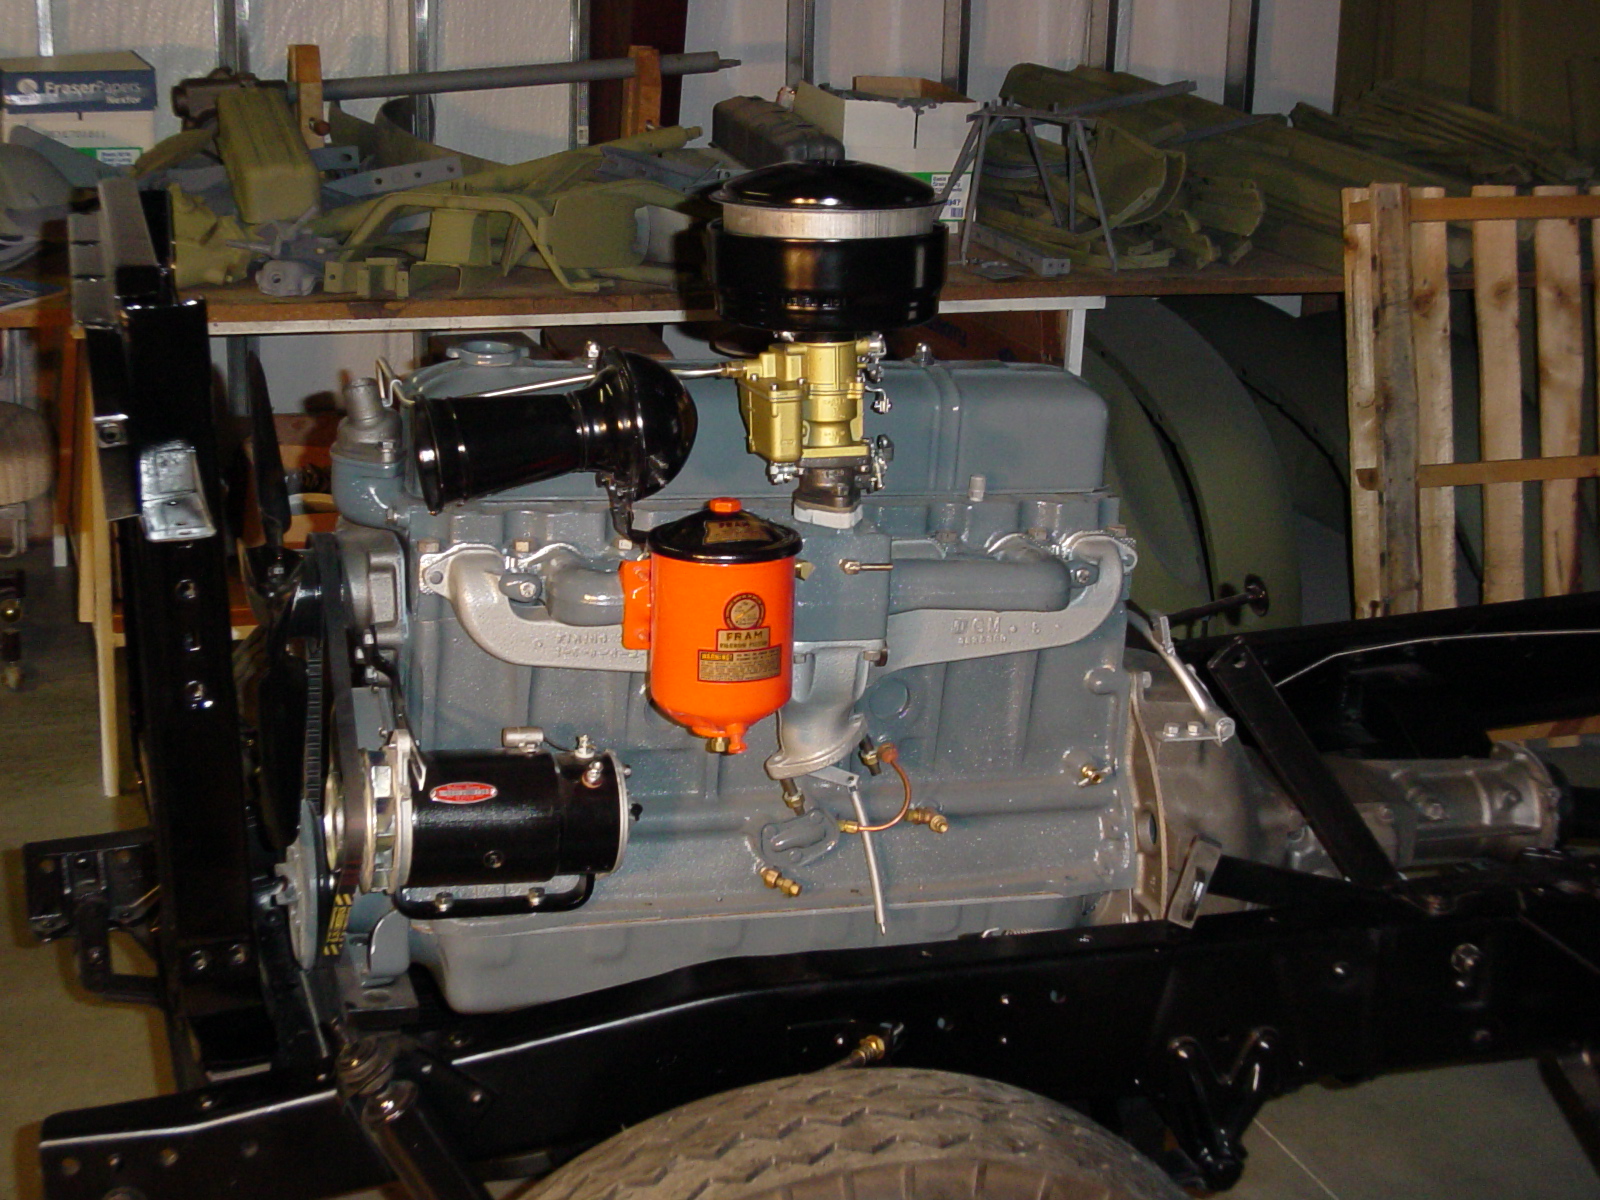
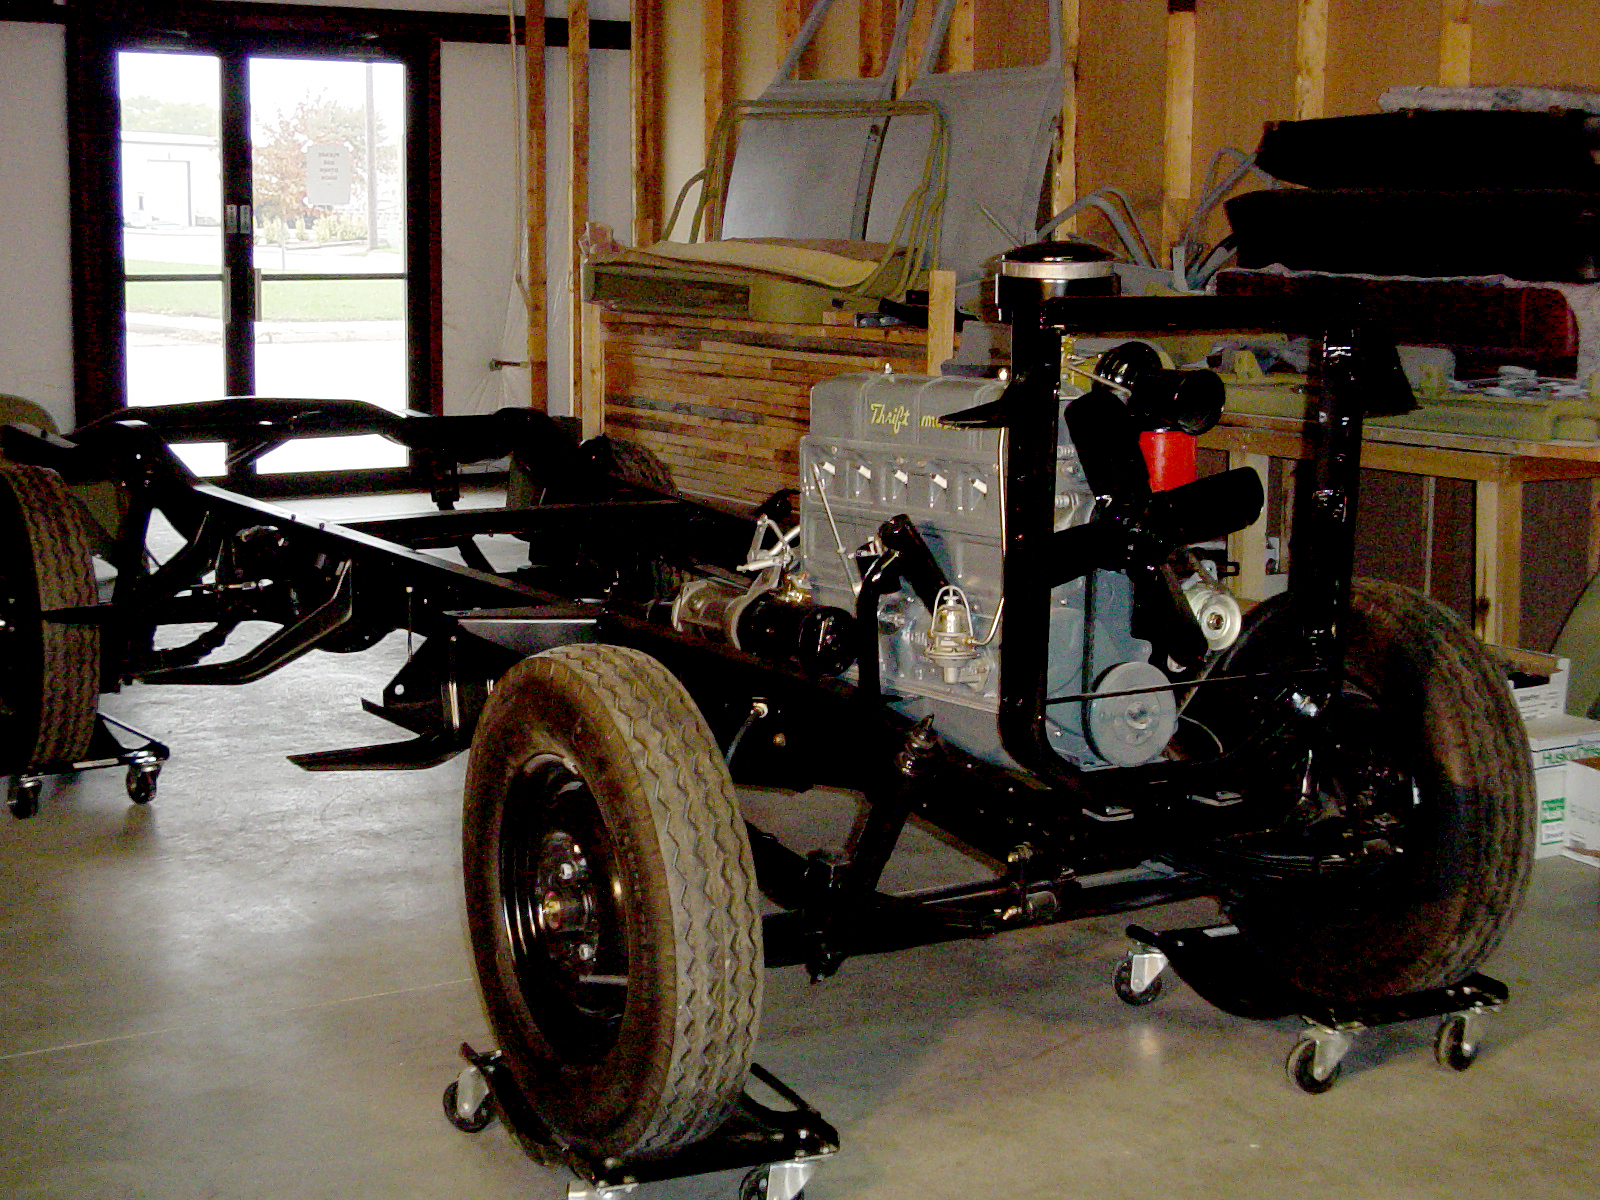
At last the engine is ready to go back on the frame. Another major milestone and nobody is happier about having the shop space back than me!
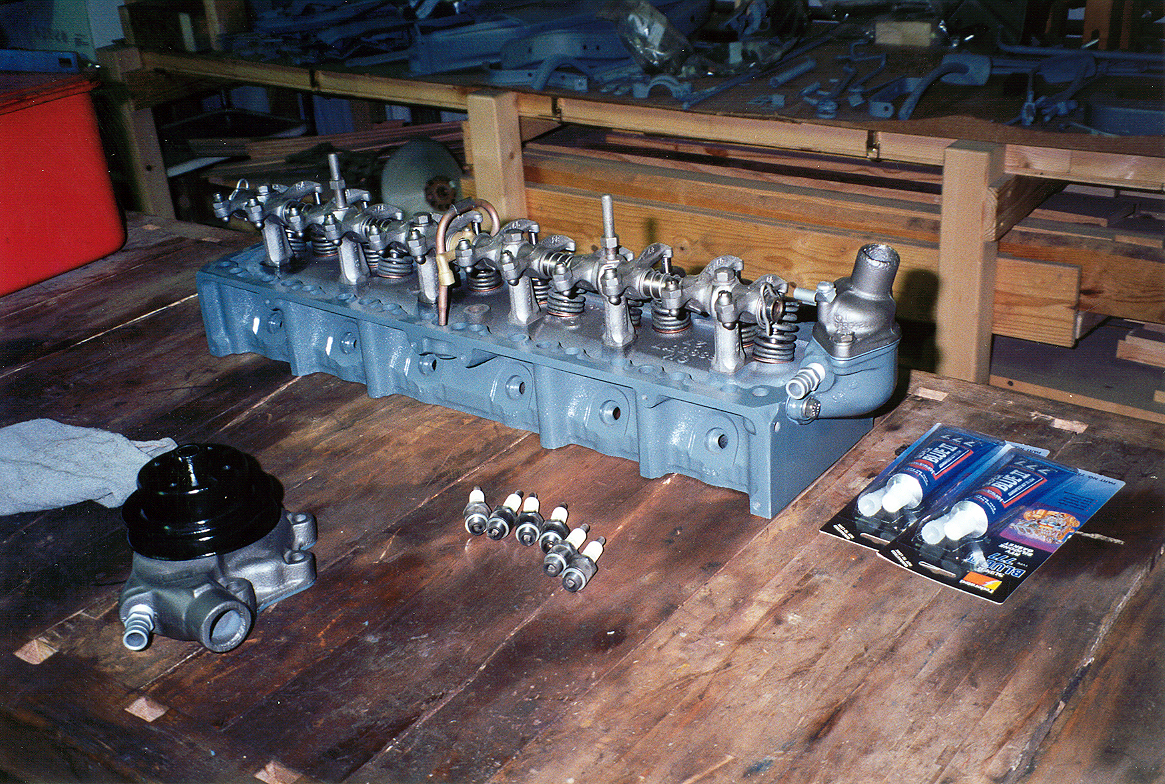
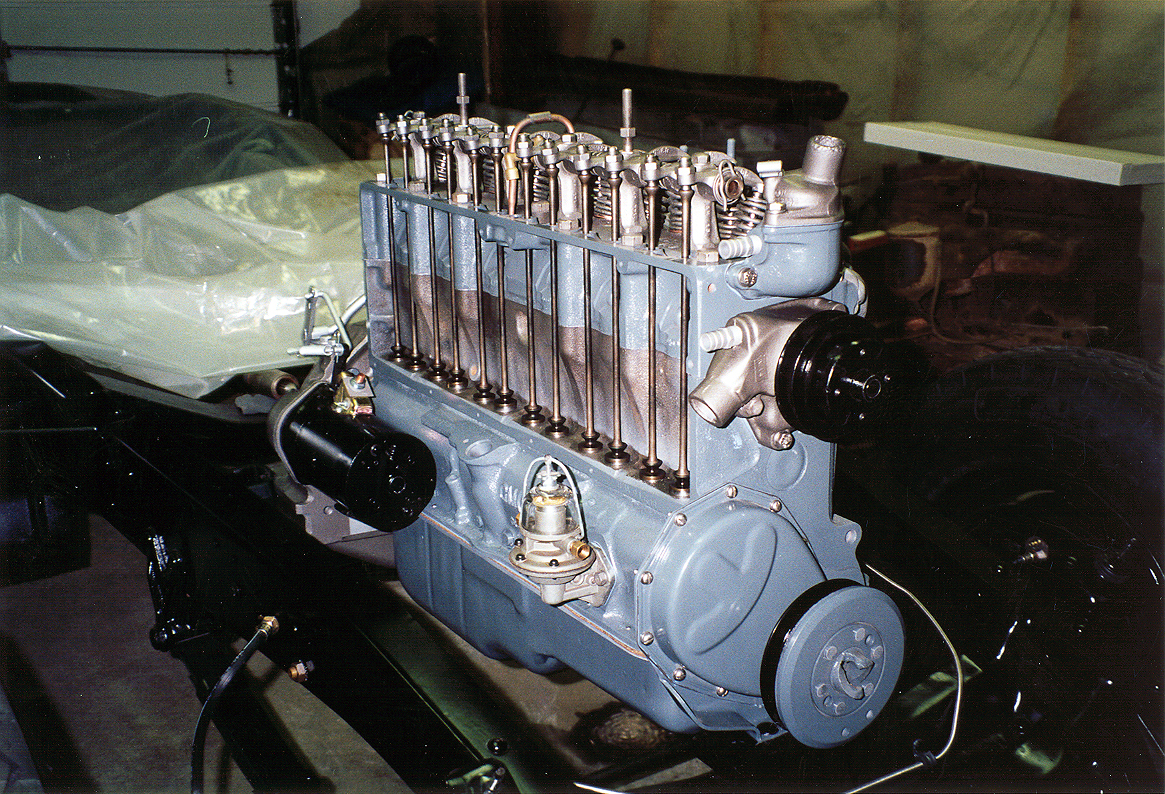
Here is the head all ready to be put back on. I did this after setting the engine in since I felt it would be easier that way.
A very short roll but it's a busy time of year for our business so I don't get as much done as I'd like... it's January 20, 2001. Time to start work on the cab sheet-metal but after a few other pickup projects get completed. Stay tuned for more!

With so many other projects under way, I have been slowly making progress over the past year. The carb has been
rebuilt and a few other misc. items have been completed. I am at the point where completion of the cab sheet metal
repair is next. It's November of 2002 and progress is slow, but sure!
Present Day Note: (October, 2000) This is about where a fellow came into my shop from the neighborhood asking if I wanted to purchase
his 1950 Deluxe Cab complete truck for $400. Then, one thing lead to another and I put this project on hold and
started the other one. The work that was done 12 years ago still looks as pristine as ever since my projects are all
in a climate controlled environment and I will get back to this one, it's just that the new project gave me some
new insight on things. You see the project you have been reading is slated to be 100% original, while the Deluxe Cab
project will have many tasteful improvements. Decisions were based on which one had the most rich educational content
in the fastest time. It enabled me to share many How-To articles with you that wouldn't have existed until much later.
Check out the Deluxe Cab project next!