


Deve's Technical Network
1947-1955 1st Chevy Trucks
216/235/261 Engine Solutions & More
This instruction was composed using the Juliano's Retractable 3-Point Shoulder Harness with Soft Arm (JU016300 Series) which comes complete with all of the necessary hardware to mount the system securely. The hardware kit is also sold separately. Pricing as of this writing (April 23, 2005) was $89.95 per side.
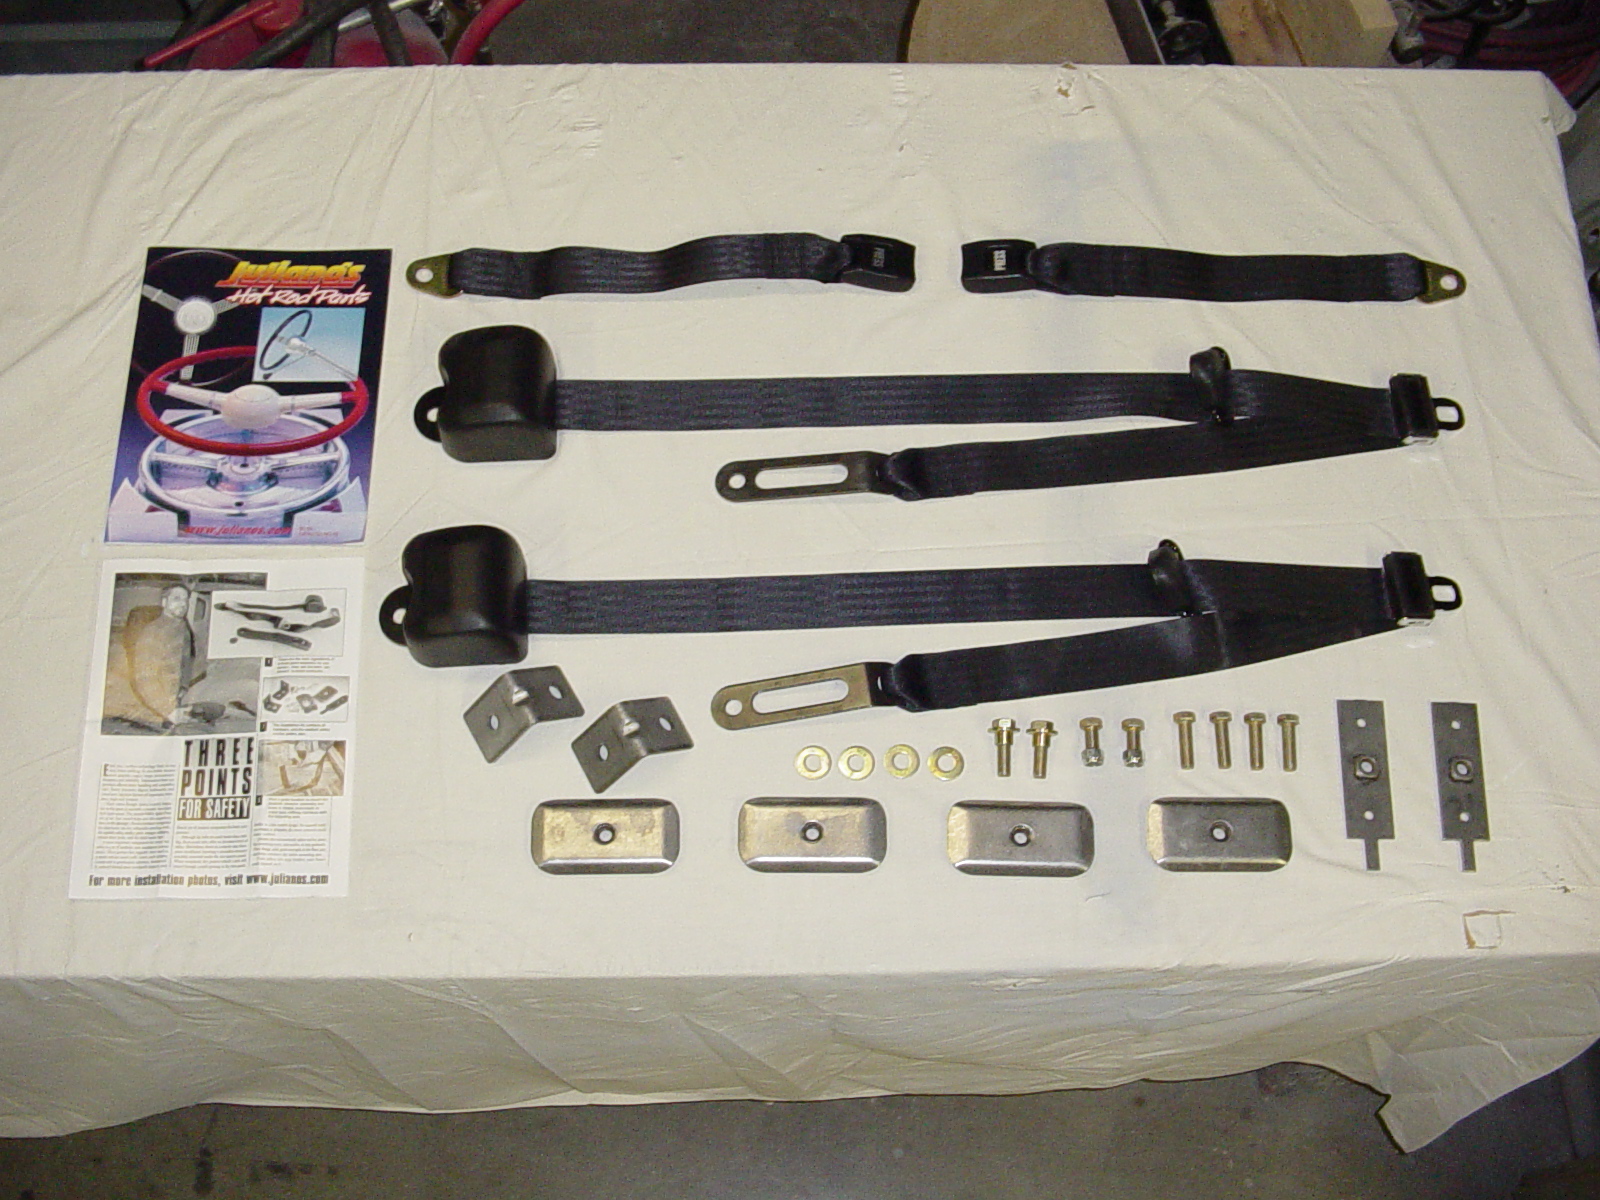
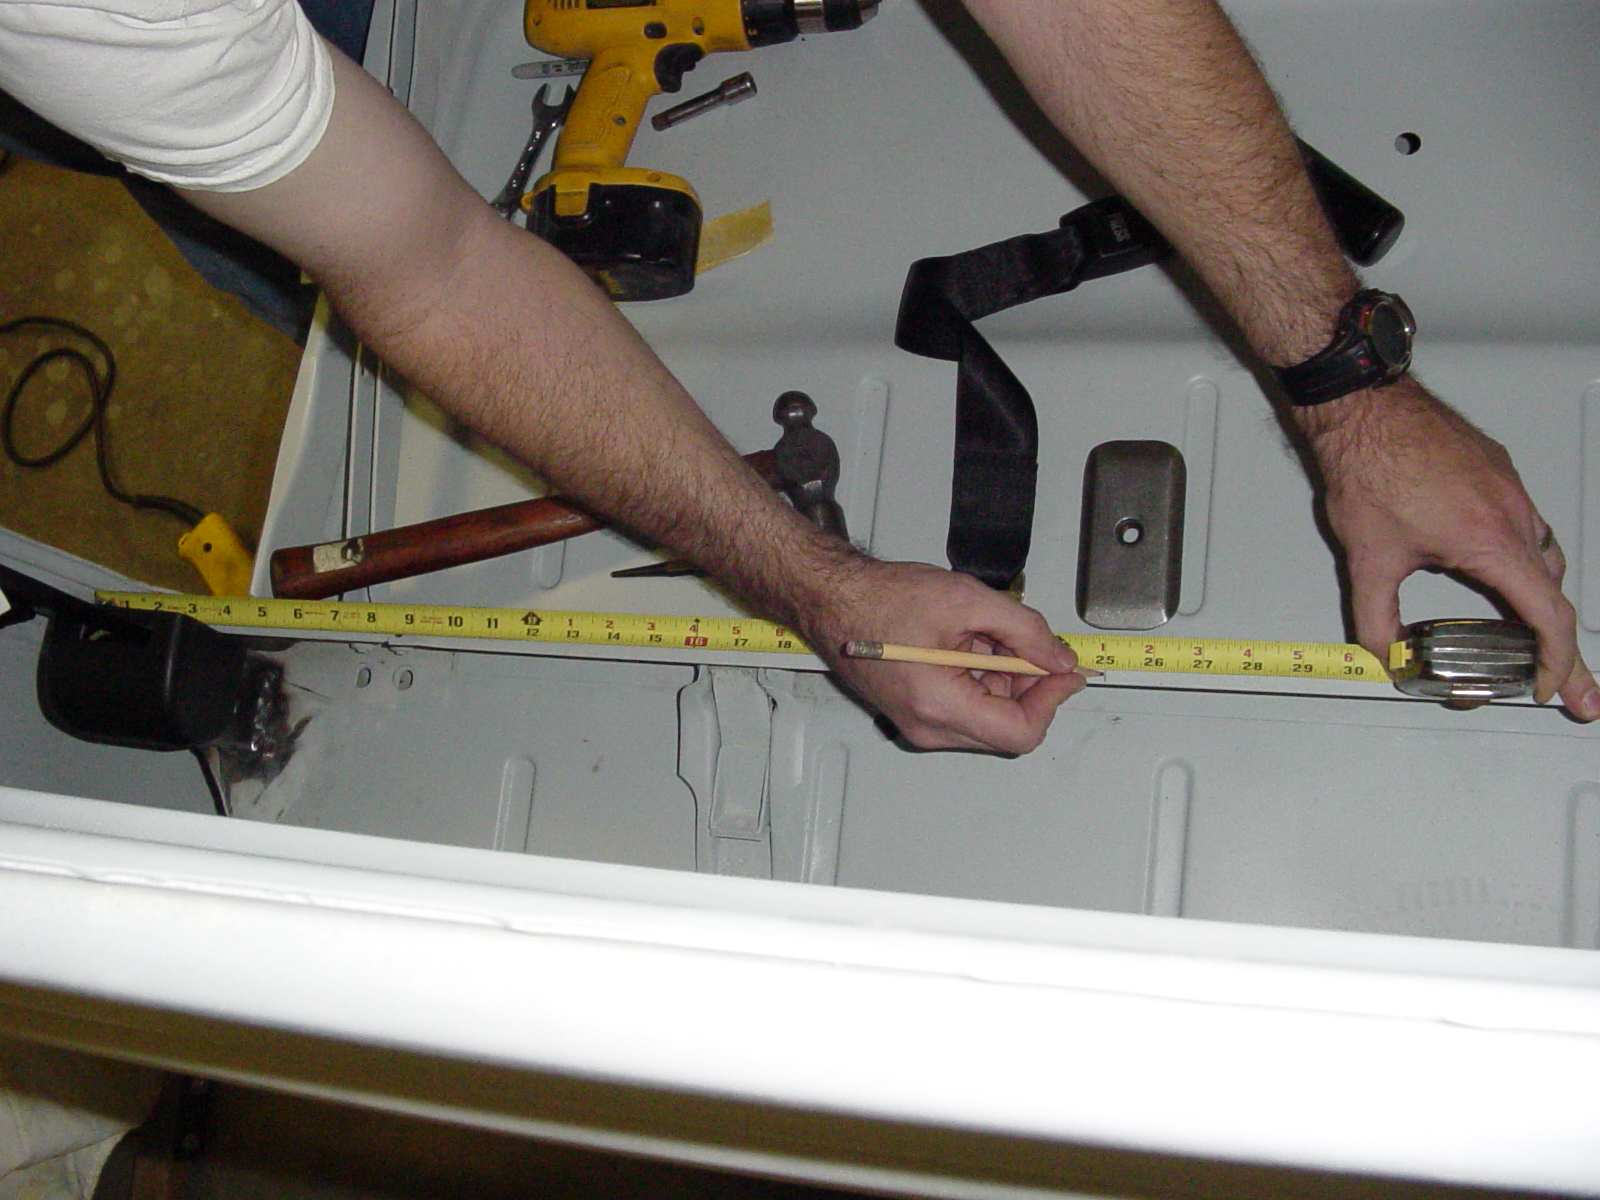
Survey the Juliano's Kit and read the accompanying document to familiarize yourself with the parts. After measuring several vehicles to determine proper height placement for the top pivoting shoulder harness bolt, it was determined that 41" off the floor of the cab was the proper height to ensure the harness isn't too low or too high for the average person. This number is variable, however, due to the height of the person. Vehicles measured from the top of the seat bottom to the bolt hole varied anywhere from 26" to 30". Most trucks are at 28" which equates to 41" off the floor. So happens, for our trucks, this is about the perfect location anyway providing for the best structural support.

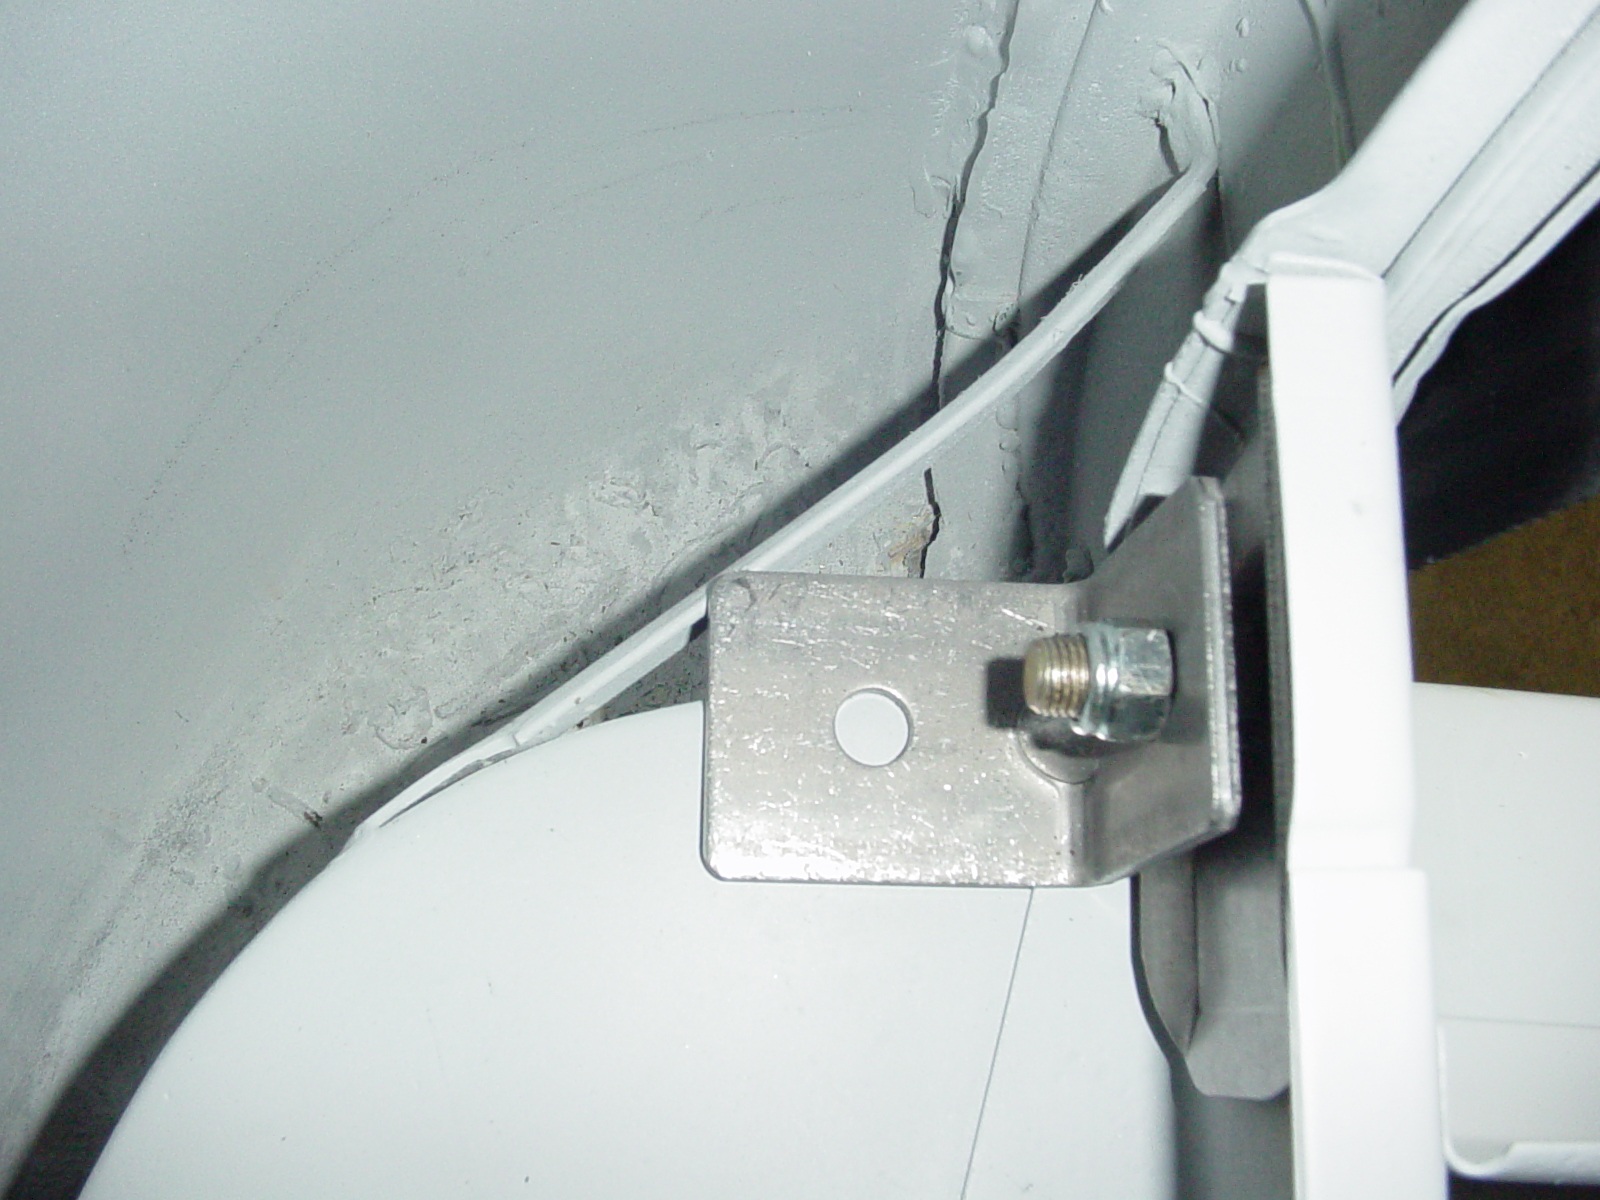
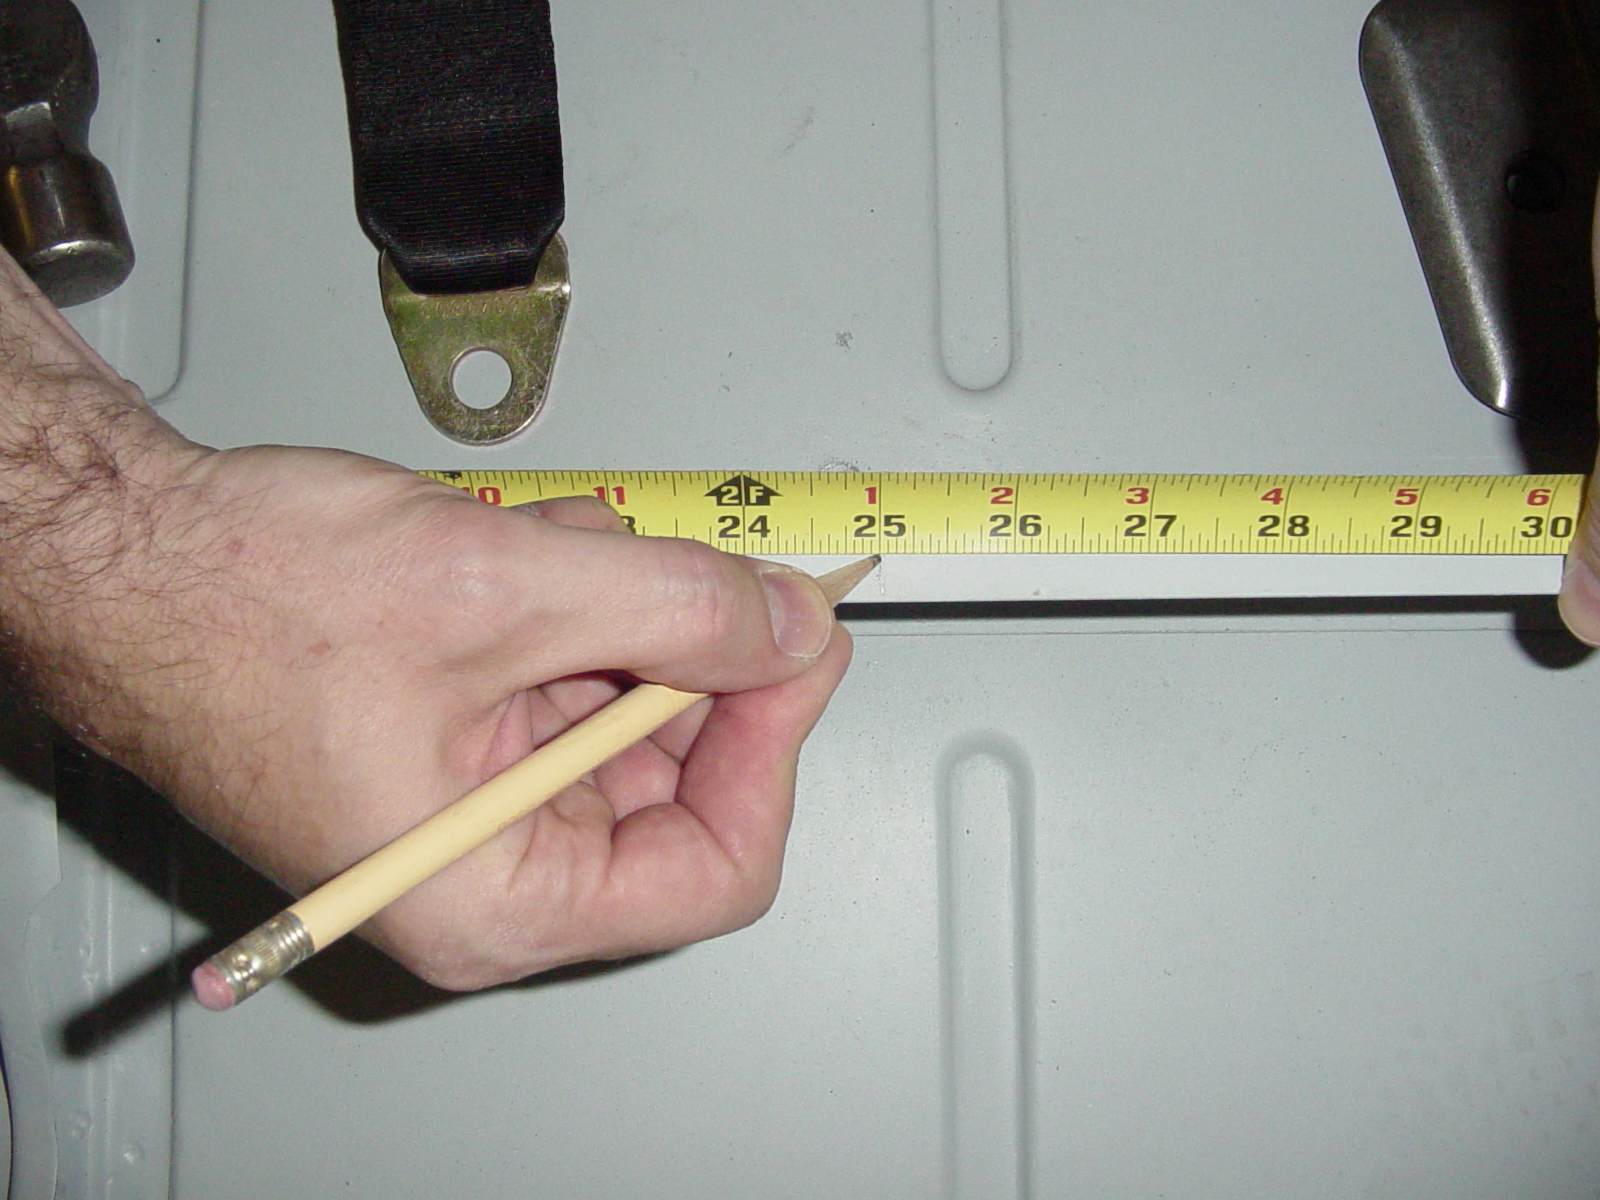
Make a mark at 41" off the floor of the cab as shown. Center the mark on the post as much as possible. As you can see, the 5 Window cab complicates matters so we will use a 5 window for our install. If you are installing on a 3 window standard cab, you can just put the plate behind the sheet metal in approx. the same position without cutting. You will have to remove or at least loosen the back corners of the headliner because you will be installing a plate behind the dual layered area of the post.


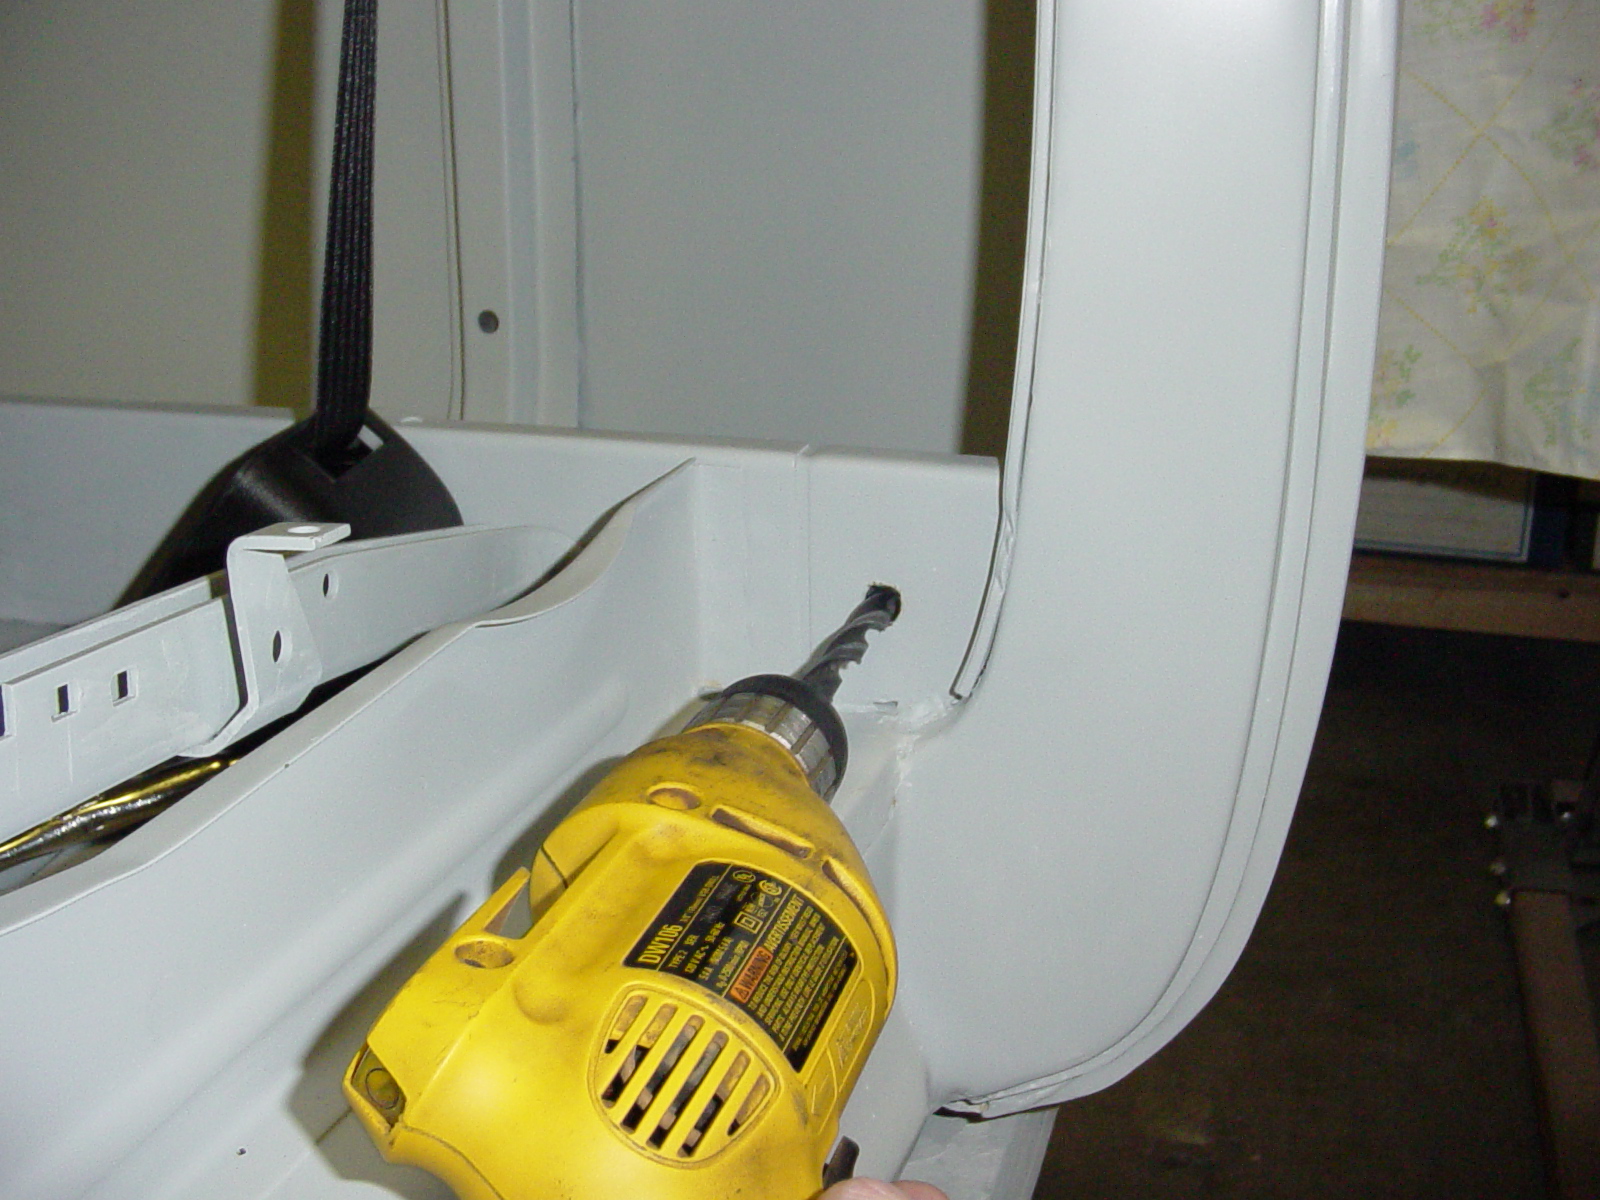
Next make a cardboard template of this area as shown that you can fit behind the sheet metal. Clamp the template in behind securely, then drill a 1/8" pilot hole on your 41" mark making sure to drill through both the metal and the cardboard.
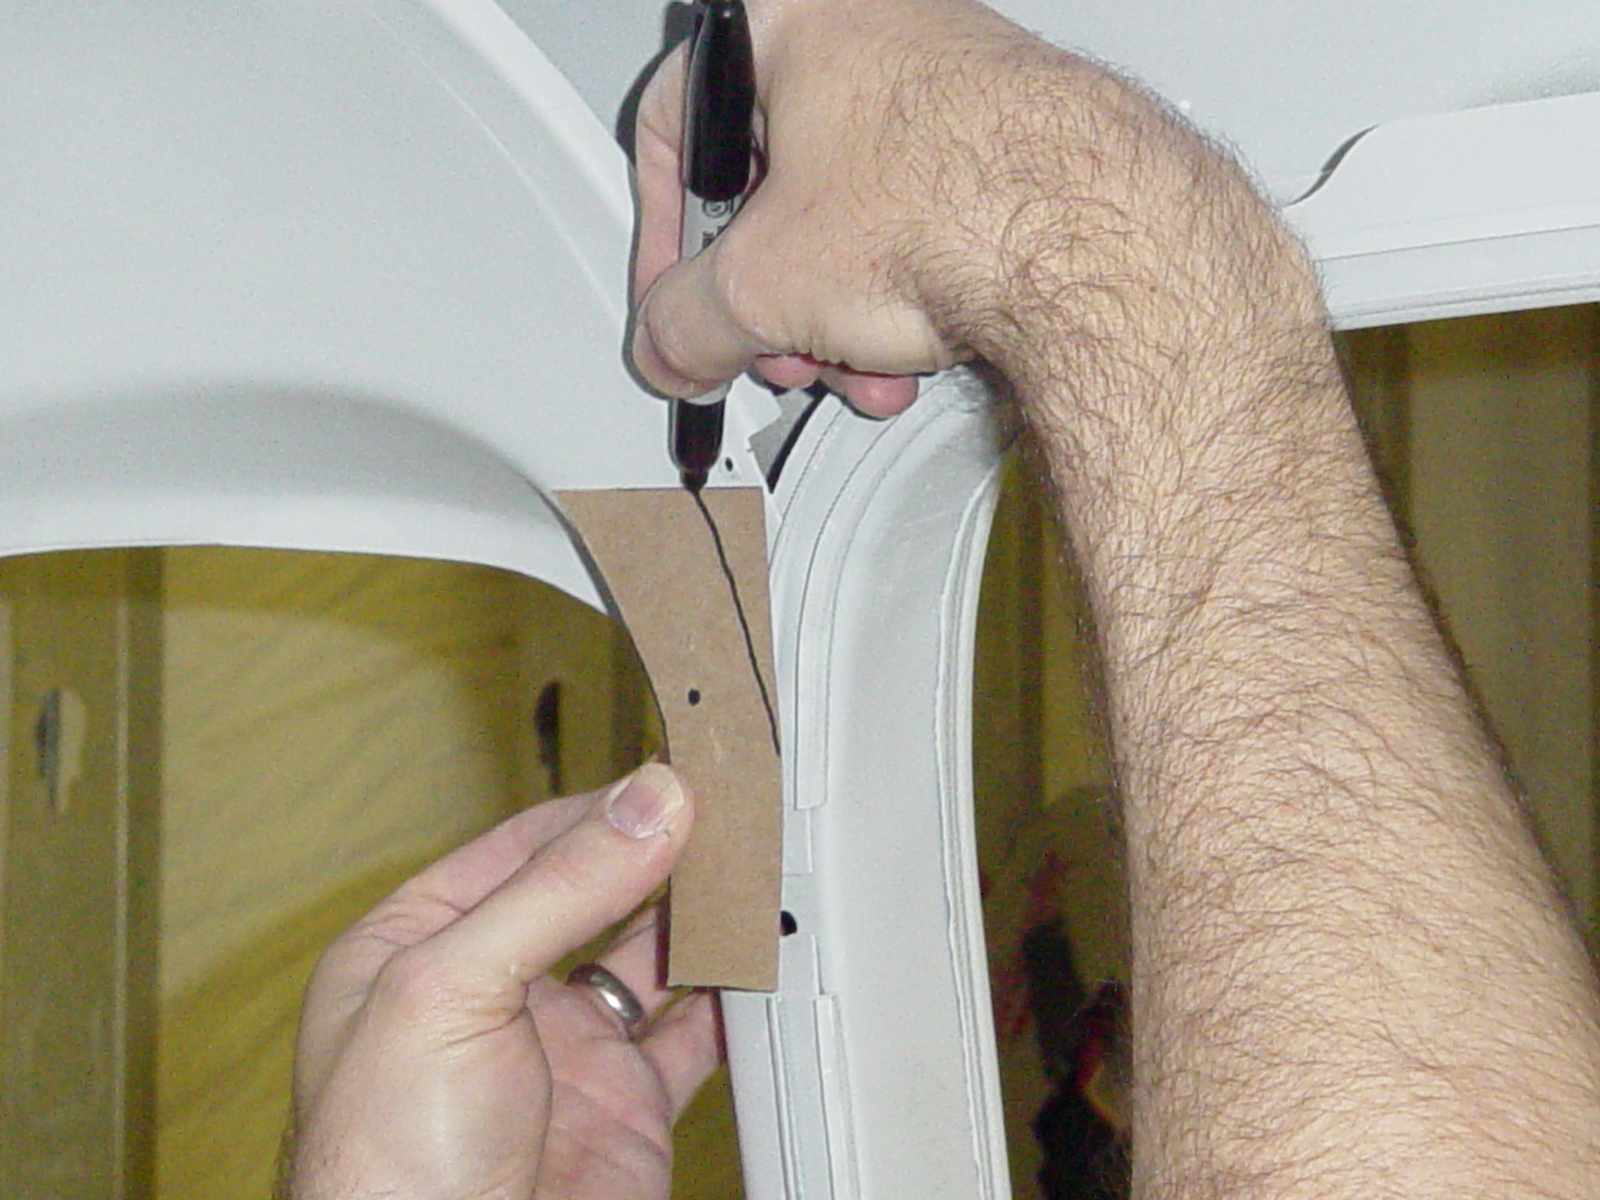
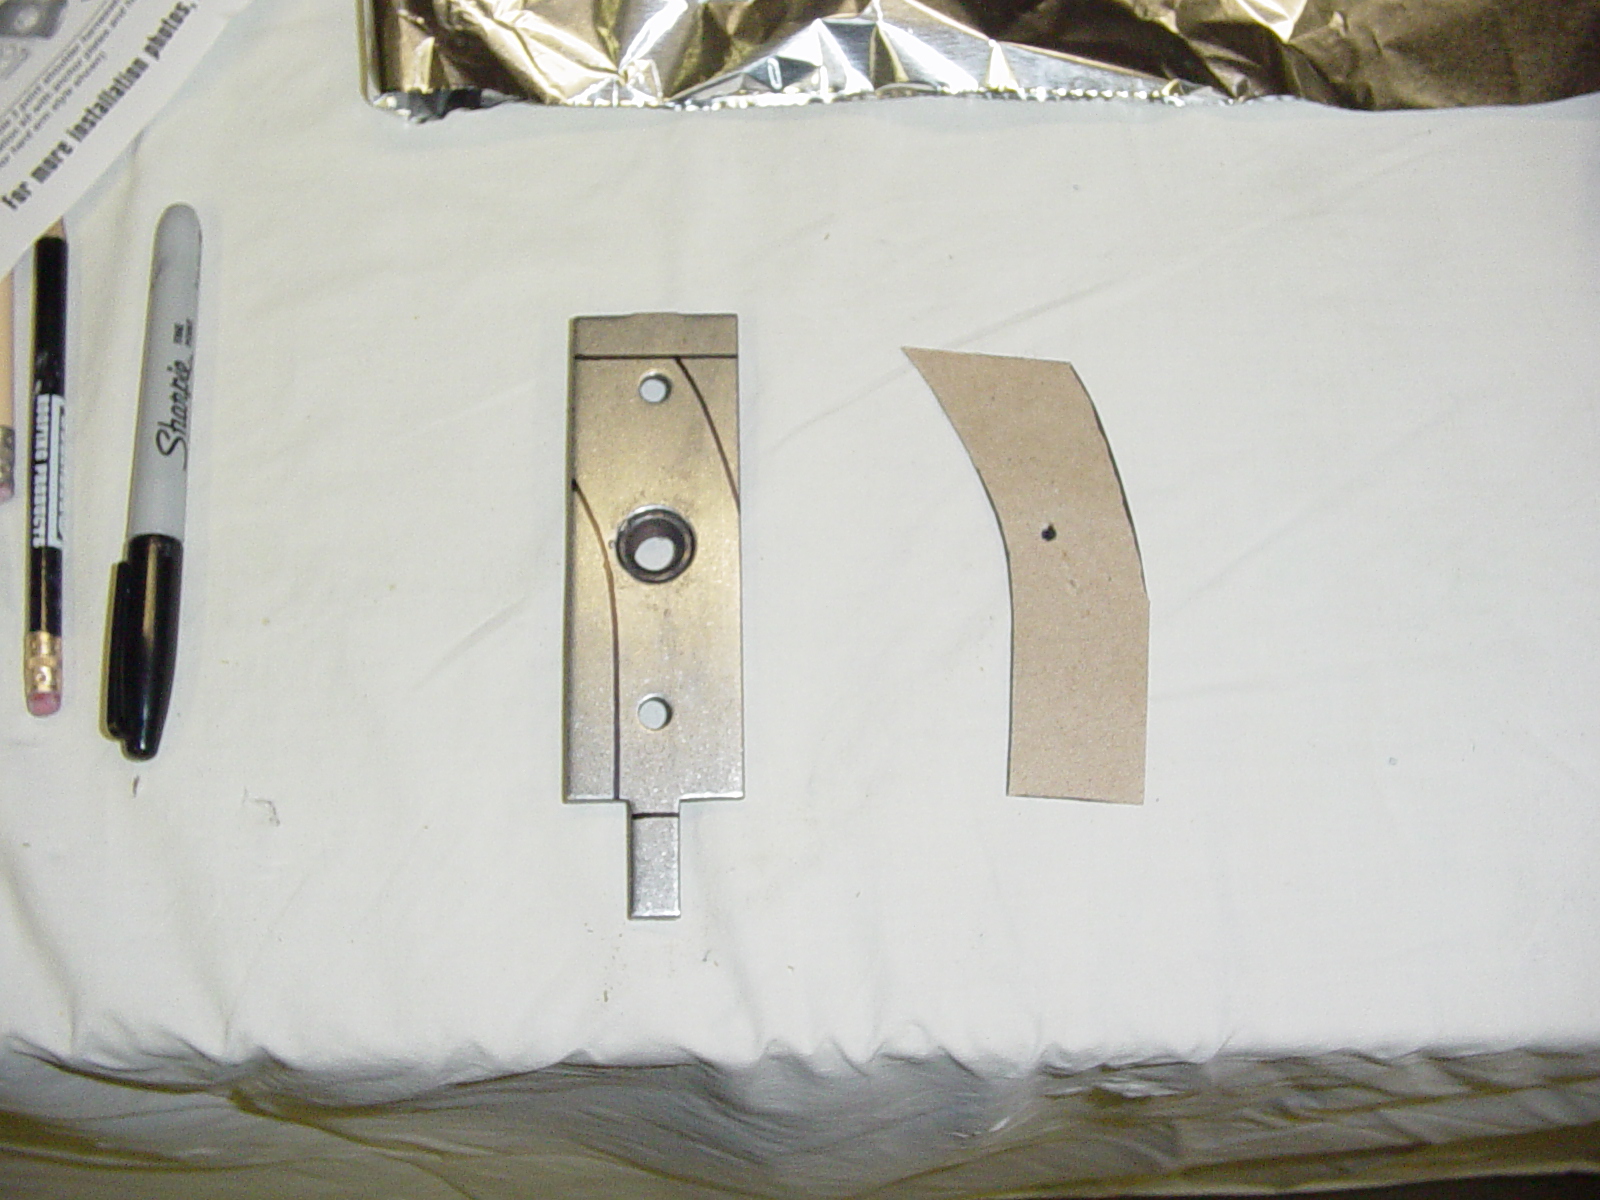
Because of the headliner screws, you will also want to taper the template (and the metal plate) so it doesn't interfere with the headliner installation. Remove your template and lay it over the Juliano's provided metal plate as shown.
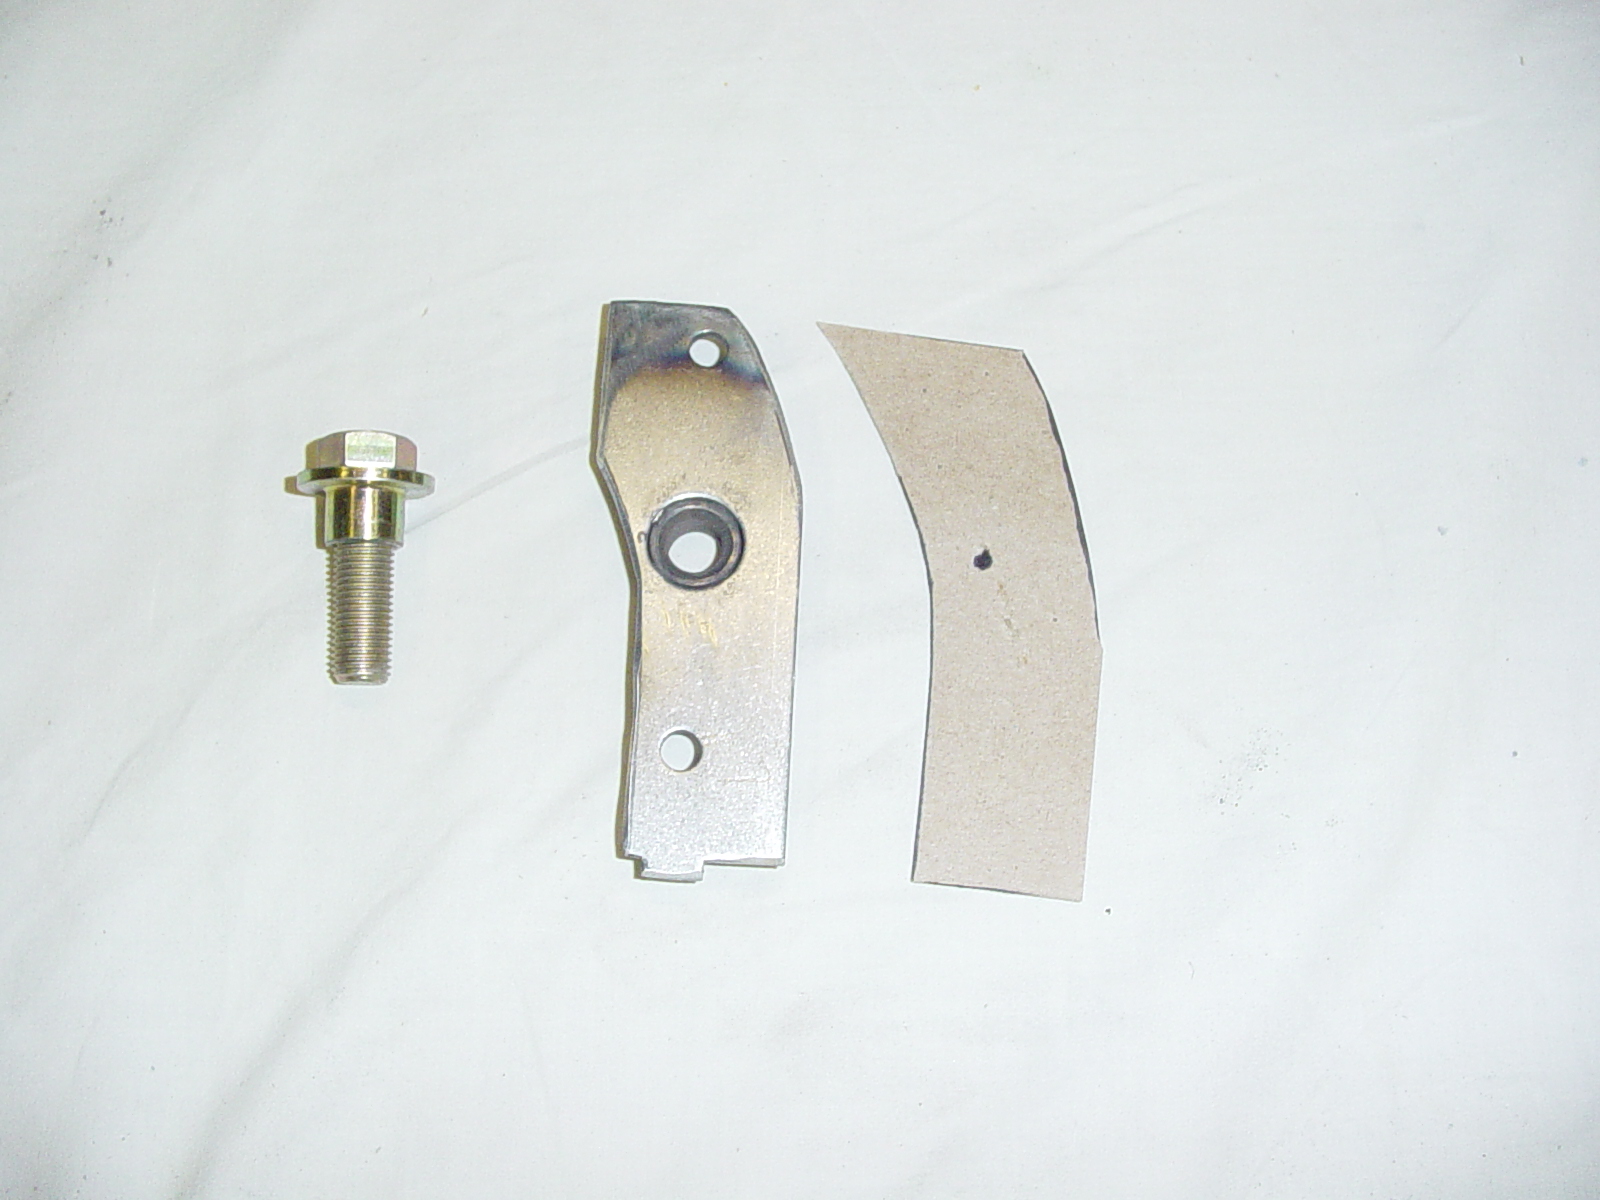
When you have your plate properly marked, make the cuts. I like to cut a little big. You can always grind it down if it doesn't fit. I used a thin cutoff wheel on my 4" Makita grinder to make the cuts, then a standard grinding wheel to round the edges of the metal slightly all the way around the piece.
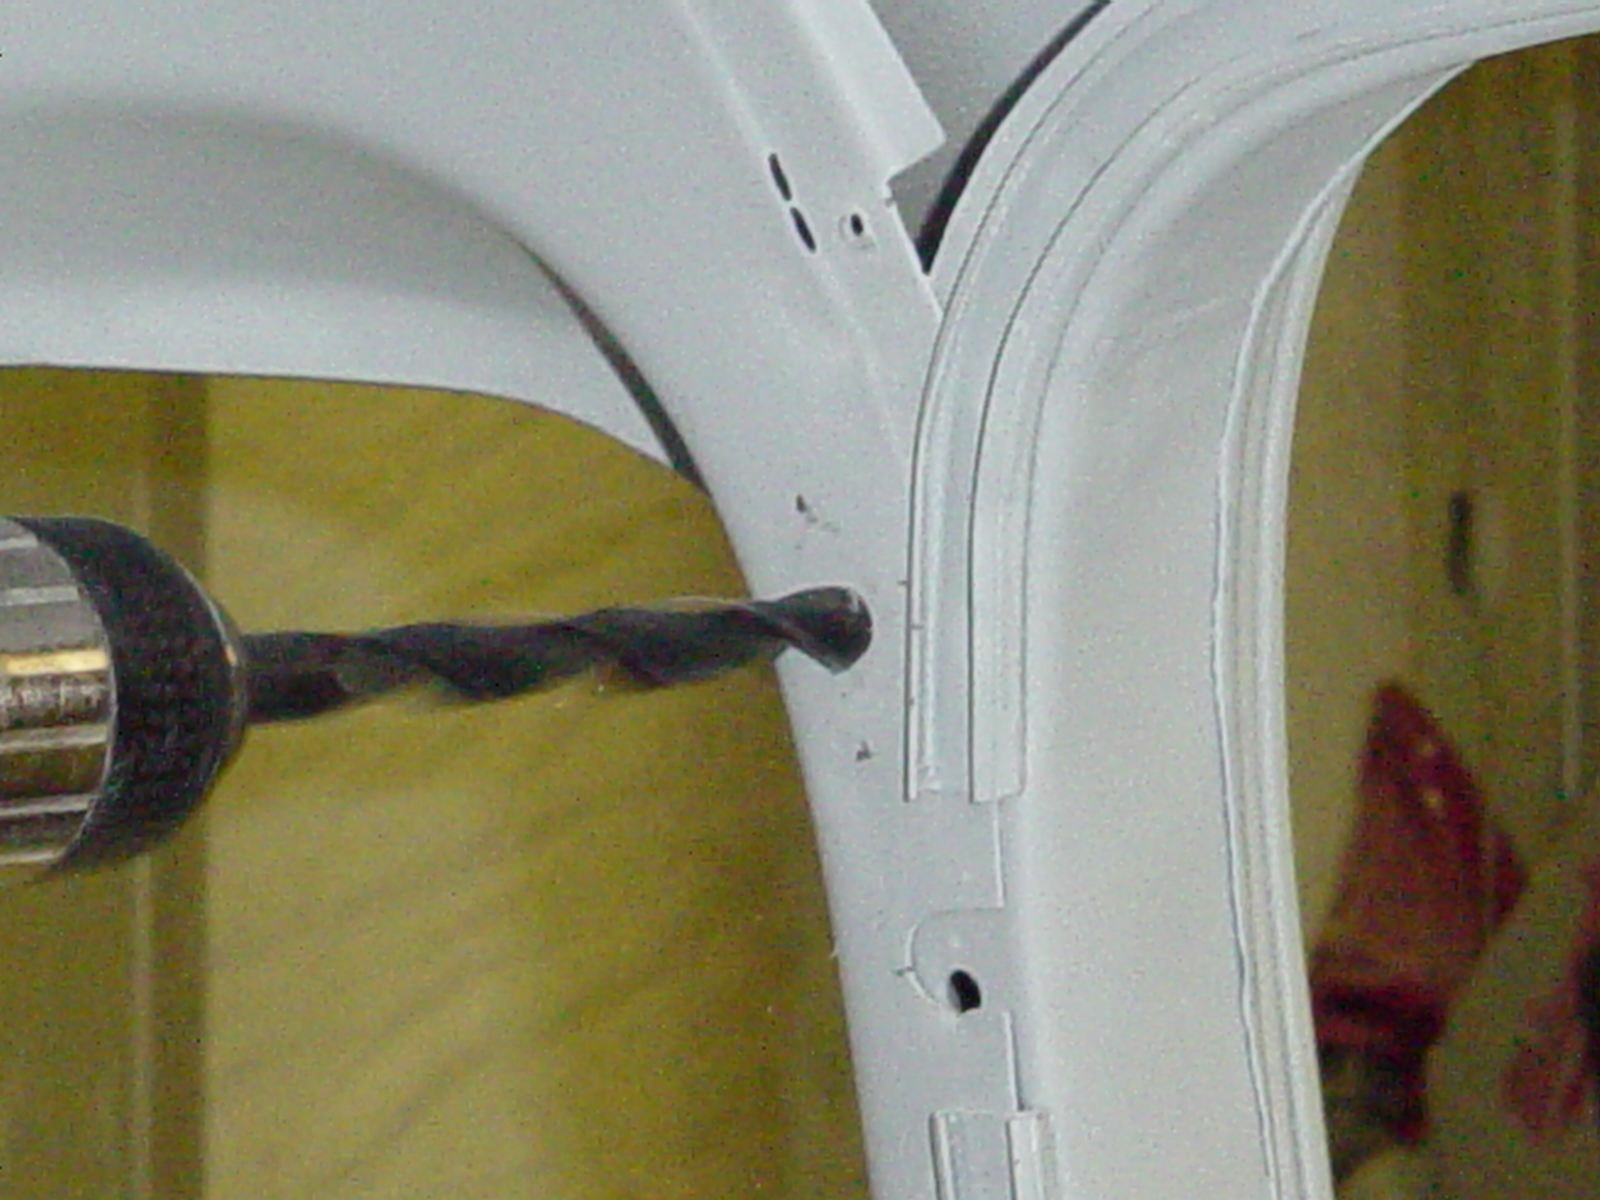
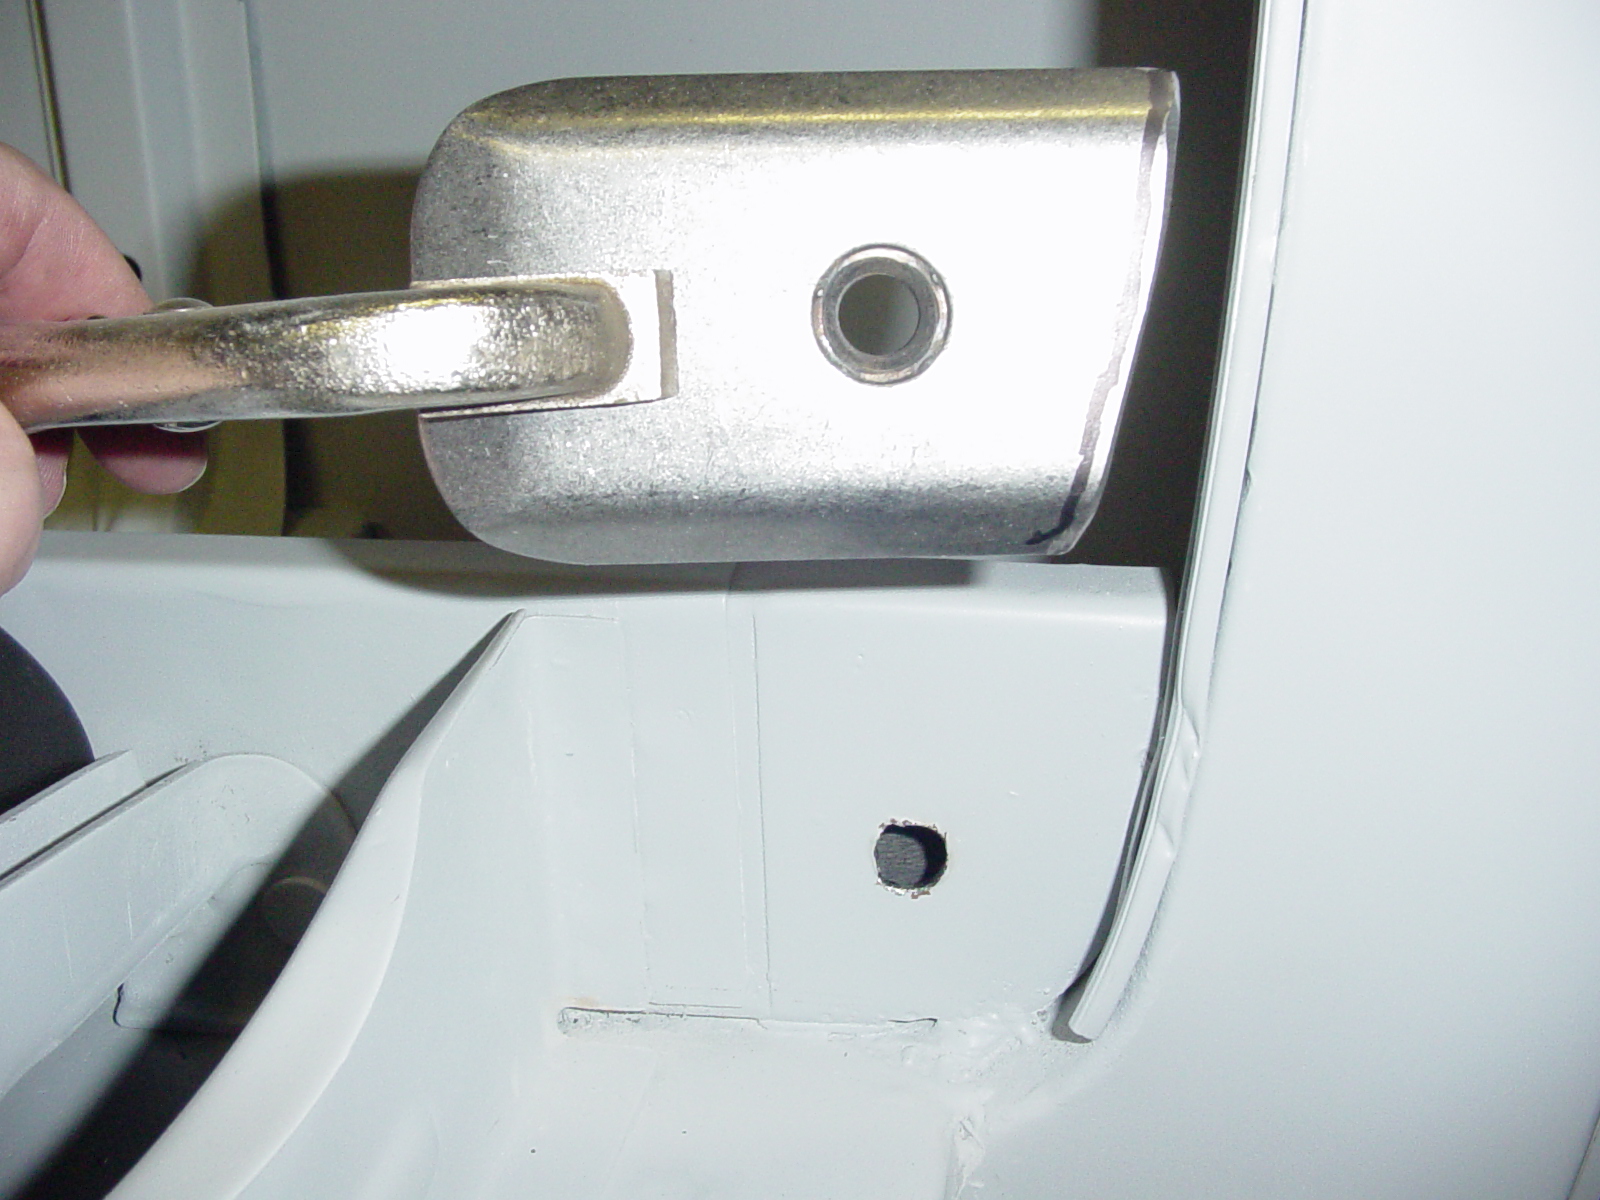
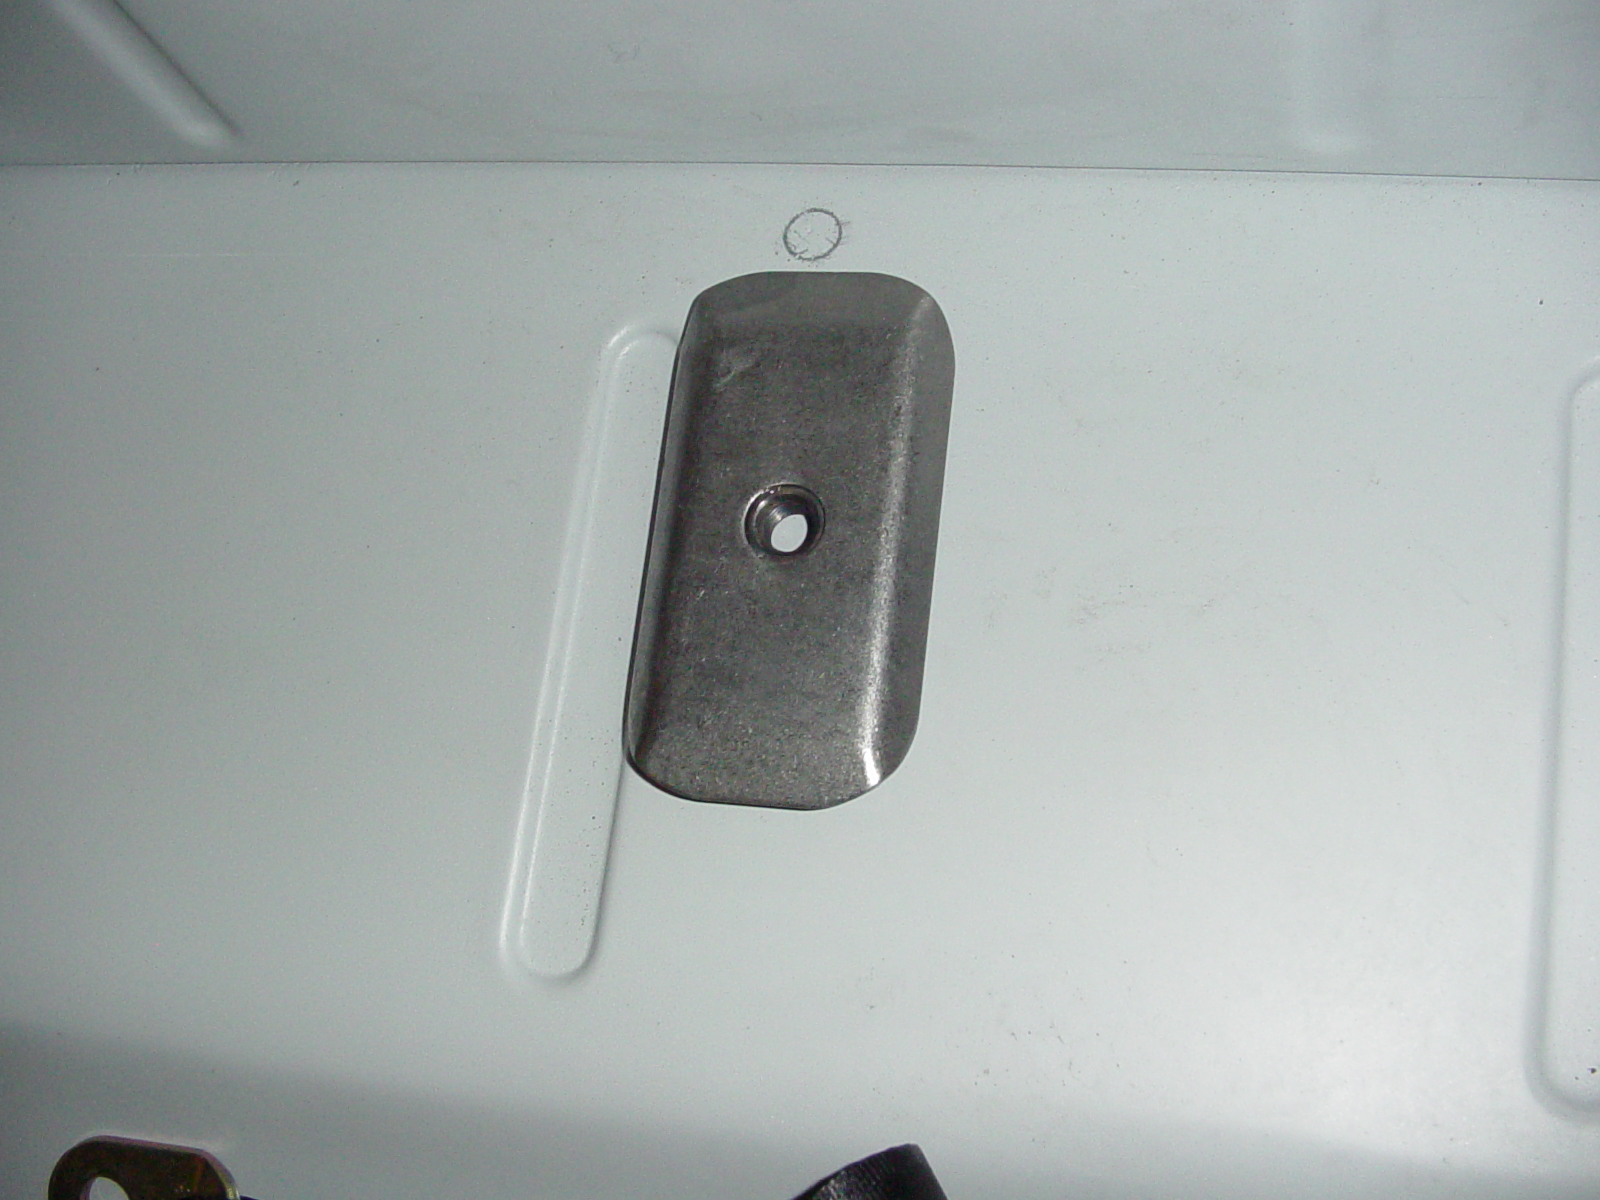
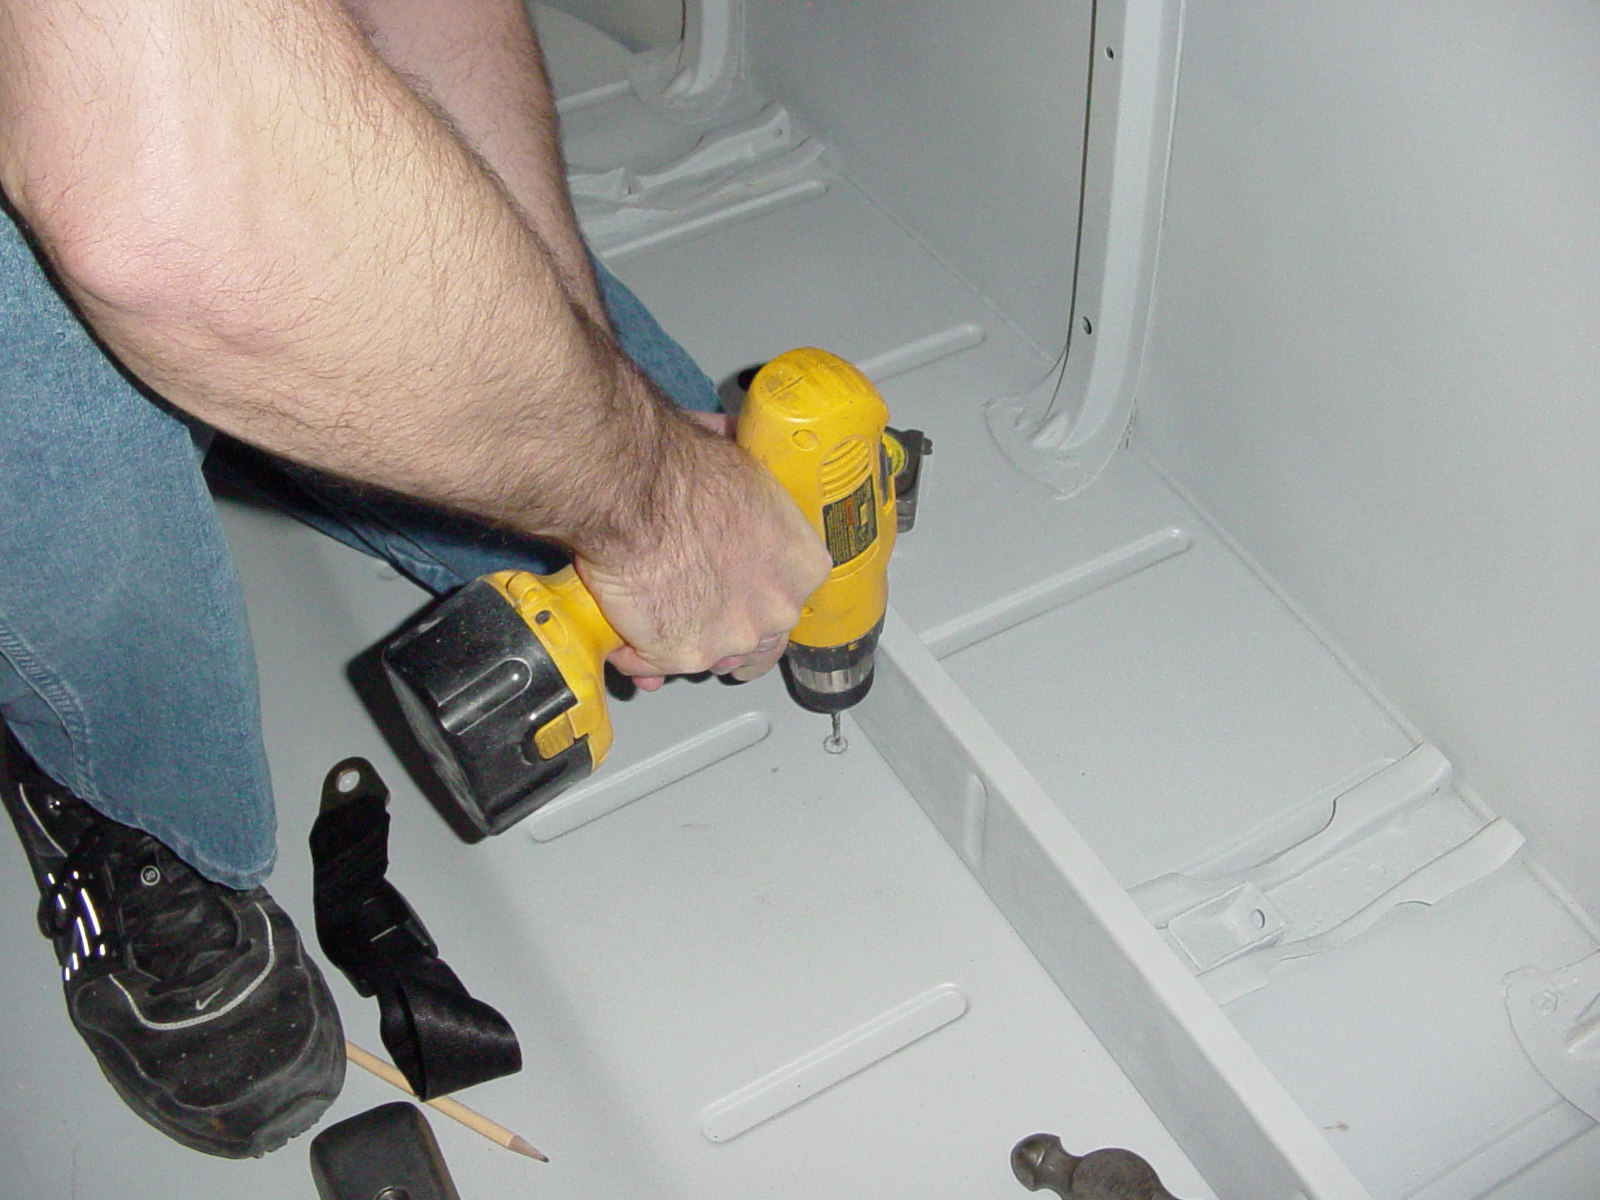
Test fit the new plate by placing it behind the post and eyeball the pilot hole to be sure it appears to be centered. If you like what you see, drill out the pilot hole with a 7/16" drill bit and test fit again putting one of the Juliano's provided short bolts into the hole and bolting it down.
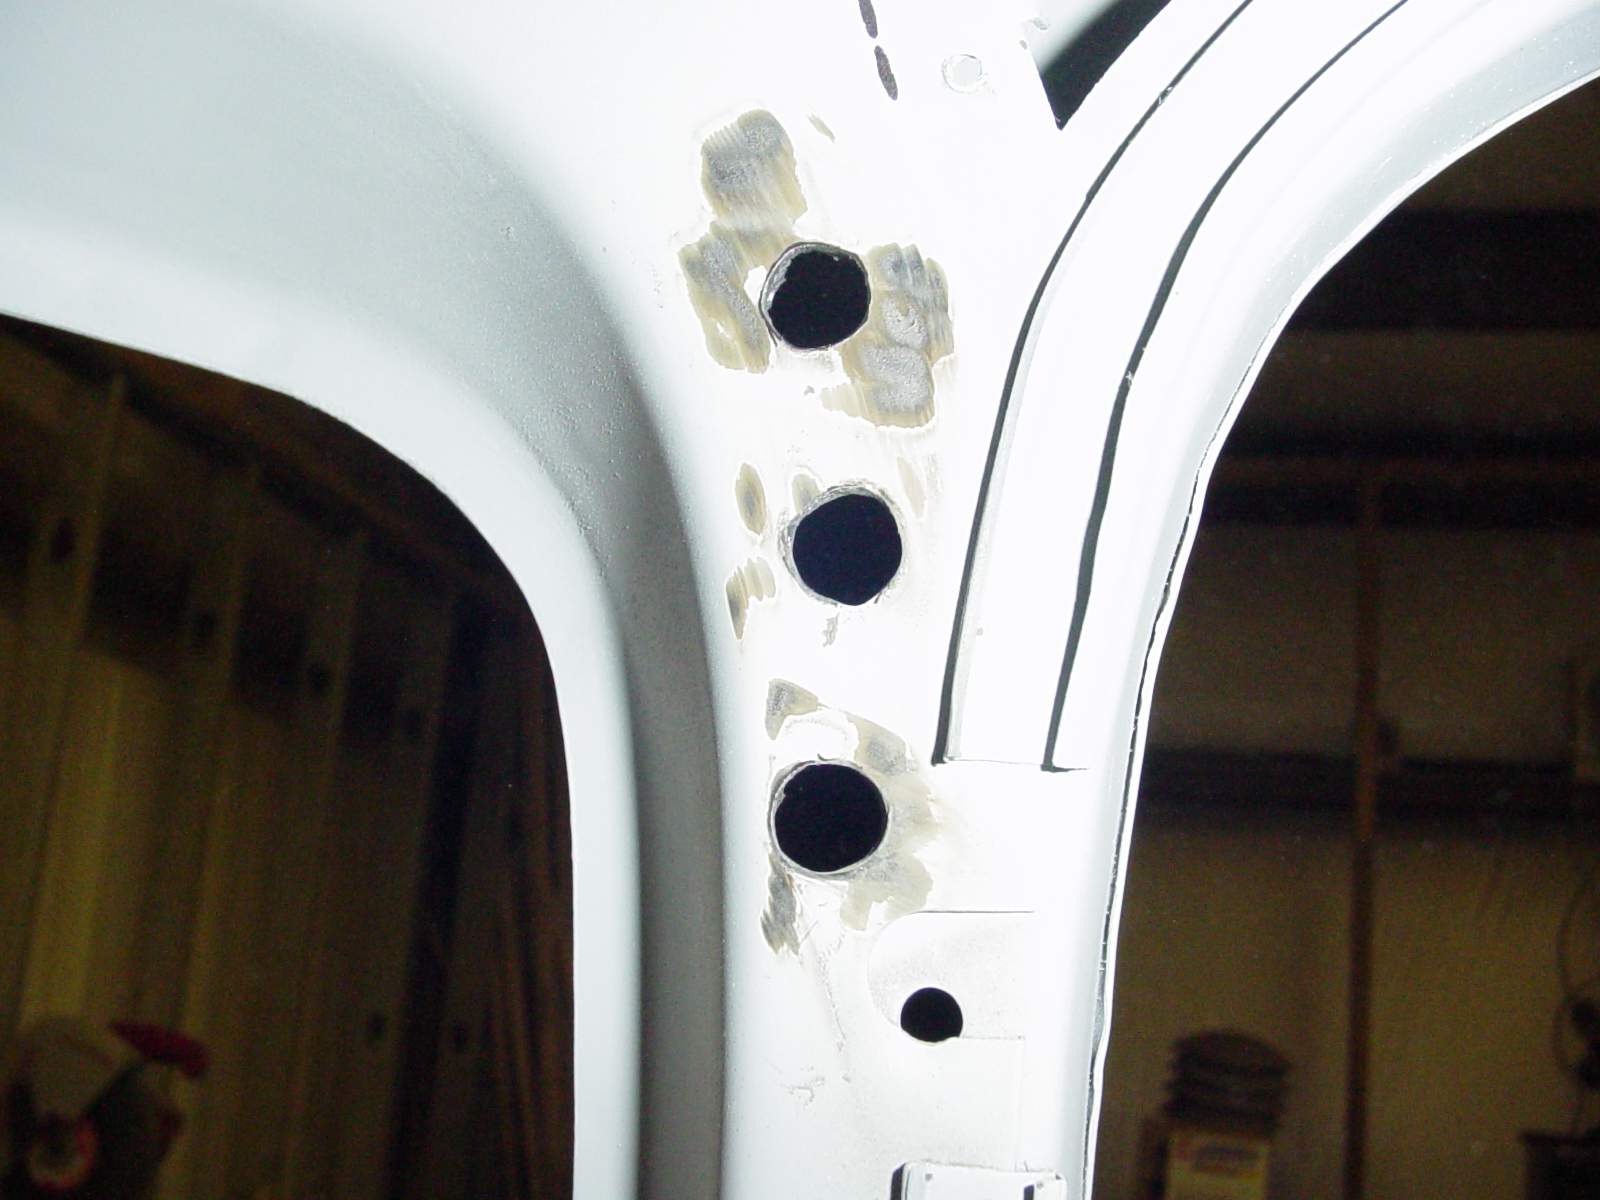

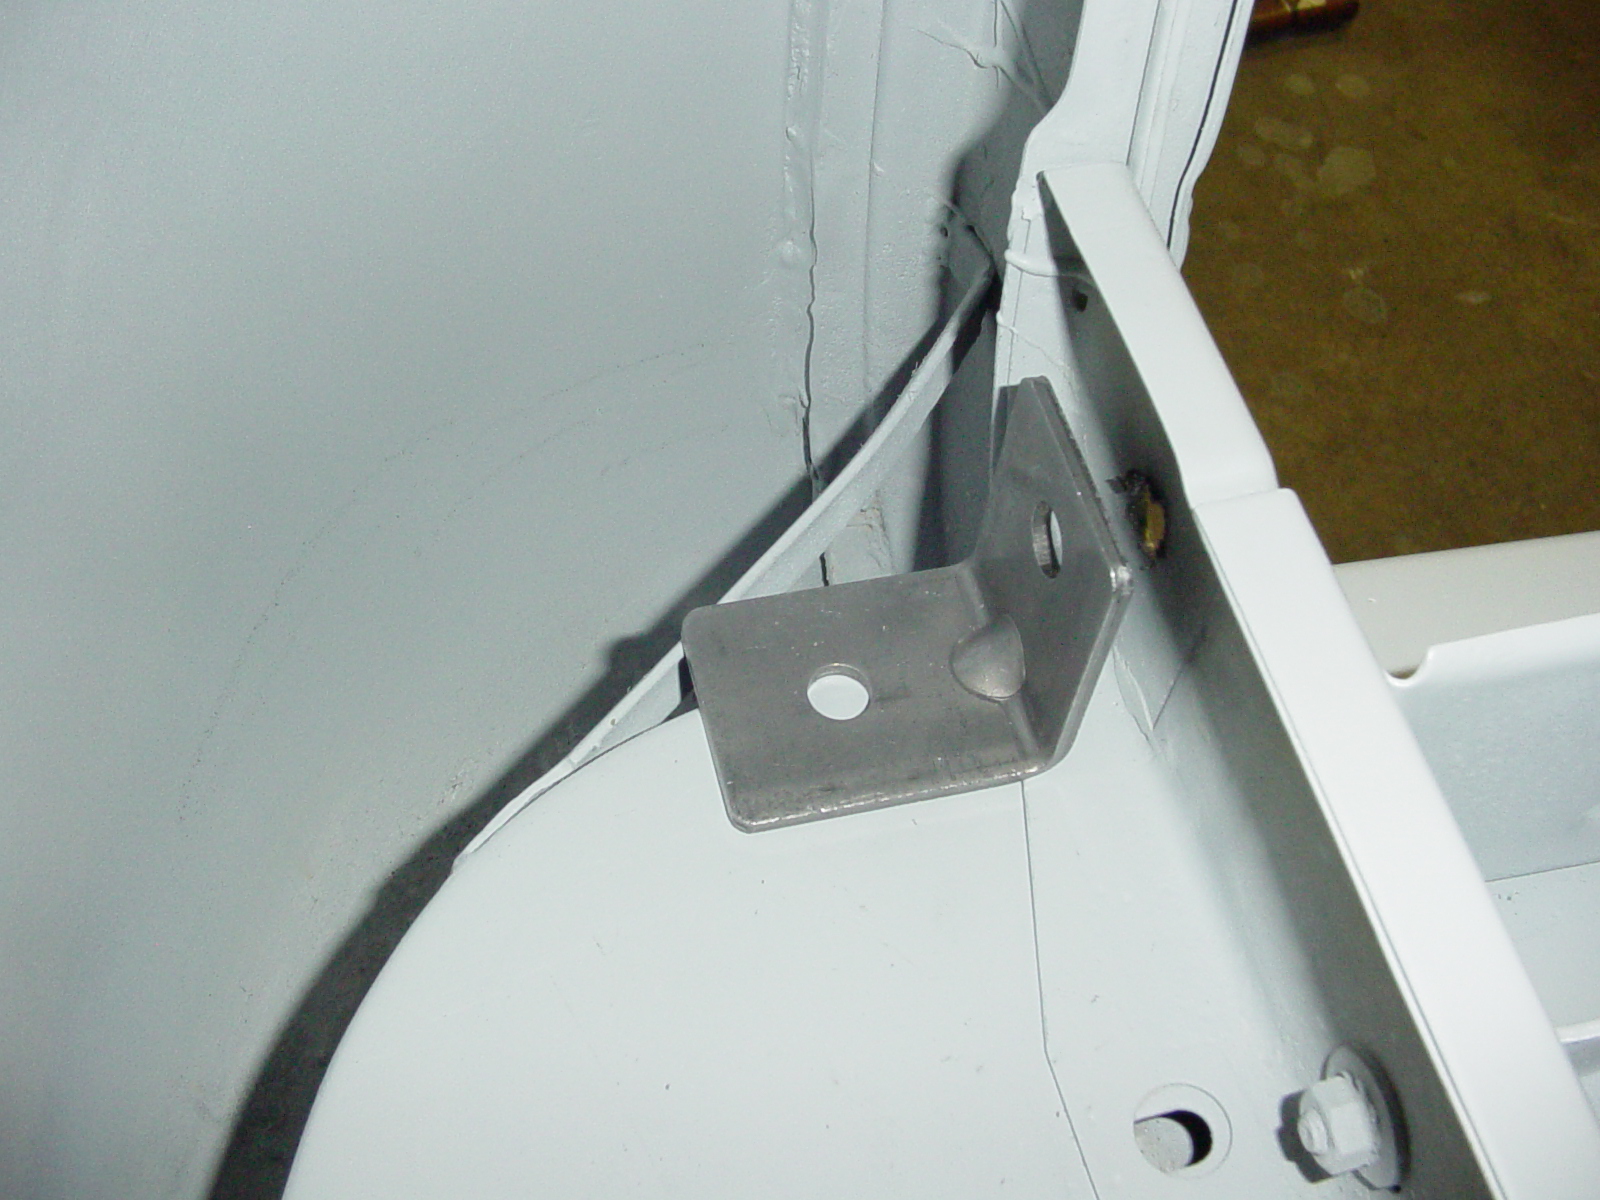
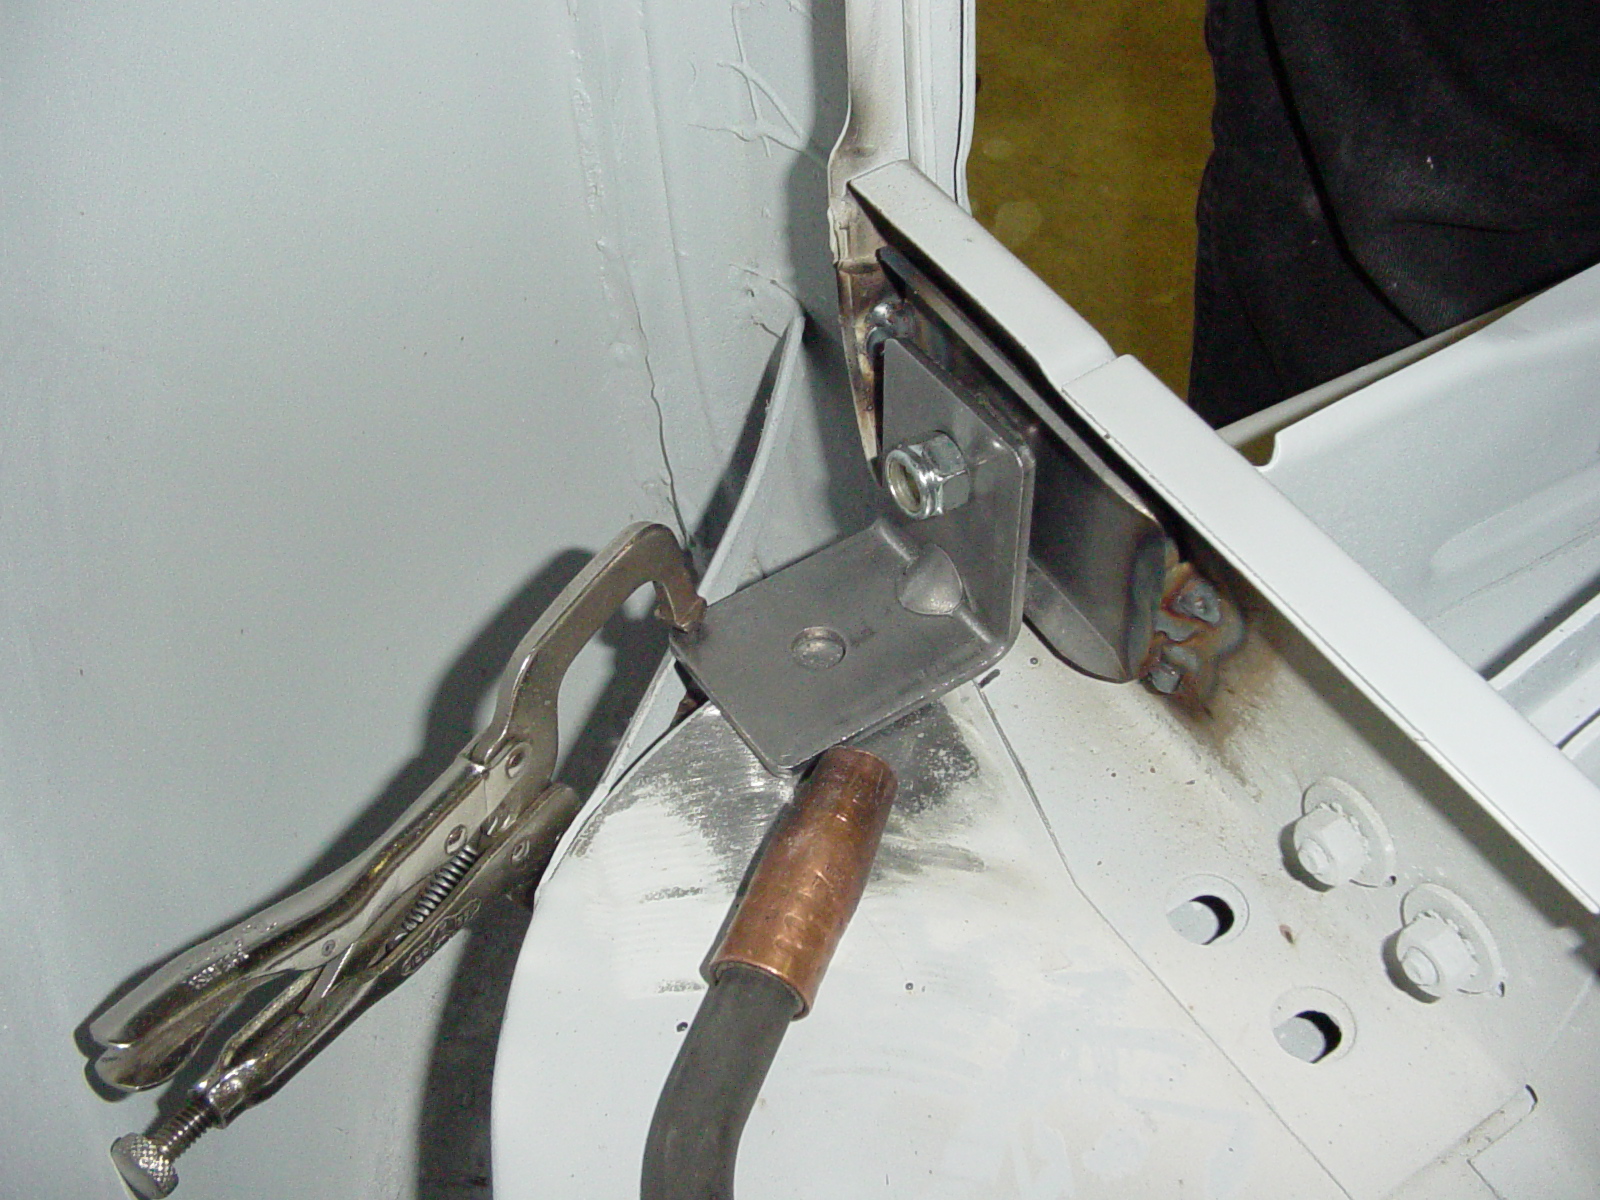
Determine where you want to drill two more holes in your cab sheet-metal, one above the 7/16" hole and one below for the purpose of spot welding the plate in place. It's also necessary to slightly bend the custom plate to conform to the contour of the cab.

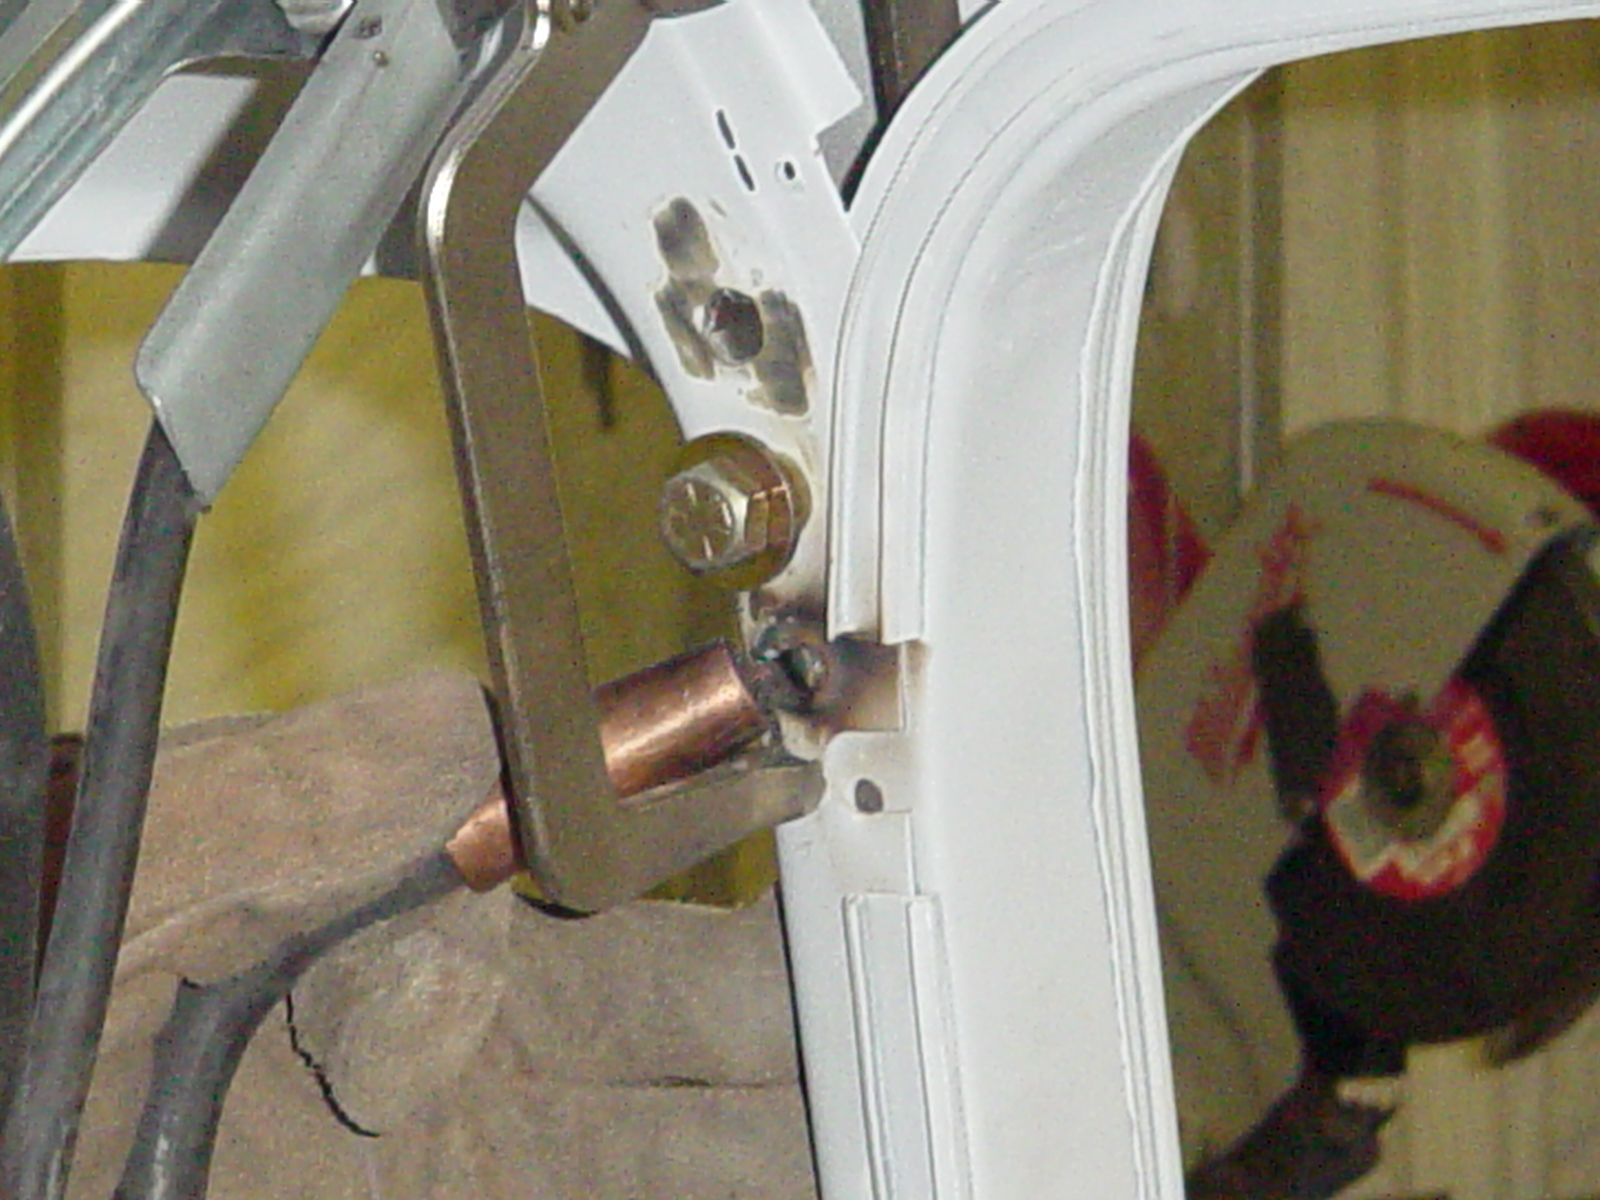
Once your holes are drilled and properly dressed, install the plate using one of the Juliano's provided shoulder bolts and tighten snugly. I augmented the pressure with a welder's vise grip clamp to keep up the pressure for welding. Weld the plate in place by applying enough heat and material to ensure a secure weld.

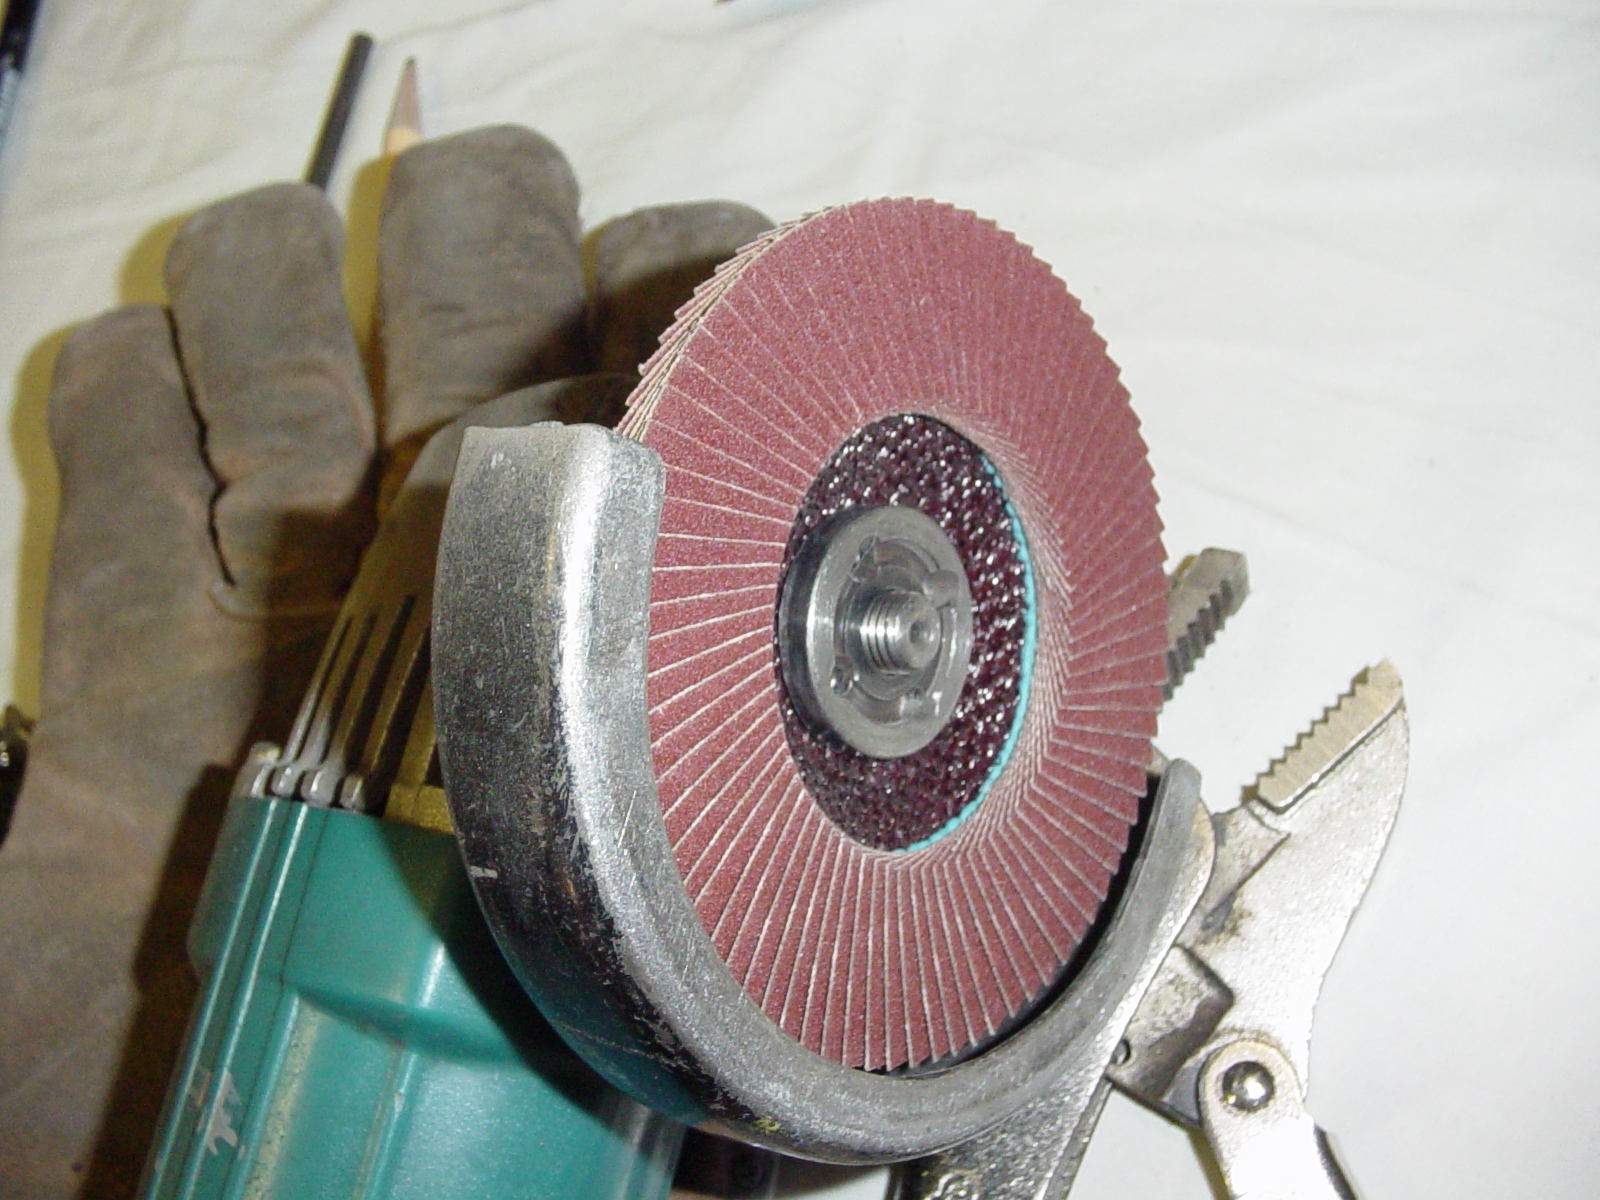
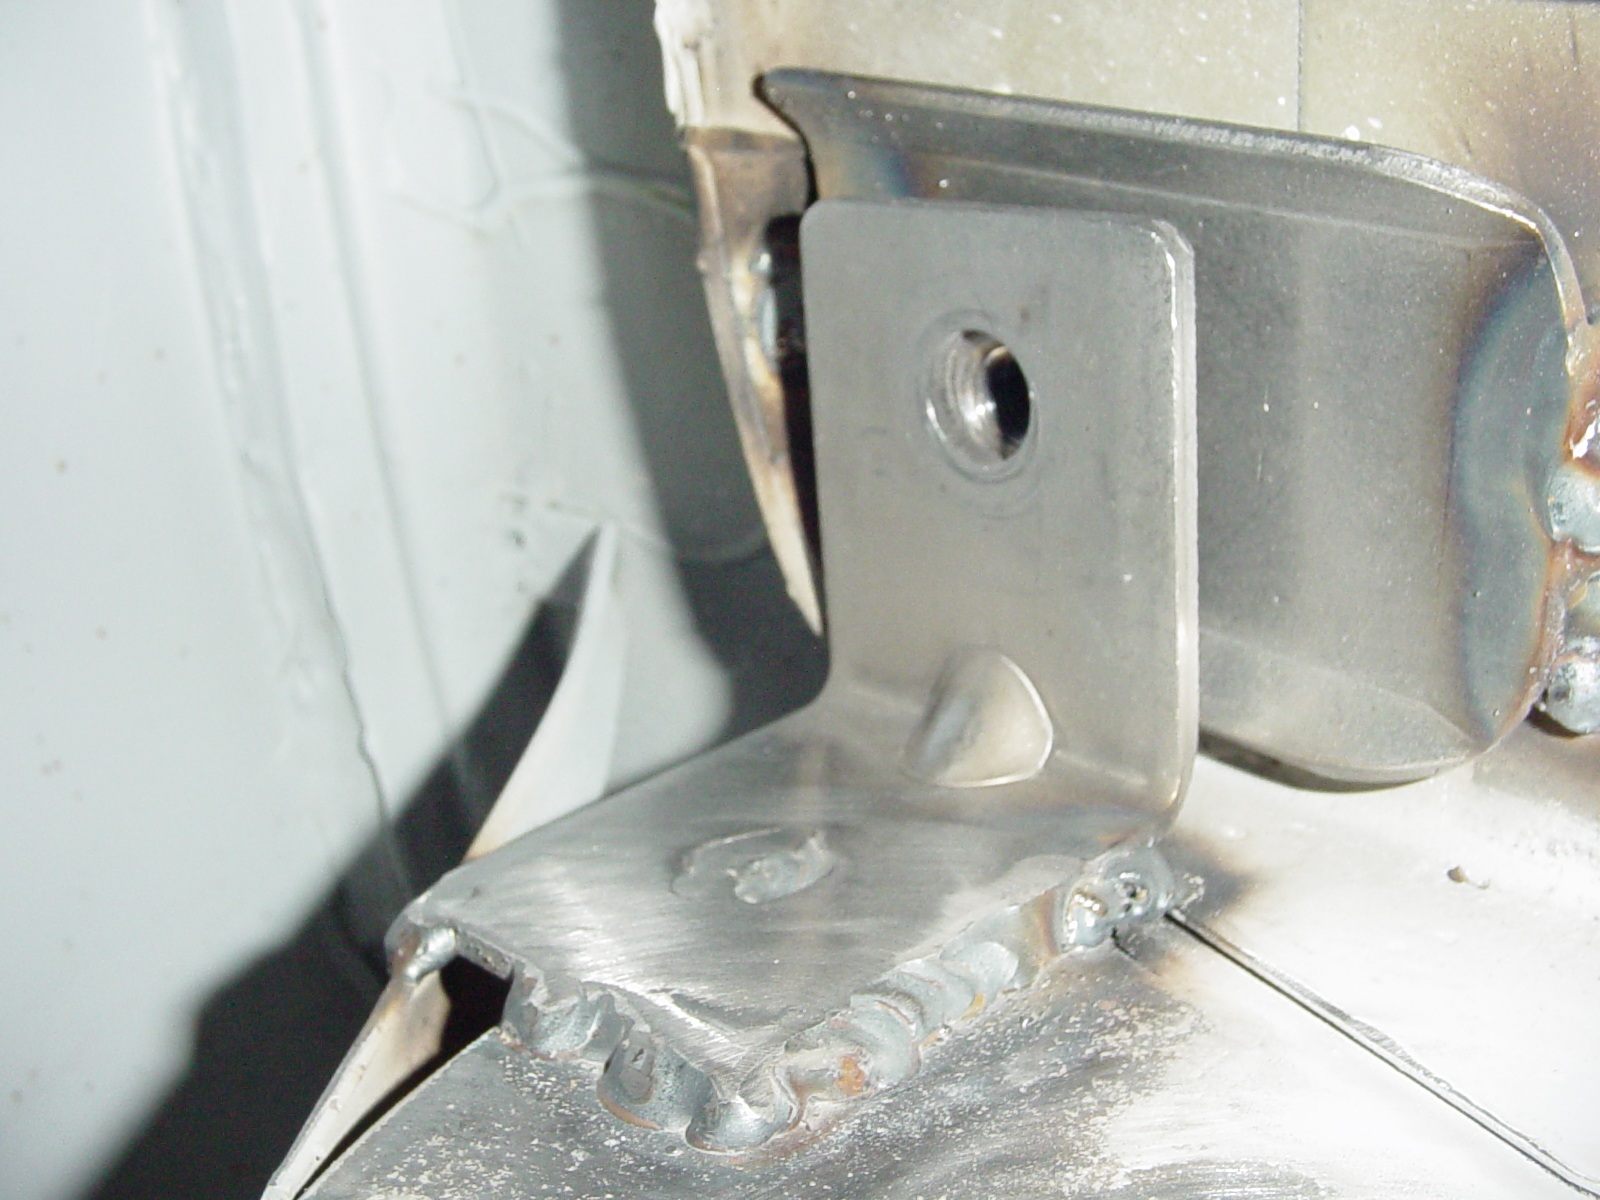
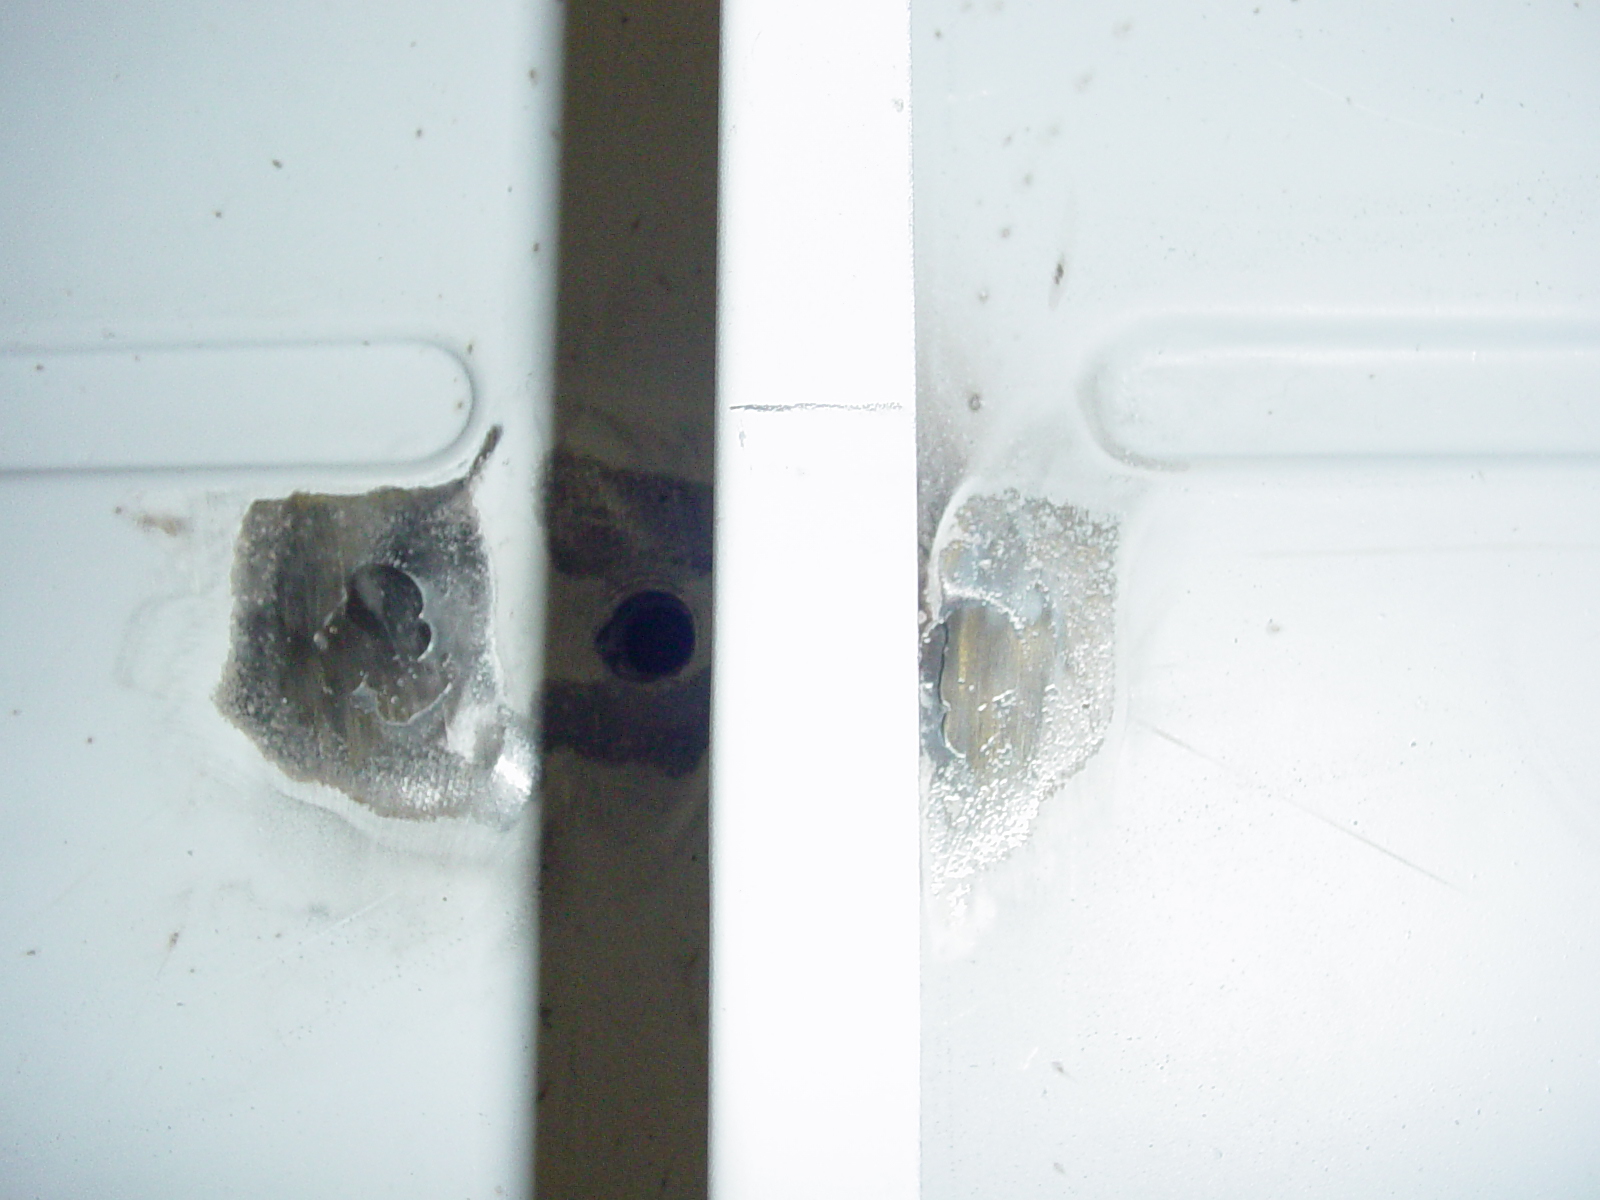
Dress down the weld and smooth it out. I like using a 120 grit sandpaper wheel on my 4" Makita grinder. It takes off weld amazingly well without being too aggressive.
This is the END of the Shoulder Harness Section. Now we will attack the Retractor Assembly.
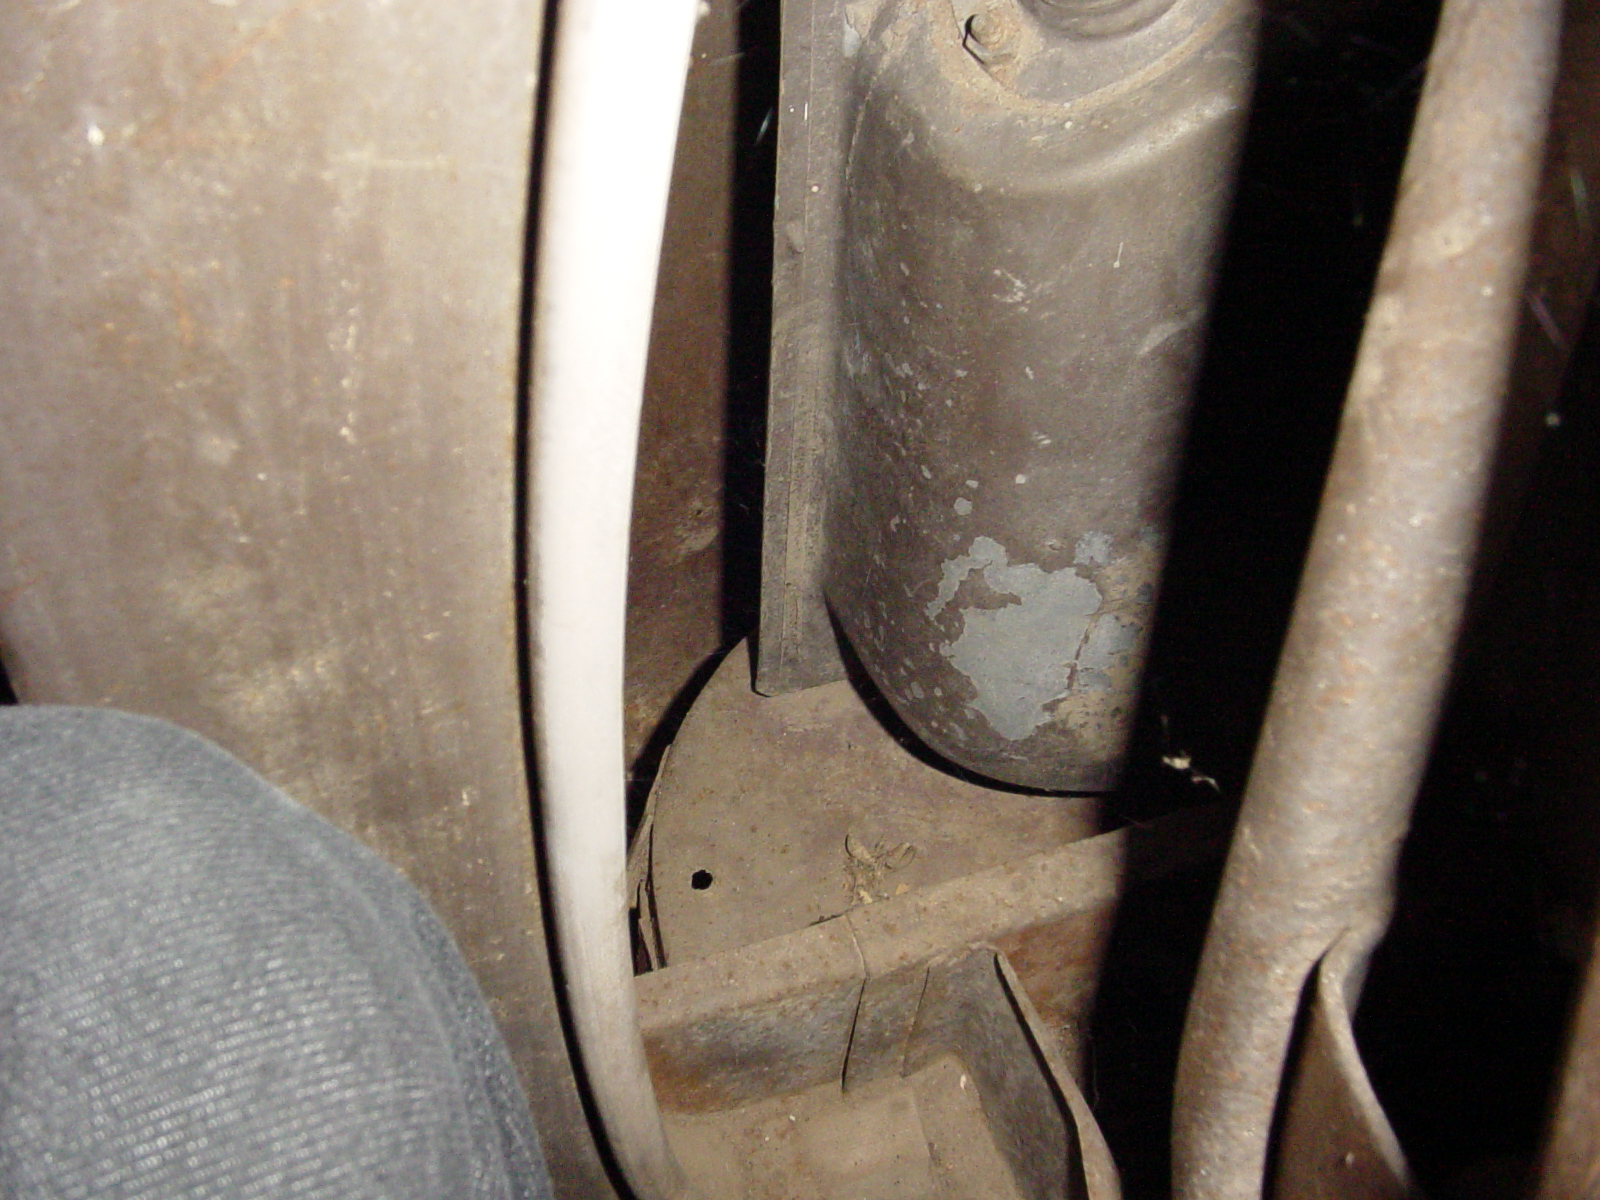
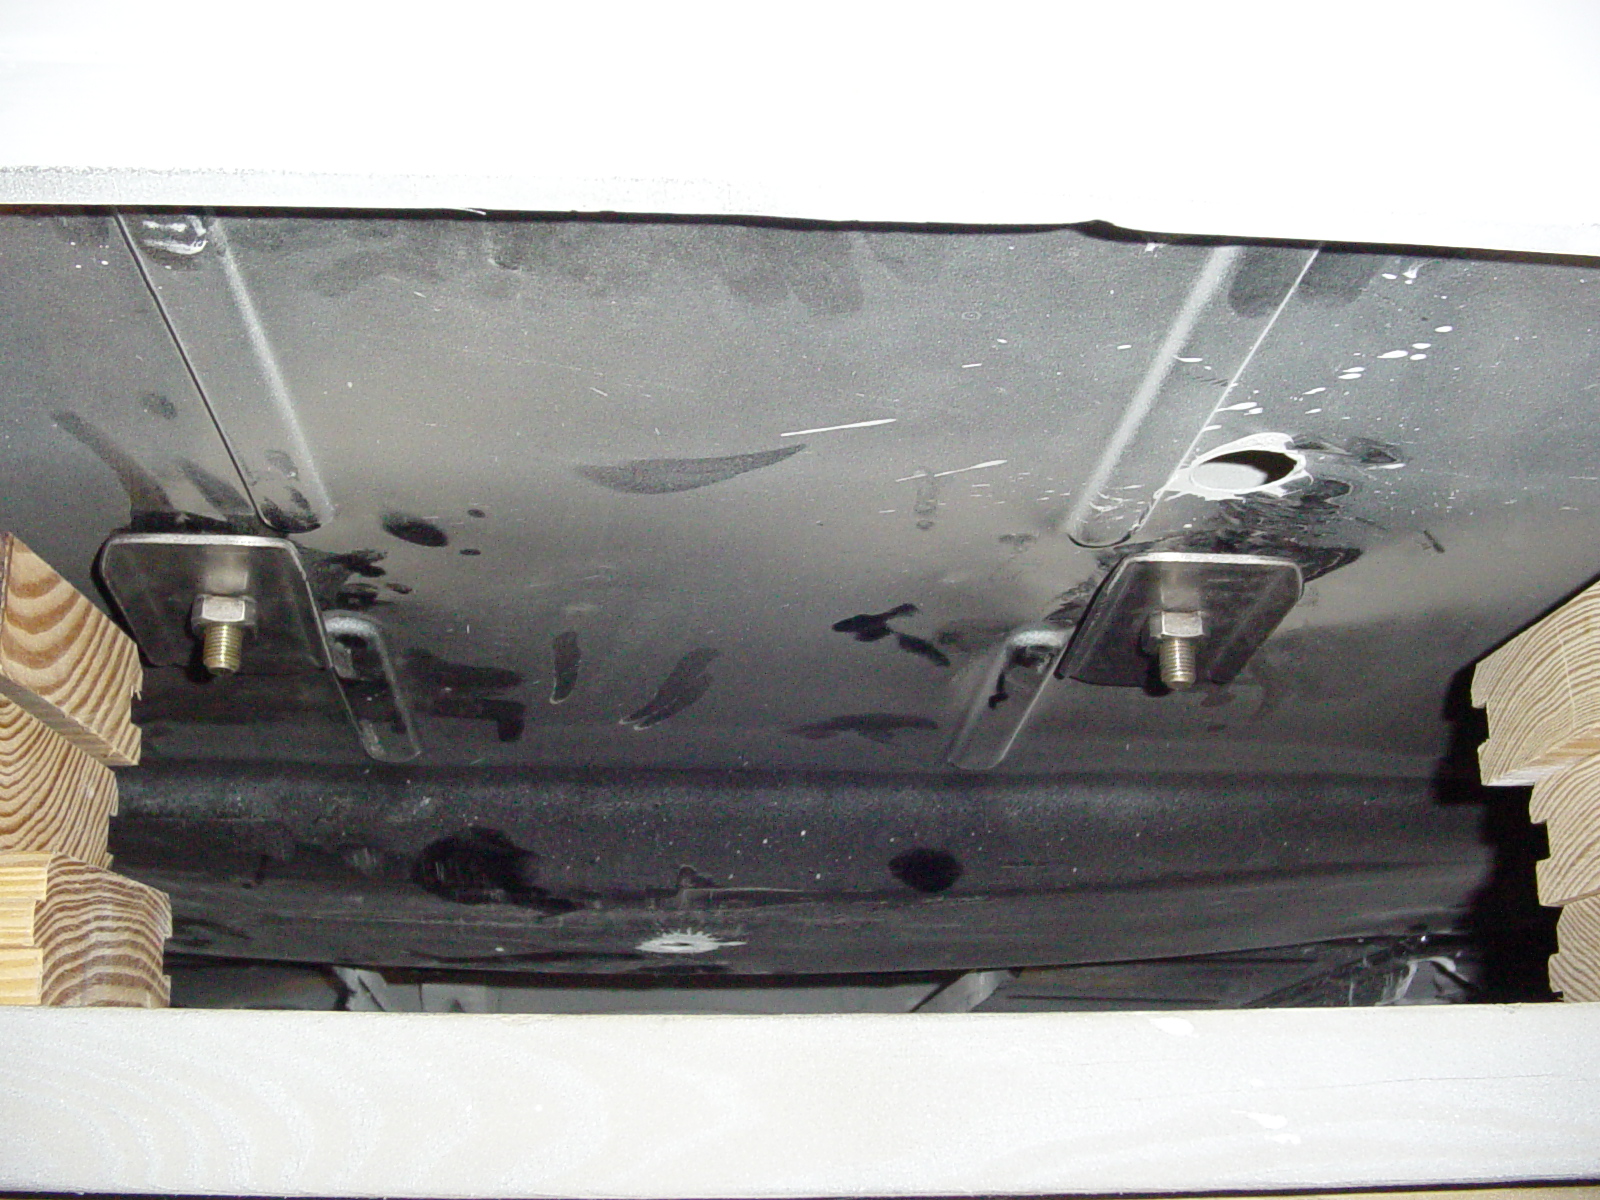
Due to gas tank, gas inlet tube and chassis connections, there is only one logical place to put your Juliano's Belt Retractor Assembly as shown. This placement meets the strict requirement that the top shoulder post be directly above the retractor while keeping the belt assembly out of the way. Since the chassis/cab mounts are in our way, we need another solution to make the belt retractor assembly solid and secure.

Locate the angle bracket in your Juliano's provided kit as well as the 2-3/8" x 4-1/2" metal plate as shown. We are going to weld both brackets into place so that we are utilizing the seat pedestal back AND the cab floor for a very secure mounting.
Cut the 2-3/8" x 4-1/2" modified plate as shown. Drill the 7/16" hole accurately by setting in the angle bracket so it's set properly flush with the lip of the seat pedestal back (leaving an approx. 1/2" gap). This is to that we have room to slide in the modified metal plate. The corner of your angle bracket should sit flush on top of that little support beam.
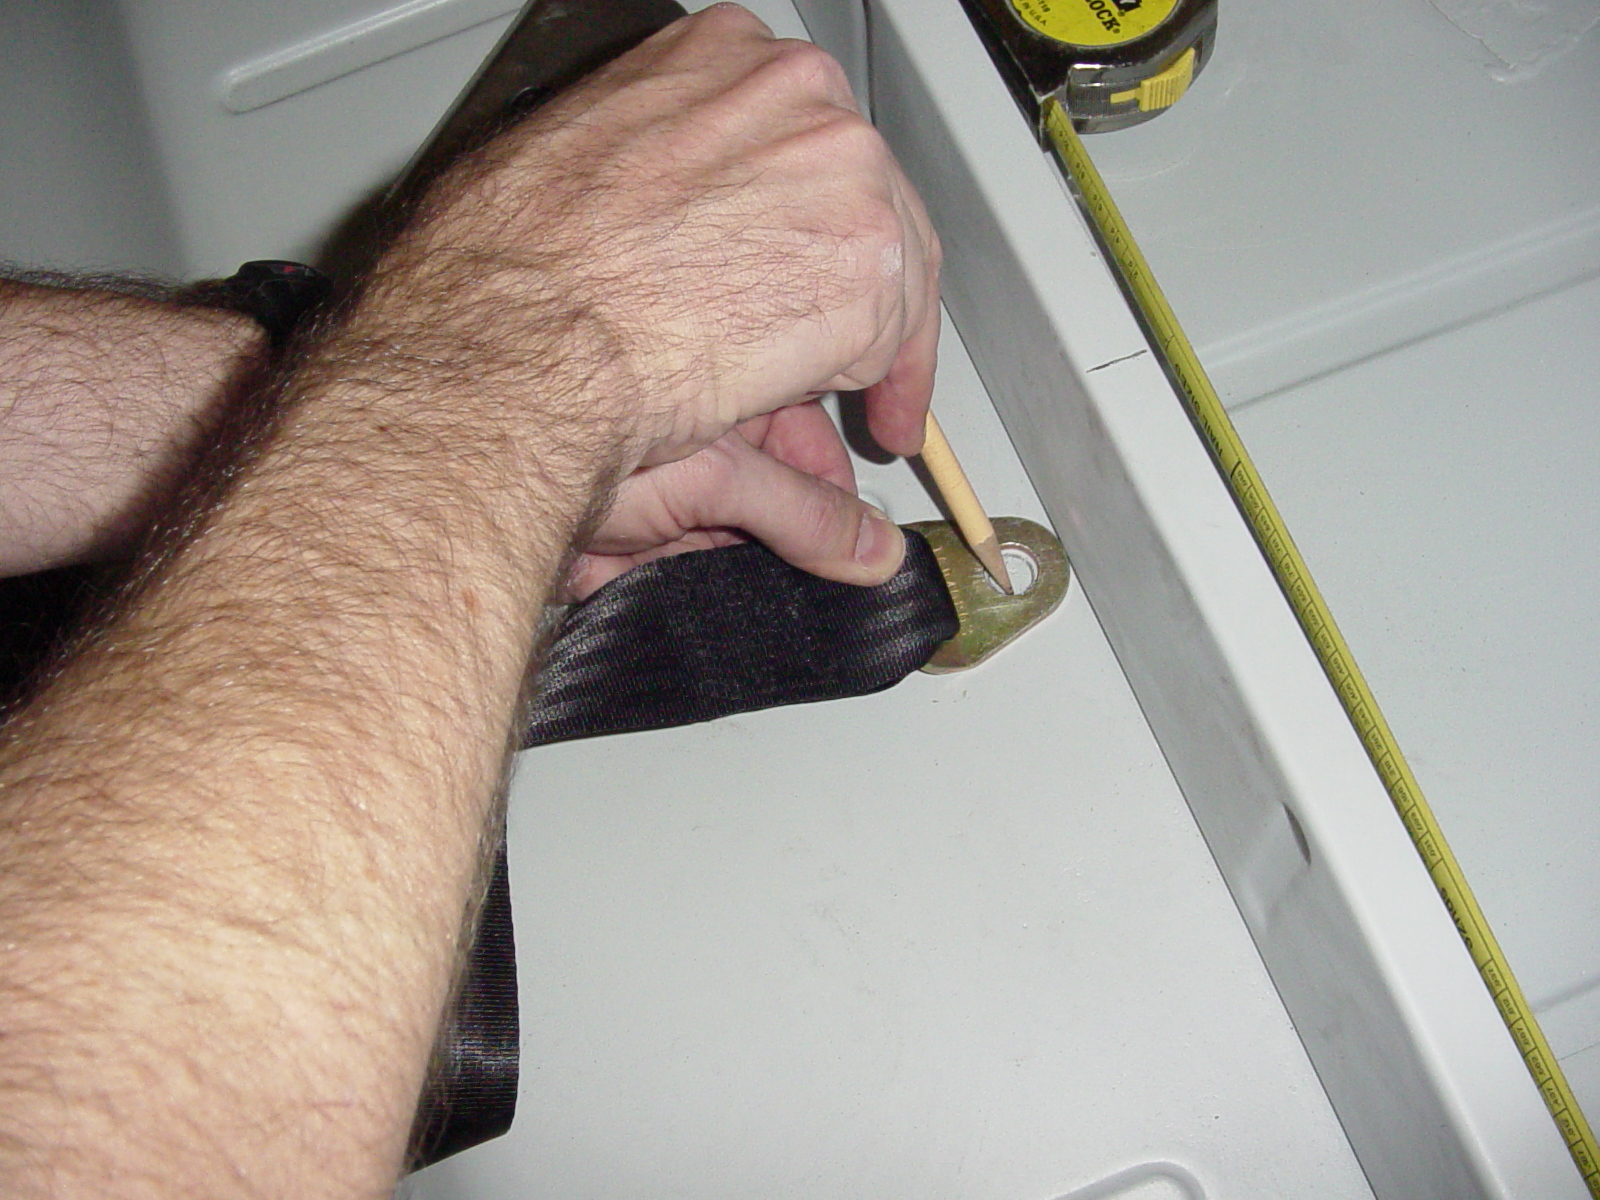
With a pencil, carefully mark the hole going to the seat pedestal back from the inside, then using a small taper punch and hammer, tap the center of it so you know where to drill the hole on the outside. Or use whatever other ingenious method you can think of to transfer the hole pattern to the other side. Drill the 7/16" hole making sure everything lines up correctly.
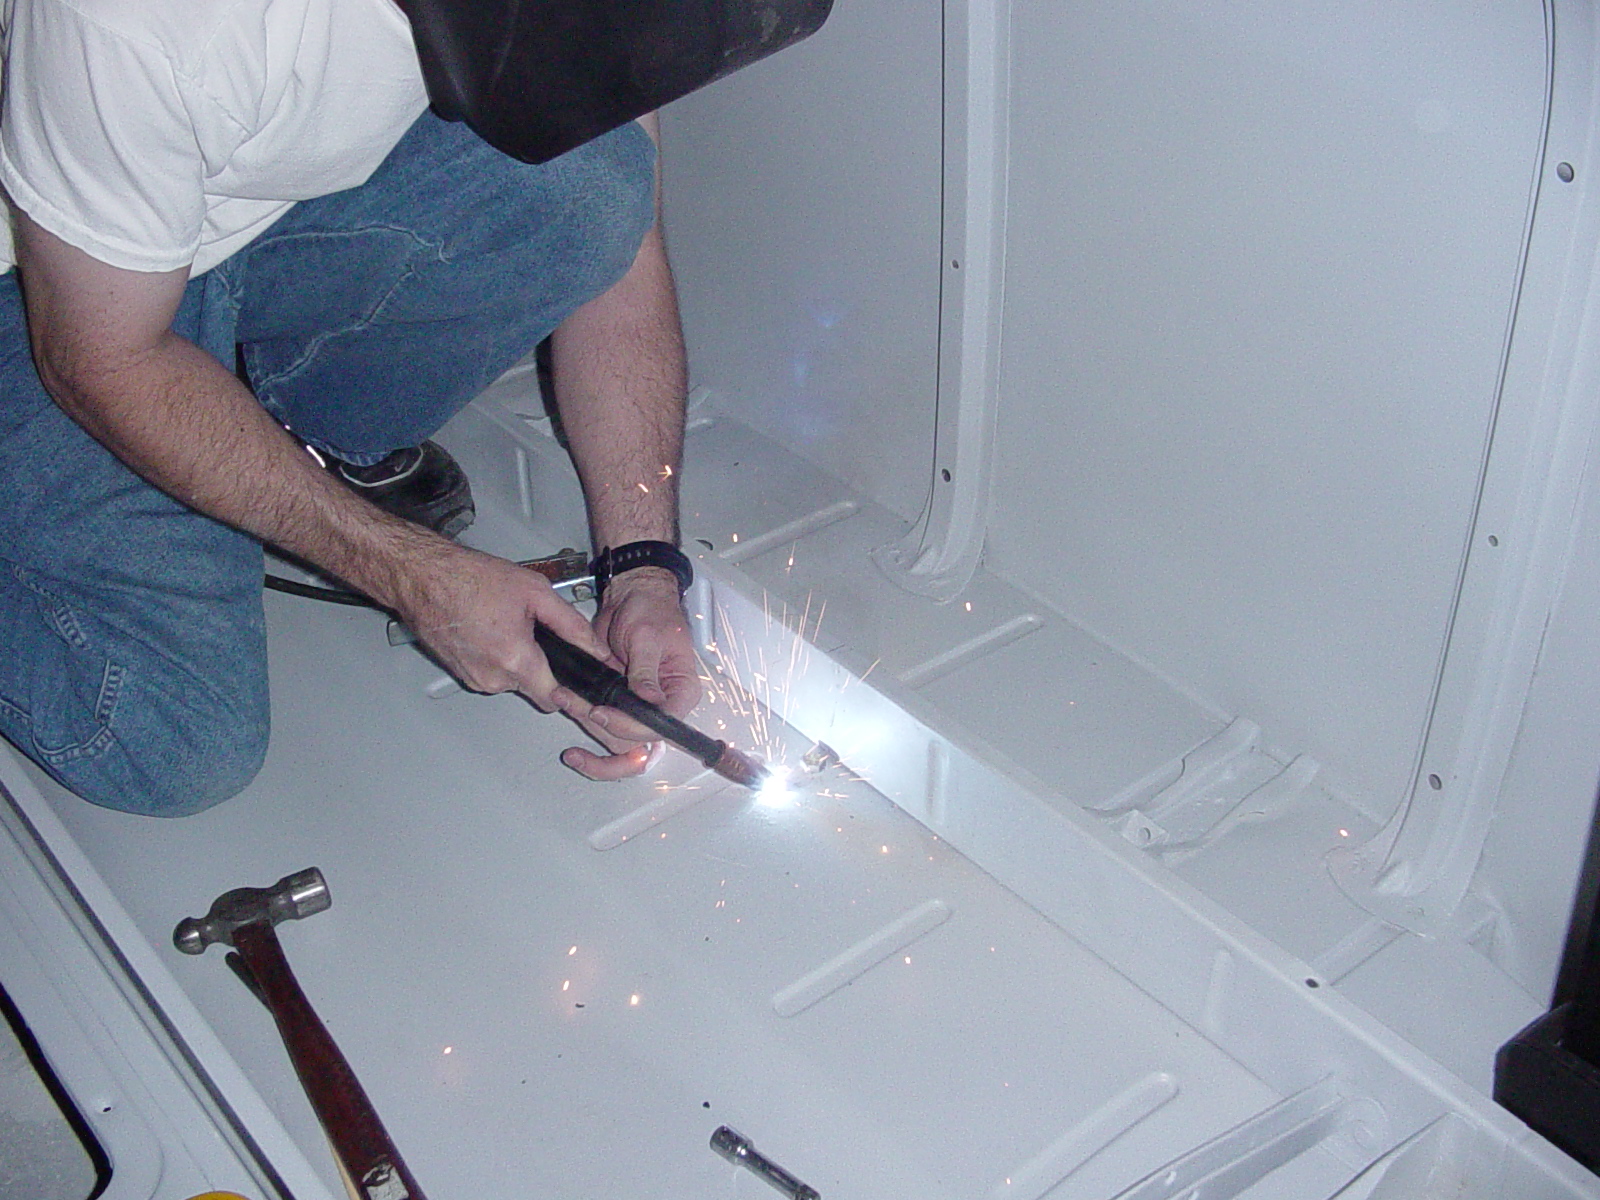
Place the modified 2-3/8" x 4-1/2" metal plate behind the seat pedestal and using the provided 7/16" short bolt, bolt the plate securely in place. You will want to sand off the weld area so welding goes smoother. Weld the plate into place securely from behind.
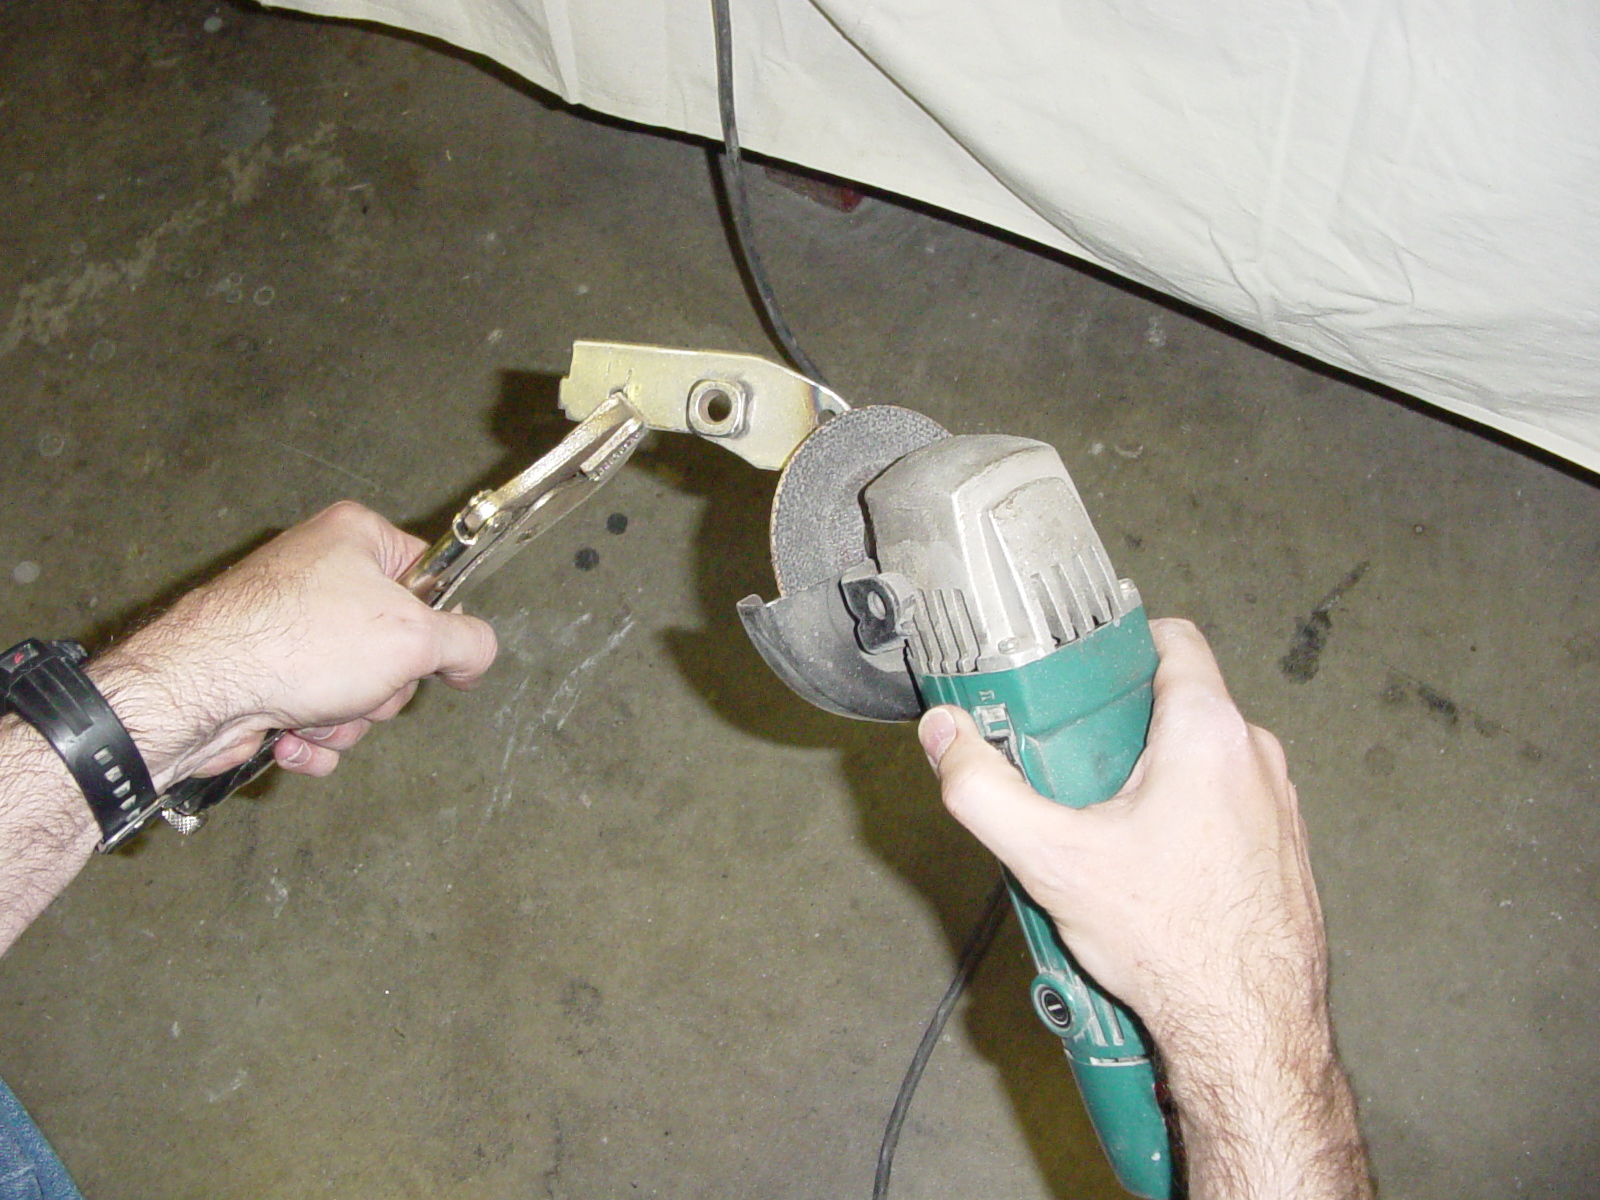
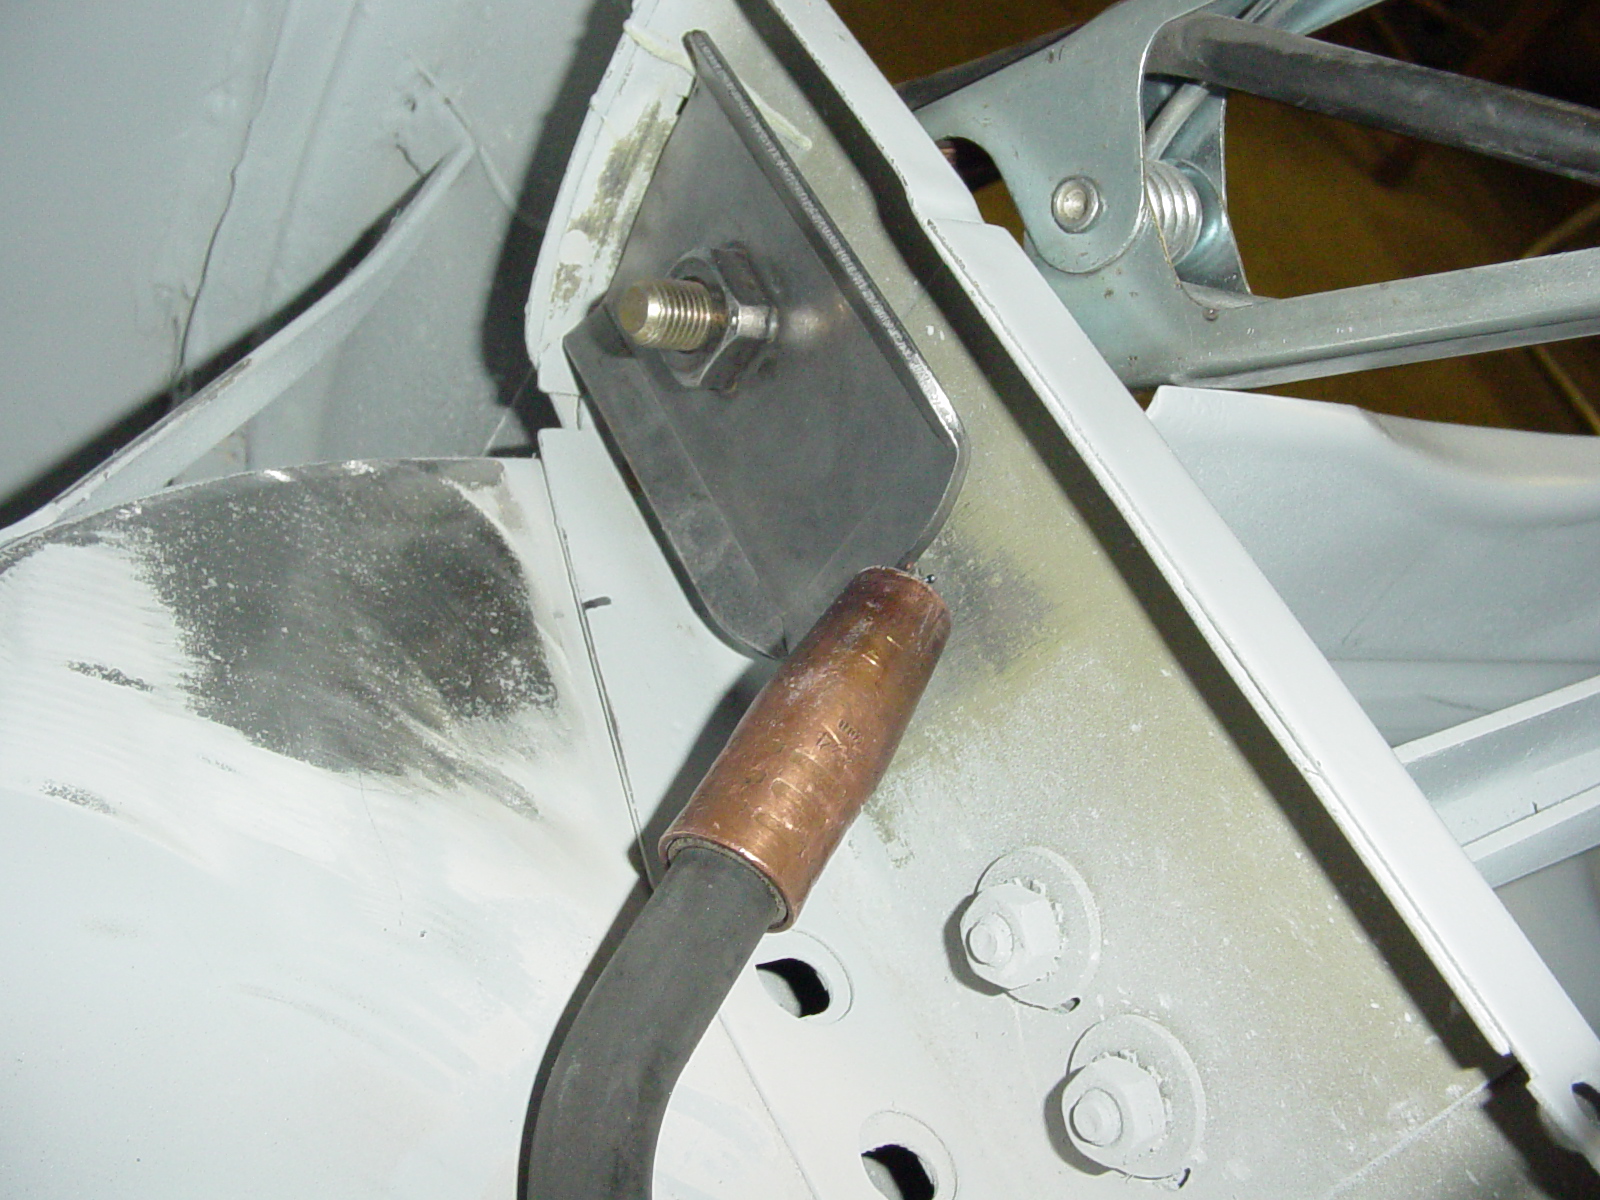
Using the 7/16" nut, bolt the angle plate in place as shown. I also used a welding clamp to hold the angle bracket securely to the floor. Weld the angle bracket into place and then grind off the area for a clean install. Remove the short bolt and nut and replace it with the long bolt with washer through the assembly.

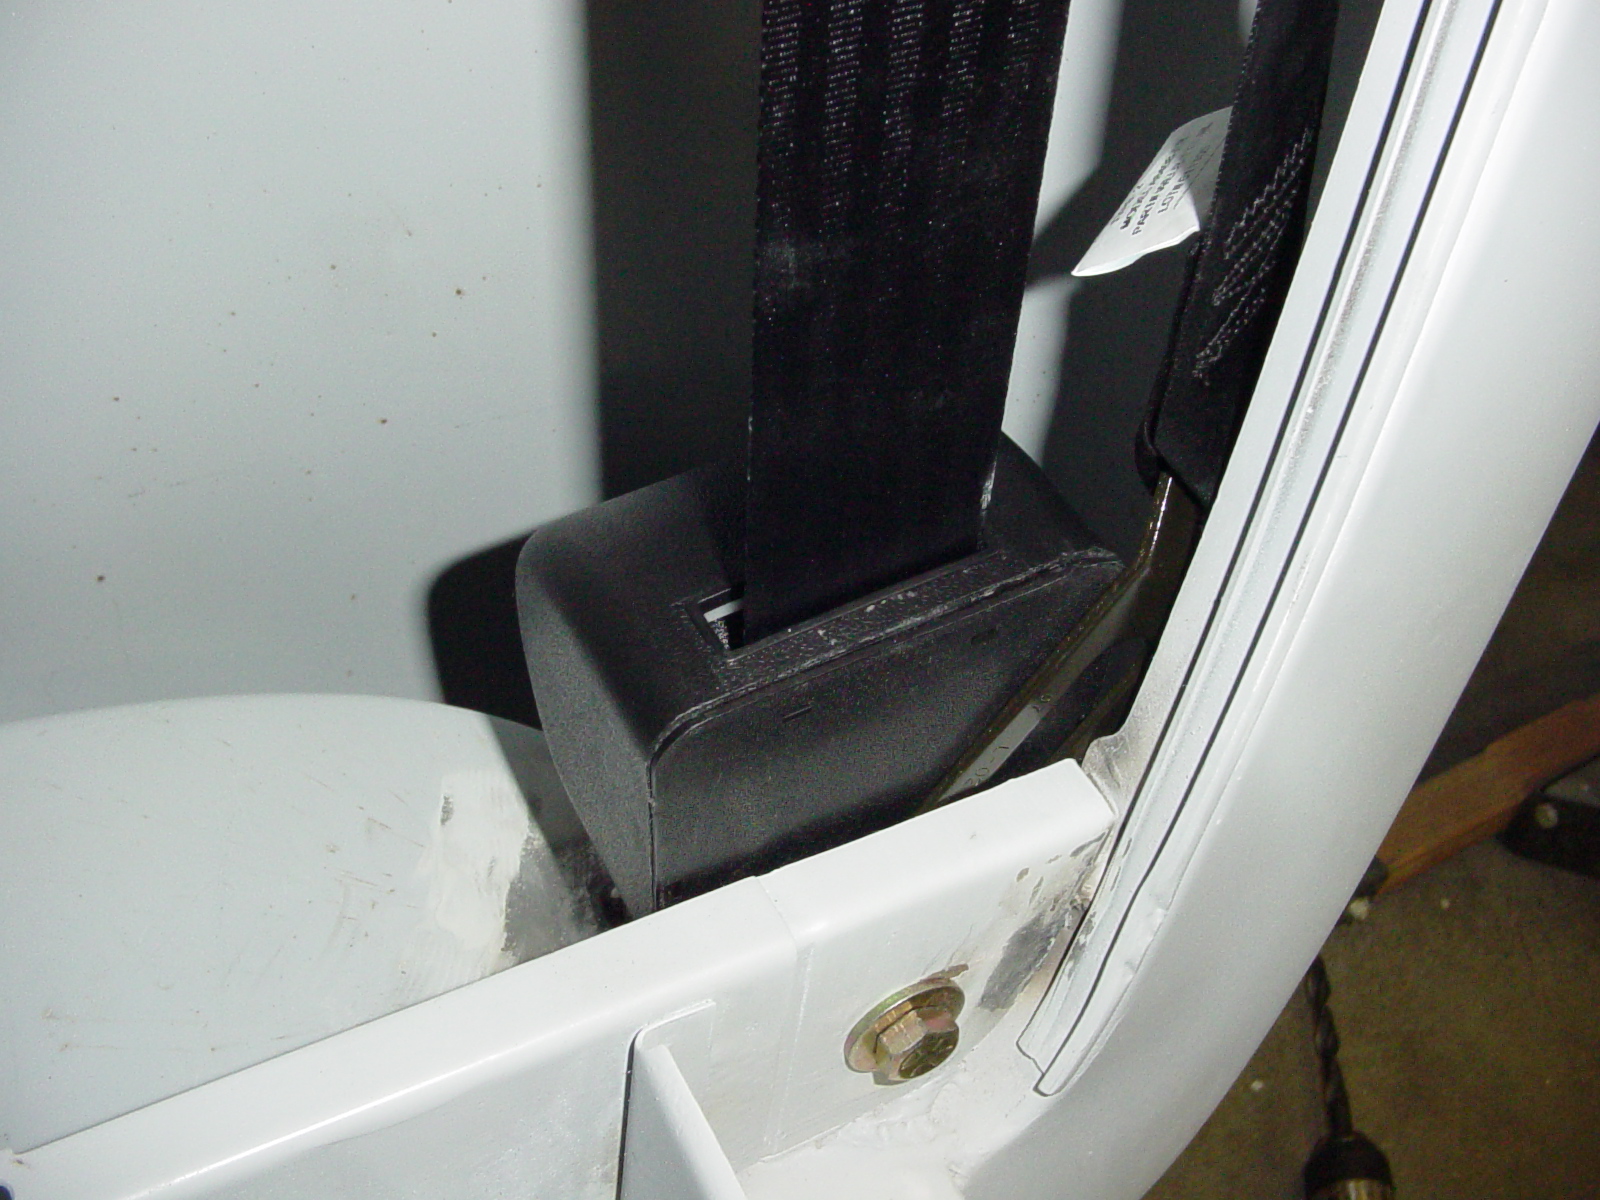
Now you can install the retractor assembly and the other end onto the bolt and tighten using the 7/16" nut. Install the belt
assembly so it is not twisted or binding in any way. The belt should not chafe on the sides of the retractor assembly and the
system should work smoothly.
This ends the Retractor Assembly Installation. Of course, there is finishing sanding
and painting to do, but mechanically, everything should work great.
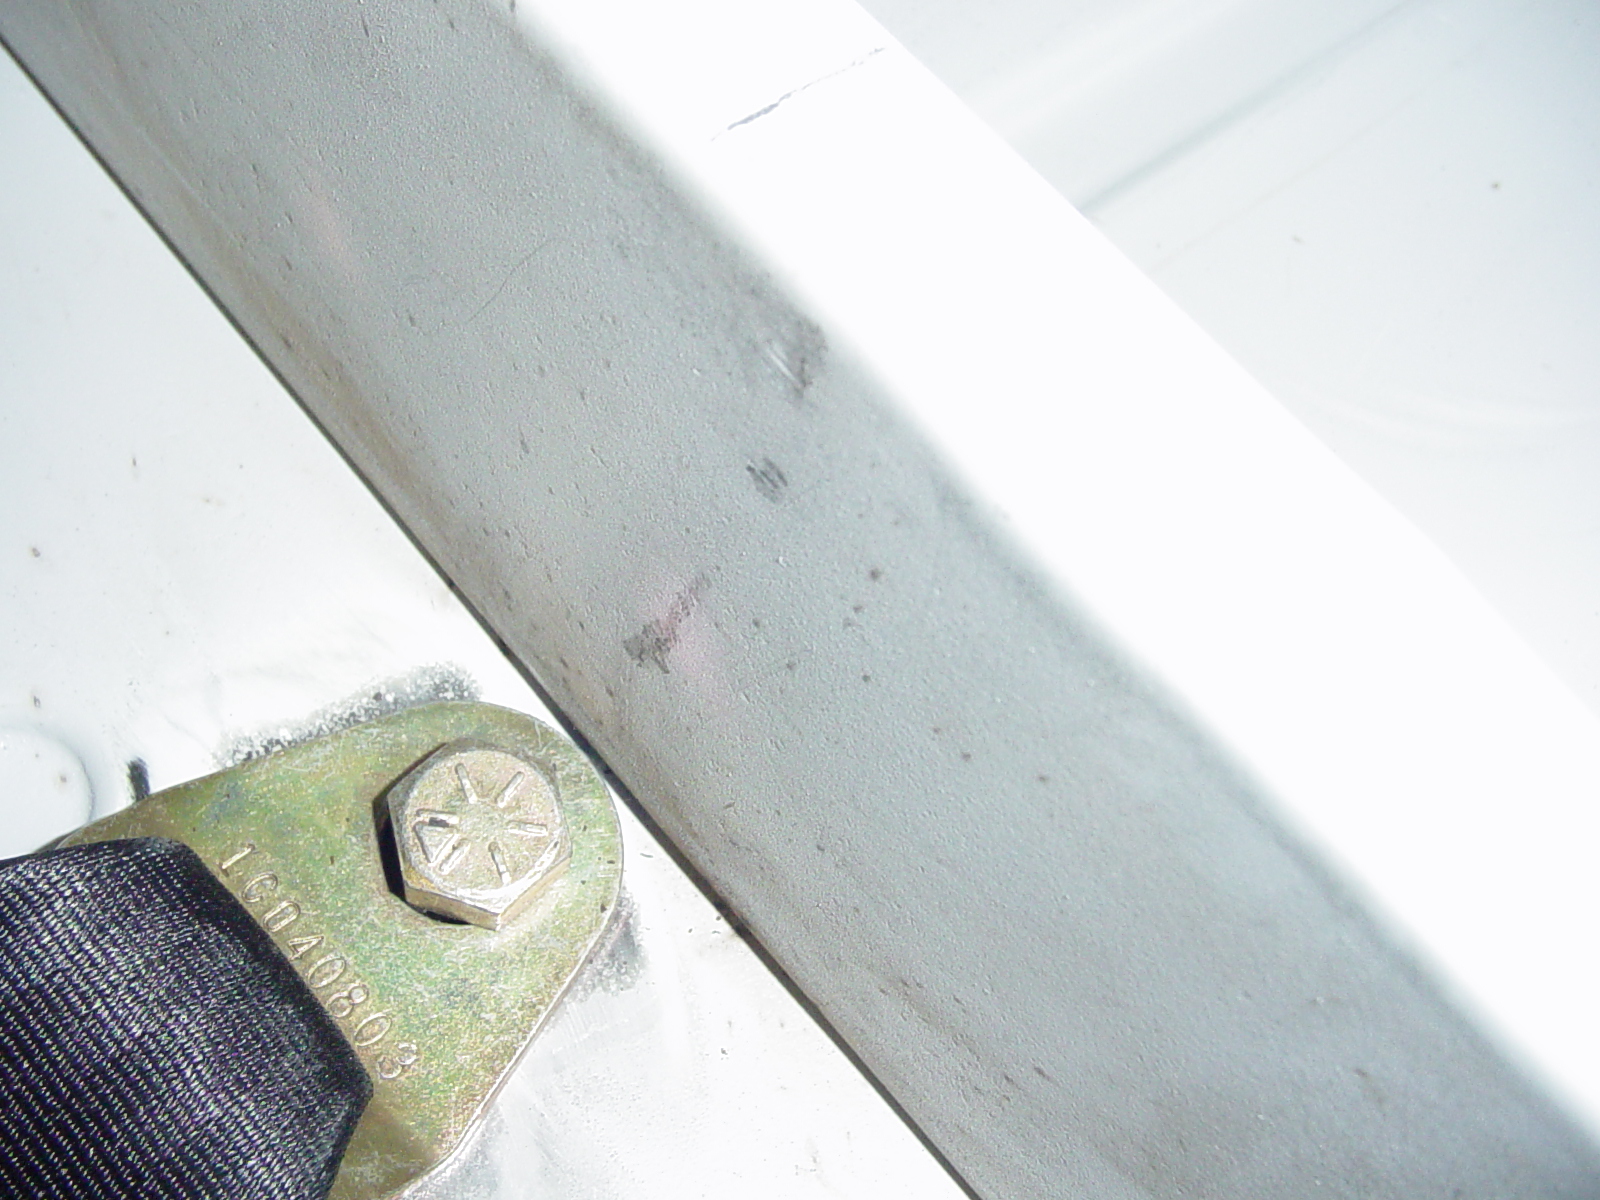
This is up to you, but I determined that 25 inches (approx) from the rear panel of the seat pedestal nearest the door inwards is the best place to install the latch belt anchor. First it gives the rider a comfortable width if they are average size, and also we have a recessed area in the seat pedestal pan to consider that is in the way of making it longer.
Mark the anchor hole in the bottom of the seat pan at the 25" mark making sure the 2-3/8" x 4-1/2" metal plate will ride JUST shy of that recessed area in the pan.
Drill a pilot hole and then a finished 7/16" hole on the mark and place the plate under the cab and bolt into place. You can see how it just misses the recessed area.
Drill two additional holes: one at the top (JUST behind the seat pedestal) and one below for spot welding purposes. If your gas tank is in the way of the top weld, you 'could' forgo that one or weld it from the bottom of the cab. Weld the plate into place and do the required grinding.
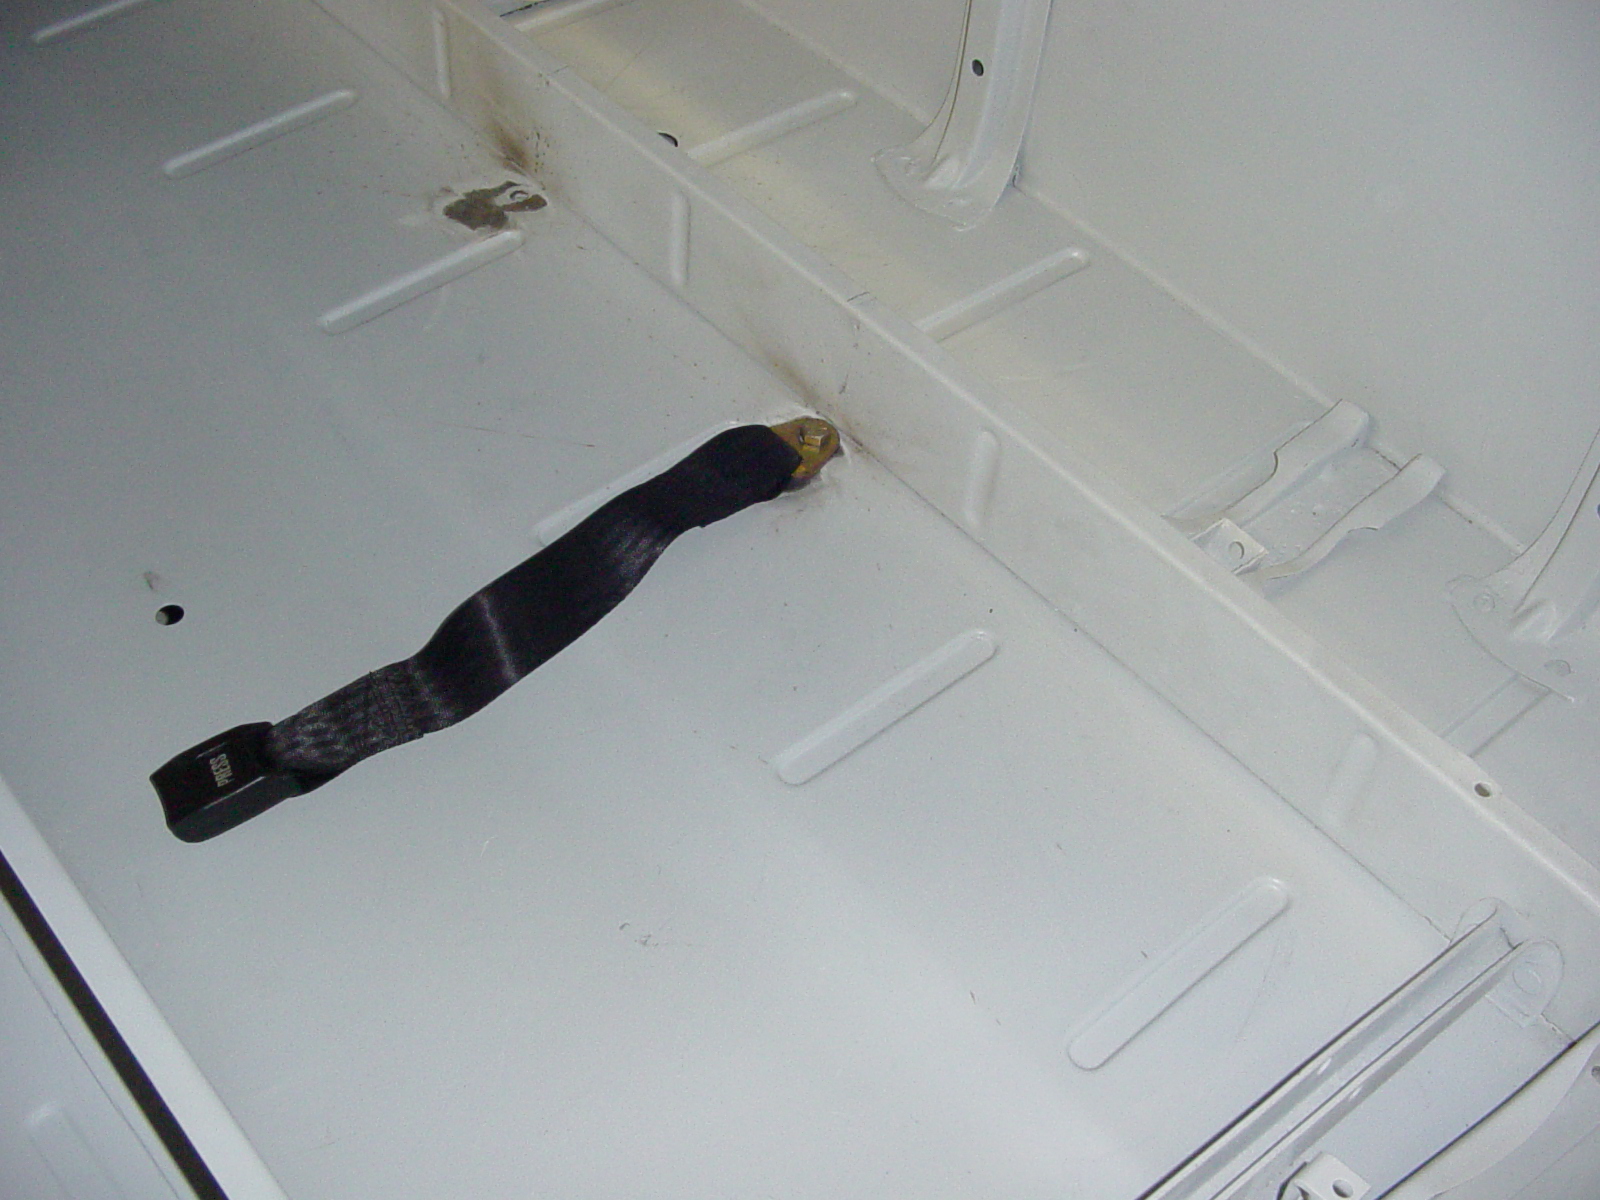
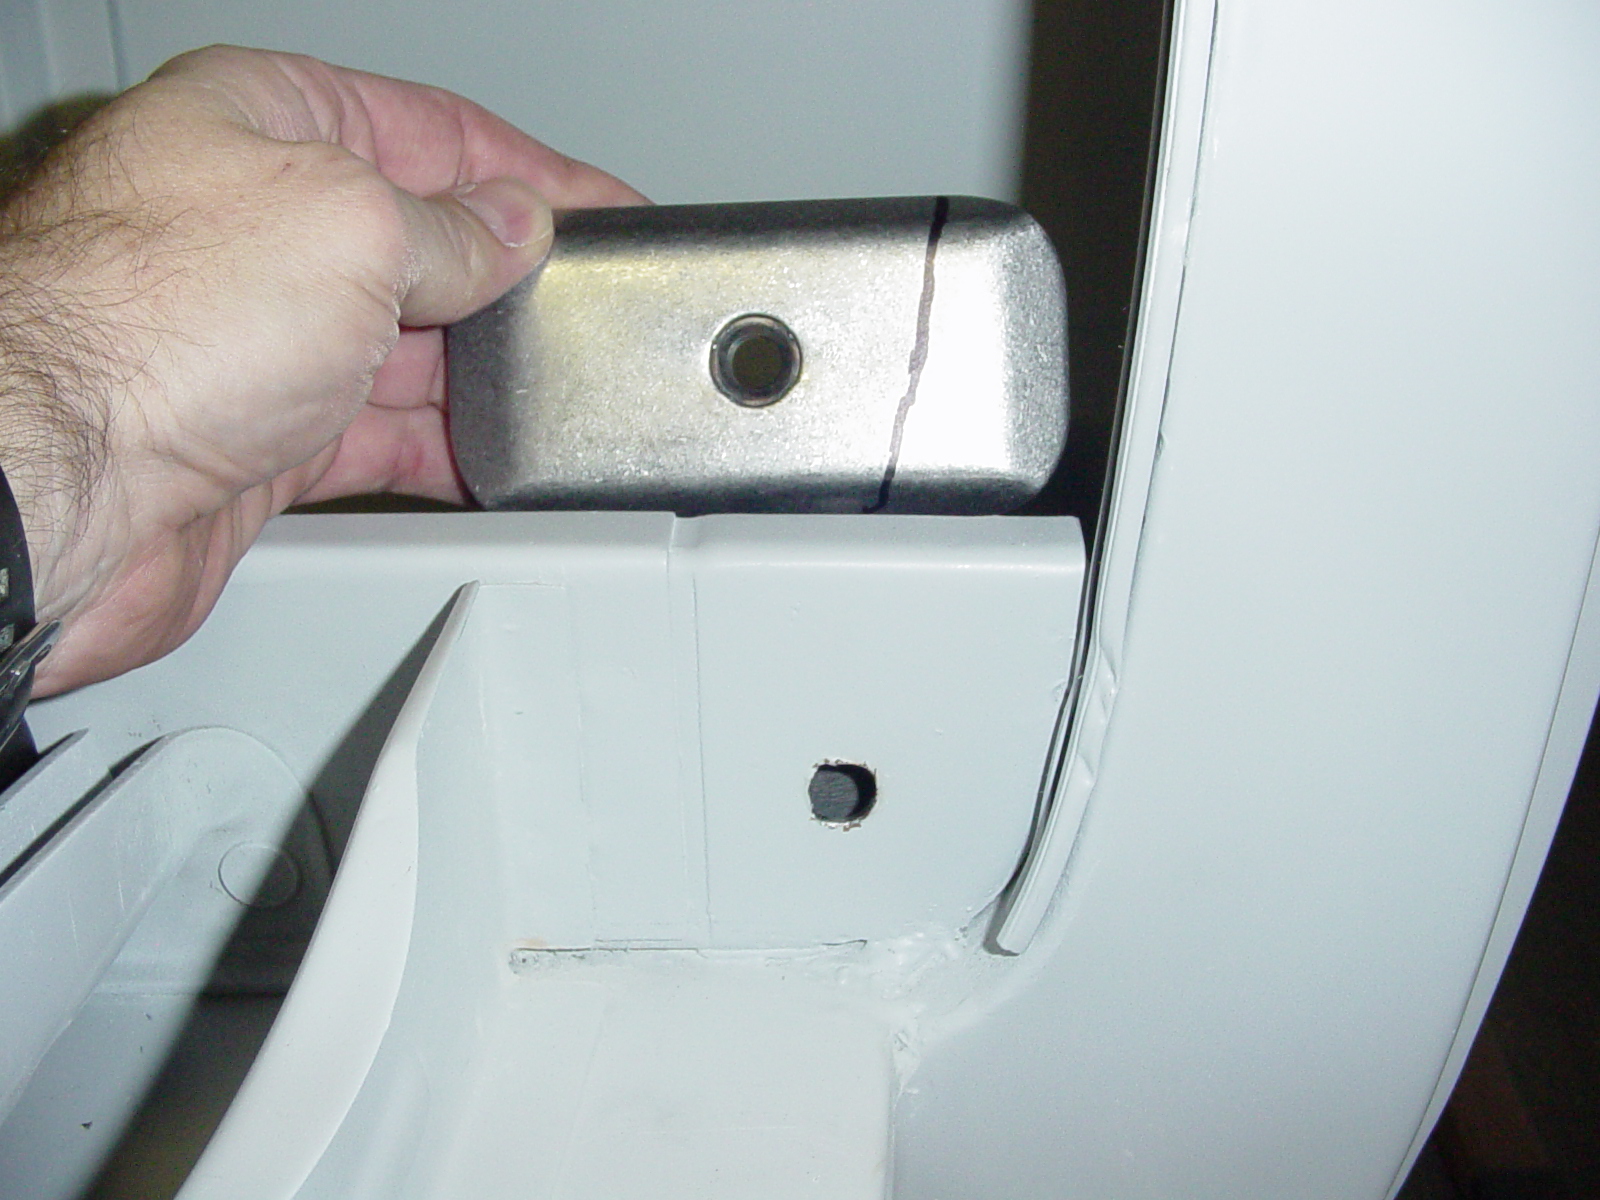
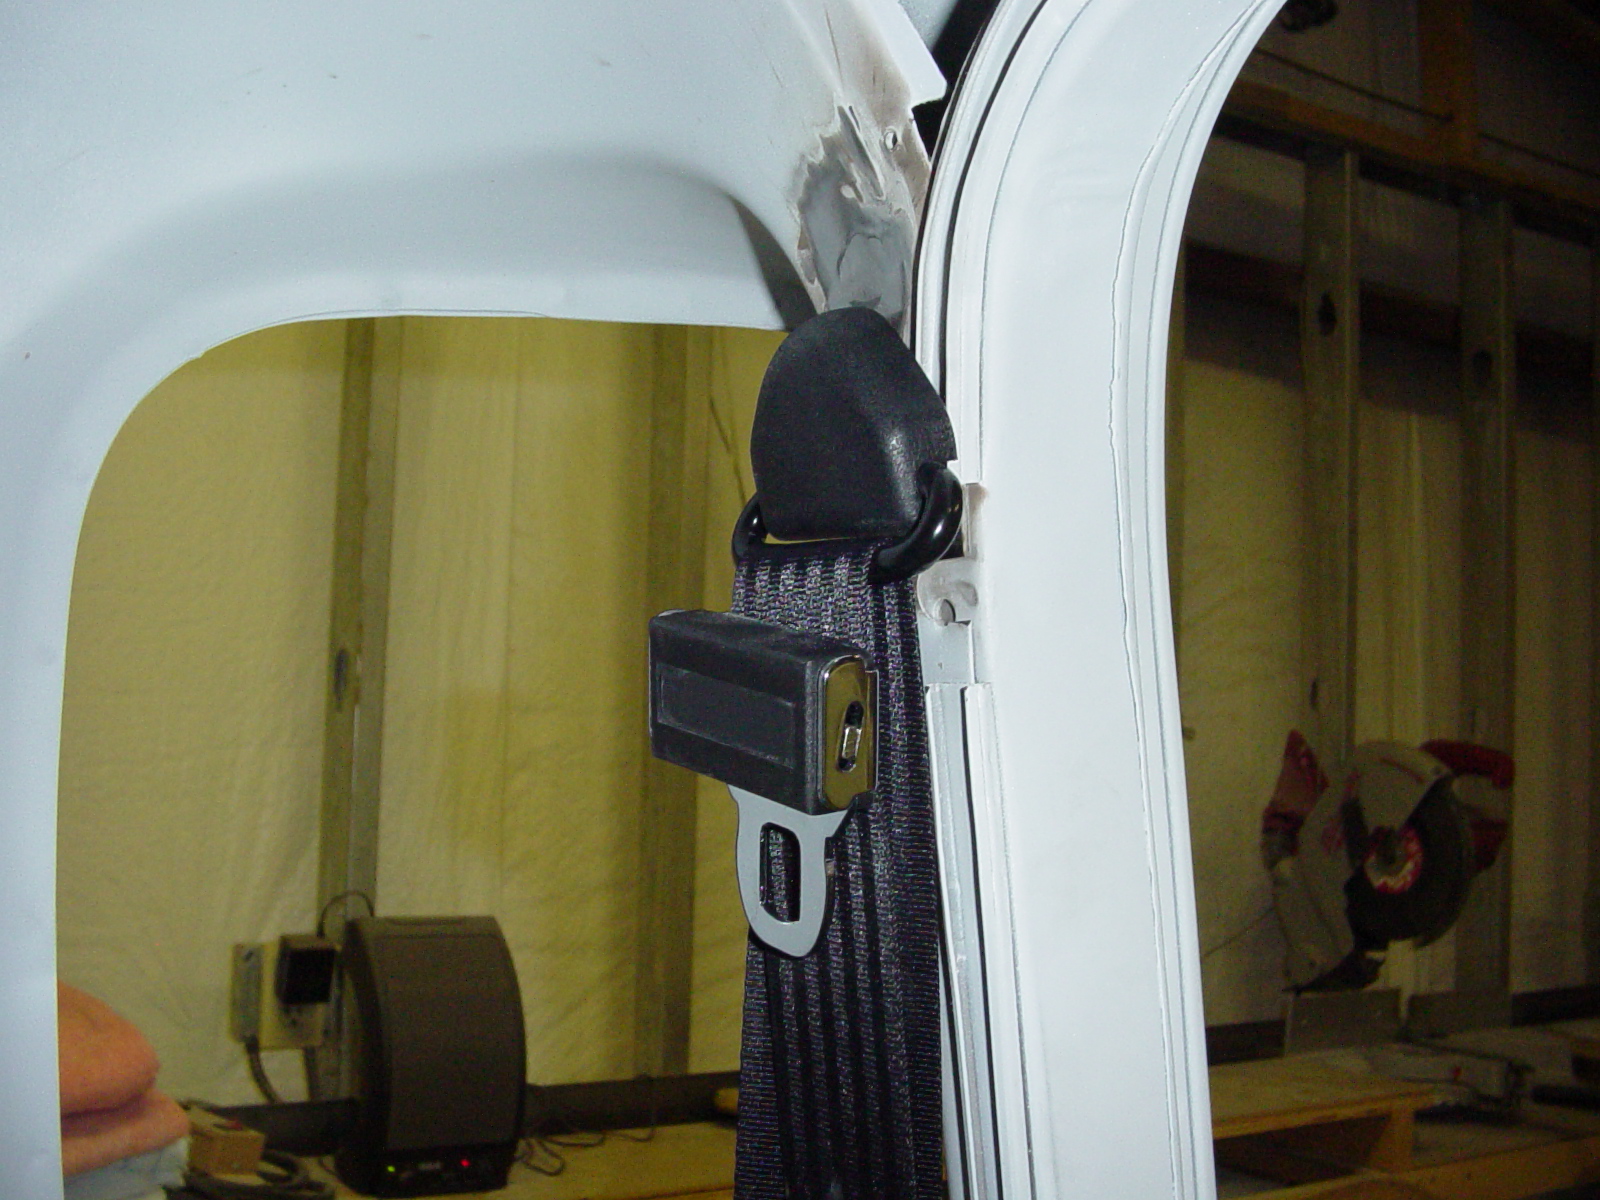
This ends the Latch Assembly Instruction. When you are done, it should look like this. Some suggested a better way would be to make an angle bracket that follows the seat pedestal back and connect the belt on the vertical plane so its closer to the seat and possibly prevent the seat squashing during use. That would not be all that difficult to make and bolt in using the bolt.

When you are done, it should look something like this. The only things left in the
Juliano's
kit that were not needed were two long bolts. I was impressed with the relative ease of installation.
Of course I did it in an empty cab, but still feel that it would be well worth it even if I would have had to remove the seat
assembly and part of the headliner to do it.
Anyone having suggestions on how to improve this document, please
contact Deve.