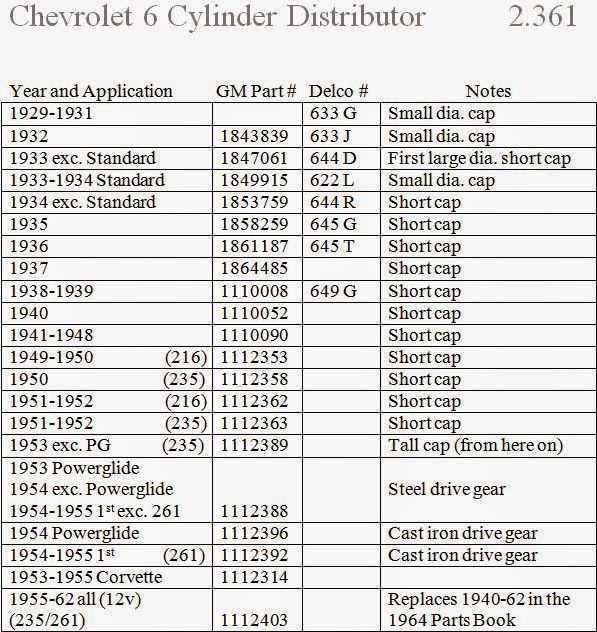
Deve's Technical Network
1947-1955 1st Chevy Trucks
216/235/261 Engine Solutions & More
Here are Brad Allen's slide-show presentations direct from General Motors in 1938, The Ignition System, and the 2nd one, Checking
The Ignition System. Since the stock Ignition system wasn't changed until 1954, and only then just slightly, this is very pertinent information.
After that, check out the Rebuild How-To below.

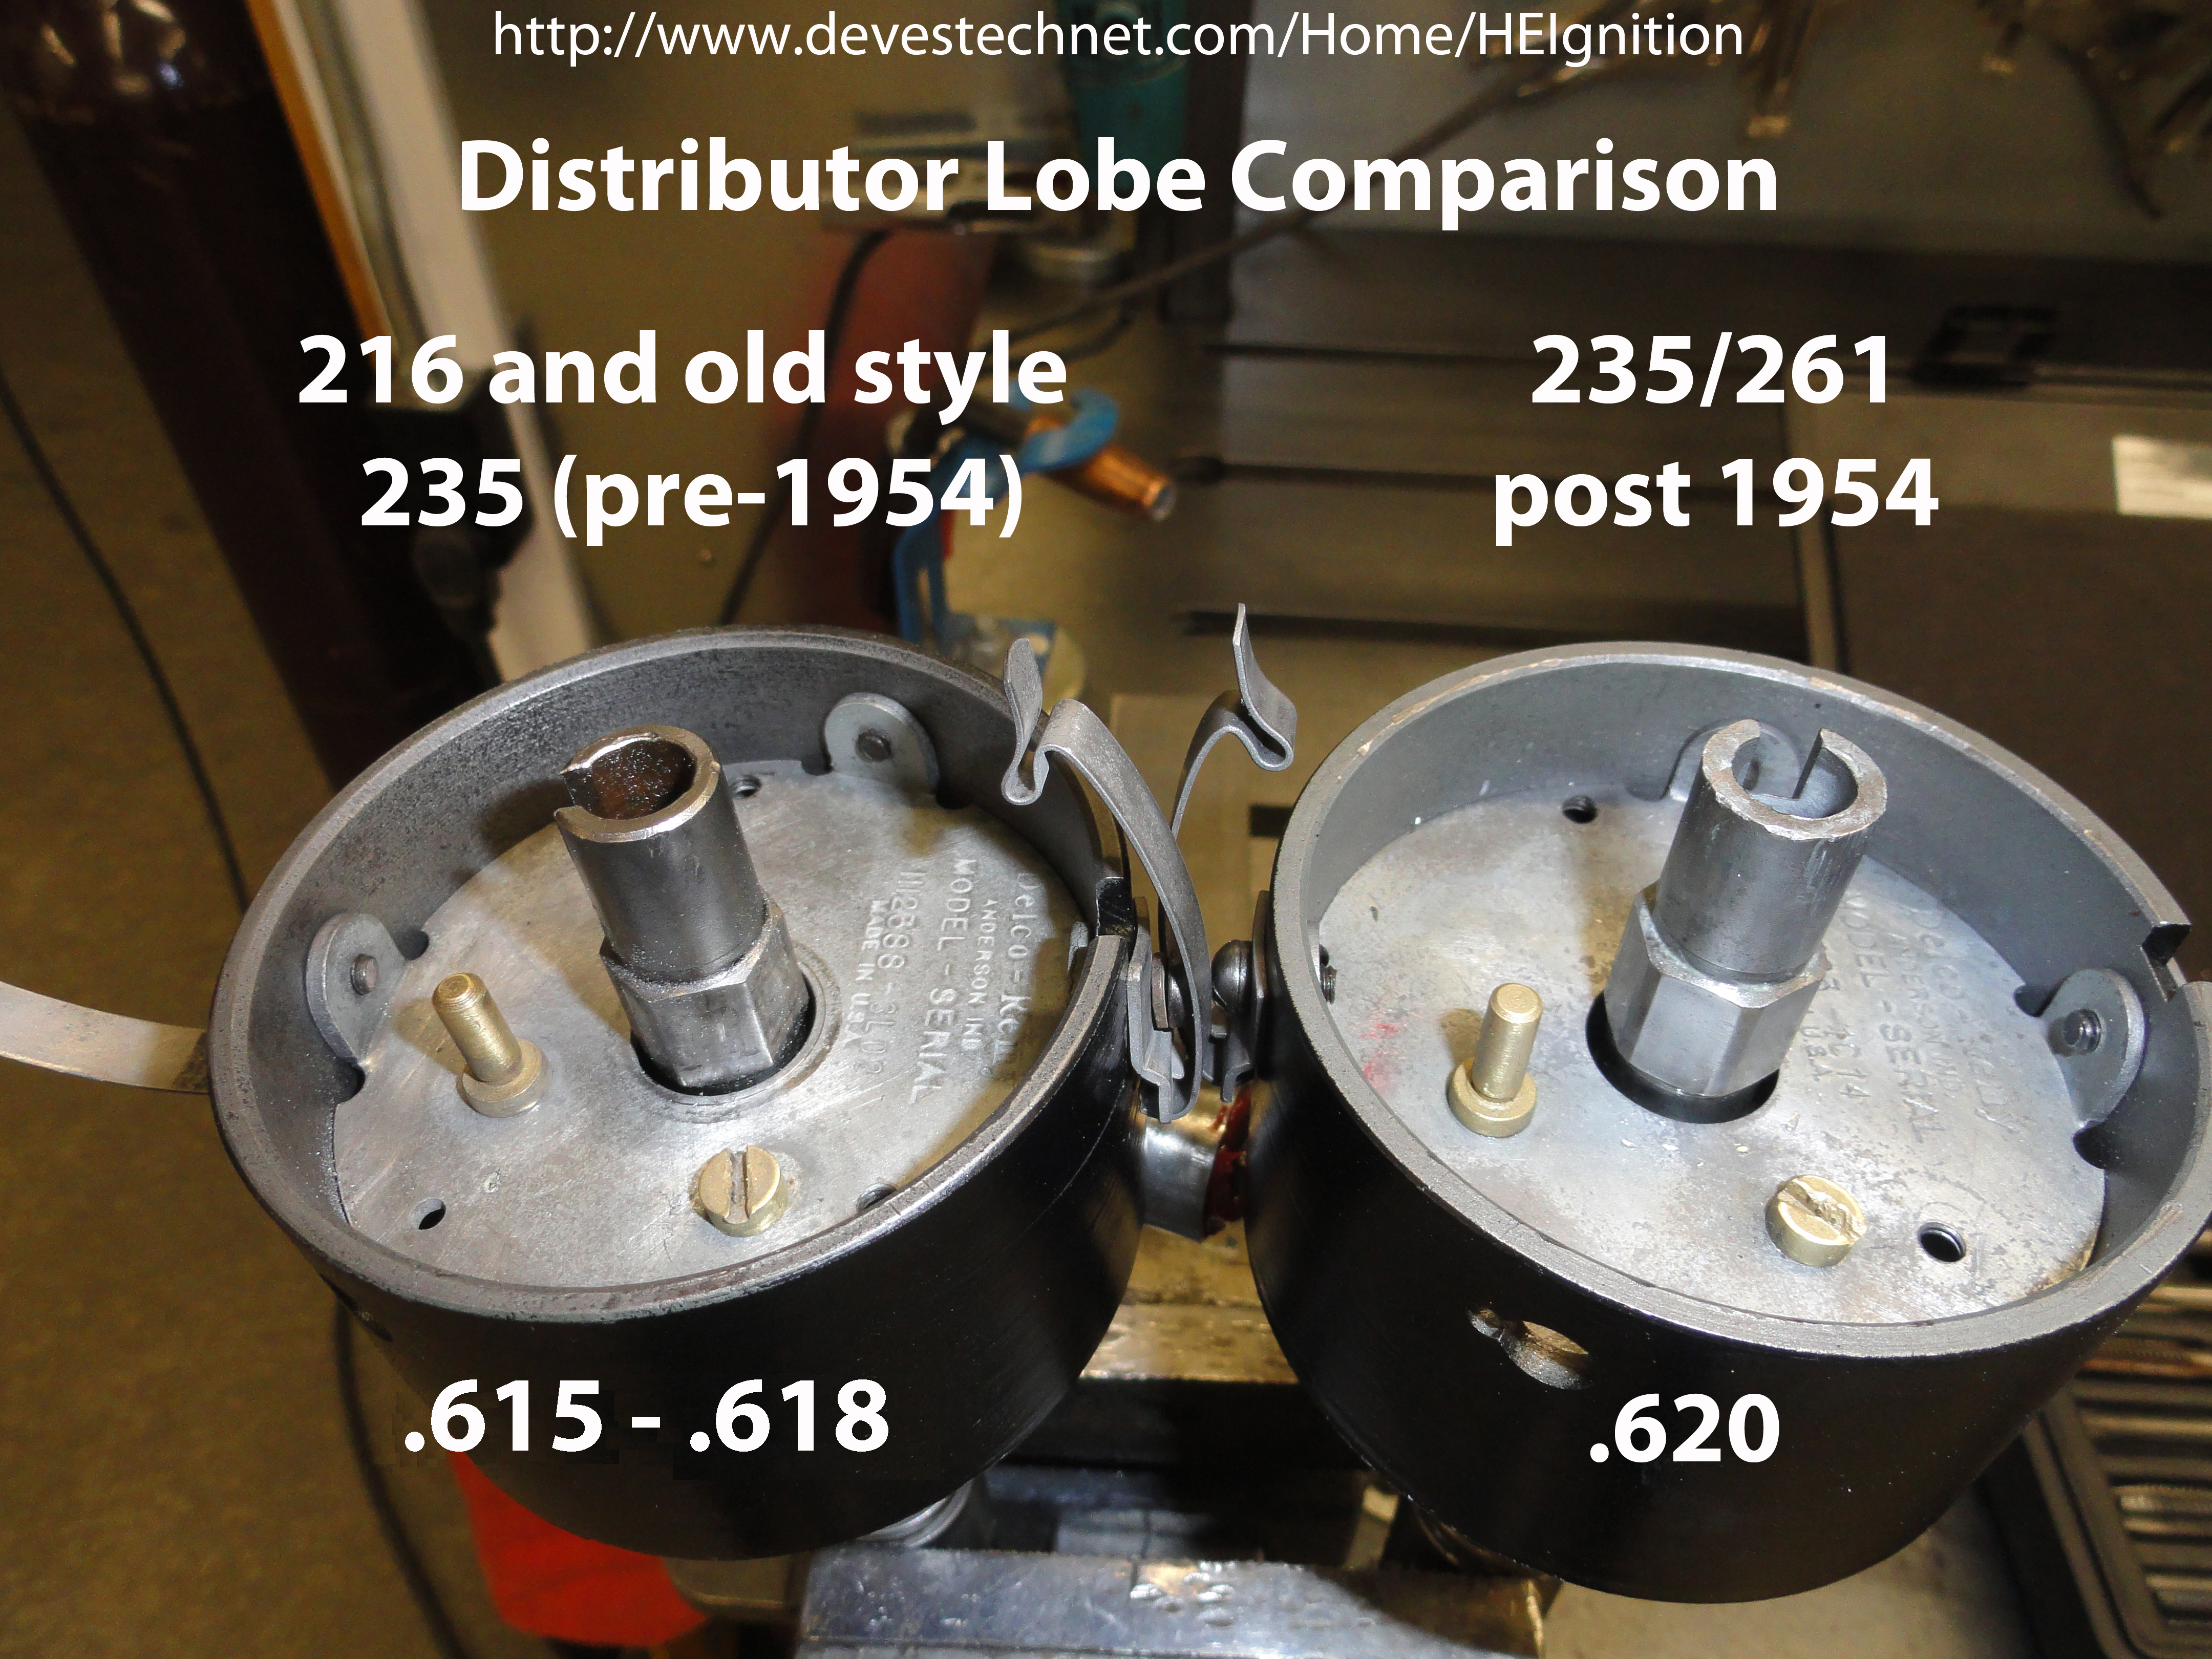
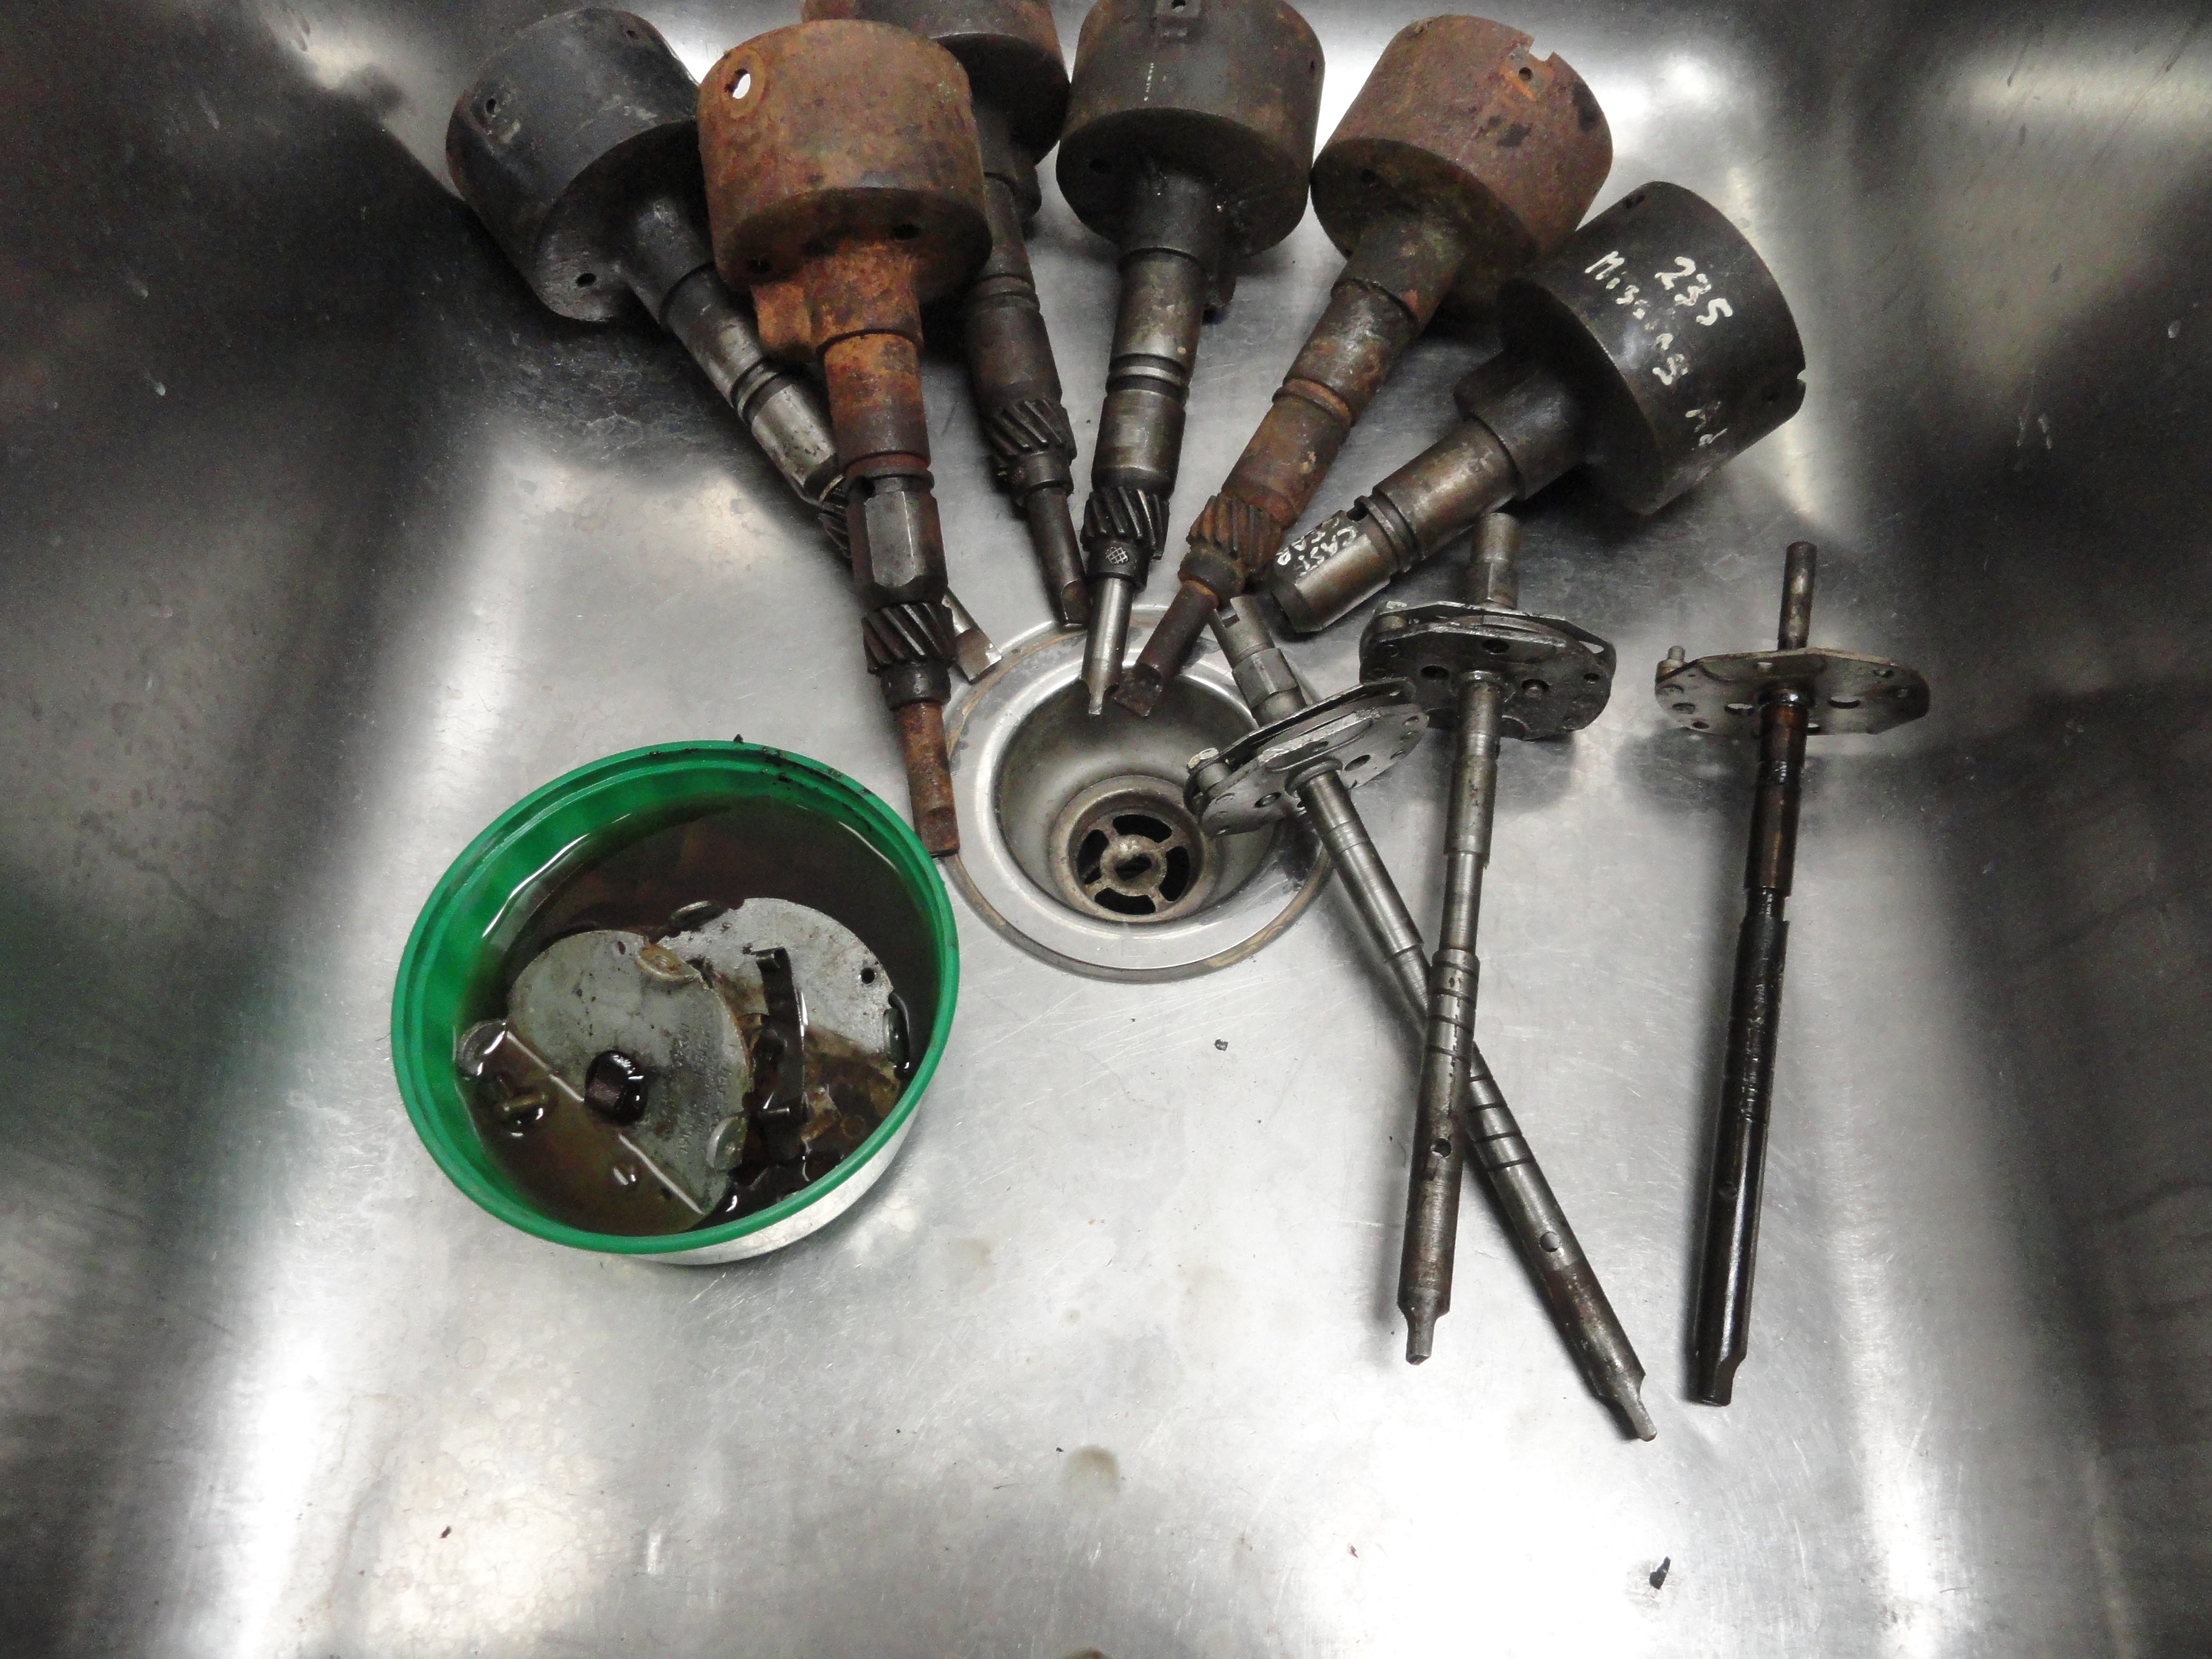
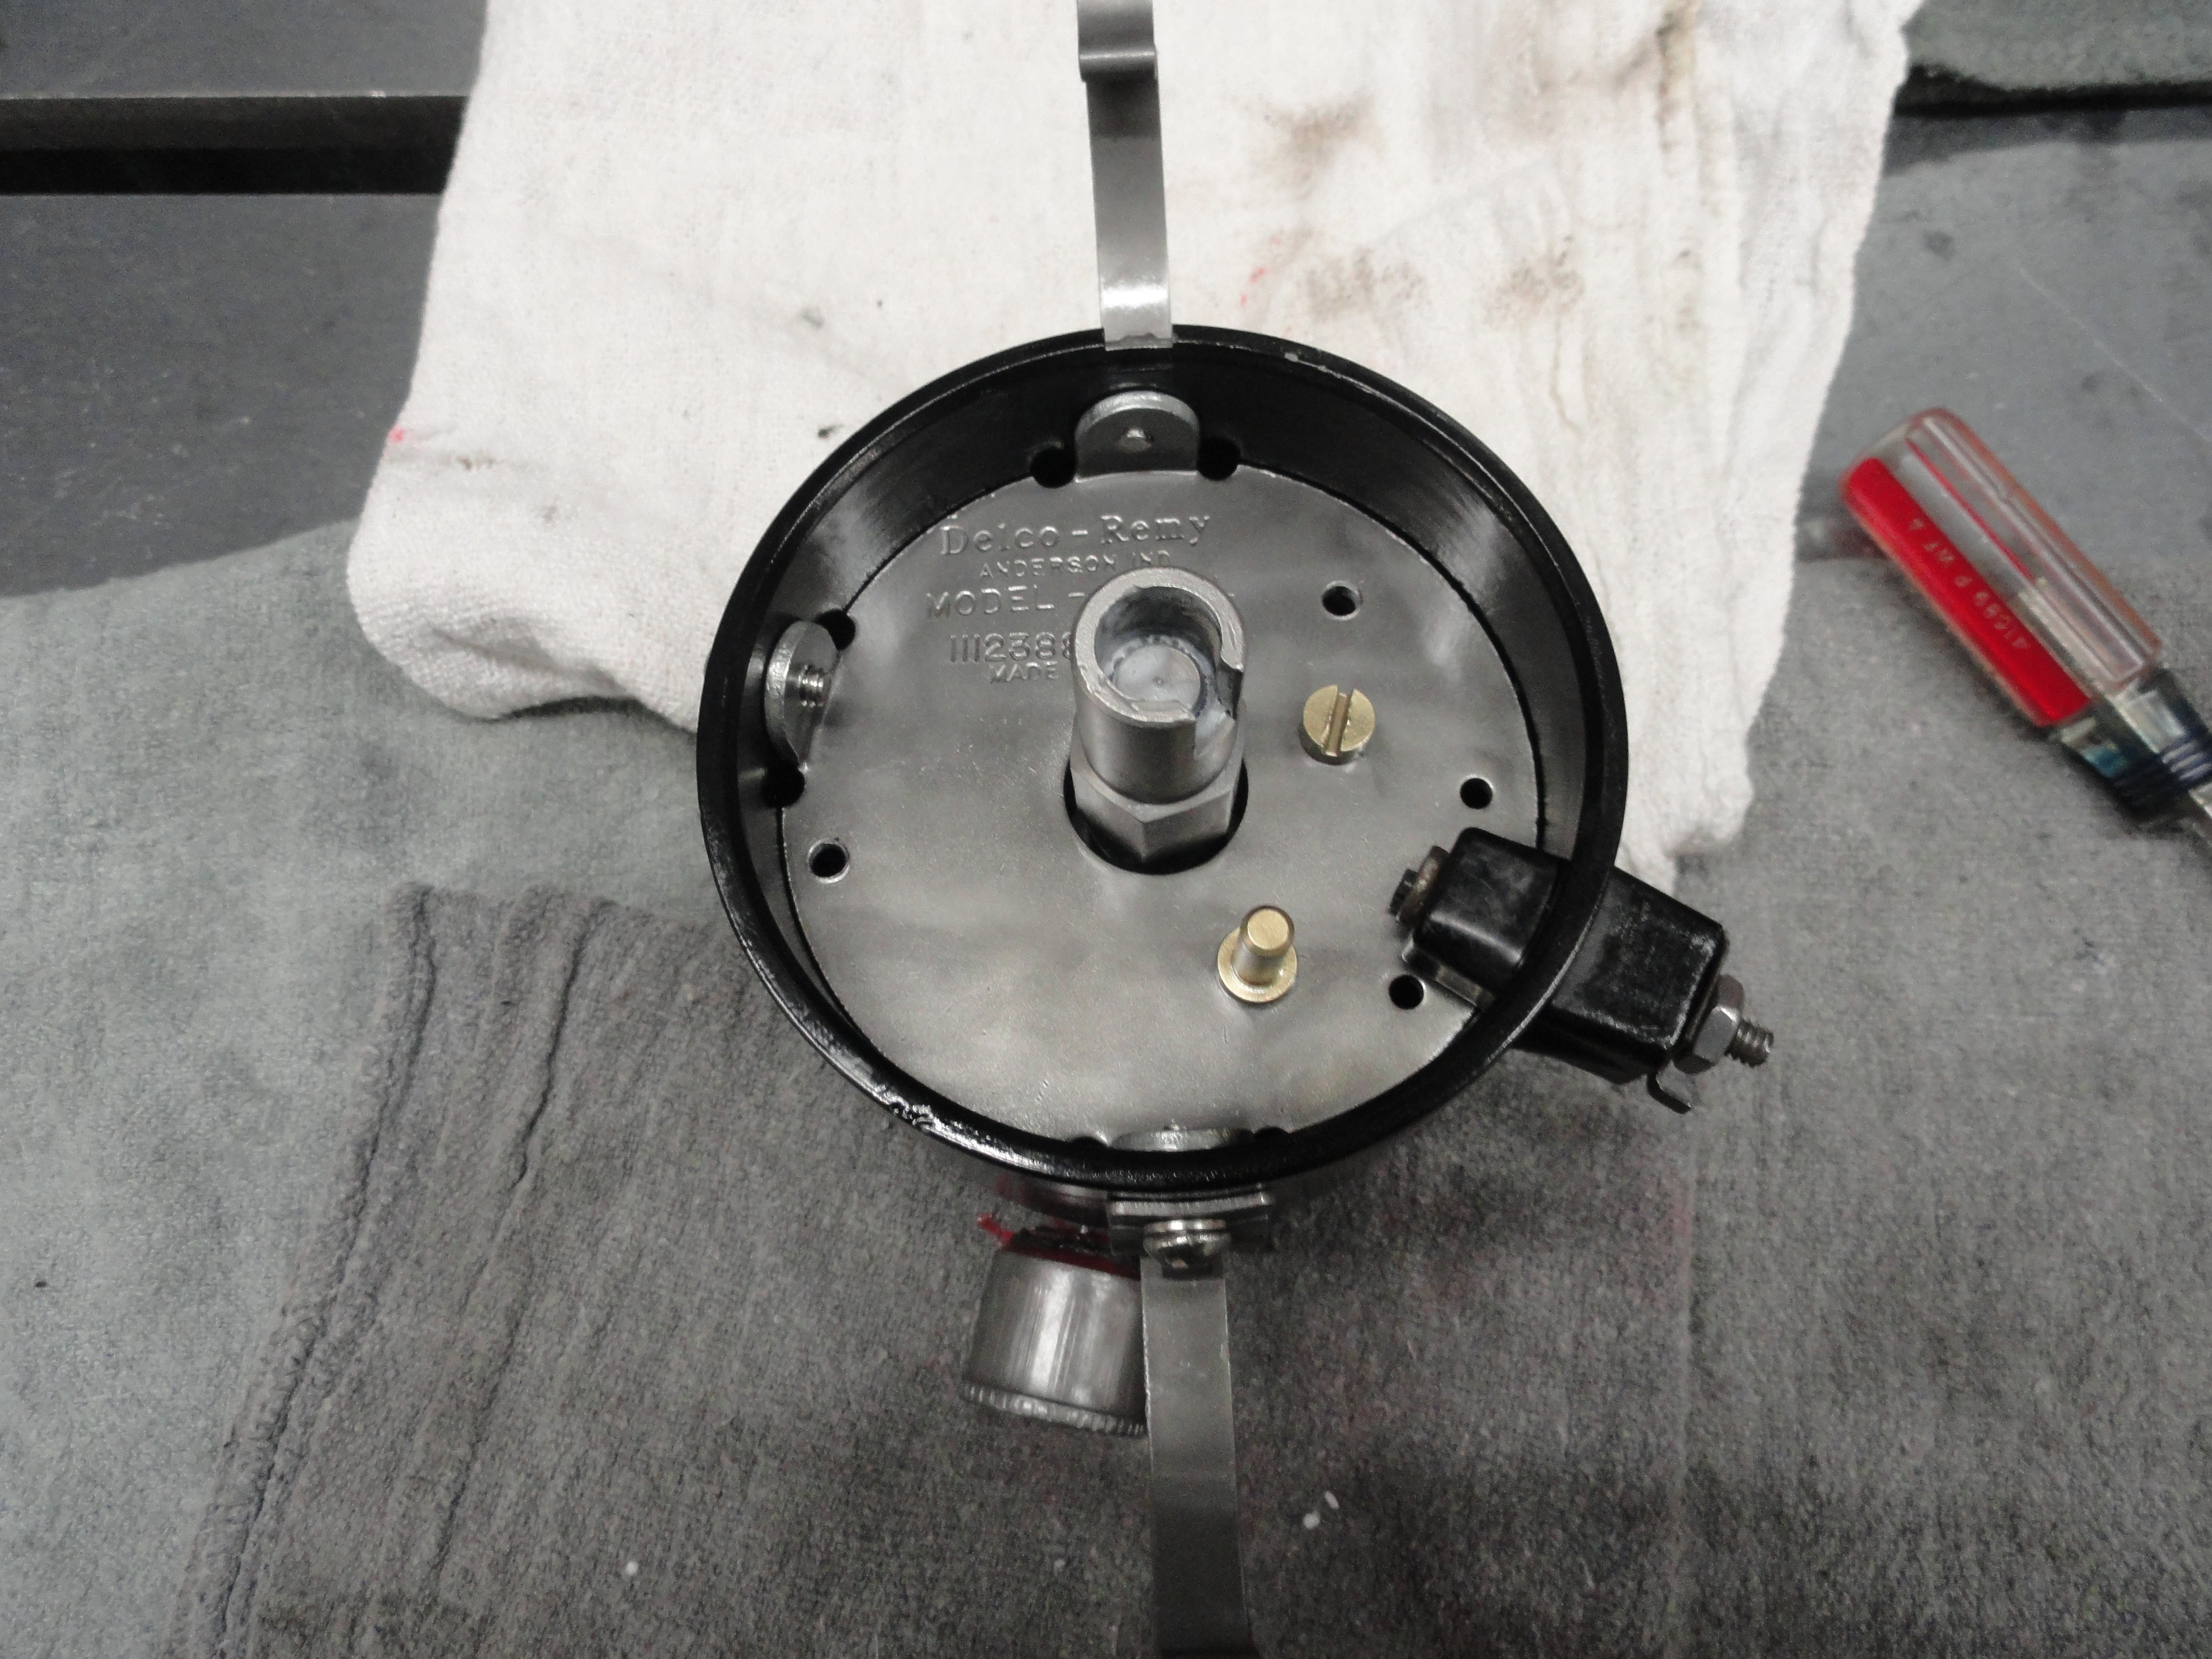
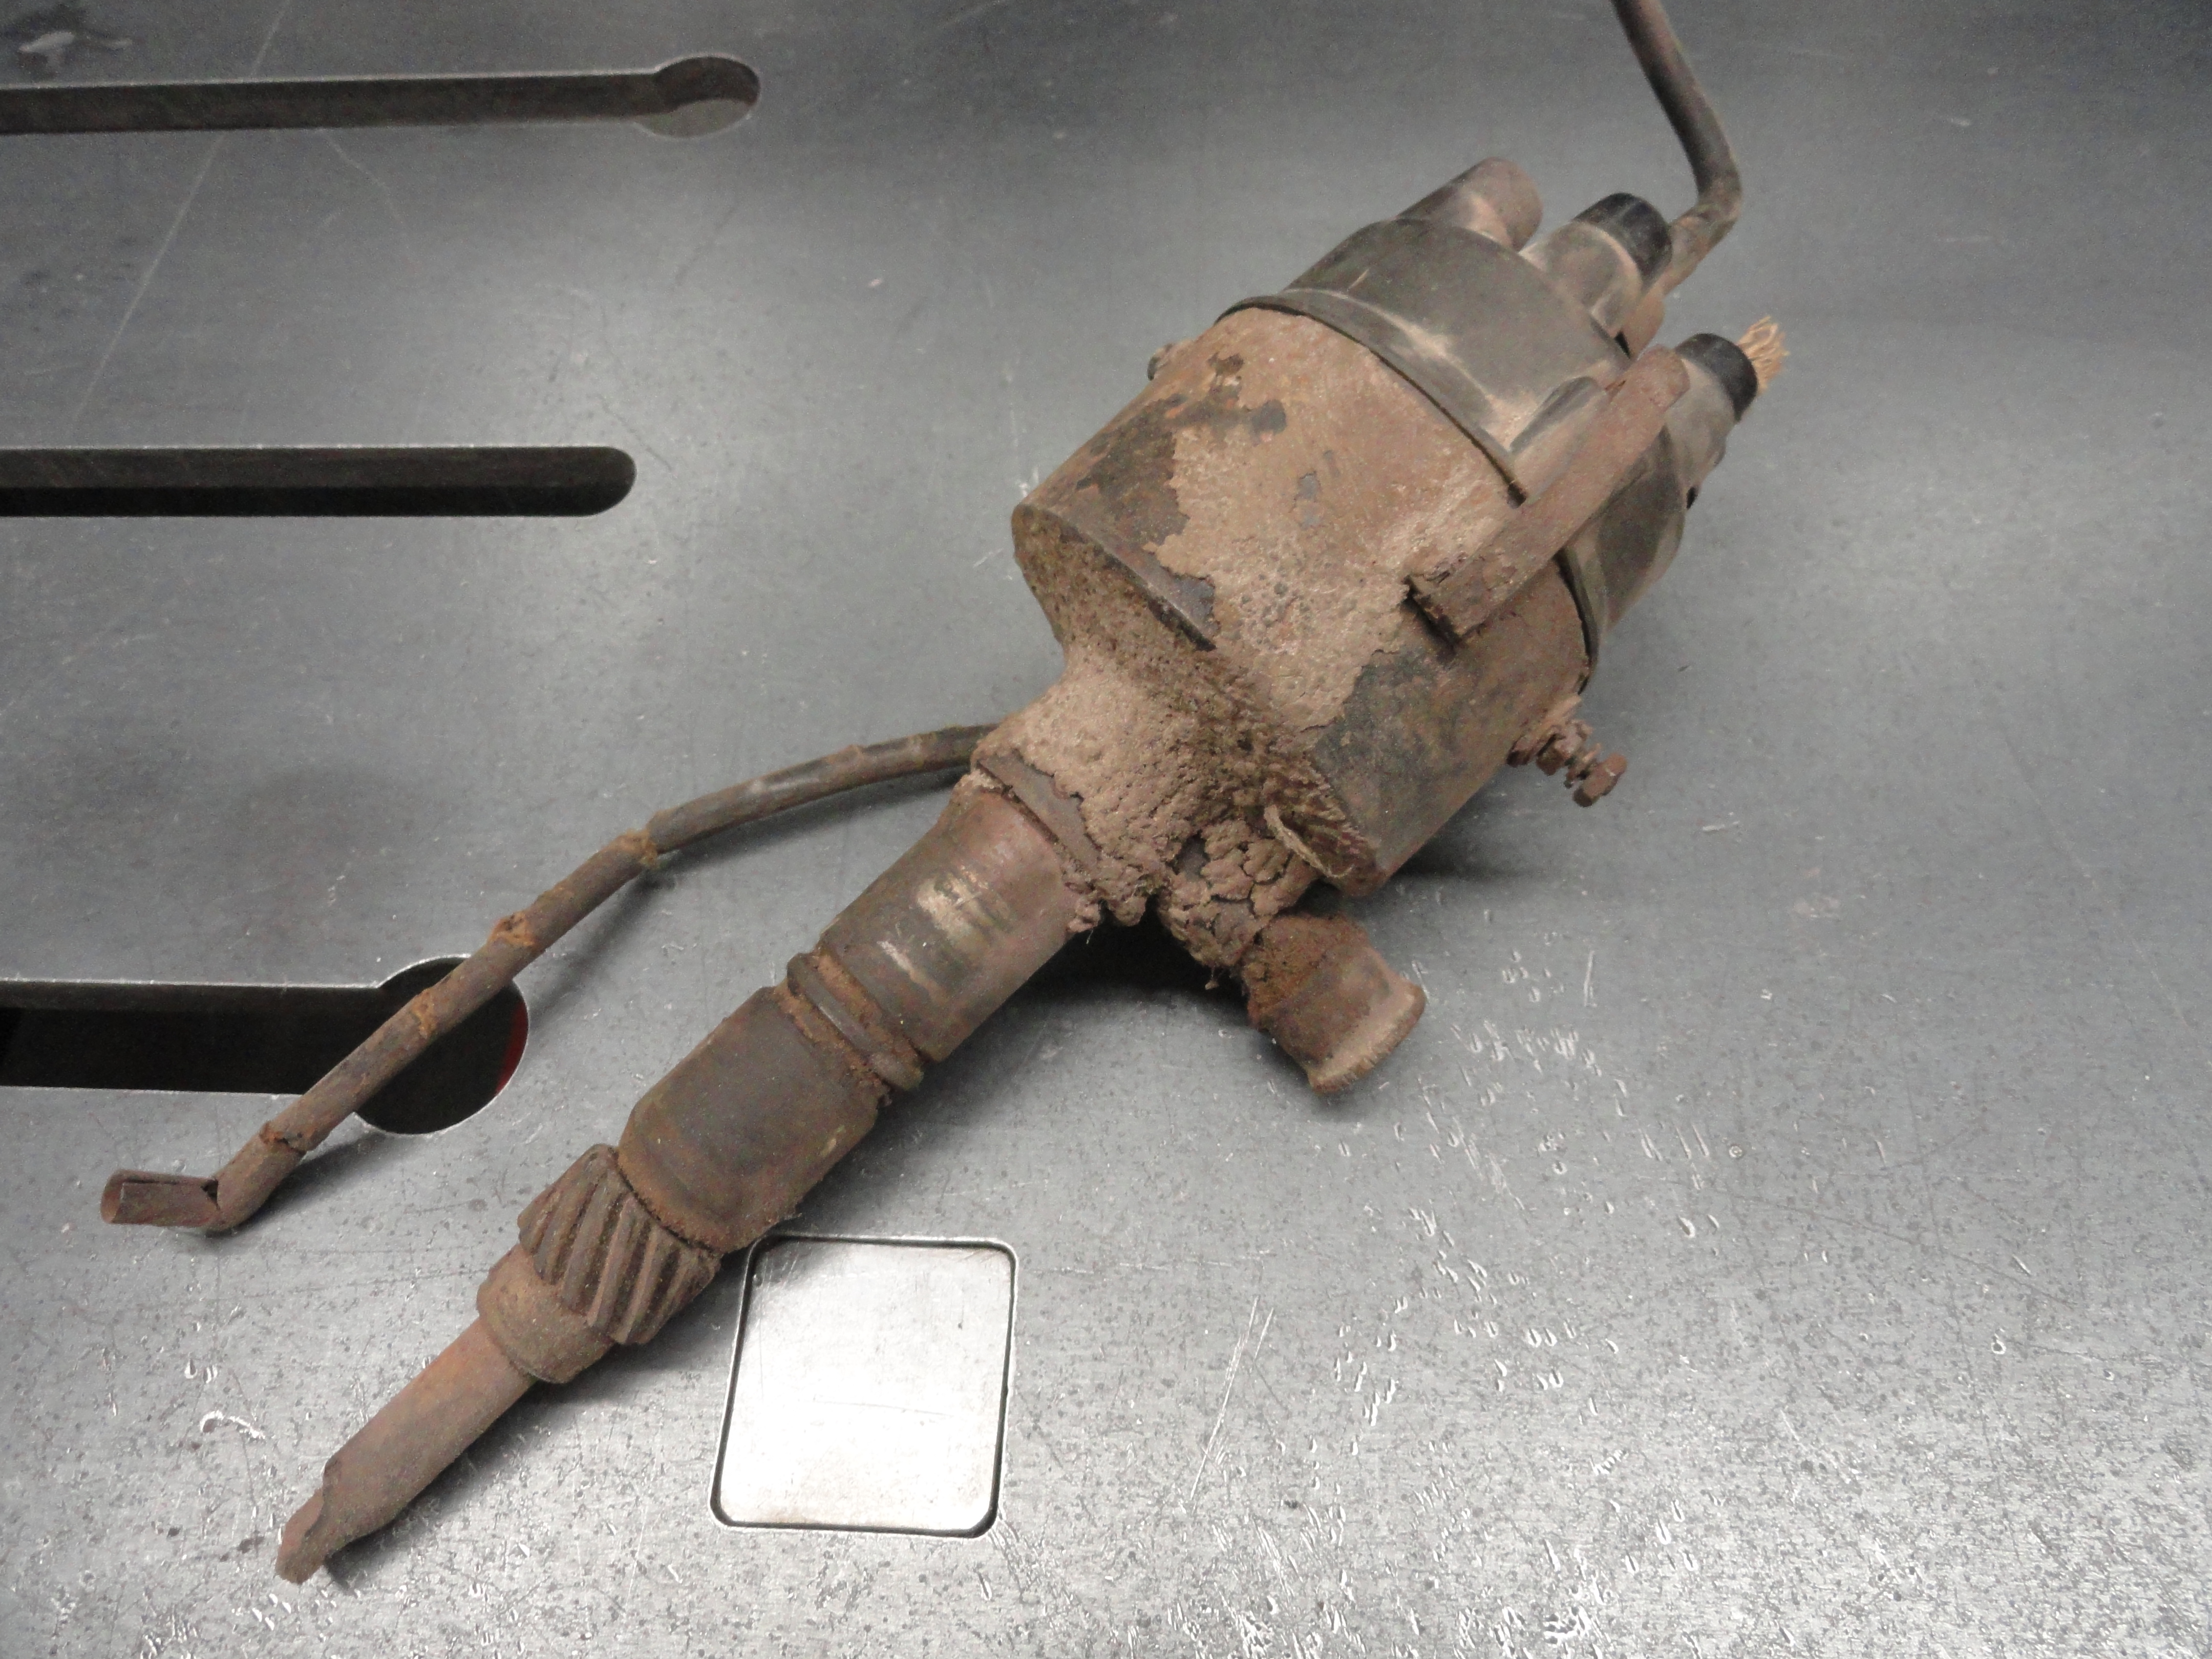
GM made two different types of lobe contact areas depending on the year of your Distributor. Most of us enthusiasts purchased our vehicles from previous owners and we are not 100% certain that things have not been replaced along the way. The Model and Serial Number can be found on the face plate inside the distributor where the Points and Condenser are mounted. This will tell you if your Distributor is original to your vehicle/engine. The number starts with 111xxxx. Also take a look at the lobes and compare them to the picture on the left. You can never have enough information about your vintage ride!
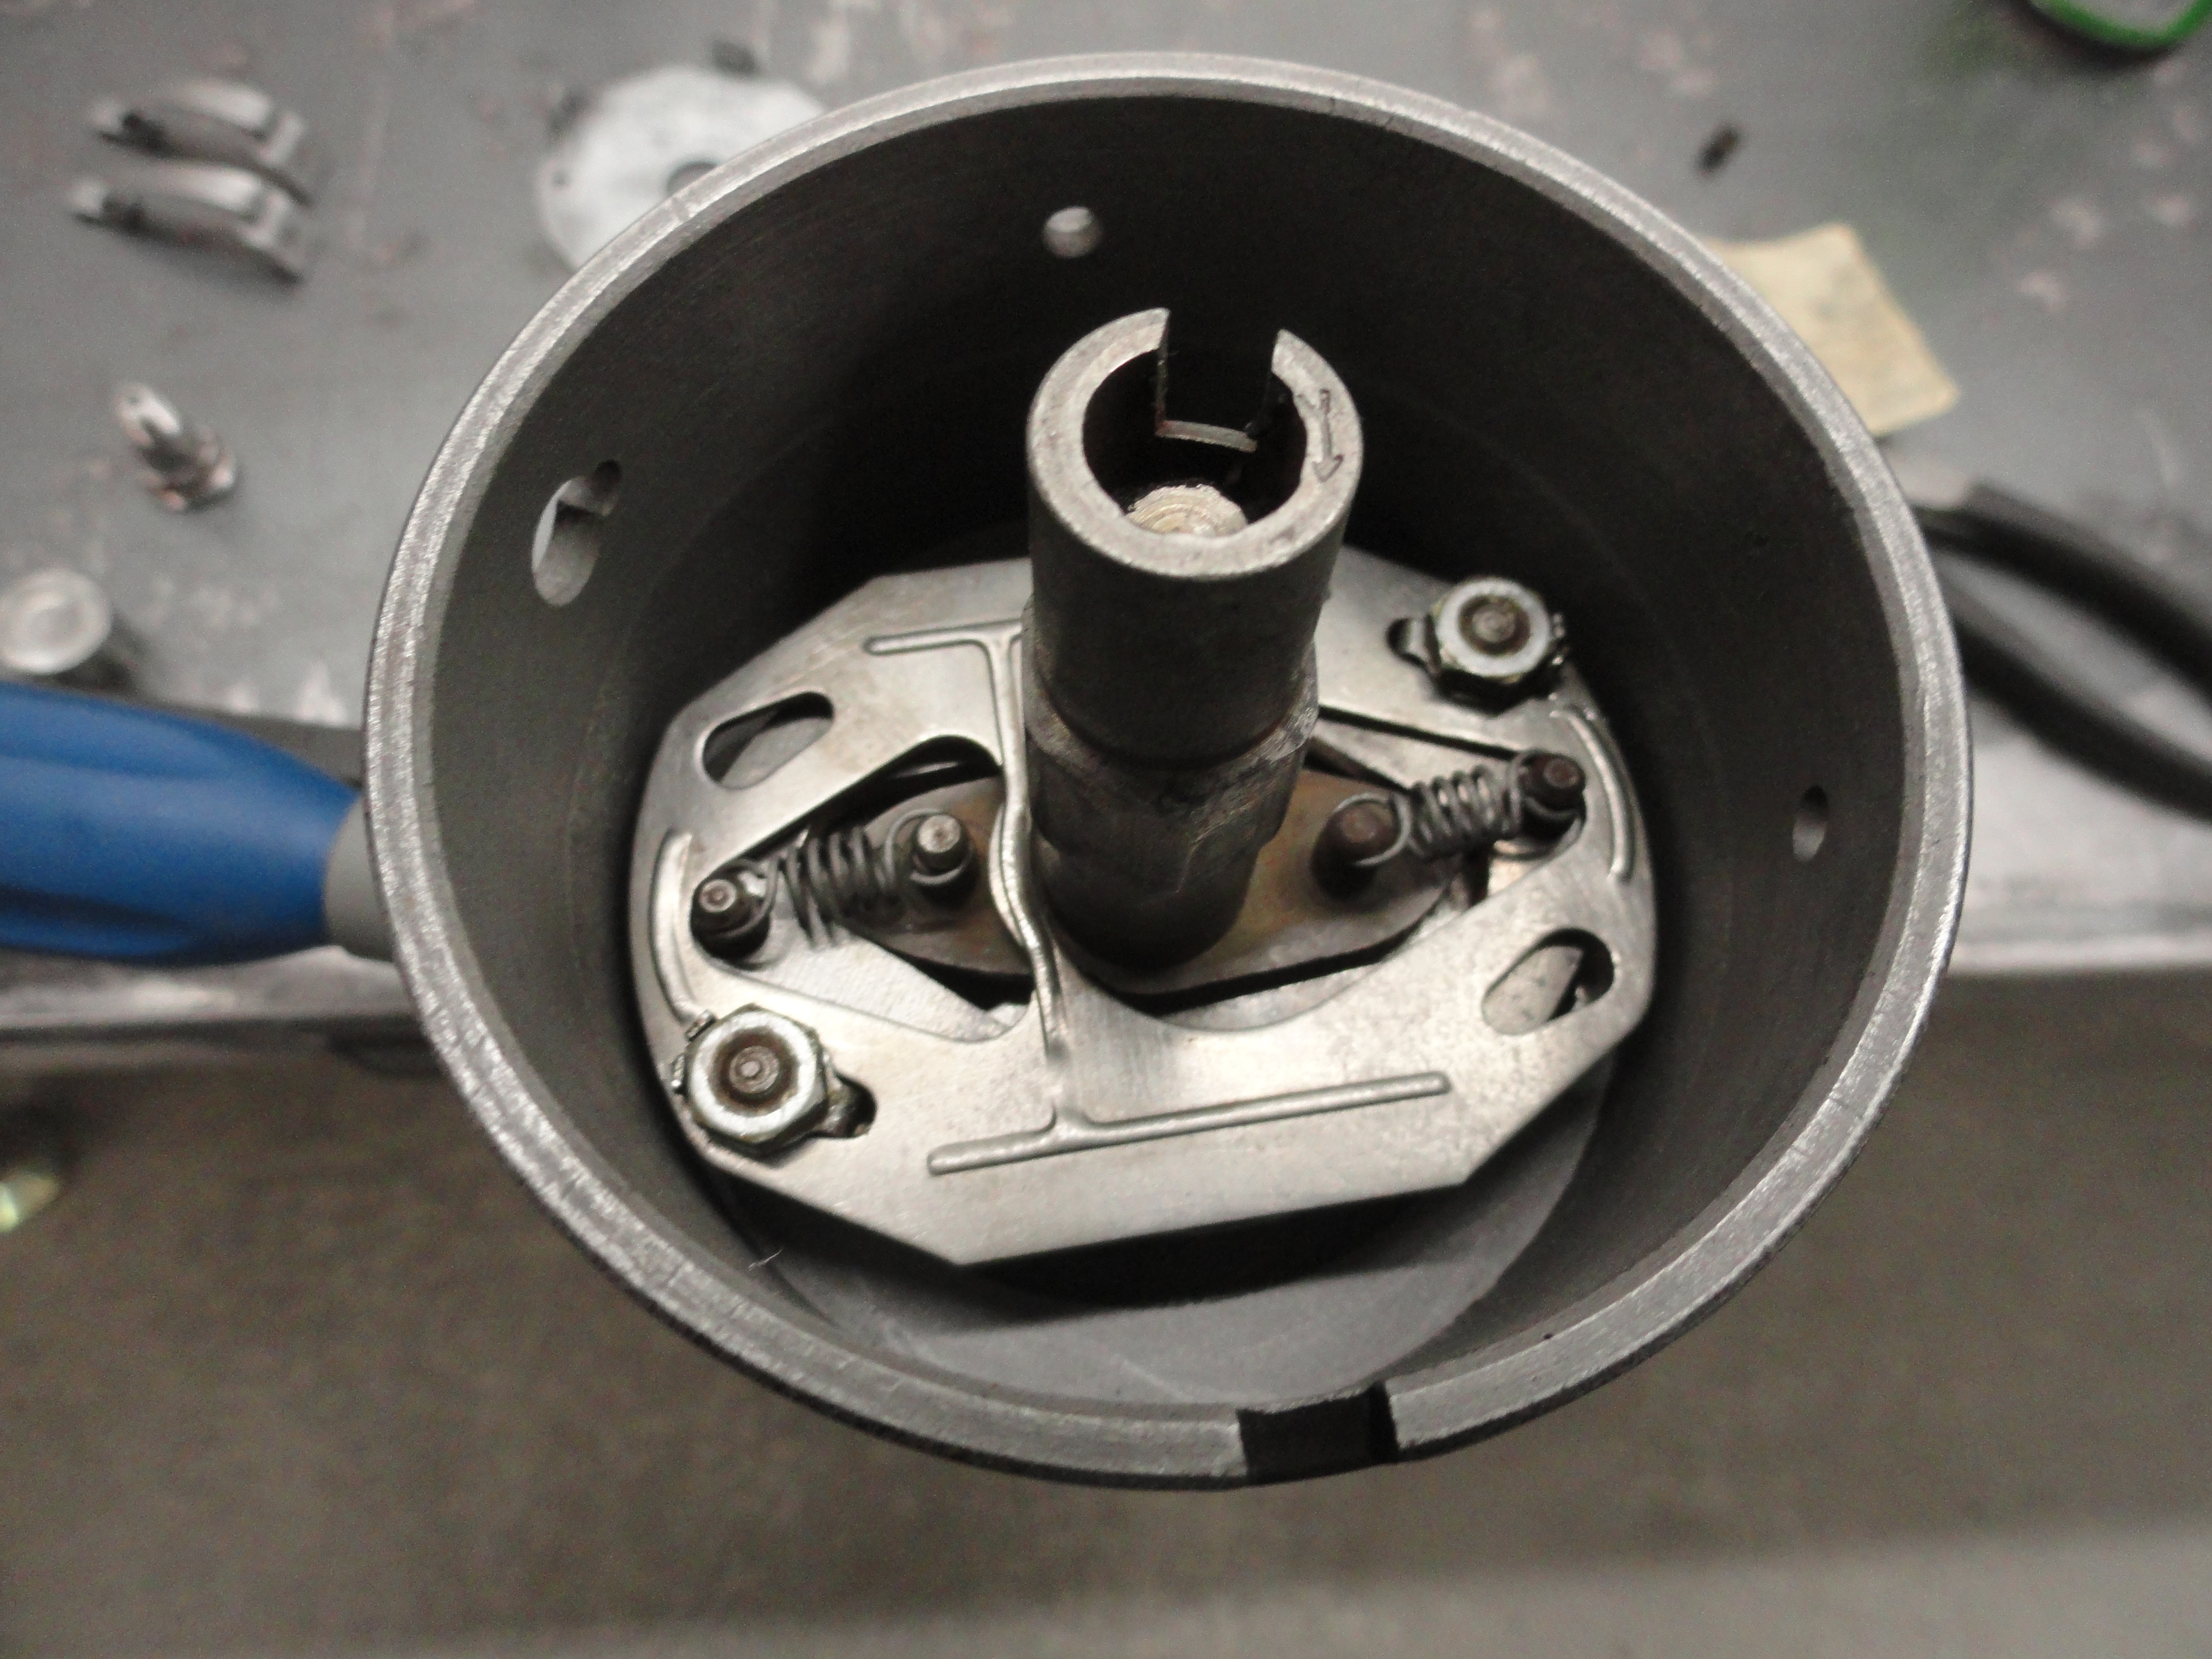
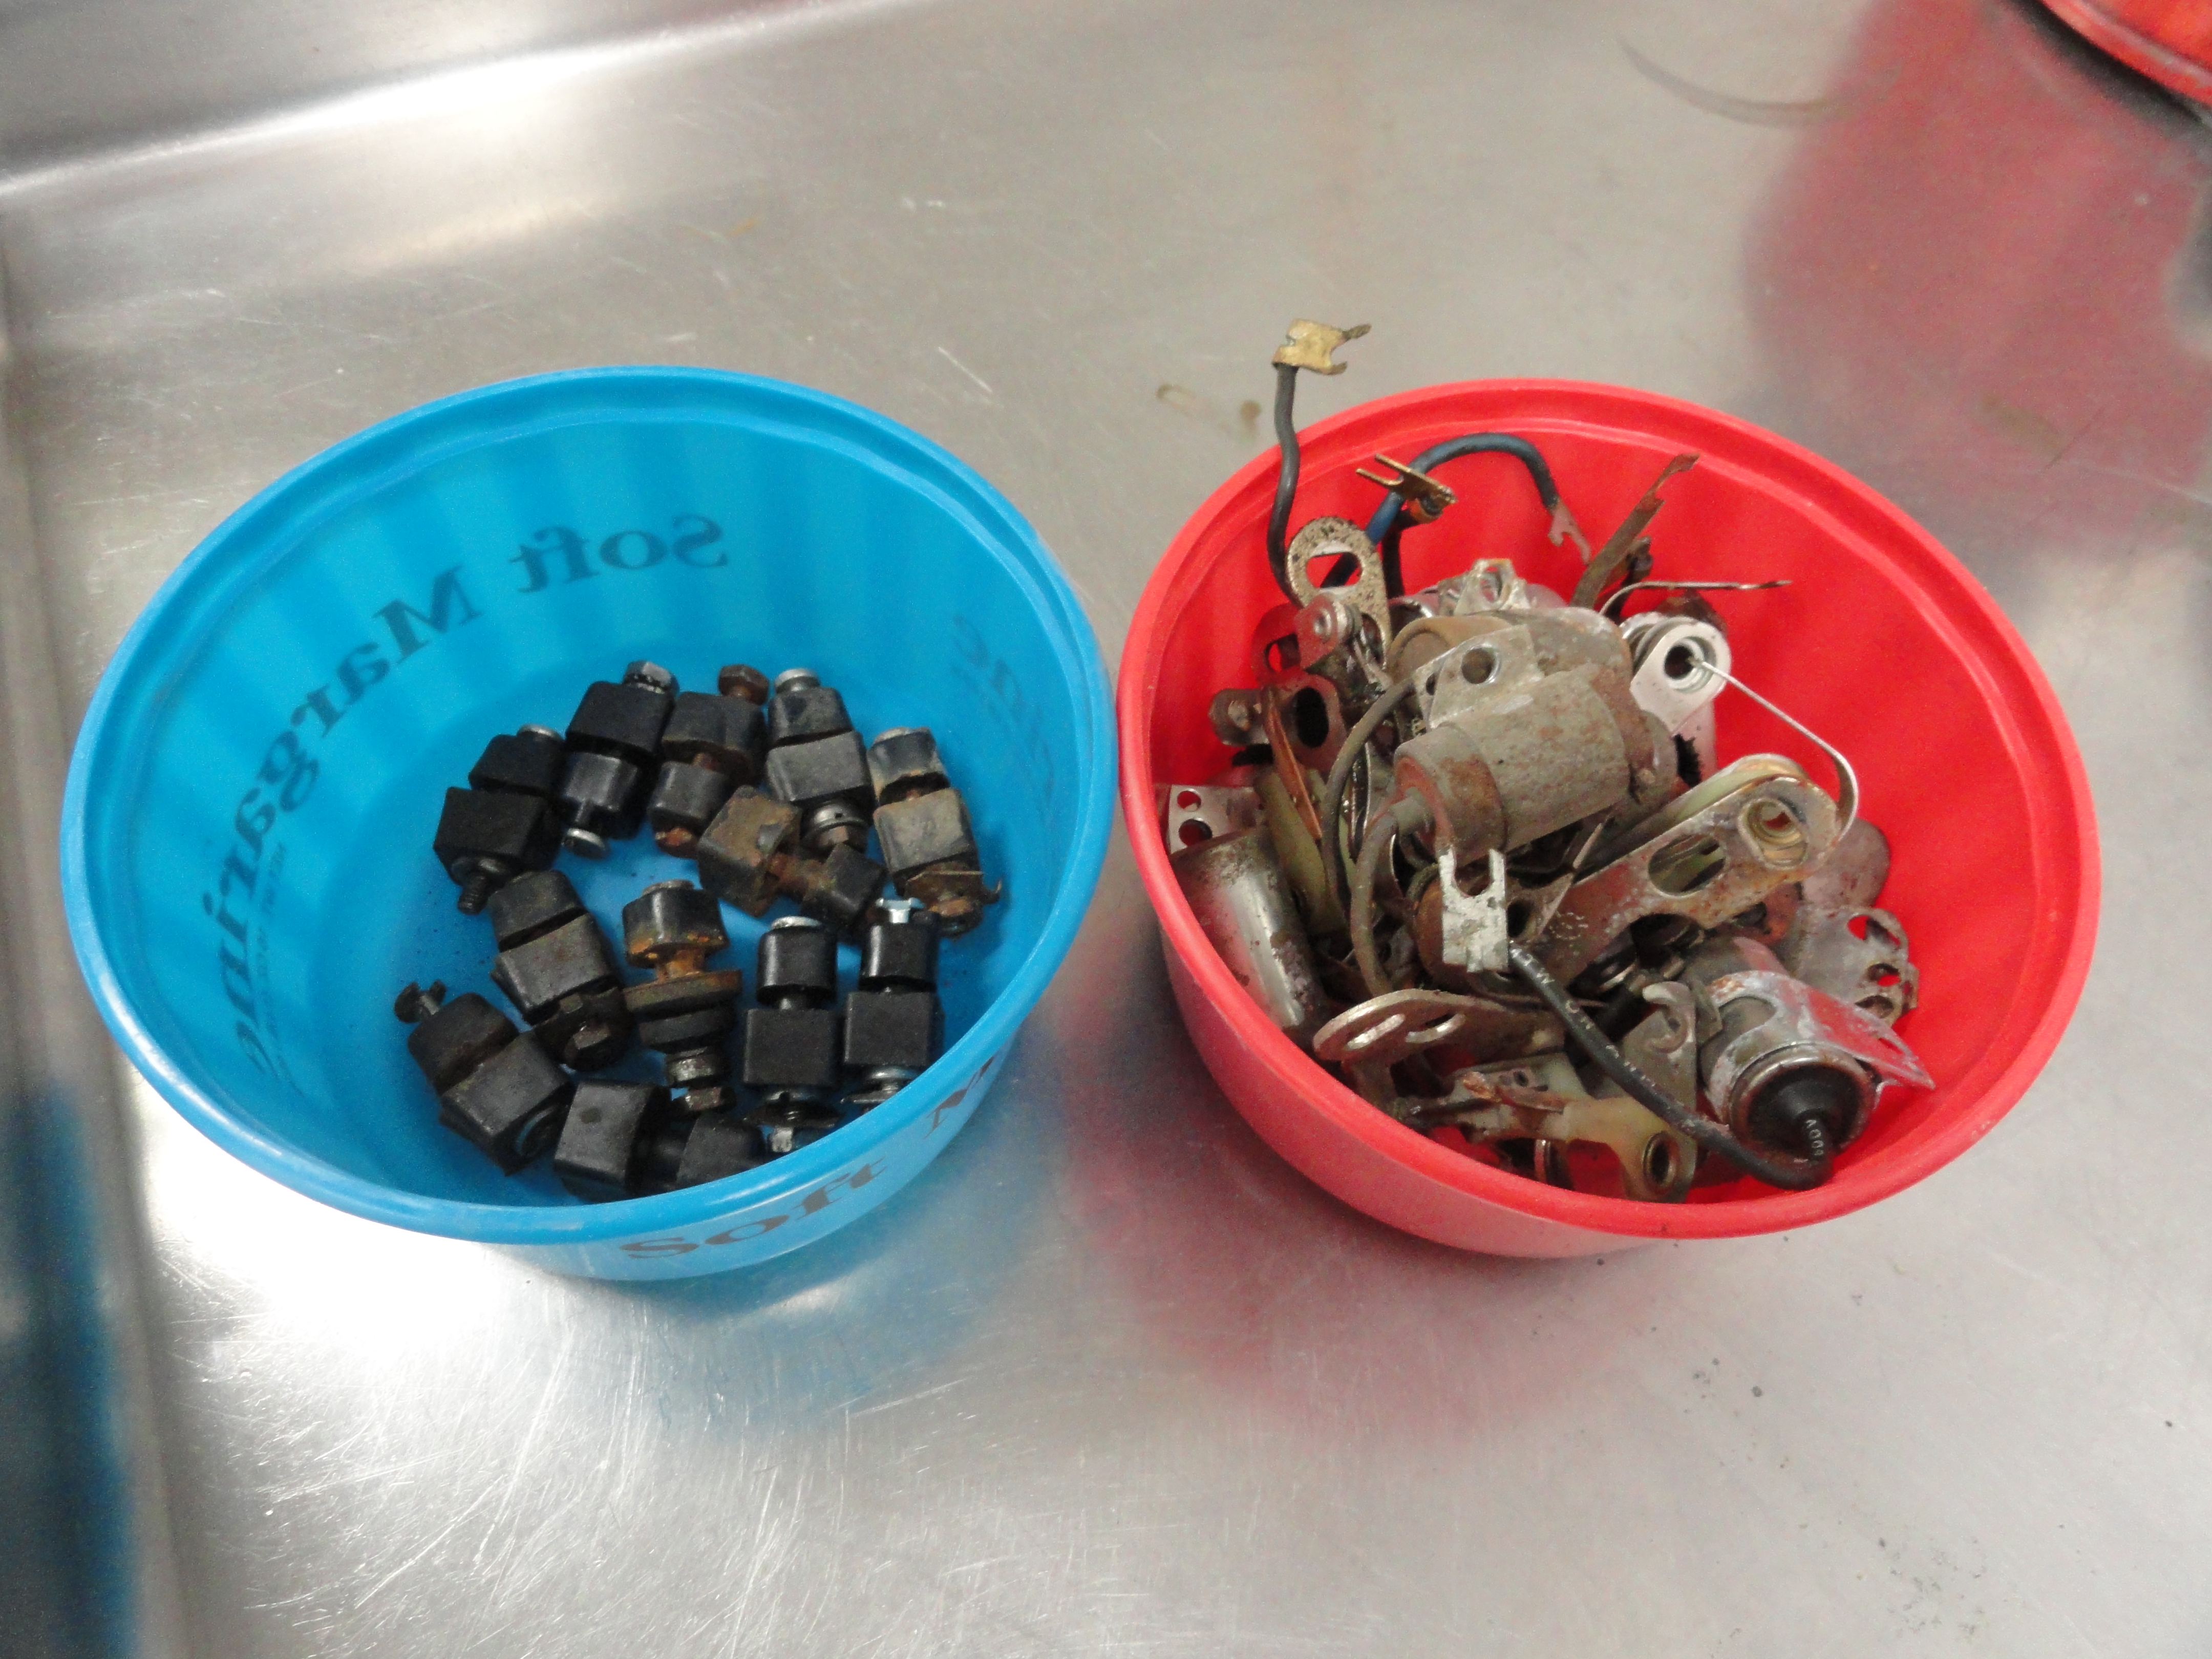
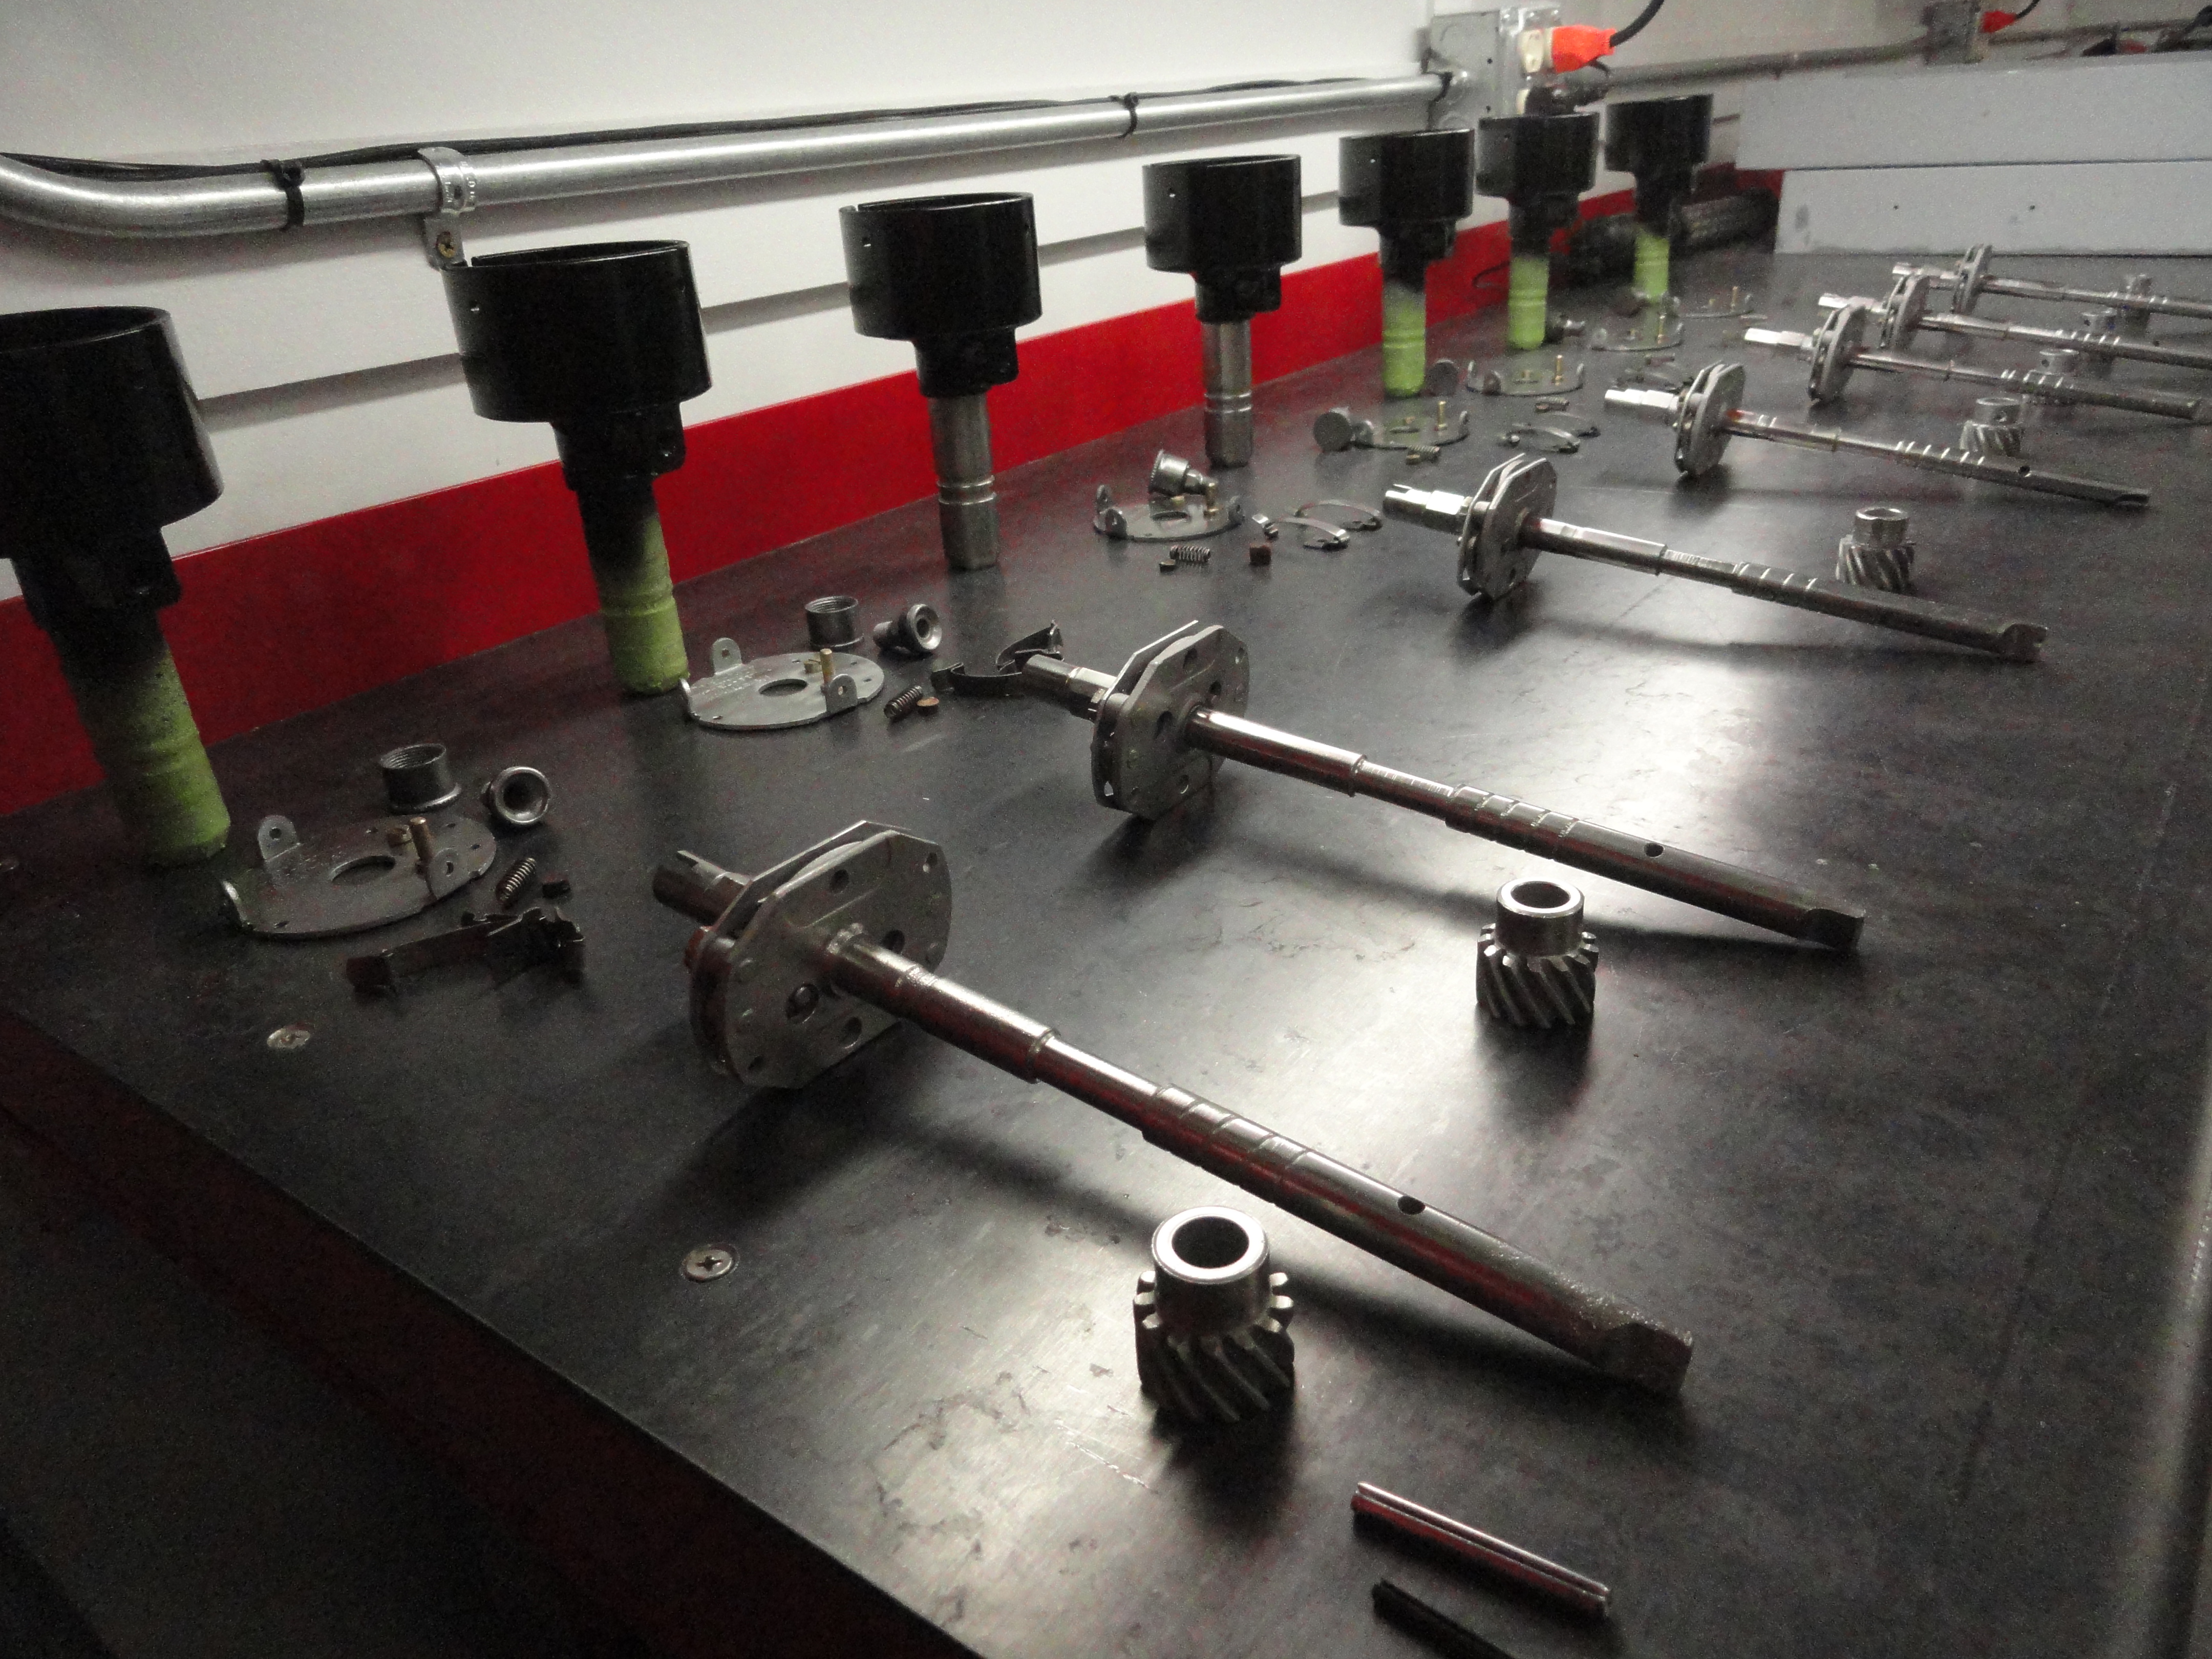
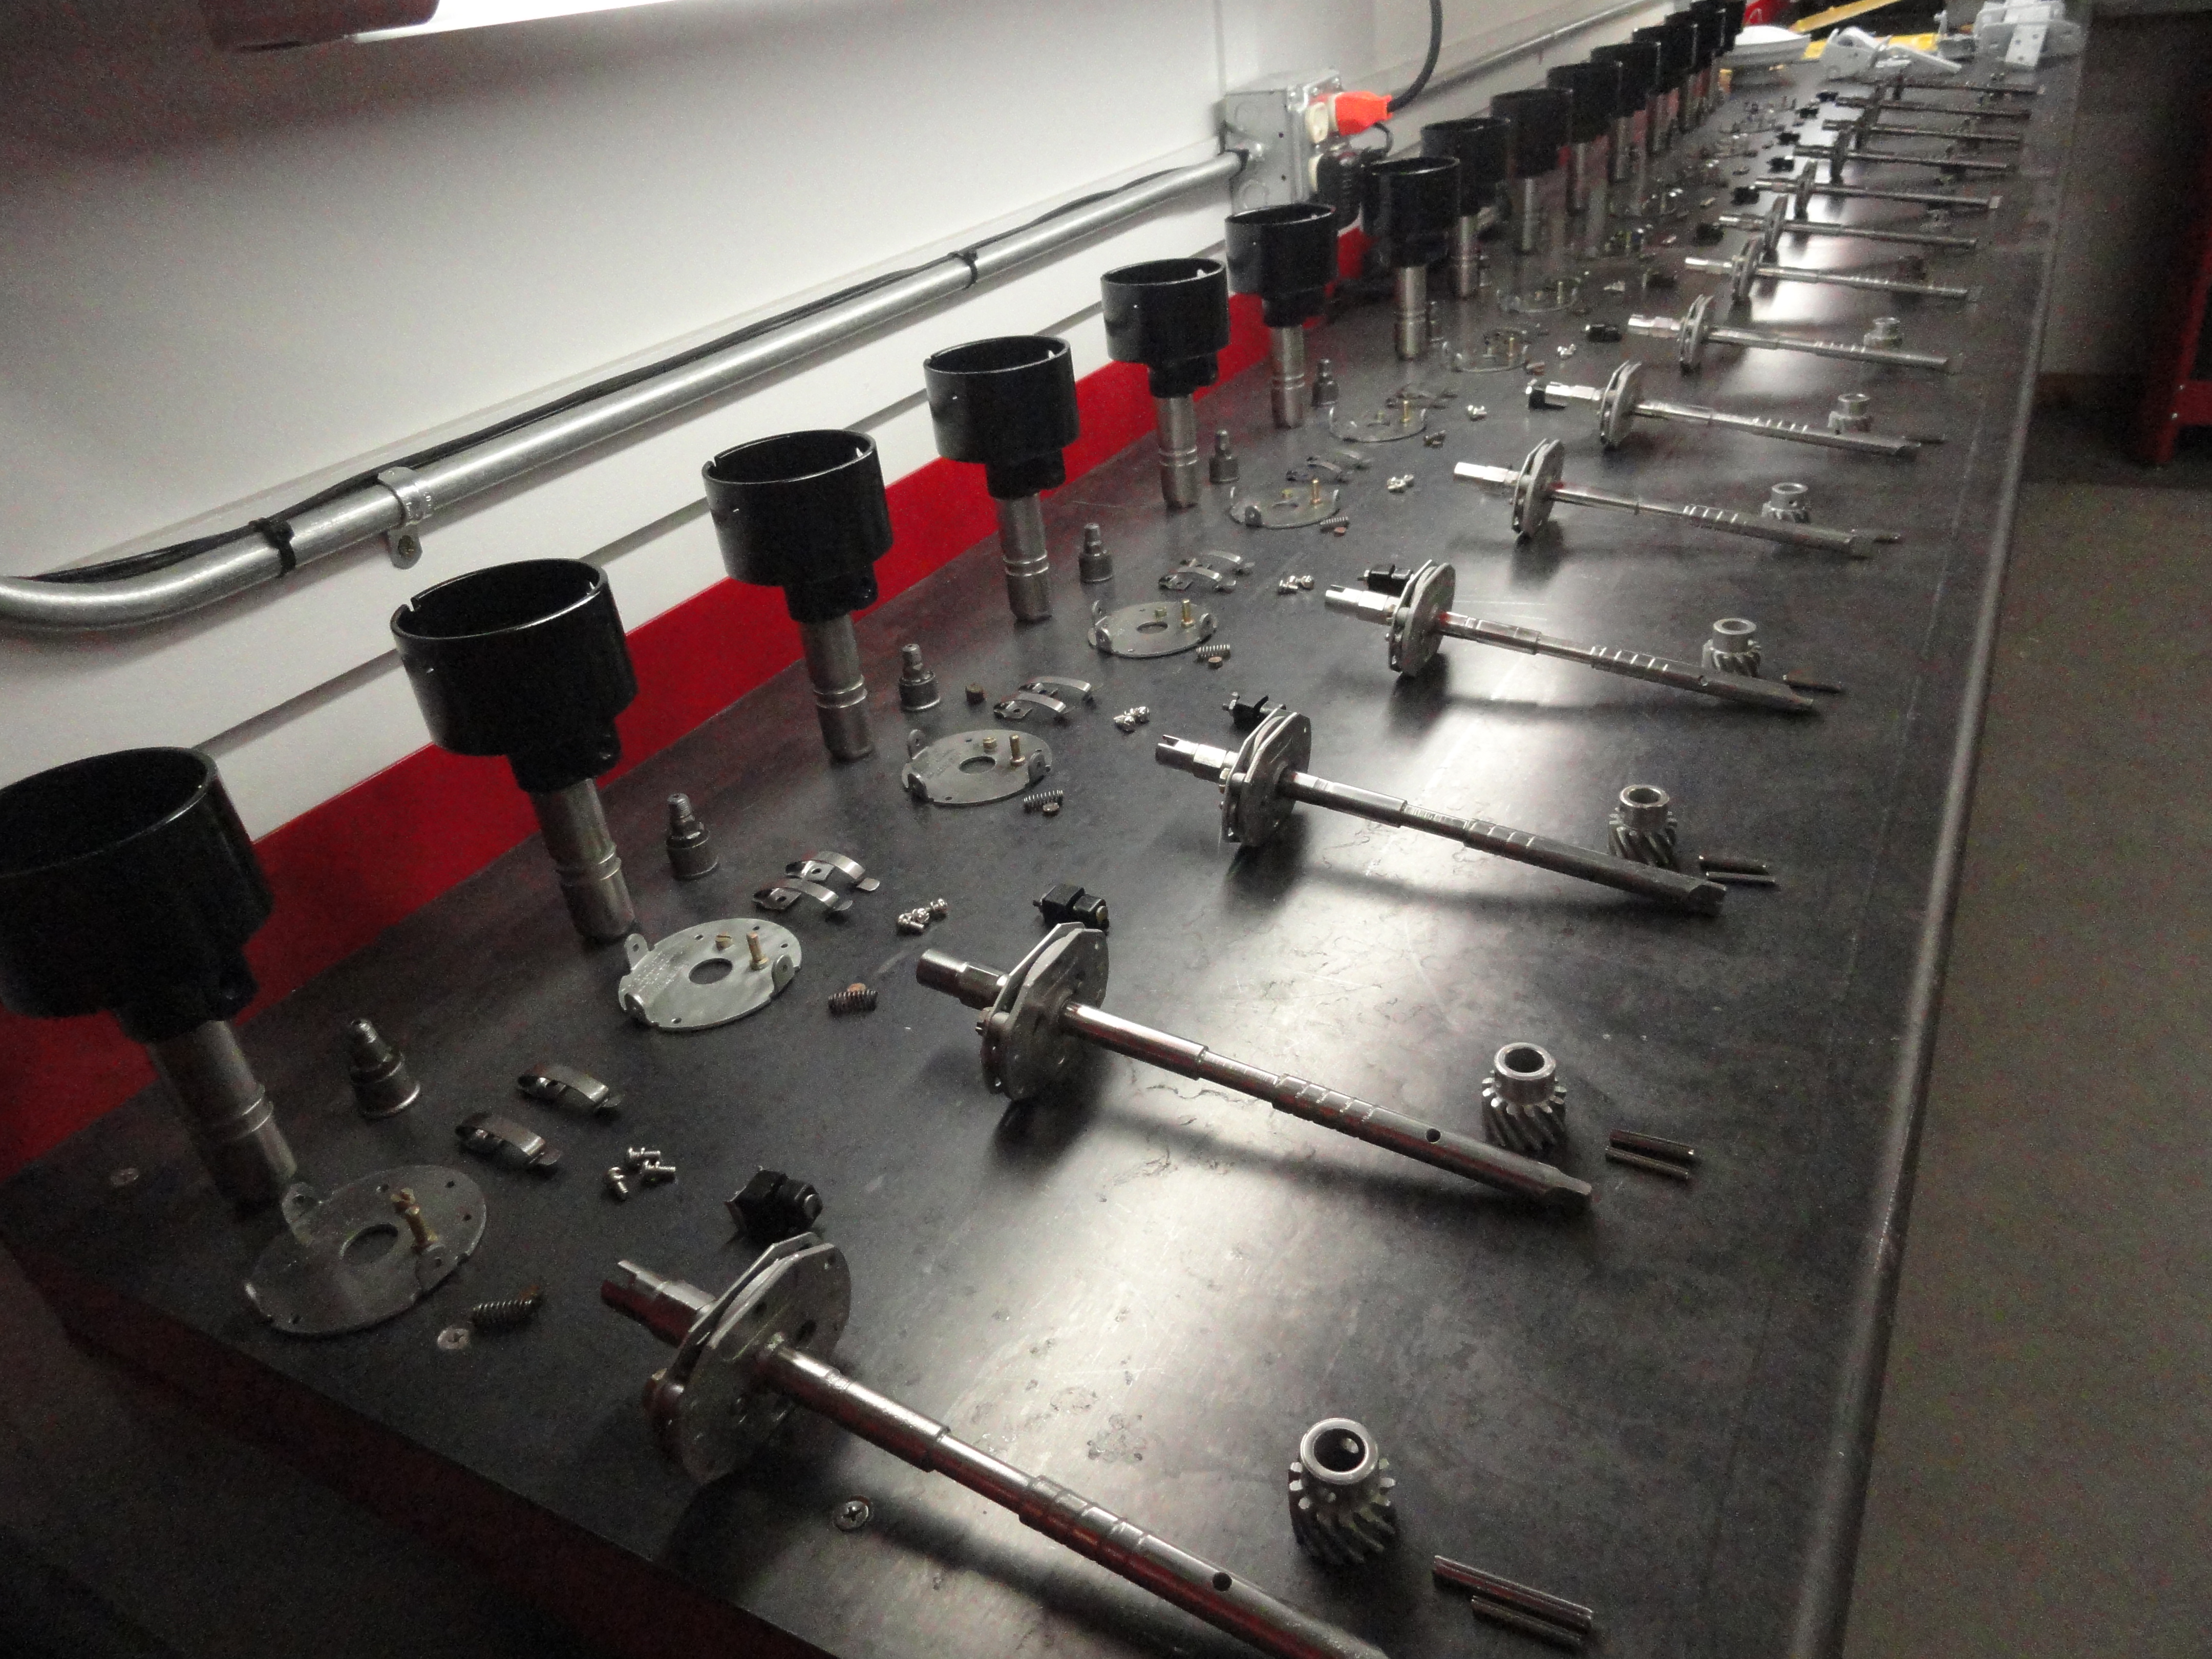
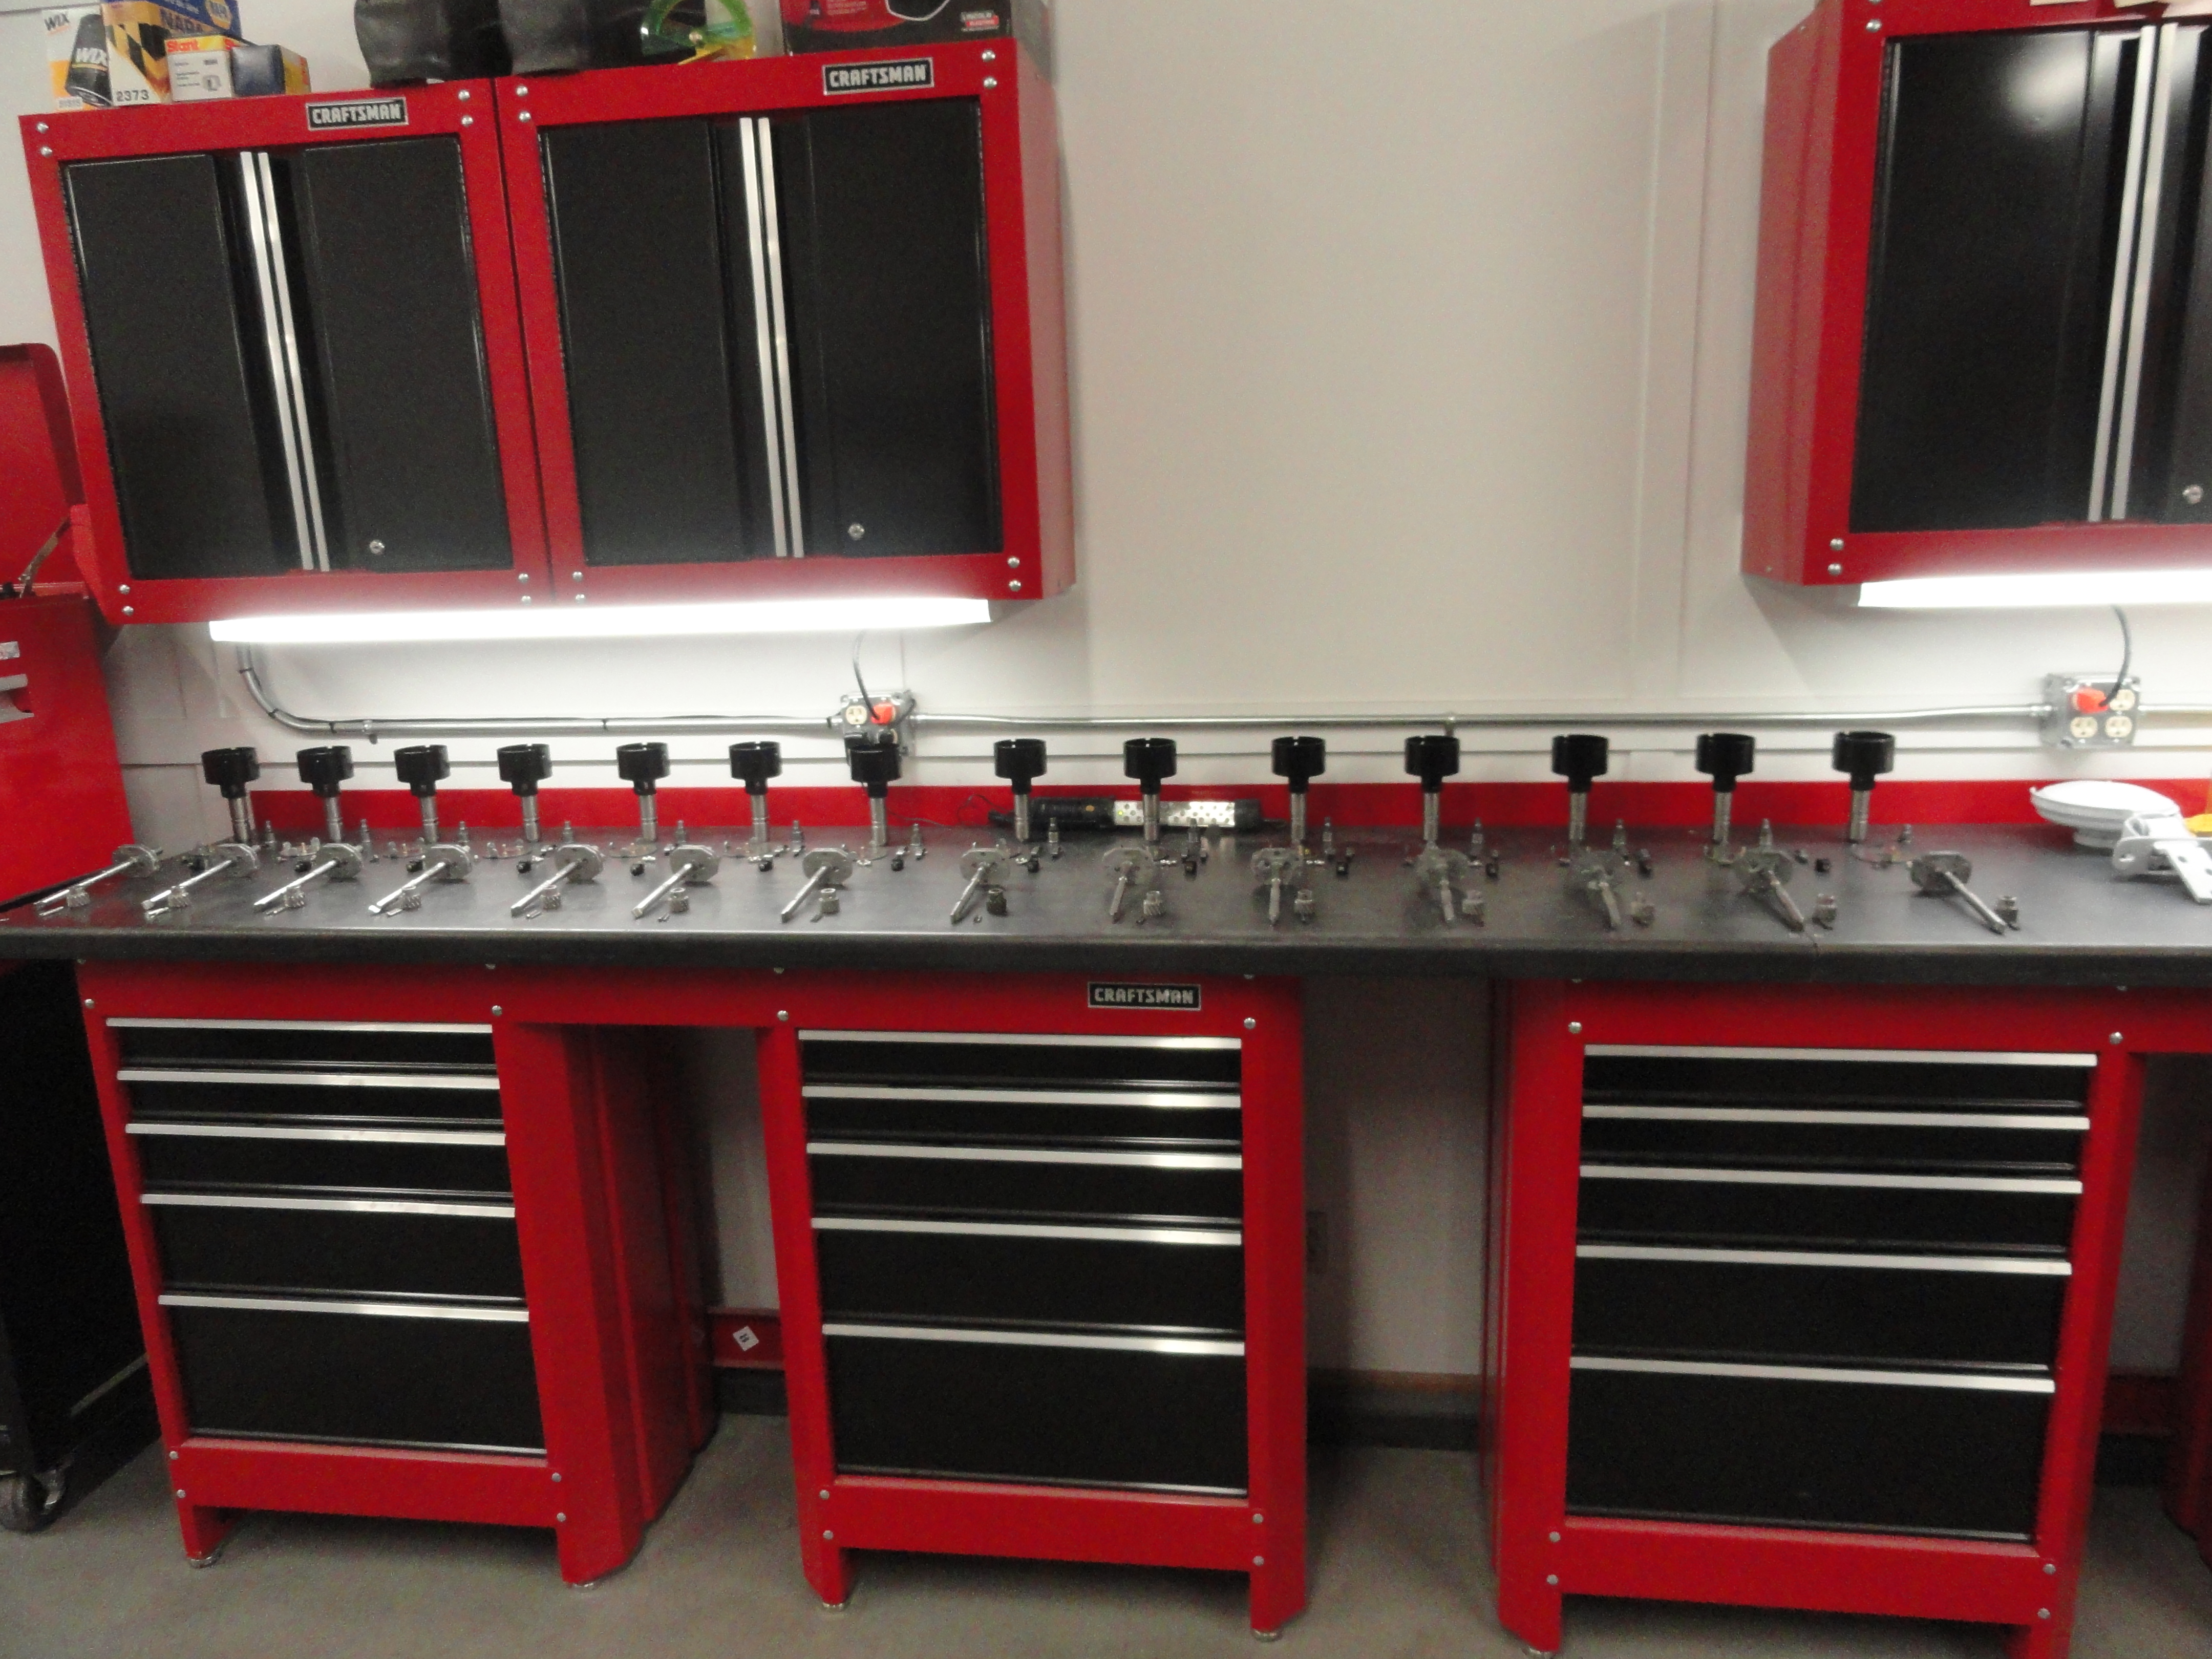
I decided to just go ahead and rebuild a Lot of them since I had them laying around the shop and eventually will need them anyway. This gave me a complete understanding of how things go back together. First order of business after removing the Distributor Cap is to remove the points and condenser. Go easy on the phenolic (black plastic) pieces because they are getting very hard to find. If the condenser wire pulls right out, great, but if its stuck in there, first remove the nut on the outside and the conductor plate. This will reveal a round nut with slots on both sides of the screw. With something small, just rotate it out a little and your condenser and points will come right out. Let's go ahead and remove the plastic pieces. This by again, removing the nut and conductor plate, the round nut and then behind the round nut goes a lock washer. Once you have all that removed, take the screw out (carefully) and the two plastic pieces should just pull apart from each other and come out as well. The plastic pieces are very nuanced and seem to be the most difficult pieces to find along with that round nut and special screw. Don't lose anything!
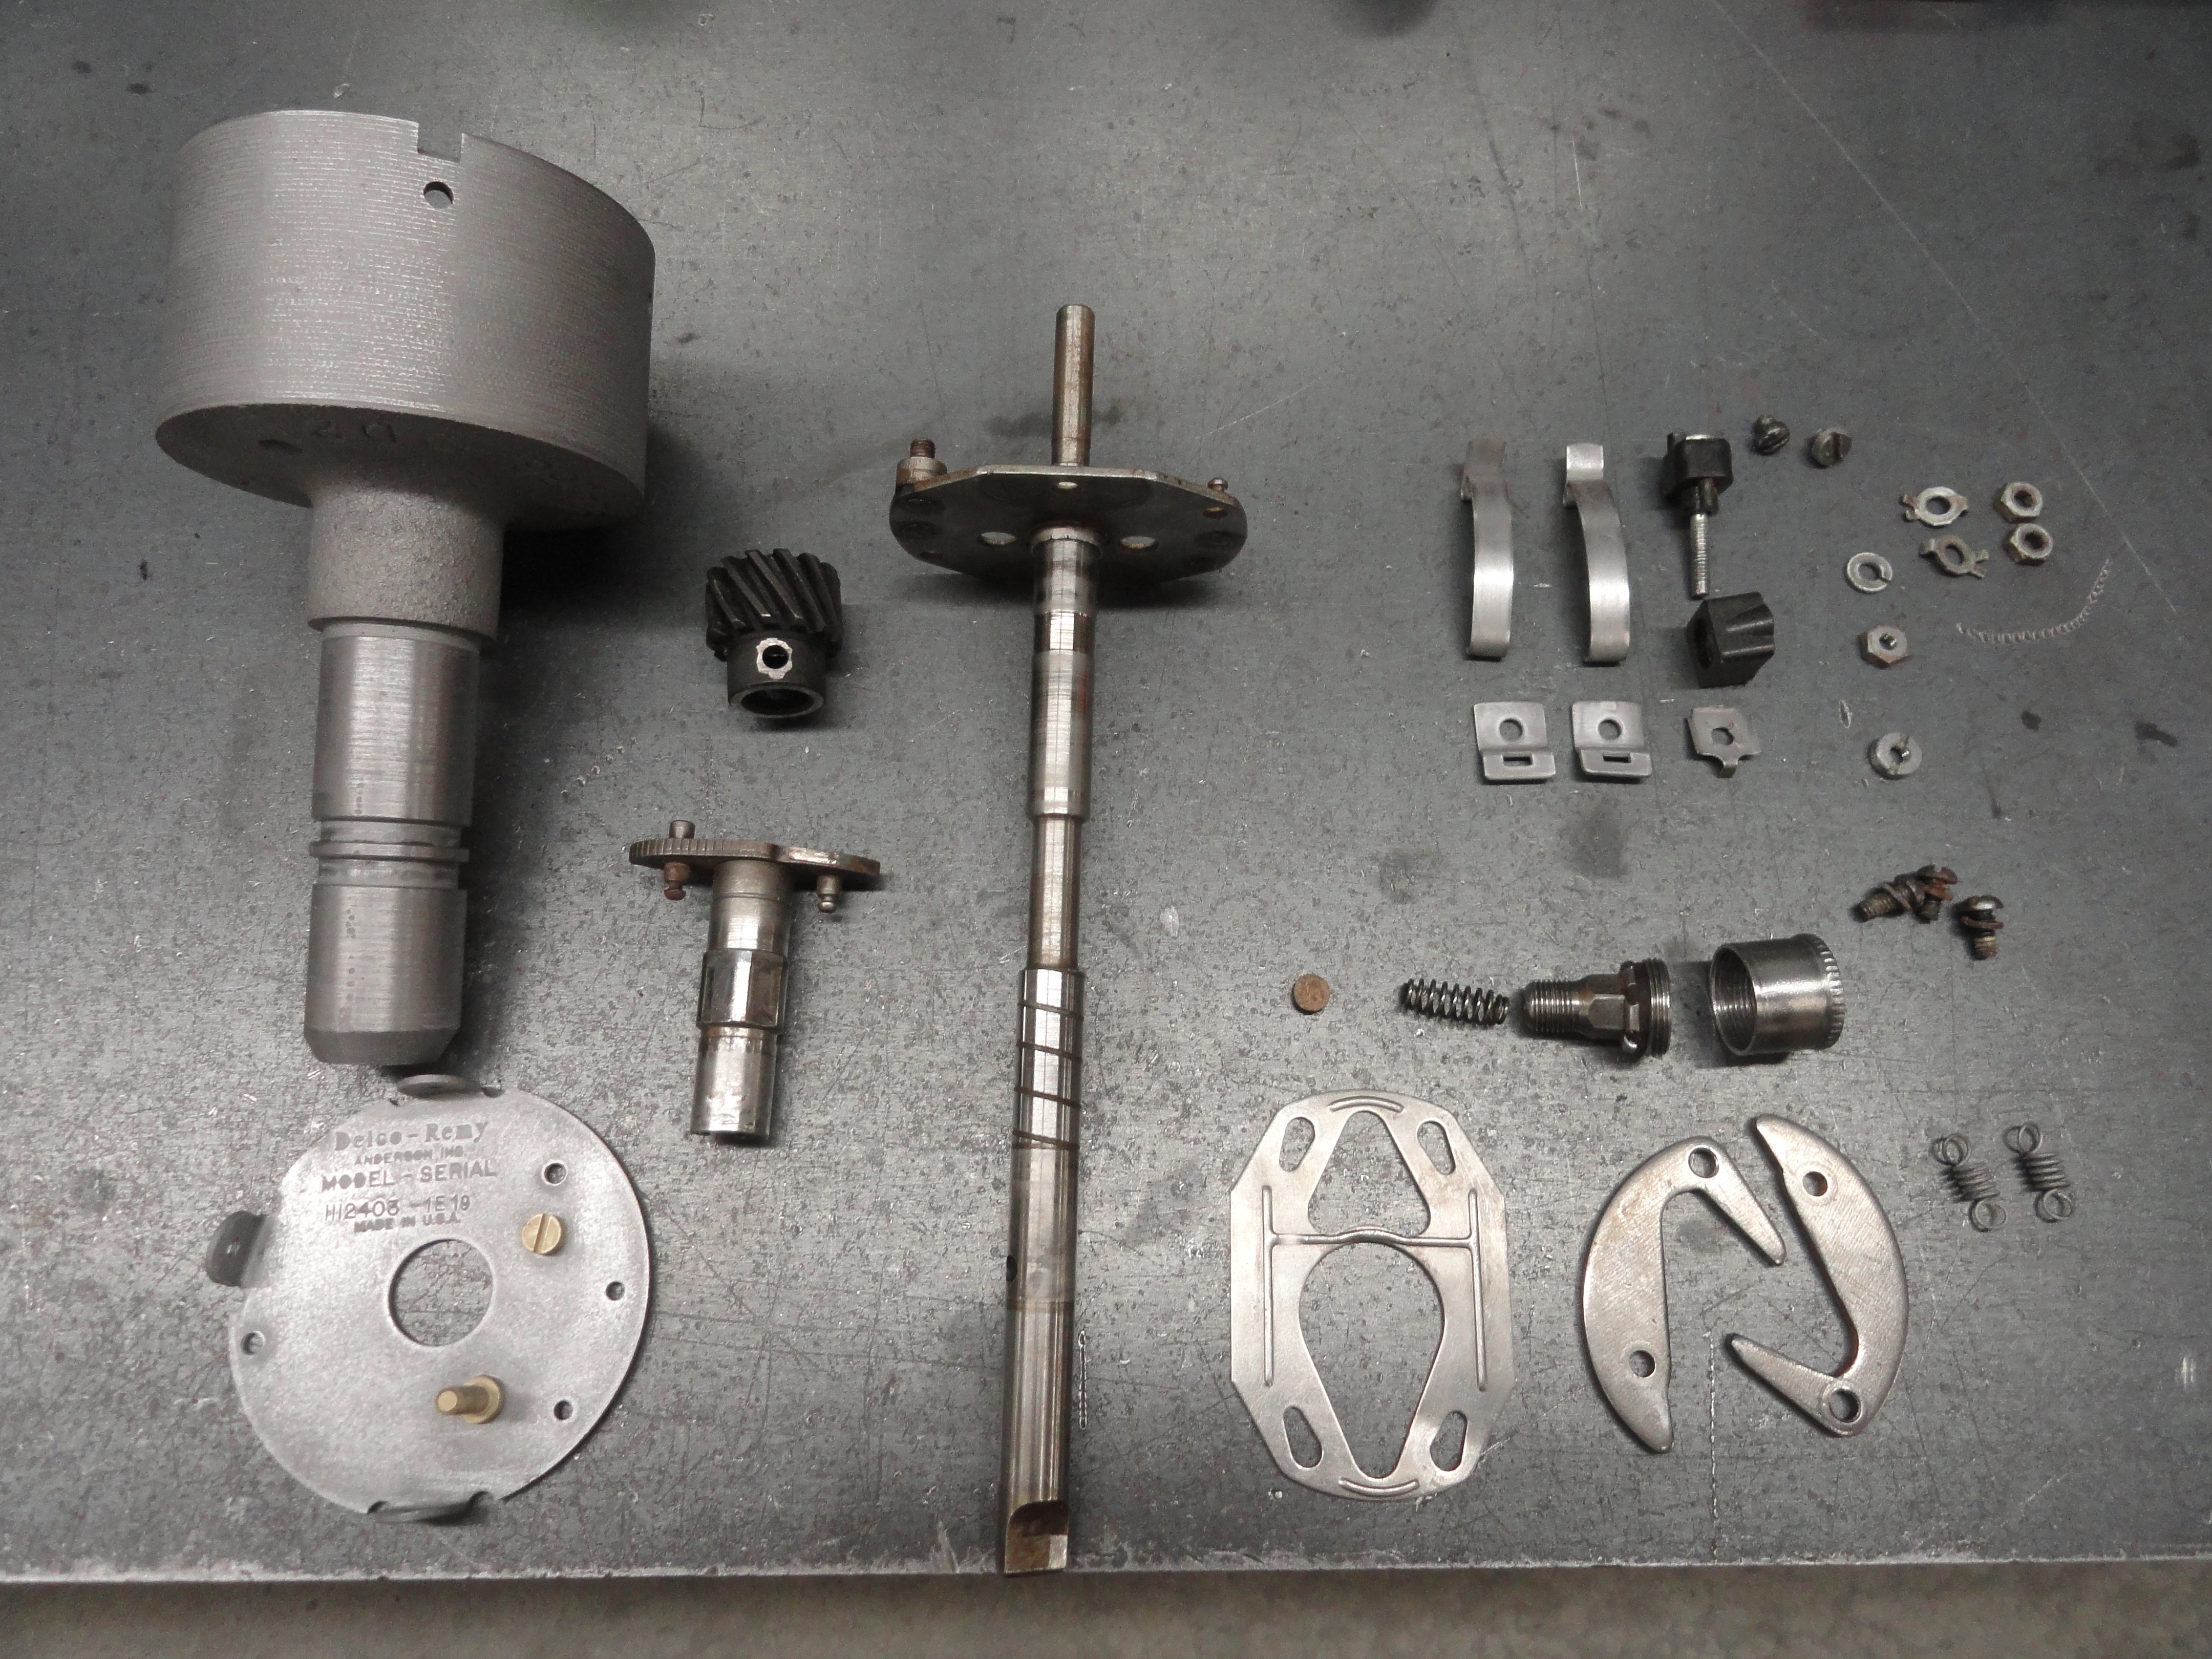
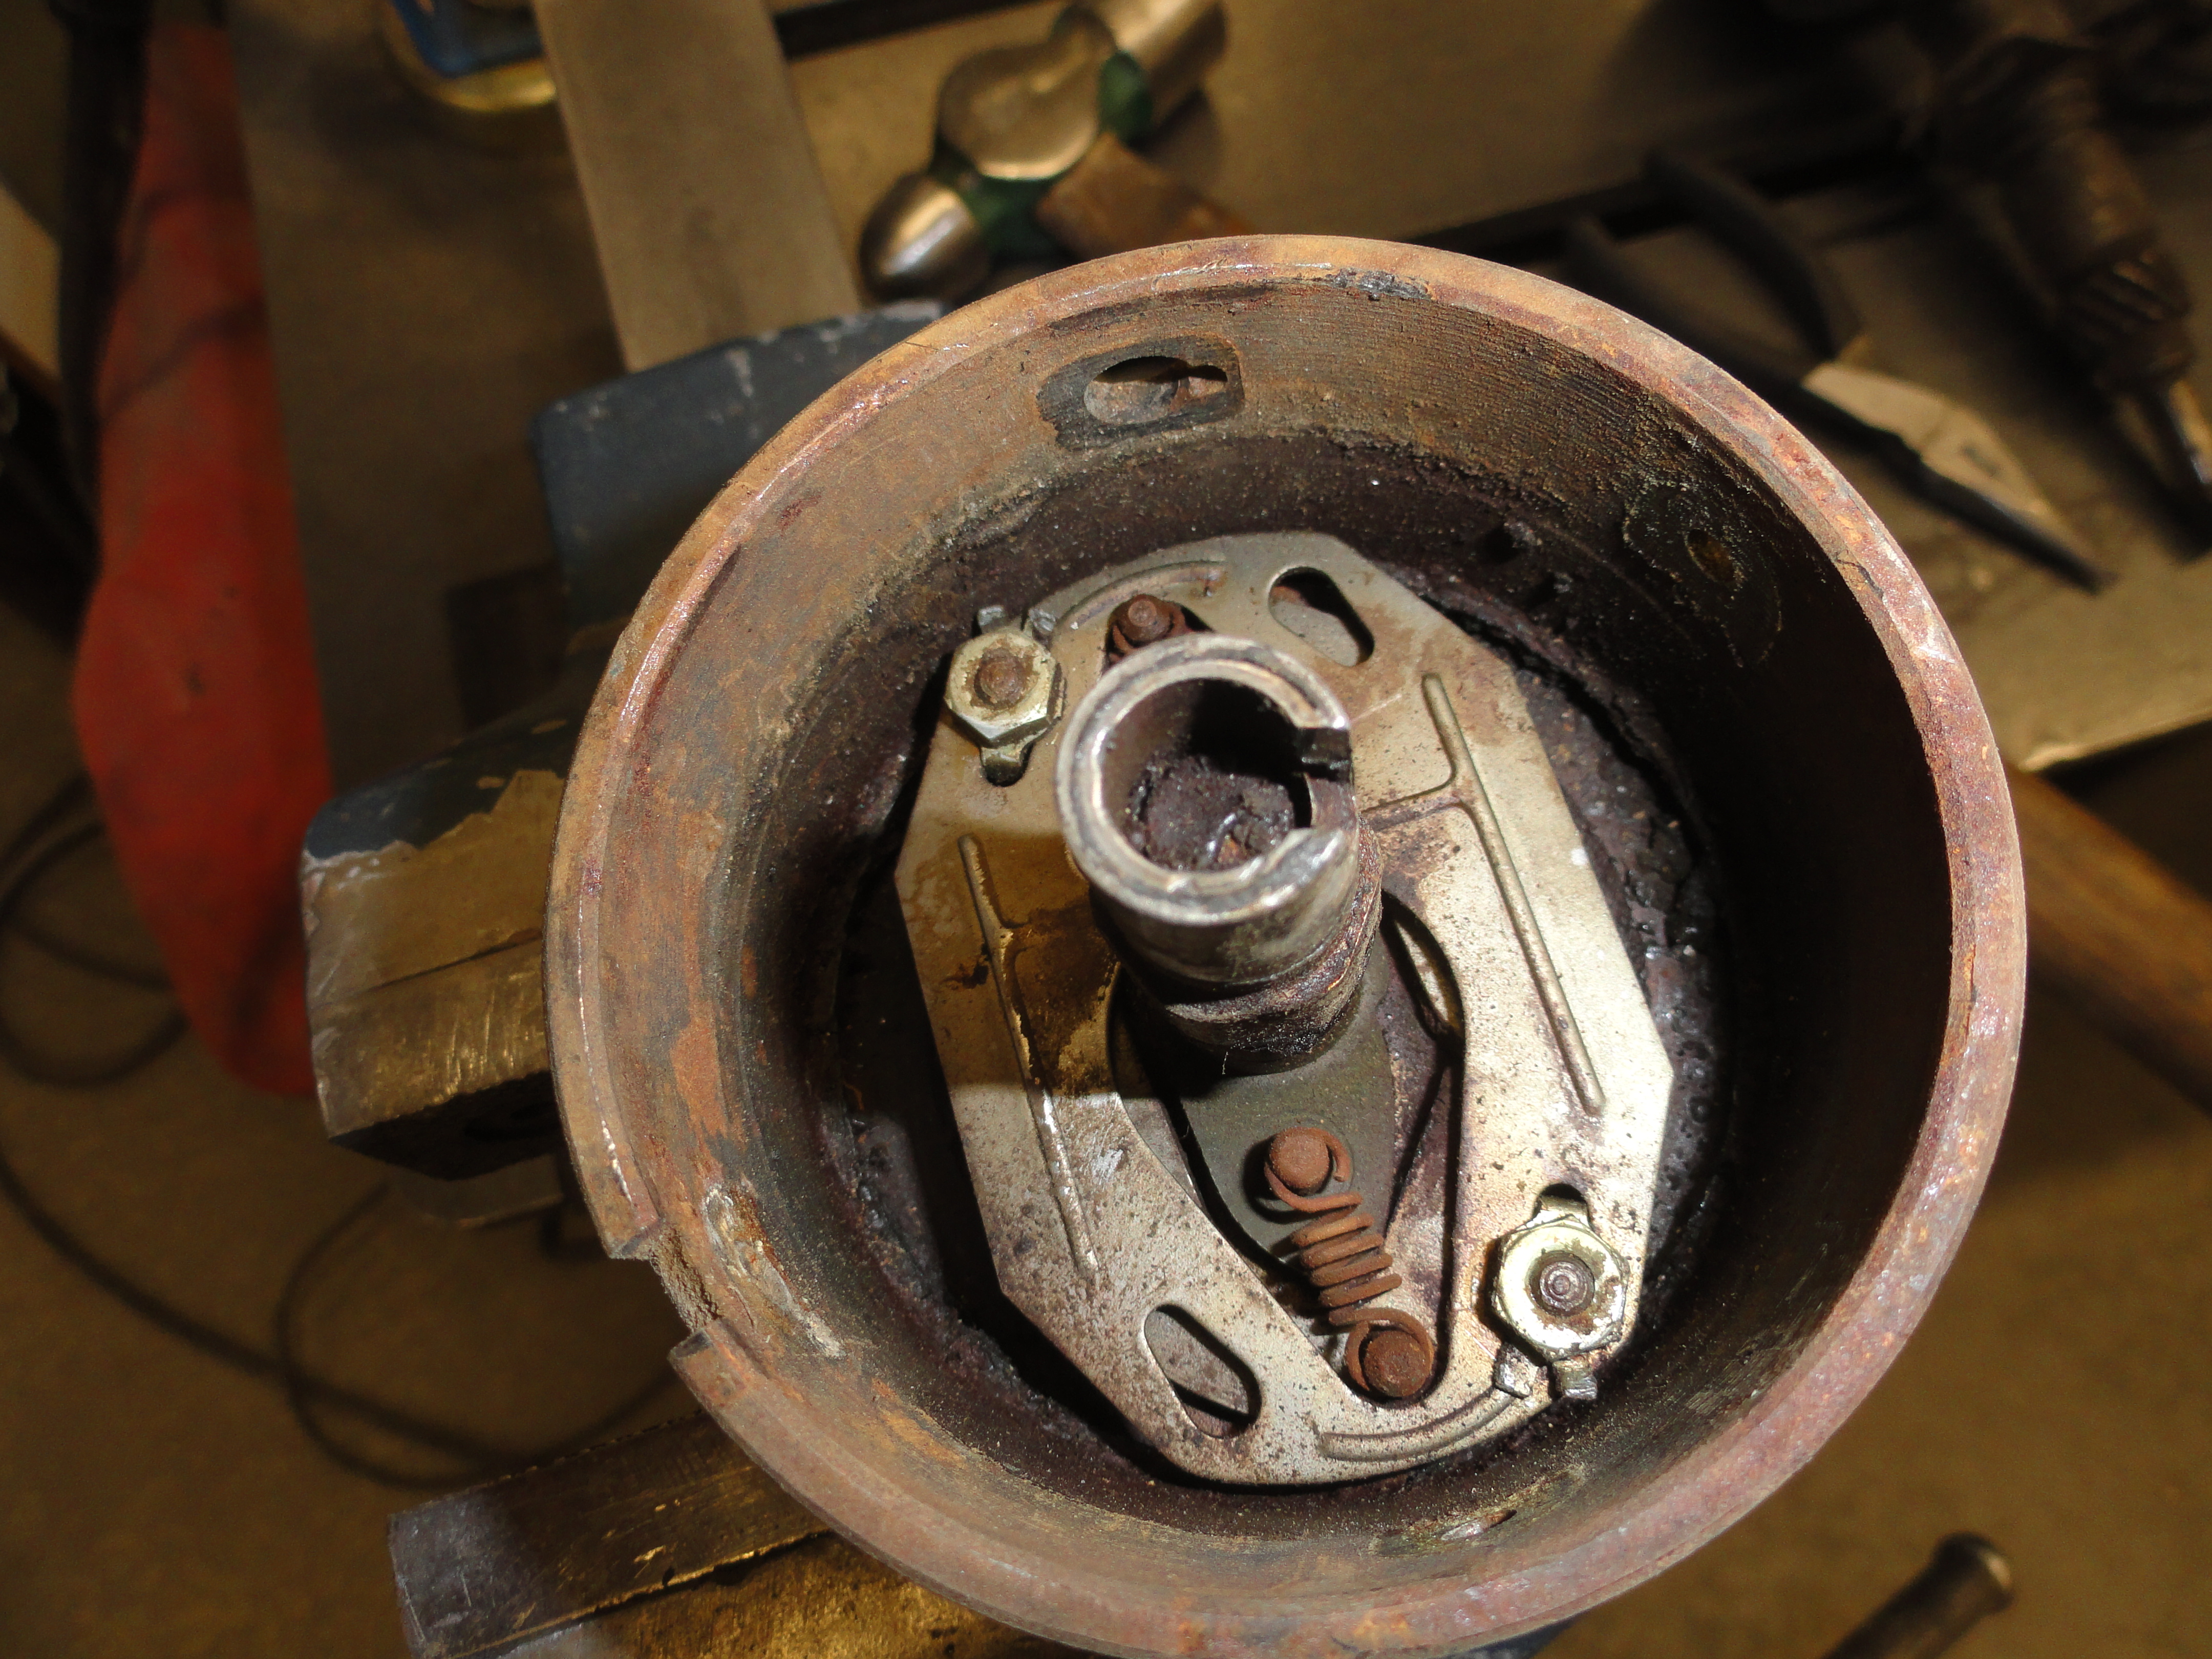
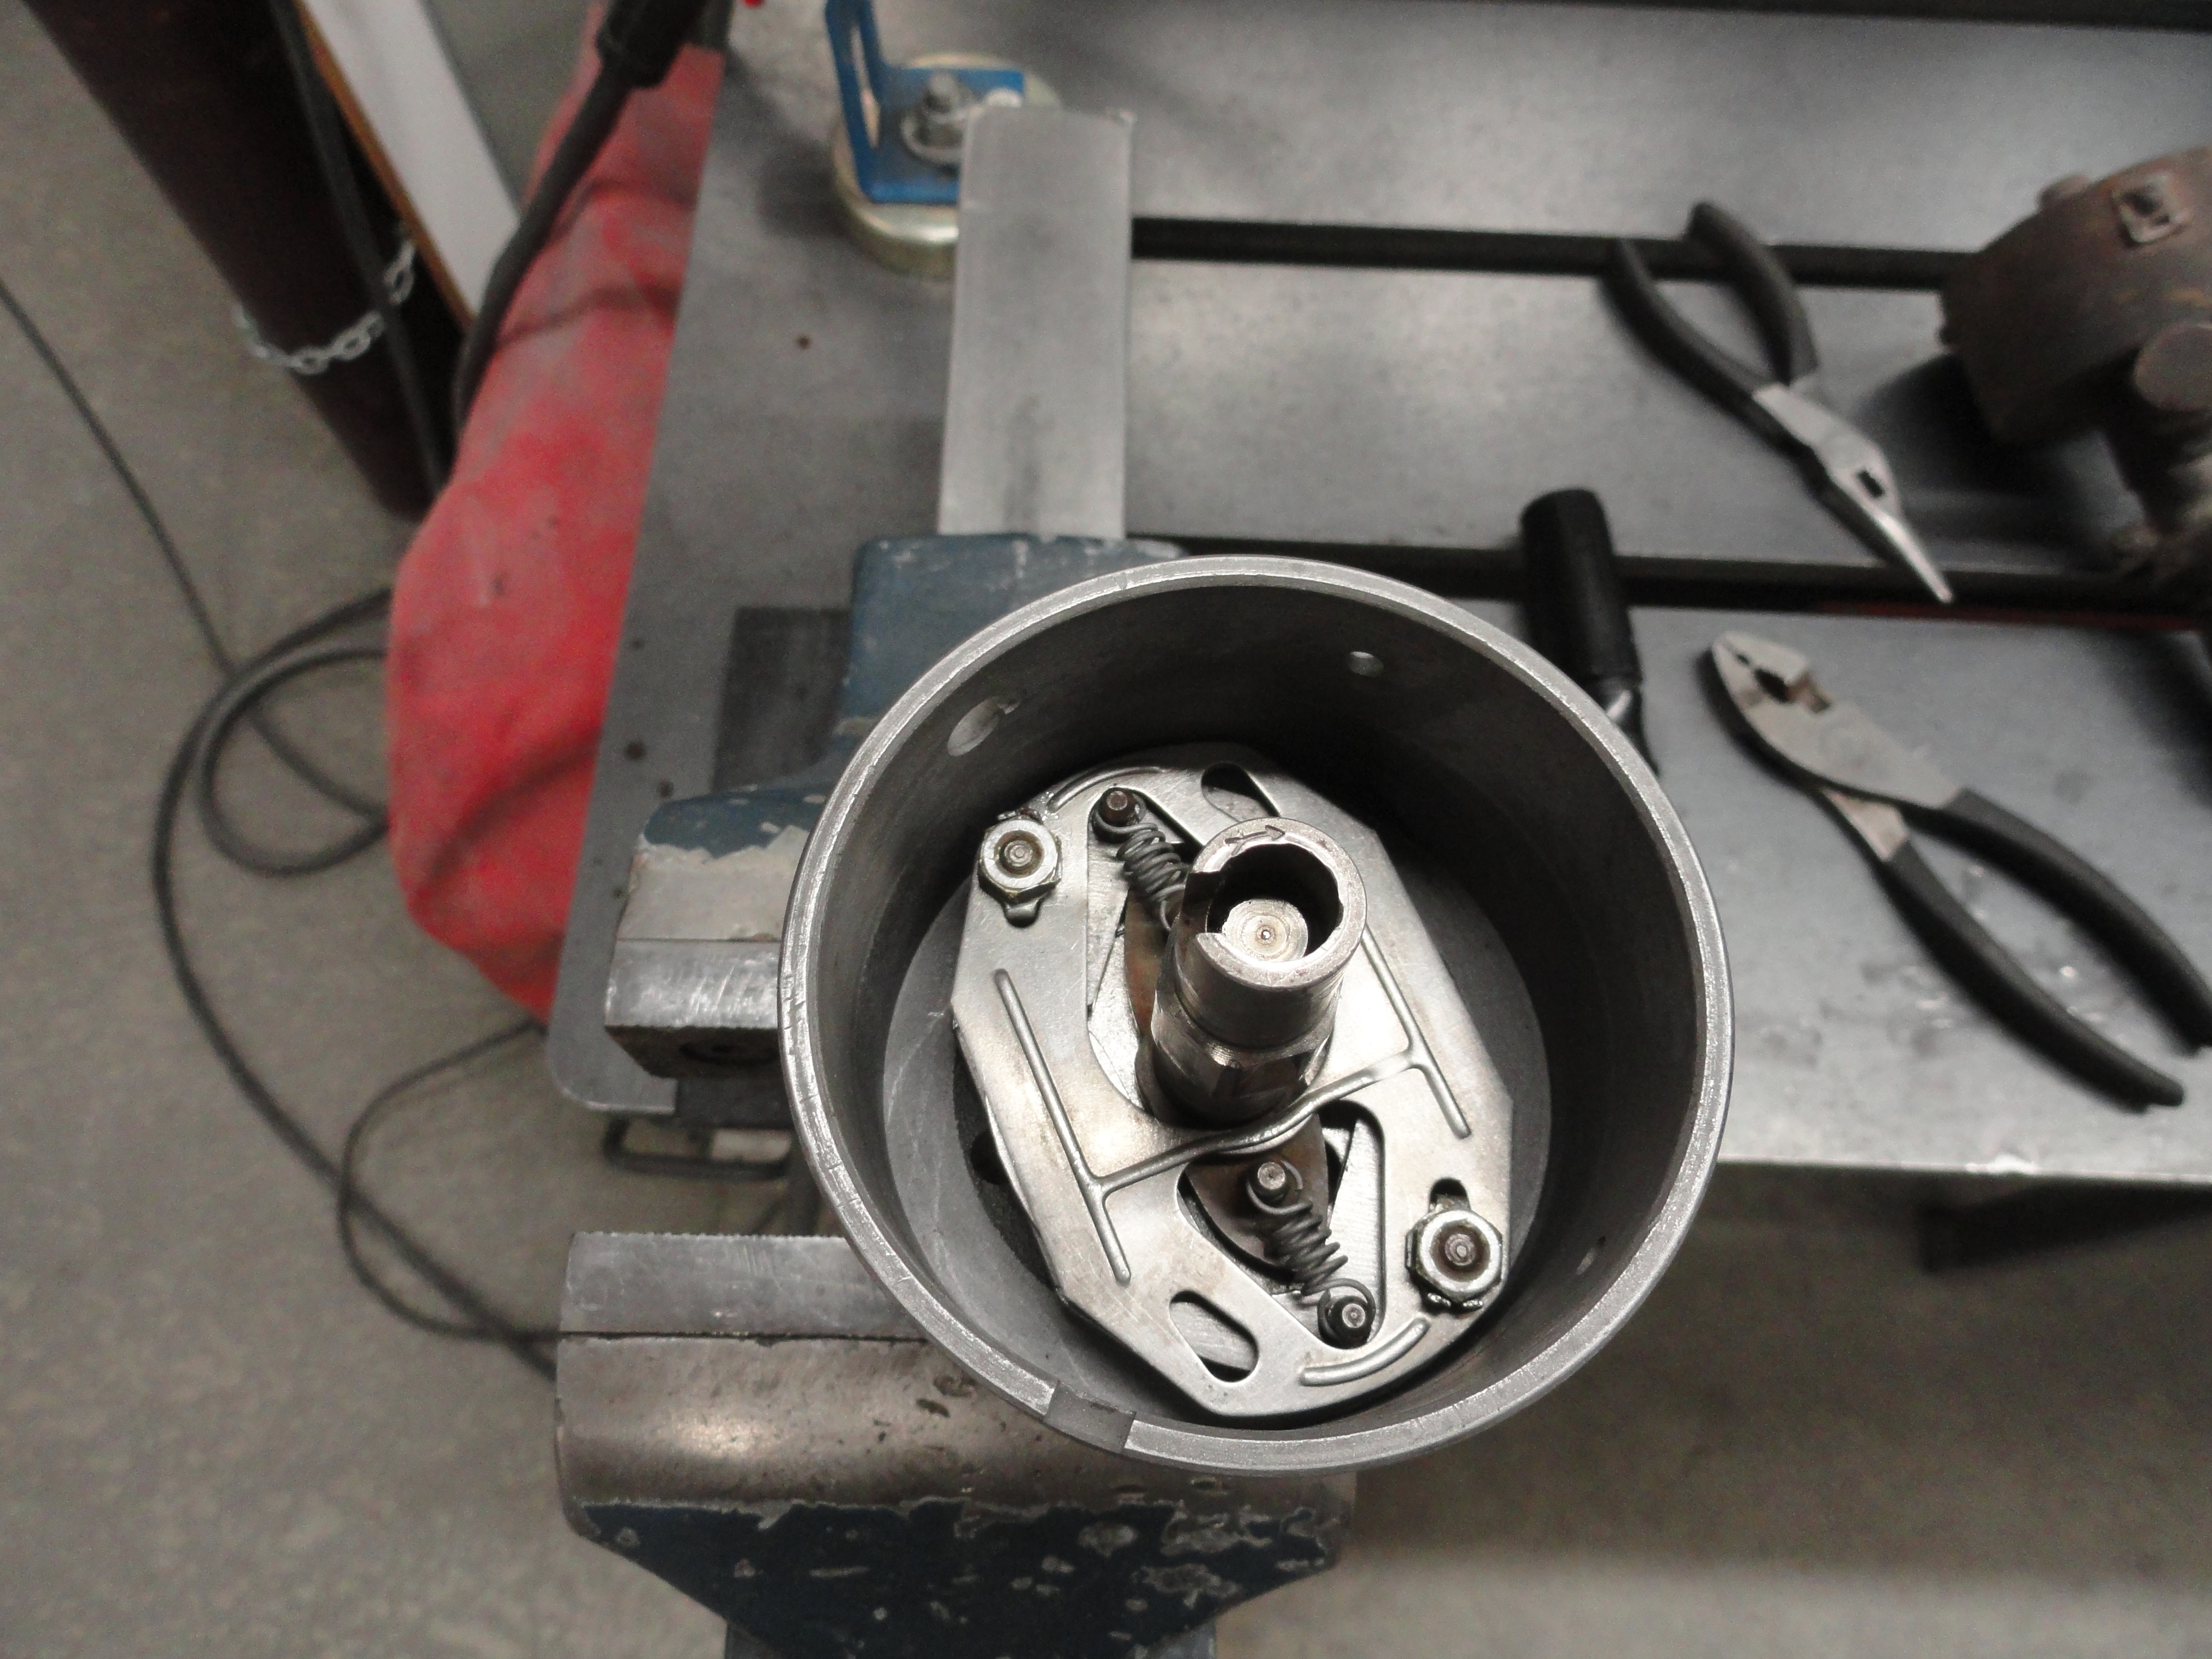
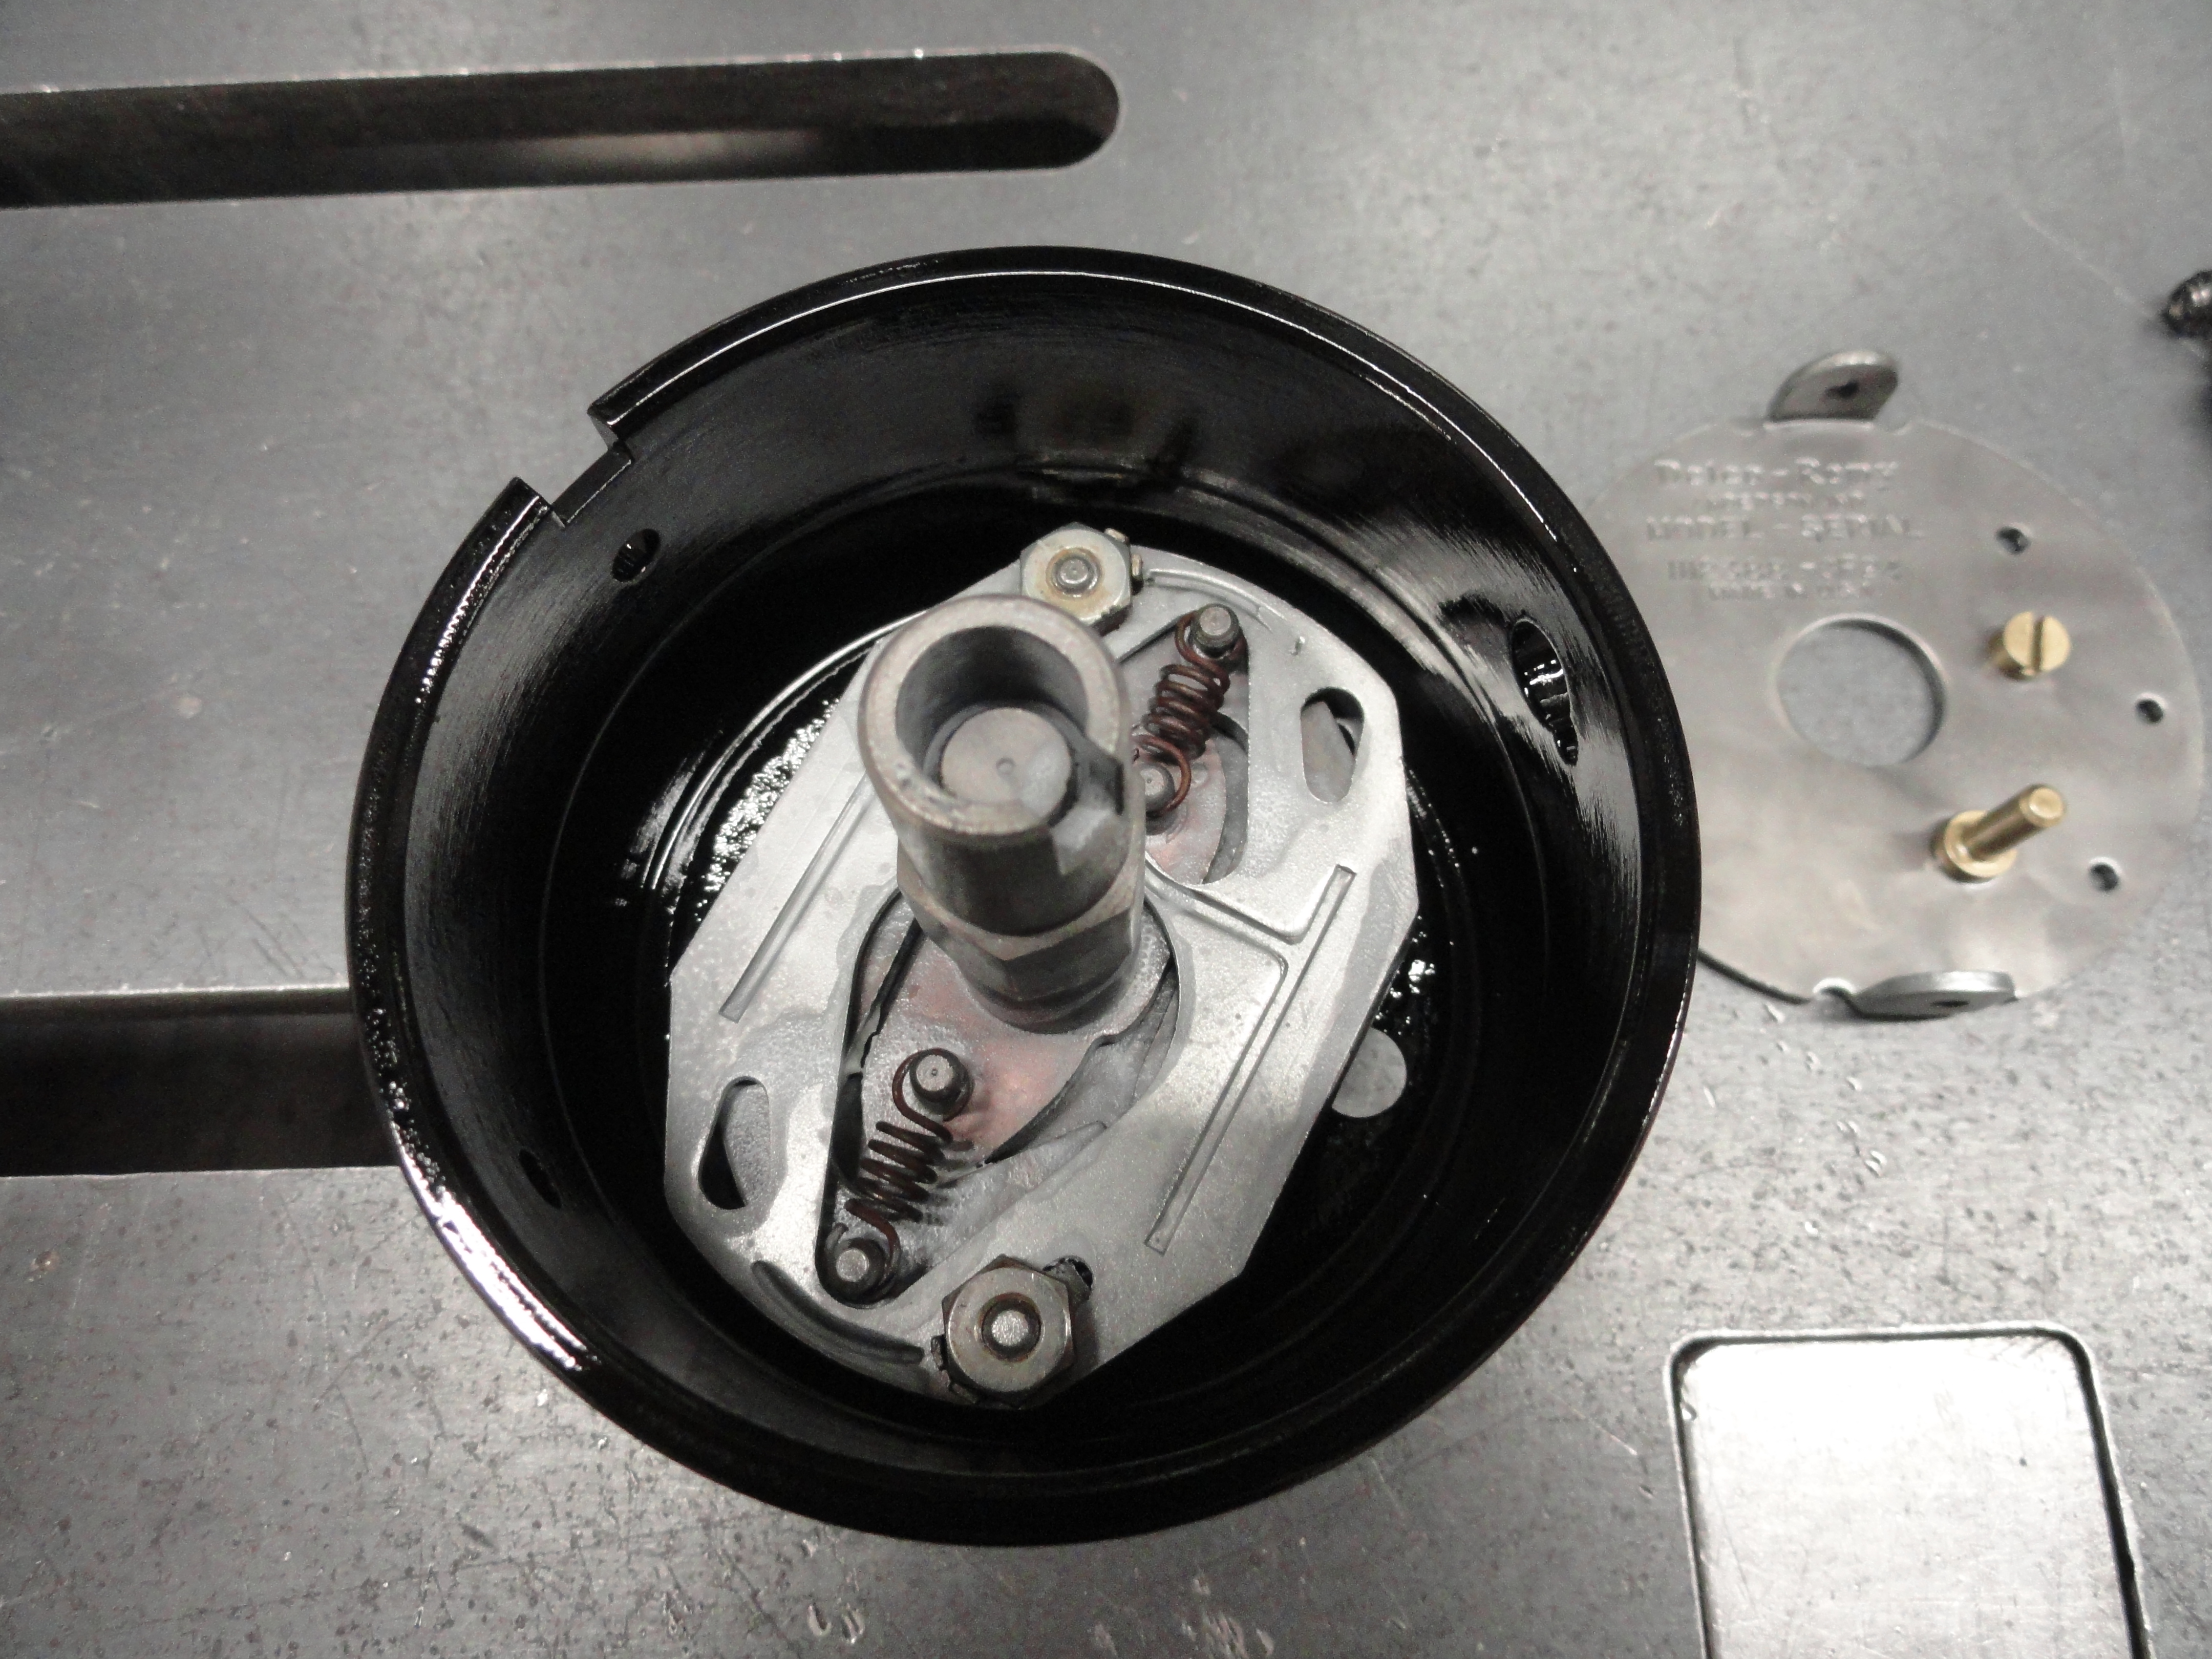
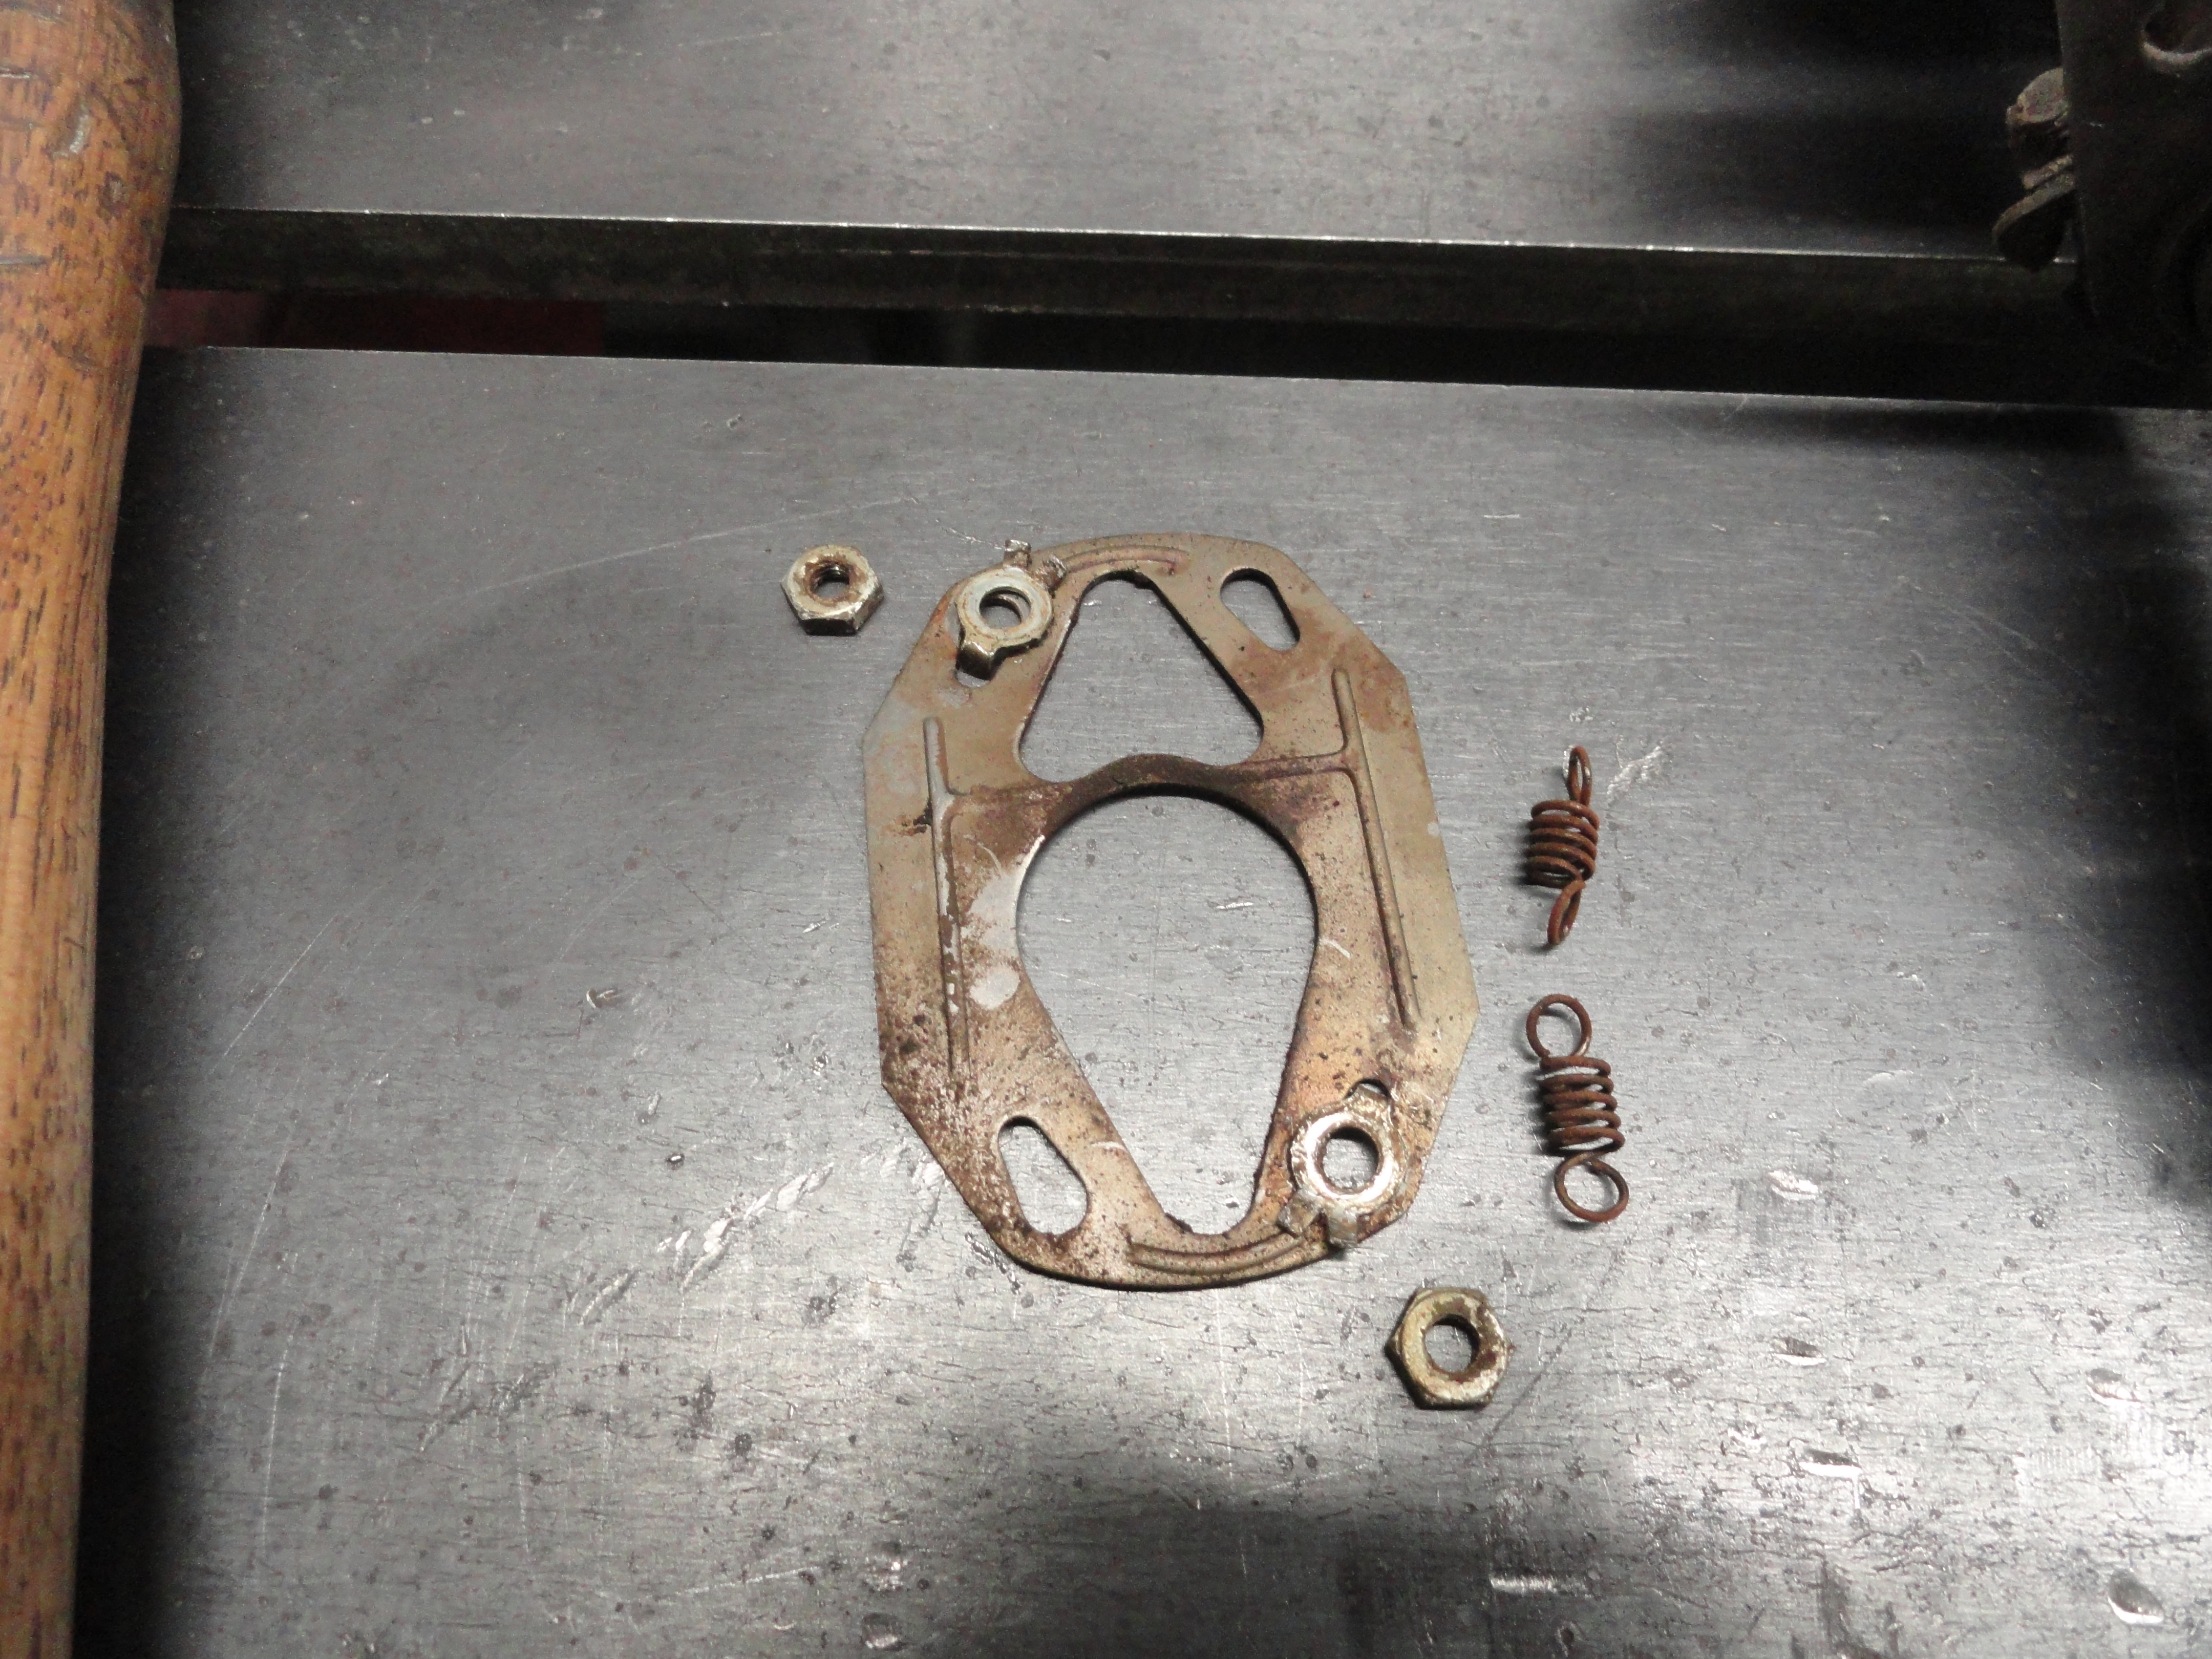
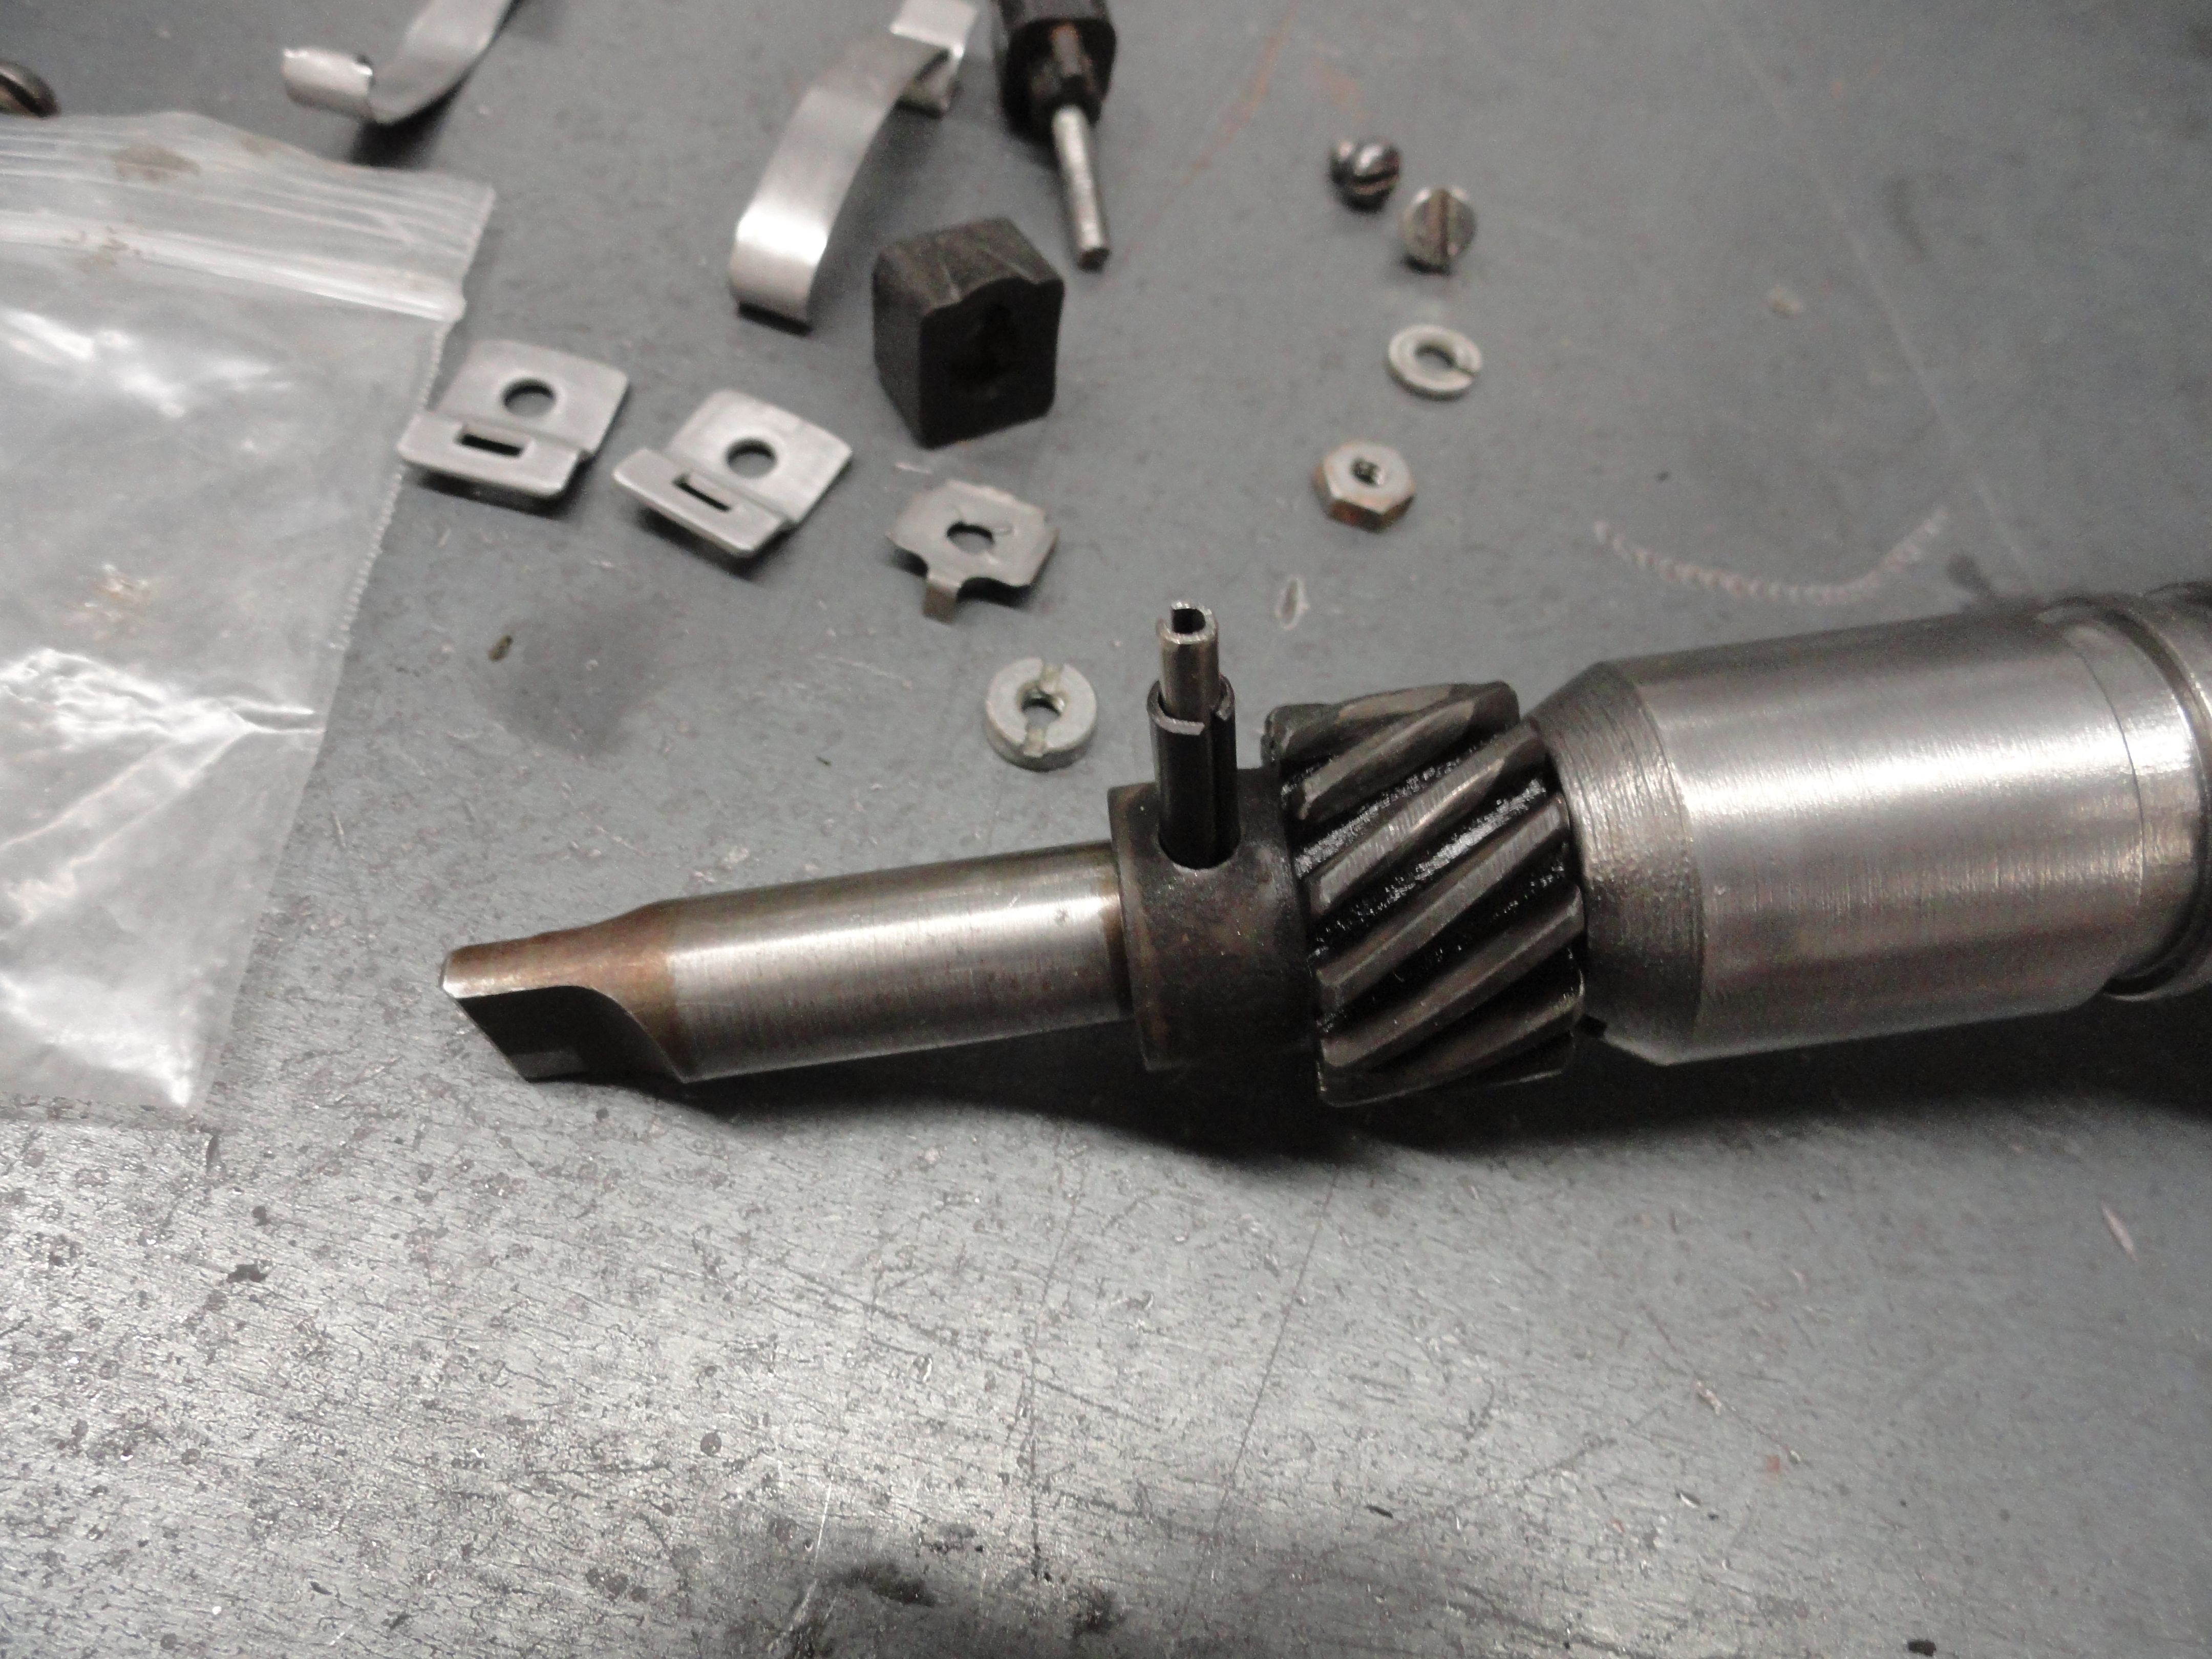
Now remove the top plate assembly by removing the three screws on the outside. Two of these that are across from each other hold the Distributor Cap clips. These screws are the same and each has a lockwasher. Once the top plate is off we can see what's next. Take a close look at what you have. No need to take pictures if you are reading this, it's been done for you. Notice how the plate is oriented. We will want to put it exactly the same way when we rebuild it. There are two nuts holding the assembly together. The nuts have lock tabs and that's pretty important since once its together, they are hard to get to. Carefully bend those two tabs out far enough to remove the nuts. Place all of your parts on a nice surface where you can see what goes with what. Once you have the two lock tabs out, pull the plate straight up and out. Notice how the indentions face upward. We want to put it together the same way. Now remove the springs. Don't lose them. I was actually able to just reach in there and pull them out by hand. Not much tension on them at all. Now remove the mini shaft that has your lobes on it, then the two counter weights. That should be everything on the inside.
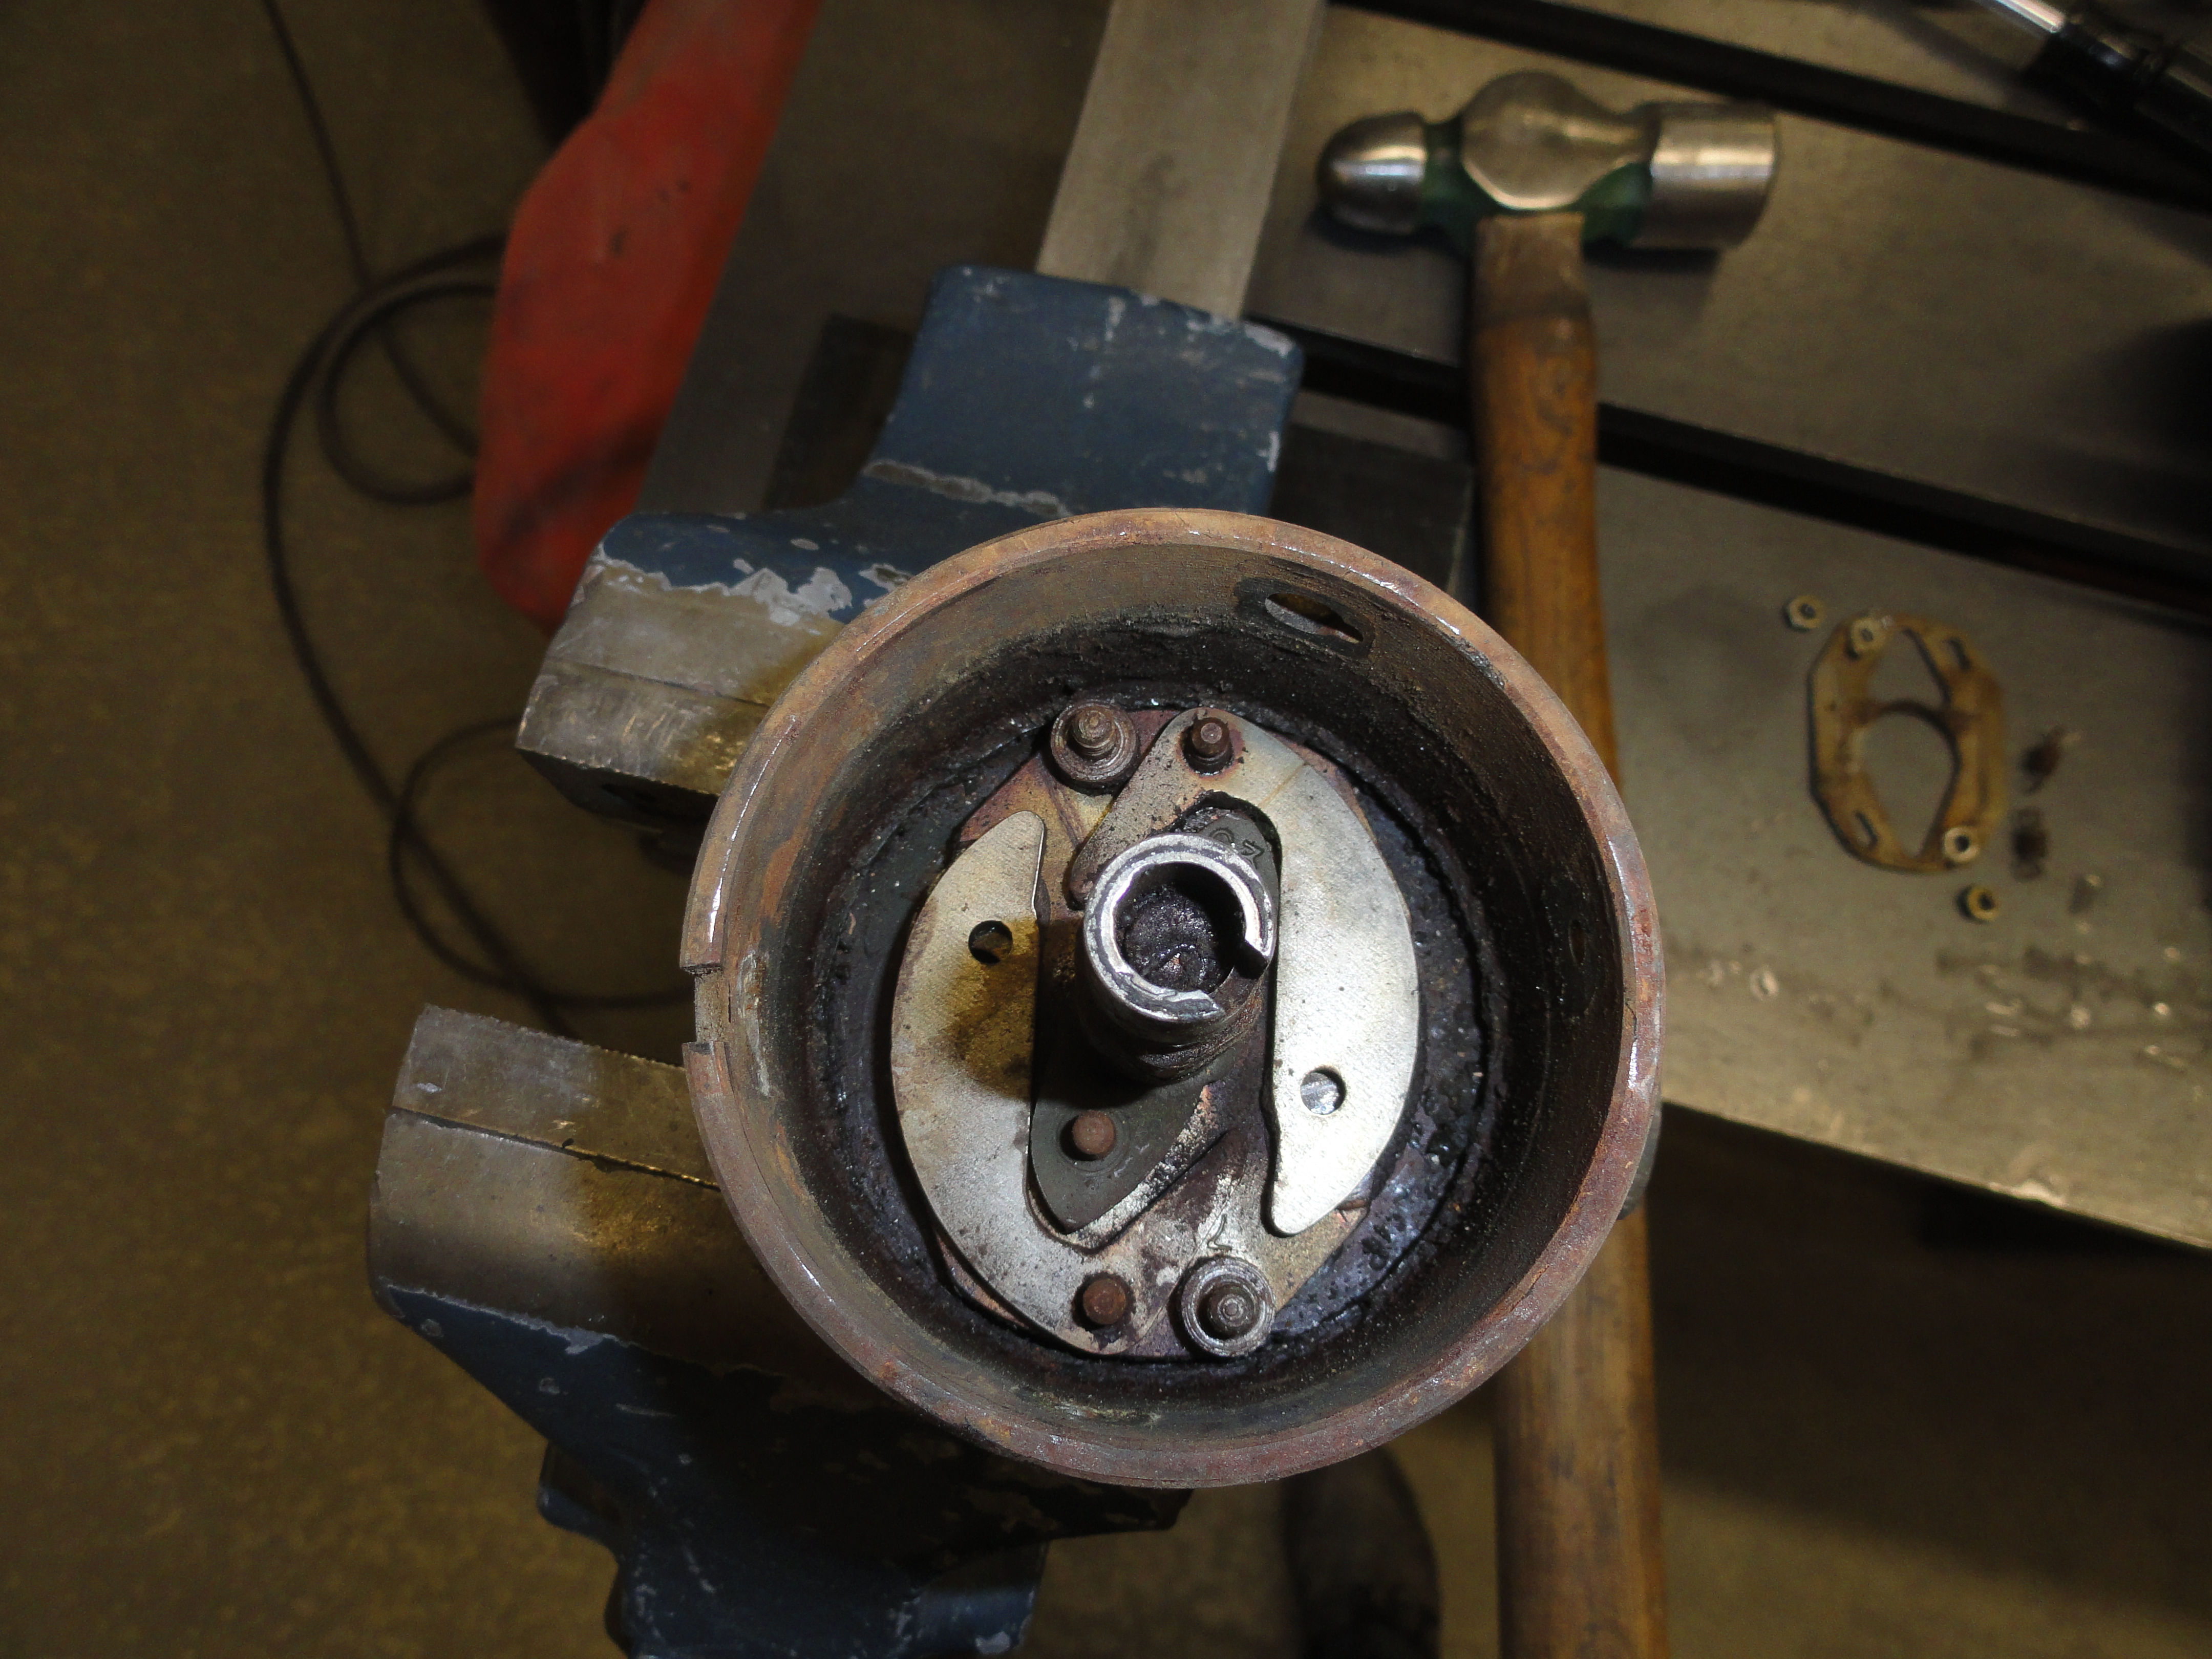
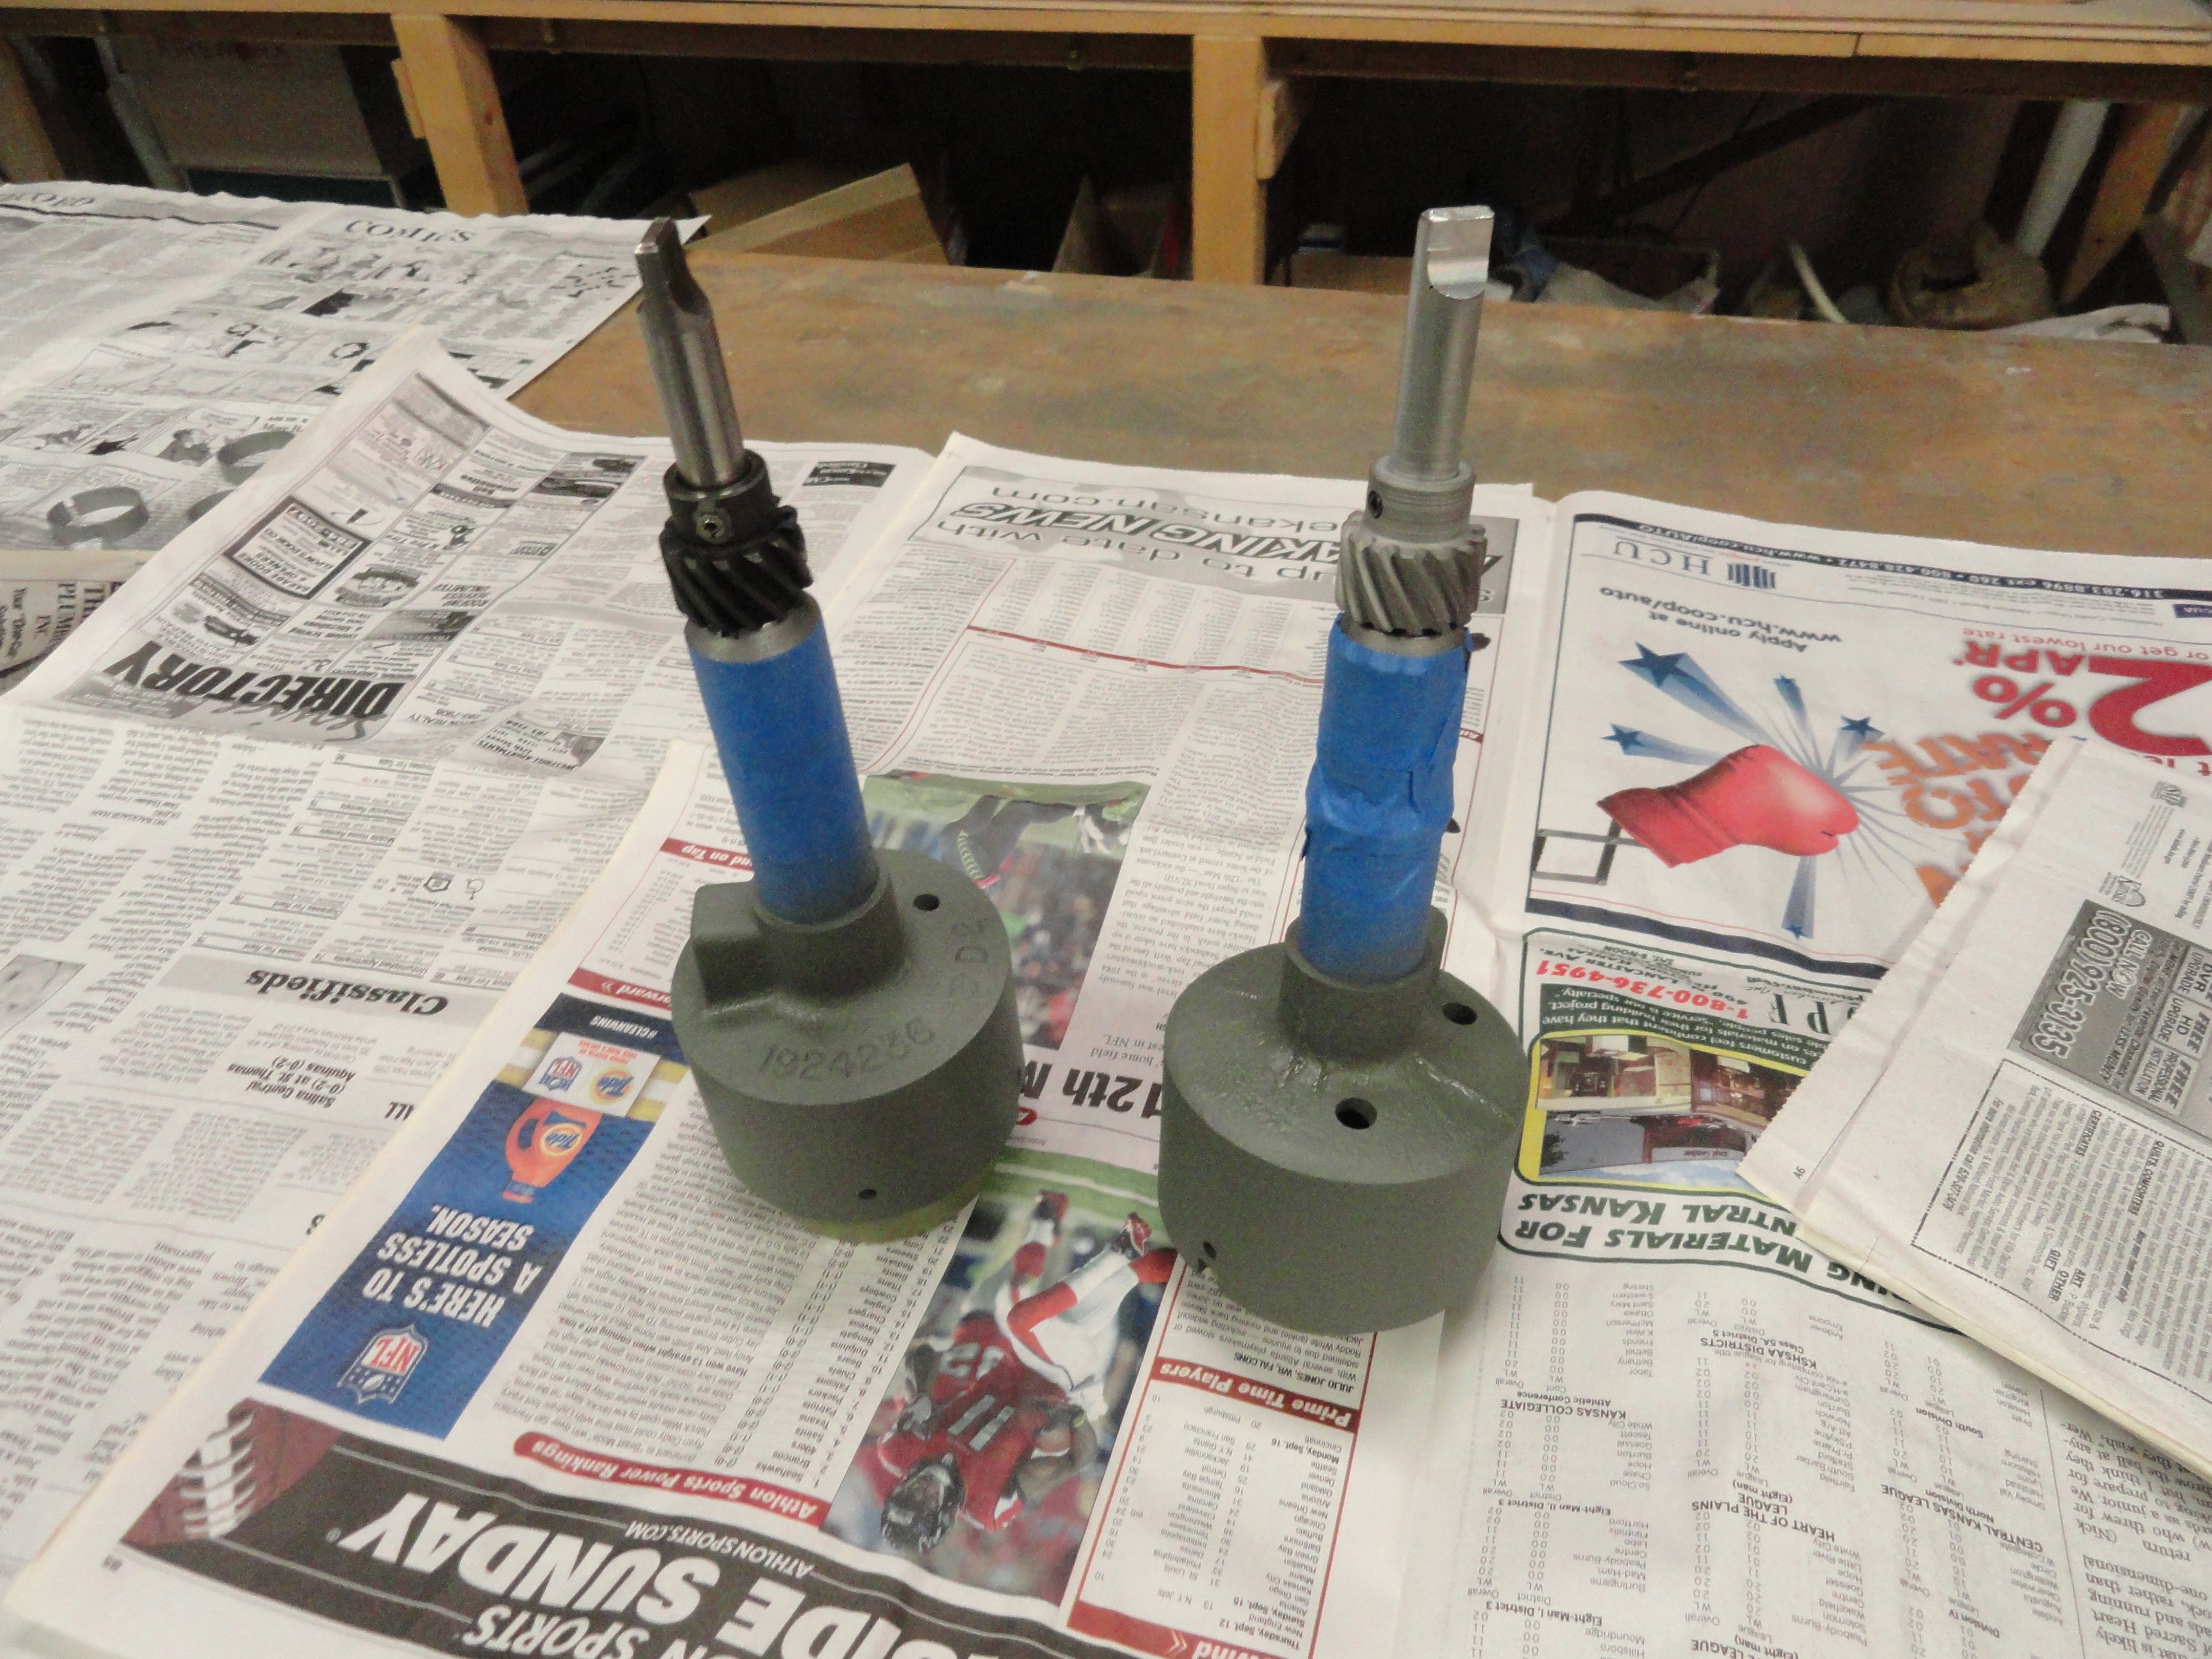
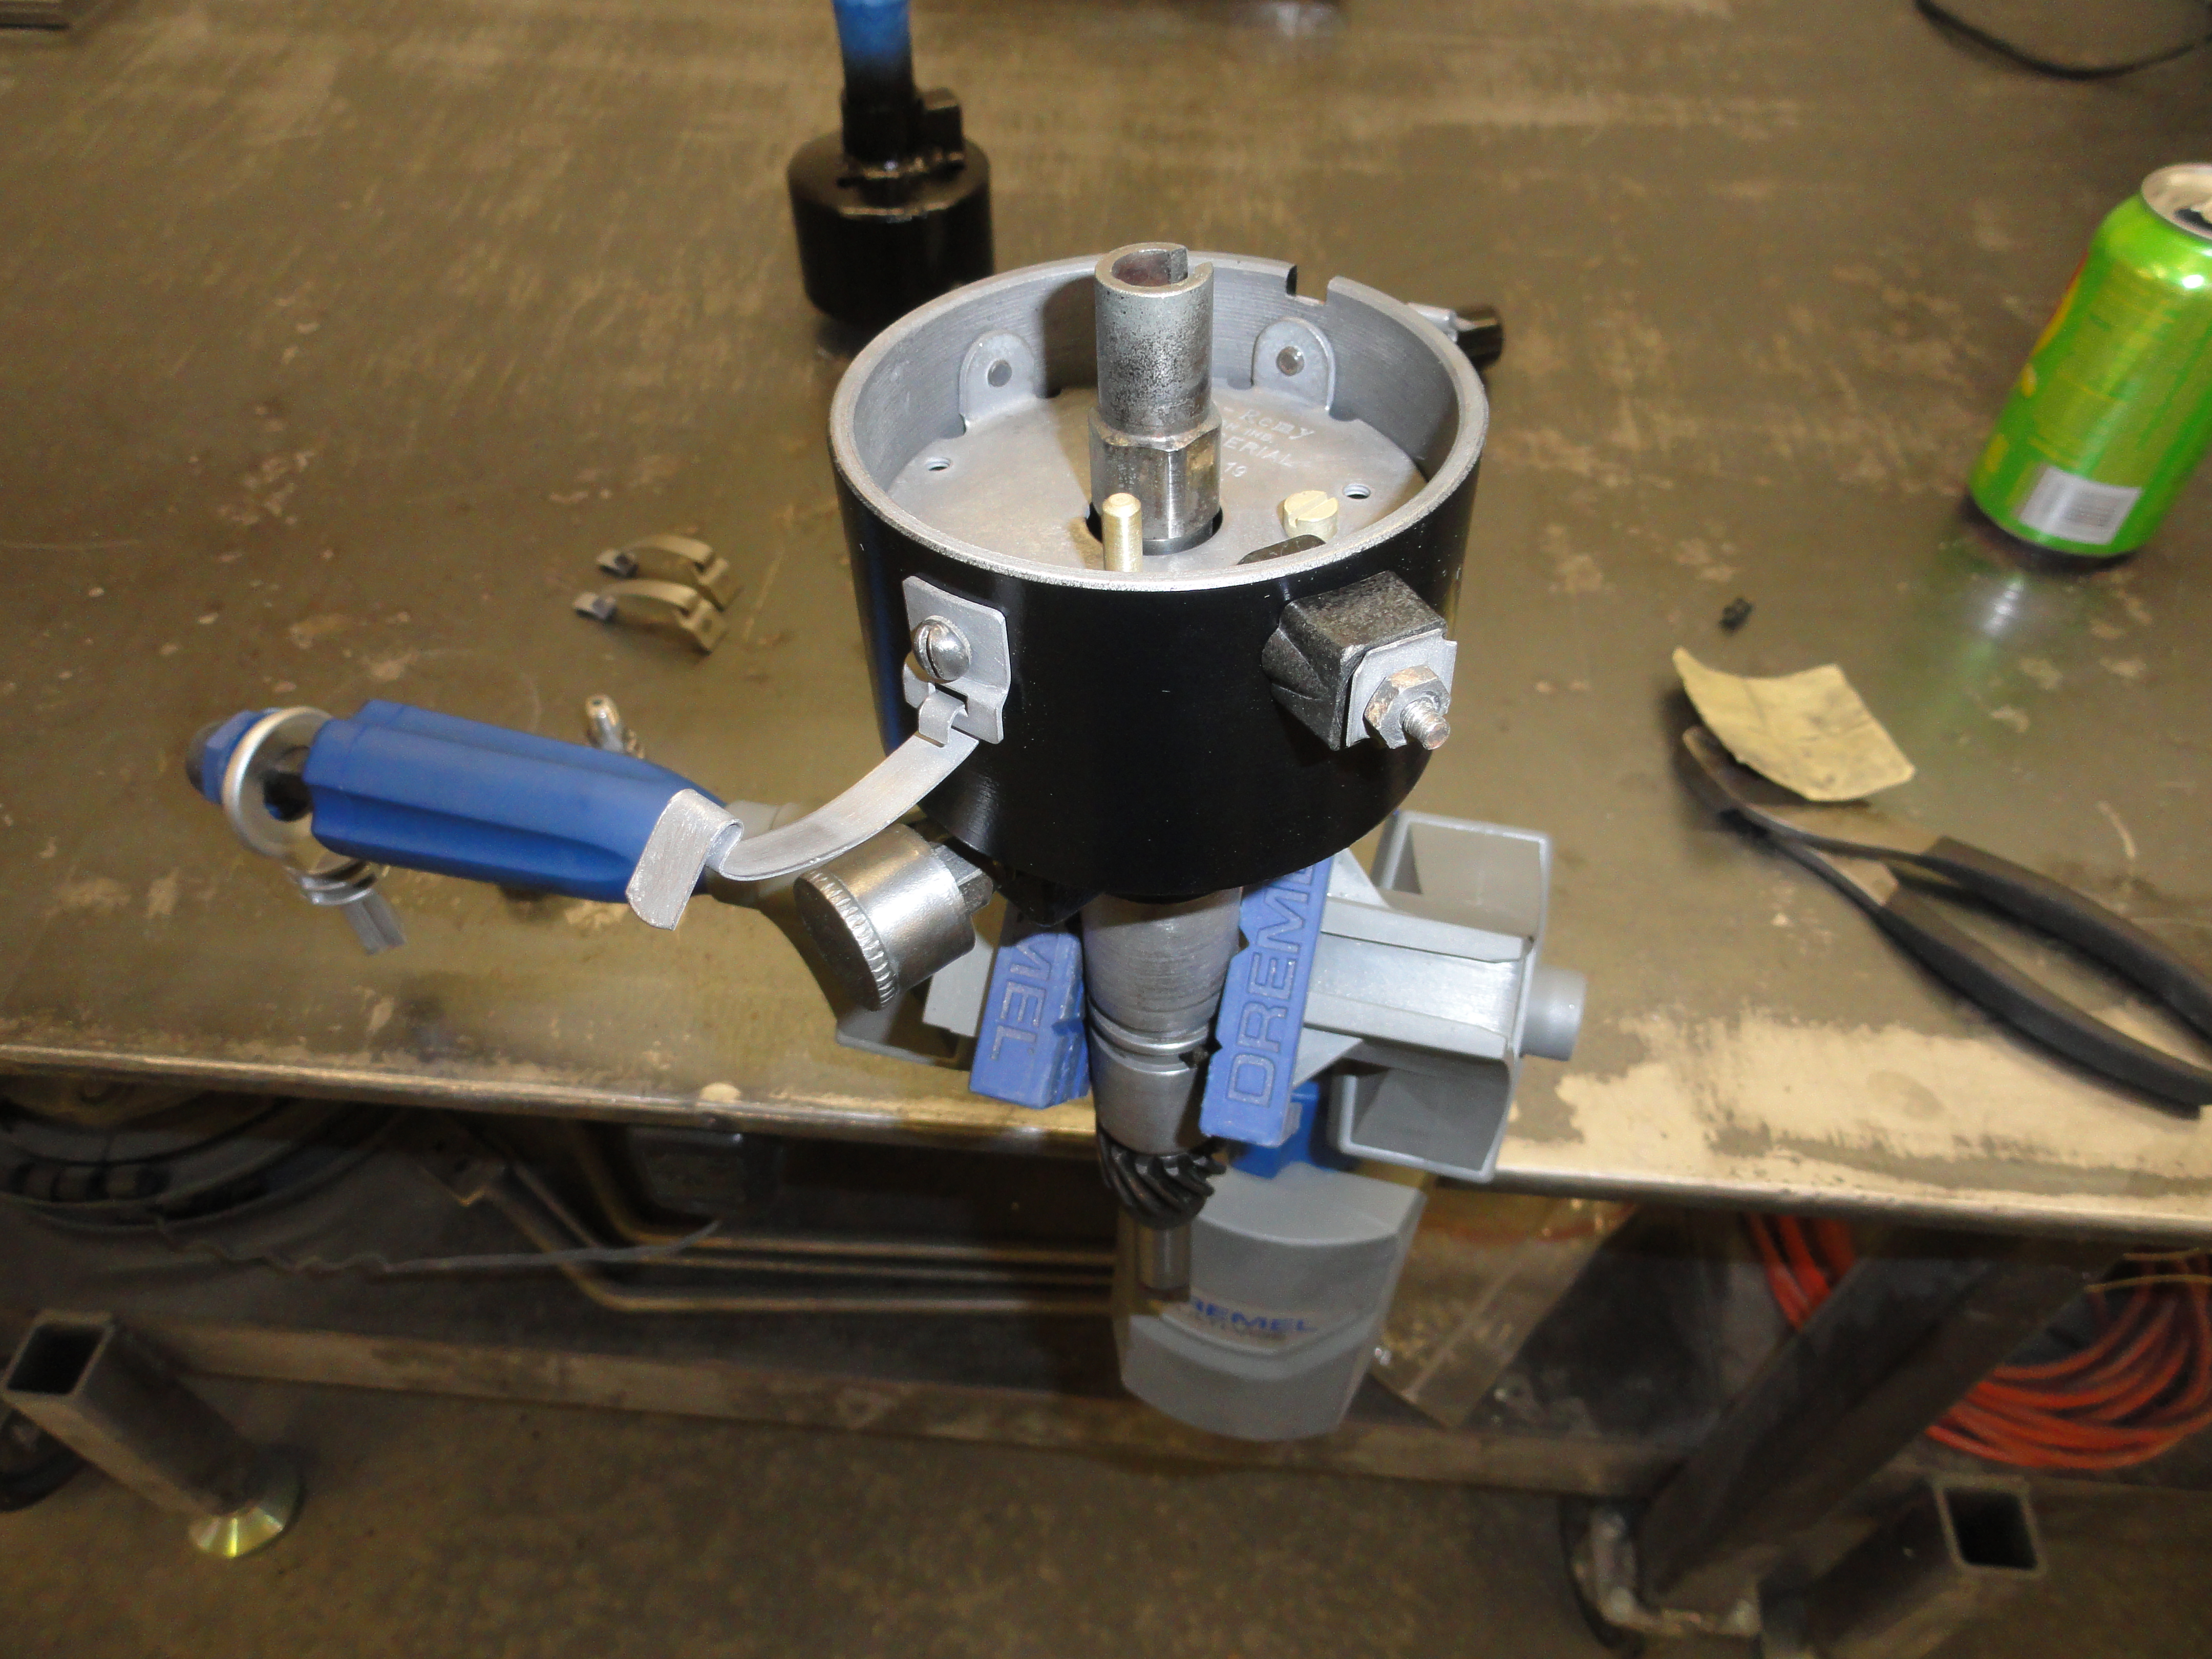
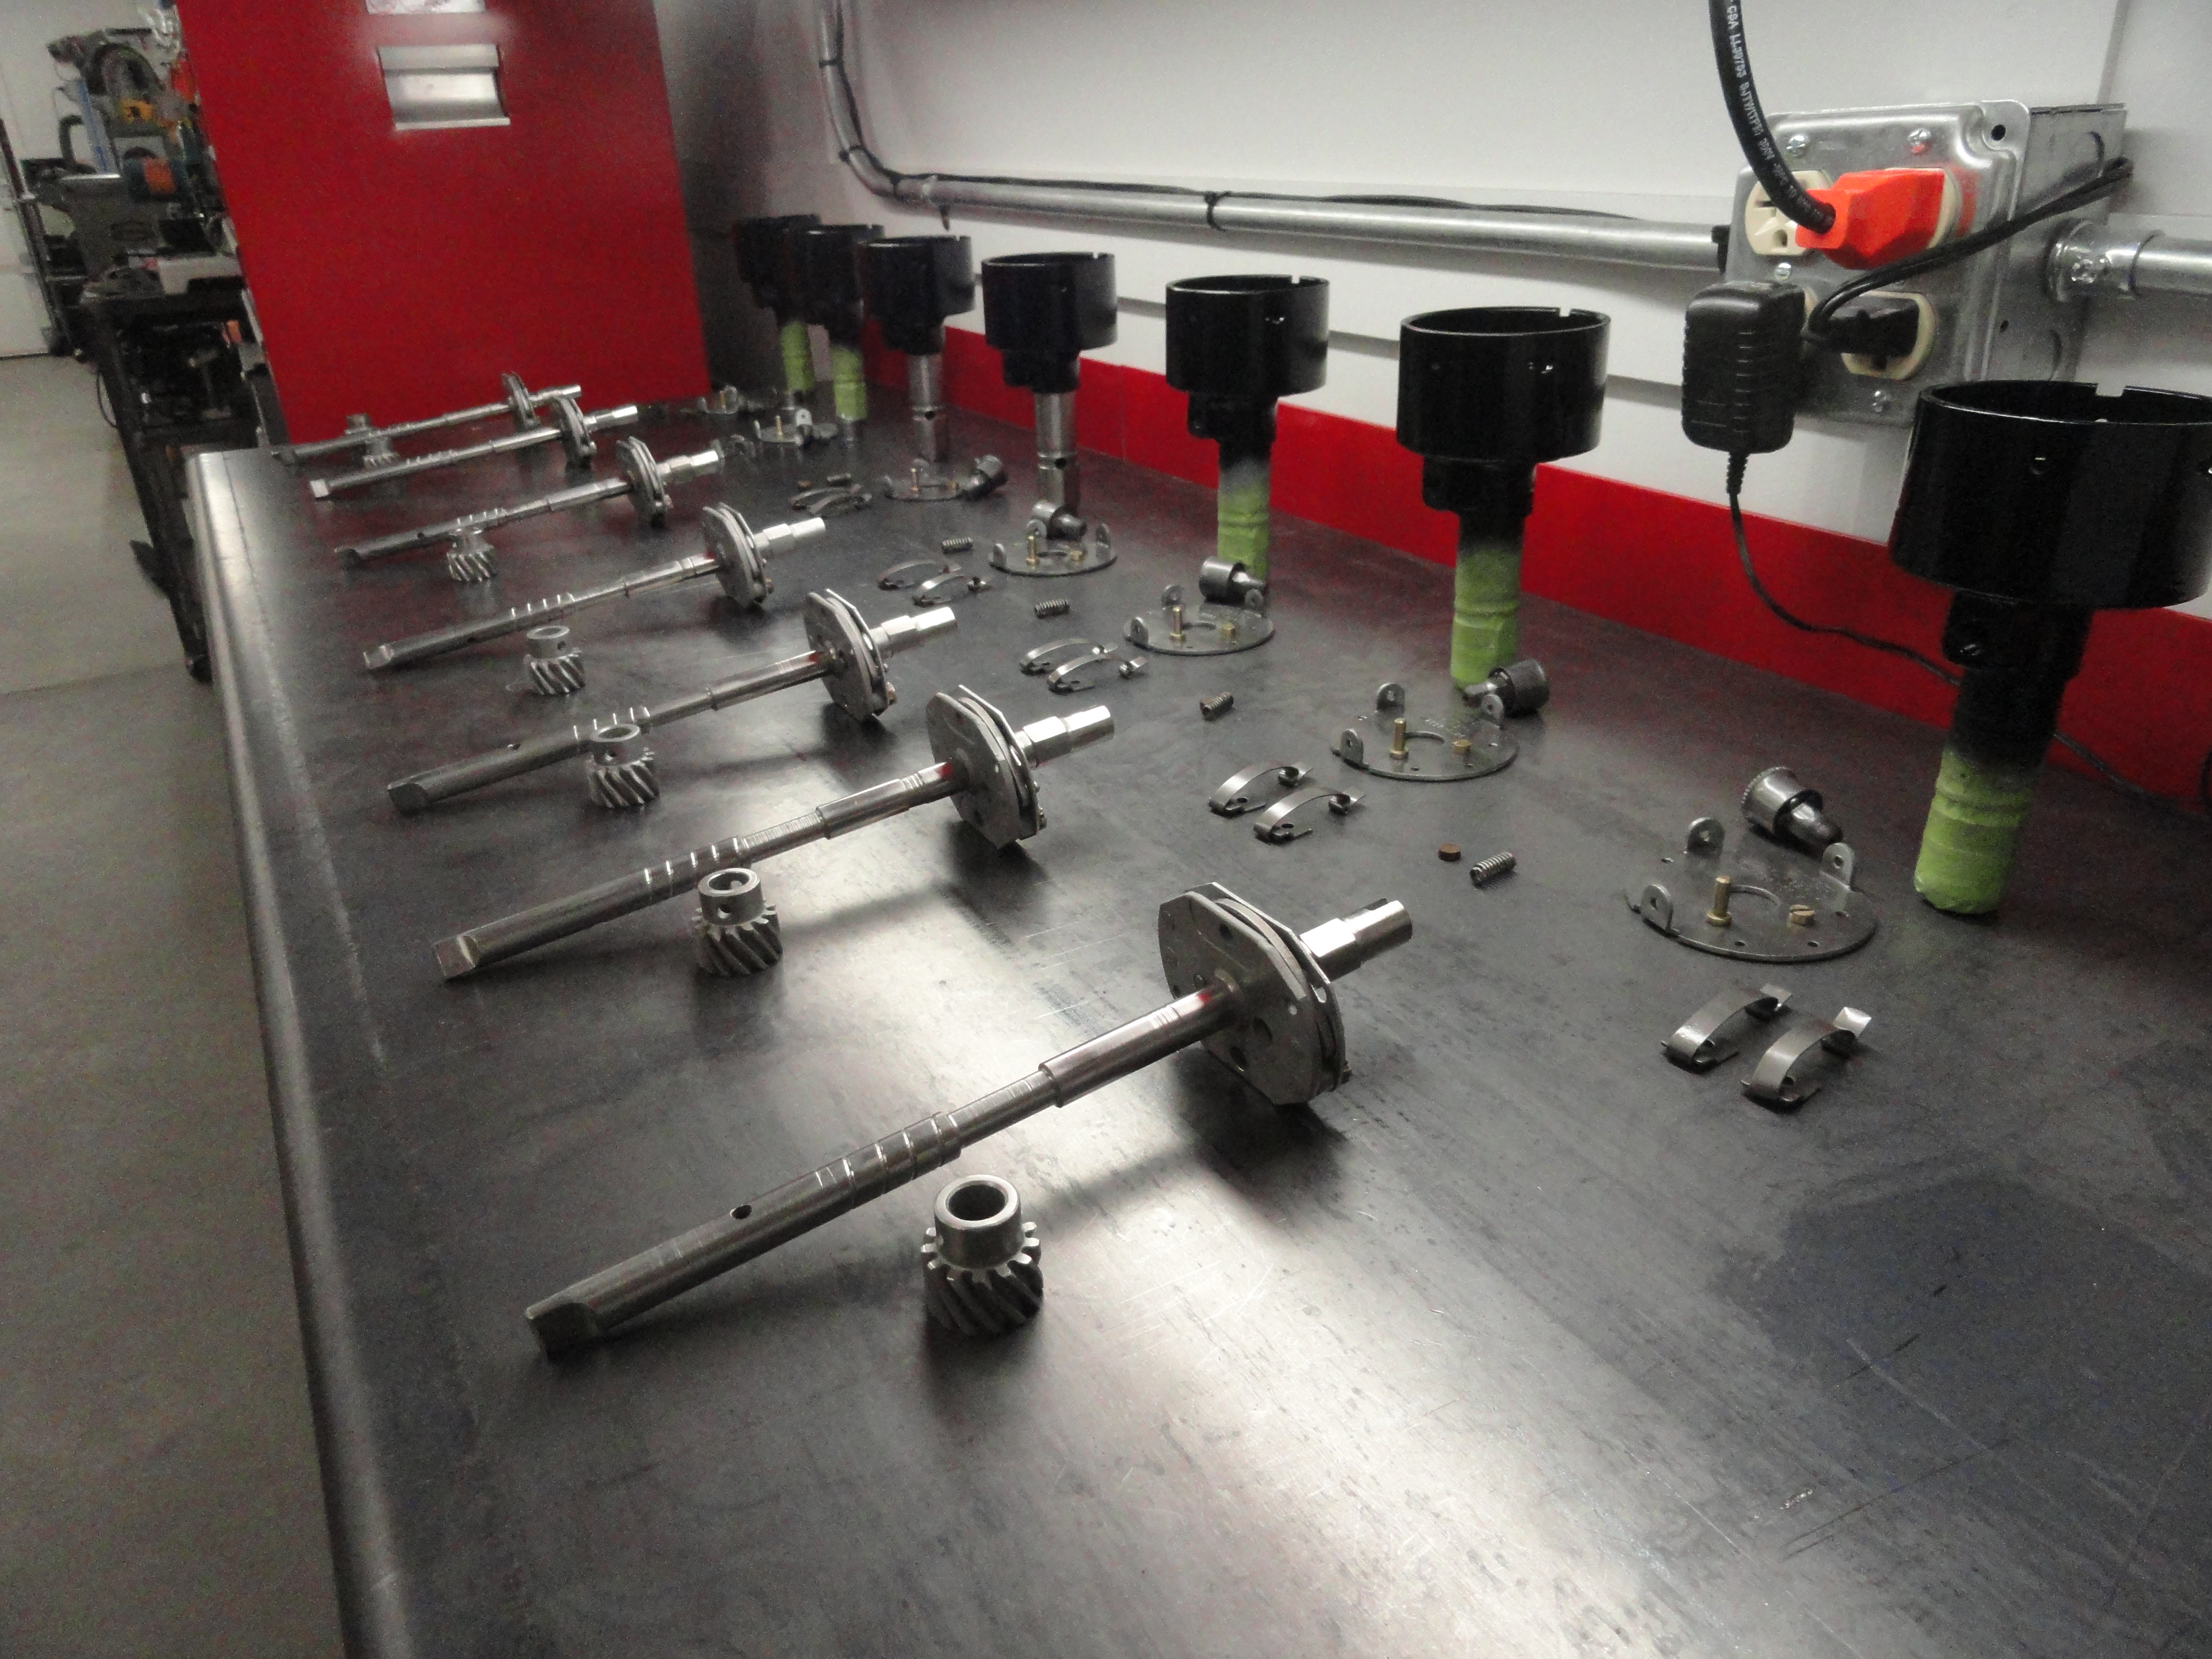
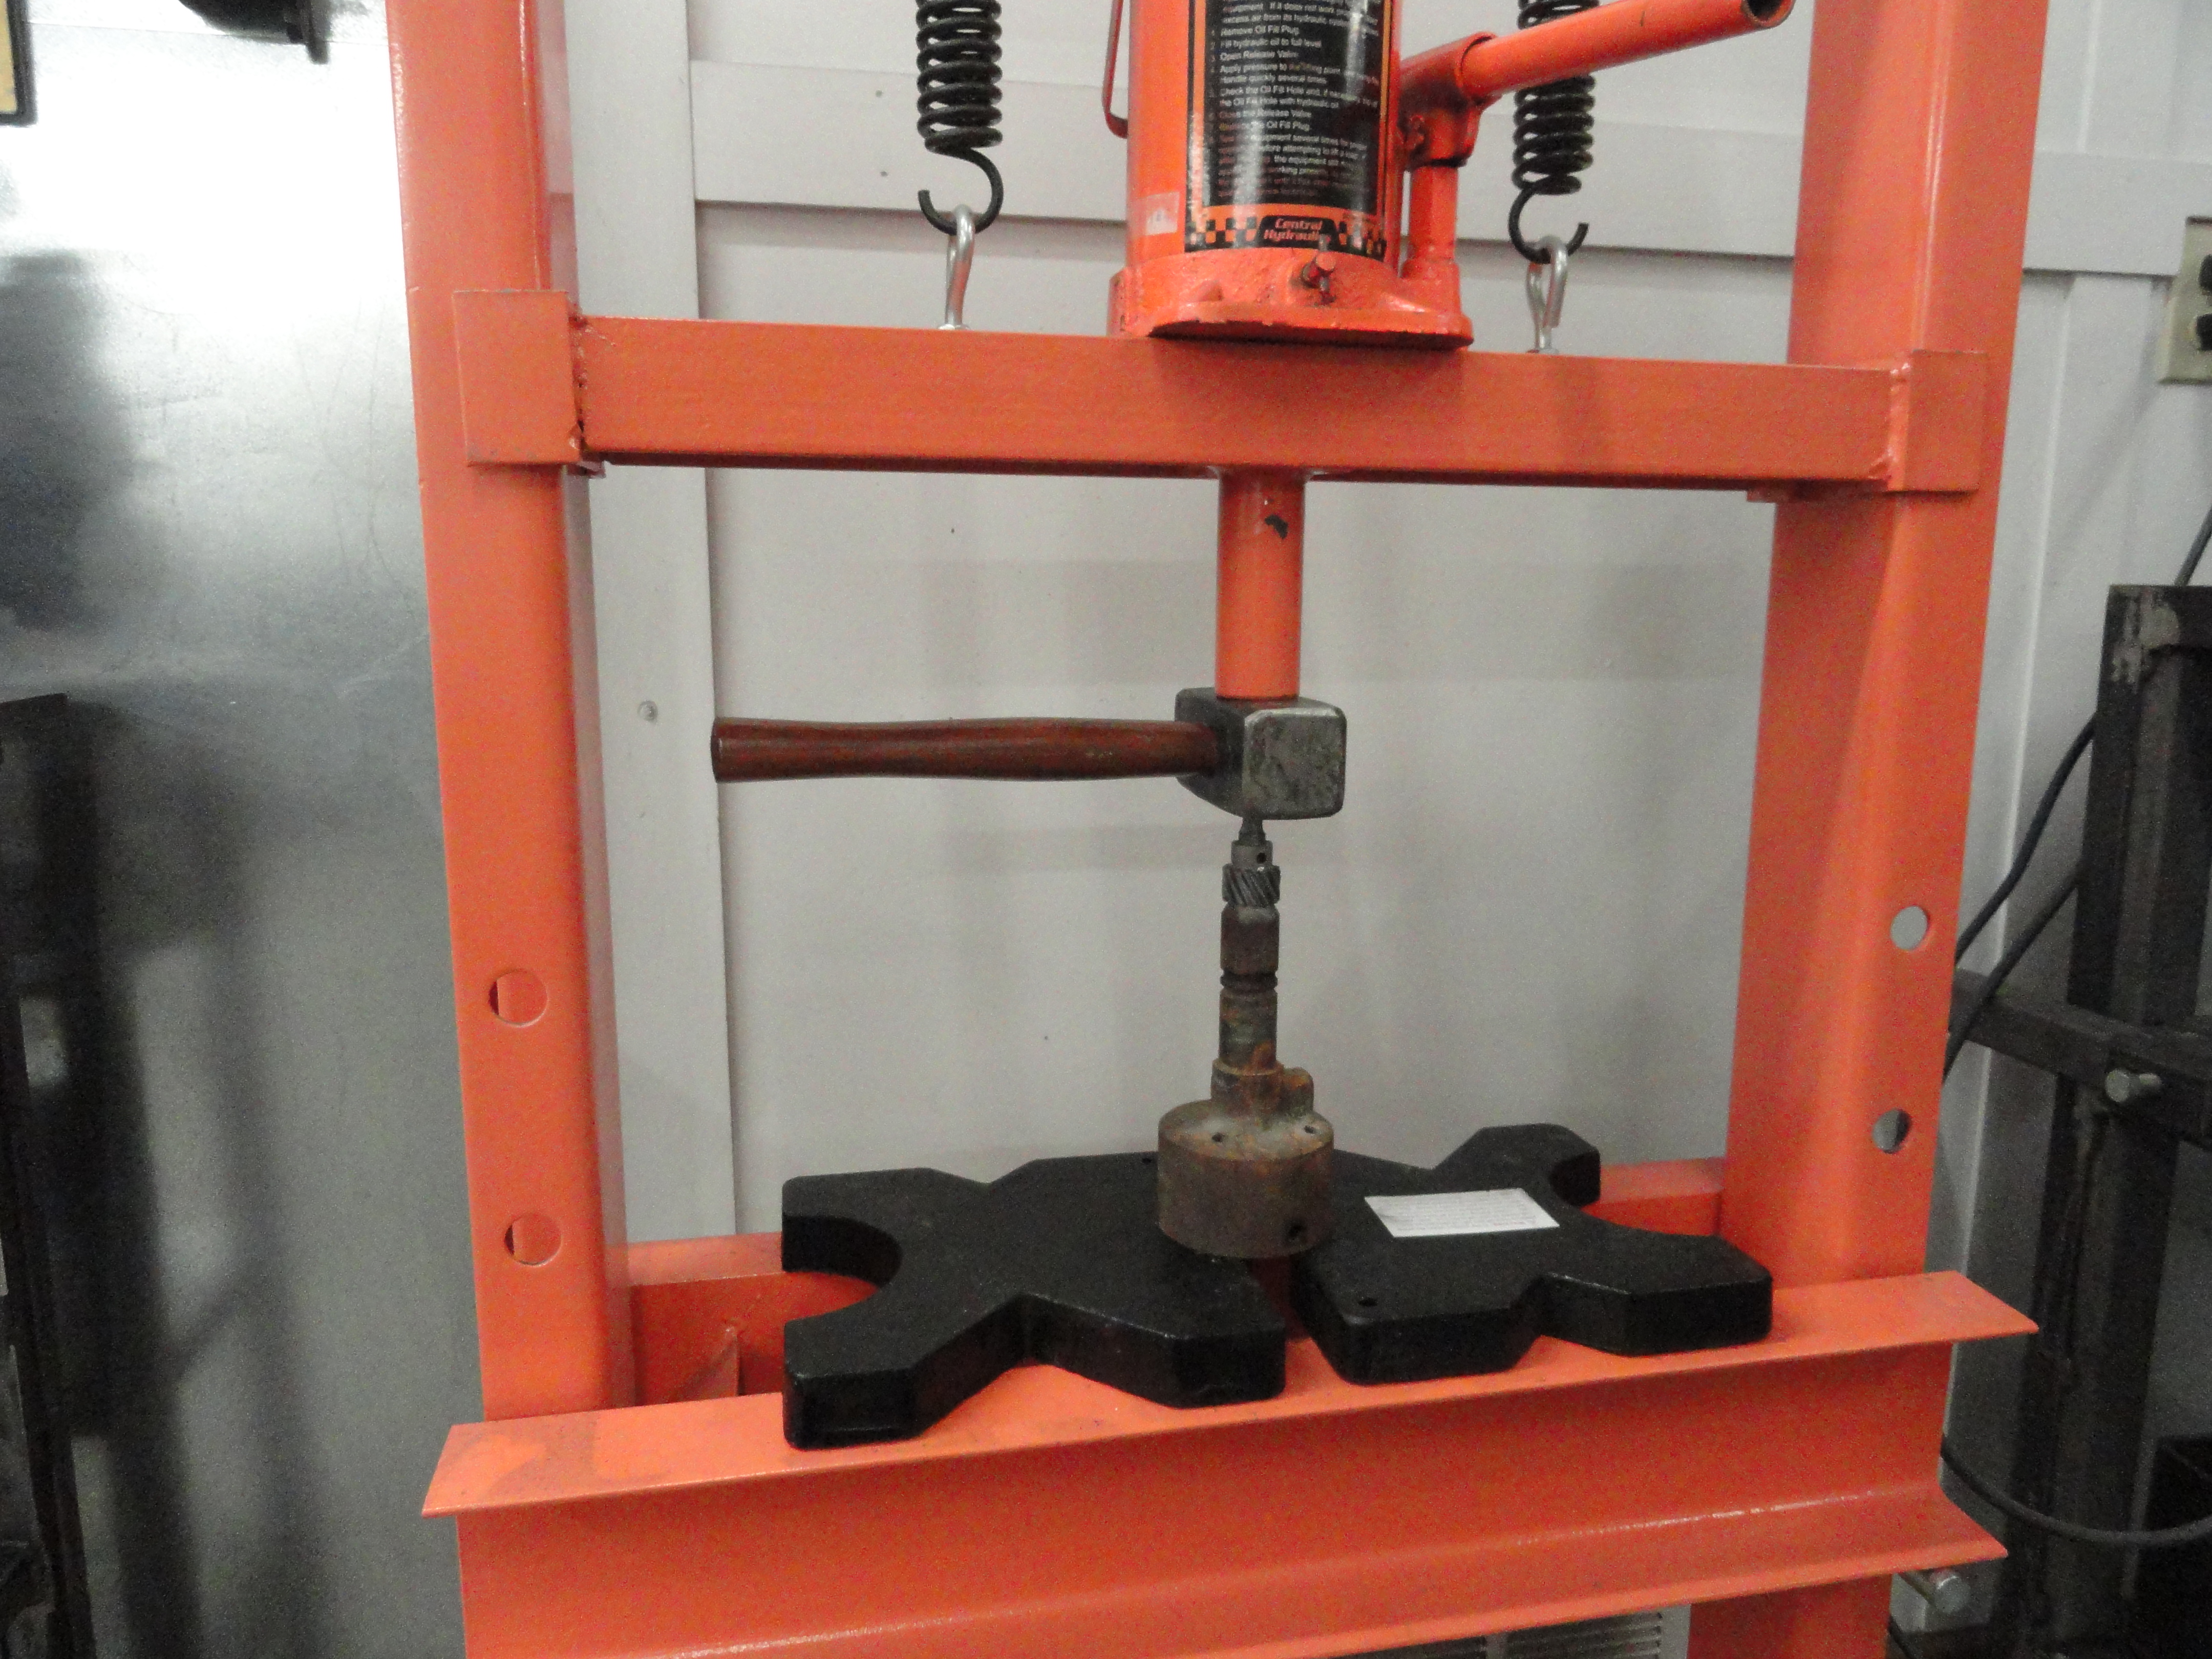
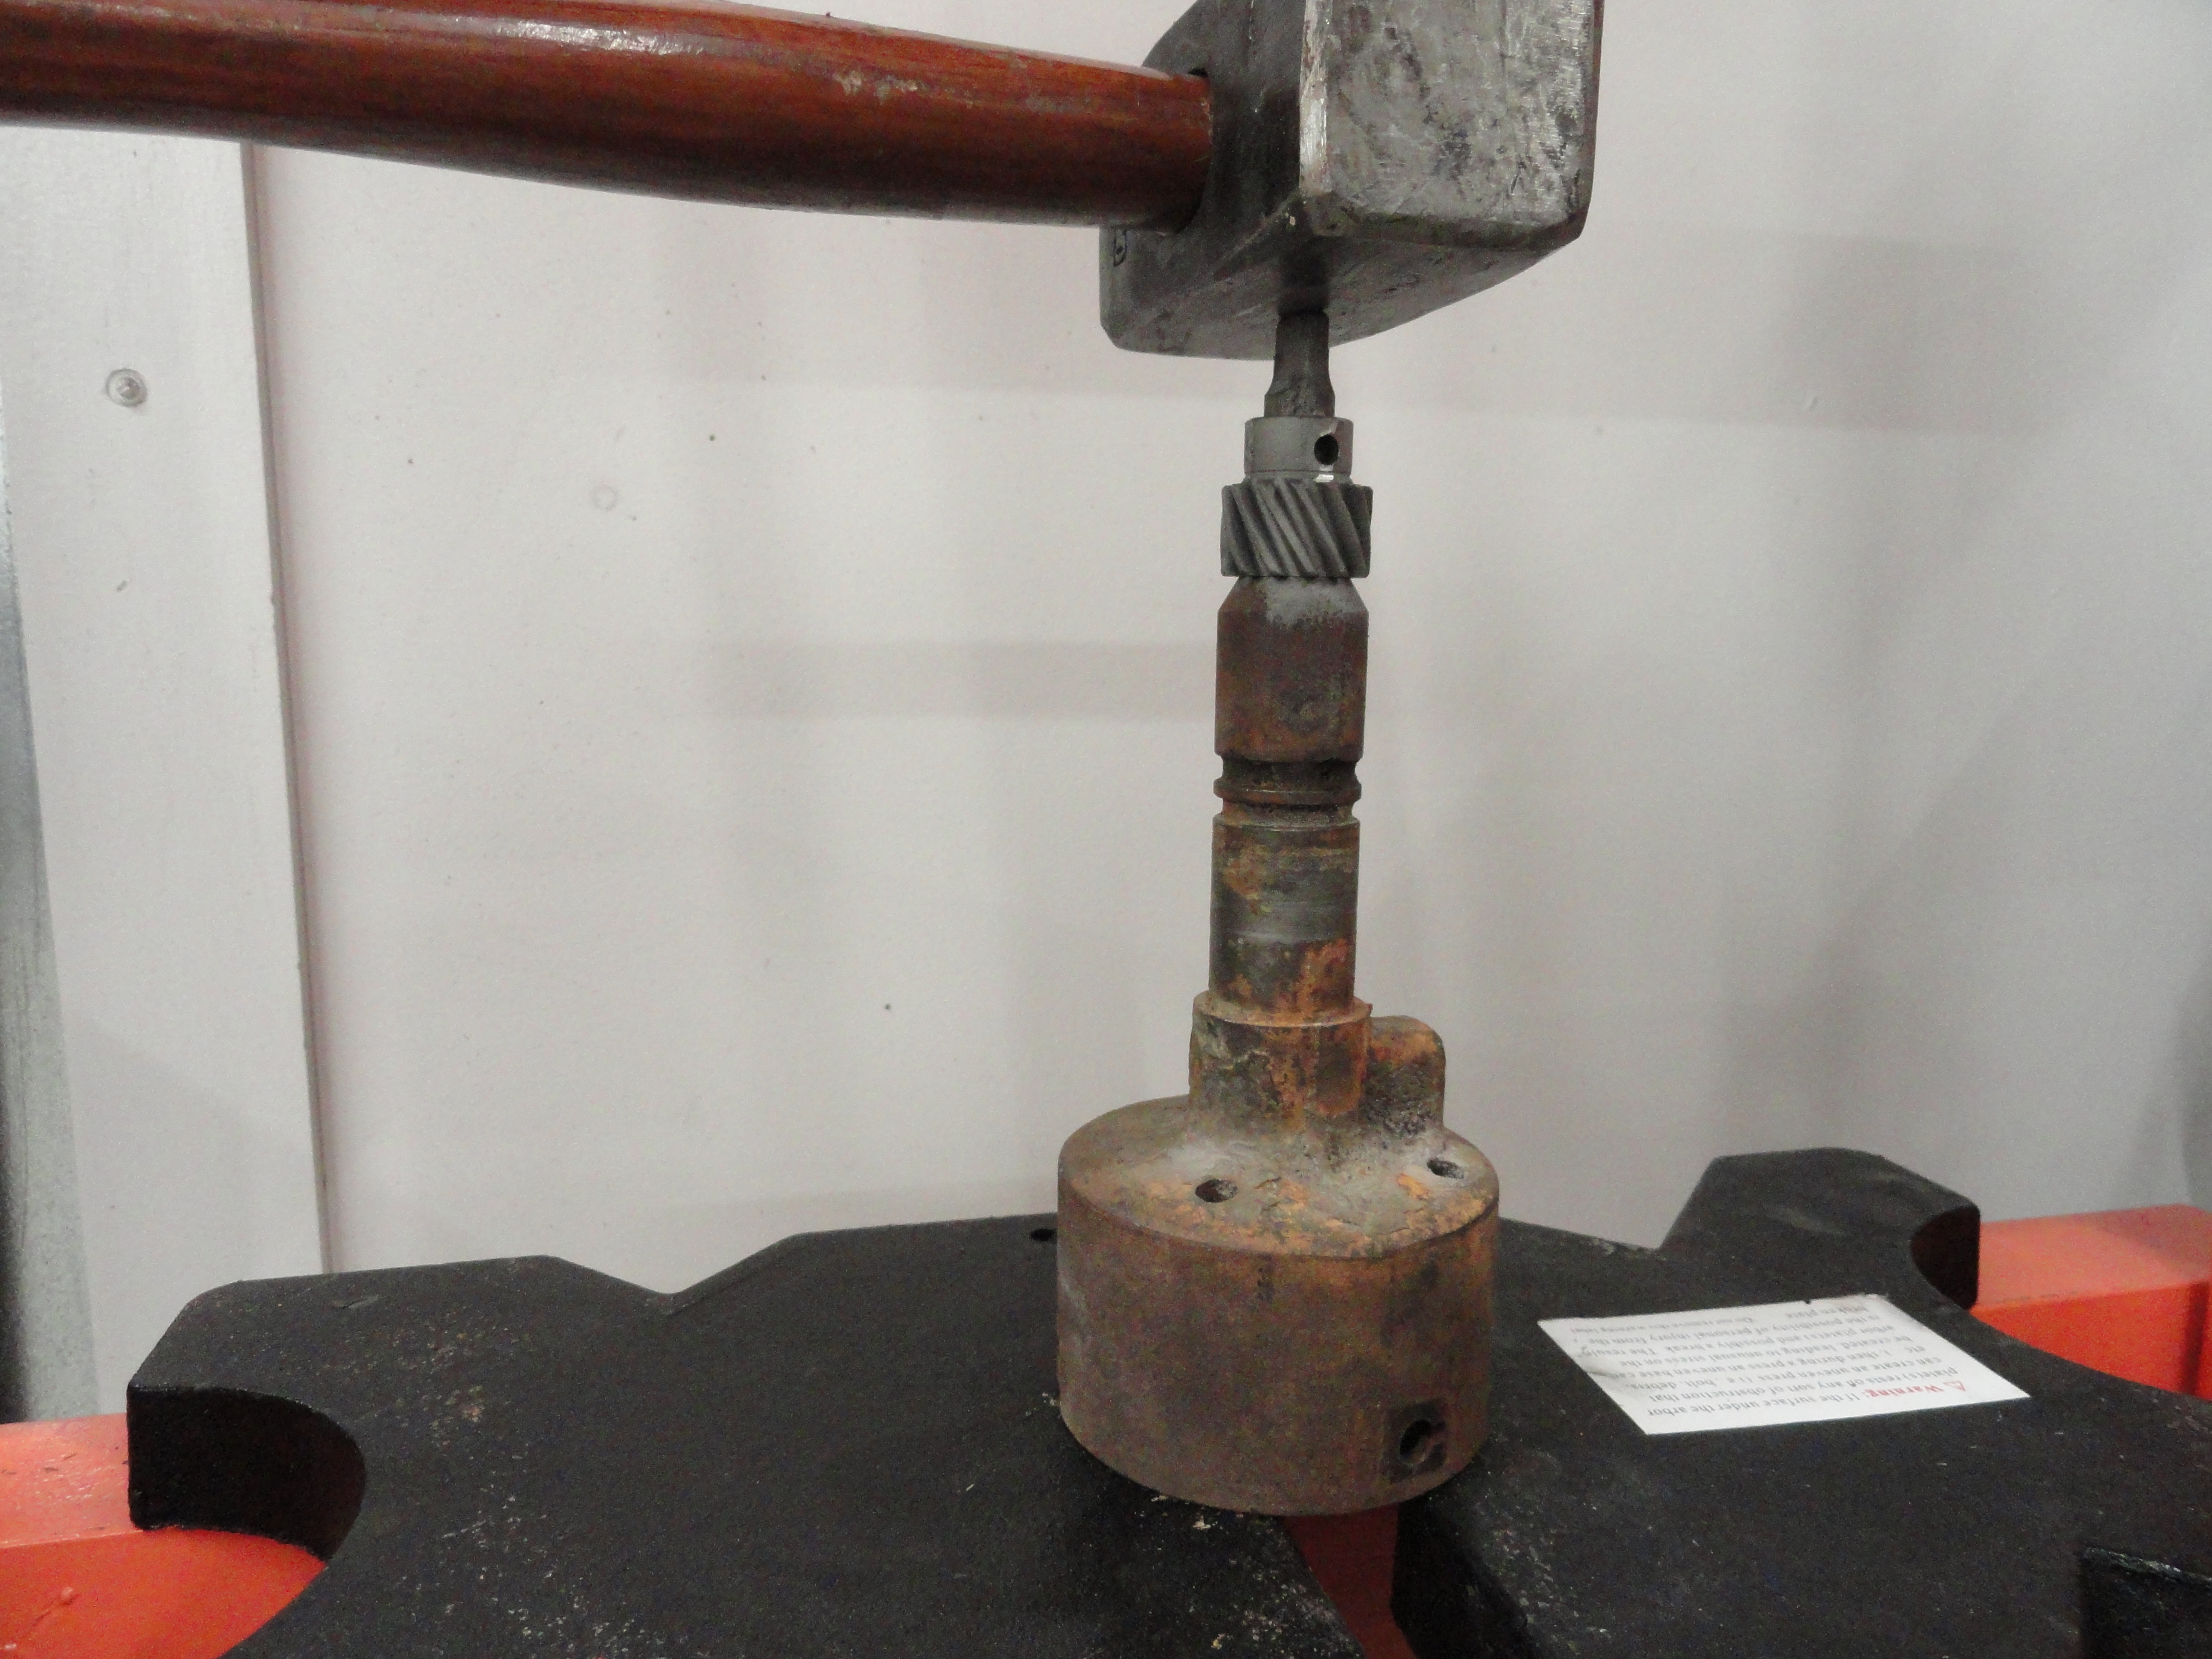
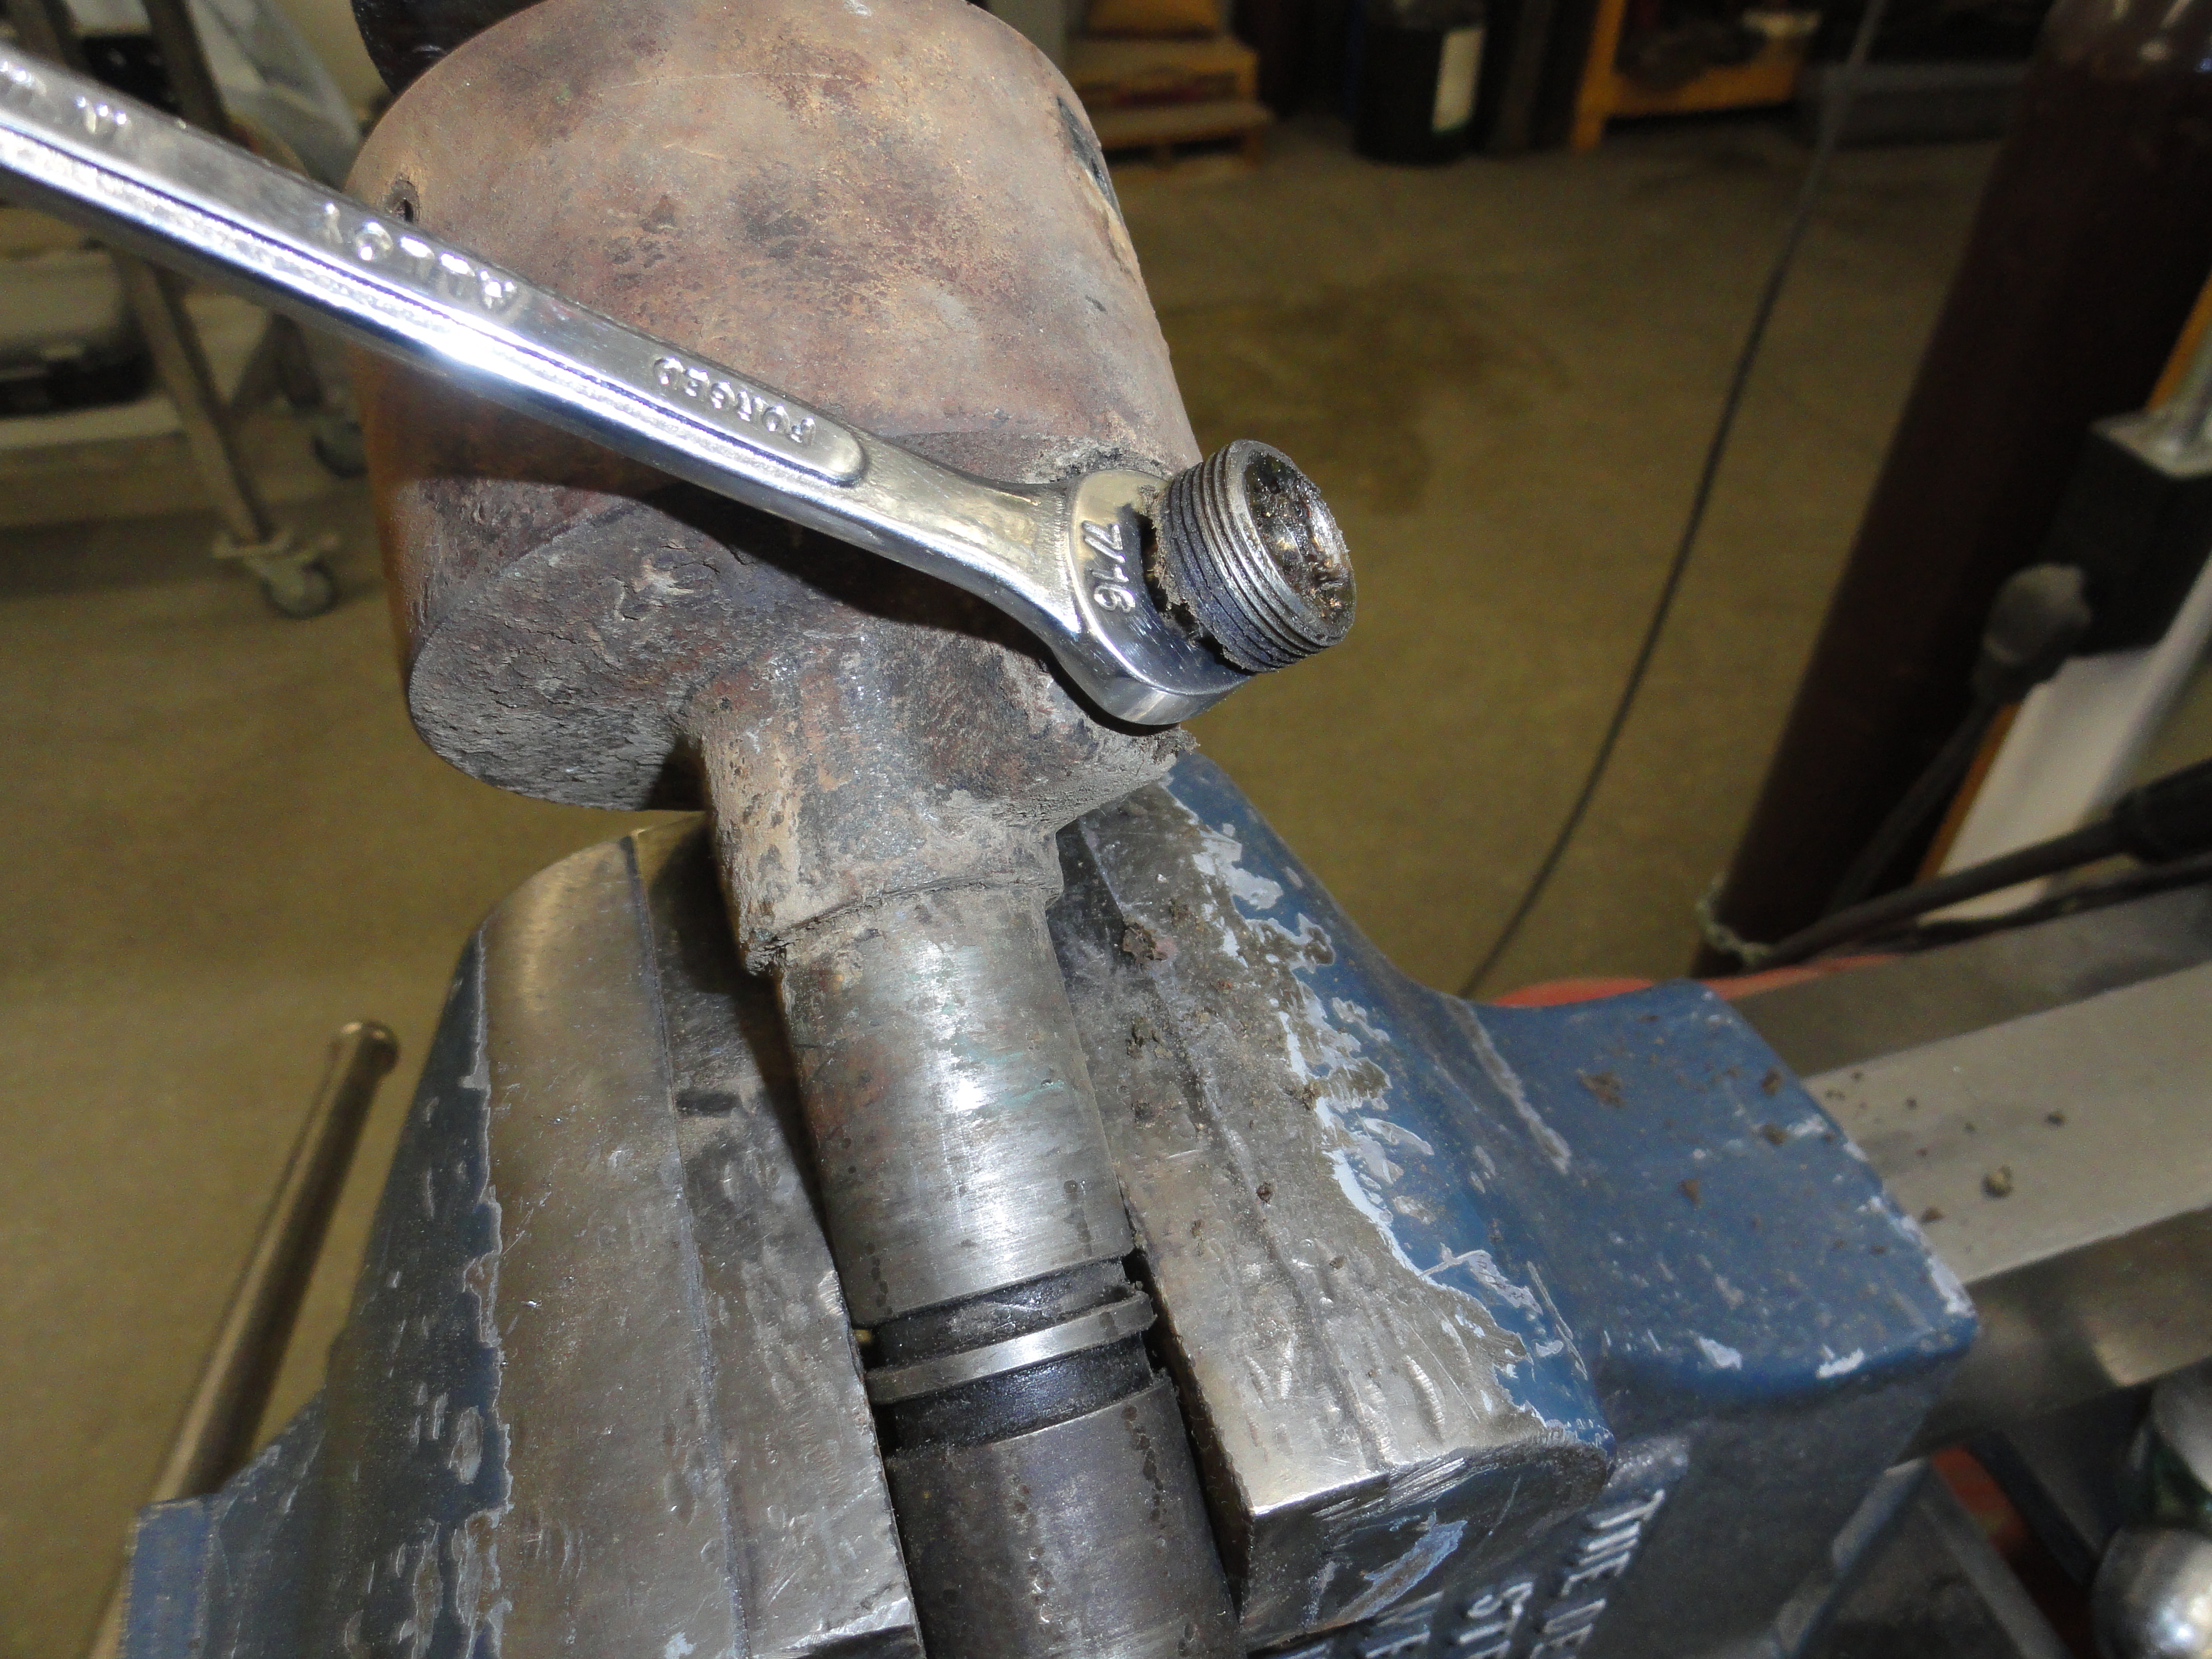
On the outside, let's remove the grease cap, then with a 7/16" wrench, the threaded grease assembly. After that is out, there are two more parts in there. One is a spring and the other is a plastic bushing that pushes against the shaft. To make that bushing retrieval just a little easier, I went ahead and removed the drive gear. Be very gentle grinding off just the head of the pin thats holding it in. Use the appropriate size punch to knock the pin out after grinding. I have never had one in there so tight that it was impossible to remove, just be sure your punch is small enough for the hole and it should come out with moderate effort. Once the pin is out, work it around a little and the gear should slide right off. Now you can remove the inner shaft assembly. That's when I was able to take the punch and push that little plastic bushing out into the center of the shaft housing, then push it out with the shaft. That plastic bushing is important and if its worn out, you can usually find a plastic bushing at your local hardware store that will work just fine. You do not want that spring to push against the shaft without a bushing. At this point you should have everything apart as in the picture on the above left only not quite that pretty.
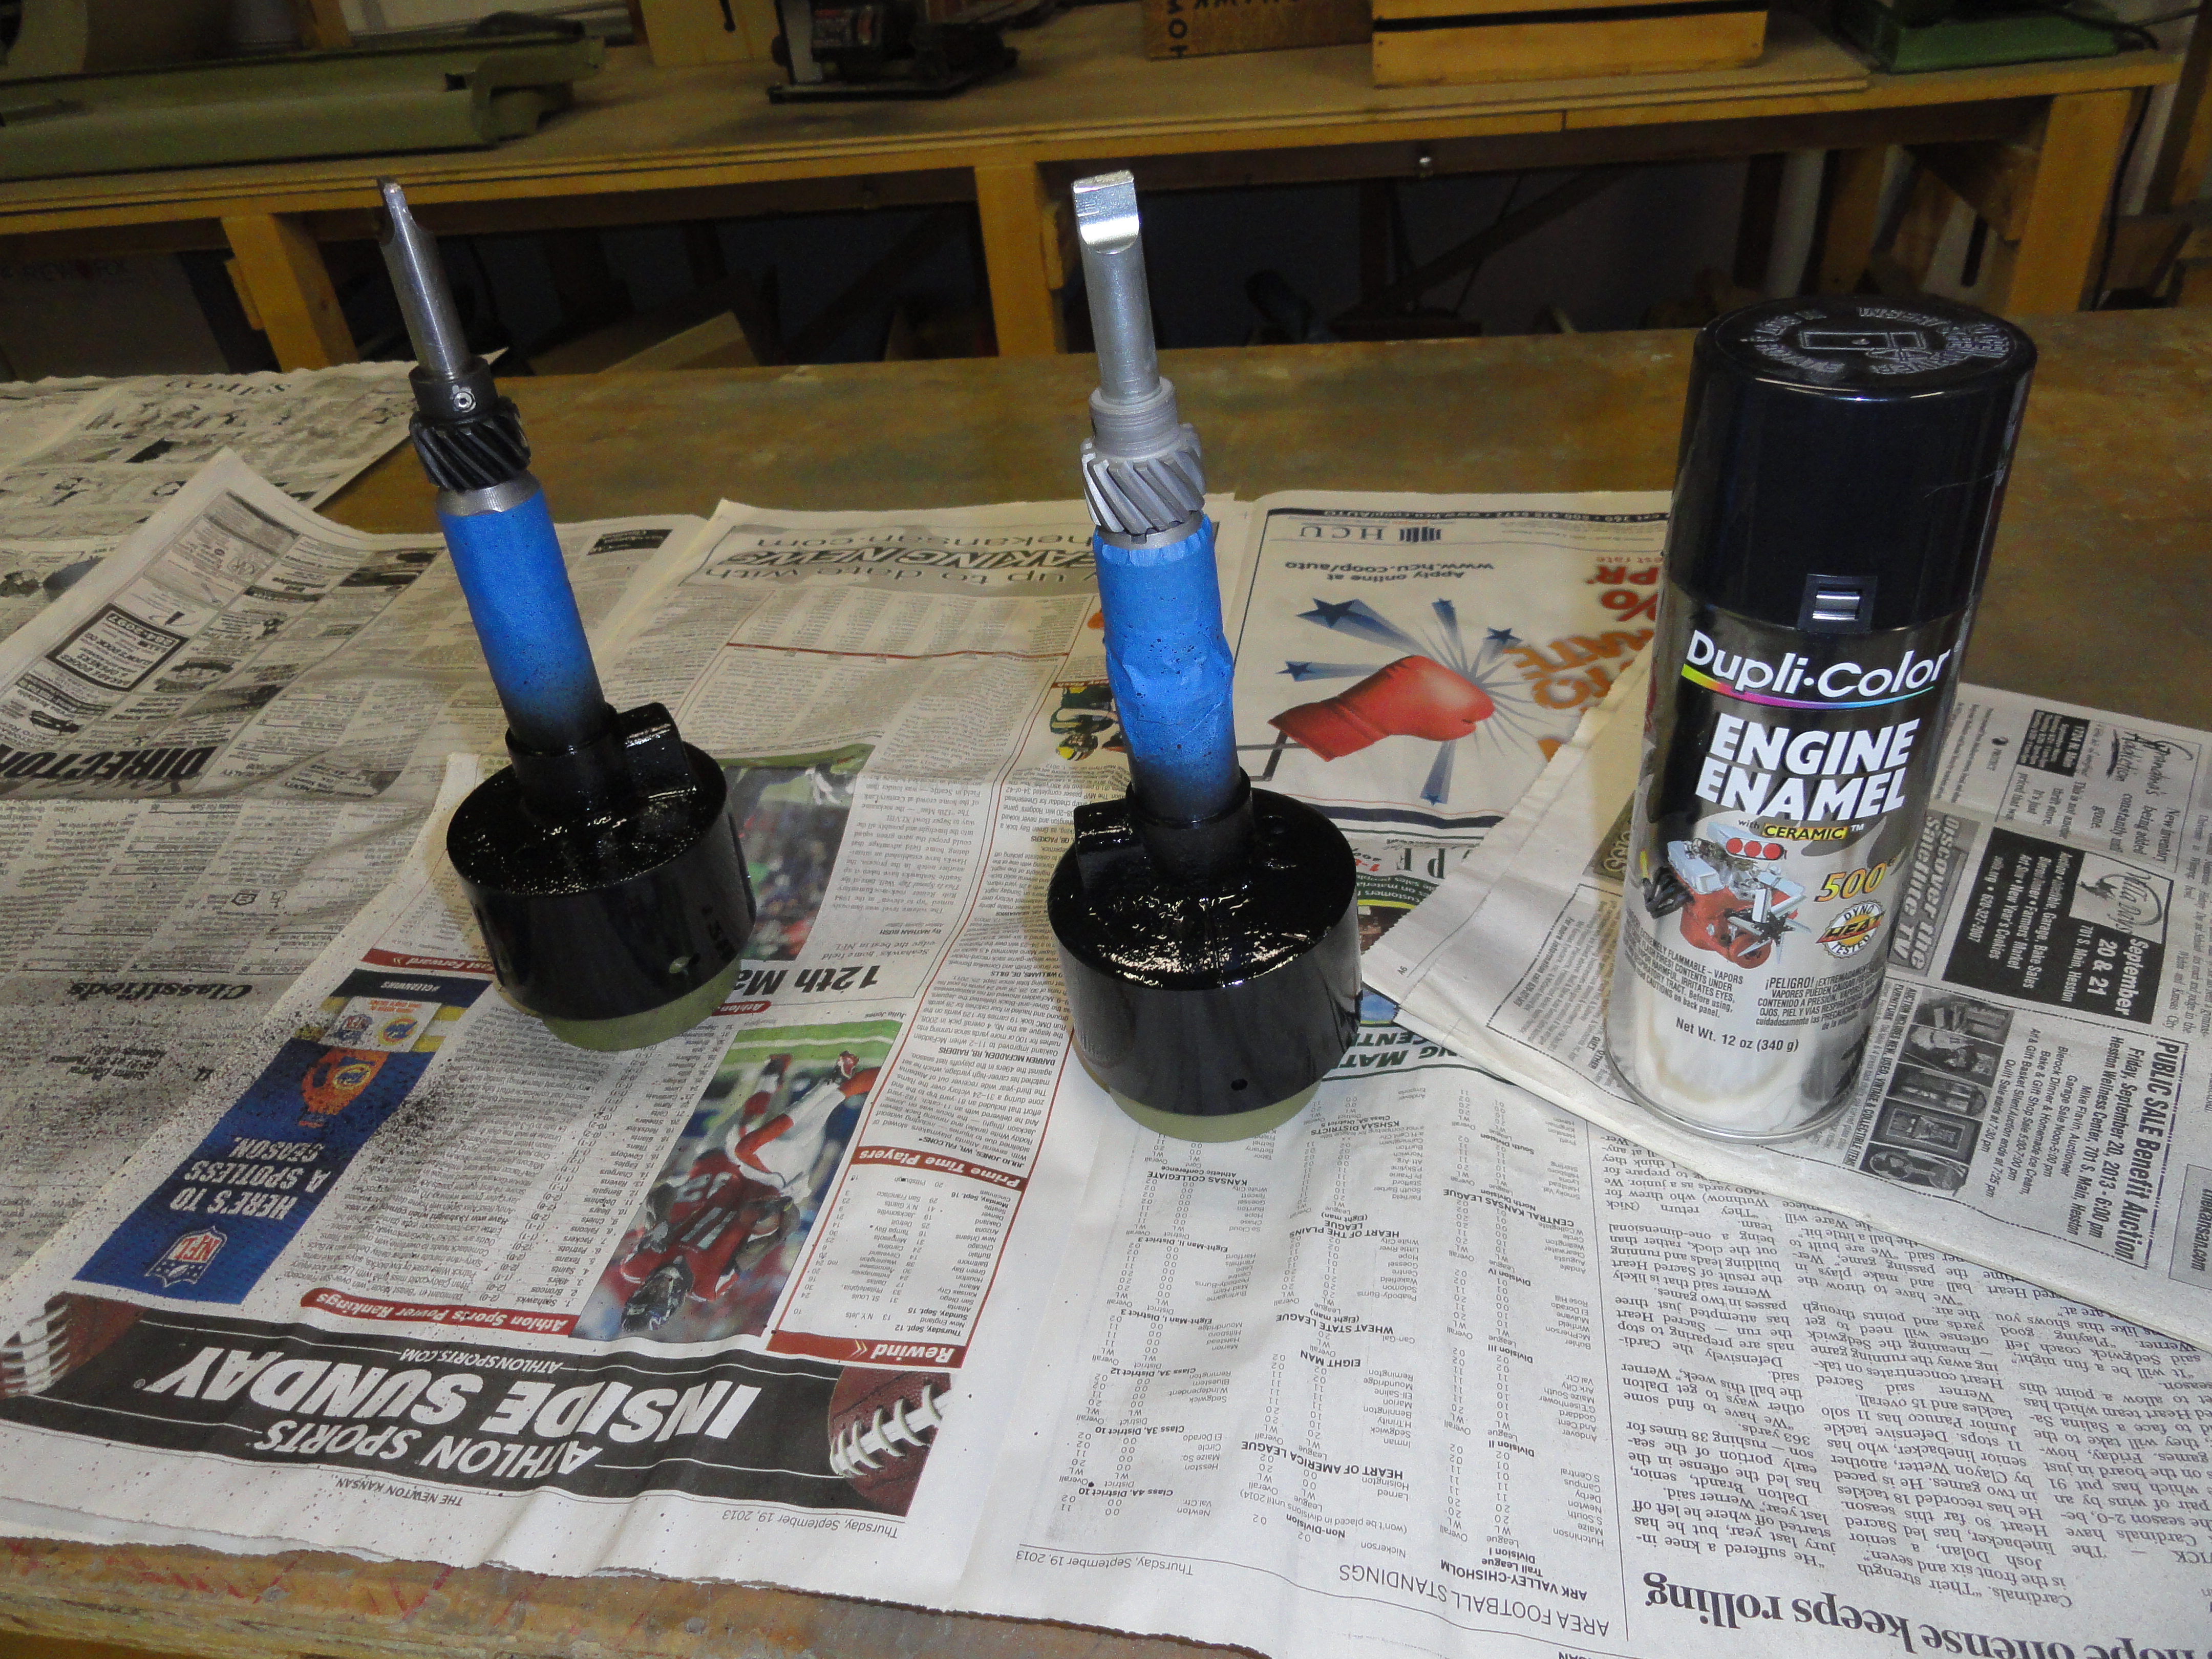
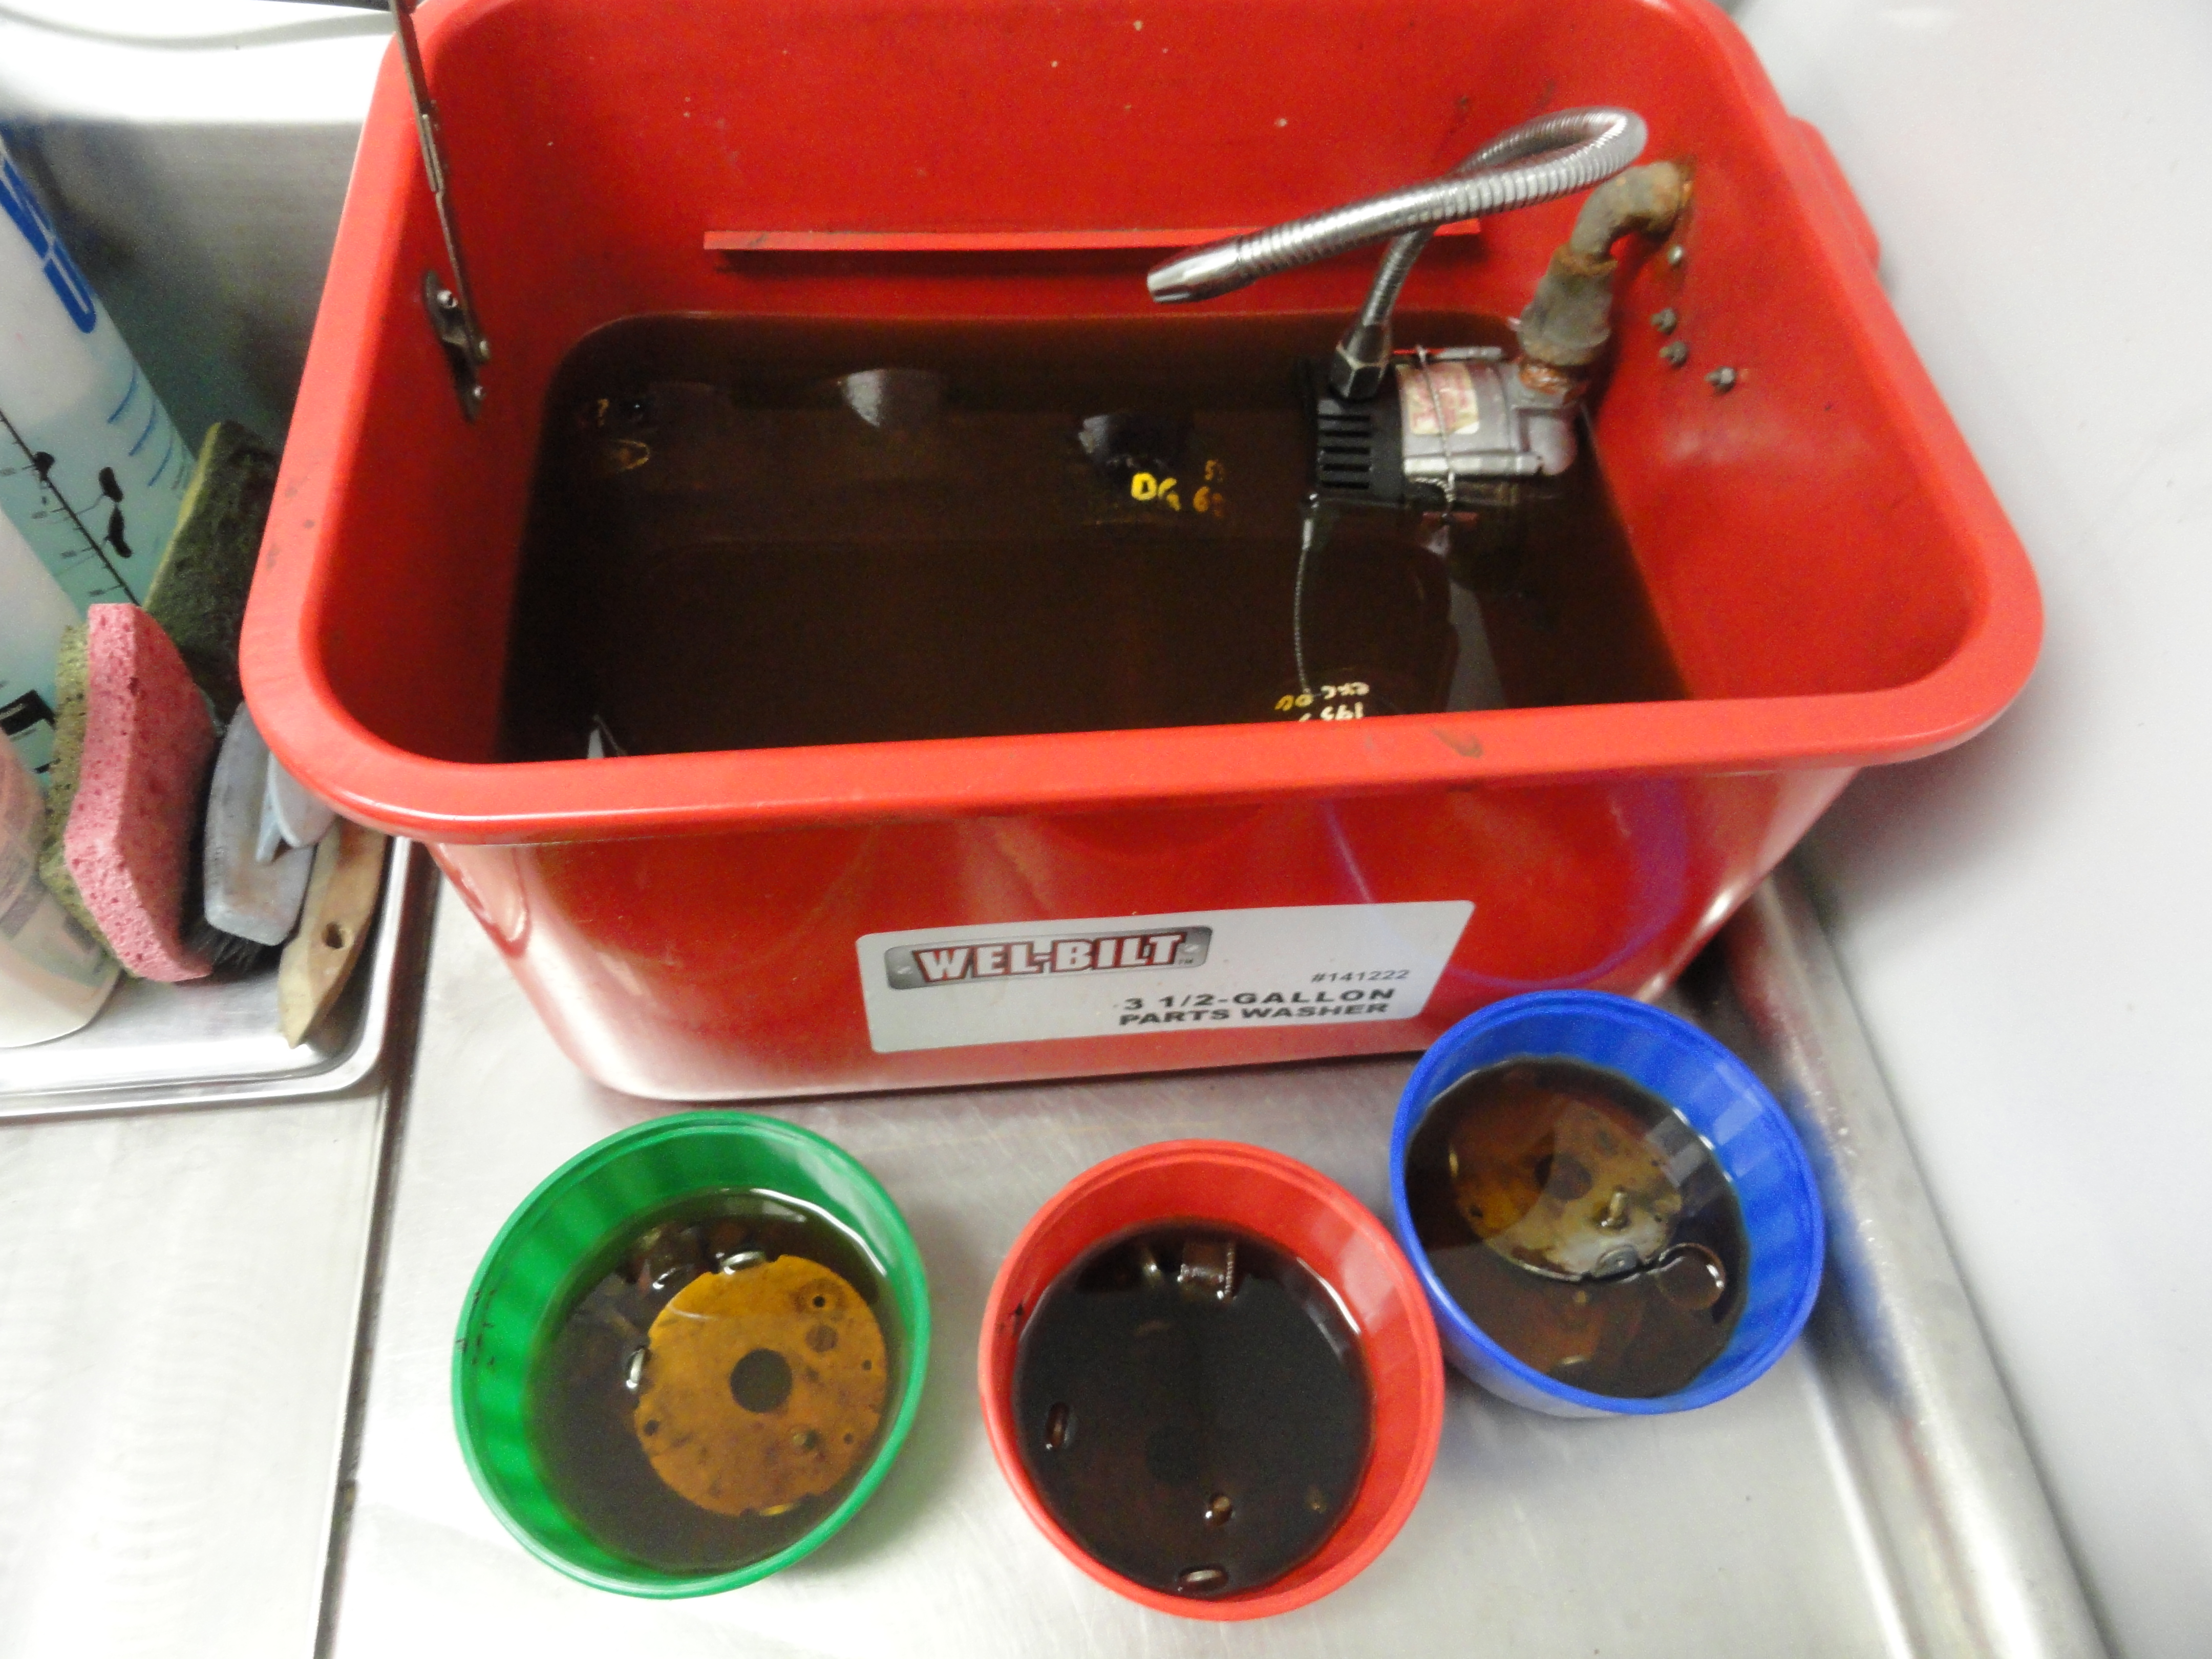
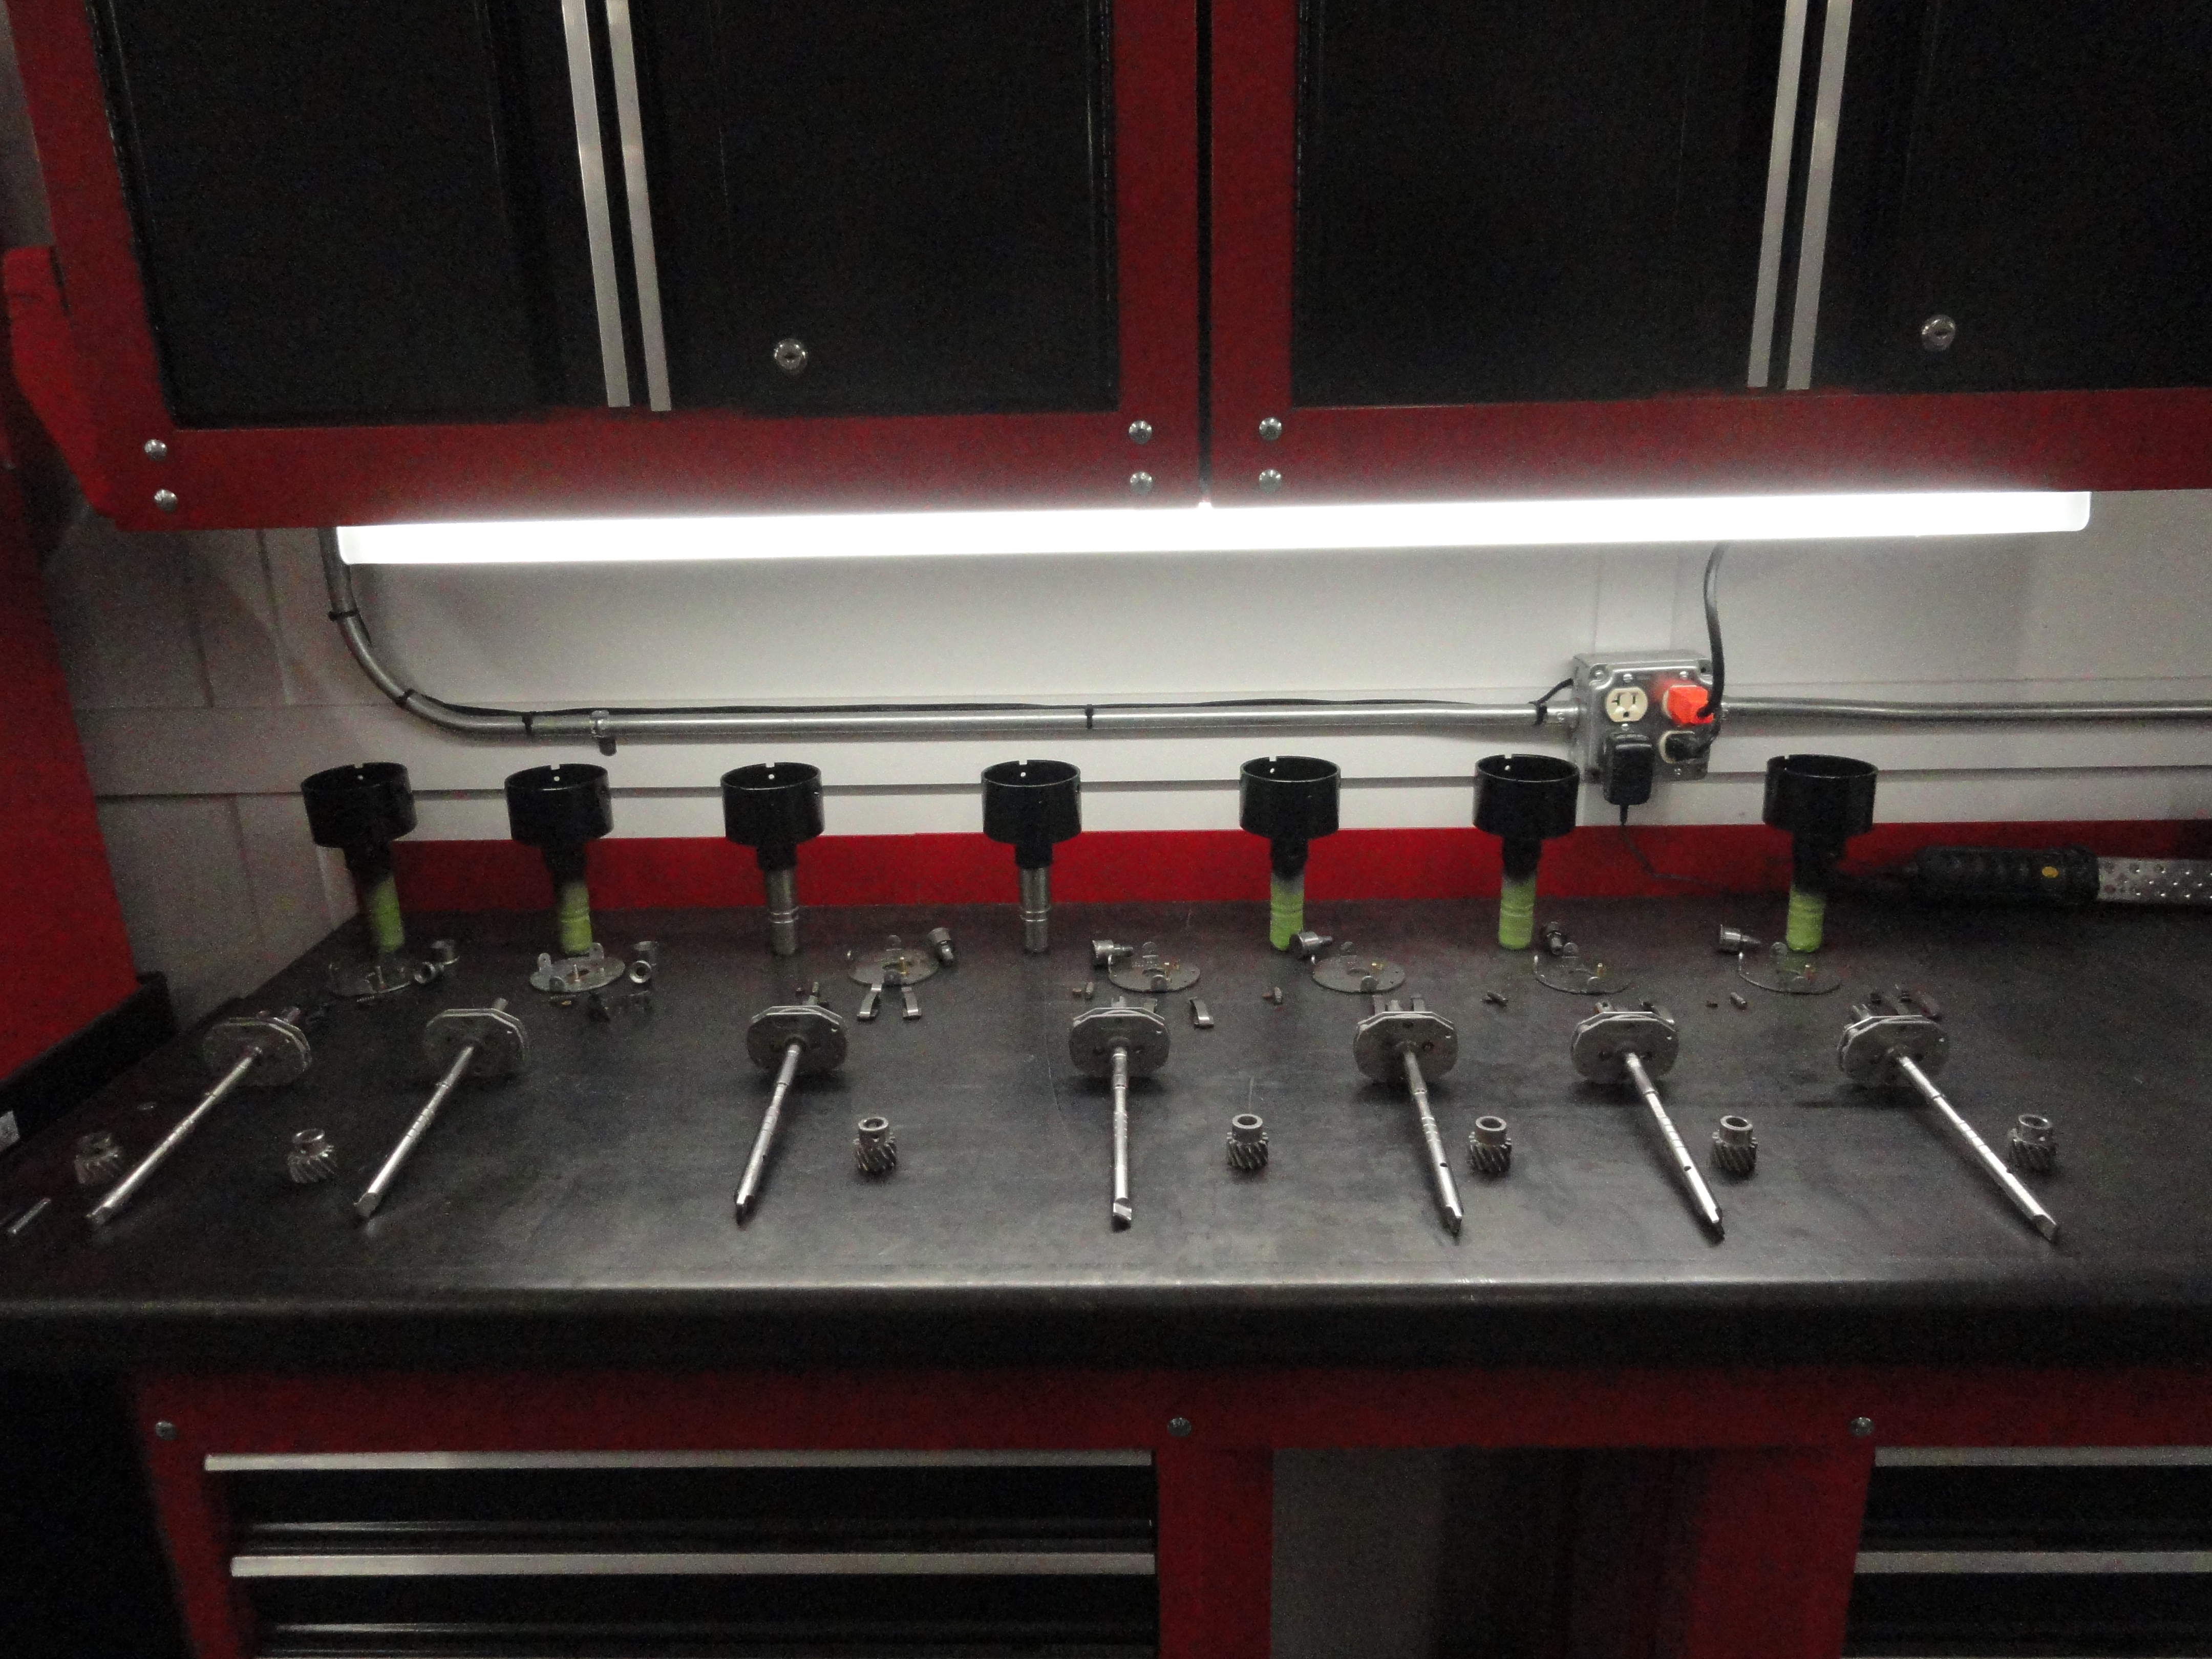
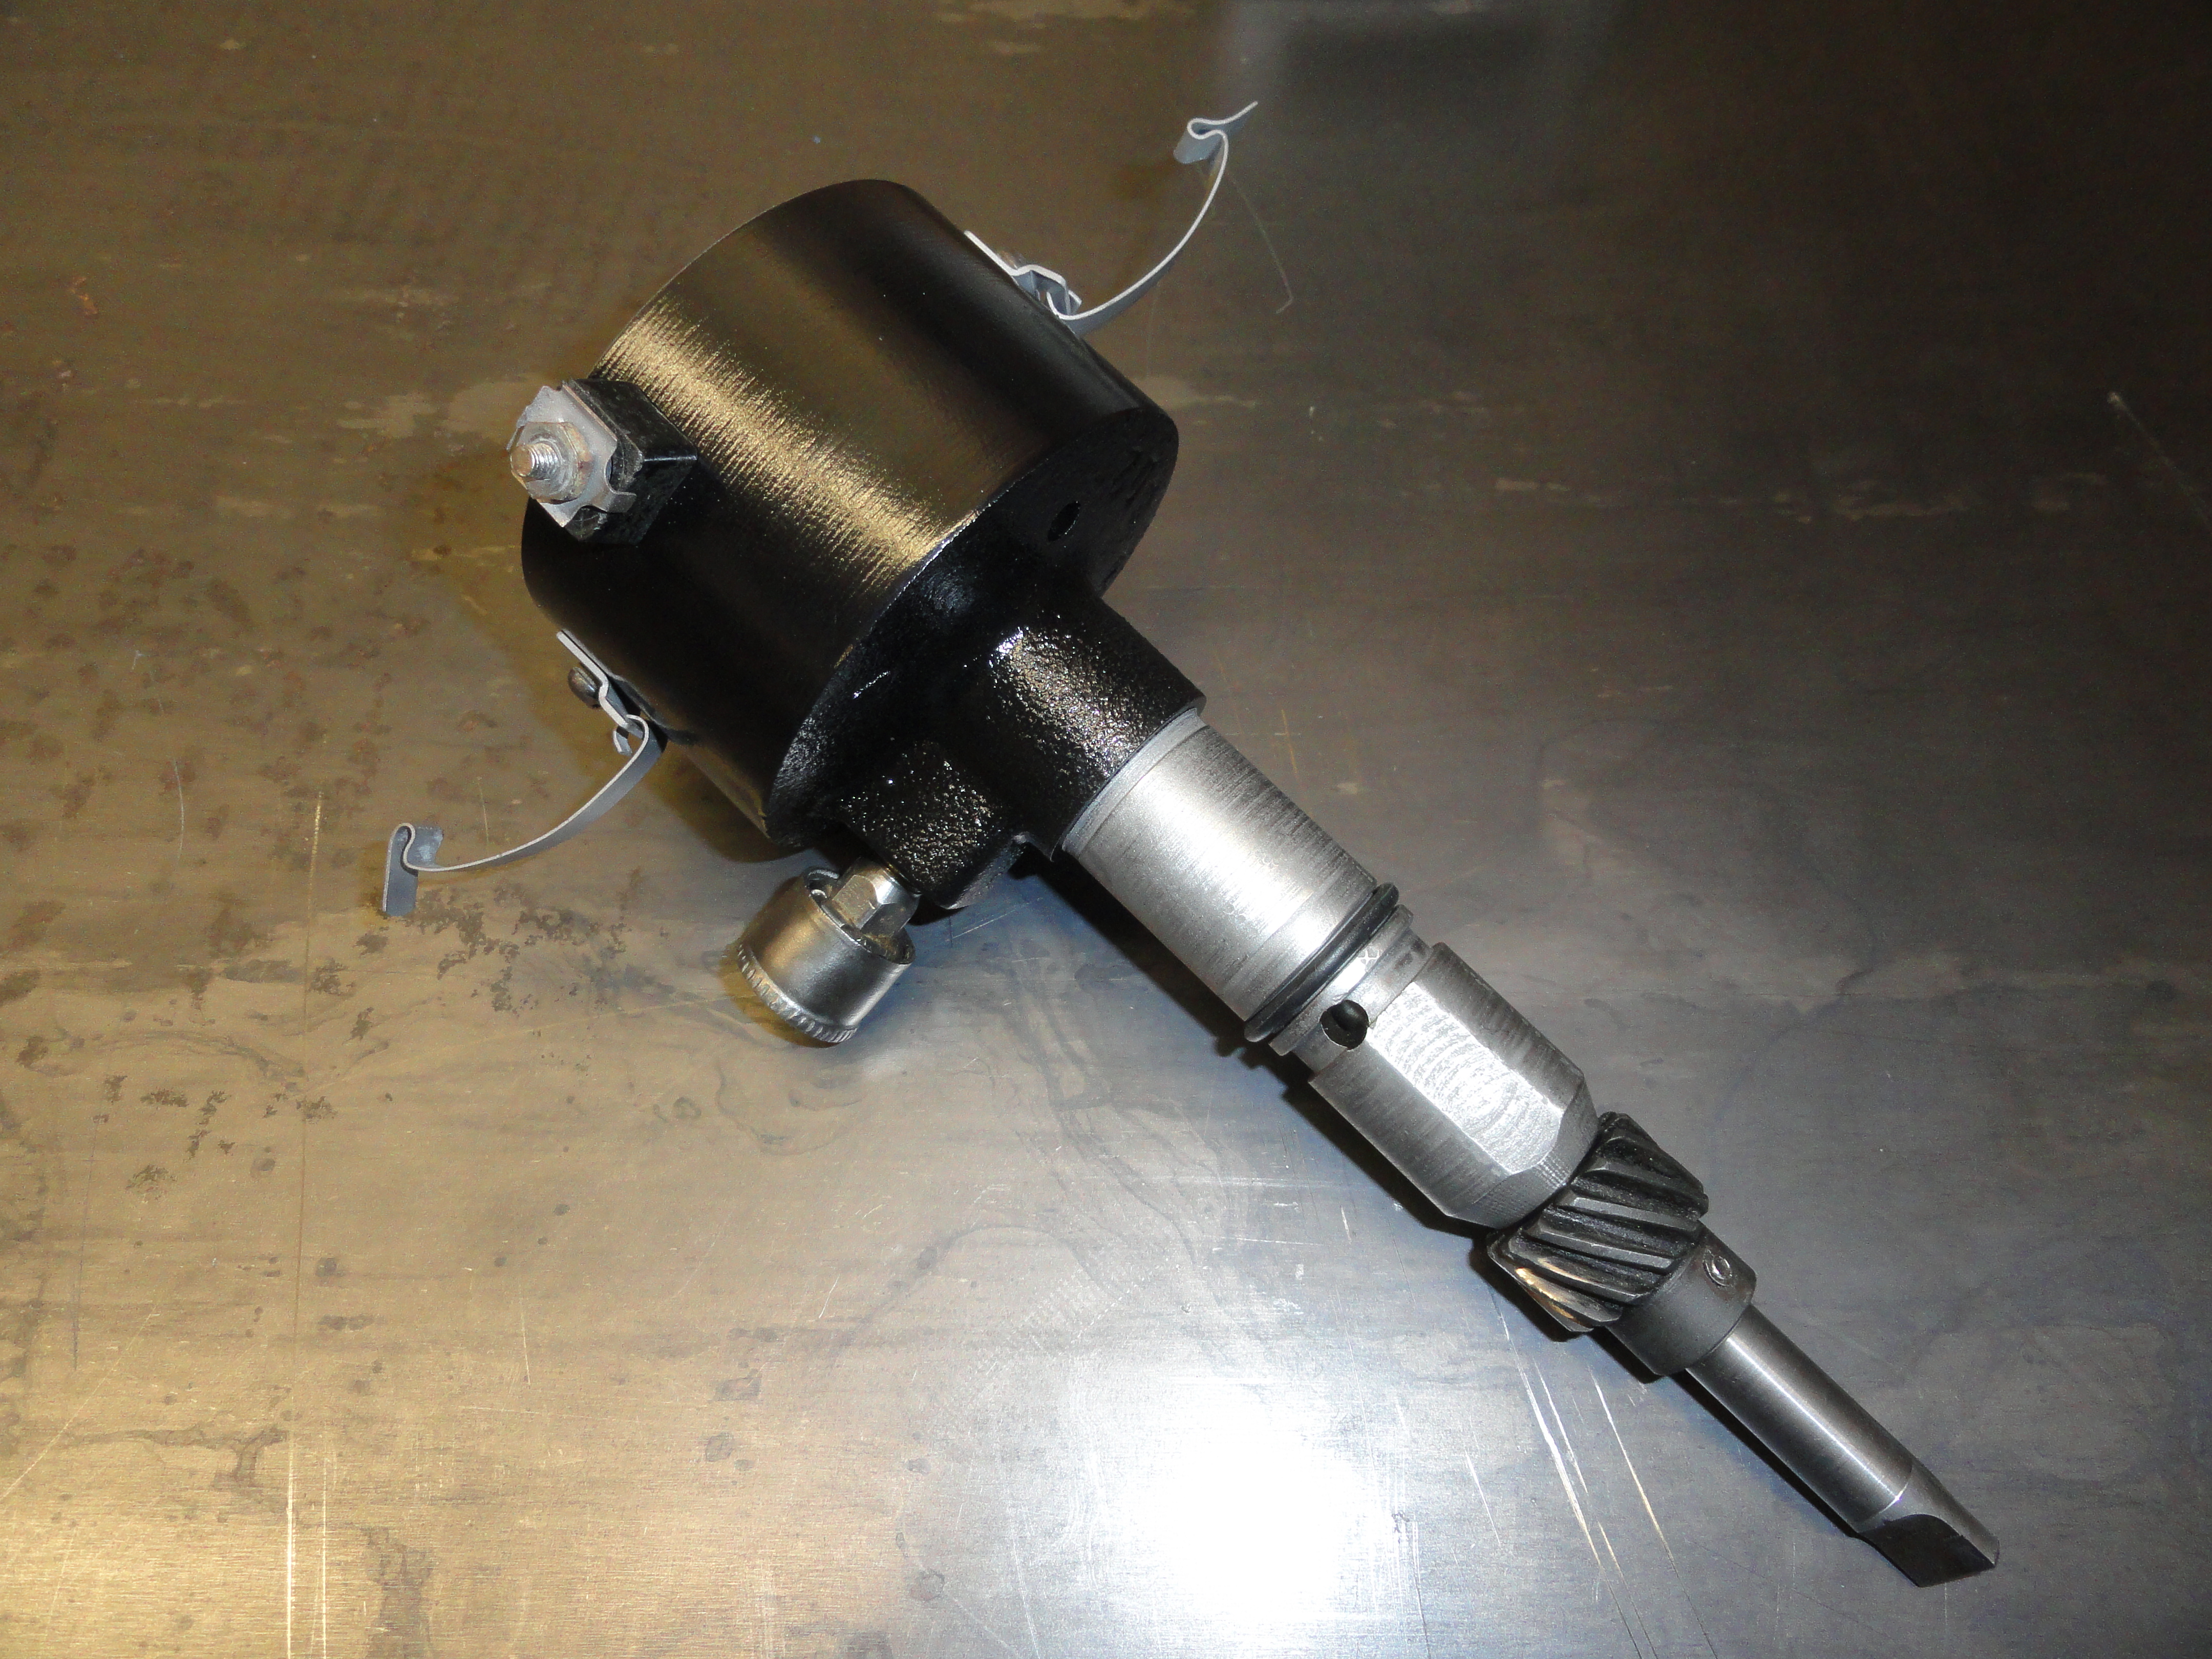
Cleaning all of this was accomplished with the 3 gallon parts washer with Kerosene. Use wire brushes and really take your time getting these parts all nice and shiny again. The machined surface of the housing was taped and then sandblasted to remove all traces of crud. The top plate was shined up with 400 grit sandpaper. Once everything is clean and compressed air is used to blow everything off good, Paint the housing the color of your choice. Flat black was used originally. I painted only the outside and with the tape still on the machined shaft. I used Etching Primer to start. Once the paint is cured, overnight preferably, spray WD40 on all the parts and inside the housing. Place the shaft in the housing and move it up and down to ensure you don't have any more crud in the housing. With the WD40 on it, it should spin very nice and freely. I use the WD40 as a rinse to get rid of any contamination as the last cleaning step.
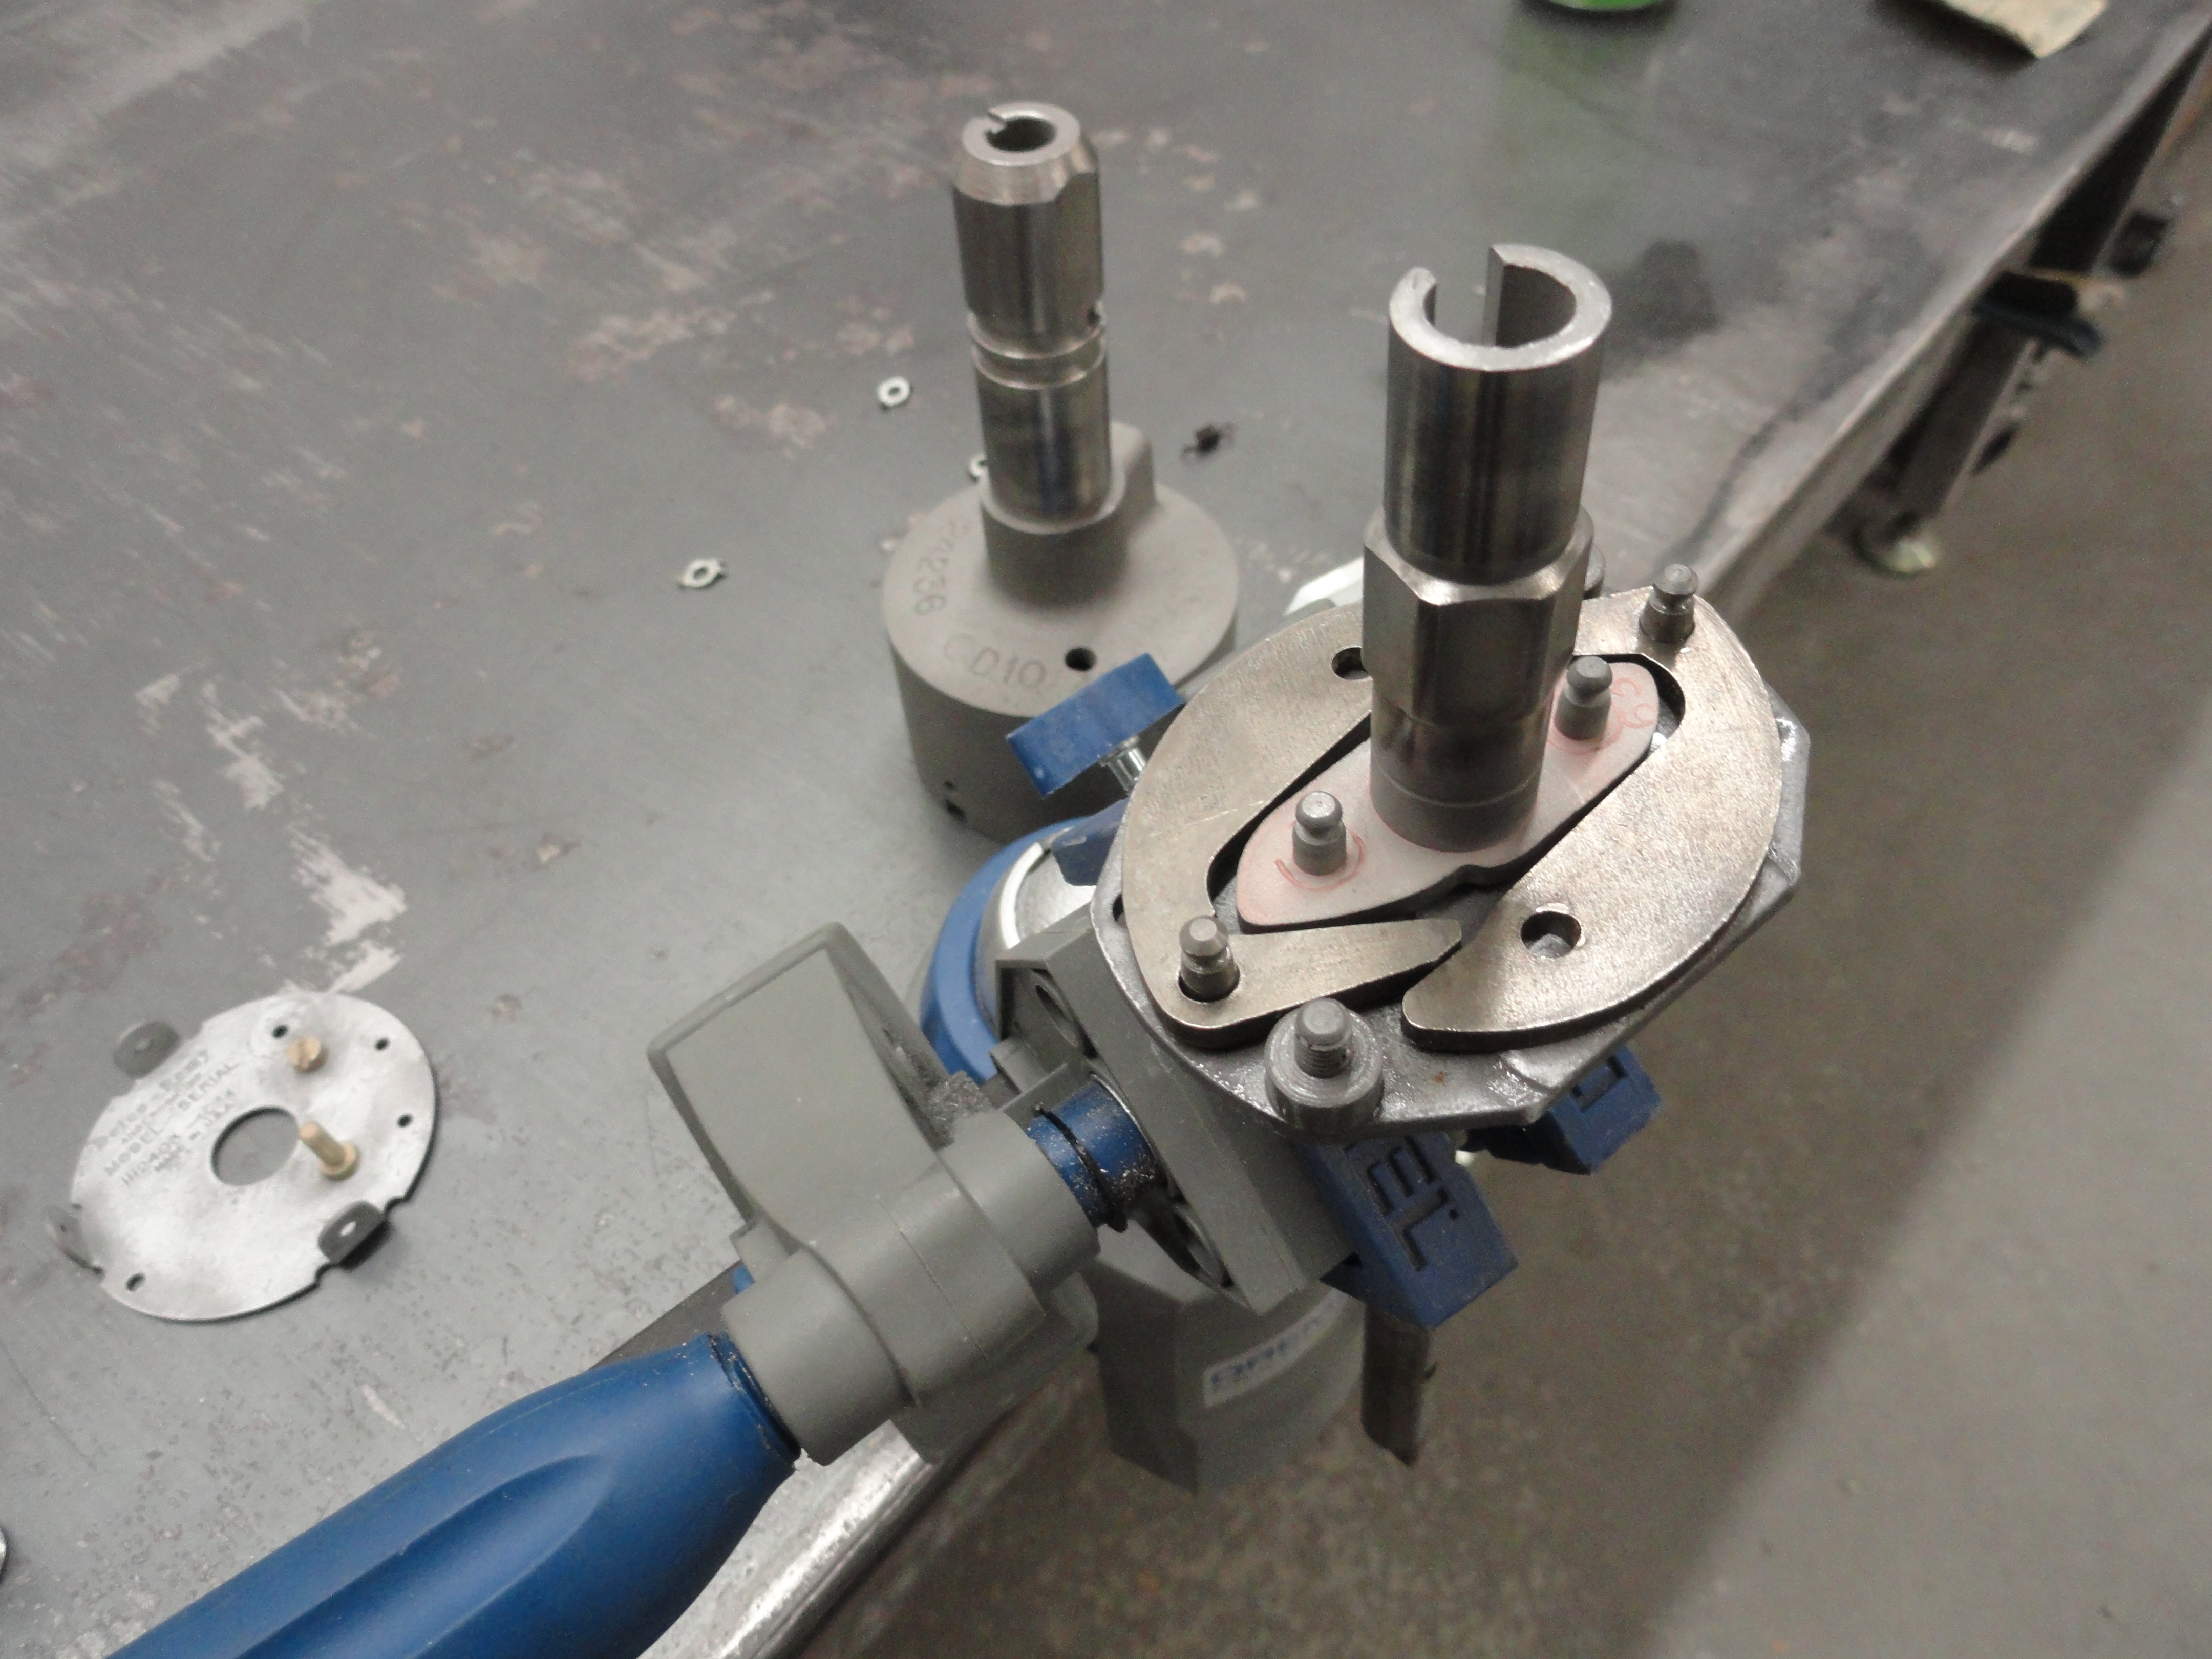
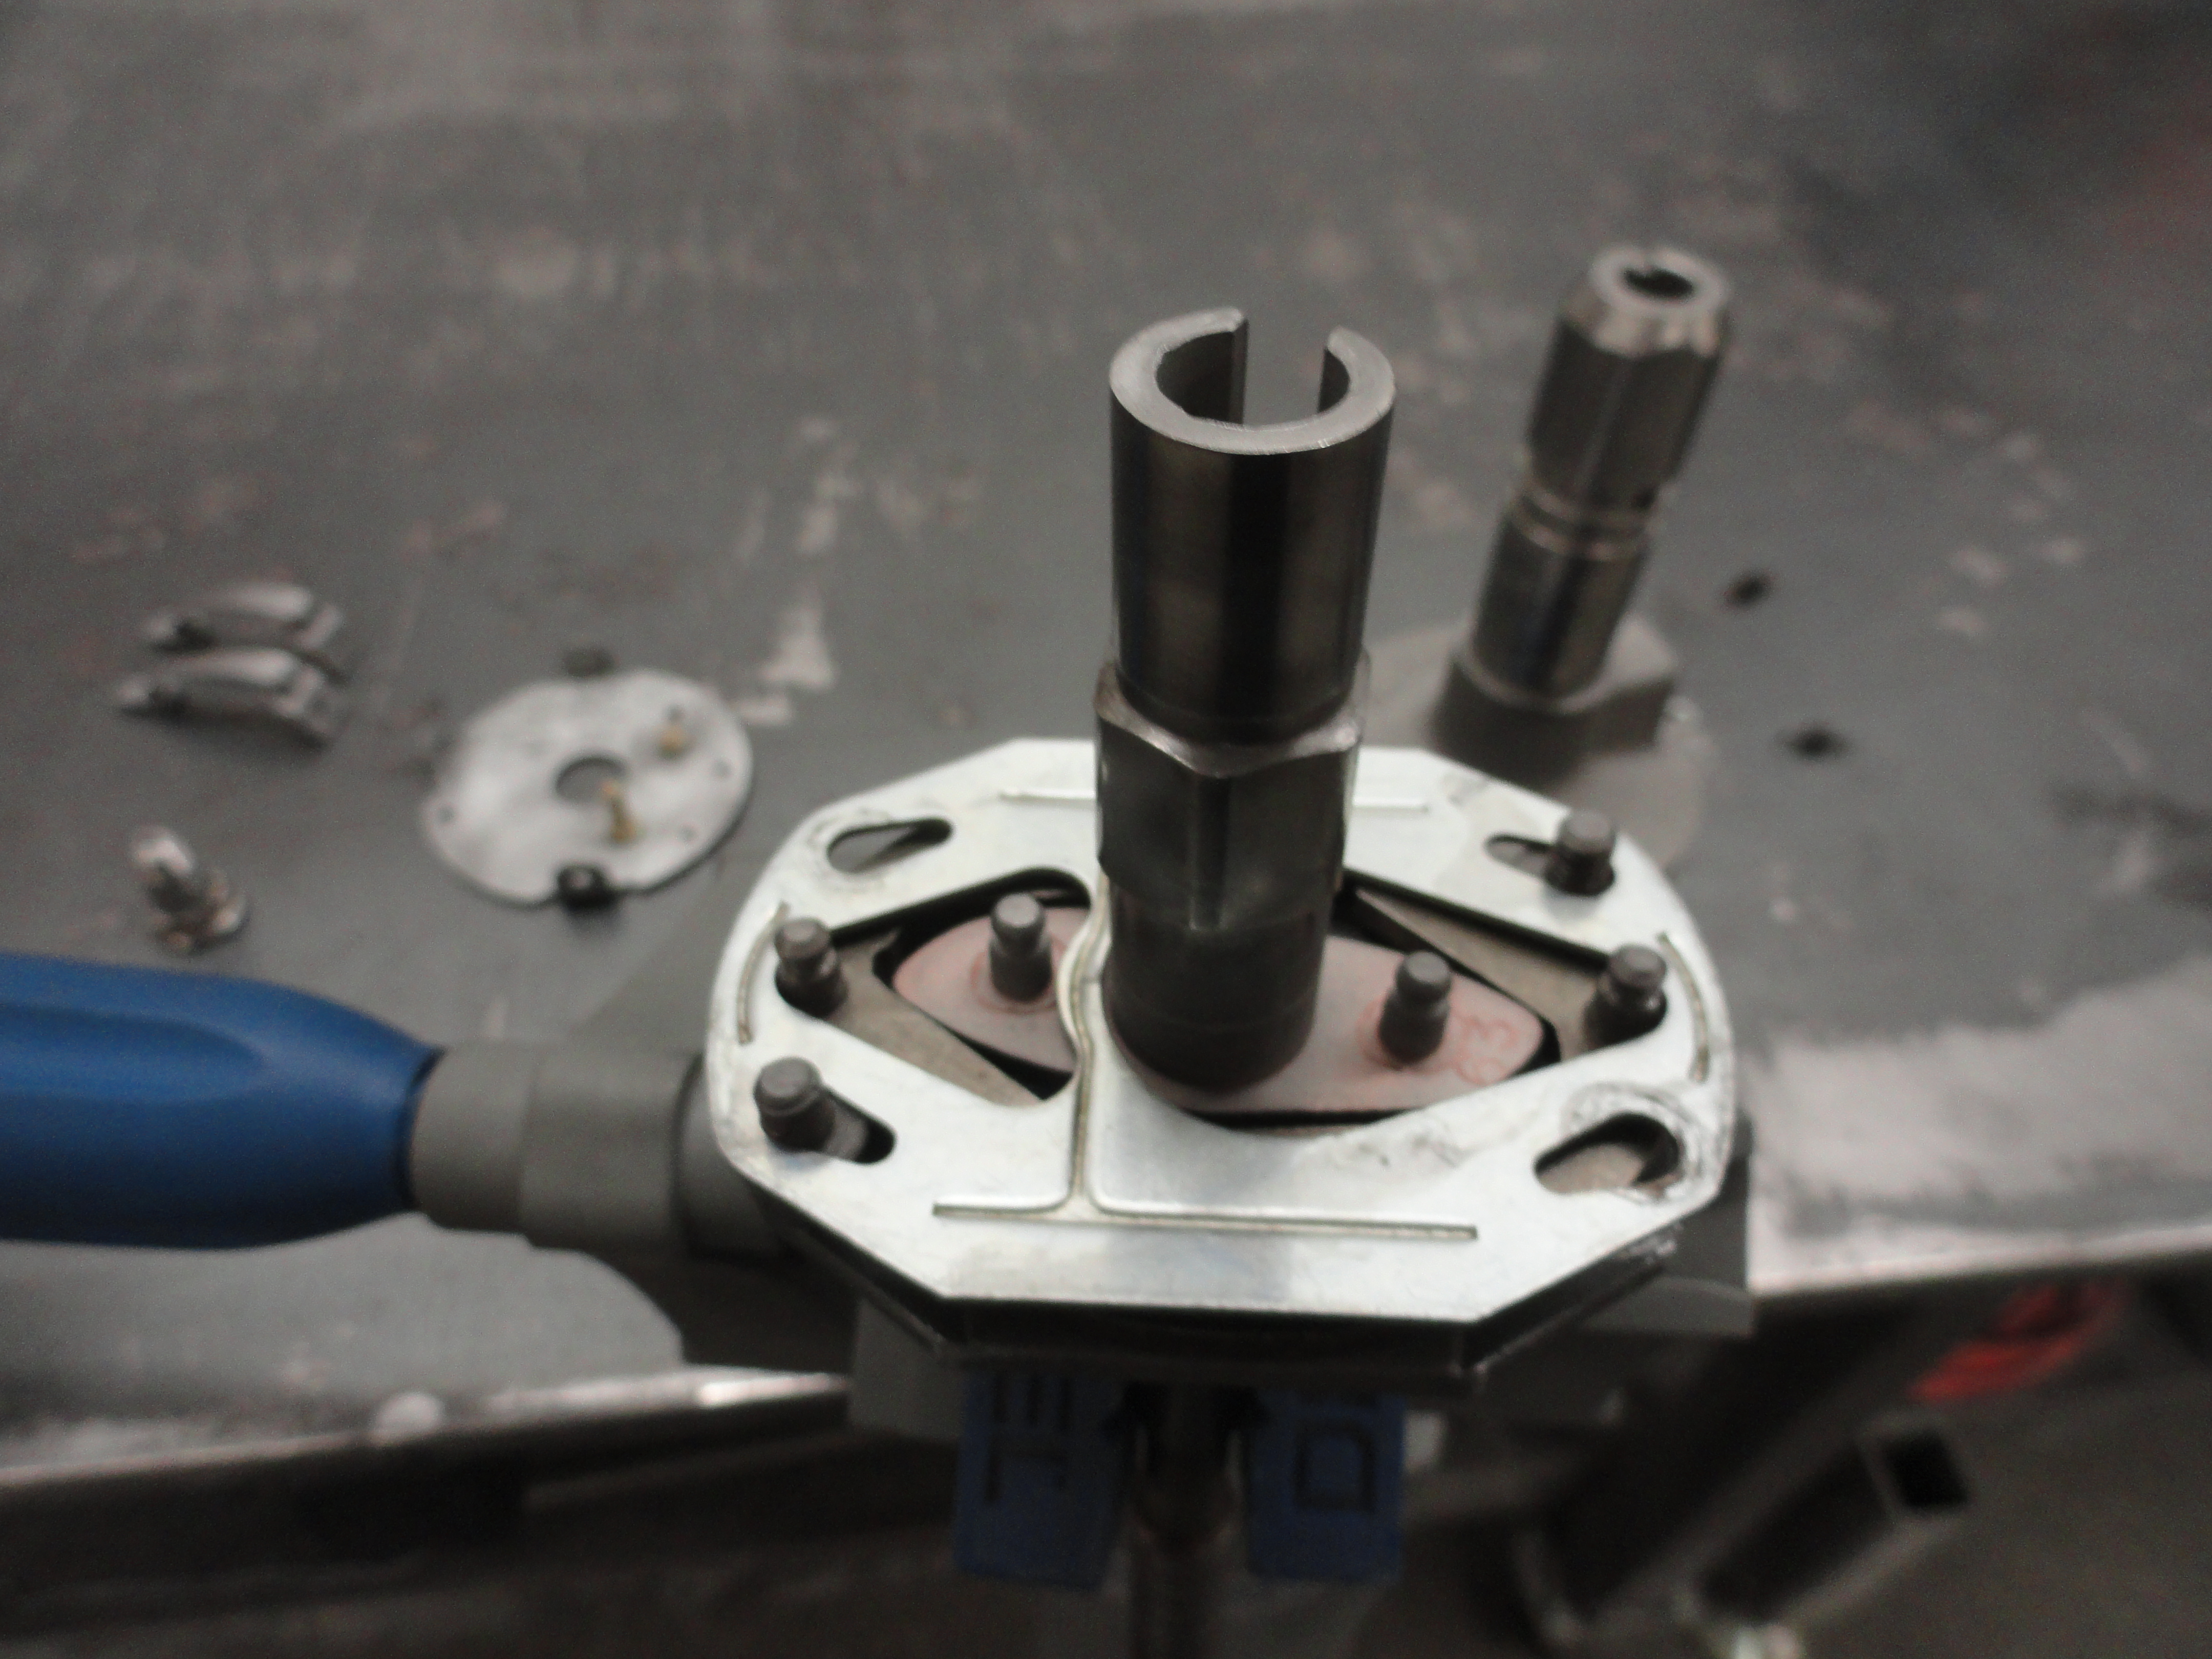
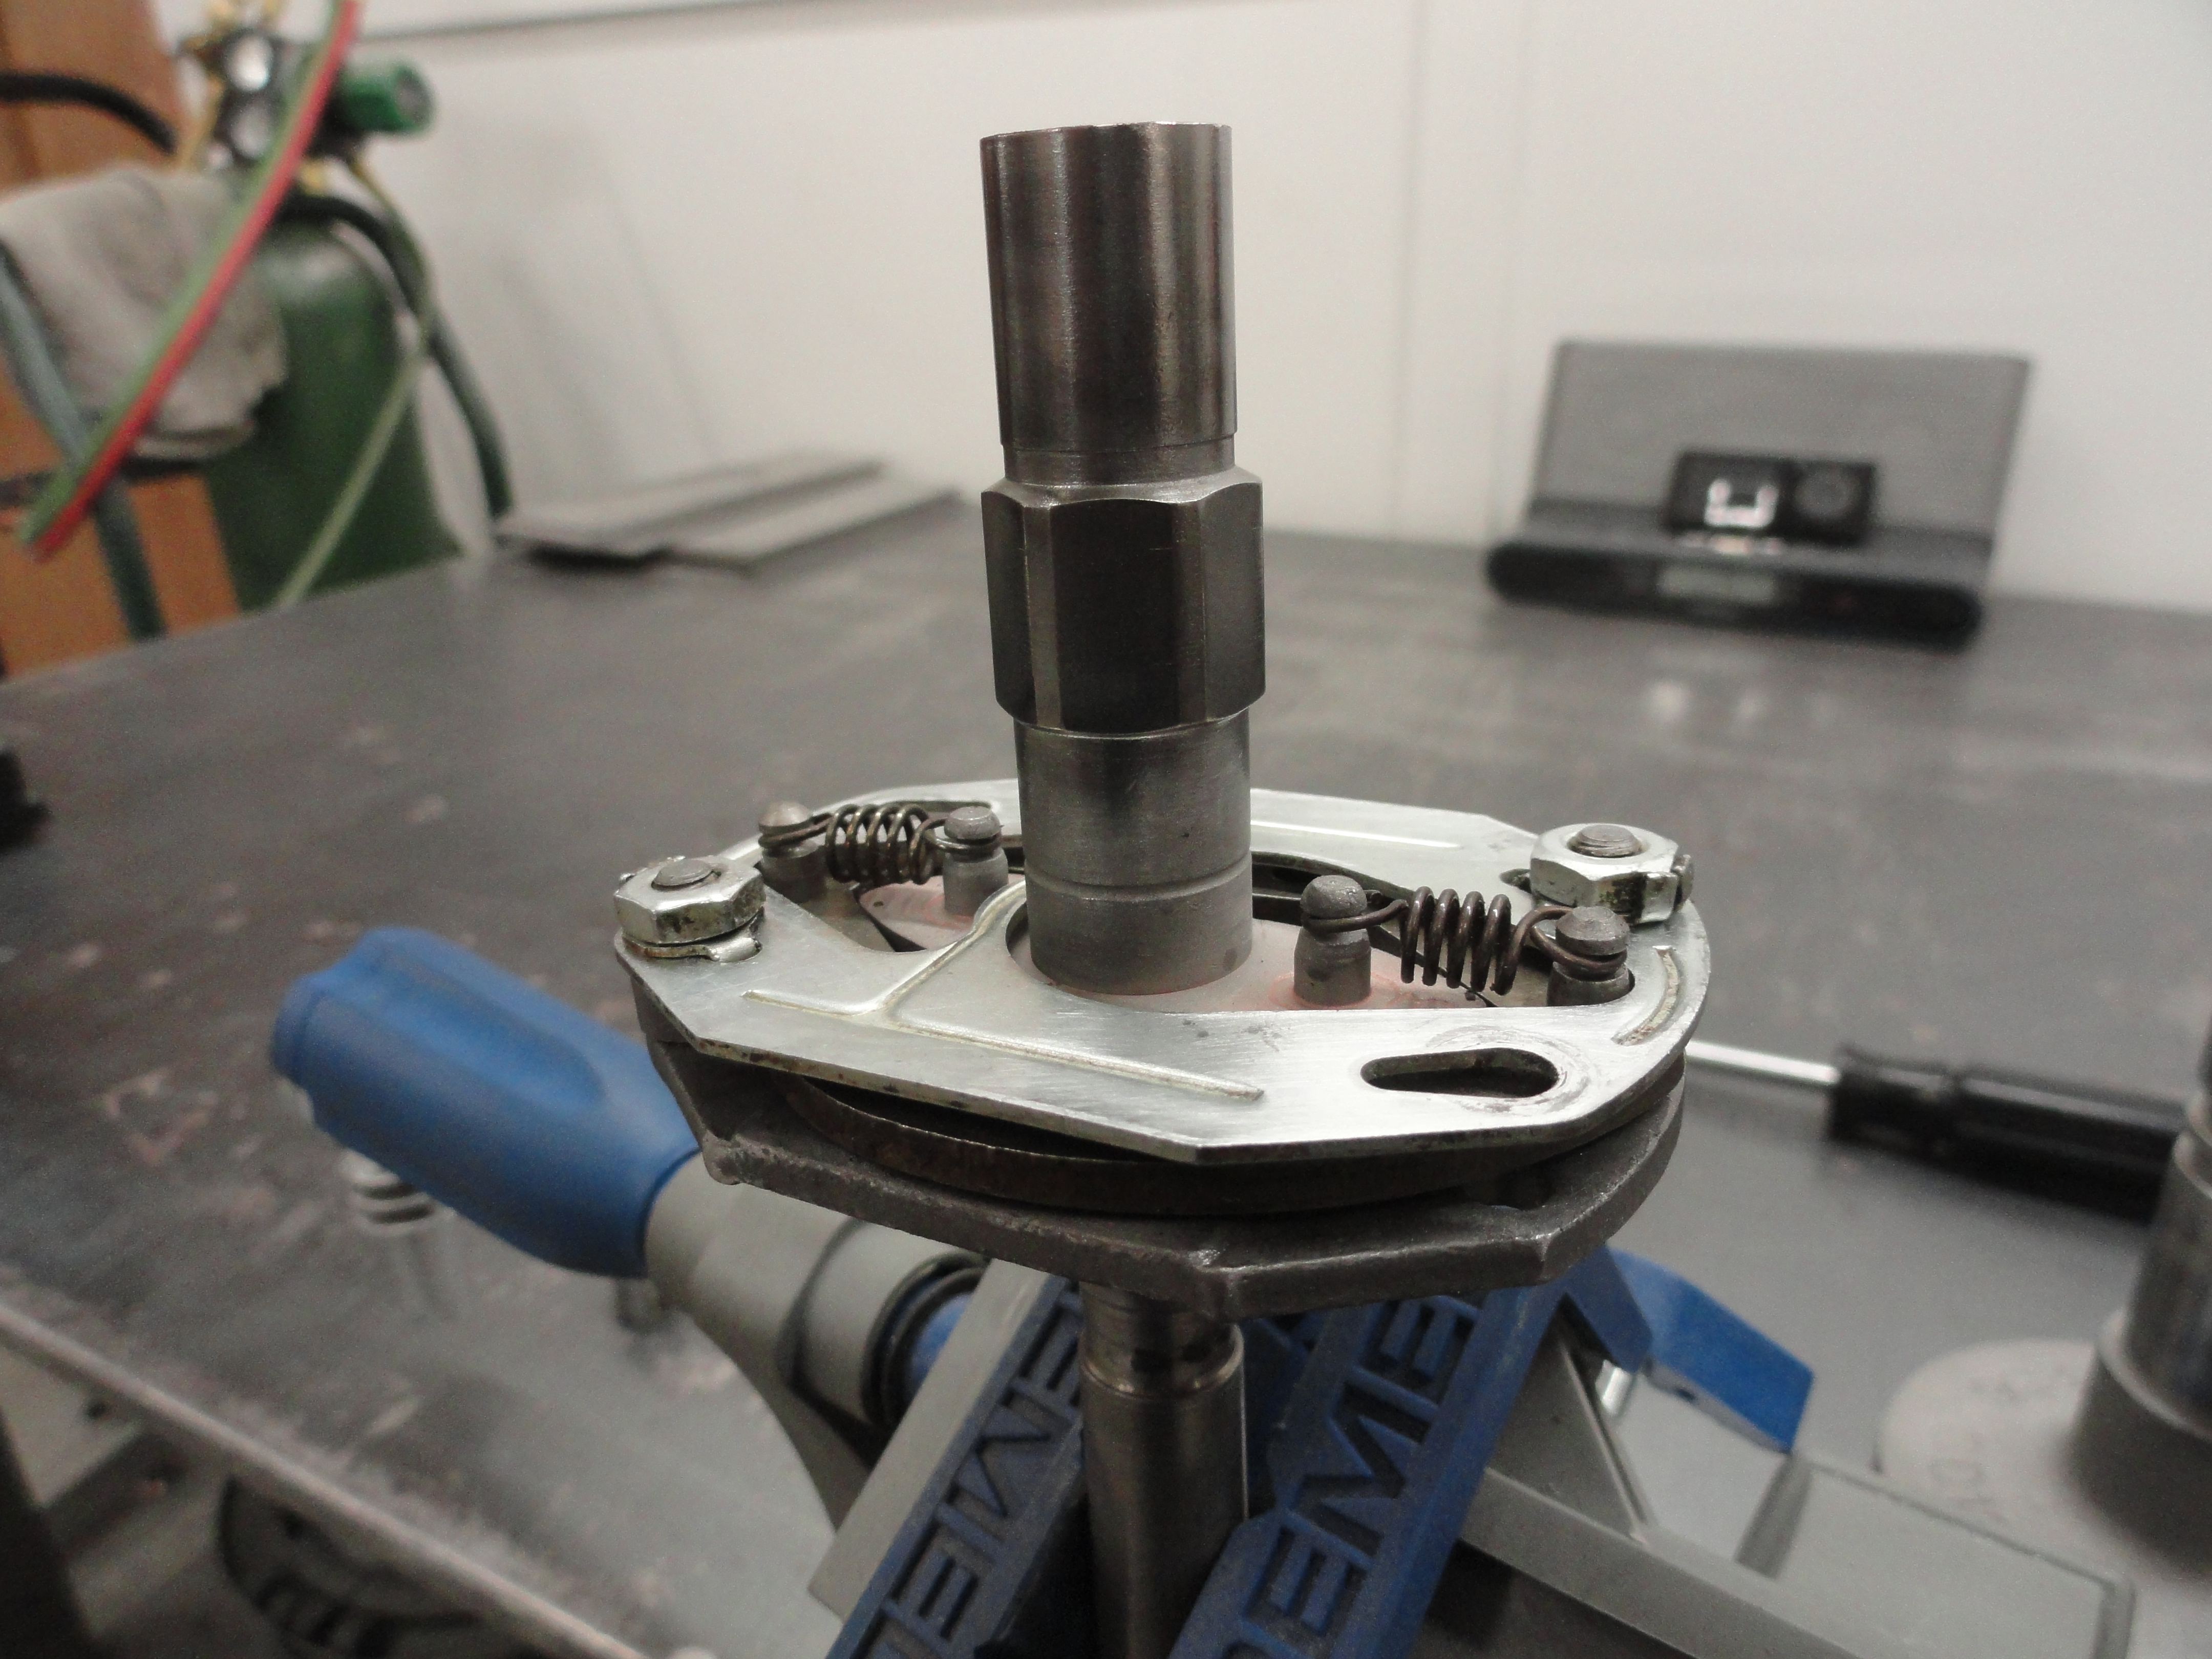
To Start Re-Assembly, put the inner shaft assembly in a vice with plastic jaws, or protect it somehow, and we will reinstall all of the bottom part of the inside. We can do this because the gear will go on last. I use white lithium grease as sort of an assembly lube. I slather it over every part. The Distributor doesn't get any oil and very little grease, so you want those weights to be slick and free from rust in the future. Place the counter weights on first as shown. Once the counter weights are on and they move freely, place the upper shaft assembly in so that it occupies the same plane as the weights. Then install the plate with the locking tabs and nuts. Tighten securely and then bend the tabs over to lock the nuts in place.
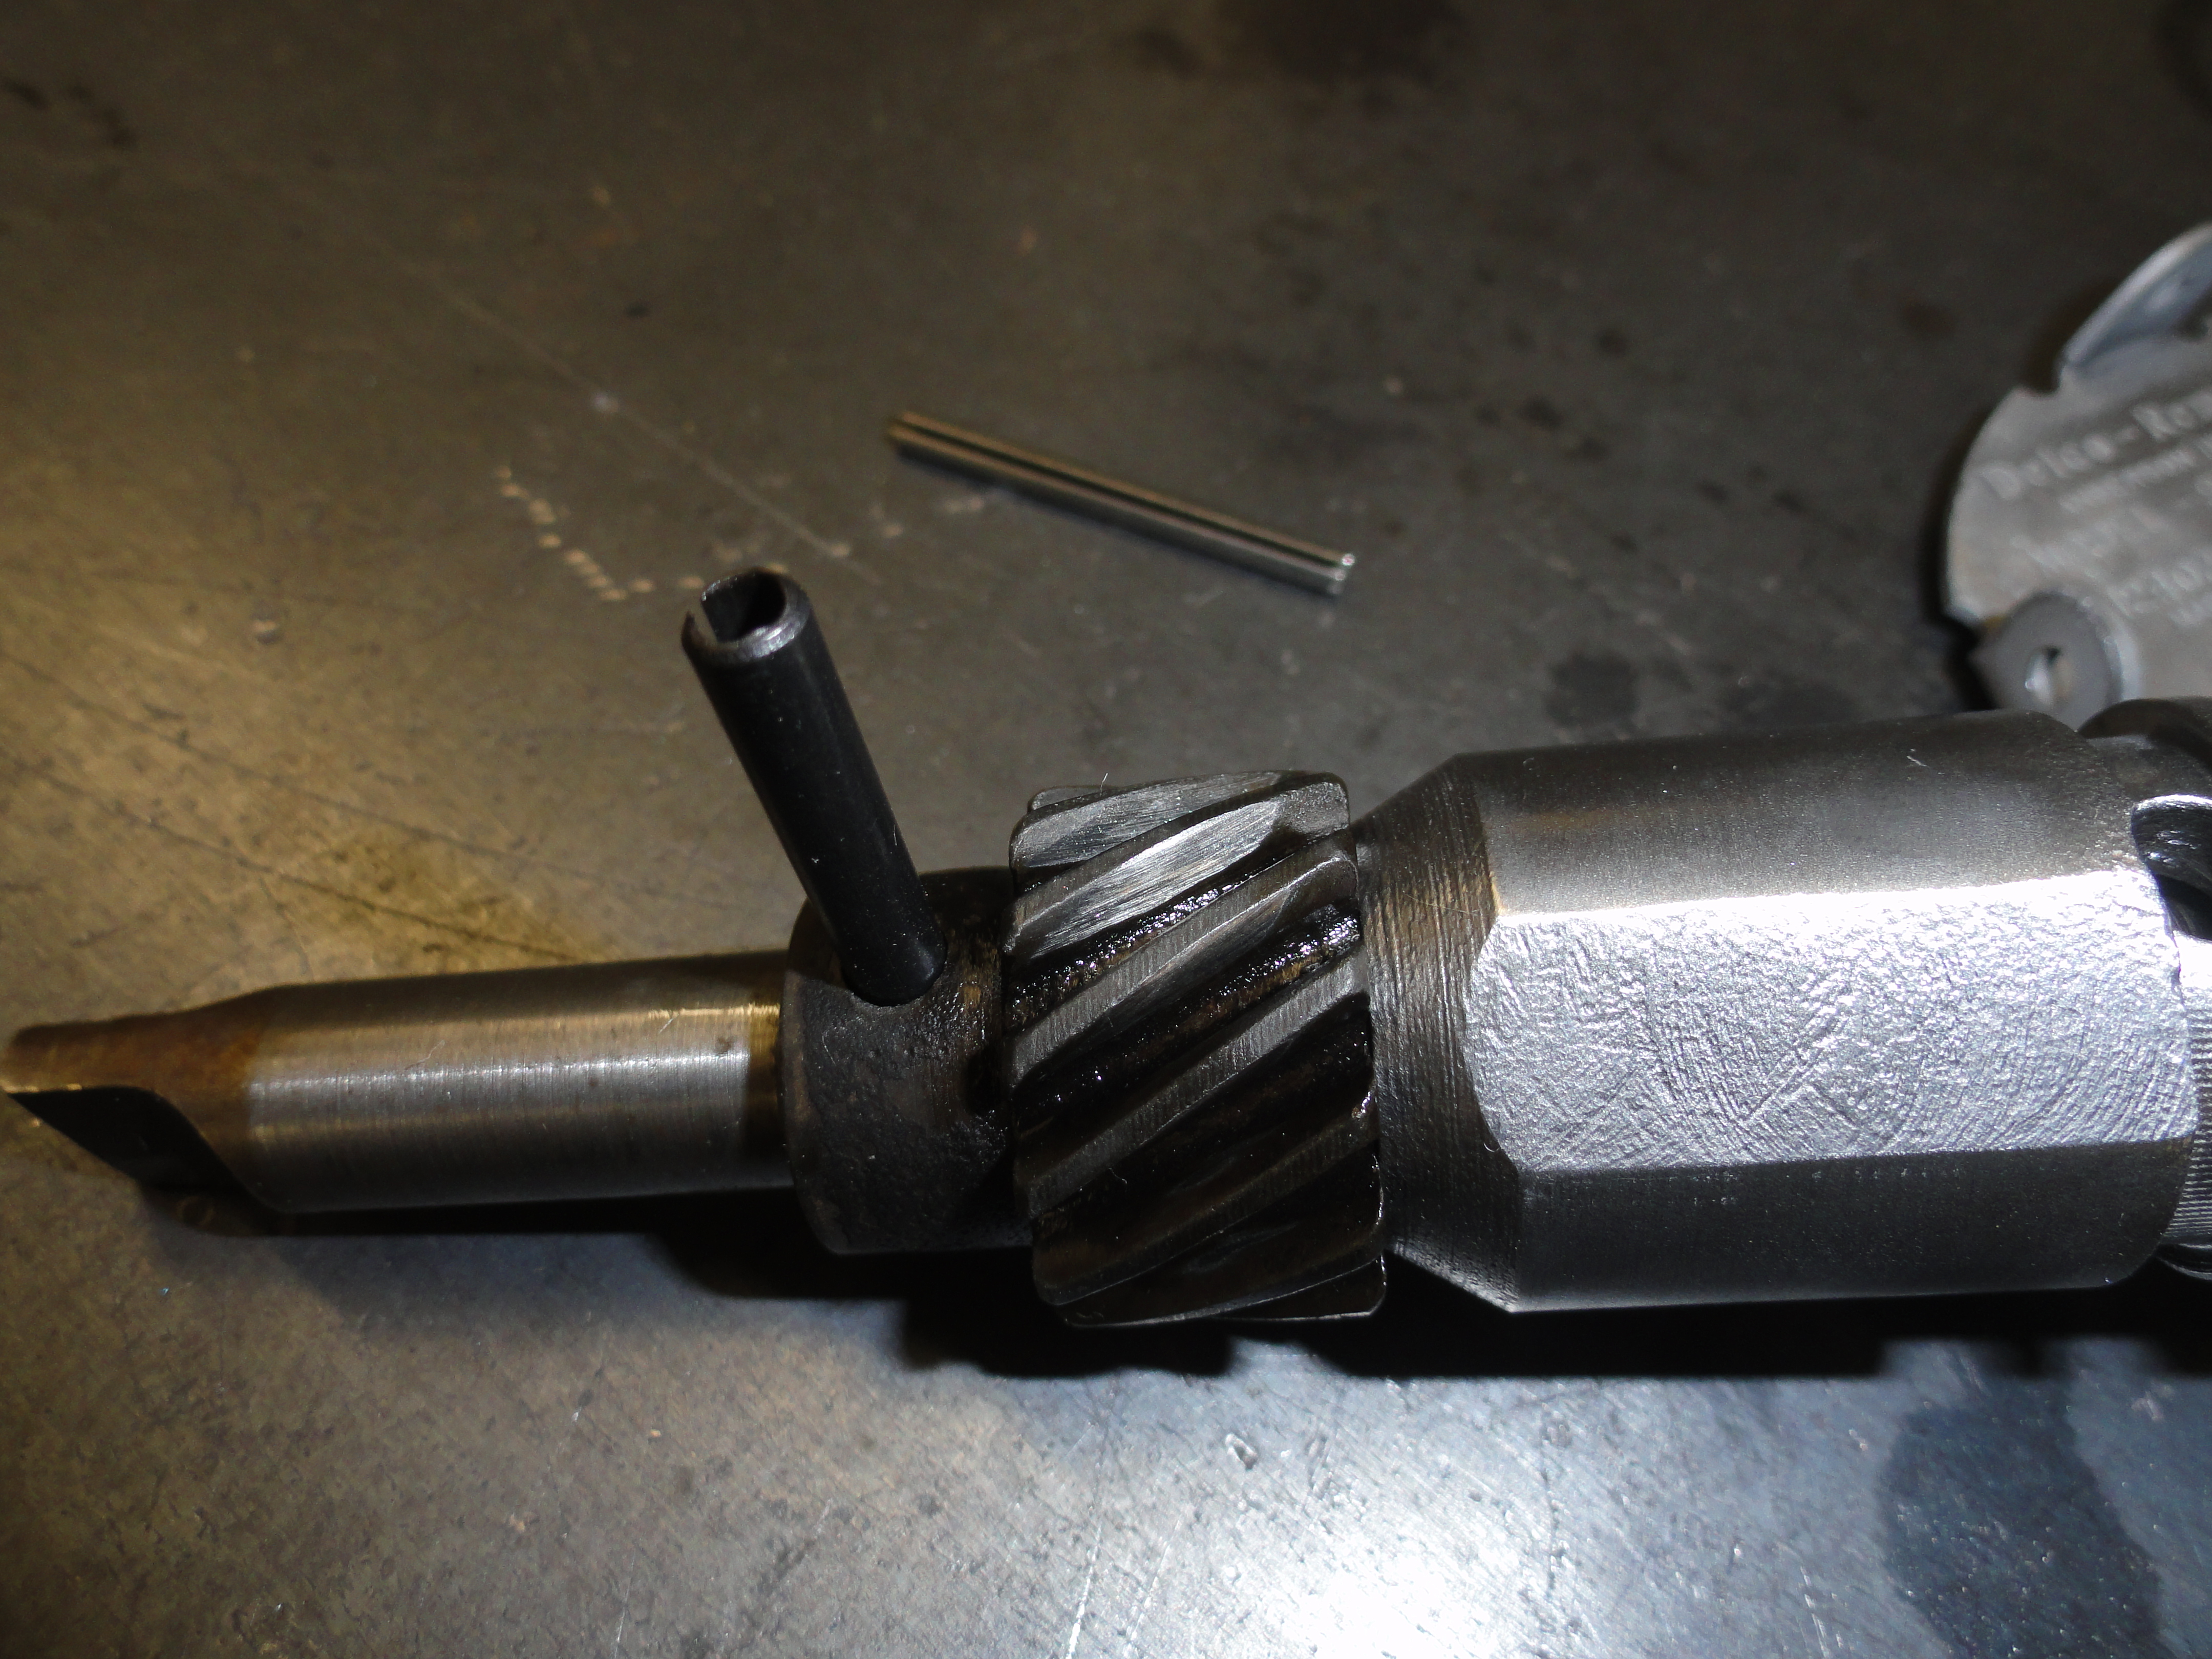
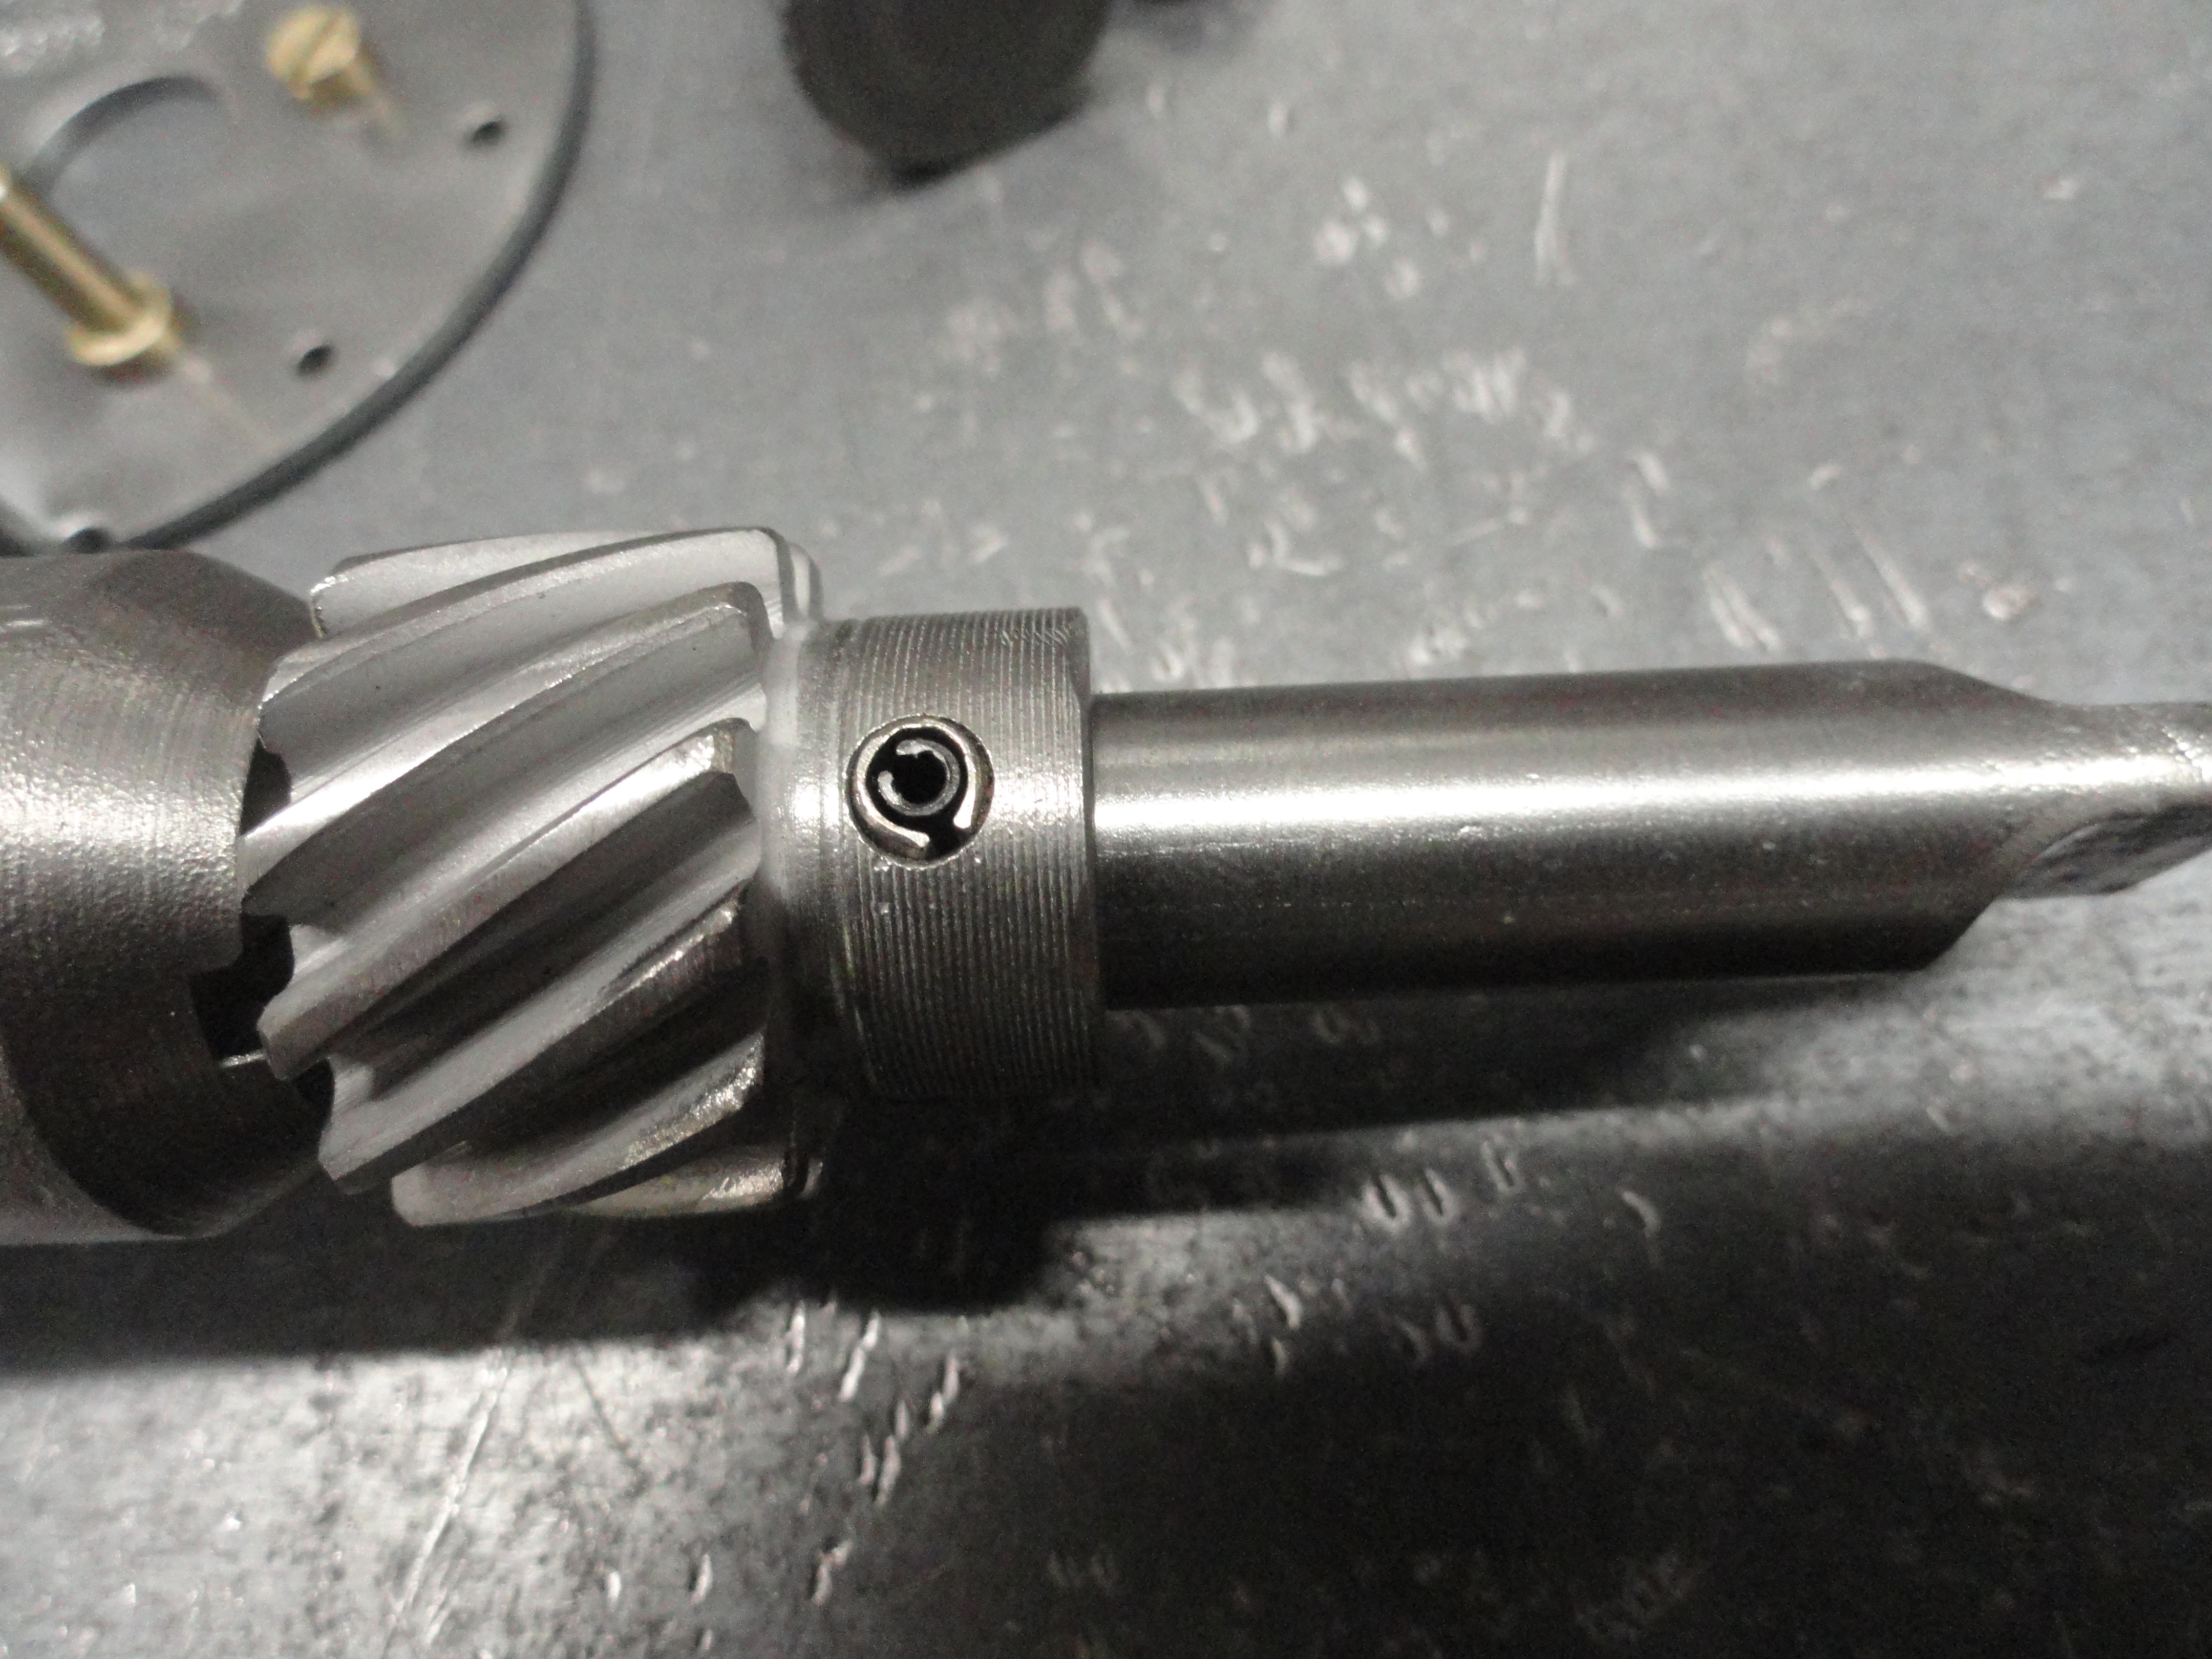
To reinstall the gear, get the proper length and size of roll pin. I use high strength stainless steel ones from McMaster-Carr. The 3/16" pin will be tight in the shaft, but I do not rely on that single roll pin. Put another M2.5 (x30) pin inside the first one making sure the openings are opposite each other. This almost guarantees that gear isn't going anywhere. Test it to make sure there is no slop introduced by the pin combination and then cut off the pins flush same as the one that was there in the first place. If by some chance there is any slop in the gear to shaft connection, drill both the gear and the shaft out to the next size roll pin combination which is 7/32" and 1/8". I used a 3/4 horse Bench Grinder with wire wheel to brush off alot of these parts after cleaning in the Kerosene. Whatever works as long as things are clean.
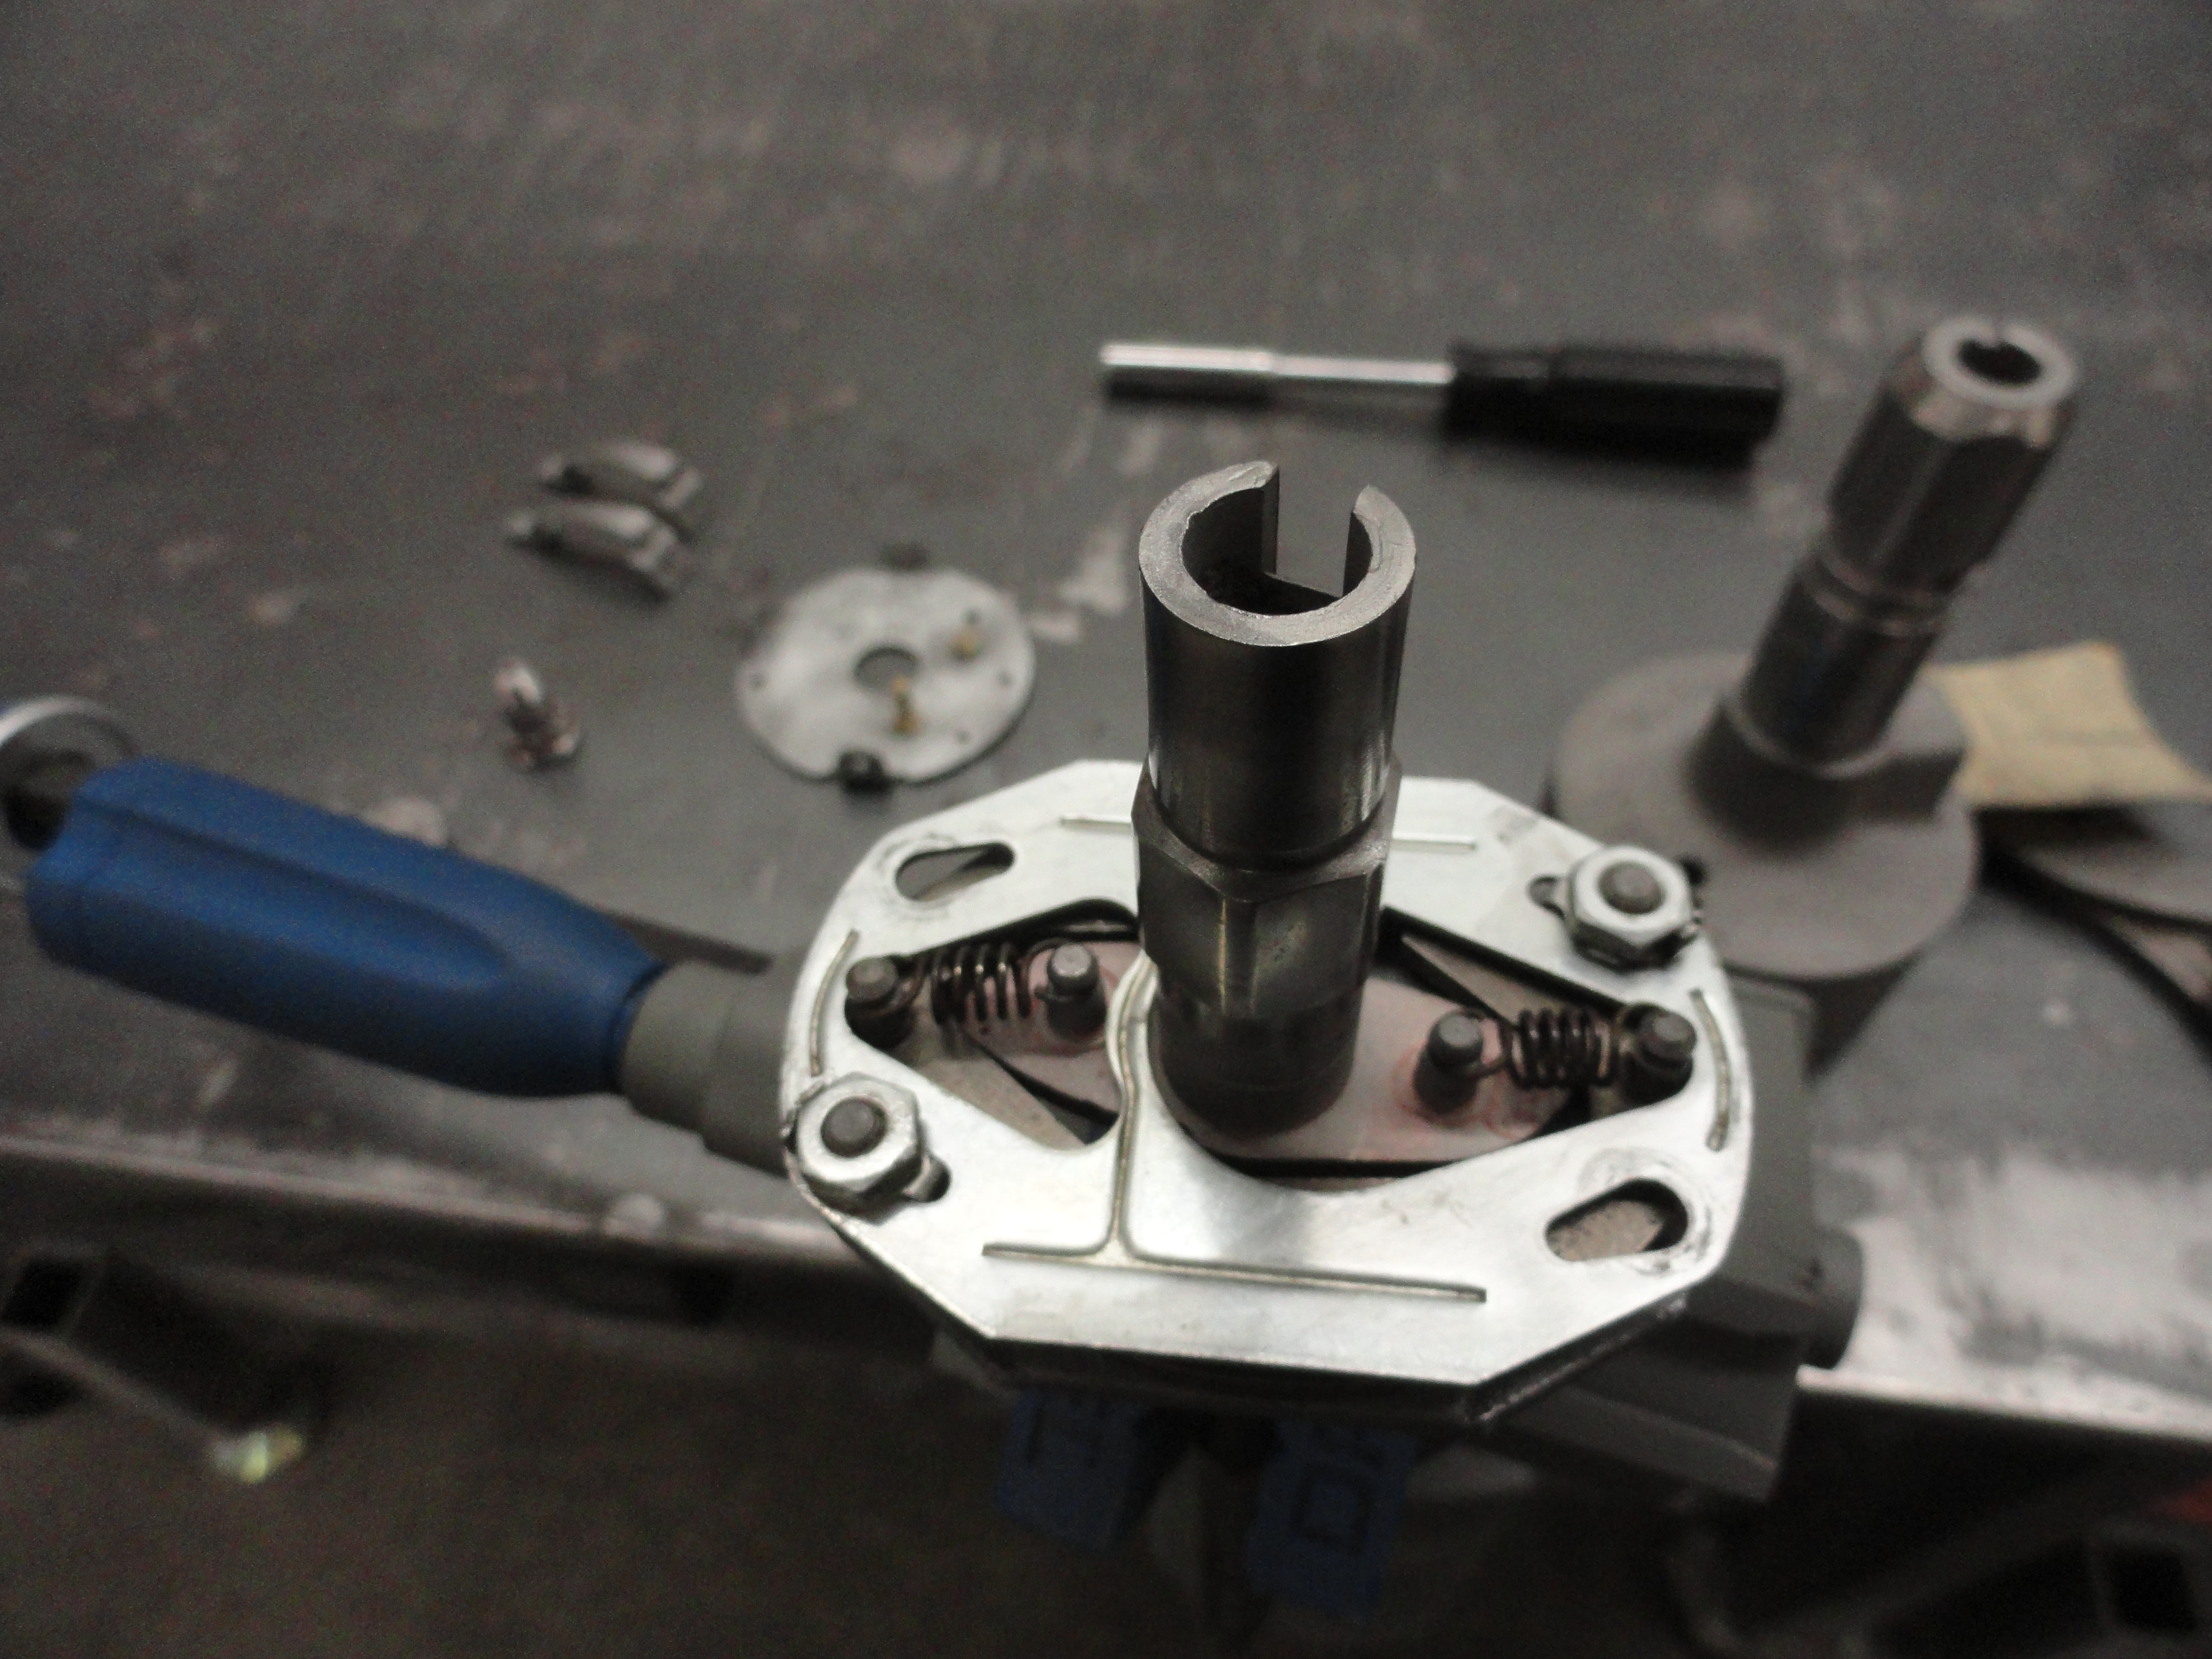
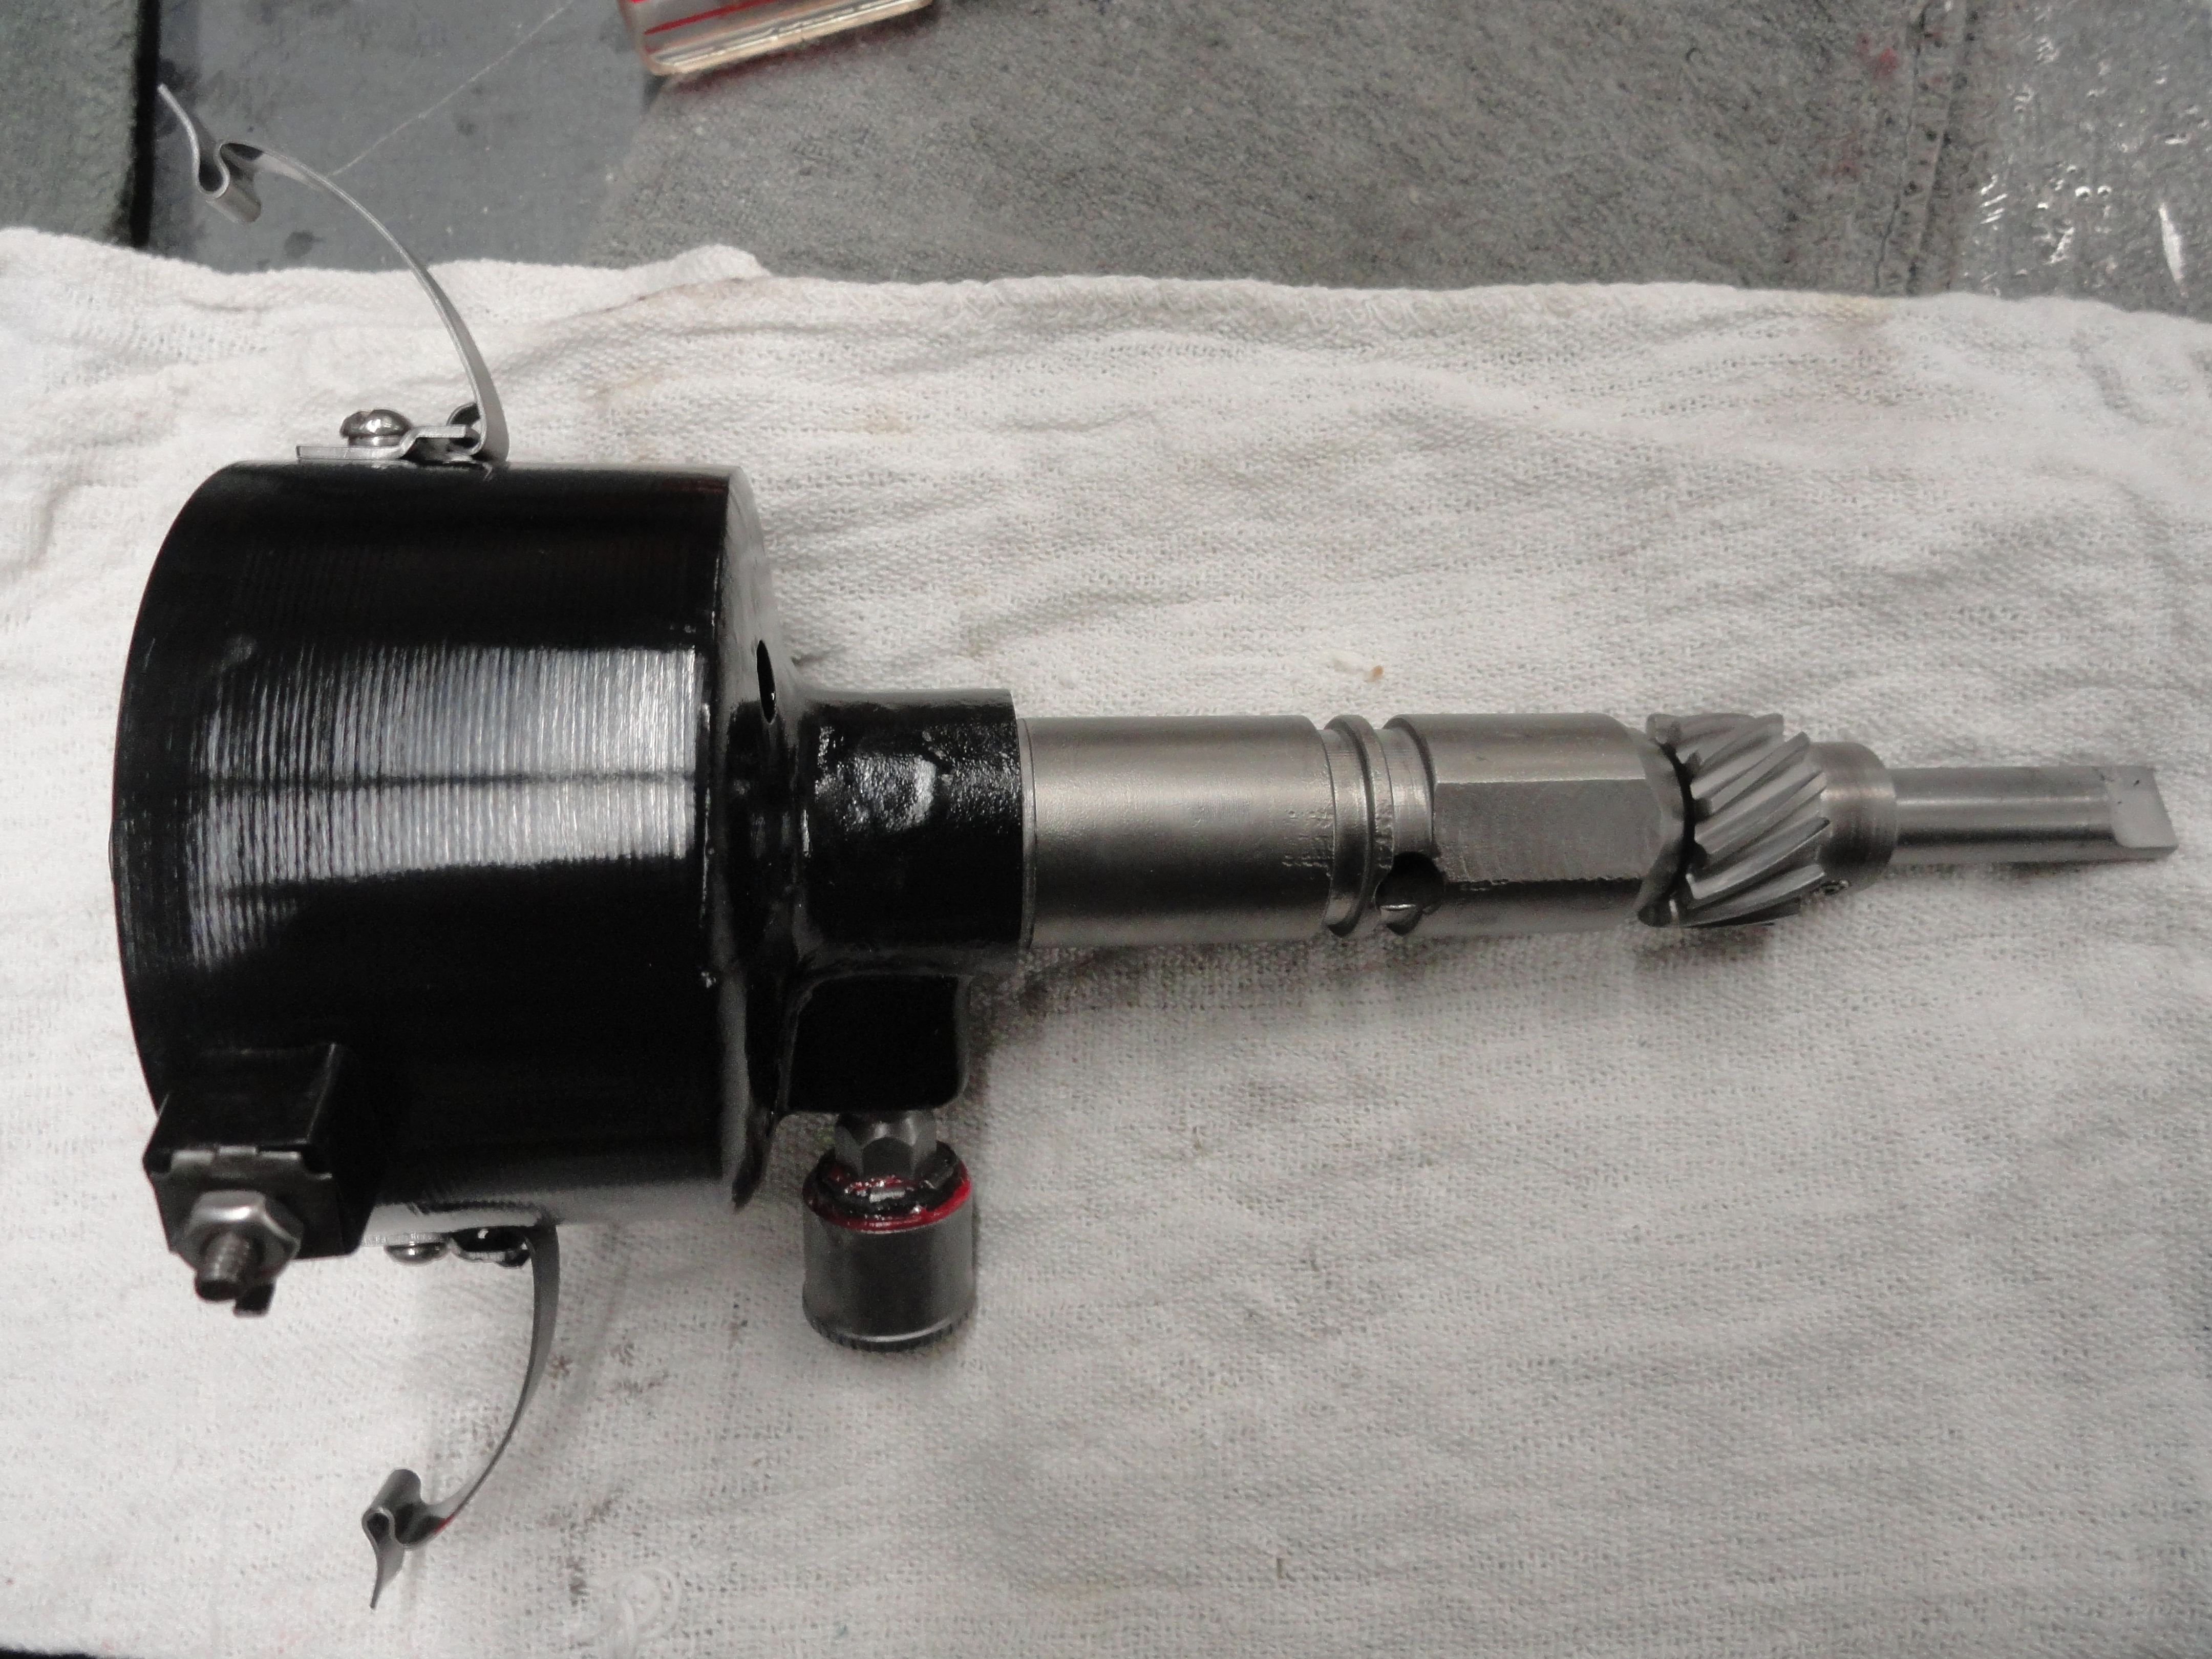
Reinstall all of the remaining parts as they were. The top plate is attached by the 3 screws/lockwashers and the two across from each other also get a clip retainer. The slot in the retainer goes down and the retainer follows the curve of the Distributor housing. The black plastic pieces go on as shown. Put the screw in the inside piece first, feed it through the hole, then on the outside, a lock washer goes on first, then the round nut, then the conductor plate, then the regular nut. You can put your points and condenser in anytime. Once it's all back together, that completes the rebuild. To re-gap the points and really fine tune your engine, follow the How To Article found here: The Chevy 216/235/261 Tuneup Guide.
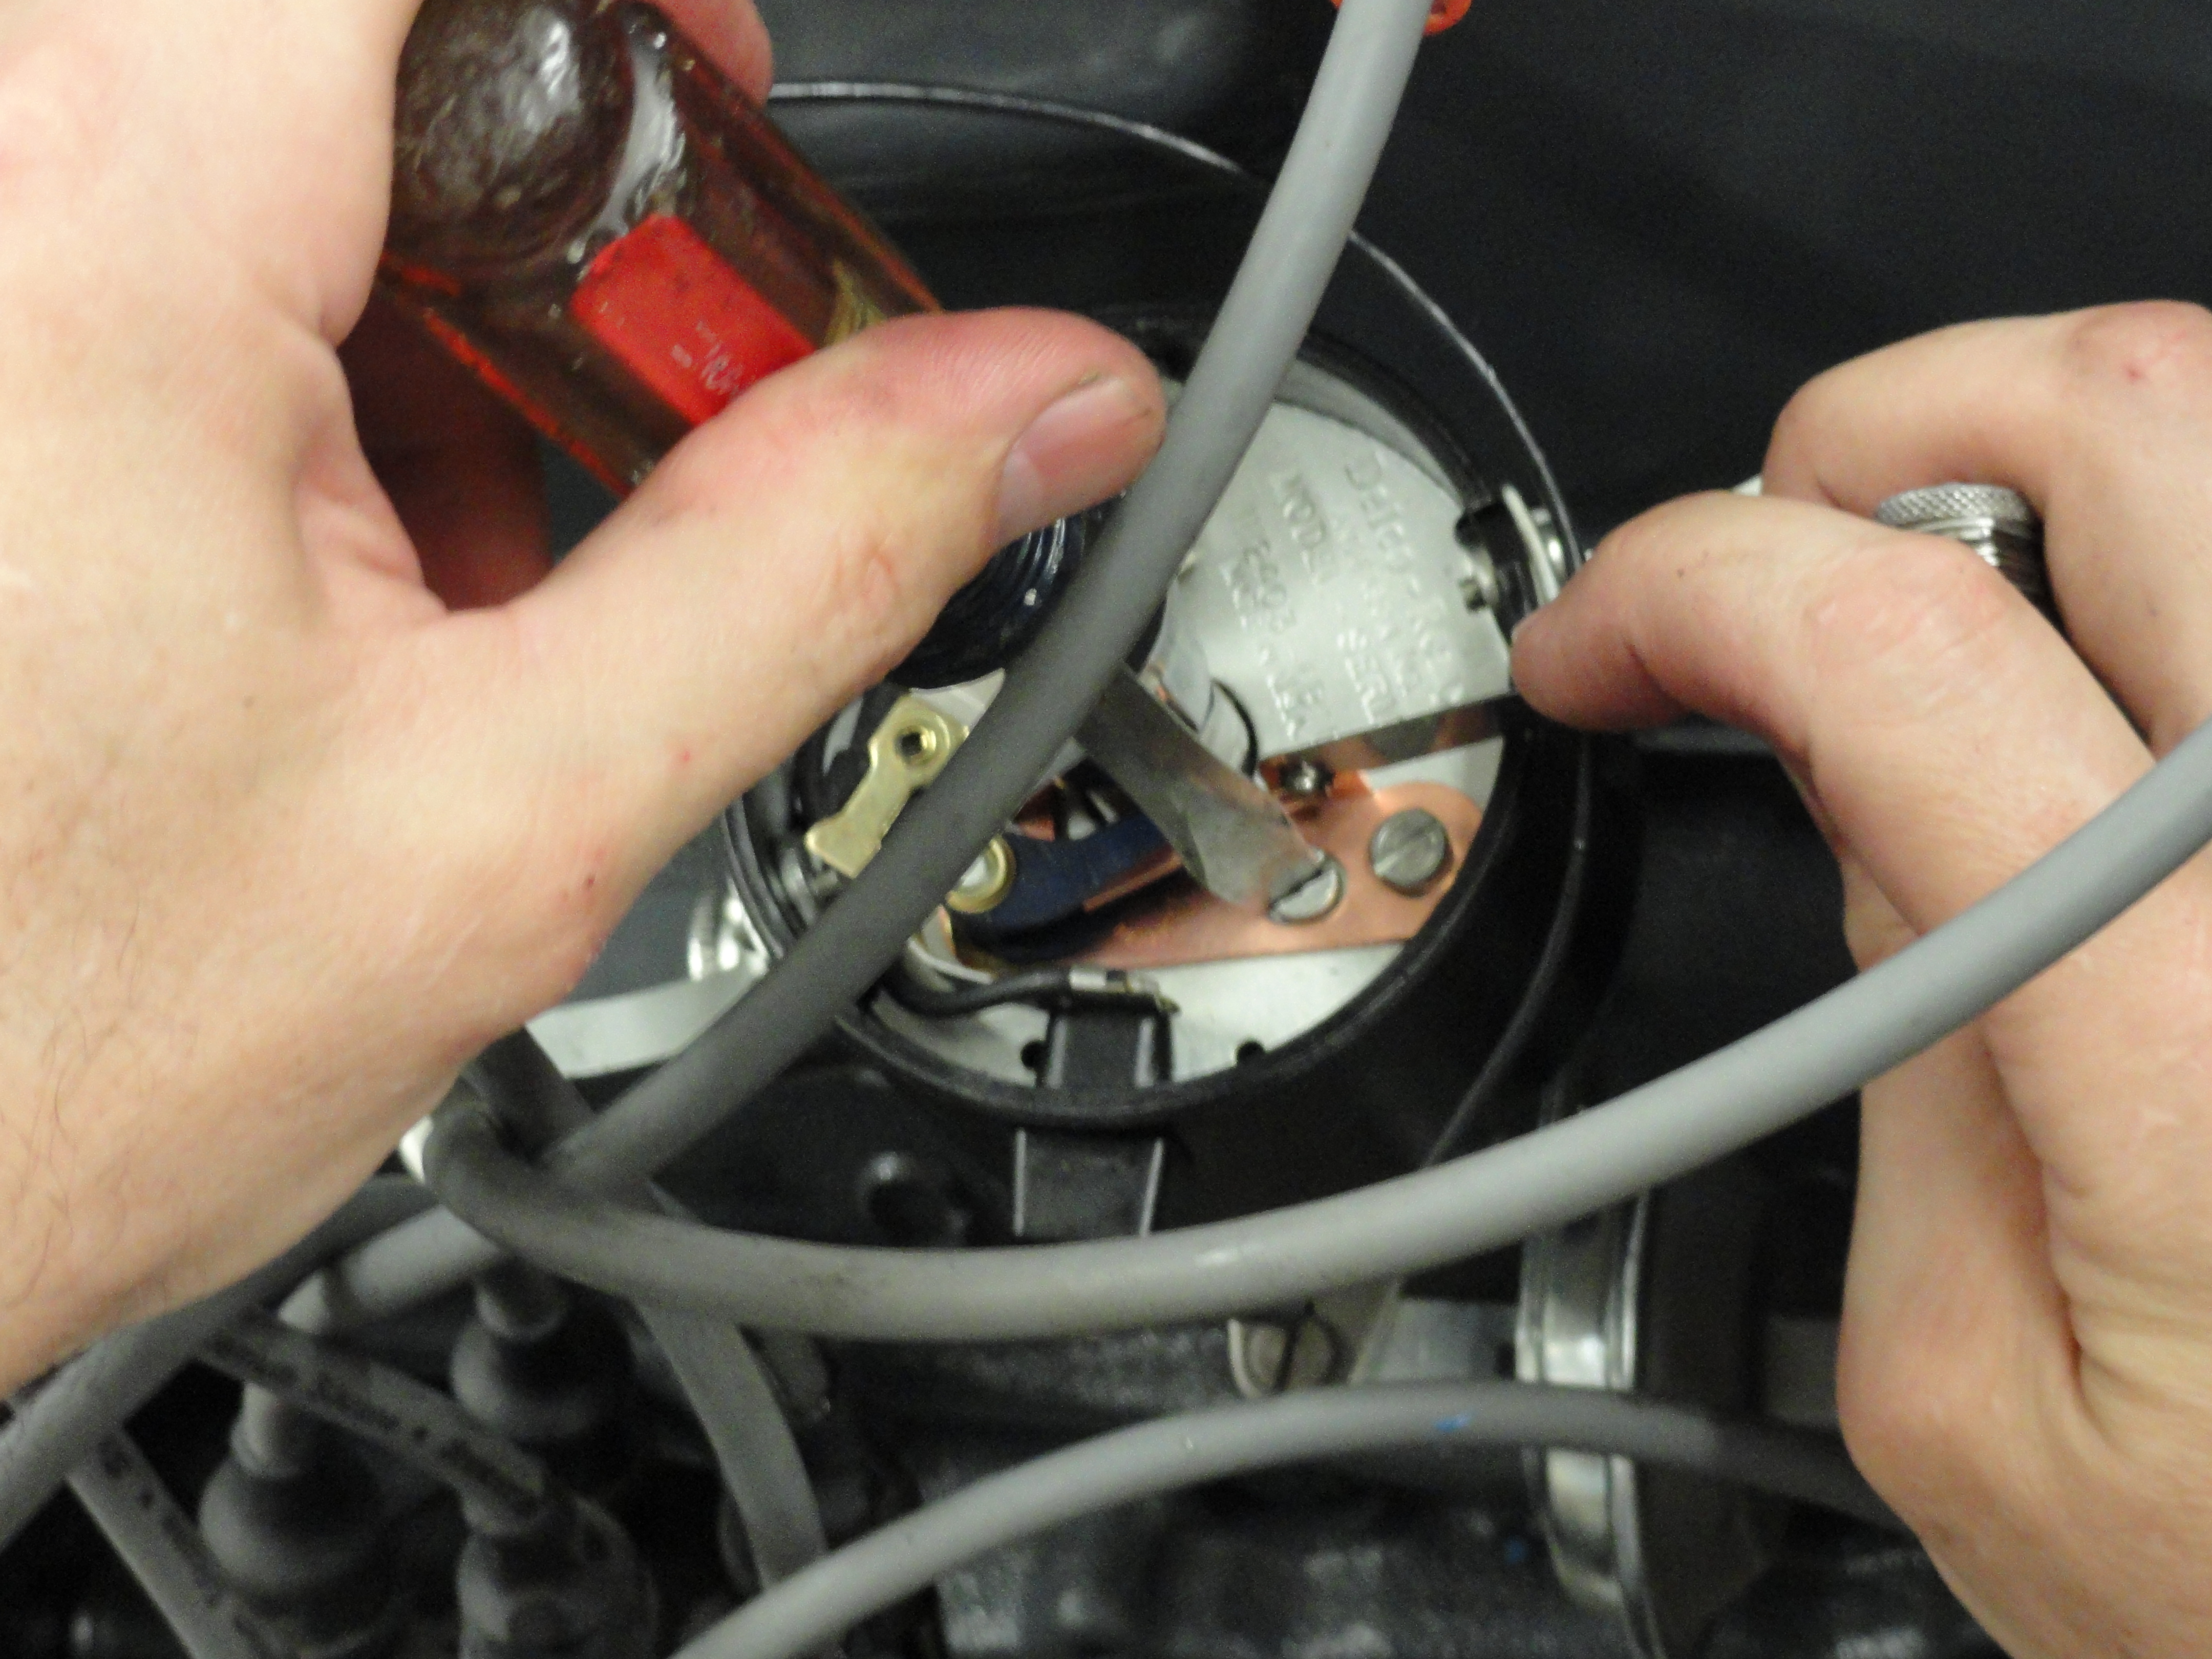
I have a box full of old vacuum advance units and I have found that to test them, a Harbor Freight Venturi Vacuum Box works really well to at least determine if the internal bellows has holes in them. These days, I do not use old ones, and very few of them that I have tested have proven to be working. Our vendors sell new ones and I just feel better purchasing new. Install your points and condenser if you go that route and Gap your points according to your shop manual for your engine, in our case .016. You can put your new rotor and cap on, and wait for the vacuum advance to arrive, then once you have that ready, you are ready for the engine.