


Deve's Technical Network
1947-1955 1st Chevy Trucks
216/235/261 Engine Solutions & More

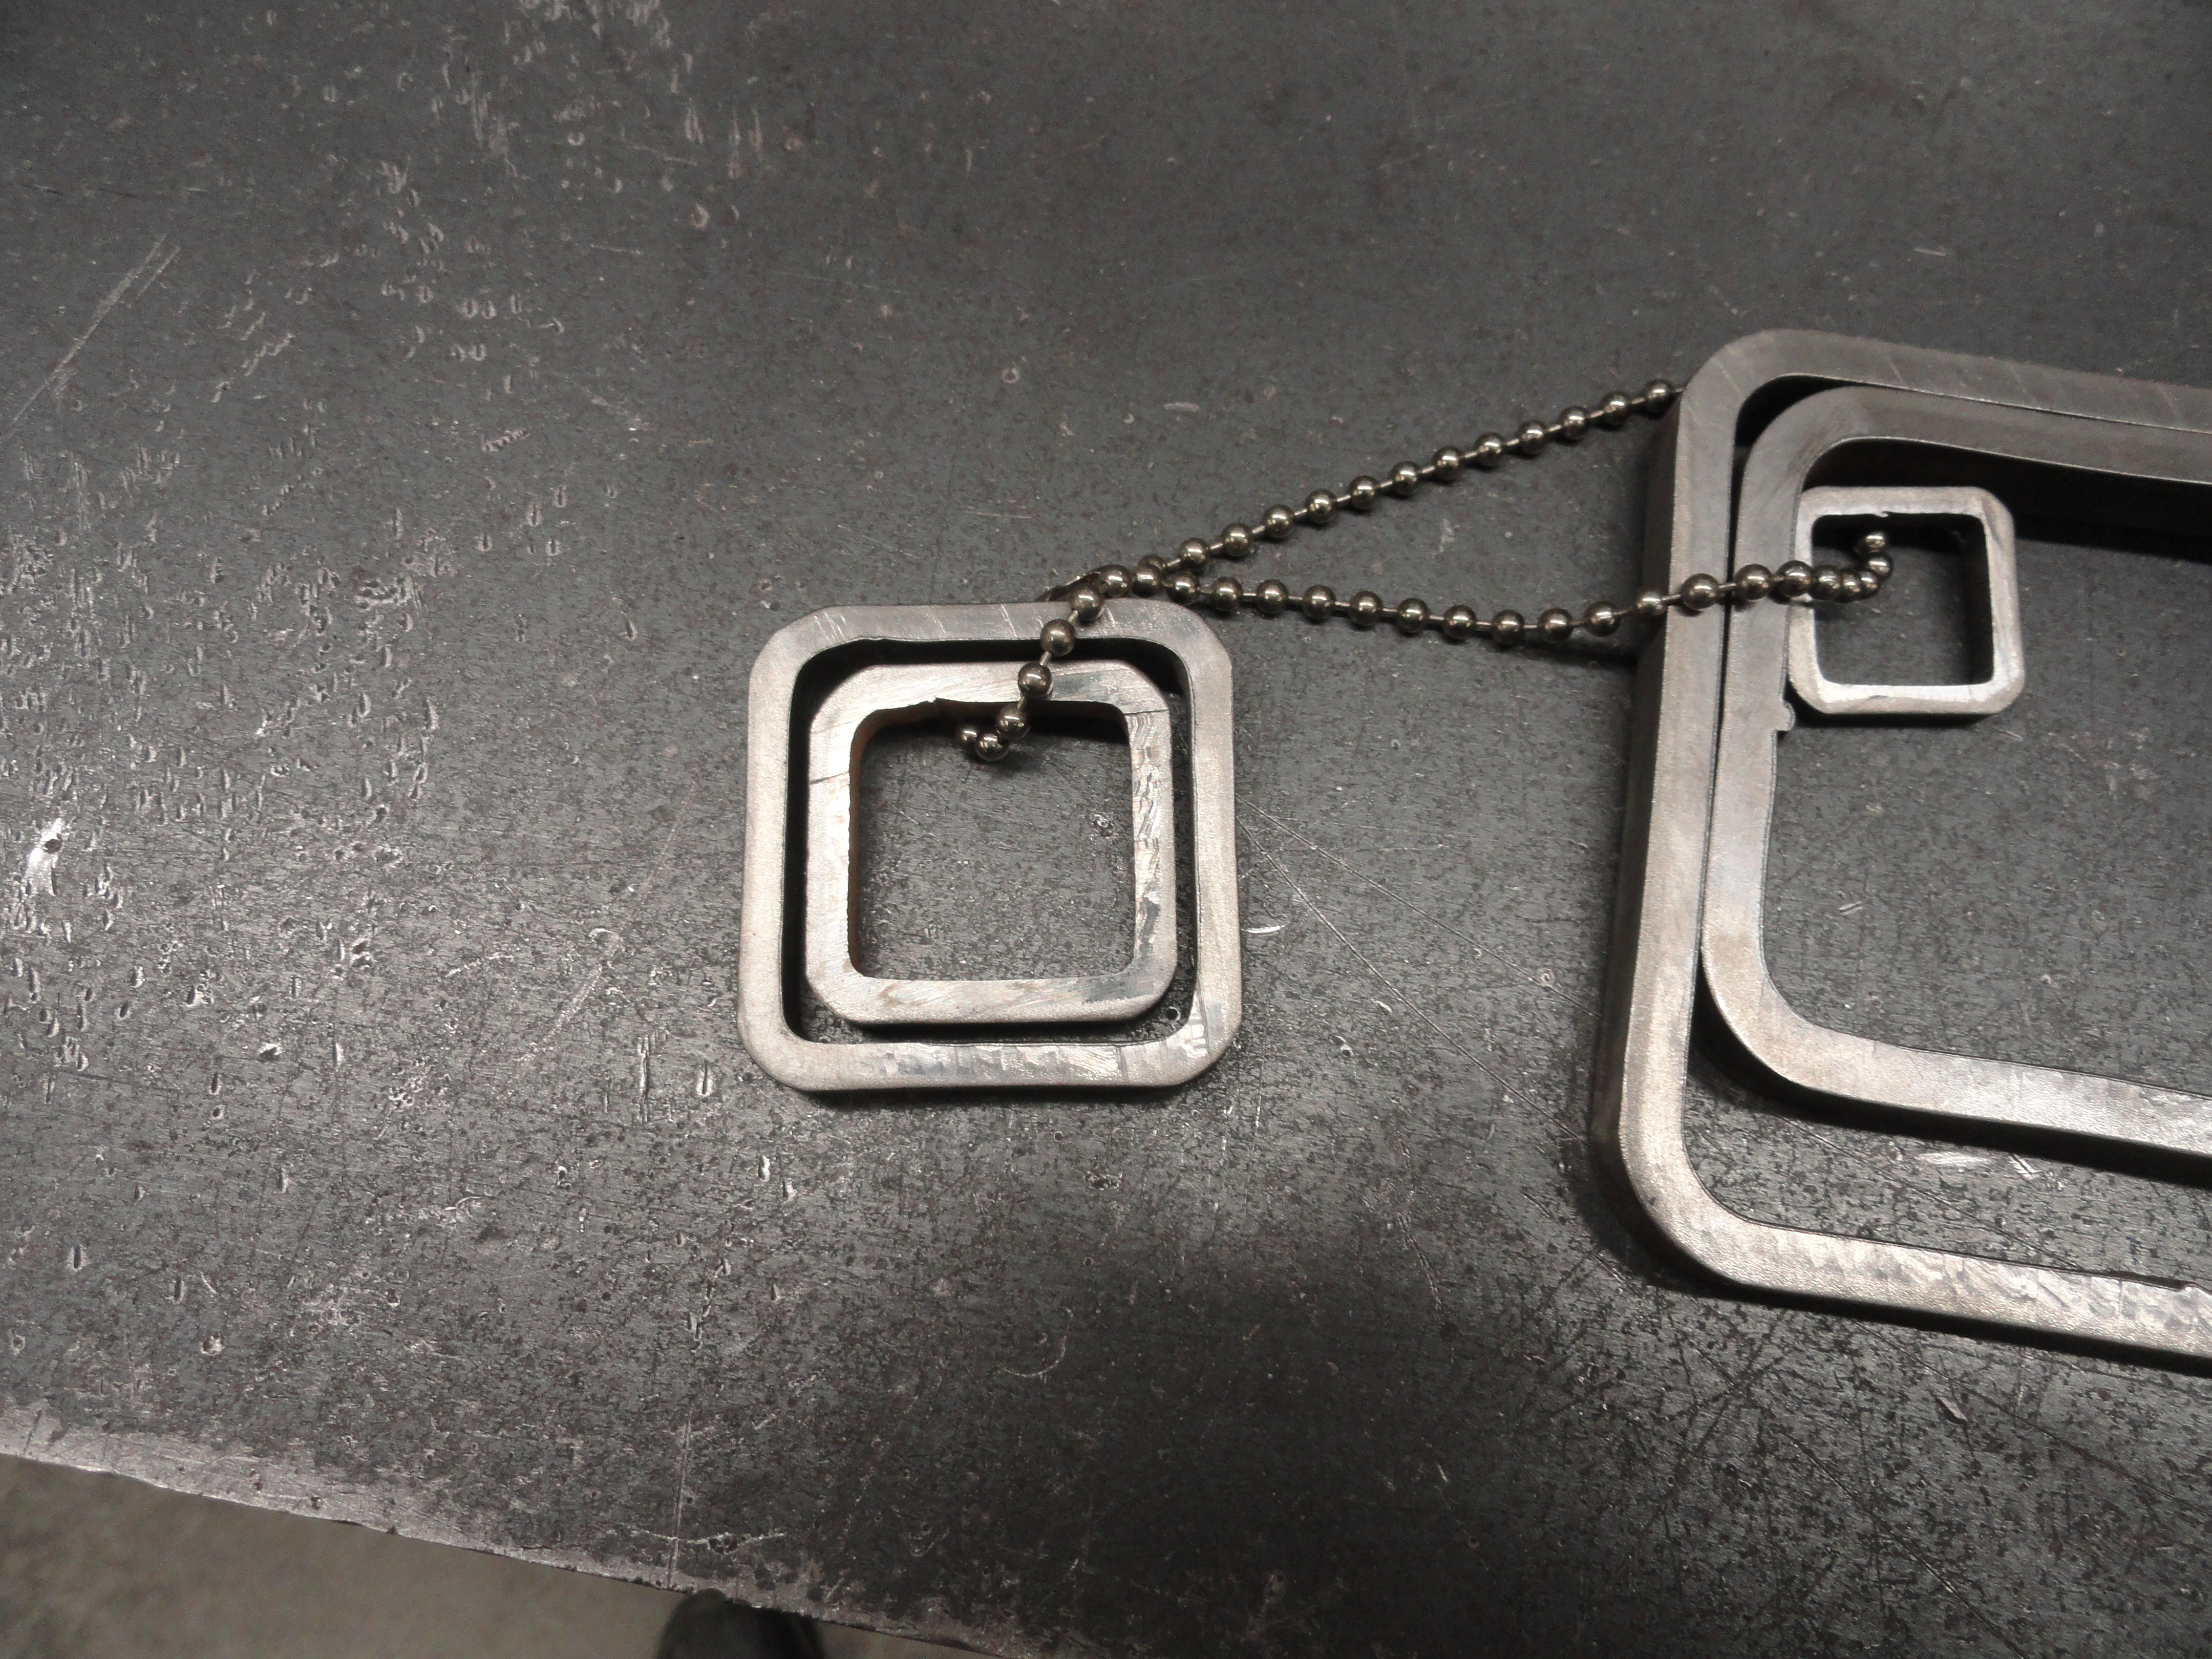
In this and many other shop solutions coming from me, you will see that I use telescoping methods for raising and lowering, fastening, and for mobility. What it amounts to is picking a dimension of square tubing and choosing the correct dimension smaller size tubing to go inside of it. This is not just a matter of getting one size smaller, there are a few considerations. I will use my favorite two dimensioned tubing sizes to illustrate.
A 2 inch square tubing is a nice size to have on the outside for most applications around a restoration shop. It's bulky, but more solid because in order for us to put a 1-1/2" square tubing piece inside, and have it so that it offers smooth and consistent service, the side walls of this 2 inch piece must be 3/16" thickness optimally. 2 inches, minus 6/16" (3/8") is enough less than 1/2" to make the system work smoothly. Since the outside diameter of a 1-1/2" tube is of course 1-1/2" inches, this gives us enough gap all the way around to operate smoothly. Remember inside the 2 inch tube is a seam that makes it necessary to go with a little thinner walled material.
The other issue that's very important is the strength of the tubing. The 2 inch with 3/16" walls is perfect because if you use a weld nut on the side of it to cinch the telescoping part down, you will not bend or distort the tube during normal operation. The 1-1/2" tube also needs to be thick so that when you cinch it down, it doesn't buckle inside the other tube causing an even bigger problem. I just order all of my 2 inch and 1-1/2 inch with 3/16" walls to eliminate the concern.
(The total lineal feet of the 2" square needed is: 72 inches.)


Start by marking two of your 2 inch by 24" in the very middle (at 12 inches), then at that mark, make another mark at one inch on each side of that 12" mark. This way you have a 2 inch wide mark in the very center as shown. We are going to sandwich the two 24" pieces together by turning one upside down over the other, so on this one, cut away 3 sides of the tube, and on the other piece cut away one side so that they fit together seamlessly.
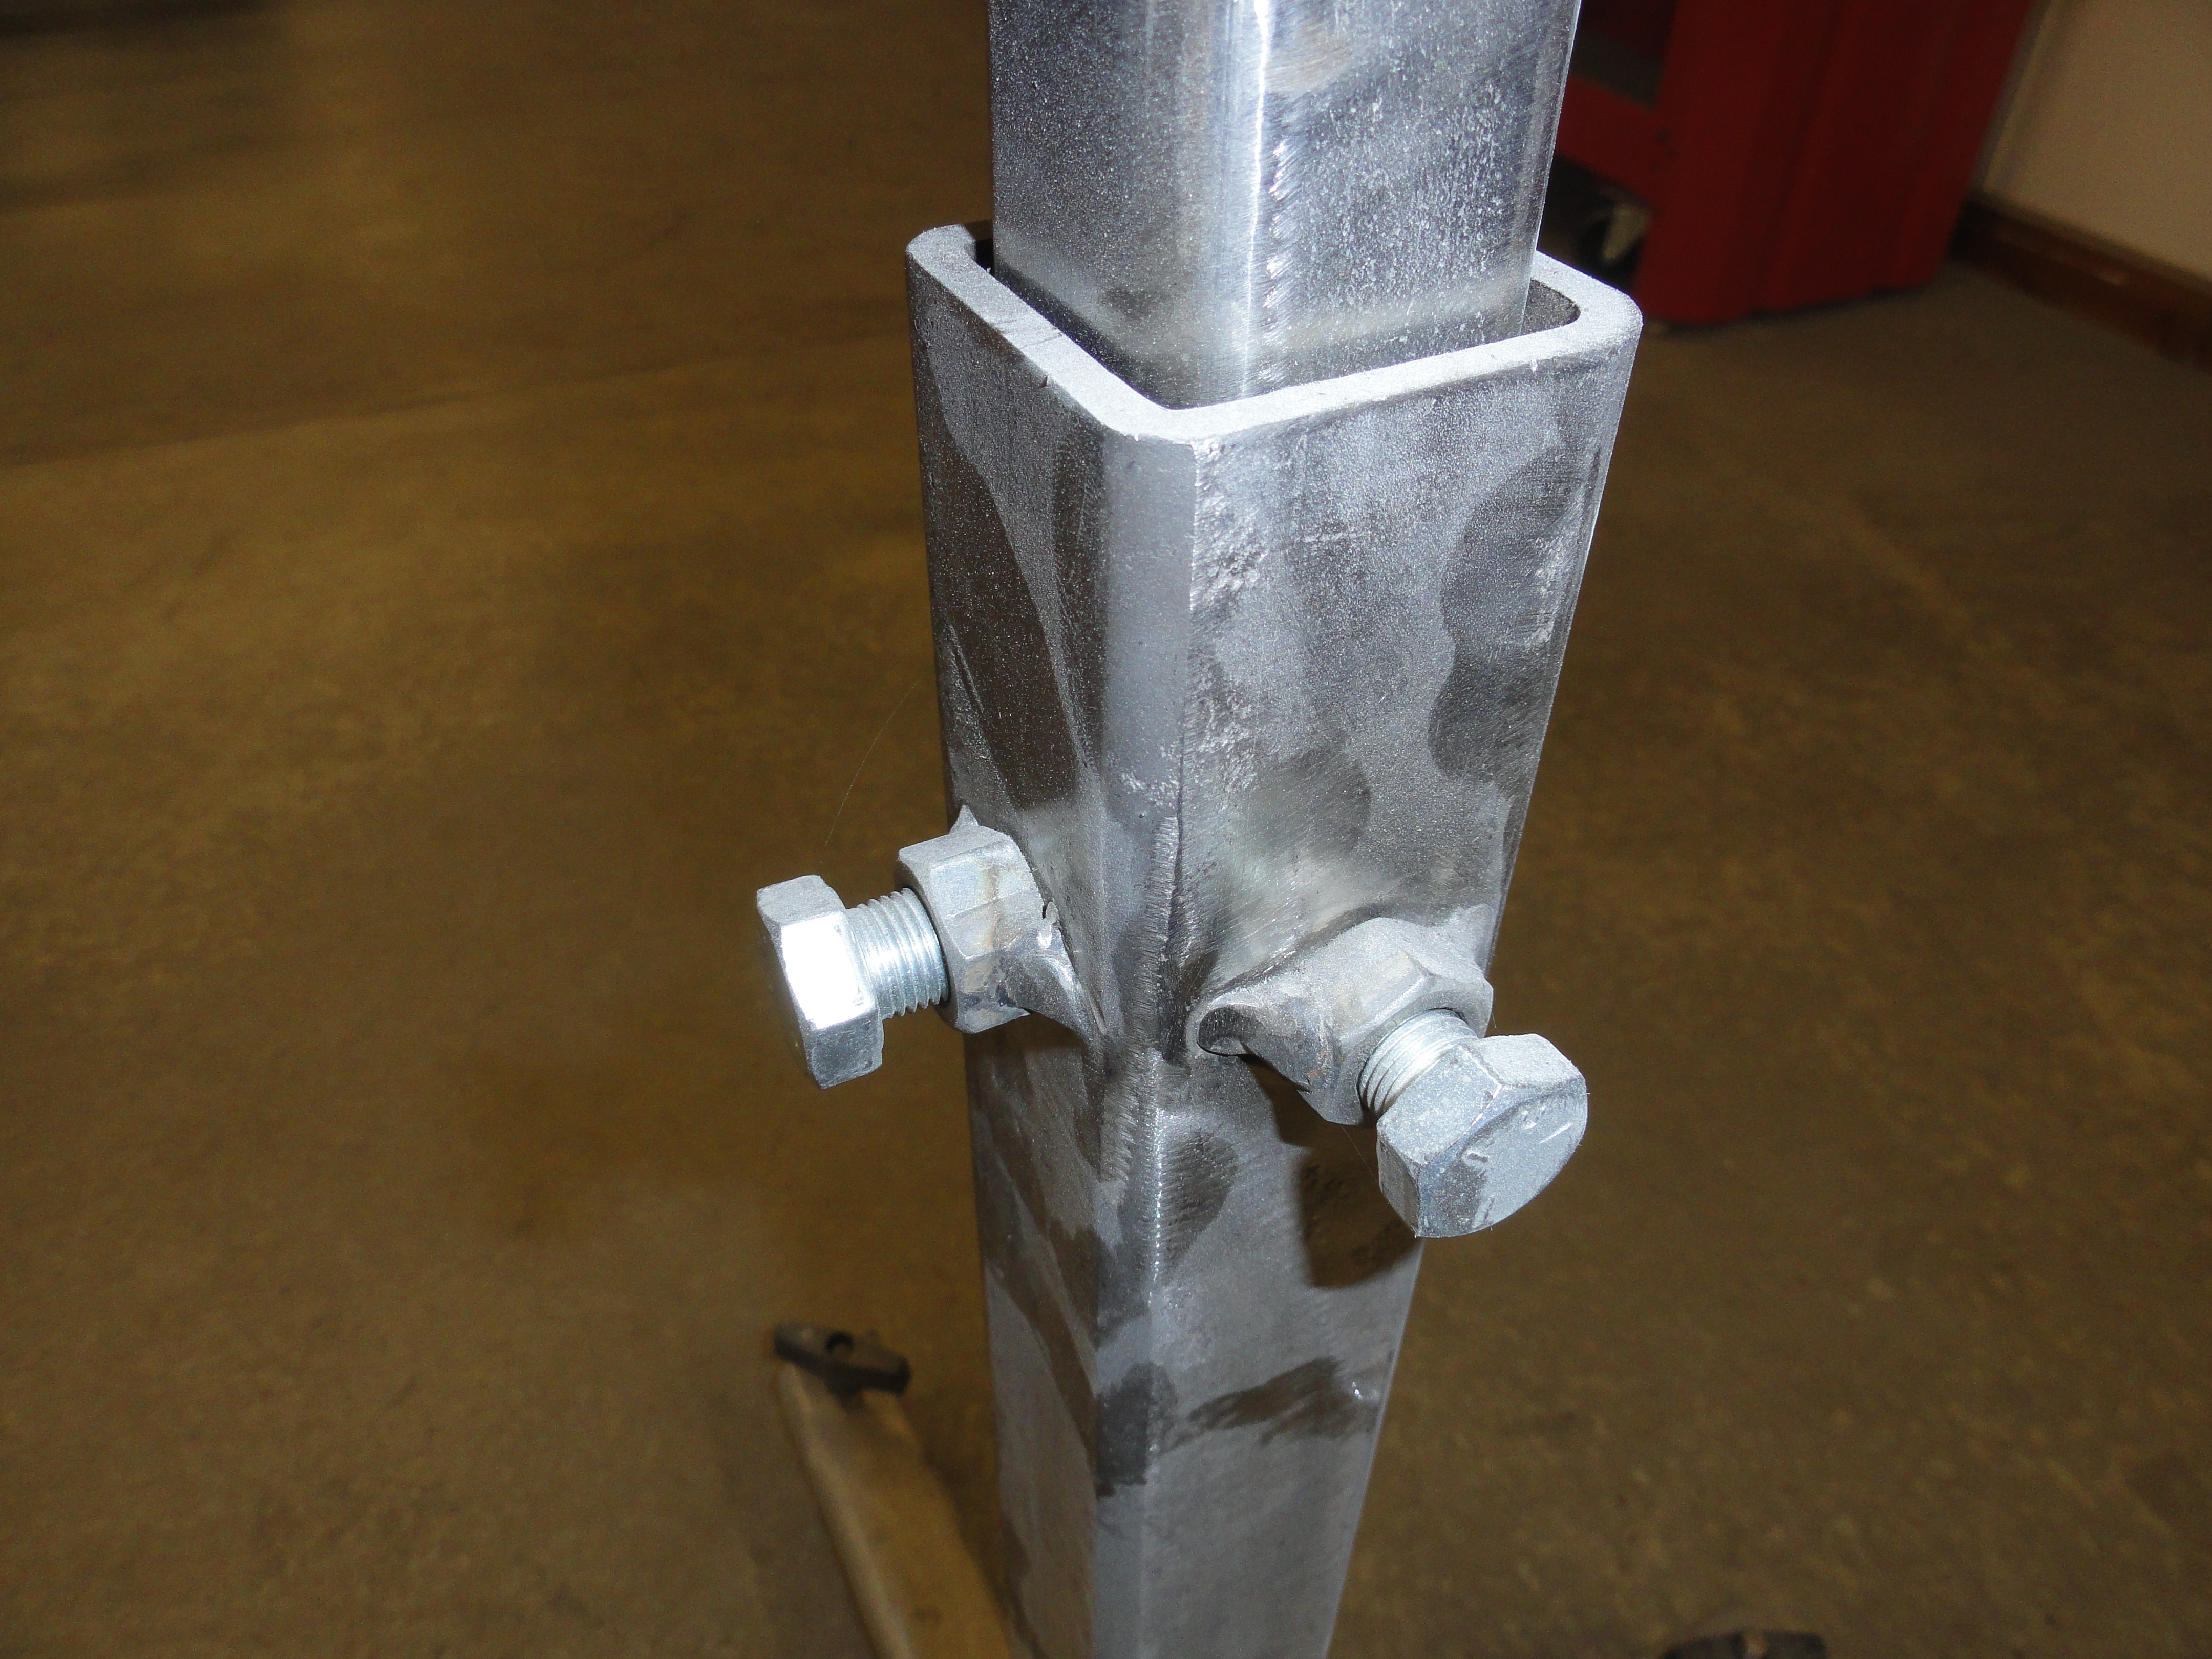
Before we weld the upright in place, we need to do a few things on the drill press. On the upright, we need to drill two 1/2" holes about 3 inches down from the top. On two adjacent sides, mark the upright 3 inches from the top in the very center of each side as shown. Drill a 1/2" hole at the mark. Make sure a 1/2" bolt goes through the holes nicely, then using two nuts per hole, put a nut on the inside, another on the outside, and bolt the outside nut tightly against the piece. You will be welding the outside nut onto the tubing. This method centers the nut and ensures you can still get the bolt on and off easily later. Weld the nuts in place. Again, prepare your pieces first for welding. In this case sandblast or grind off the Zinc plating so the weld is very secure.
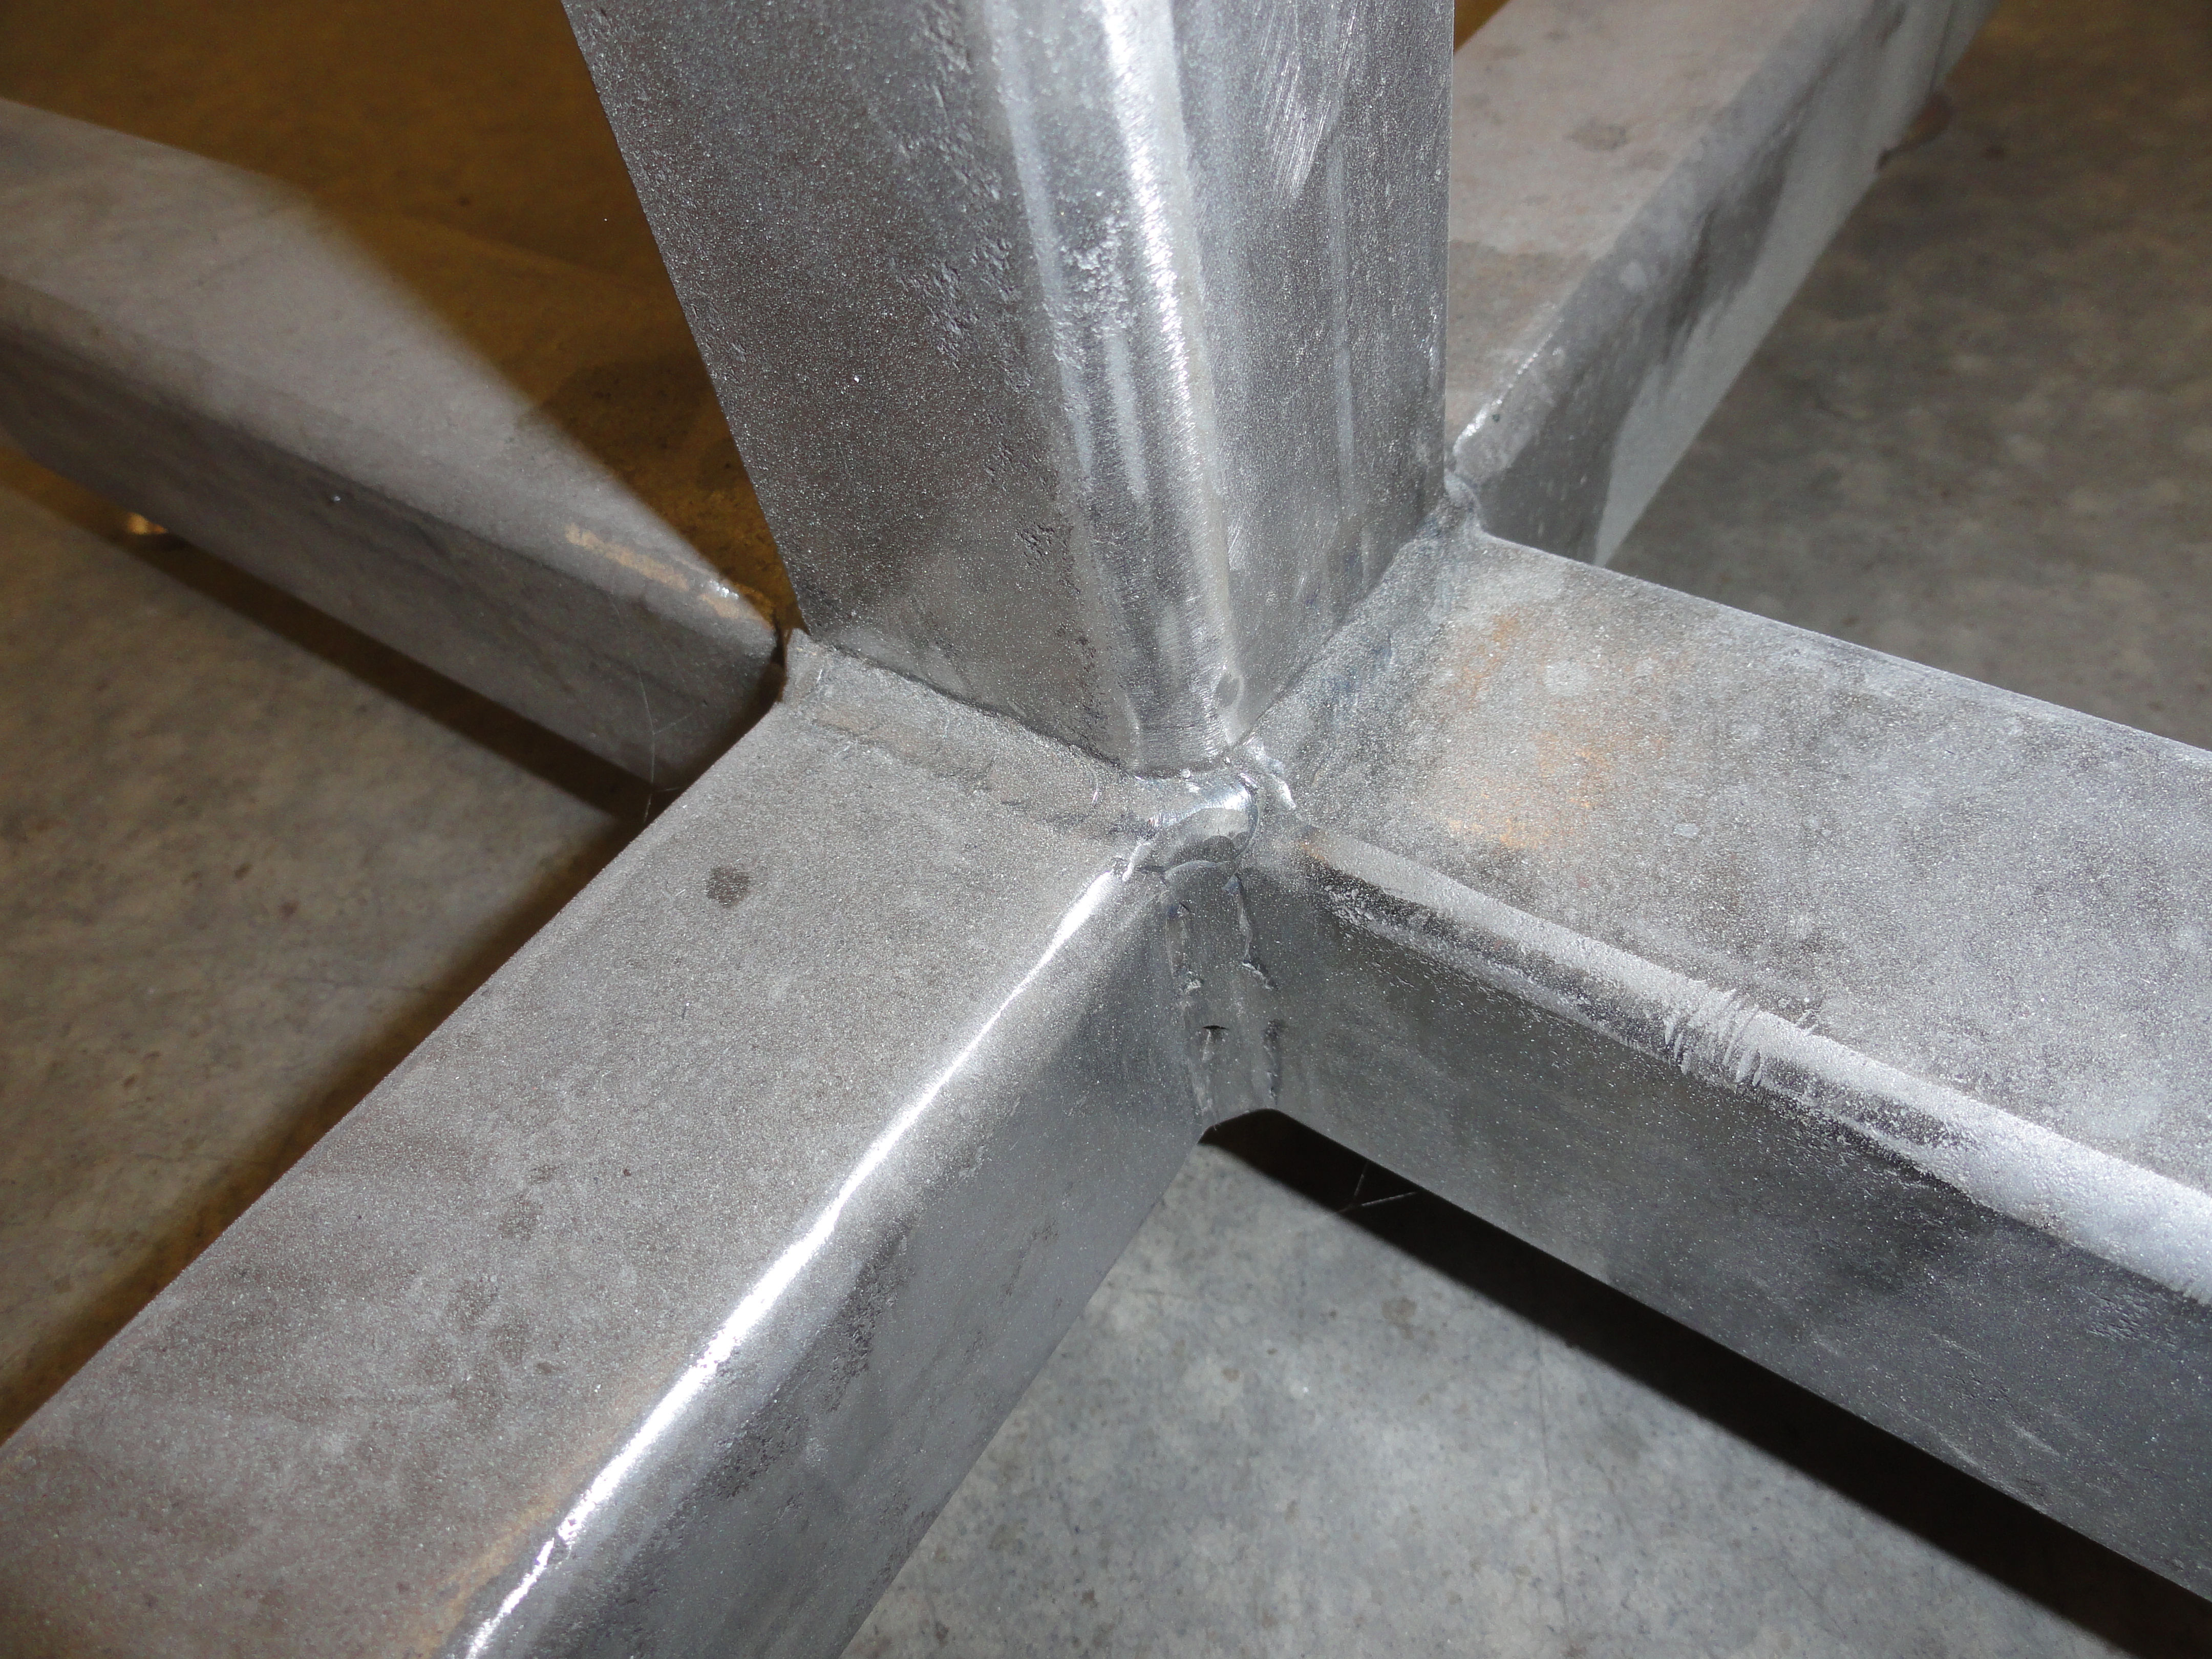
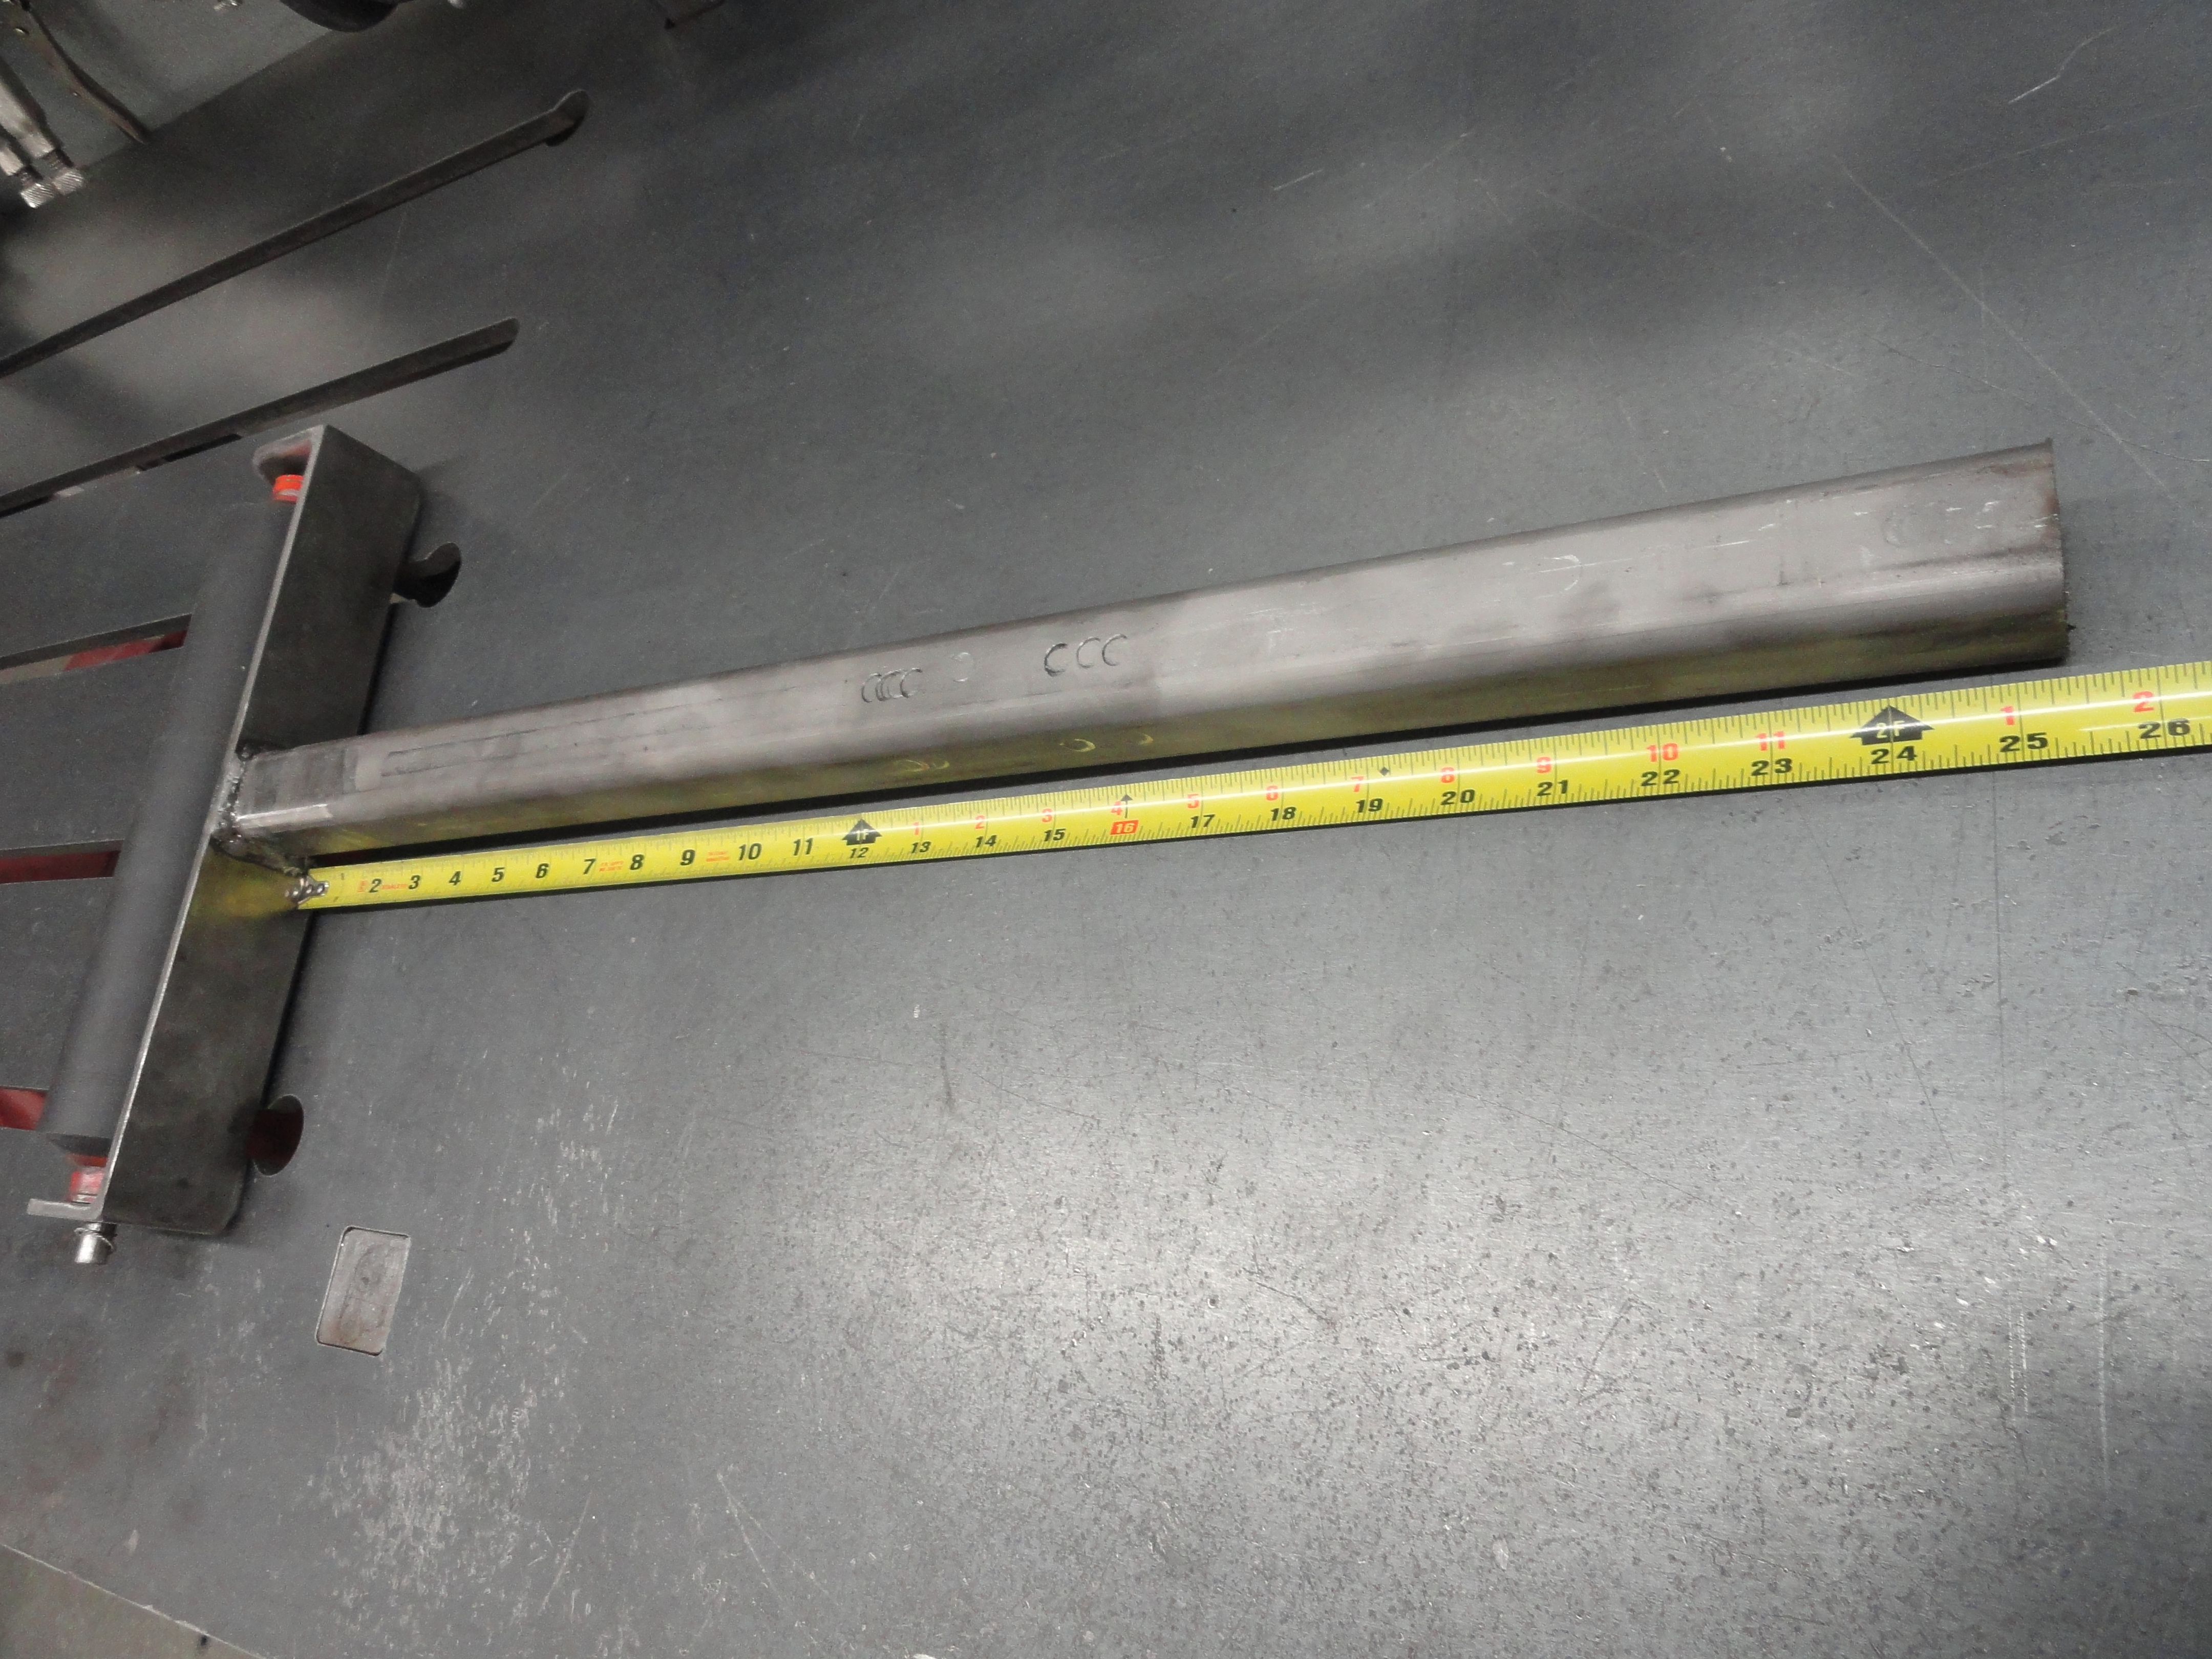
Place the final 24"x2" piece upright and in the center of your X pattern base. To make sure you weld it perfectly straight up, a challenge, I use 4 welding magnets (the 90 degree kind) so there is no question about it being straight. Smart move here is to bevel the bottom edge of that upright so that the weld penetrates better. I use my bench grinder for that. Once you have it in place, tack one side, then tack in the same place on the other side. Check your work for straightness, then weld the other two sides, check for straightness, then once you are happy, weld it good and solid moving from one side to the other.
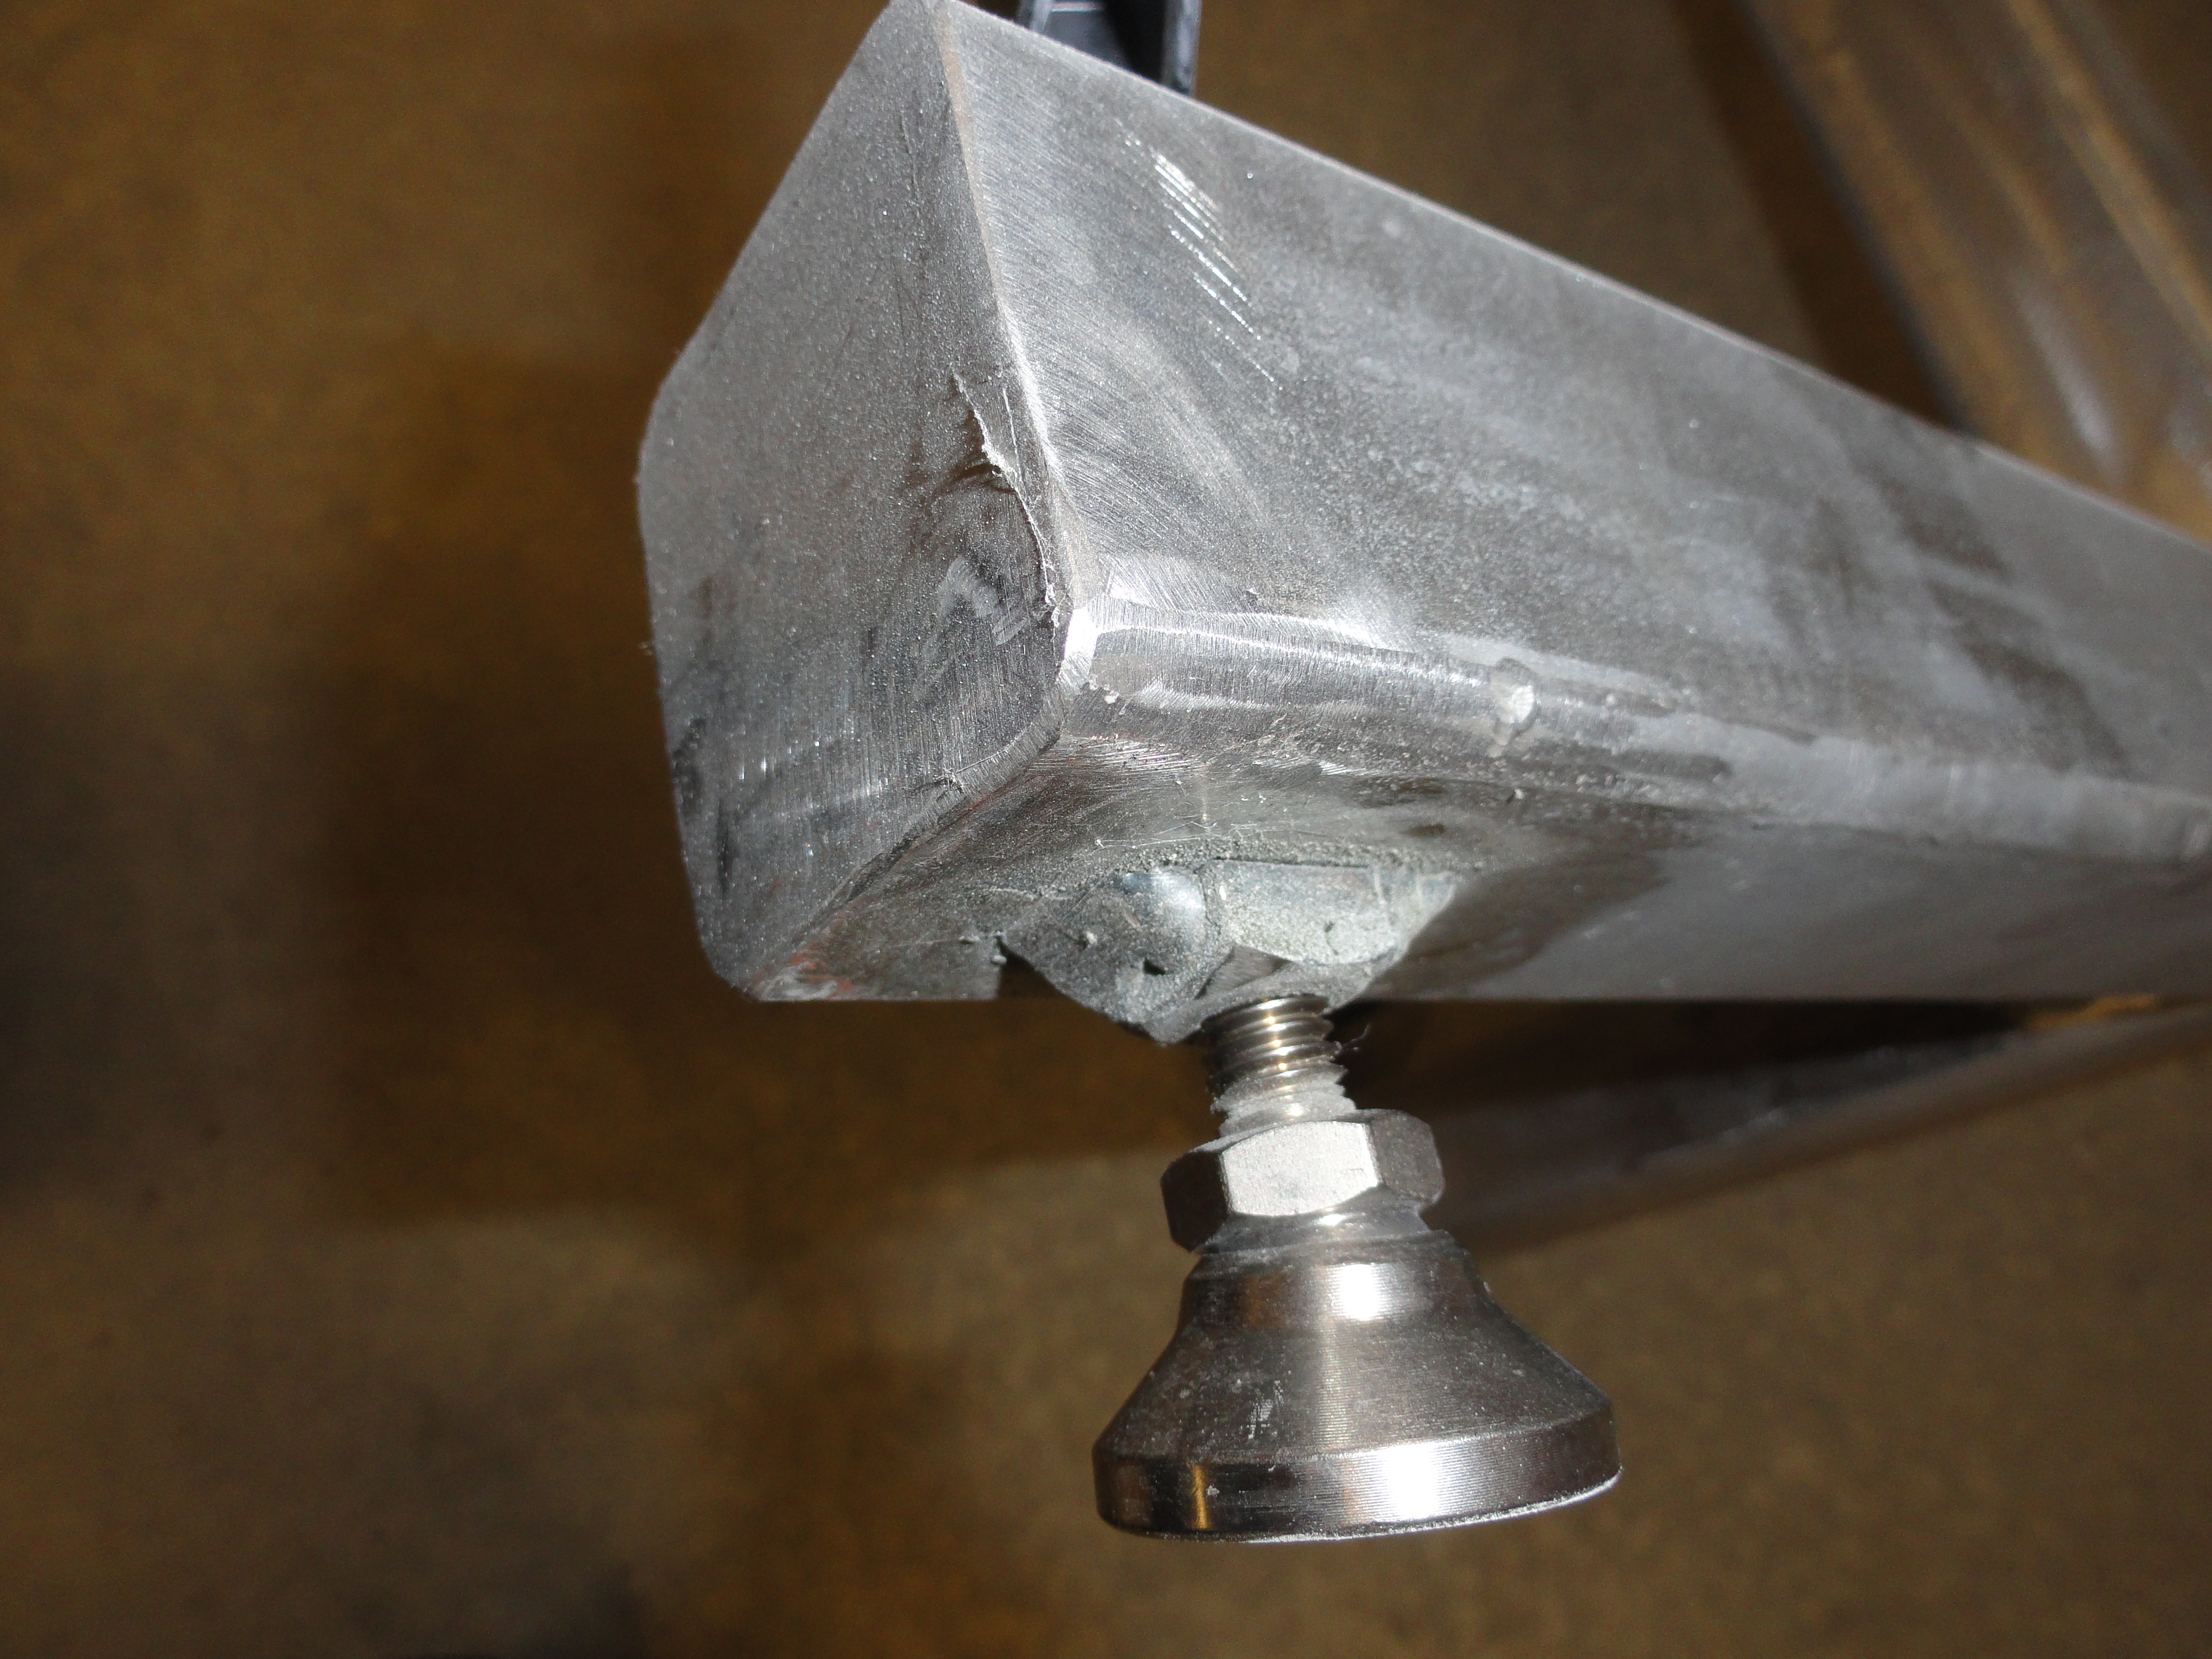
Now you should be able to set this on the floor and have a flat, straight roller pedestal. Mark 2 inches from the ends on all 4 legs (in the center) and take your pedestal over to the drill press and drill a 3/8" hole all the way through on each leg. Secure a 3/8" nut for welding to the bottom of each leg. Use a 2-1/2" bolt (3/8") or whatever works to keep the nut tightly against the piece and centered so that a foot can be screwed into and clear through the piece. Clean off the Zinc plating and weld each nut in place as shown. Optional: Take a small piece of metal and cap off the ends. Just looks nicer! If you purchased the hardware, the feet, the handles, etc. Now you can install them and that concludes the base part of the stand.
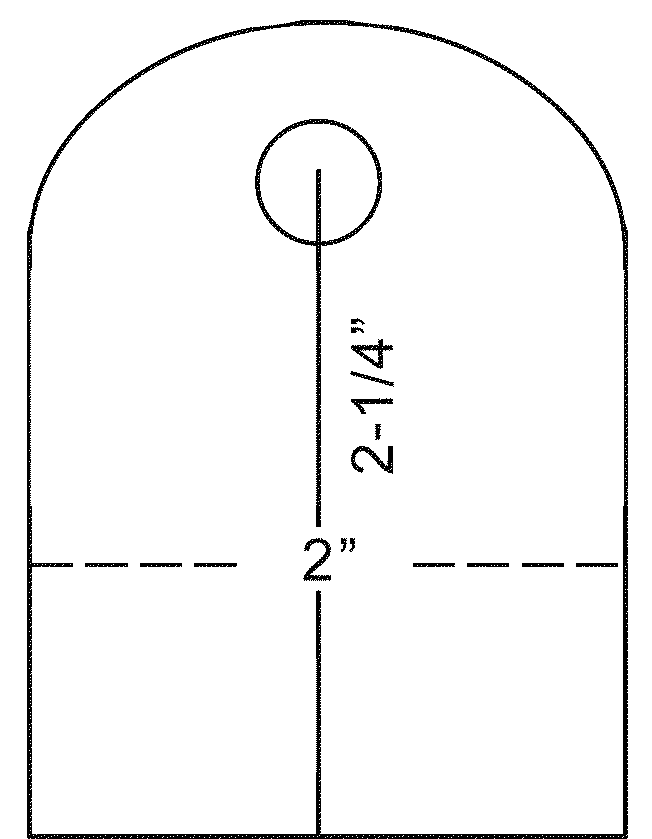

Time to assemble the head for this project. Prepare your 2 inch wide by 13-3/4" by 1/8" thick plate for welding. You will be welding two ends on this plate. The ends are 2 inches by 2-3/4". I rounded the tops of those ends so they don't interfere with whatever you use this stand for. I used a Porta-Band Bandsaw with table attachment for making those cuts, but you can use your grinder or anything really. Clamp both ends together very tightly and take them over to the drill press and drill a 7/16" hole in the center of the 2 inch dimension and 2-1/4" from the bottom (non-rounded end). Doing them together will ensure you have the holes for the shaft perfectly aligned with each other.
Prepare and weld the ends on to the long plate. Good idea to take the 7/16" rod and put it through the holes and make sure the ends are level with the plate. Weld the ends to the end of the plate, not on top of the plate. Do your due diligence though and make sure your roller is going to fit properly before you make this weld. Is the hole high enough for the radius of the roller? Is the roller going to fit between the ends? Just prudent to make sure!
Now that you have the rollers header plate made, we need to weld the 1-1/2" by 25-1/2" long piece to the header plate. Measure to the very center of the bottom of the header plate assembly and mark it so that they are centered both ways. Bevel the end, remove the mill scale and prepare to weld them together. Use 90 degree magnets or whatever you have to ensure a nice straight weld. I slide the assembly upside down to a corner of my welding table so the tubing is going straight up, then with magnets and a level, make sure its straight, then go for it!
So the base is complete, the head is complete, put them together and tighten the two bolts at any height you wish. No need to gorilla these bolts. Just
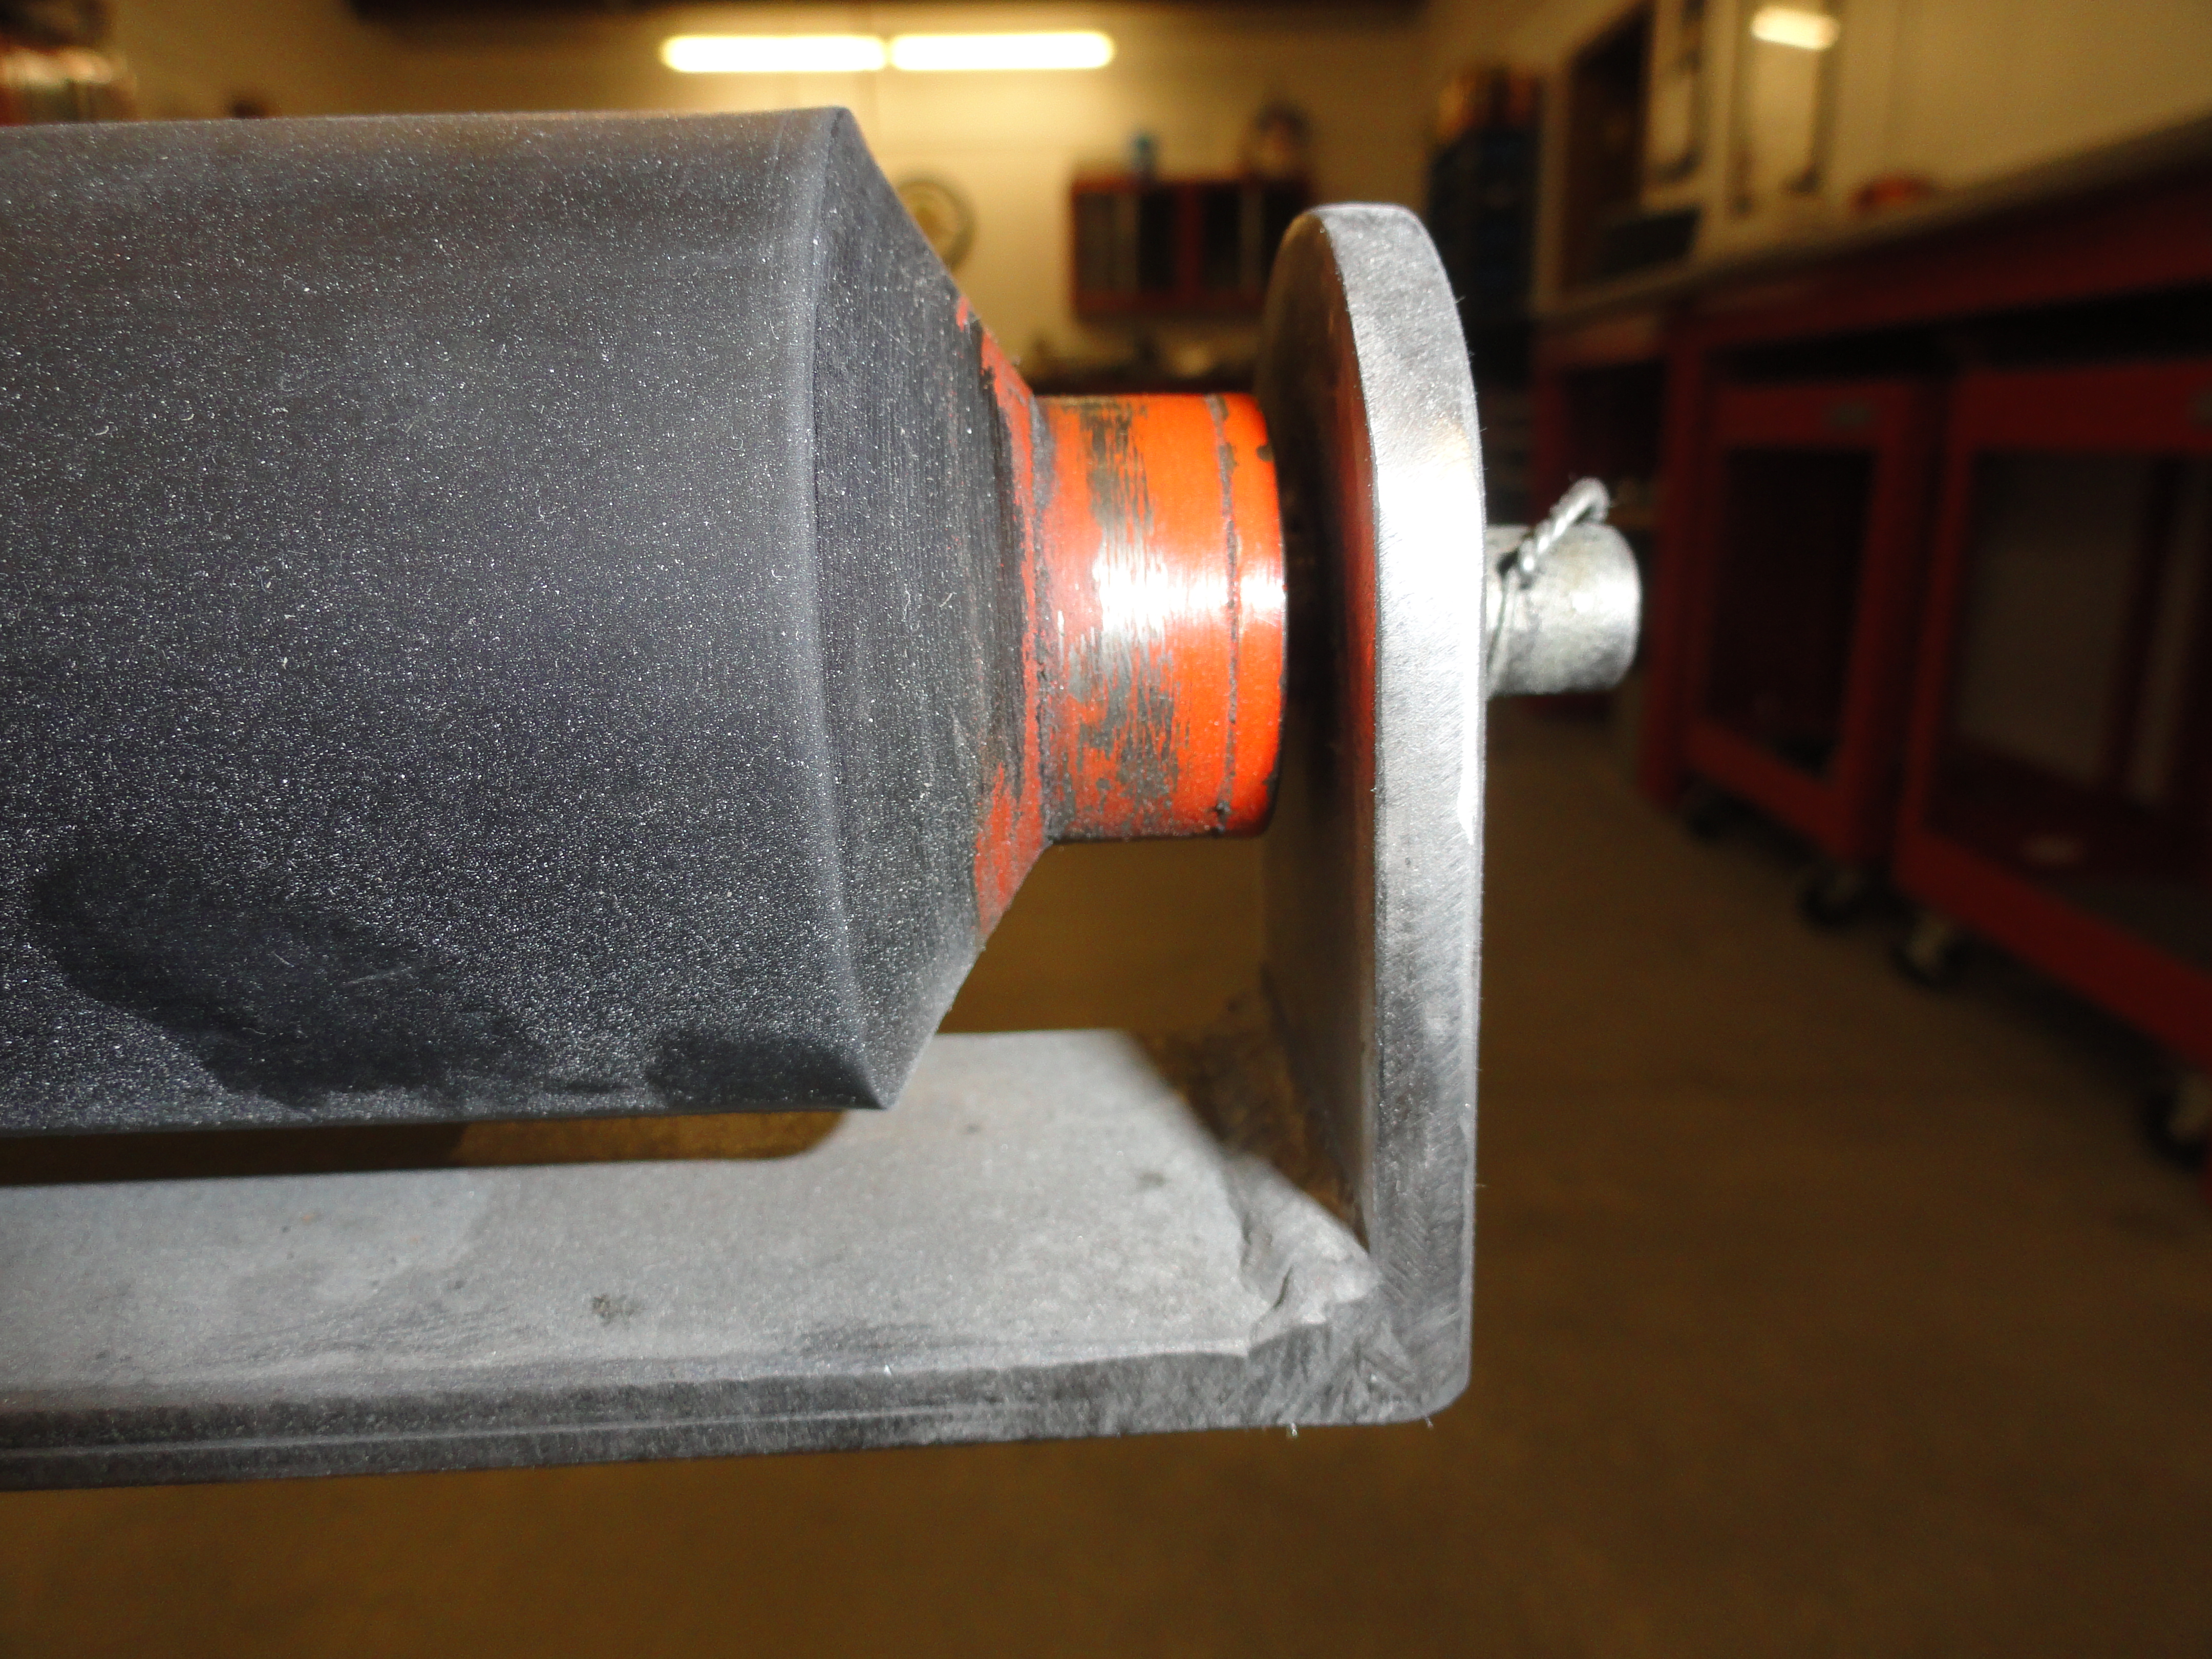
snug and then a bit more. Install the roller by placing the roller shaft through the mount and the roller. These are precision bearings in the roller
so the shaft (providing its a true 7/16") will go in. Grease the shaft first because it's very close tolerance. Once you have the shaft centered, mark
the outside of the shaft on the outside of the housing for a cotter pin, or safety wire, or whatever you choose. Remove the shaft again and drill a
small hole appropriate to your fastener on each end. Reinstall and enjoy your work. If there is play in the shaft, it won't affect anything so no worries.
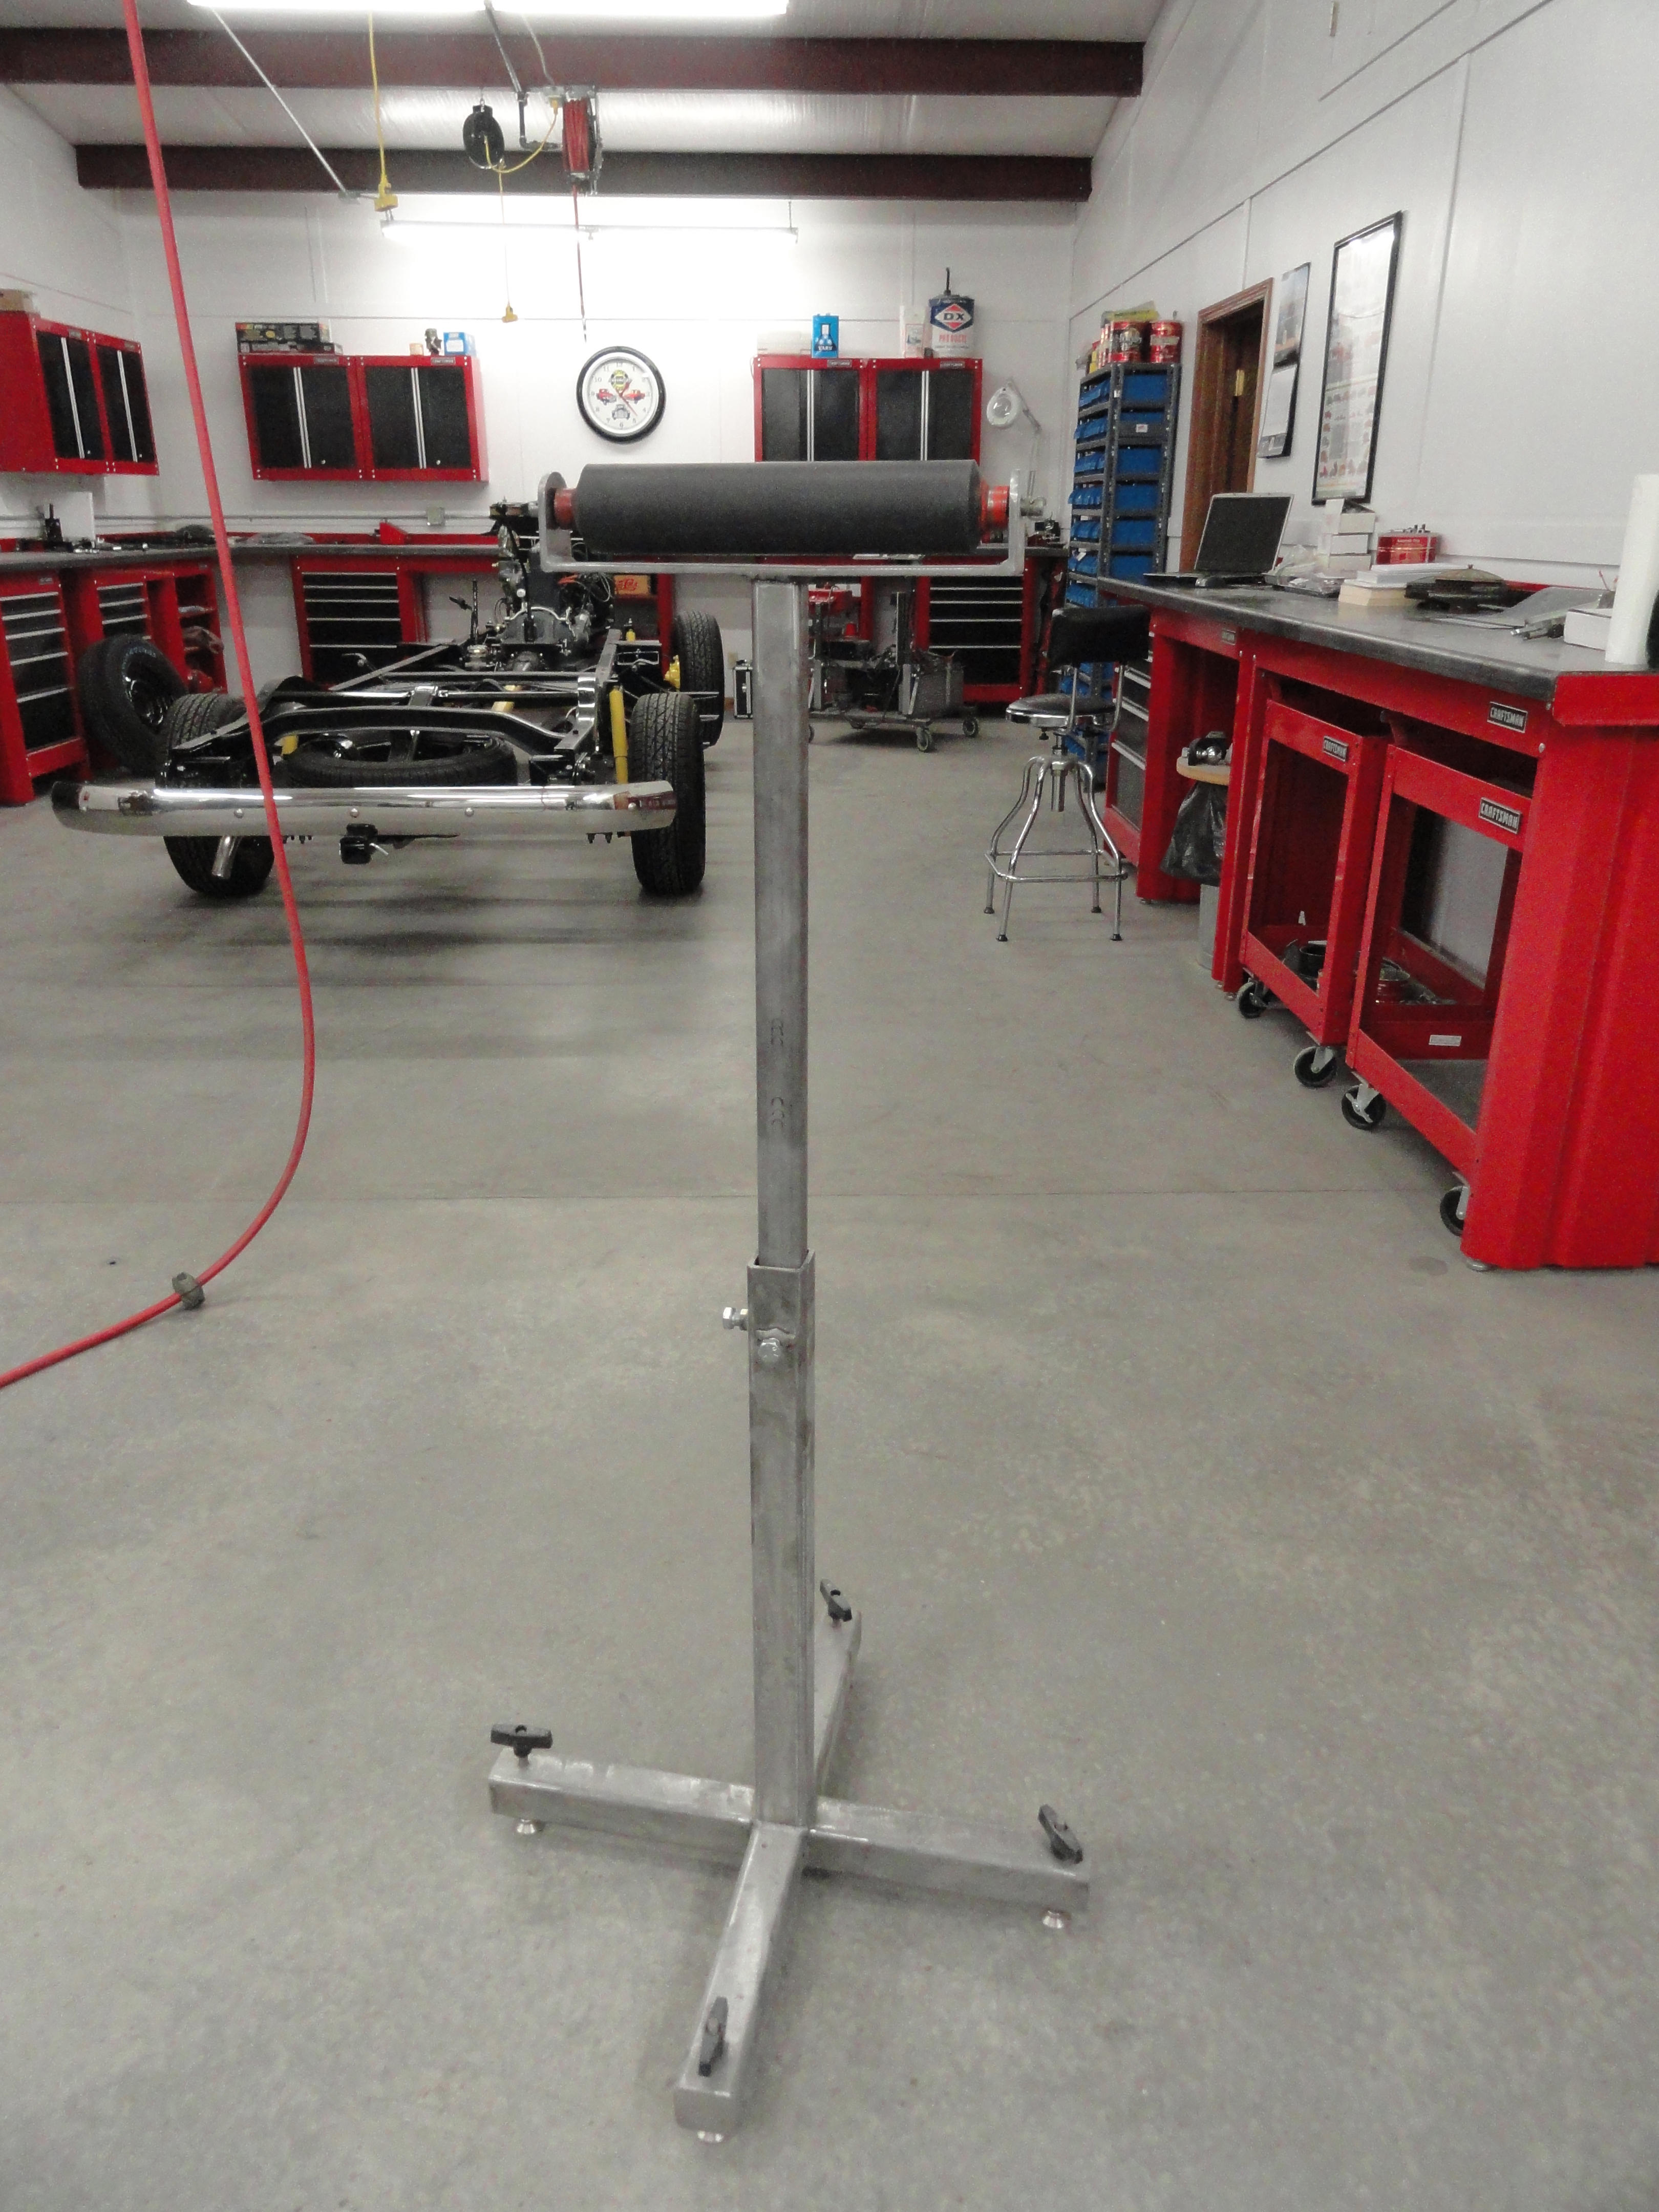
My stand has a max height of 52" or so and I use it for everything. This is one of those tools you will want to have two of!