Deve's Technical Network
1947-1955 1st Chevy Trucks
216/235/261 Engine Solutions & More
There are several different options for installing a Spin-on type oil filter for your 1929-1962 Chevy Six. This has to do with two factors. If you have the stock Bypass Filtration system or if you had your engine modified for full flow, and if you have a triangular engine mounting boss on the drivers side of the engine or not. Chevy started putting this side mount on Cars in 1952 so check to see if your 216, 235 or 261 has this triangular mounting boss arrangement. If it does not have this, don't worry, we have a new solution for you too!
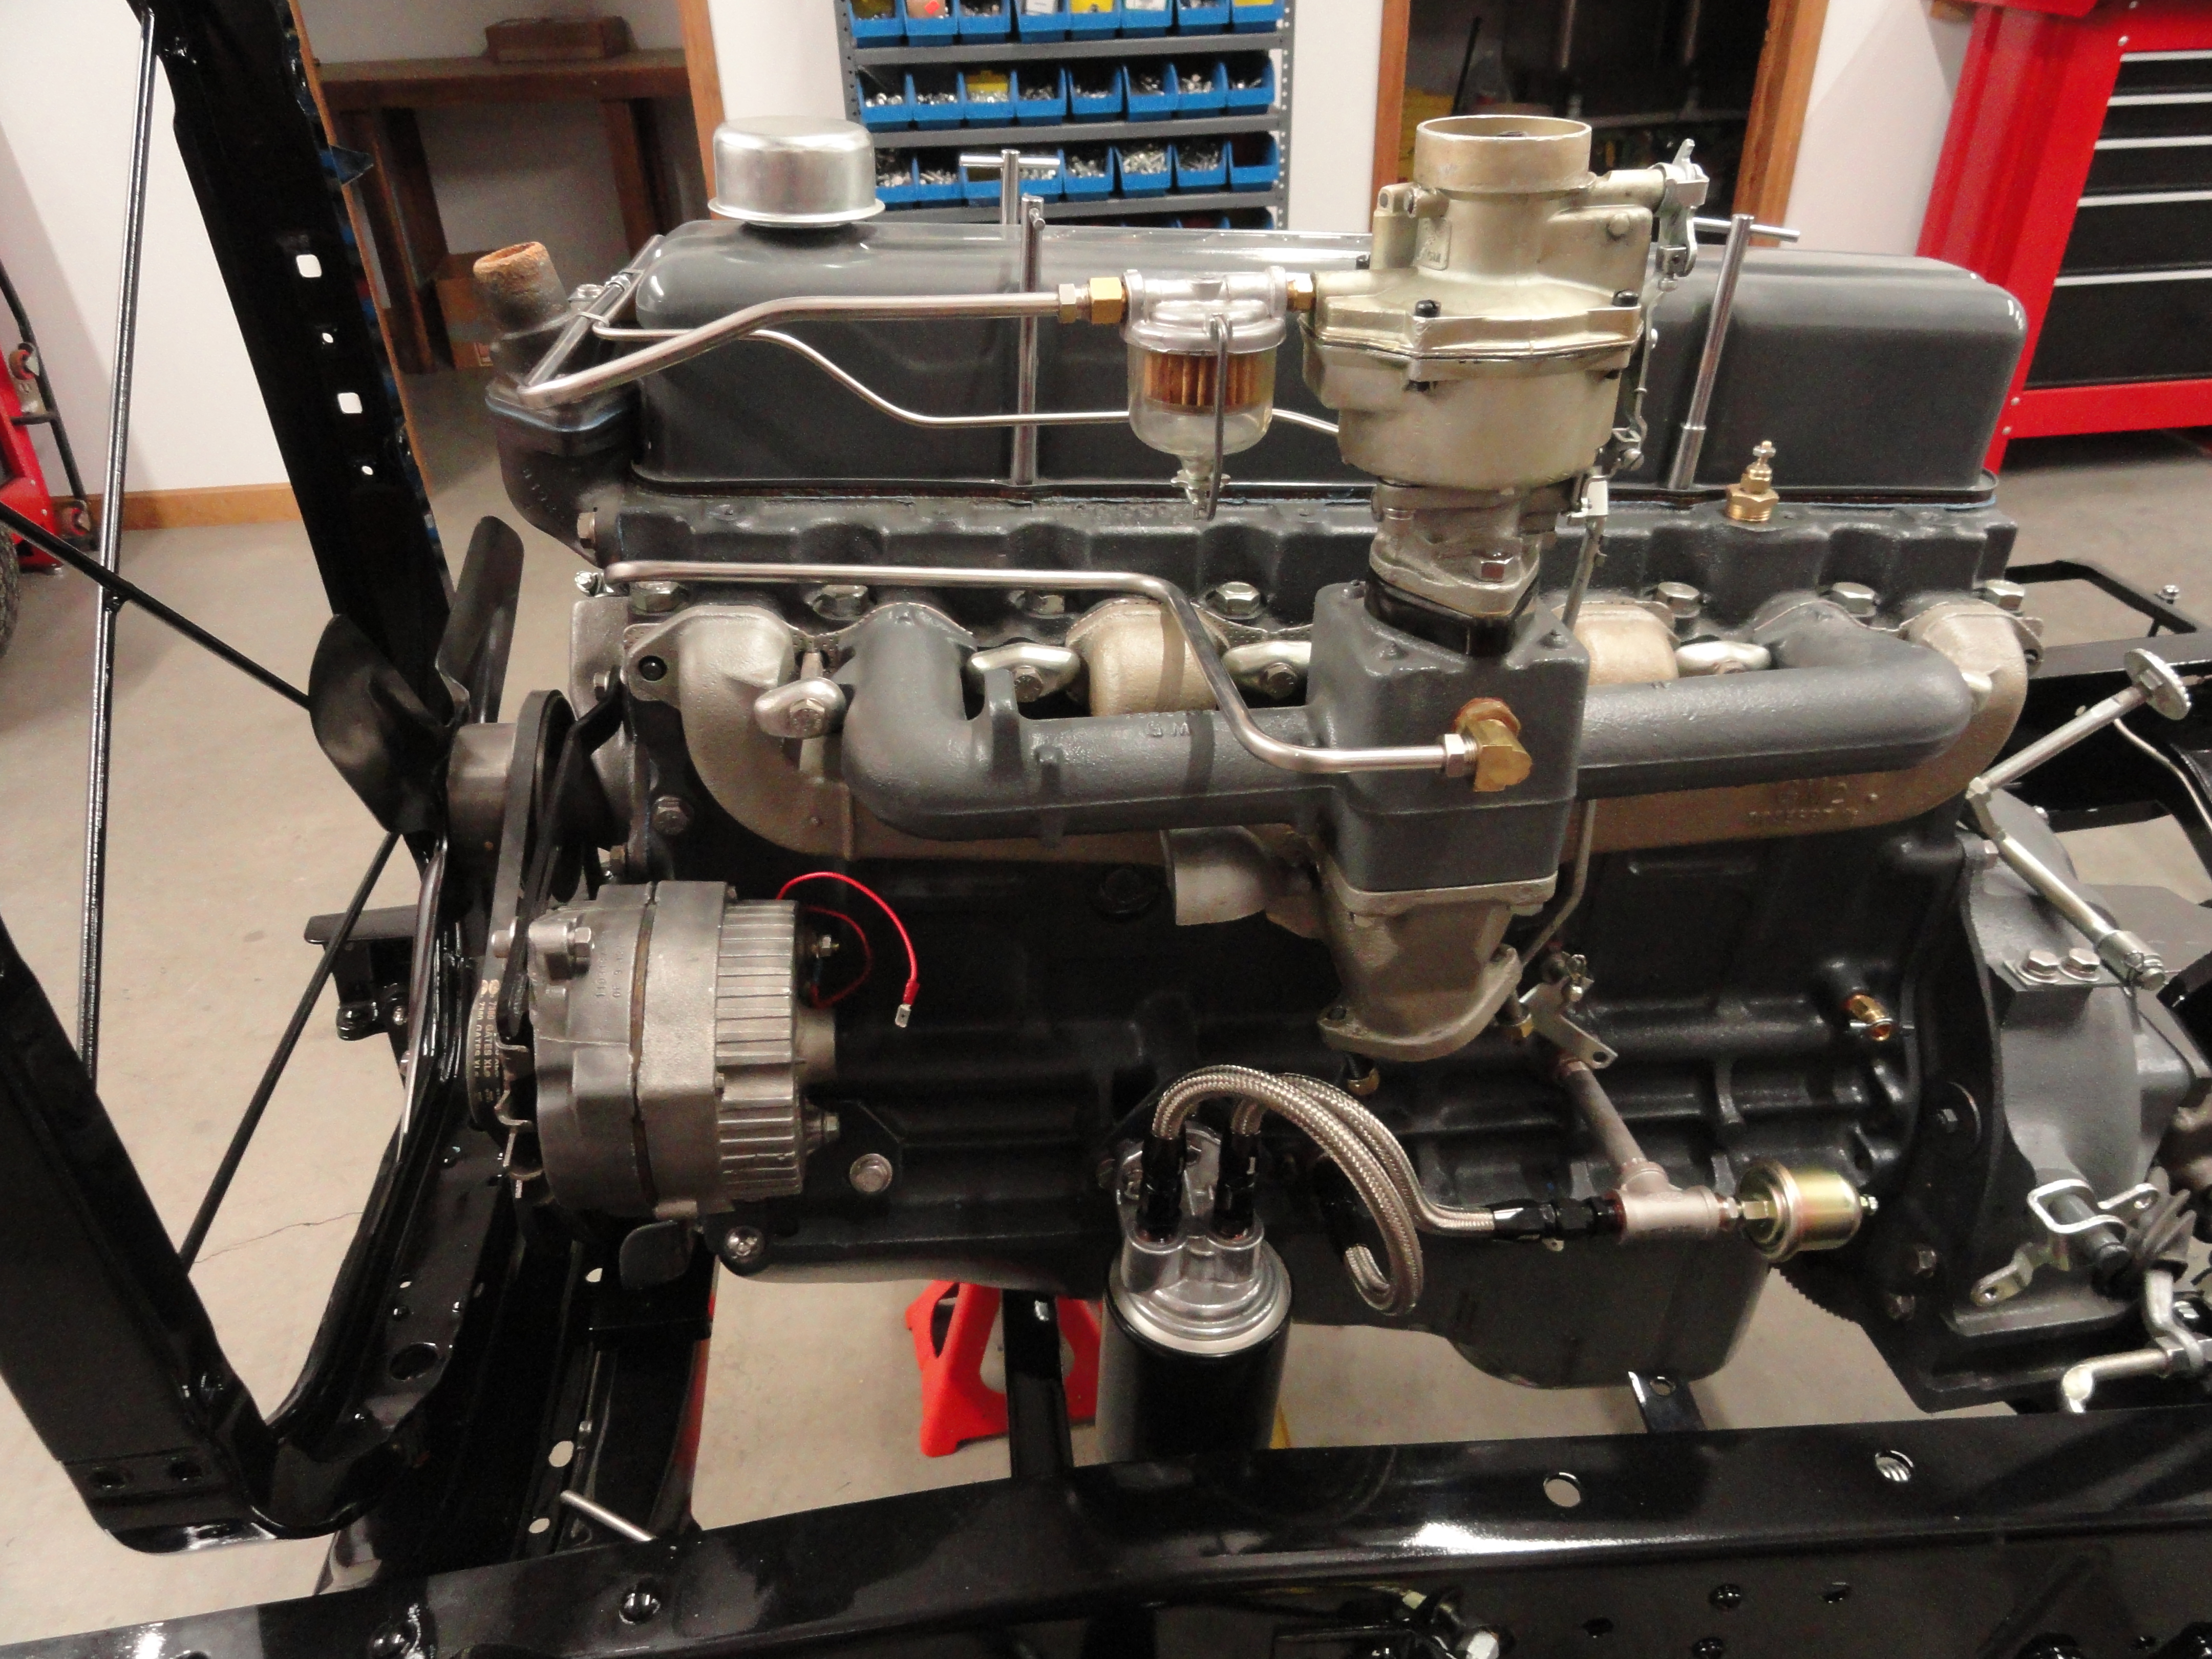
The challenge in creating anything for these vintage engines is making sure we do not make the installation look too modern or out of place. Once these brackets have been installed, they look just like they belong there. In addition, the mounts are all made purposely to be low on the engine. This keeps the oil pump from having to push oil upwards unnecessarily which is better for the overall health and oil flow performance of the engine.
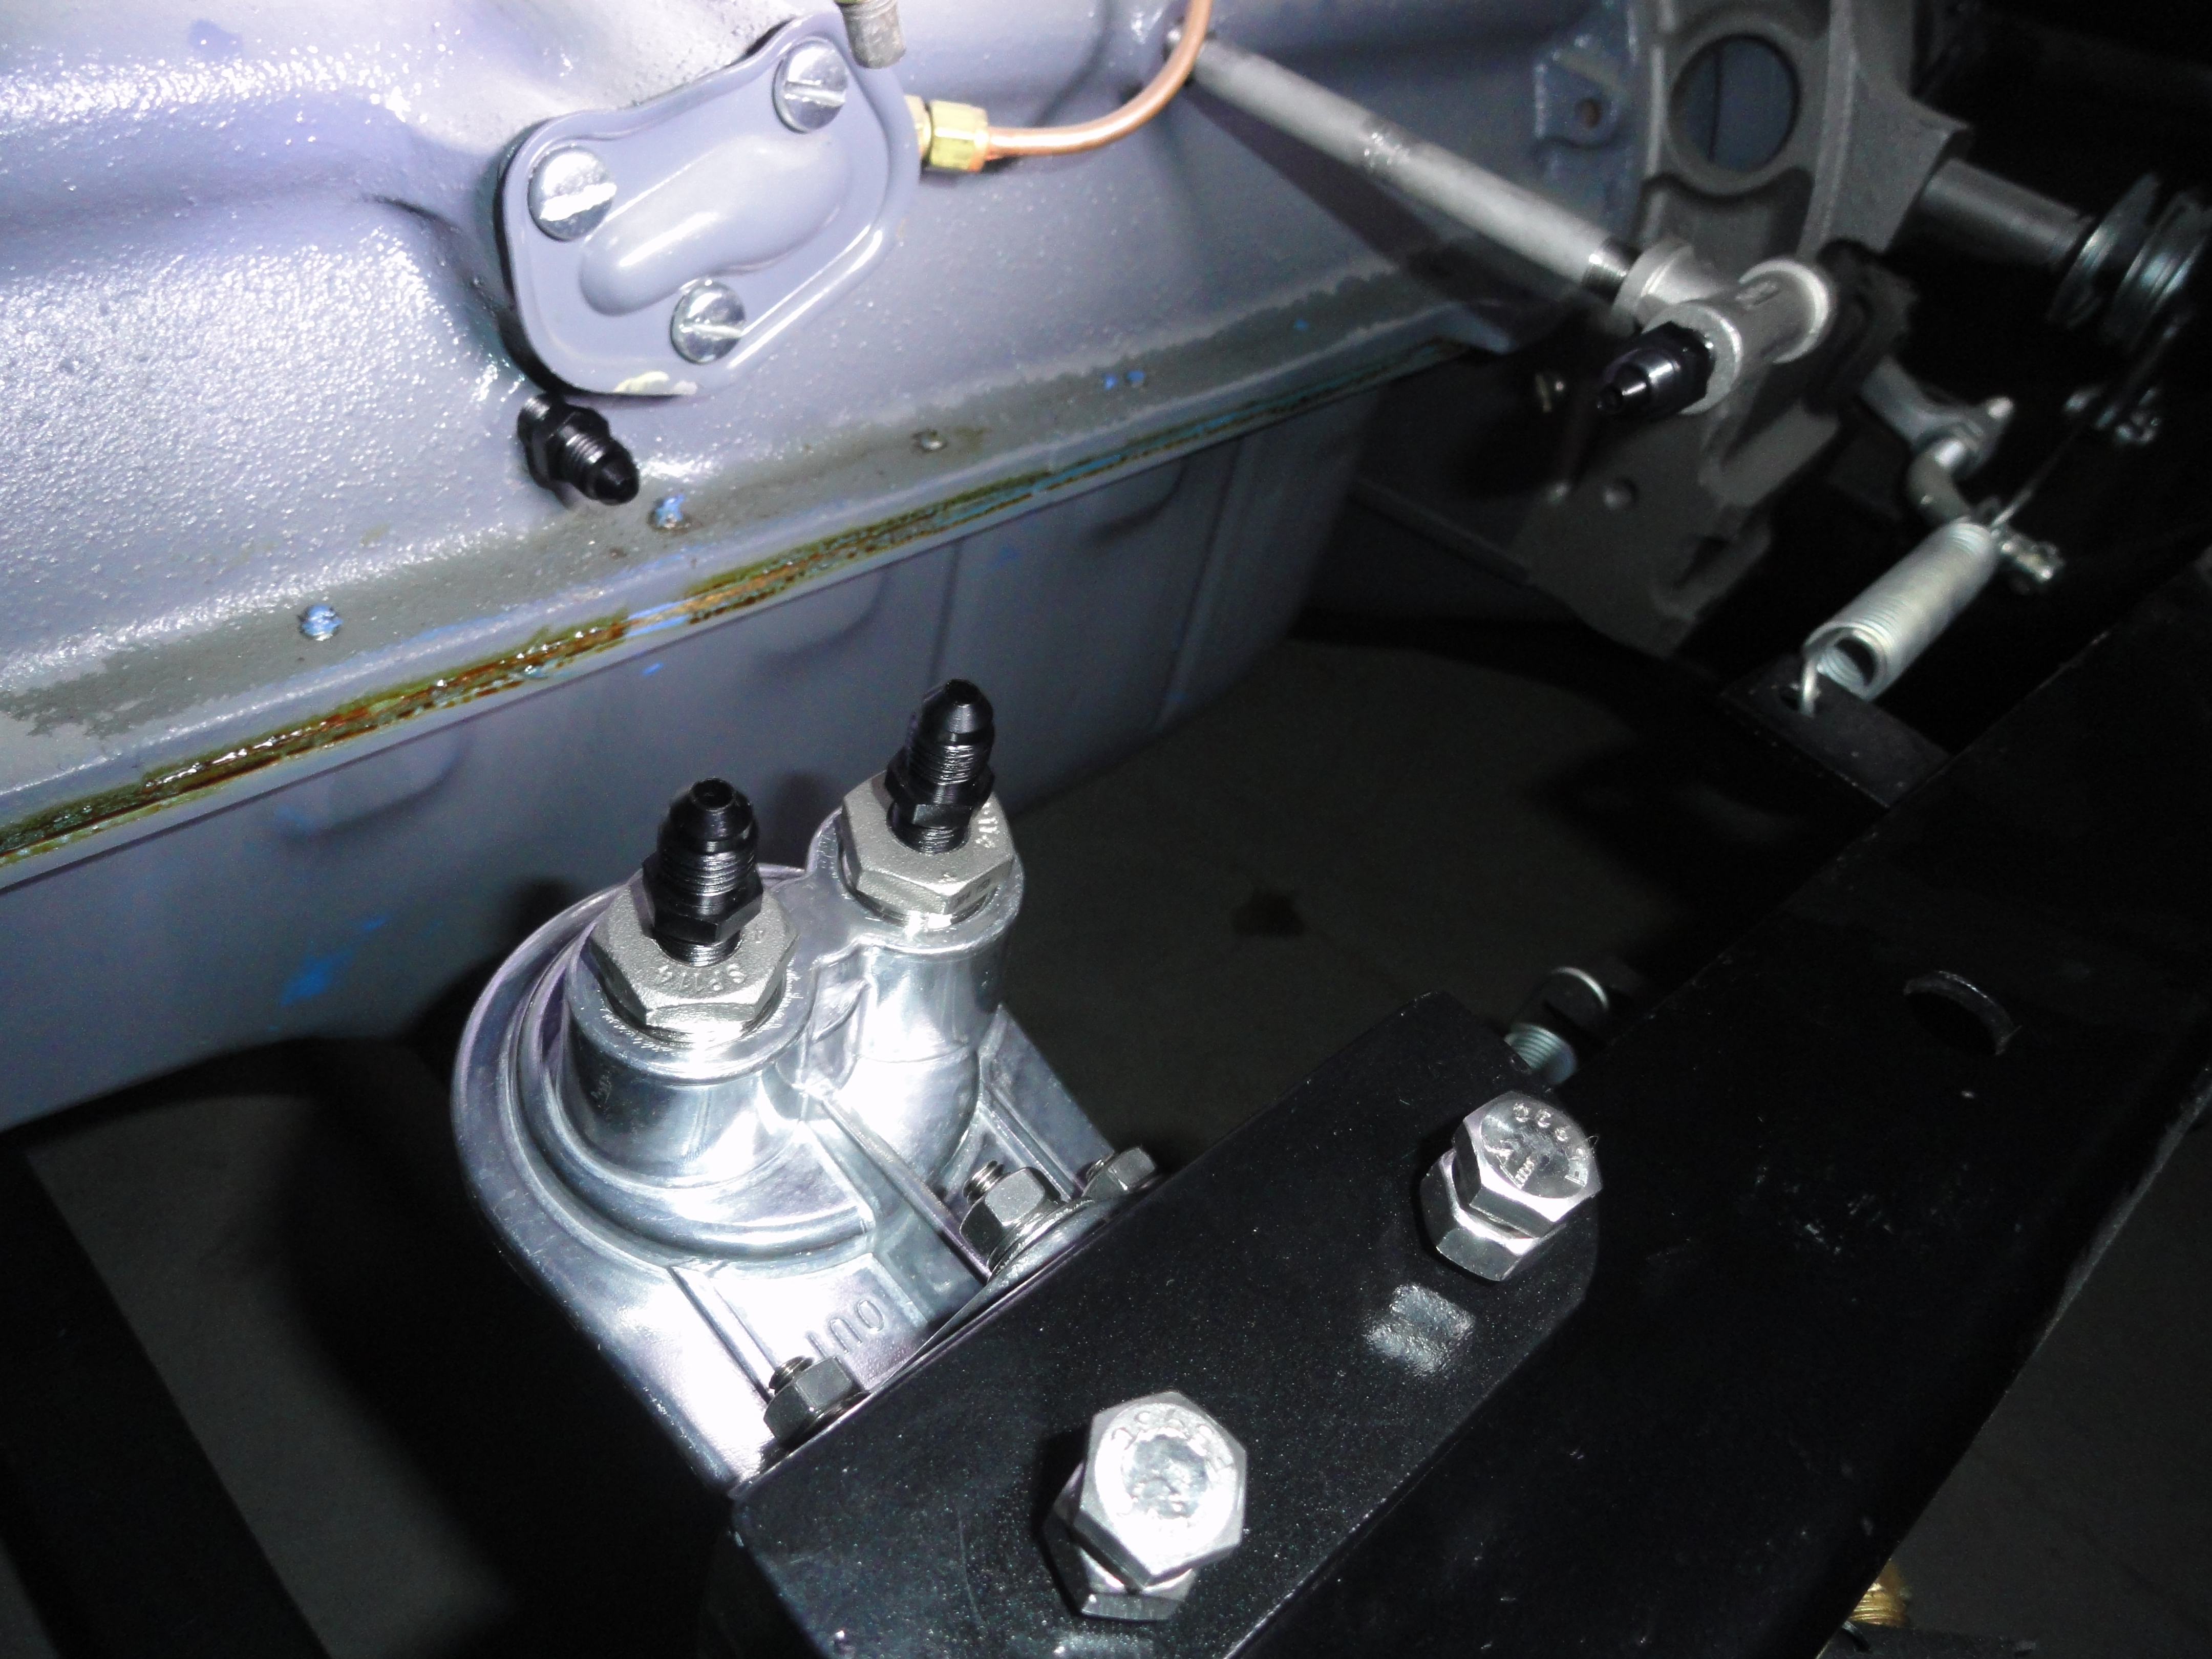
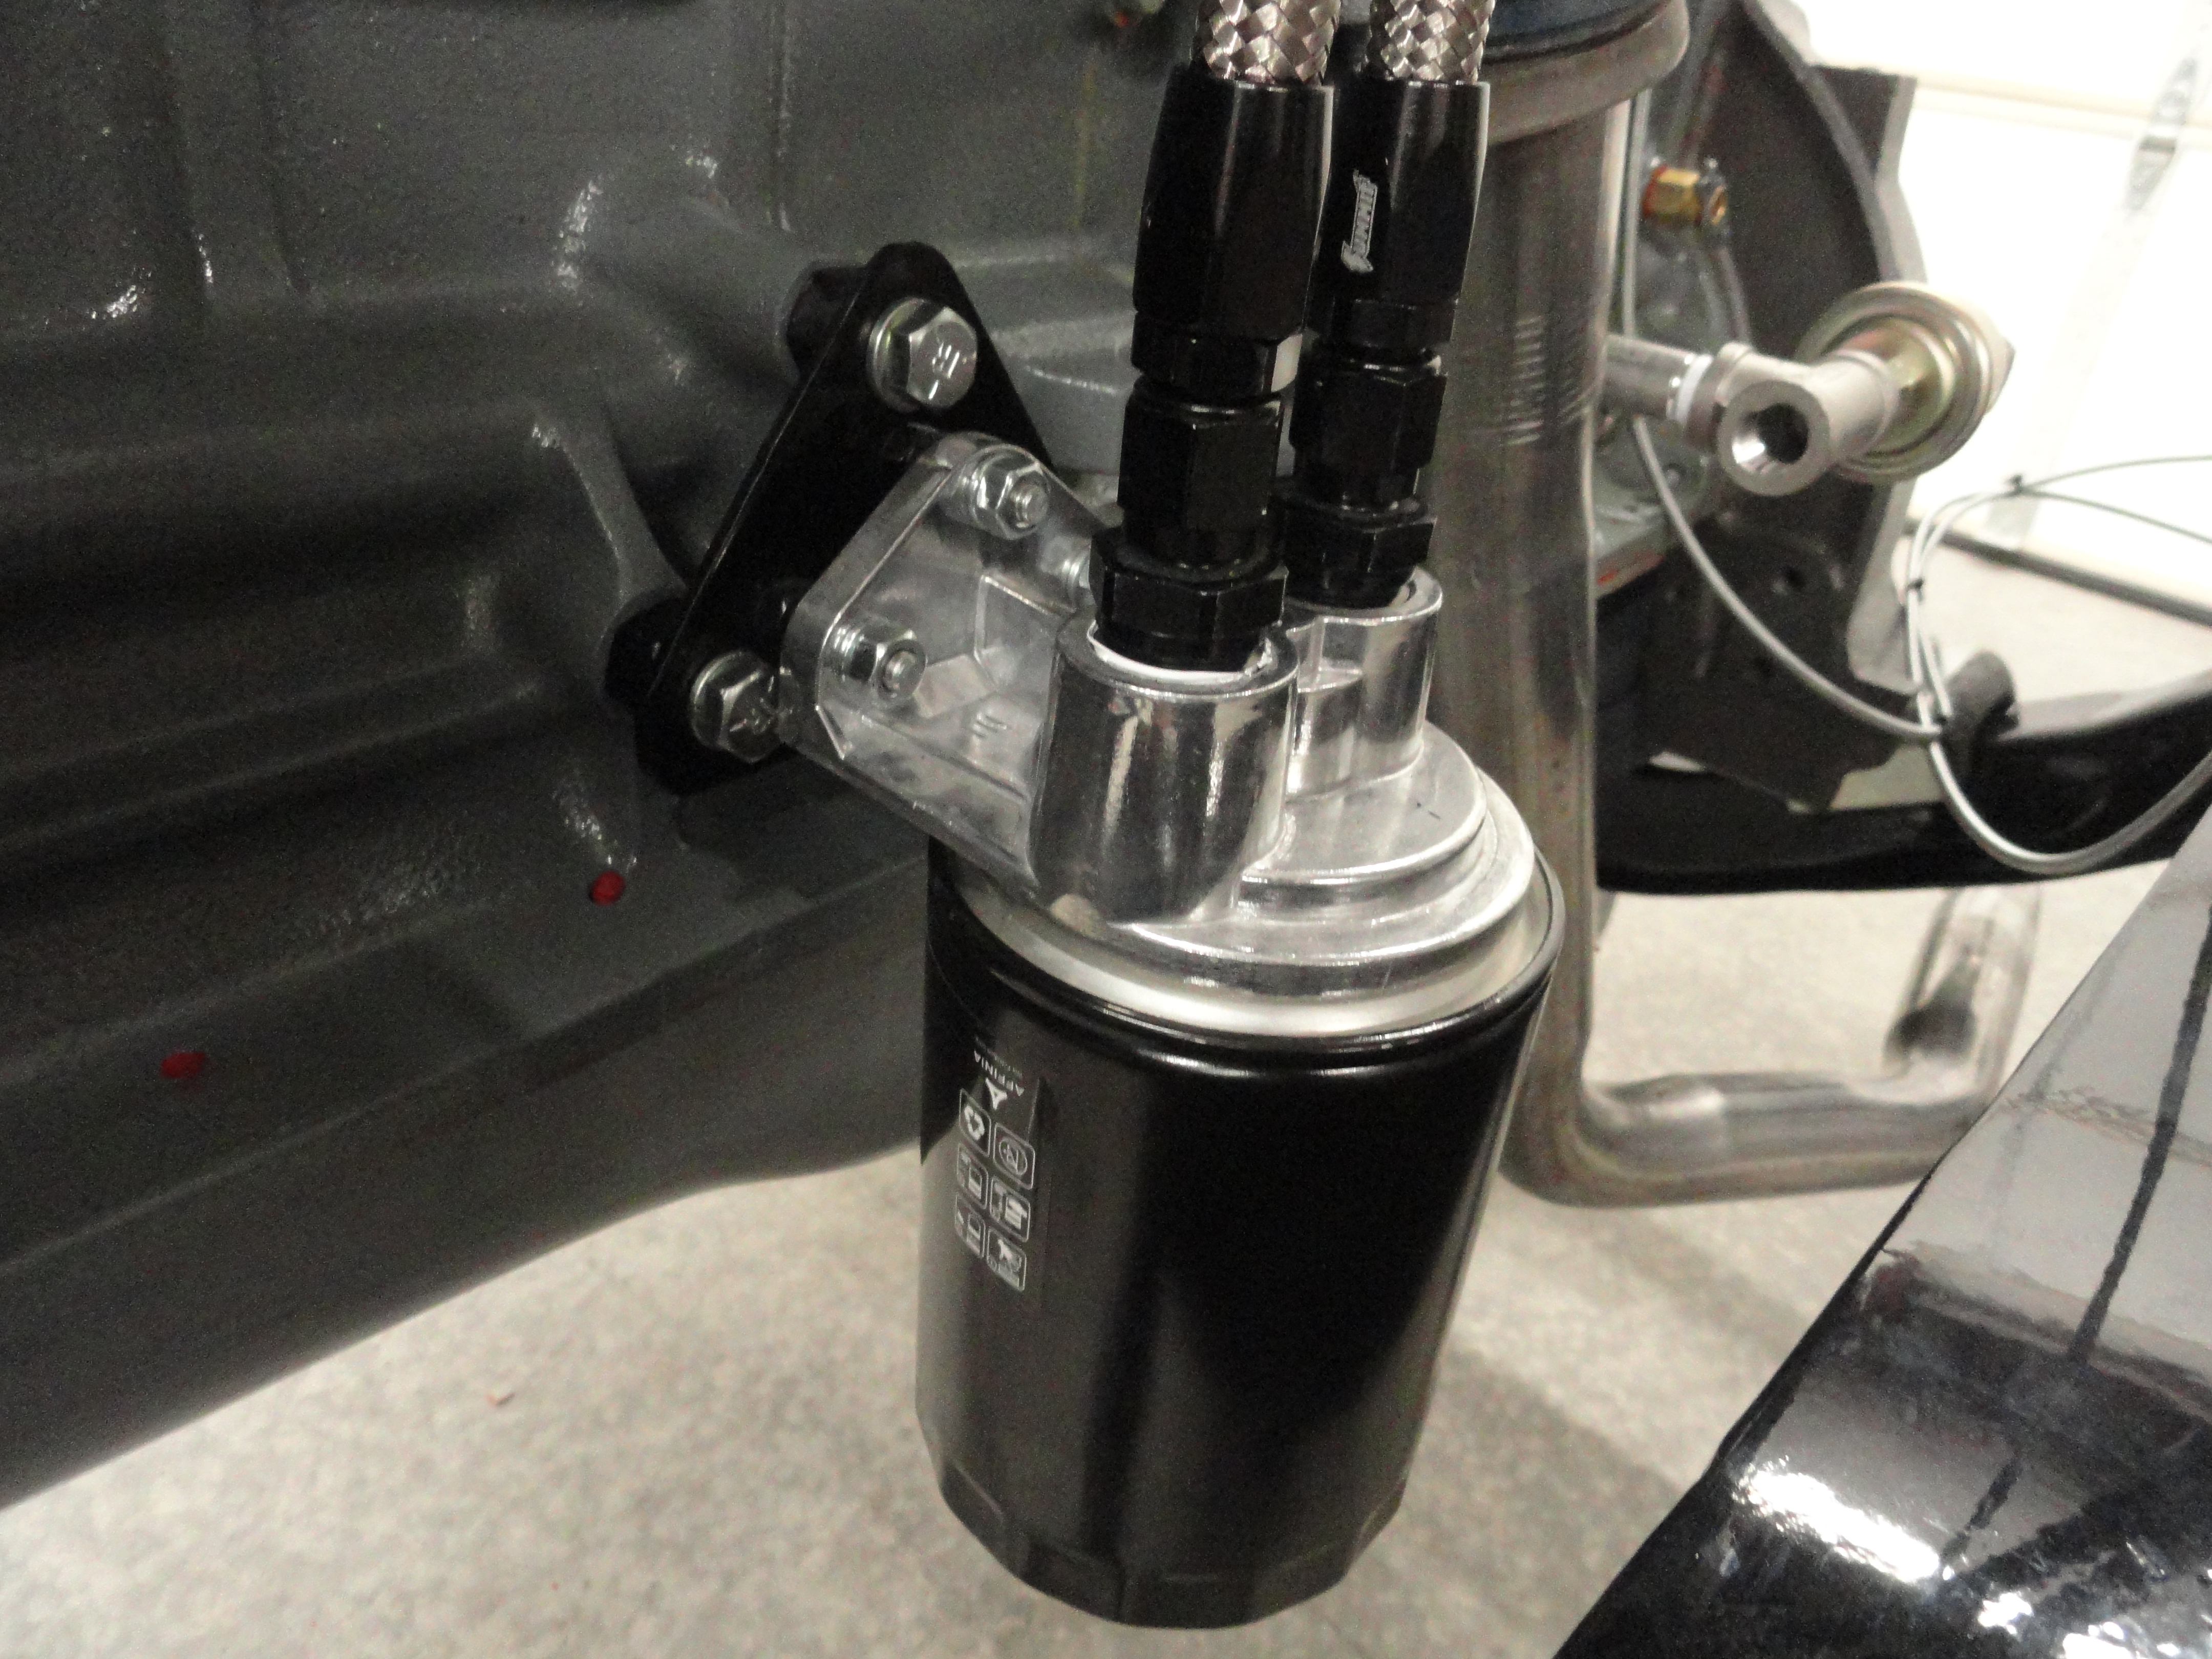
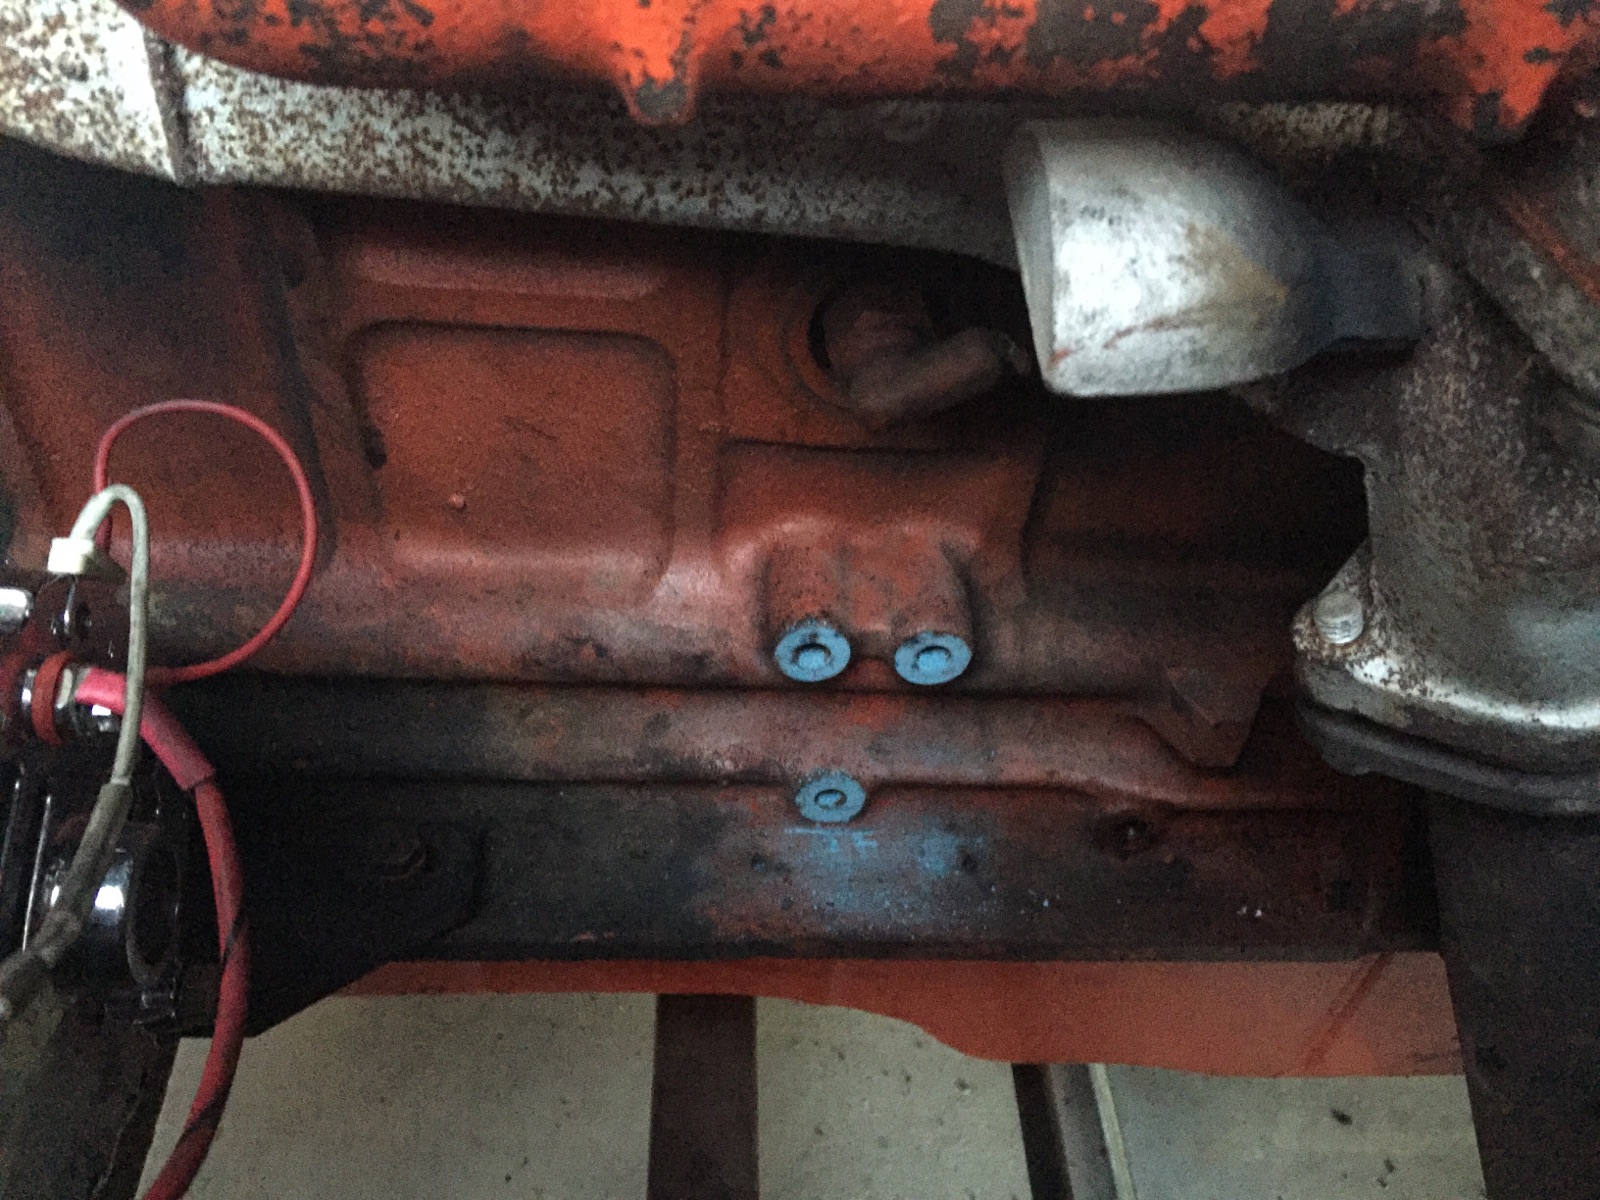
NEW Universal Solution One: This new adapter solves a few problems. First, it is mounted on the engine so there are no external forces pulling/pushing on the soft lines. Secondly, it can be mounted on any two Oil Pan mounting screws so it can be moved to several locations making it perfect for dual exhaust engines or engines with longer generators or shorter alternators. This is really the best solution for this vintage engine.
This solution truly is universal in that it also works for both bypass and full flow applications. Because of this new solution, we no longer care about the side mounting bosses and if they exist or not. This solution puts the oil filter higher than the lowest part of the oil pan, so there is no concern of damage or interference. An added benefit is it gives those with side motor mounts the option of locating this adapter anywhere along the drivers side oil pan away from side mounts and exhaust perhaps behind the exhaust.
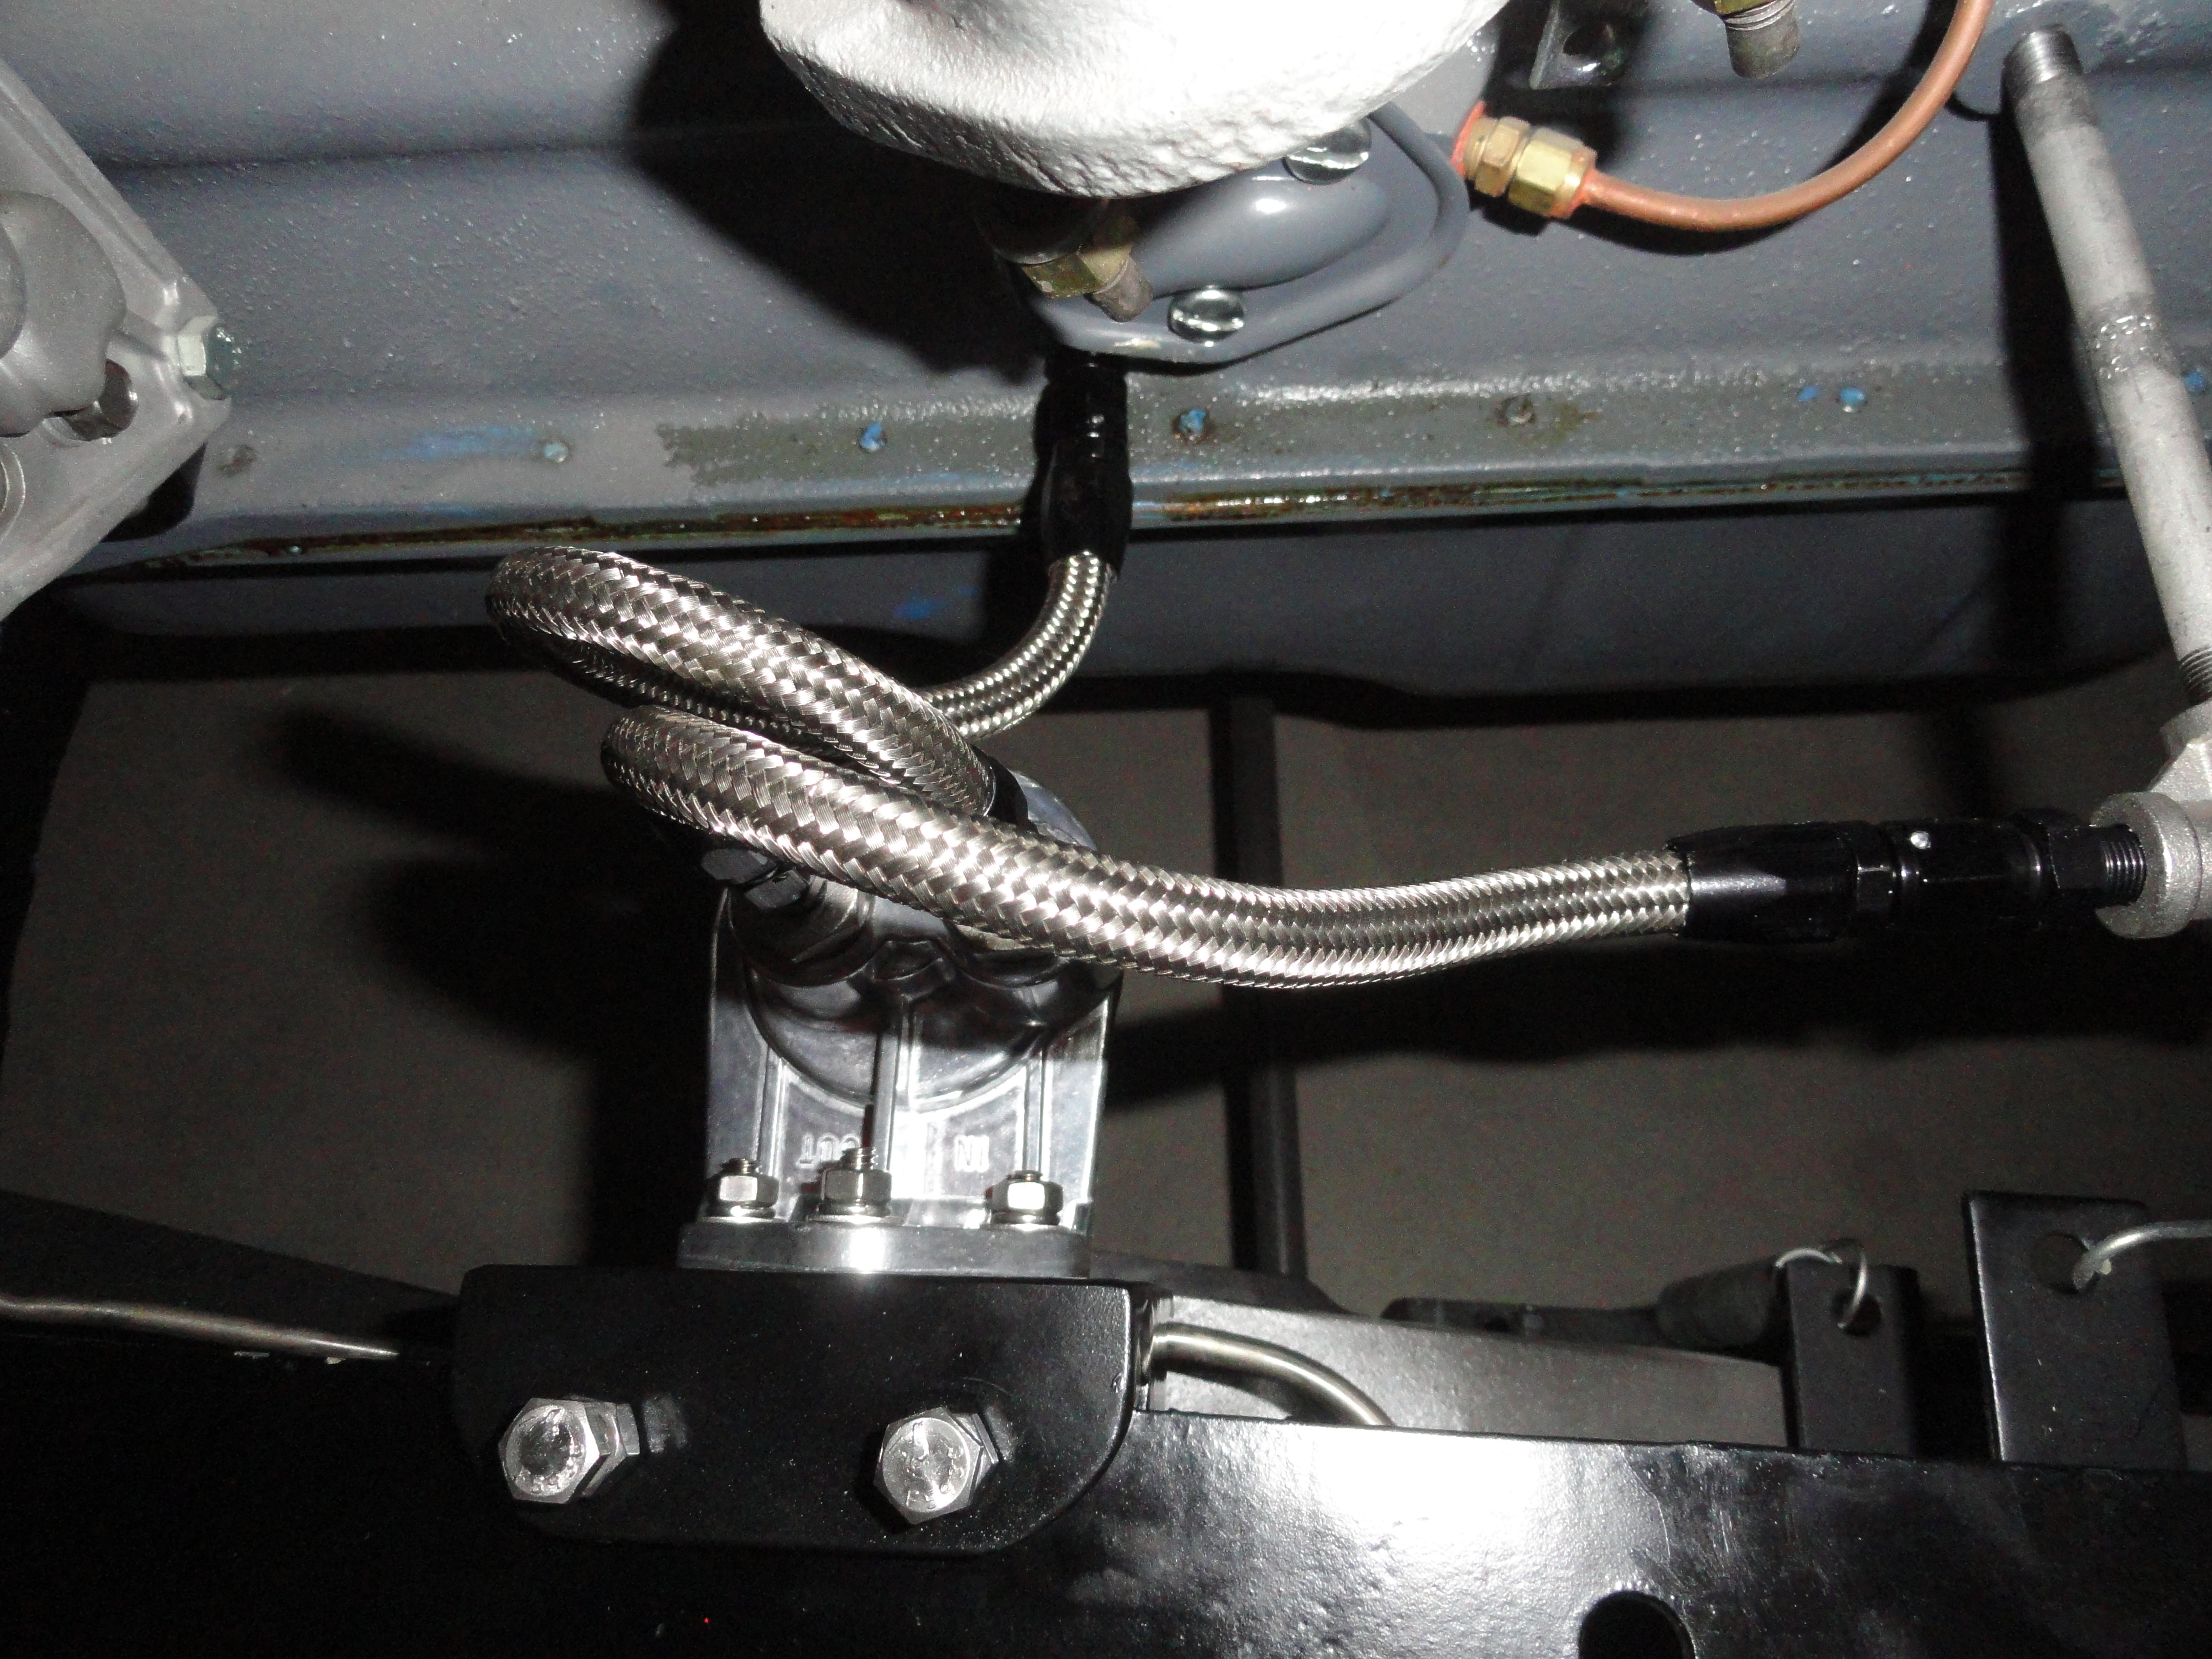
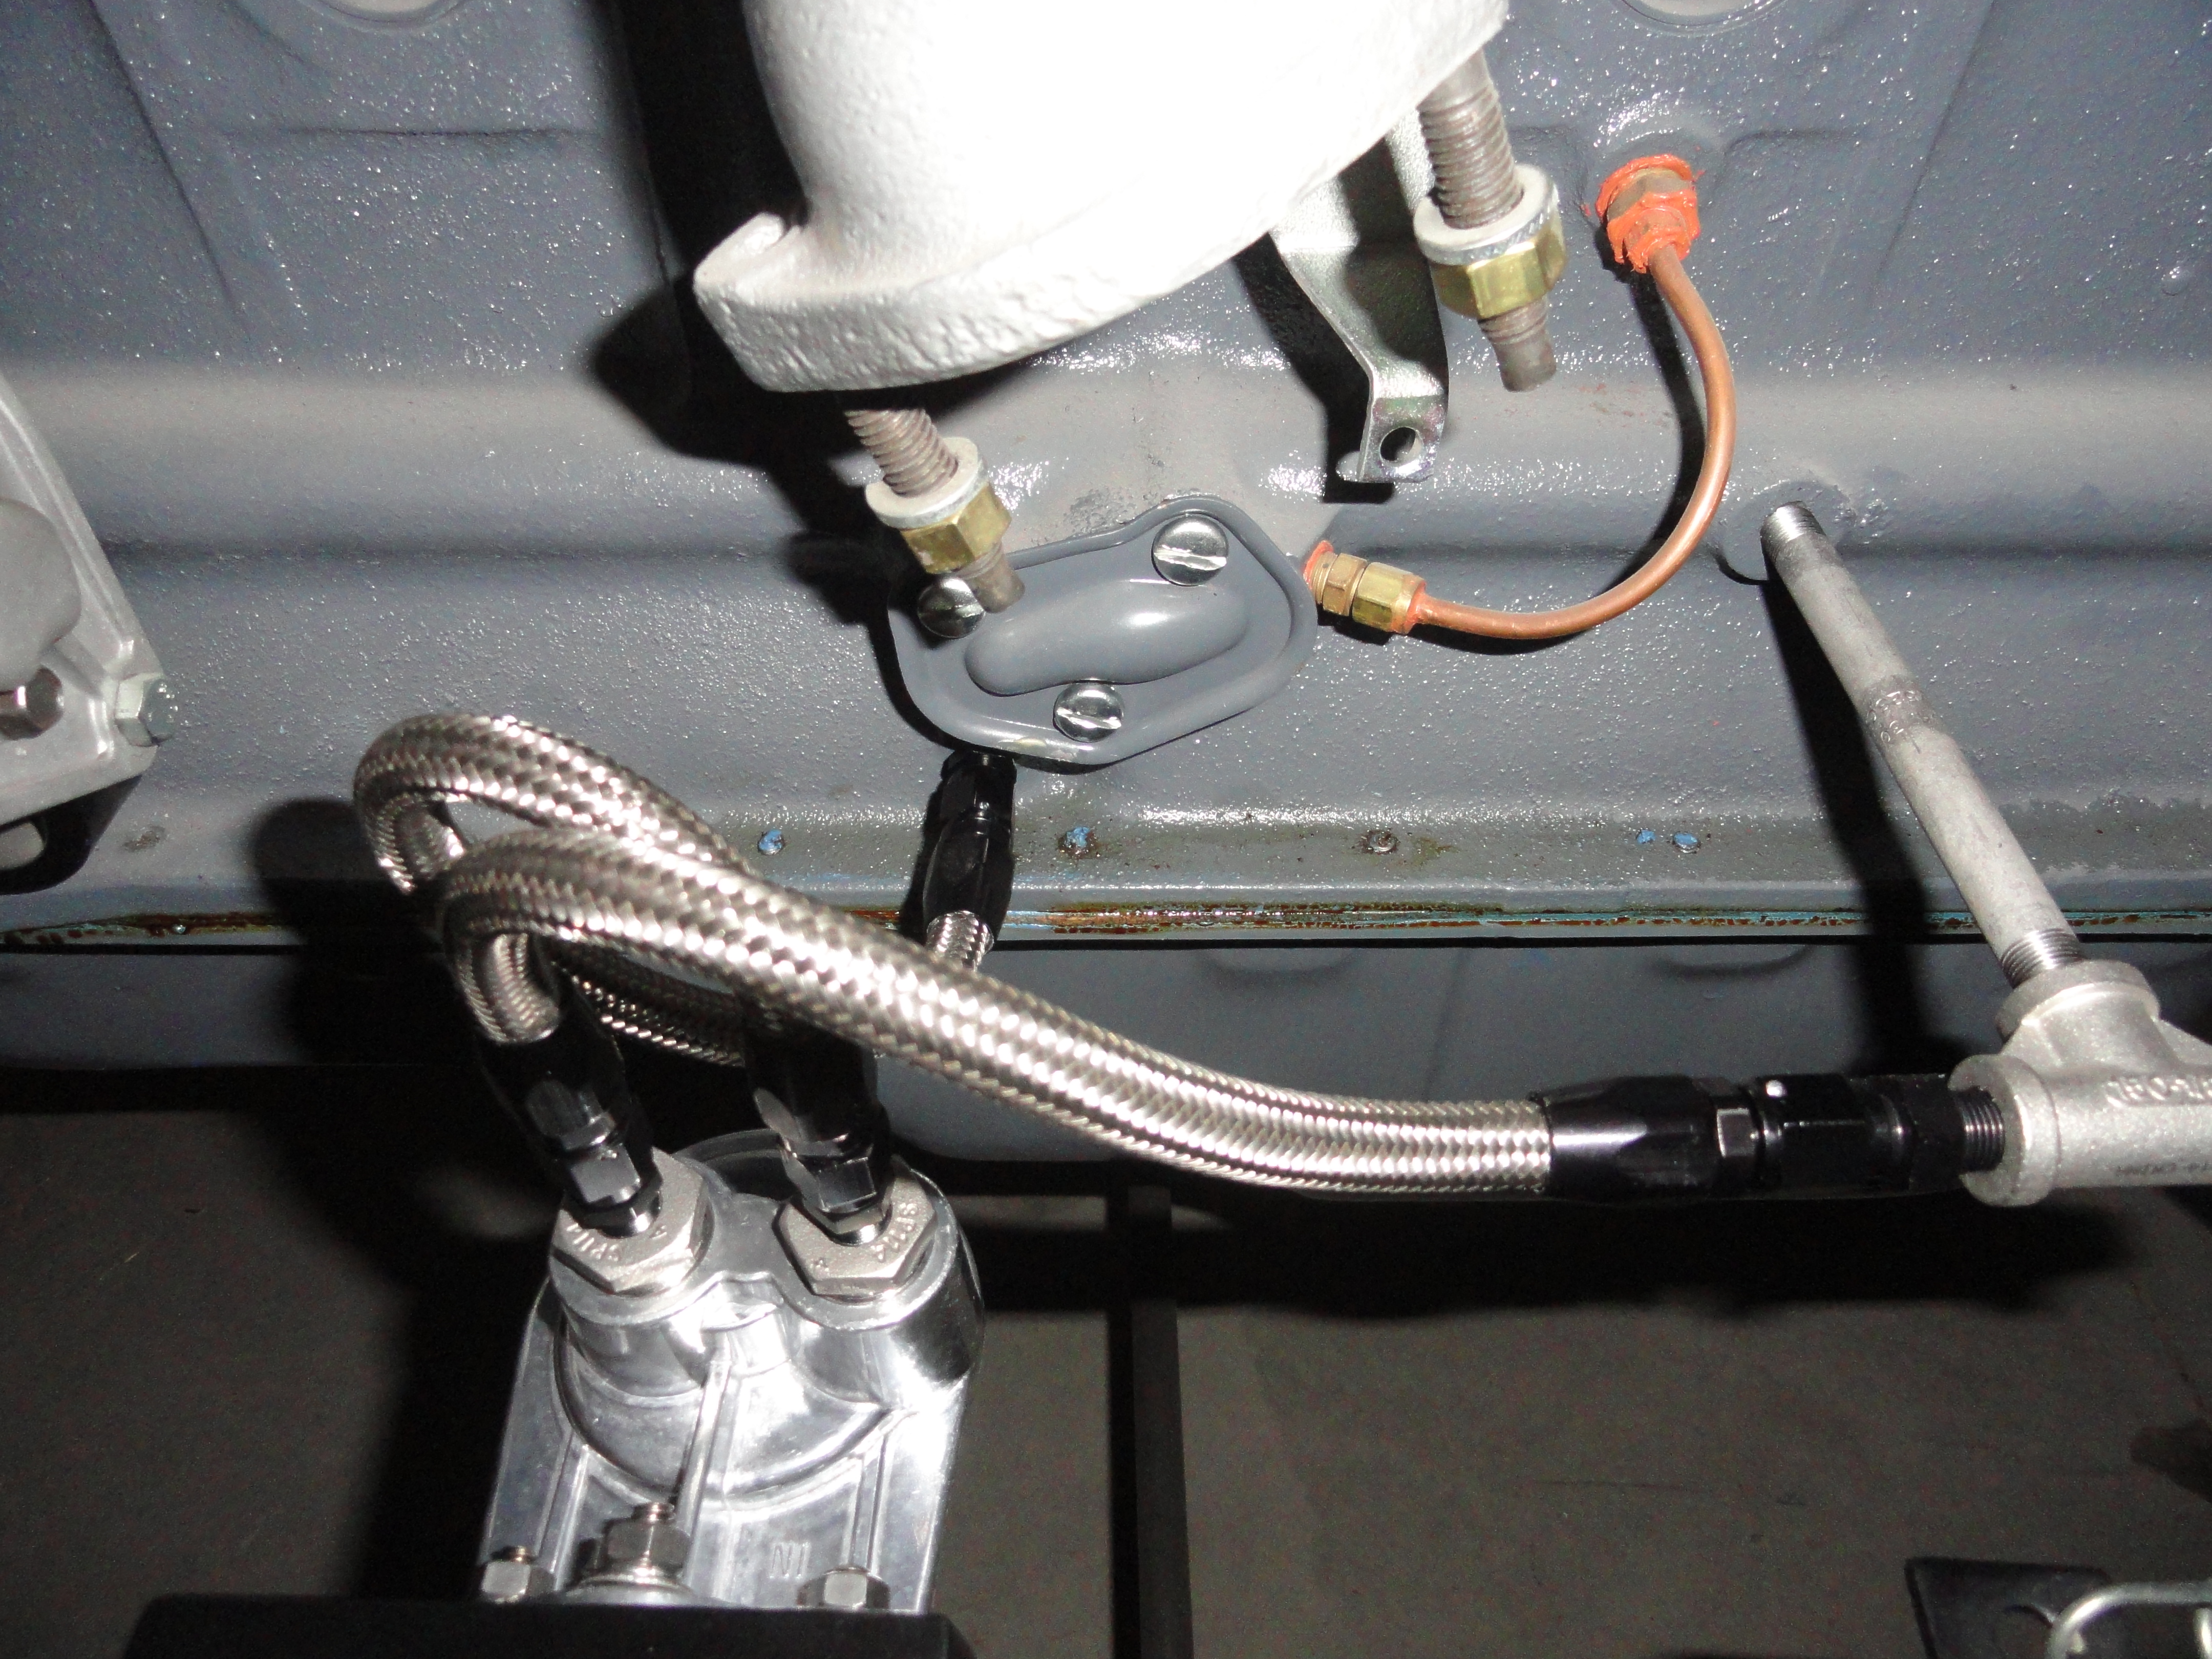
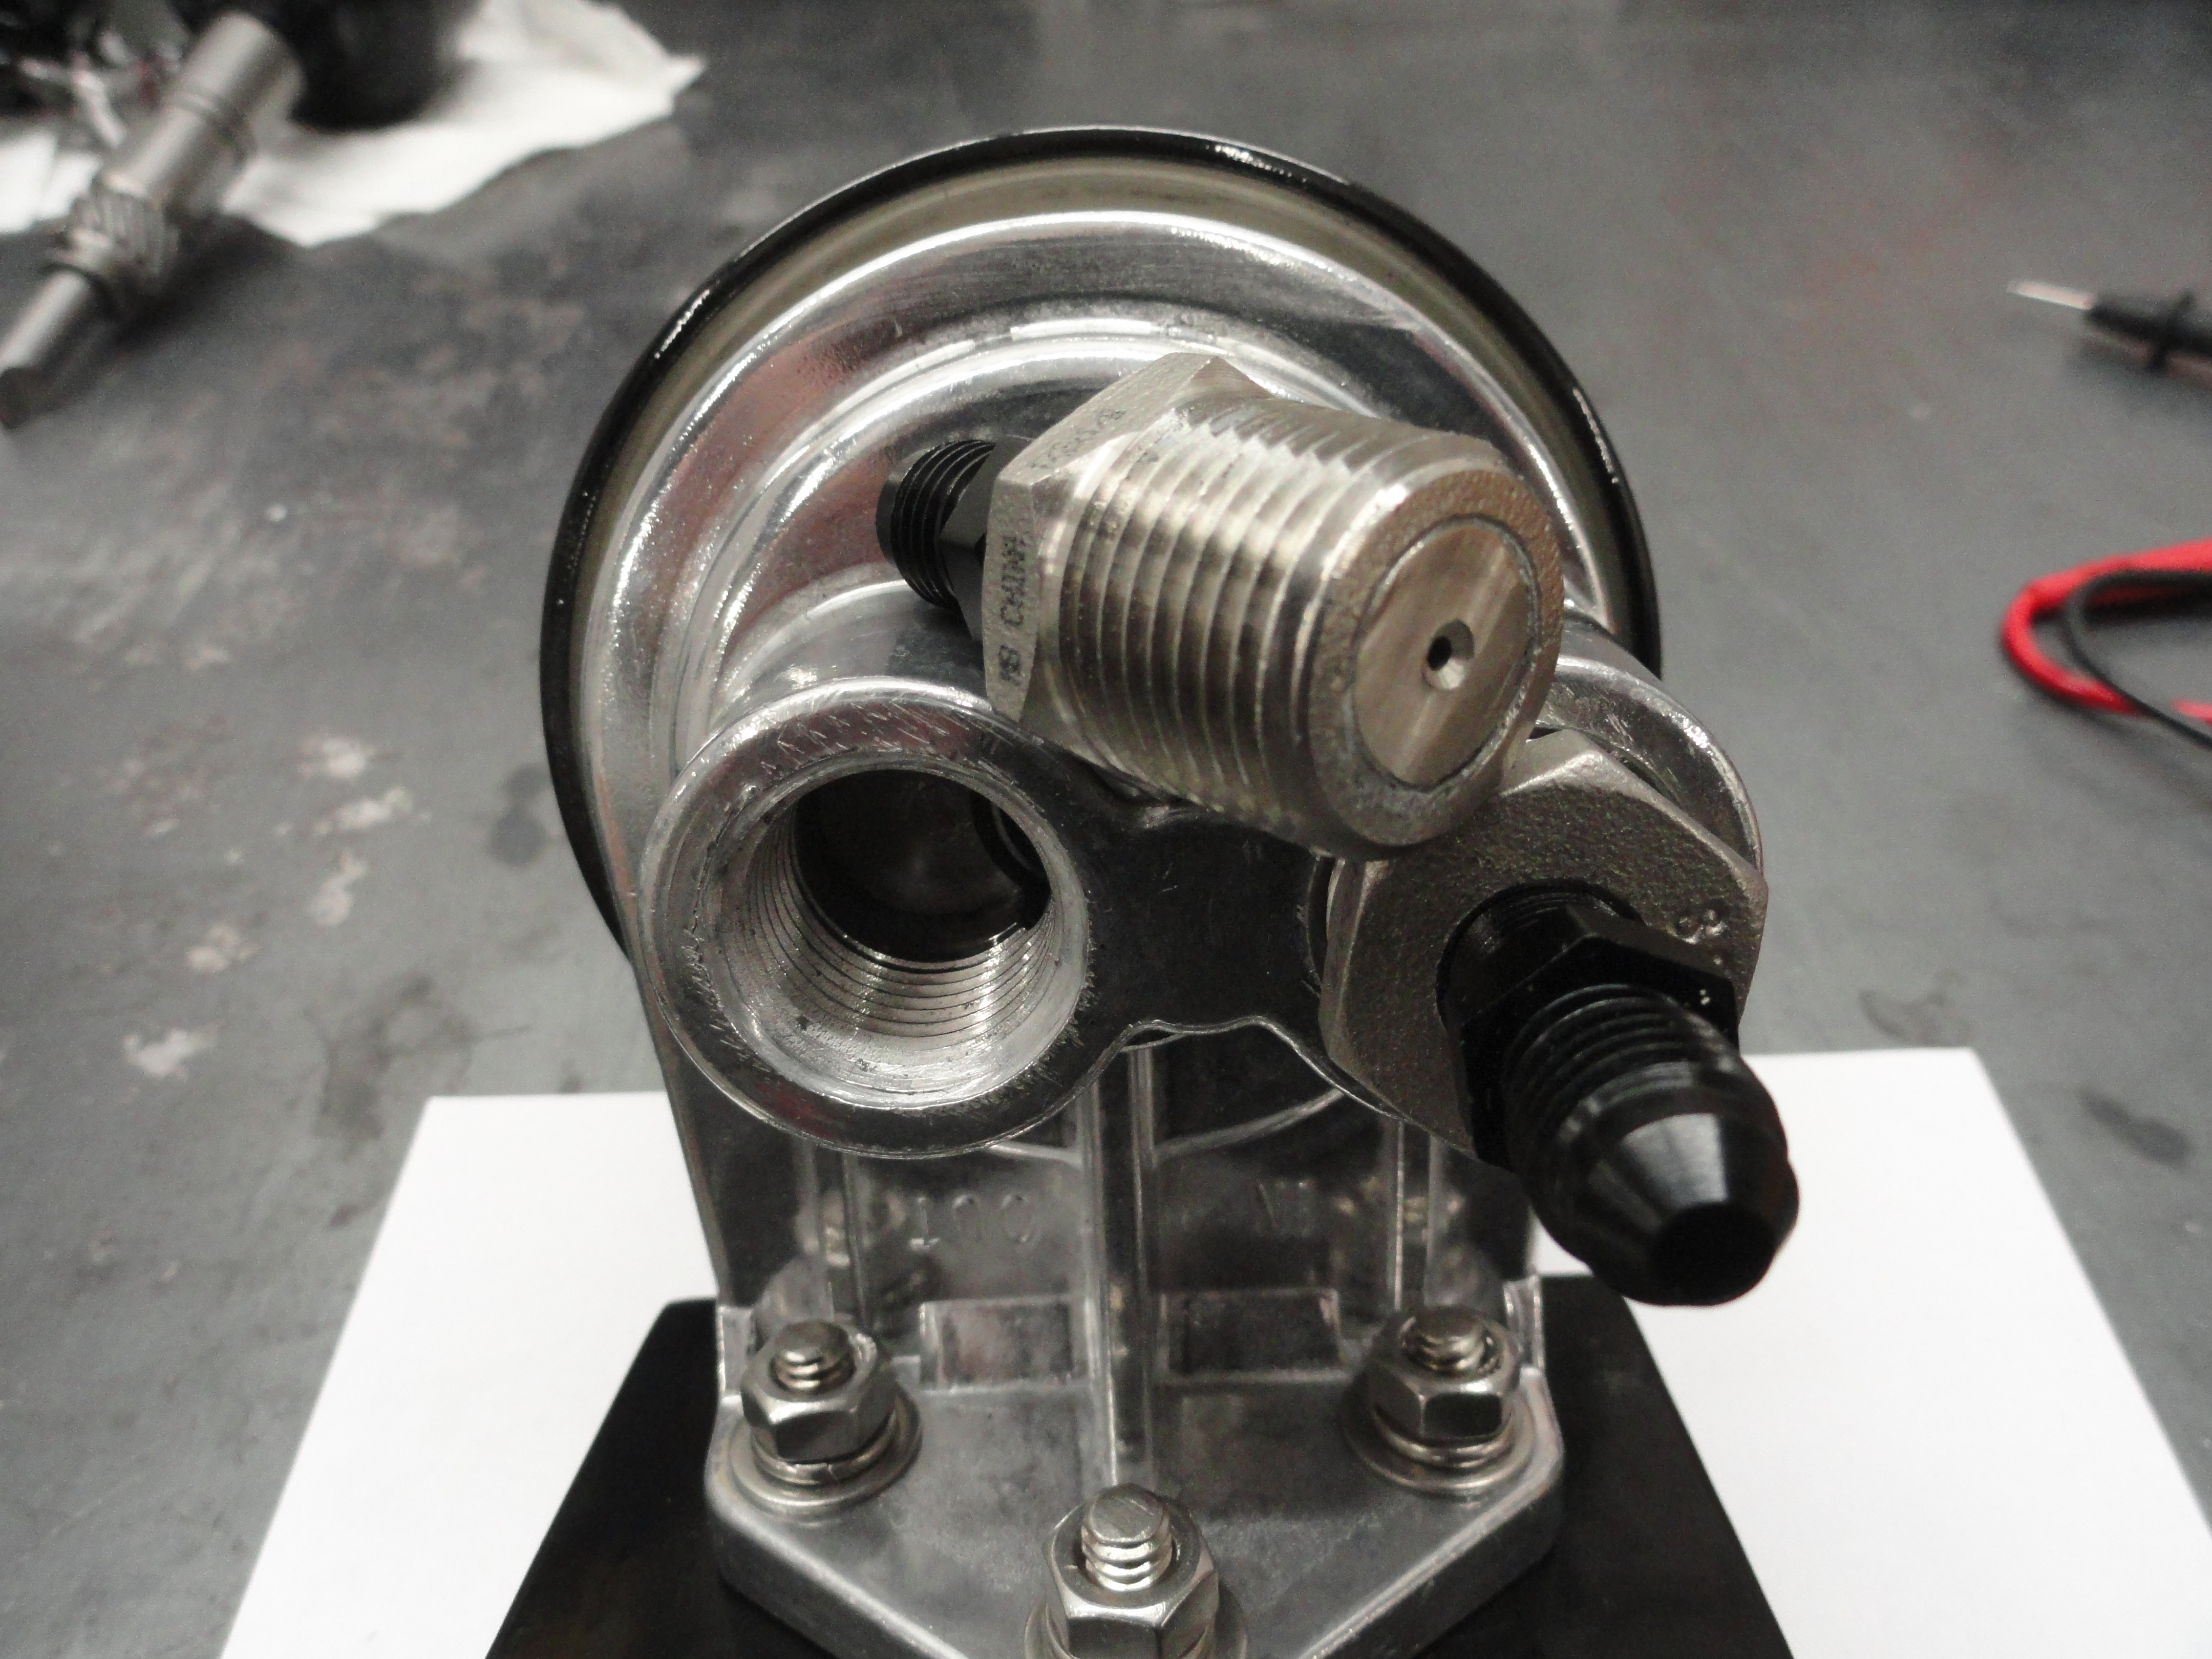
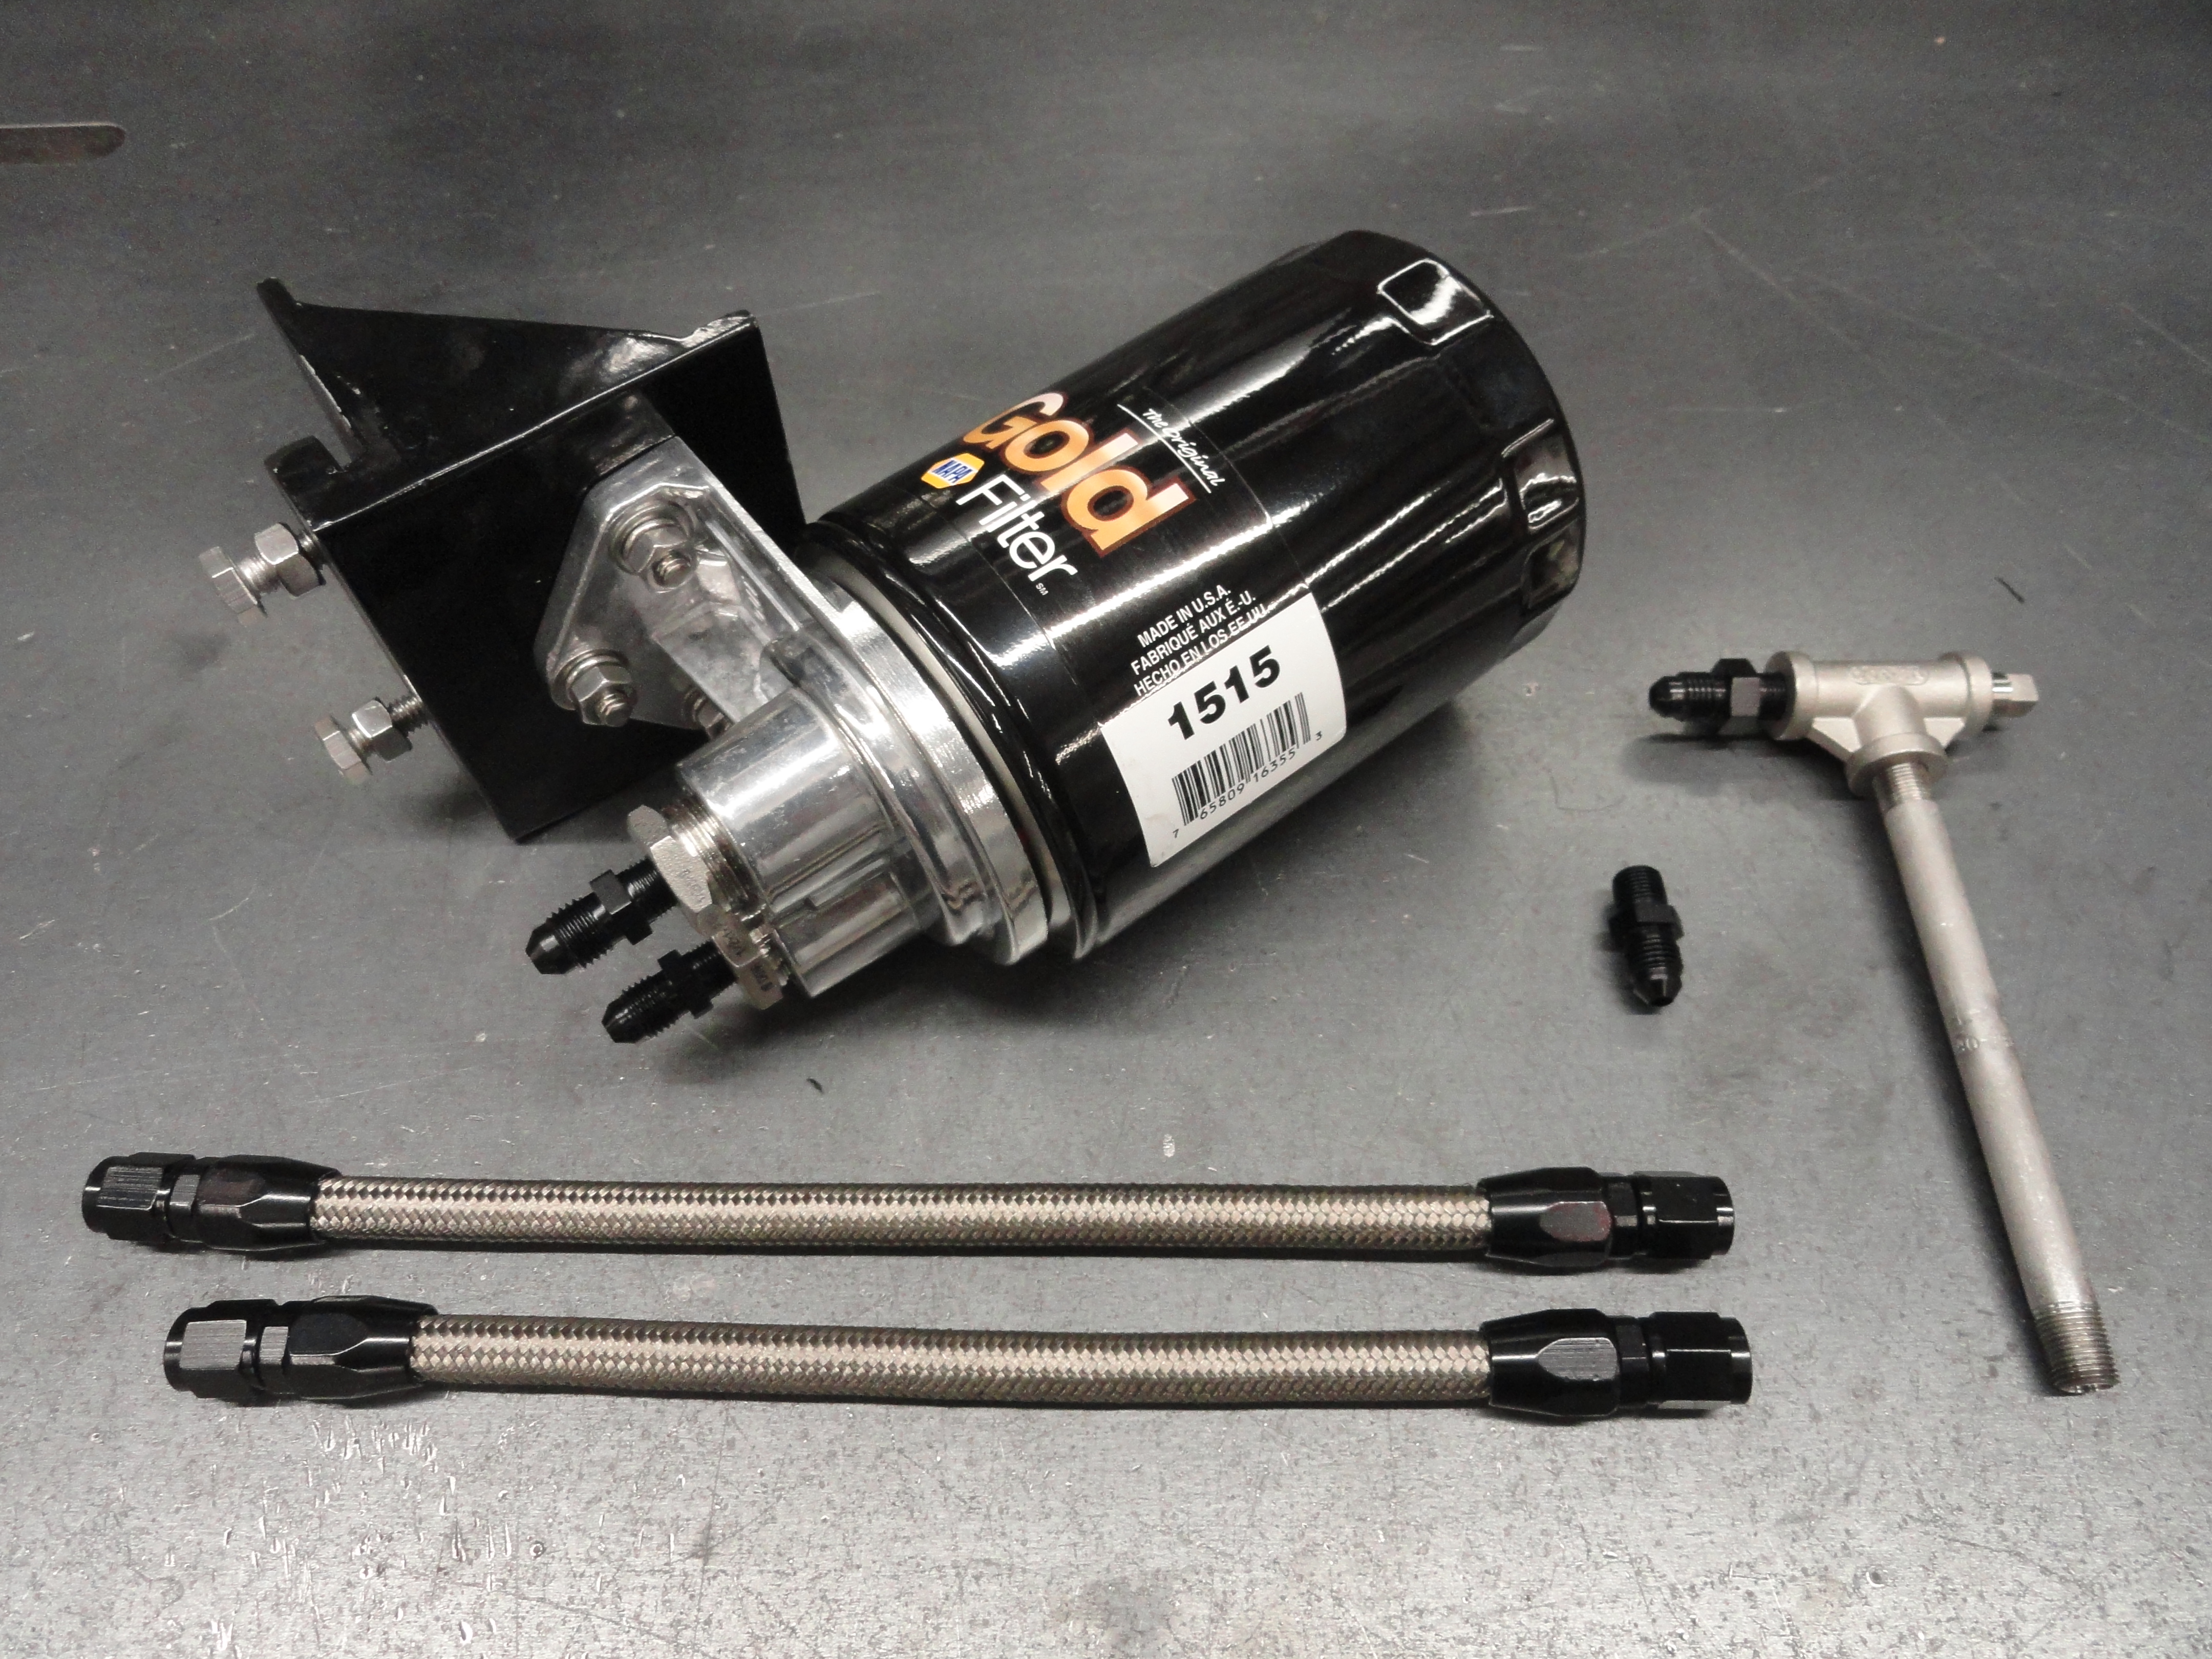
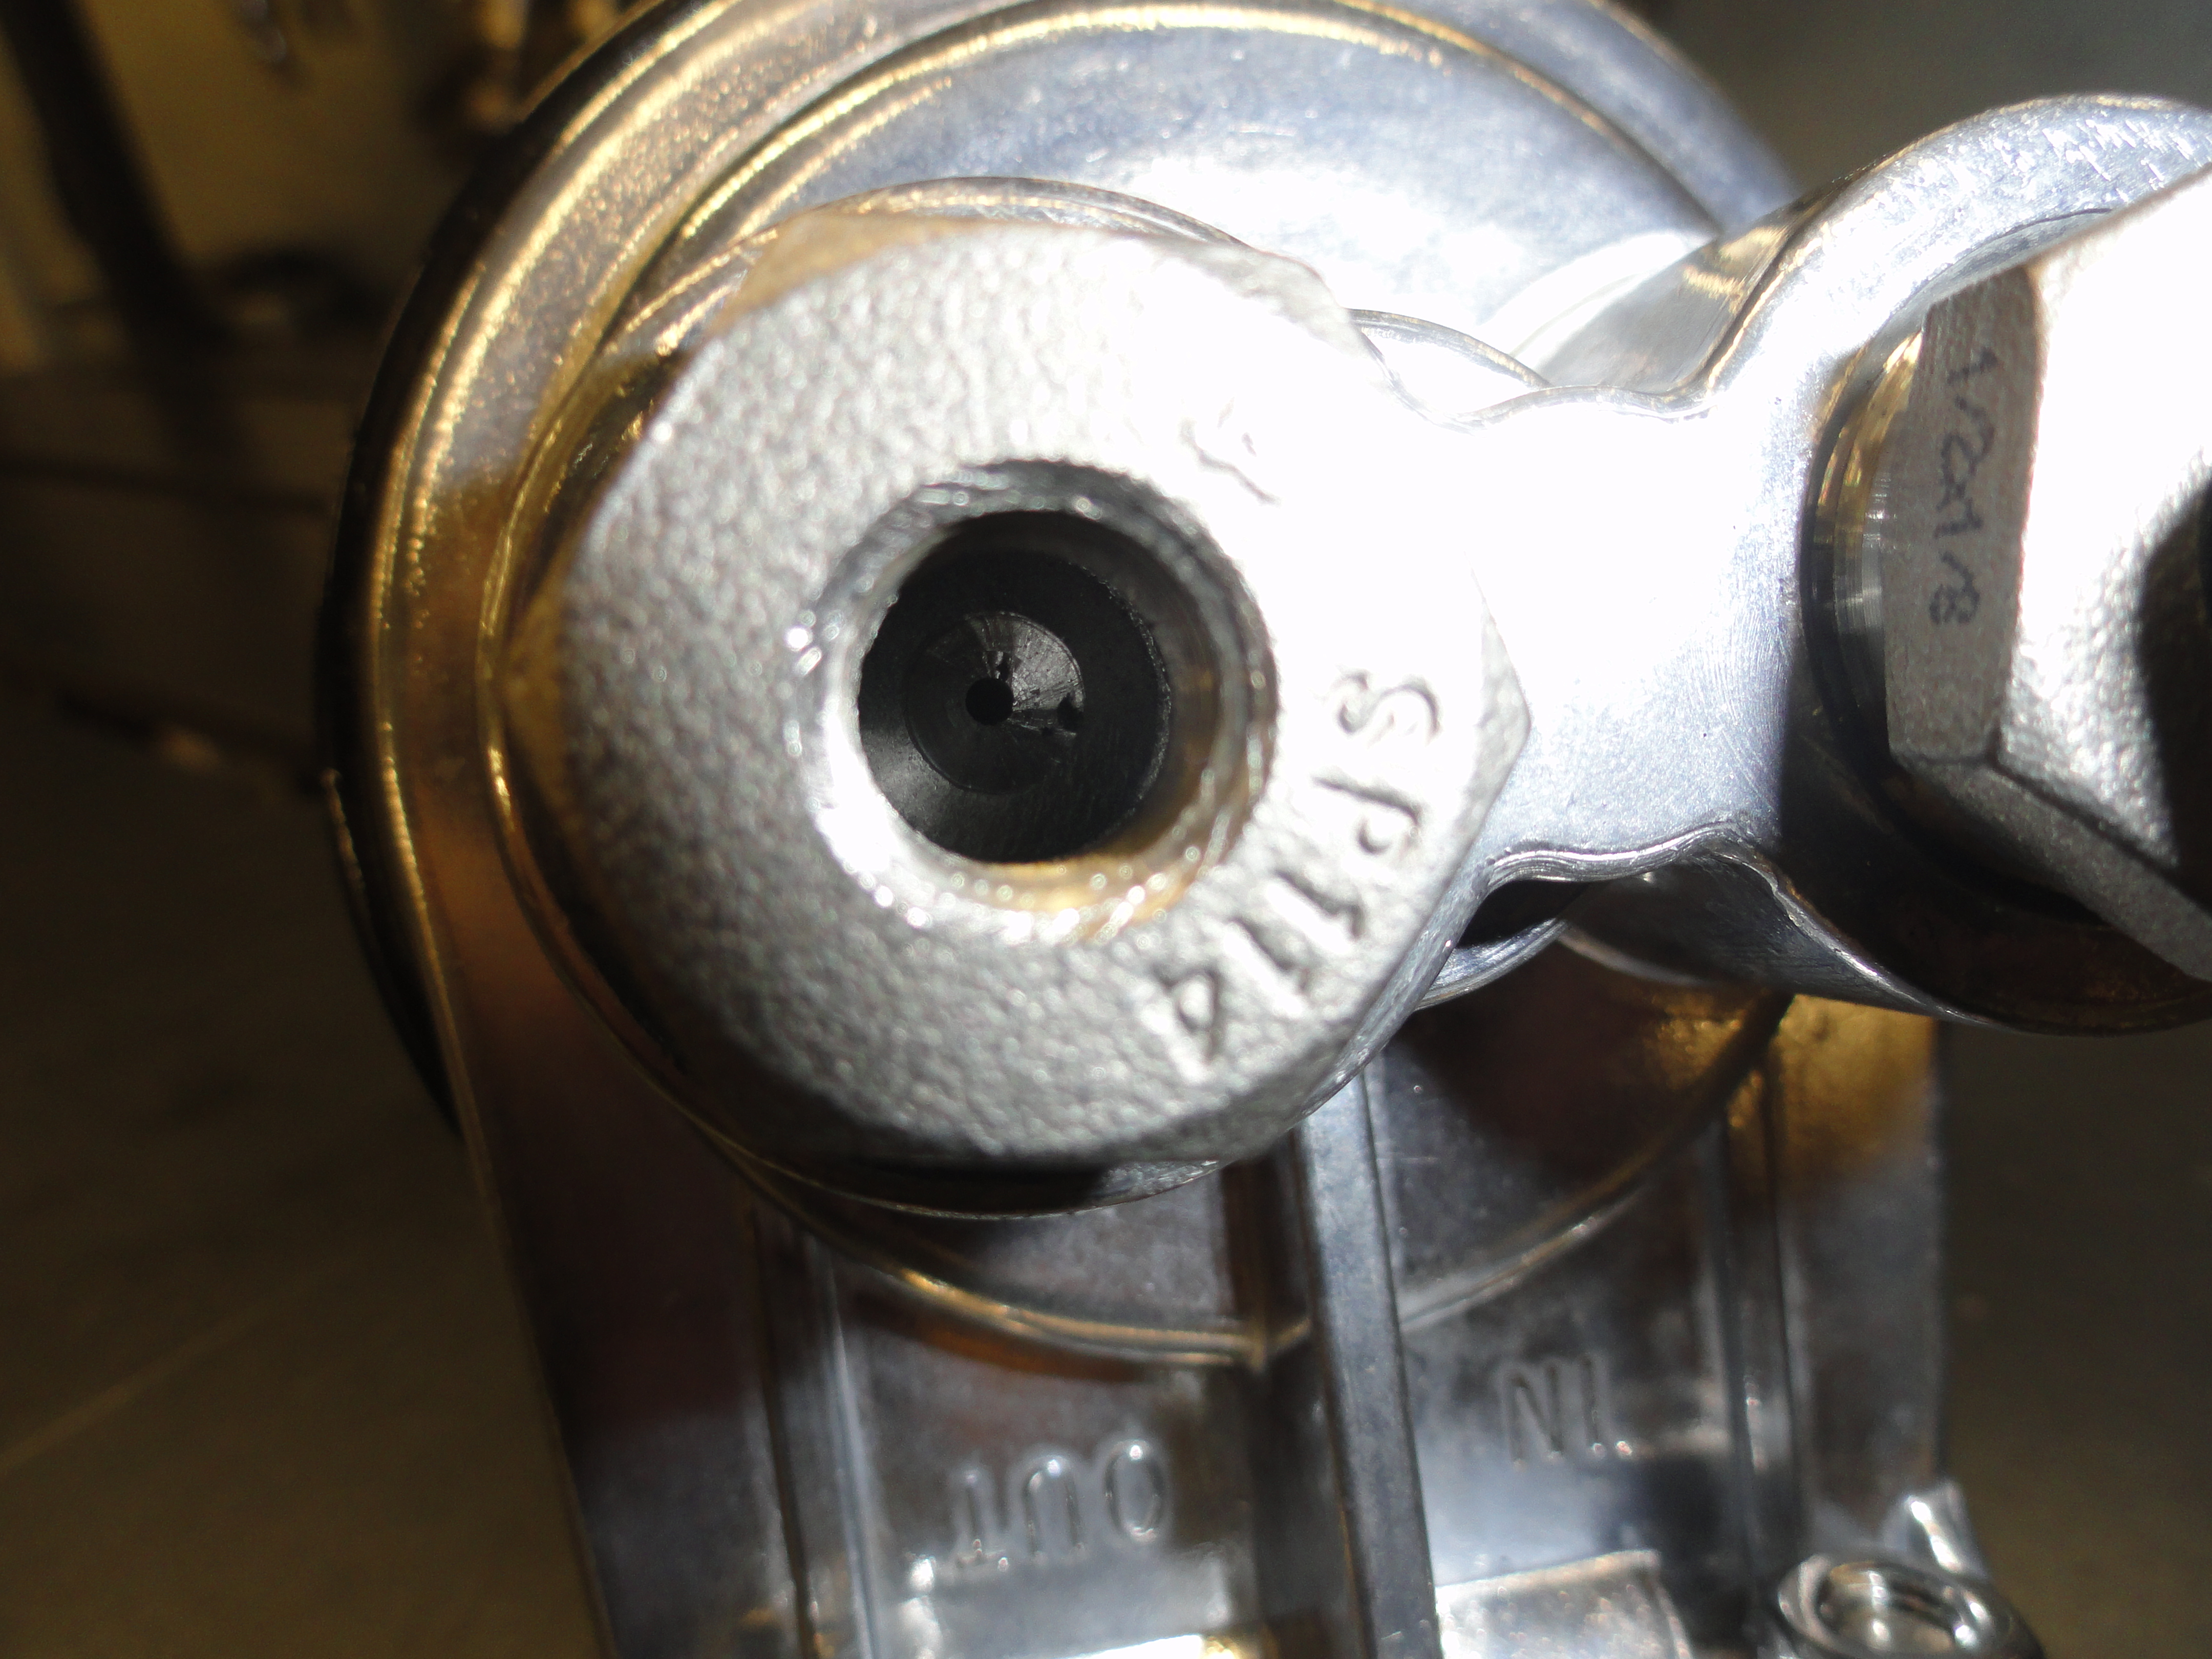
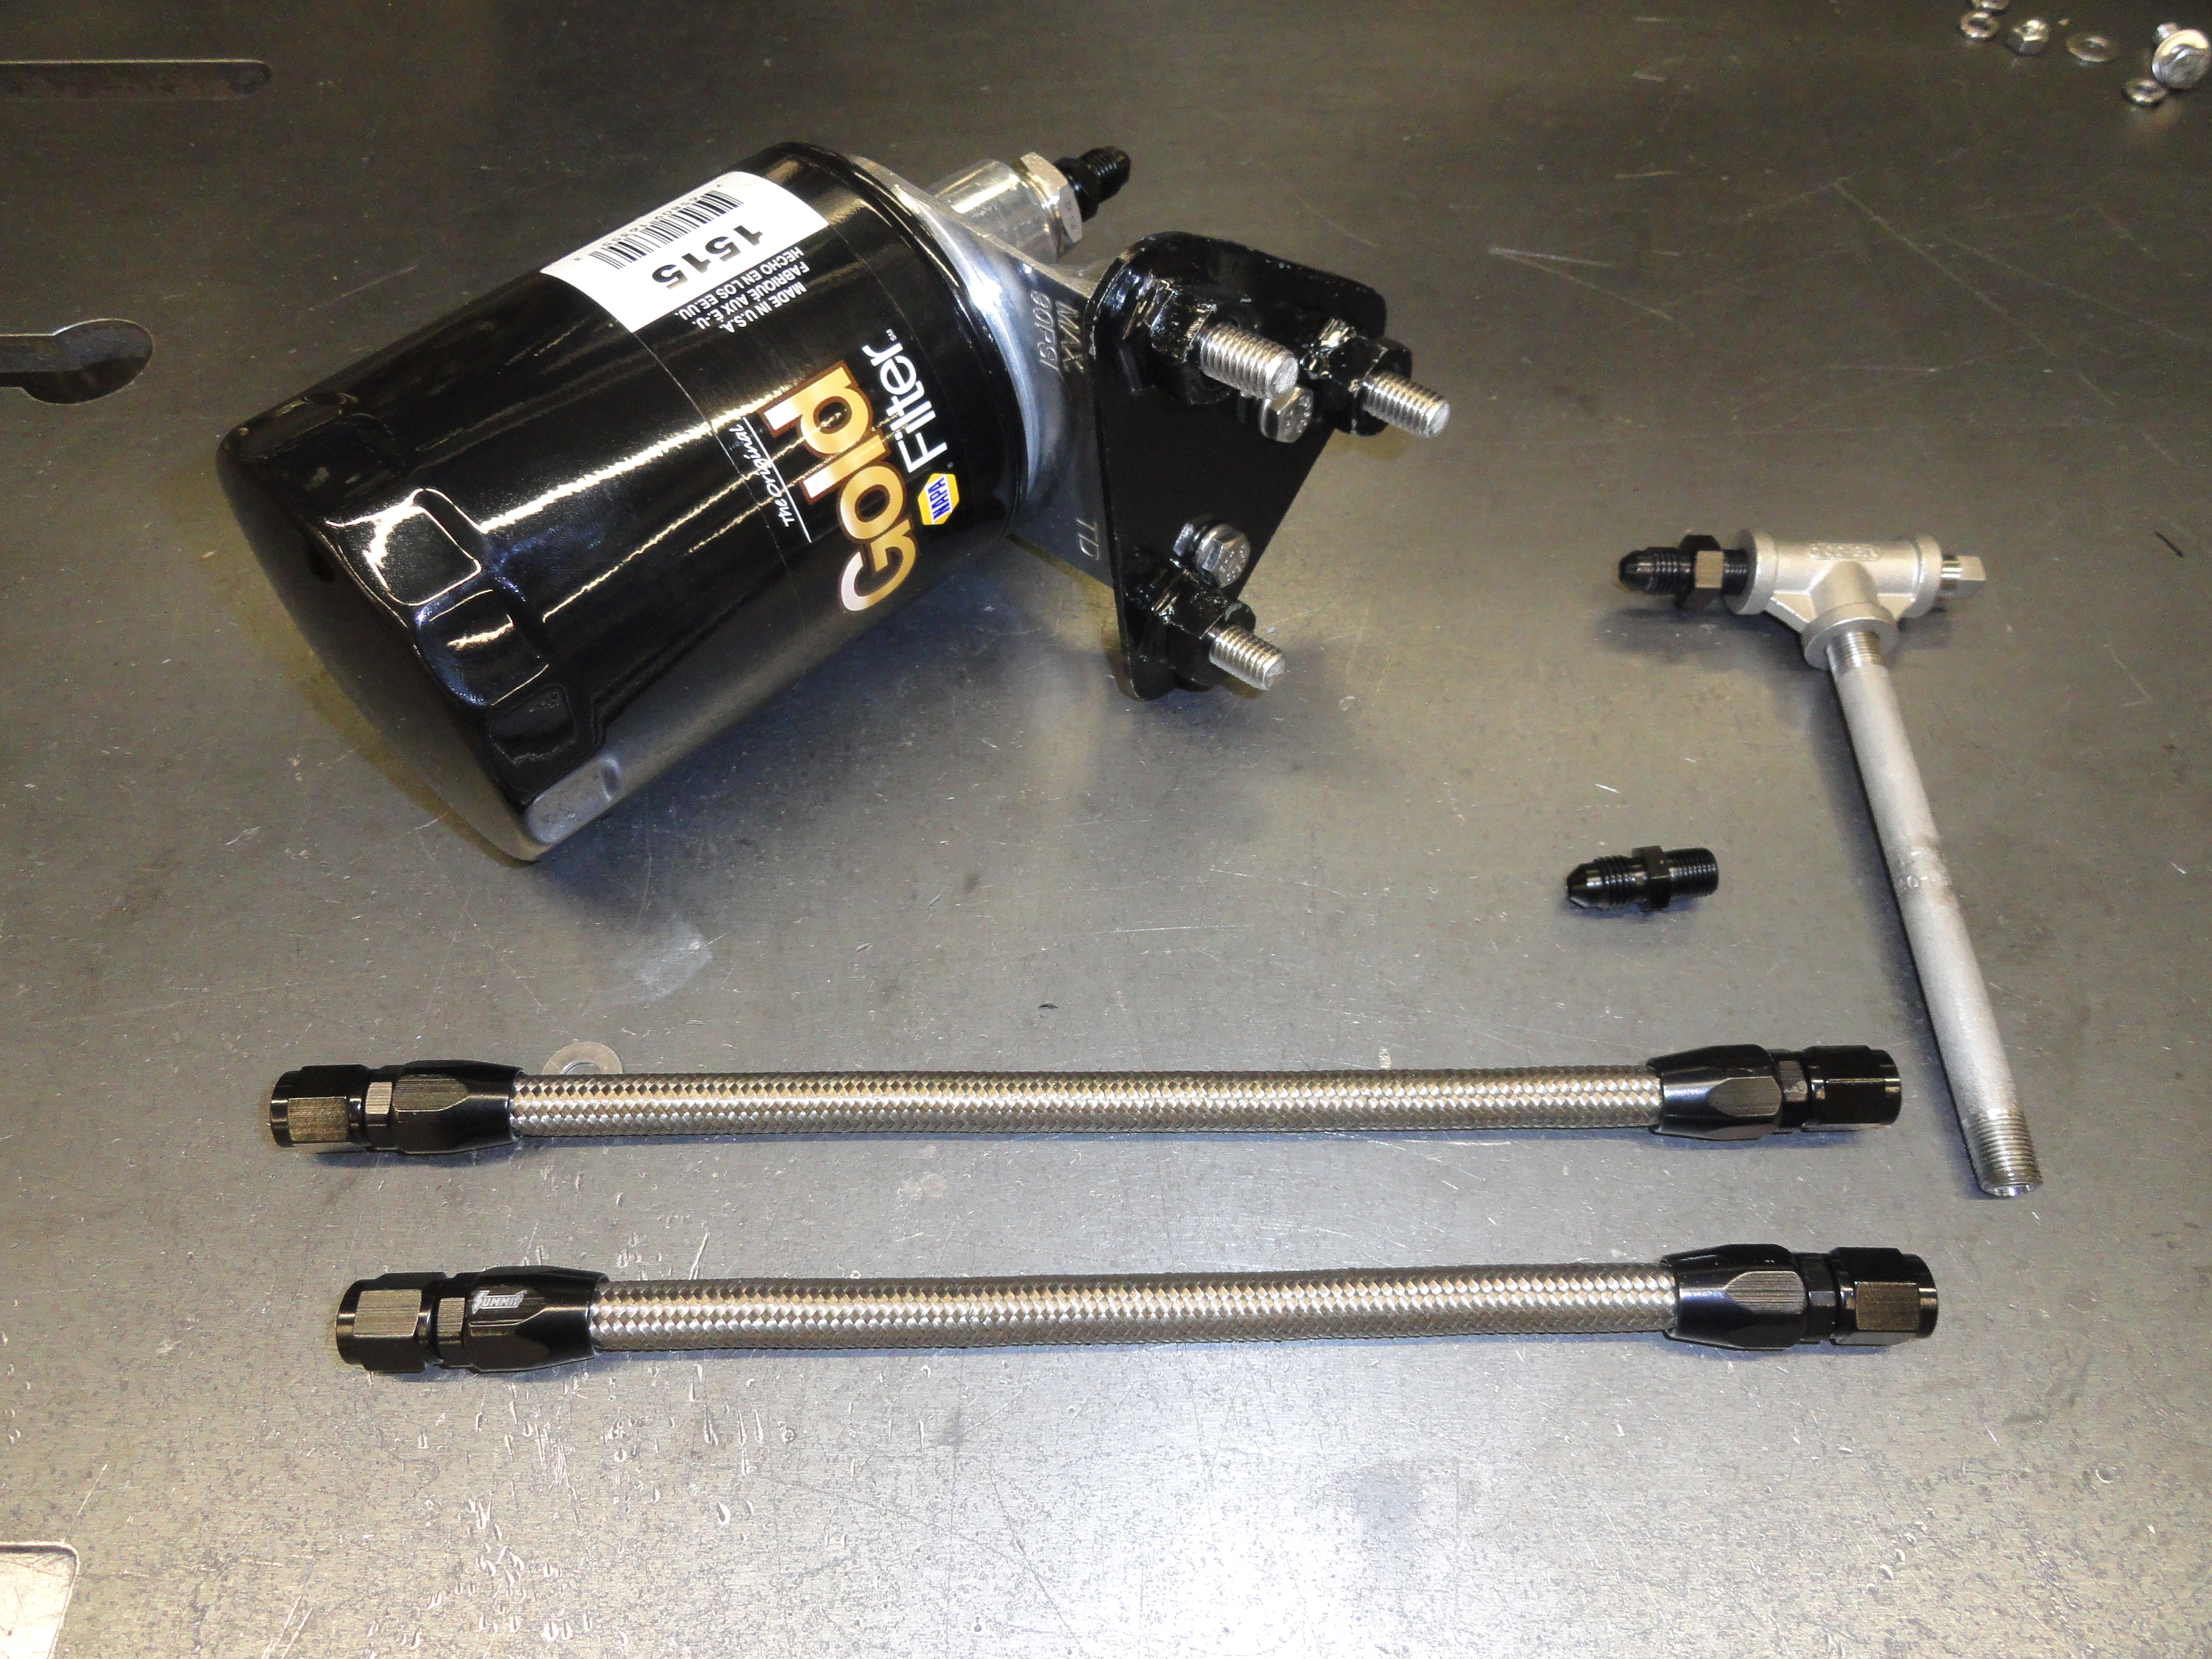
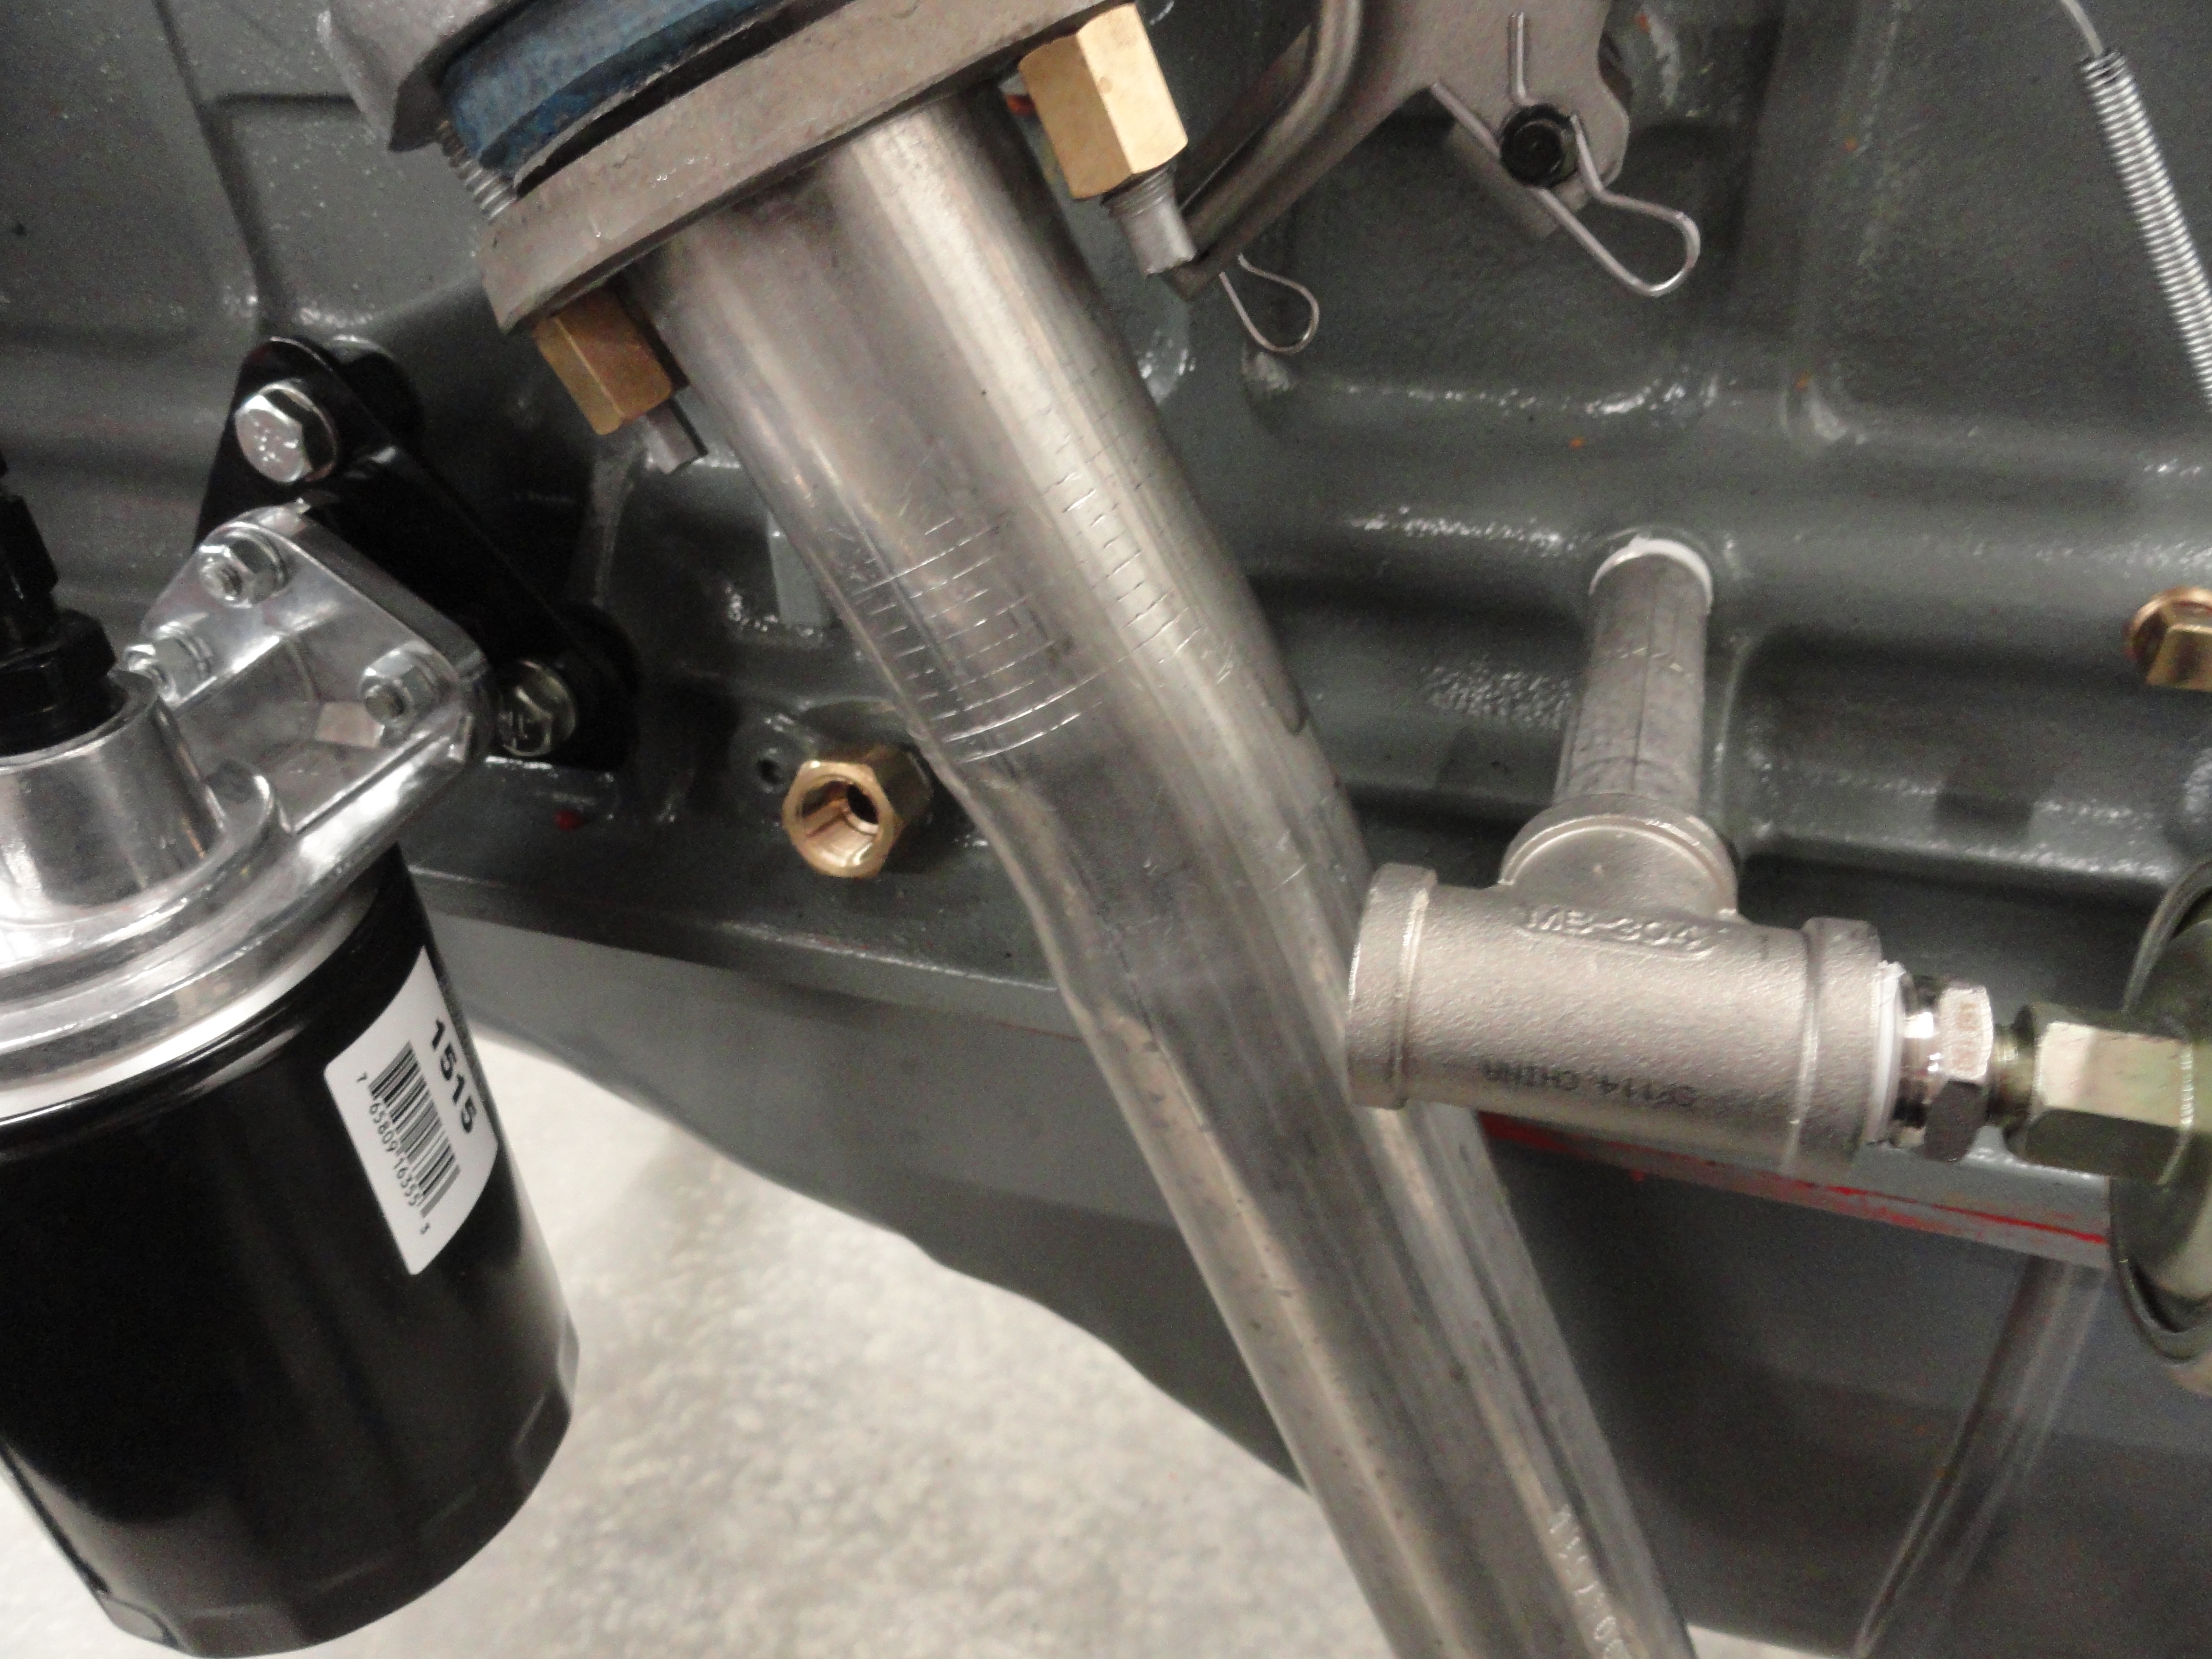
You simply locate two 1/4" mounting screws on the oil pan, install the adapter with two 1-1/4" long 1/4-20 screws and follow the connection procedures outlined later in this document. This adapter works with all GM 6 cylinders with oil pan screws that are 2-5/8" apart. Our favored Trans-Dapt 1028 Spin-On Adapter is used with a modification for Bypass Filtration that reduces the outlet port to 1/16" to work exactly like the stock system or not if for full flow. Install the bracket as far forward as possible away from the exhaust just behind the Generator or Alternator. To efficiently get around the exhaust system, a 1/8" NPT 4 inch Stainless Steel pipe is used with a Stainless Tee connection for connecting to the Oil Pressure Gauge. All fittings except the -4AN fittings at the Adapter are Stainless Steel.
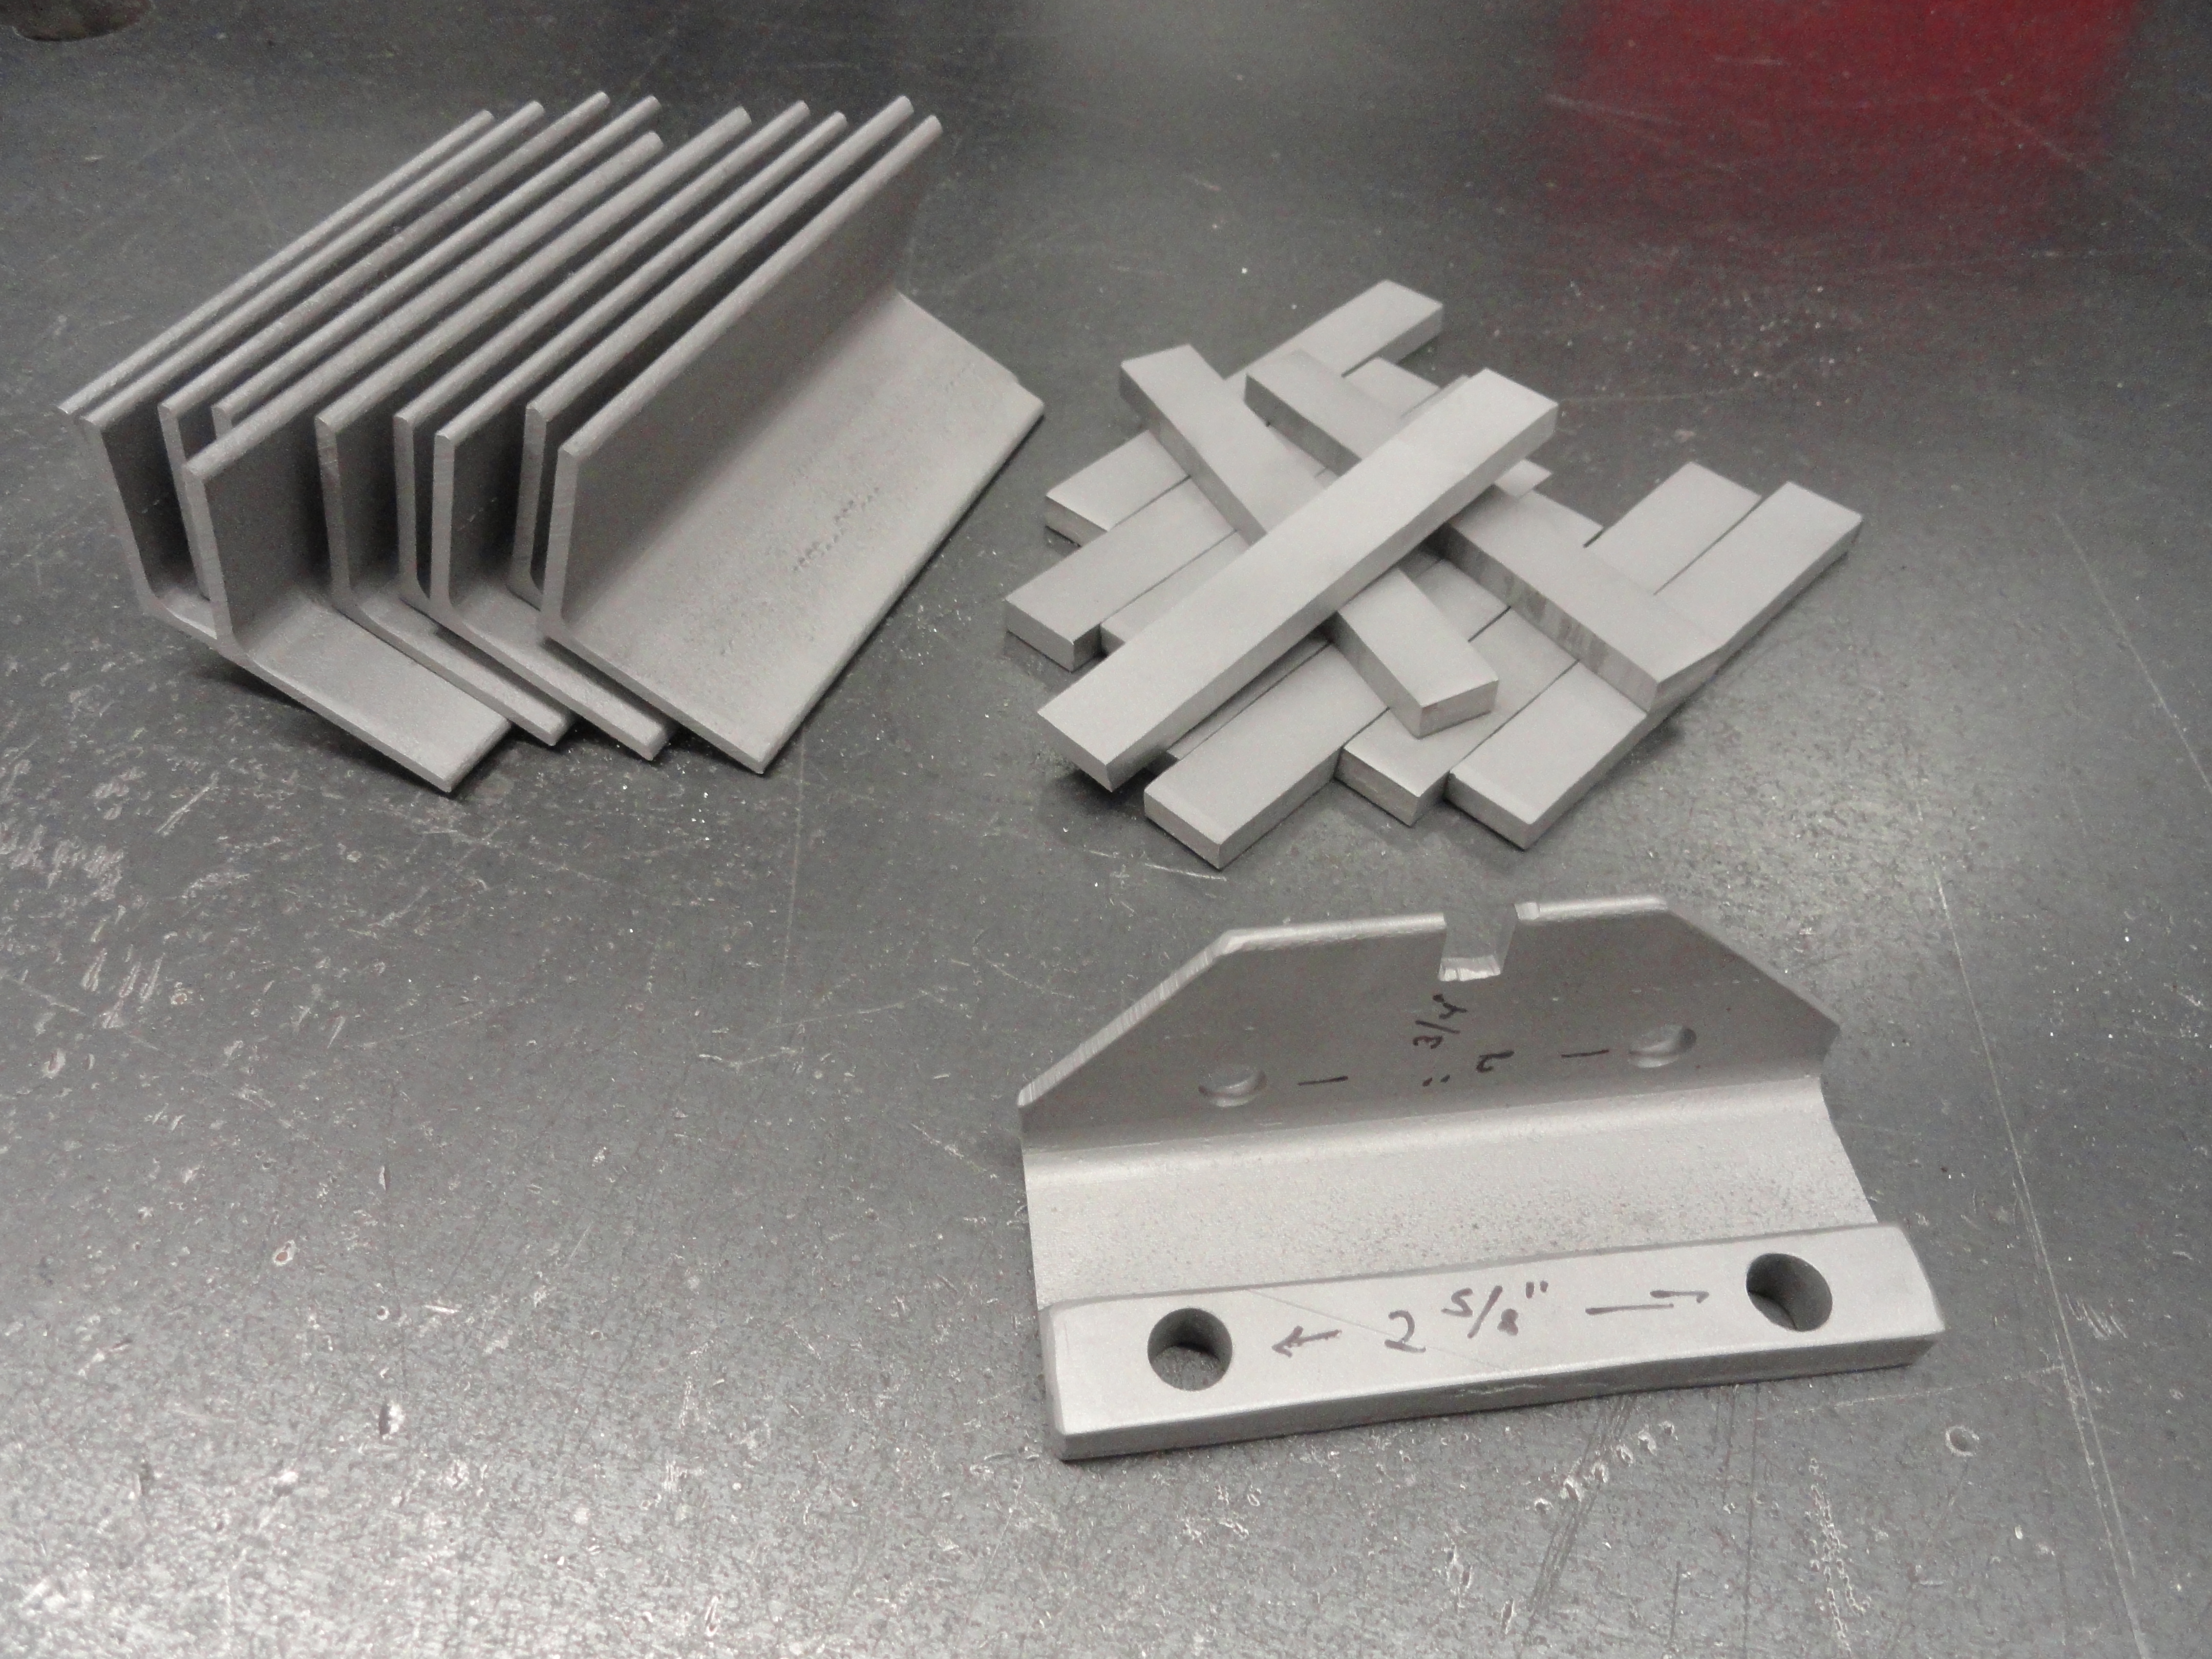
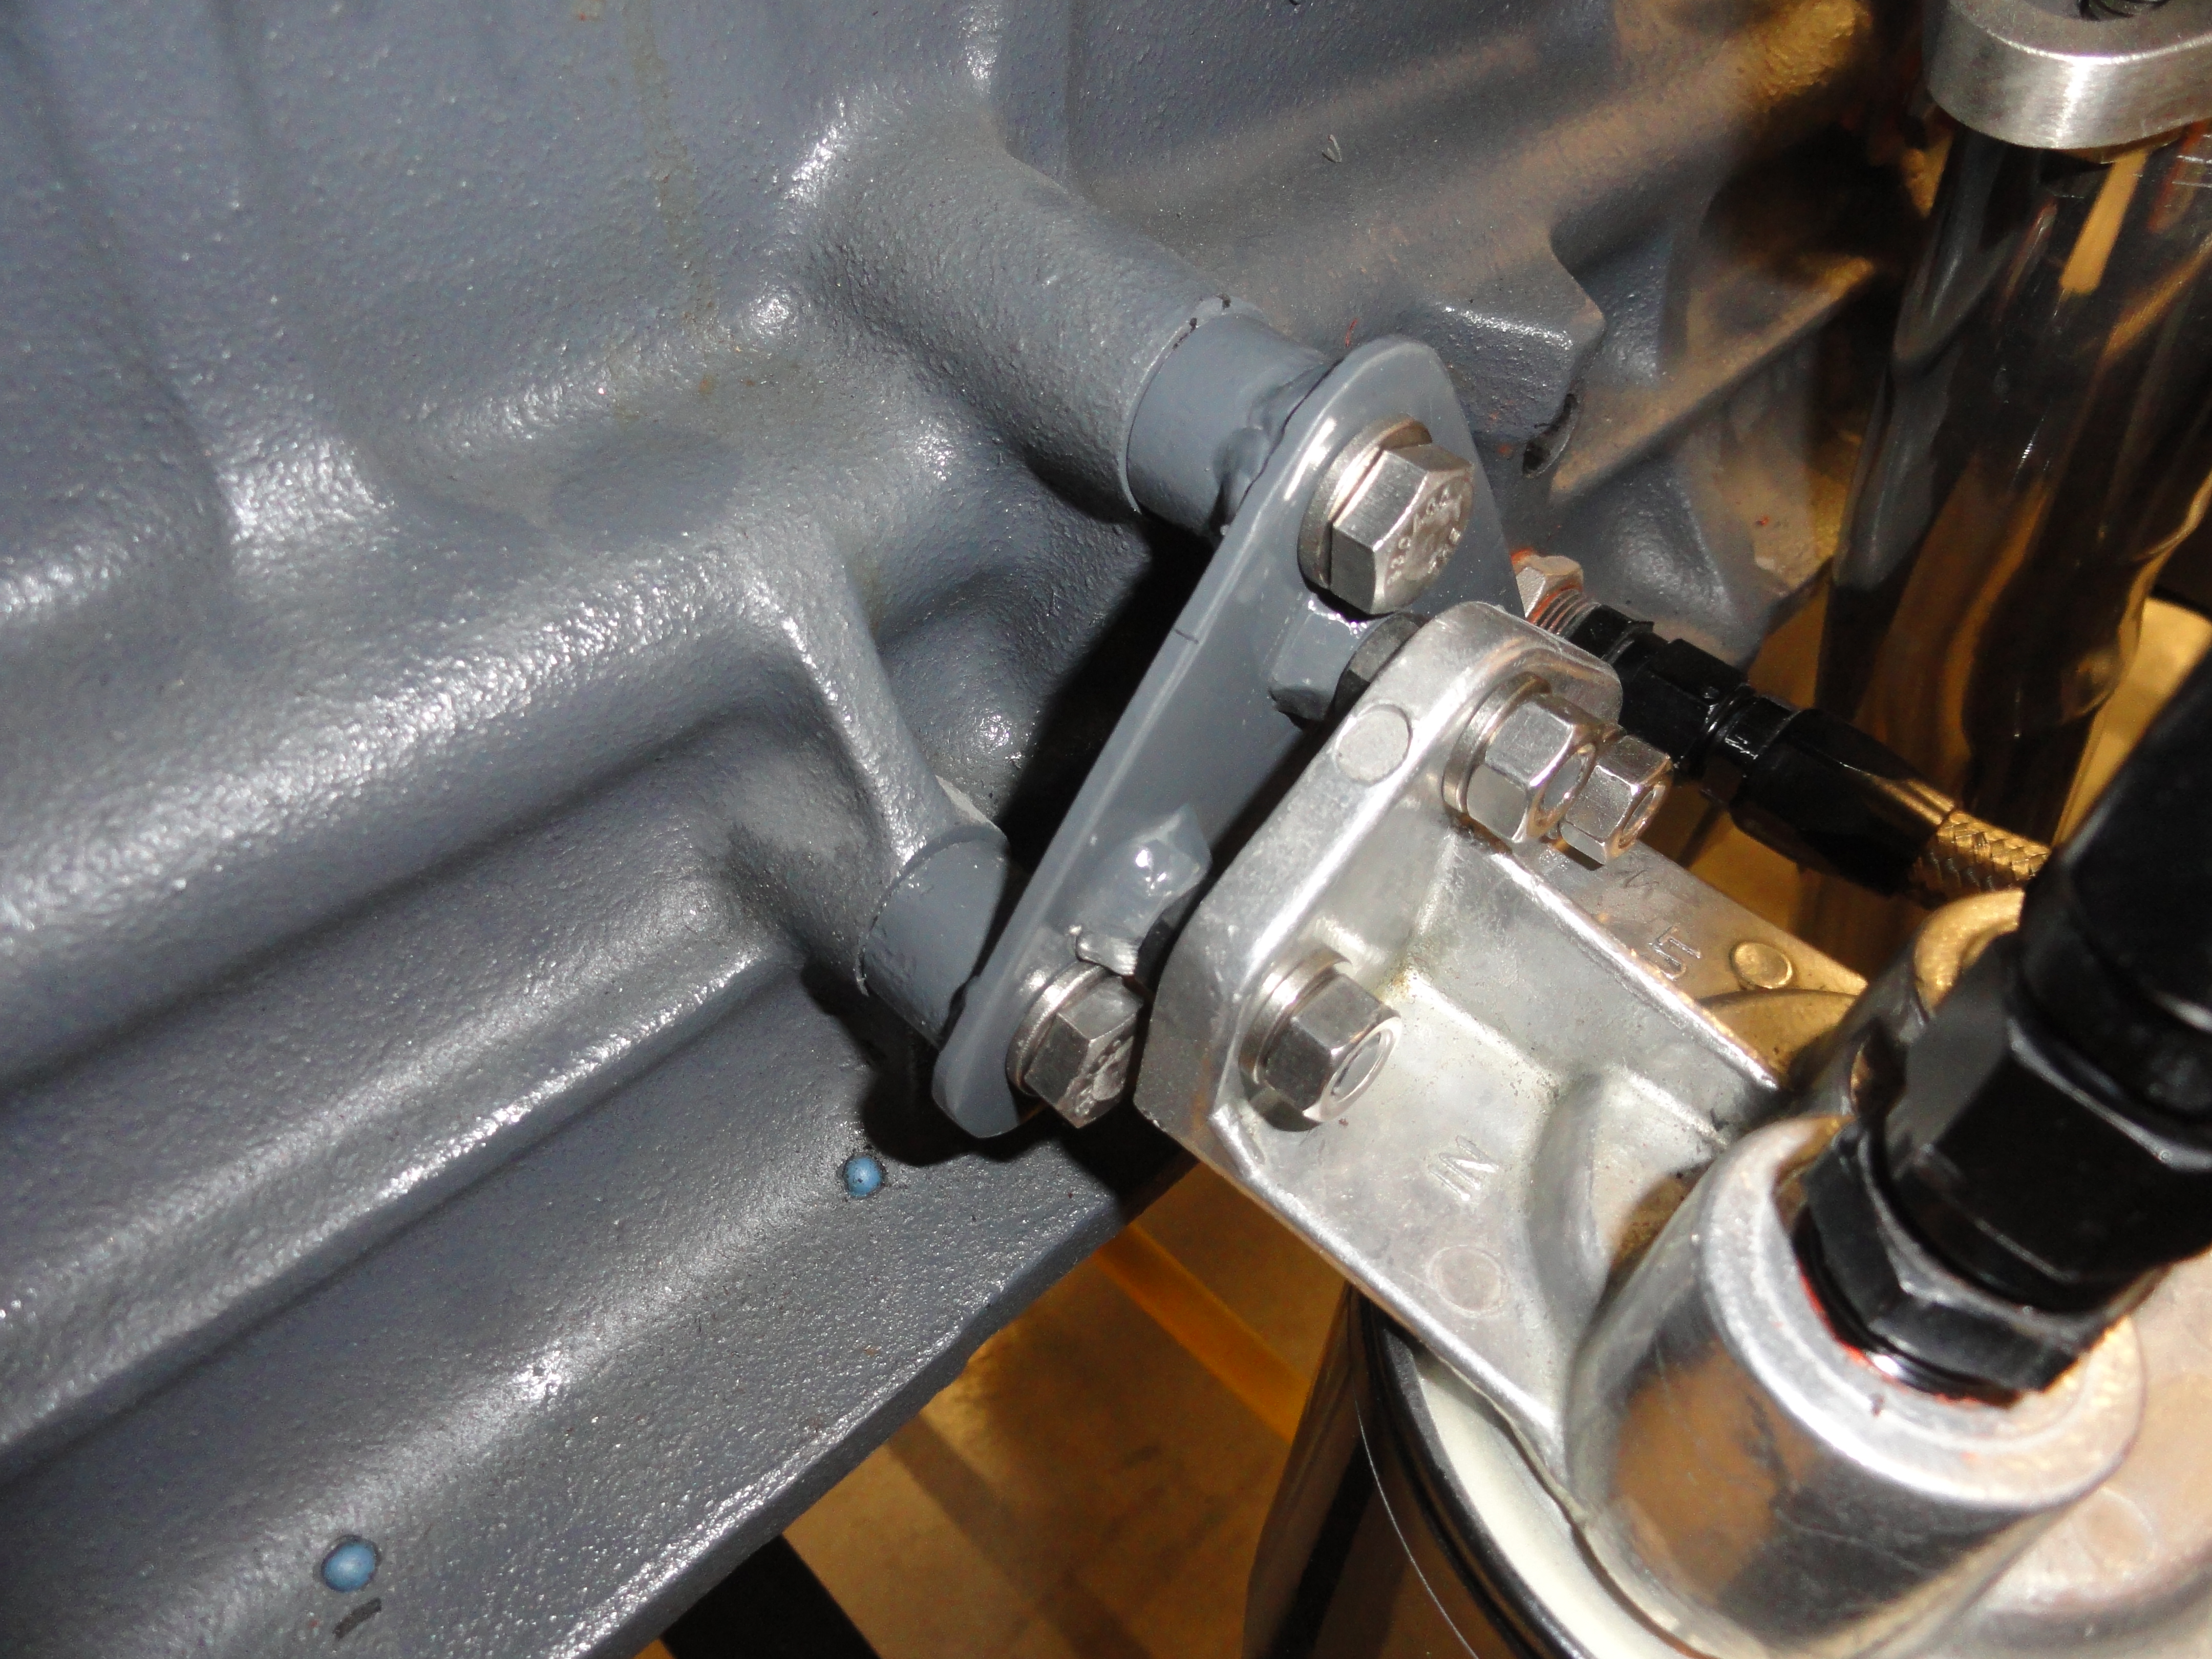
To make this adapter yourself, get a 4 inch long piece of 1-1/2" angle iron (1/8" thickness), and a 4 inch long strip of 1/4" plate steel that is 1/2" wide. Weld the 4 inch strip even with the outside of the angle iron as shown. This is needed to compensate for the oil pans lip that we do not want to damage in any way during installation.


The reason for 1-1/2" angle iron is because we do not want the adapter to stick out further from the engine causing a conflict with the frame's splash guards. Things are tighter in that area than they seem. Transfer the hole pattern for the Transdapt 1028 mounting holes to the outside of the angle iron so that the top hole is notched out and in the center of the 4 inch span. We need those bottom two holes to be high enough for the head of the screw to sit nicely.
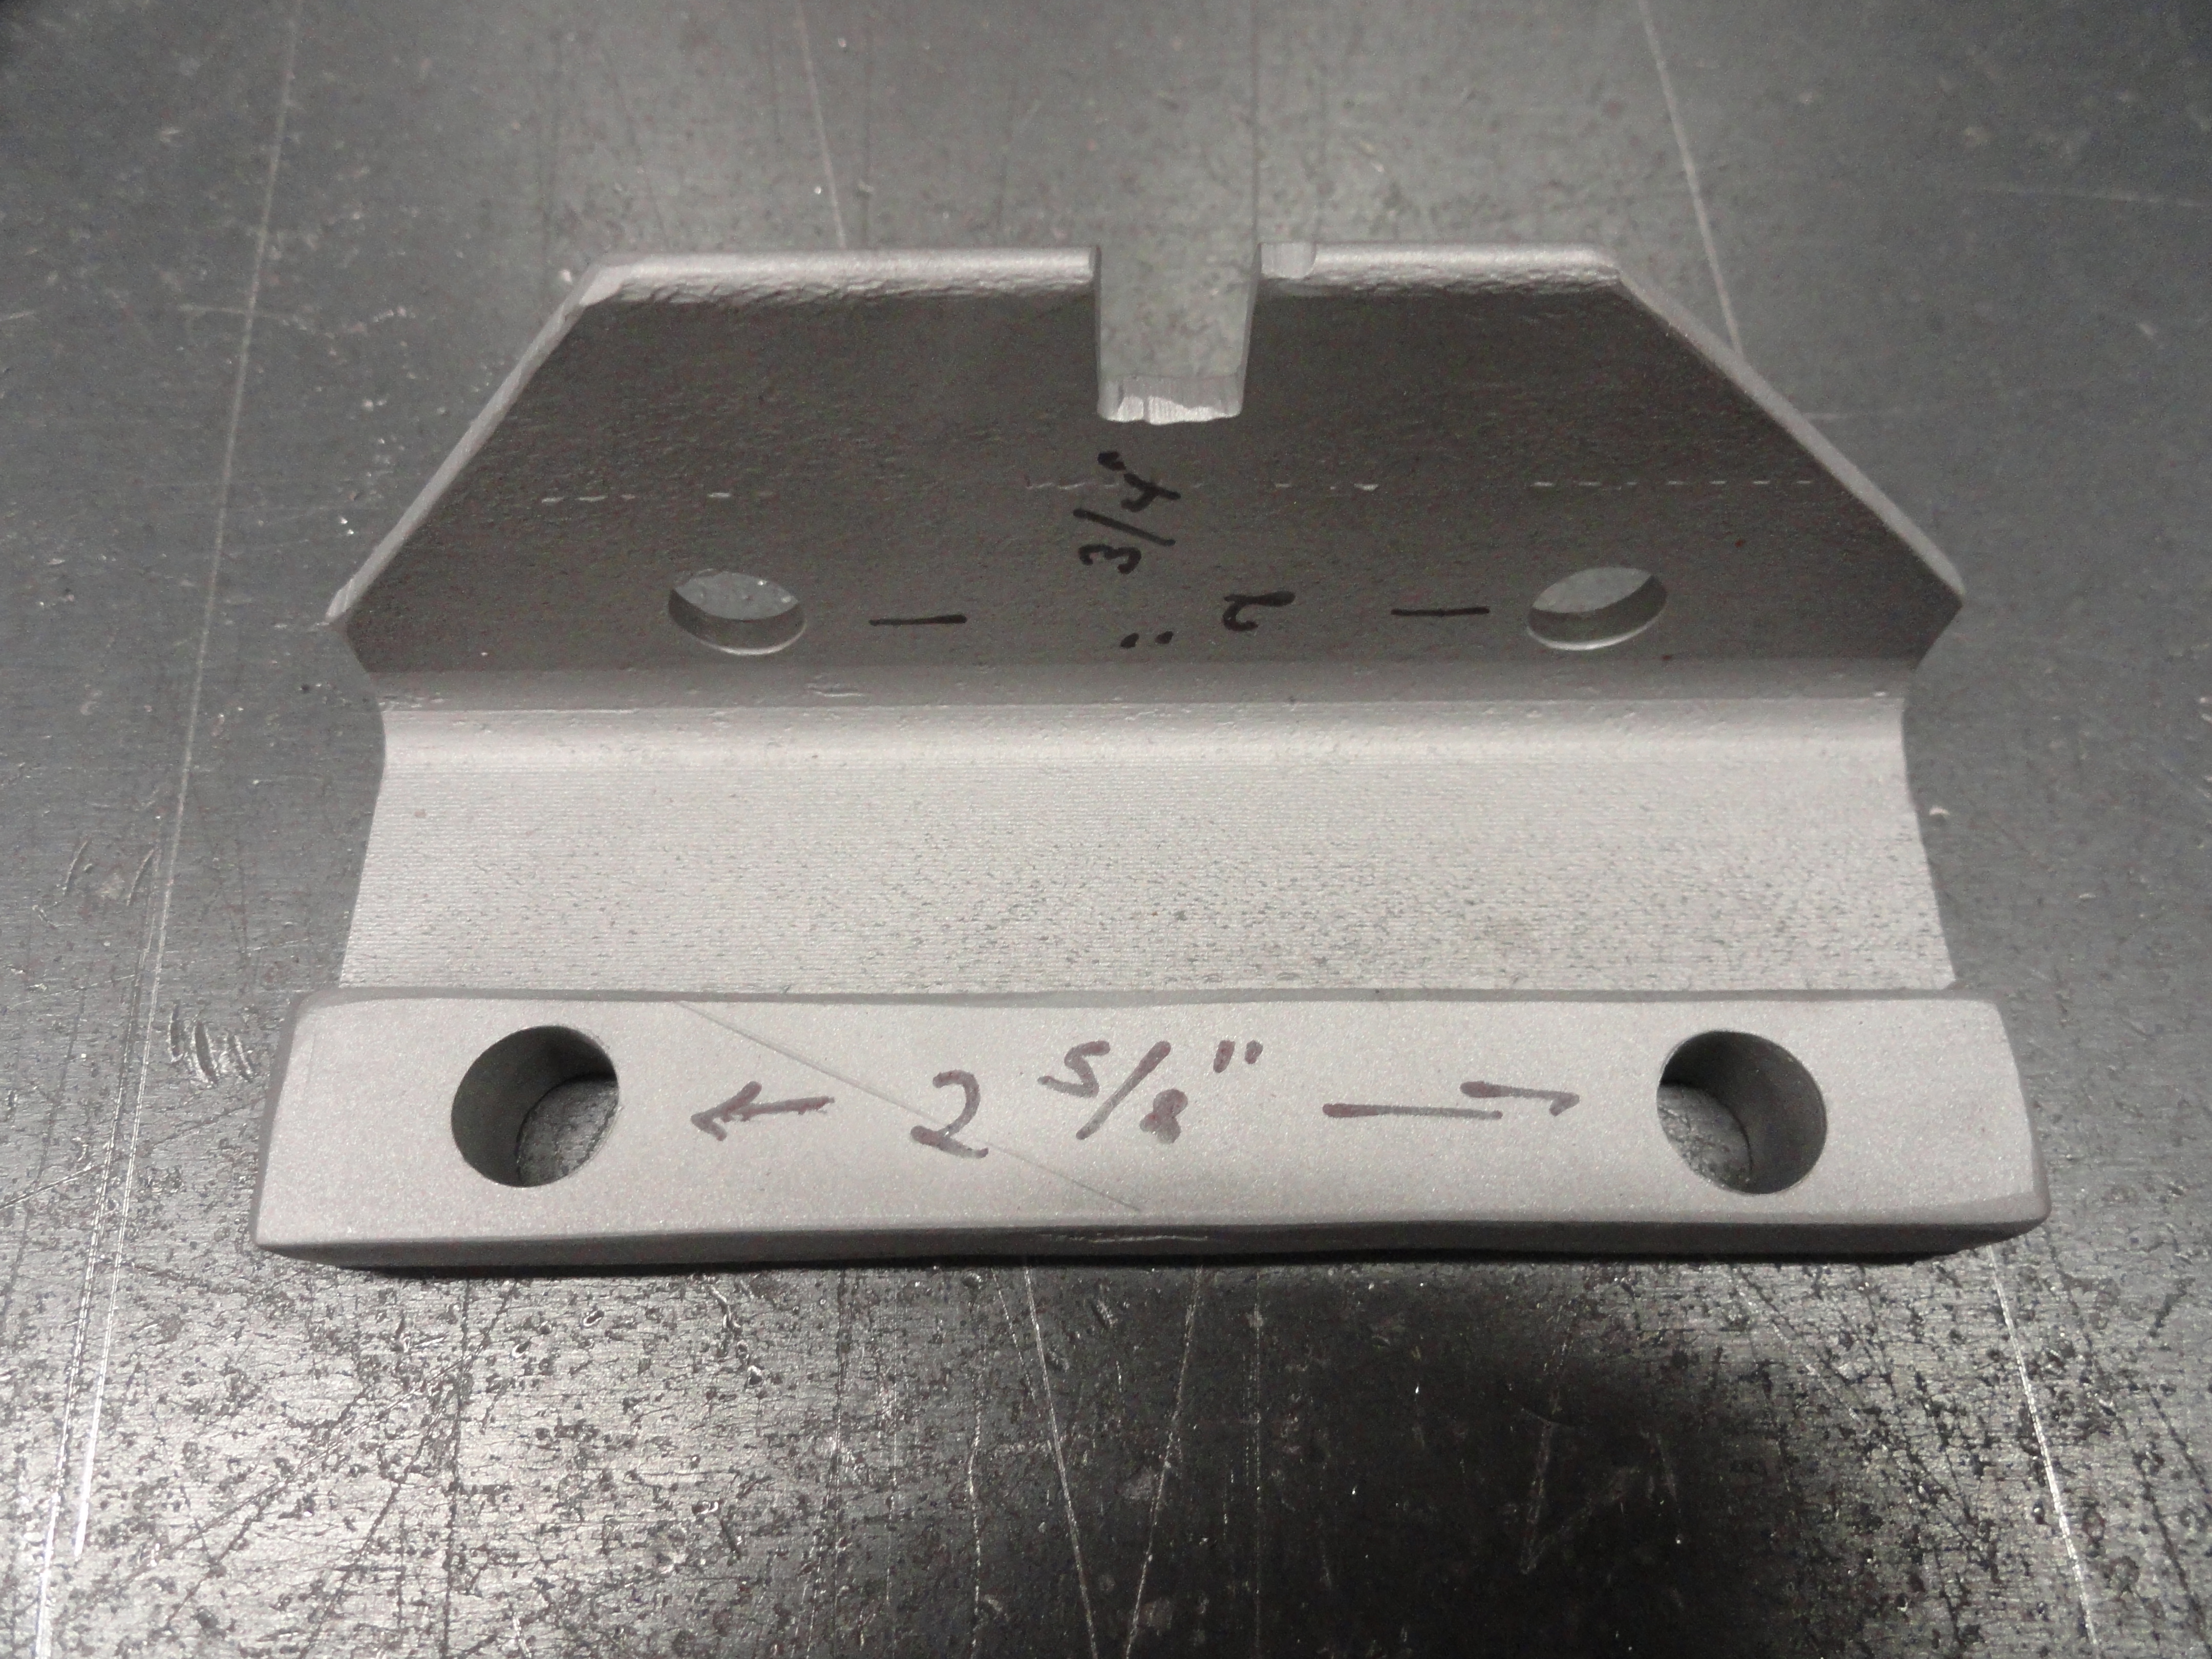
Using a center punch in the very center of the 1/2" wide strip, punch the strip with dimples that are 2-5/8" apart and in the center of the 4 inch span. This will put the mounting holes in the correct location. Since we are using 1/4" bolts for mounting, I like to drill the holes out to at least 5/16" (Maybe a little more) to compensate for inaccuracy in the drilling process.

In the end, after painting and mounting, you have a very nice solution that most people won't even see and now you can
change your oil much more efficiently than the old cannister. For the pipes, hoses, adapters, etc. kits are available
below. Be sure to email deve@speedprint.com and tell me the following:
a) Is your engine Bypass filtration or Full flow? This is necessary because bypass uses 1/8" NPT and full flow uses larger
lines (3/8" NPT). Bypass will also include a special 1/16" reducer.
b) Is your engine single or dual exhaust? Important because the soft lines must be routed away from the exhaust using a
more complex set of hard lines. The dual exhaust solution is a bit more expensive.
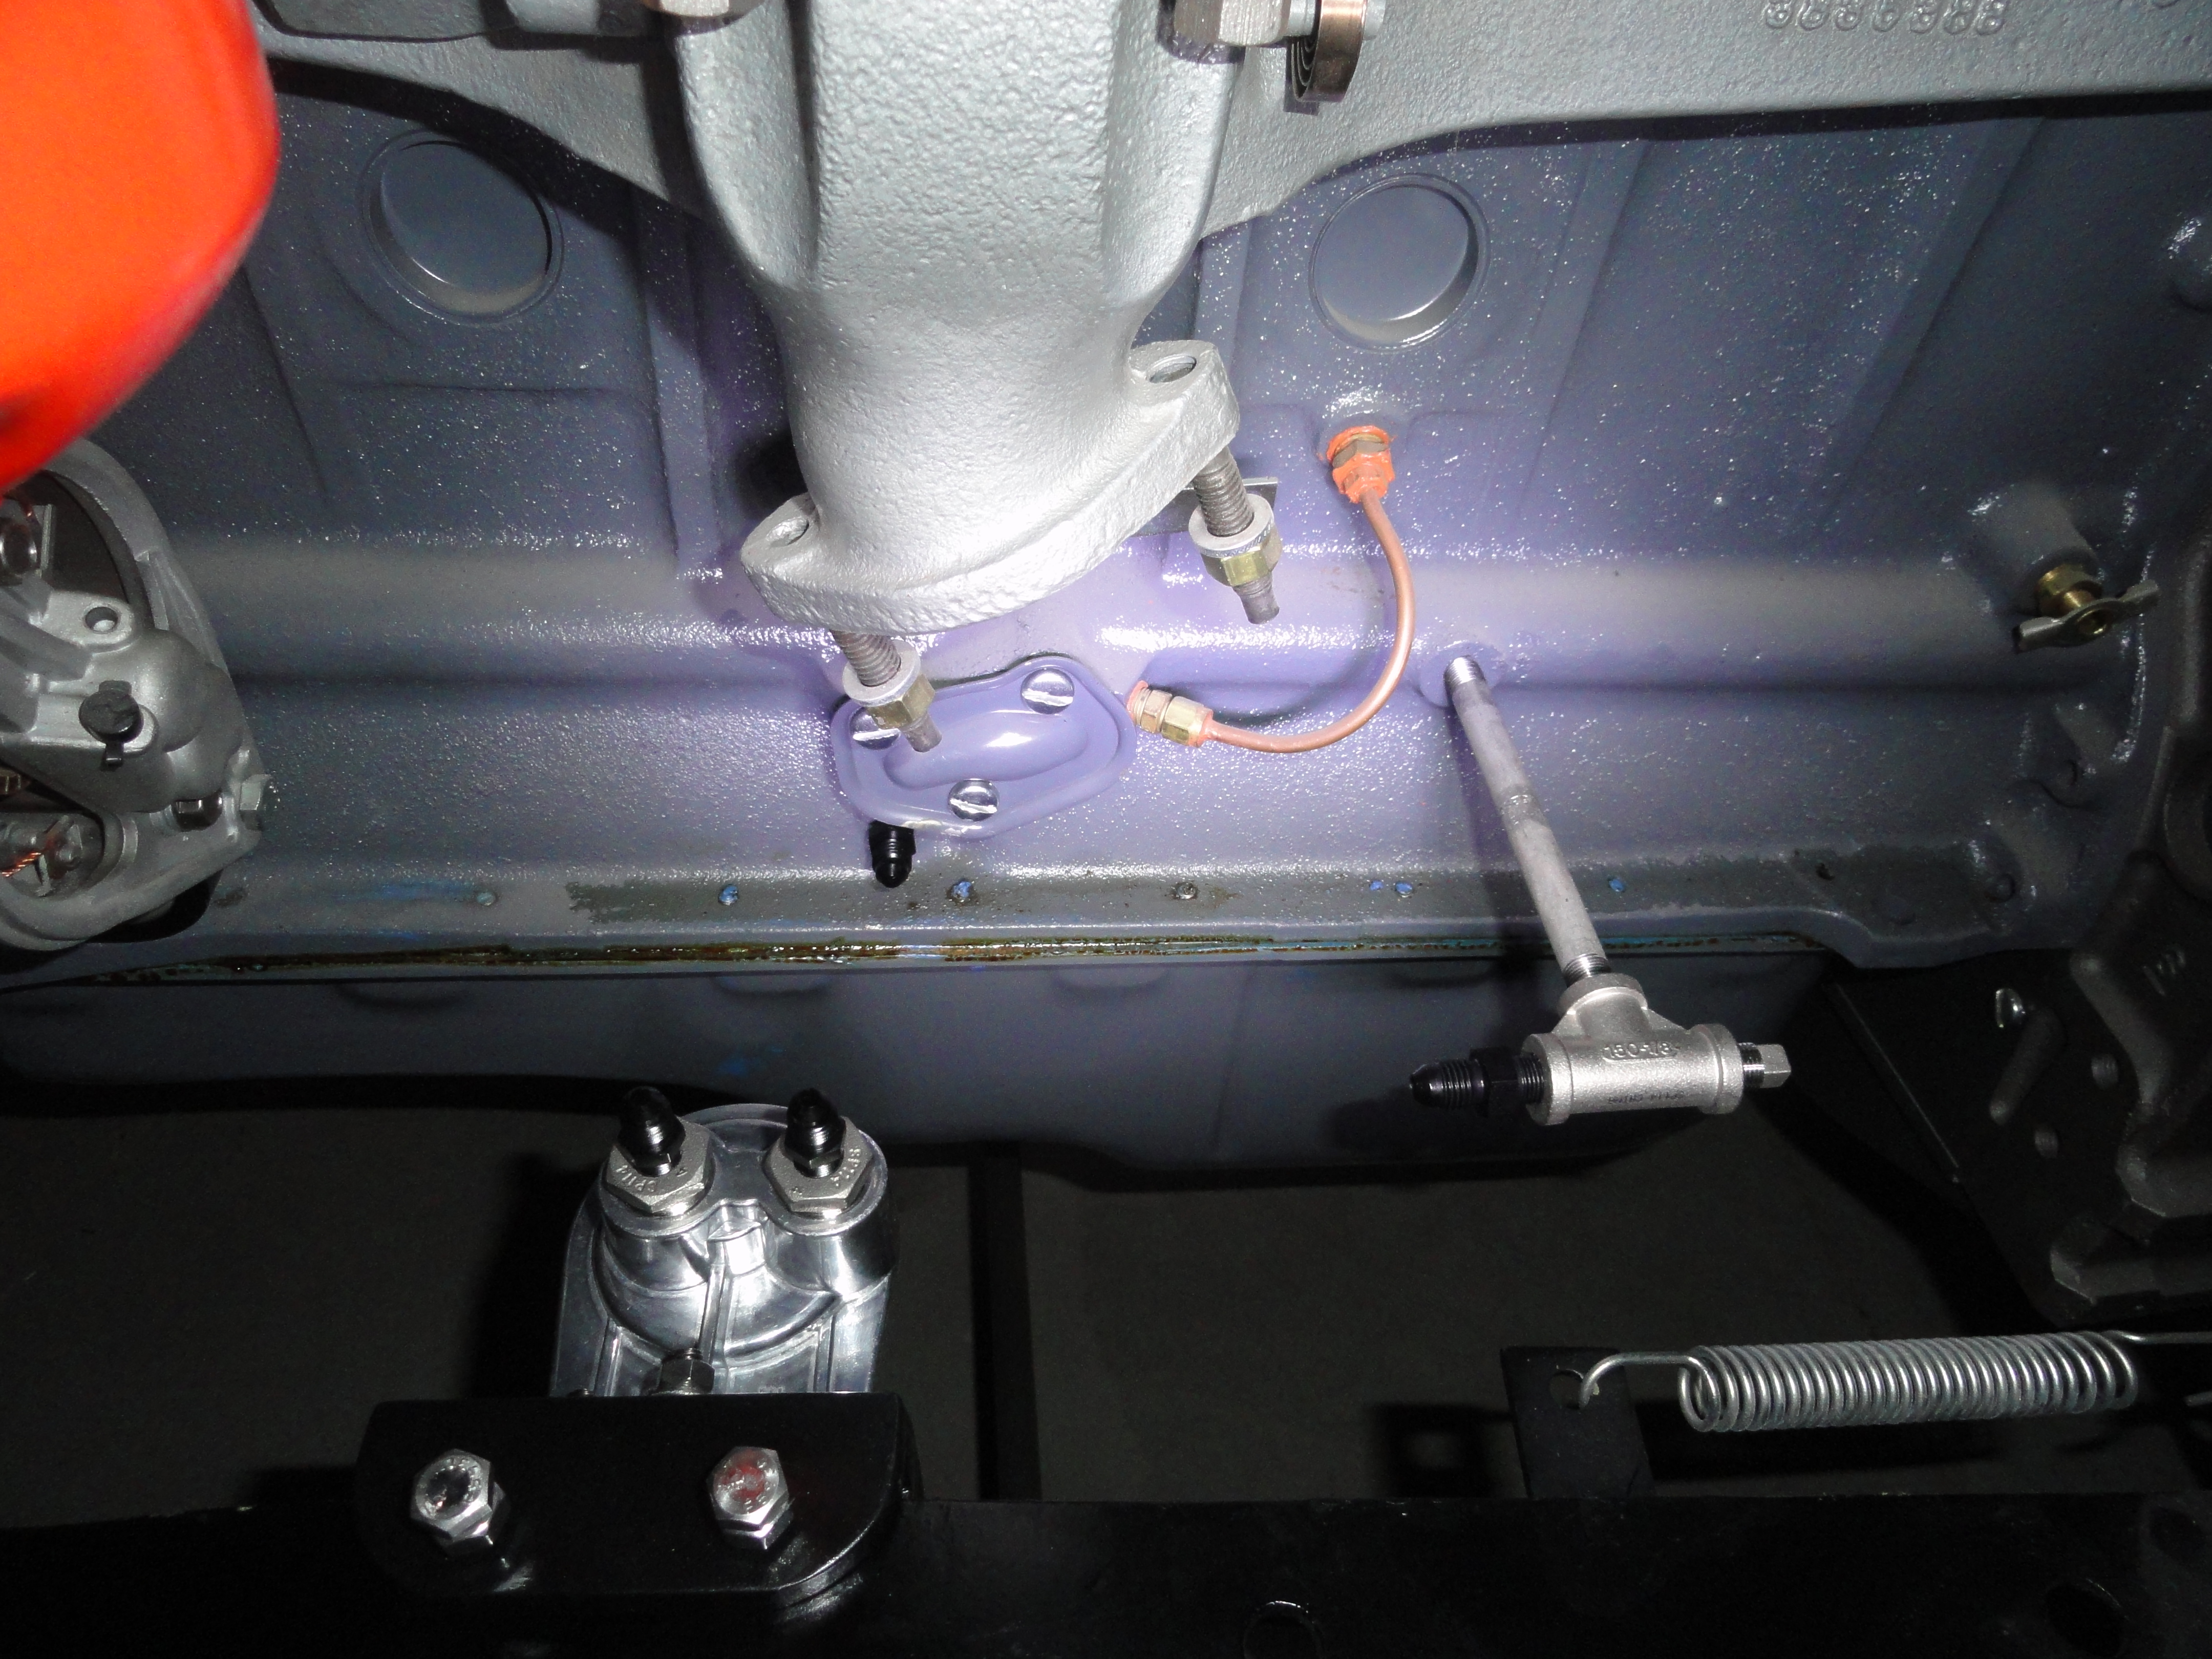
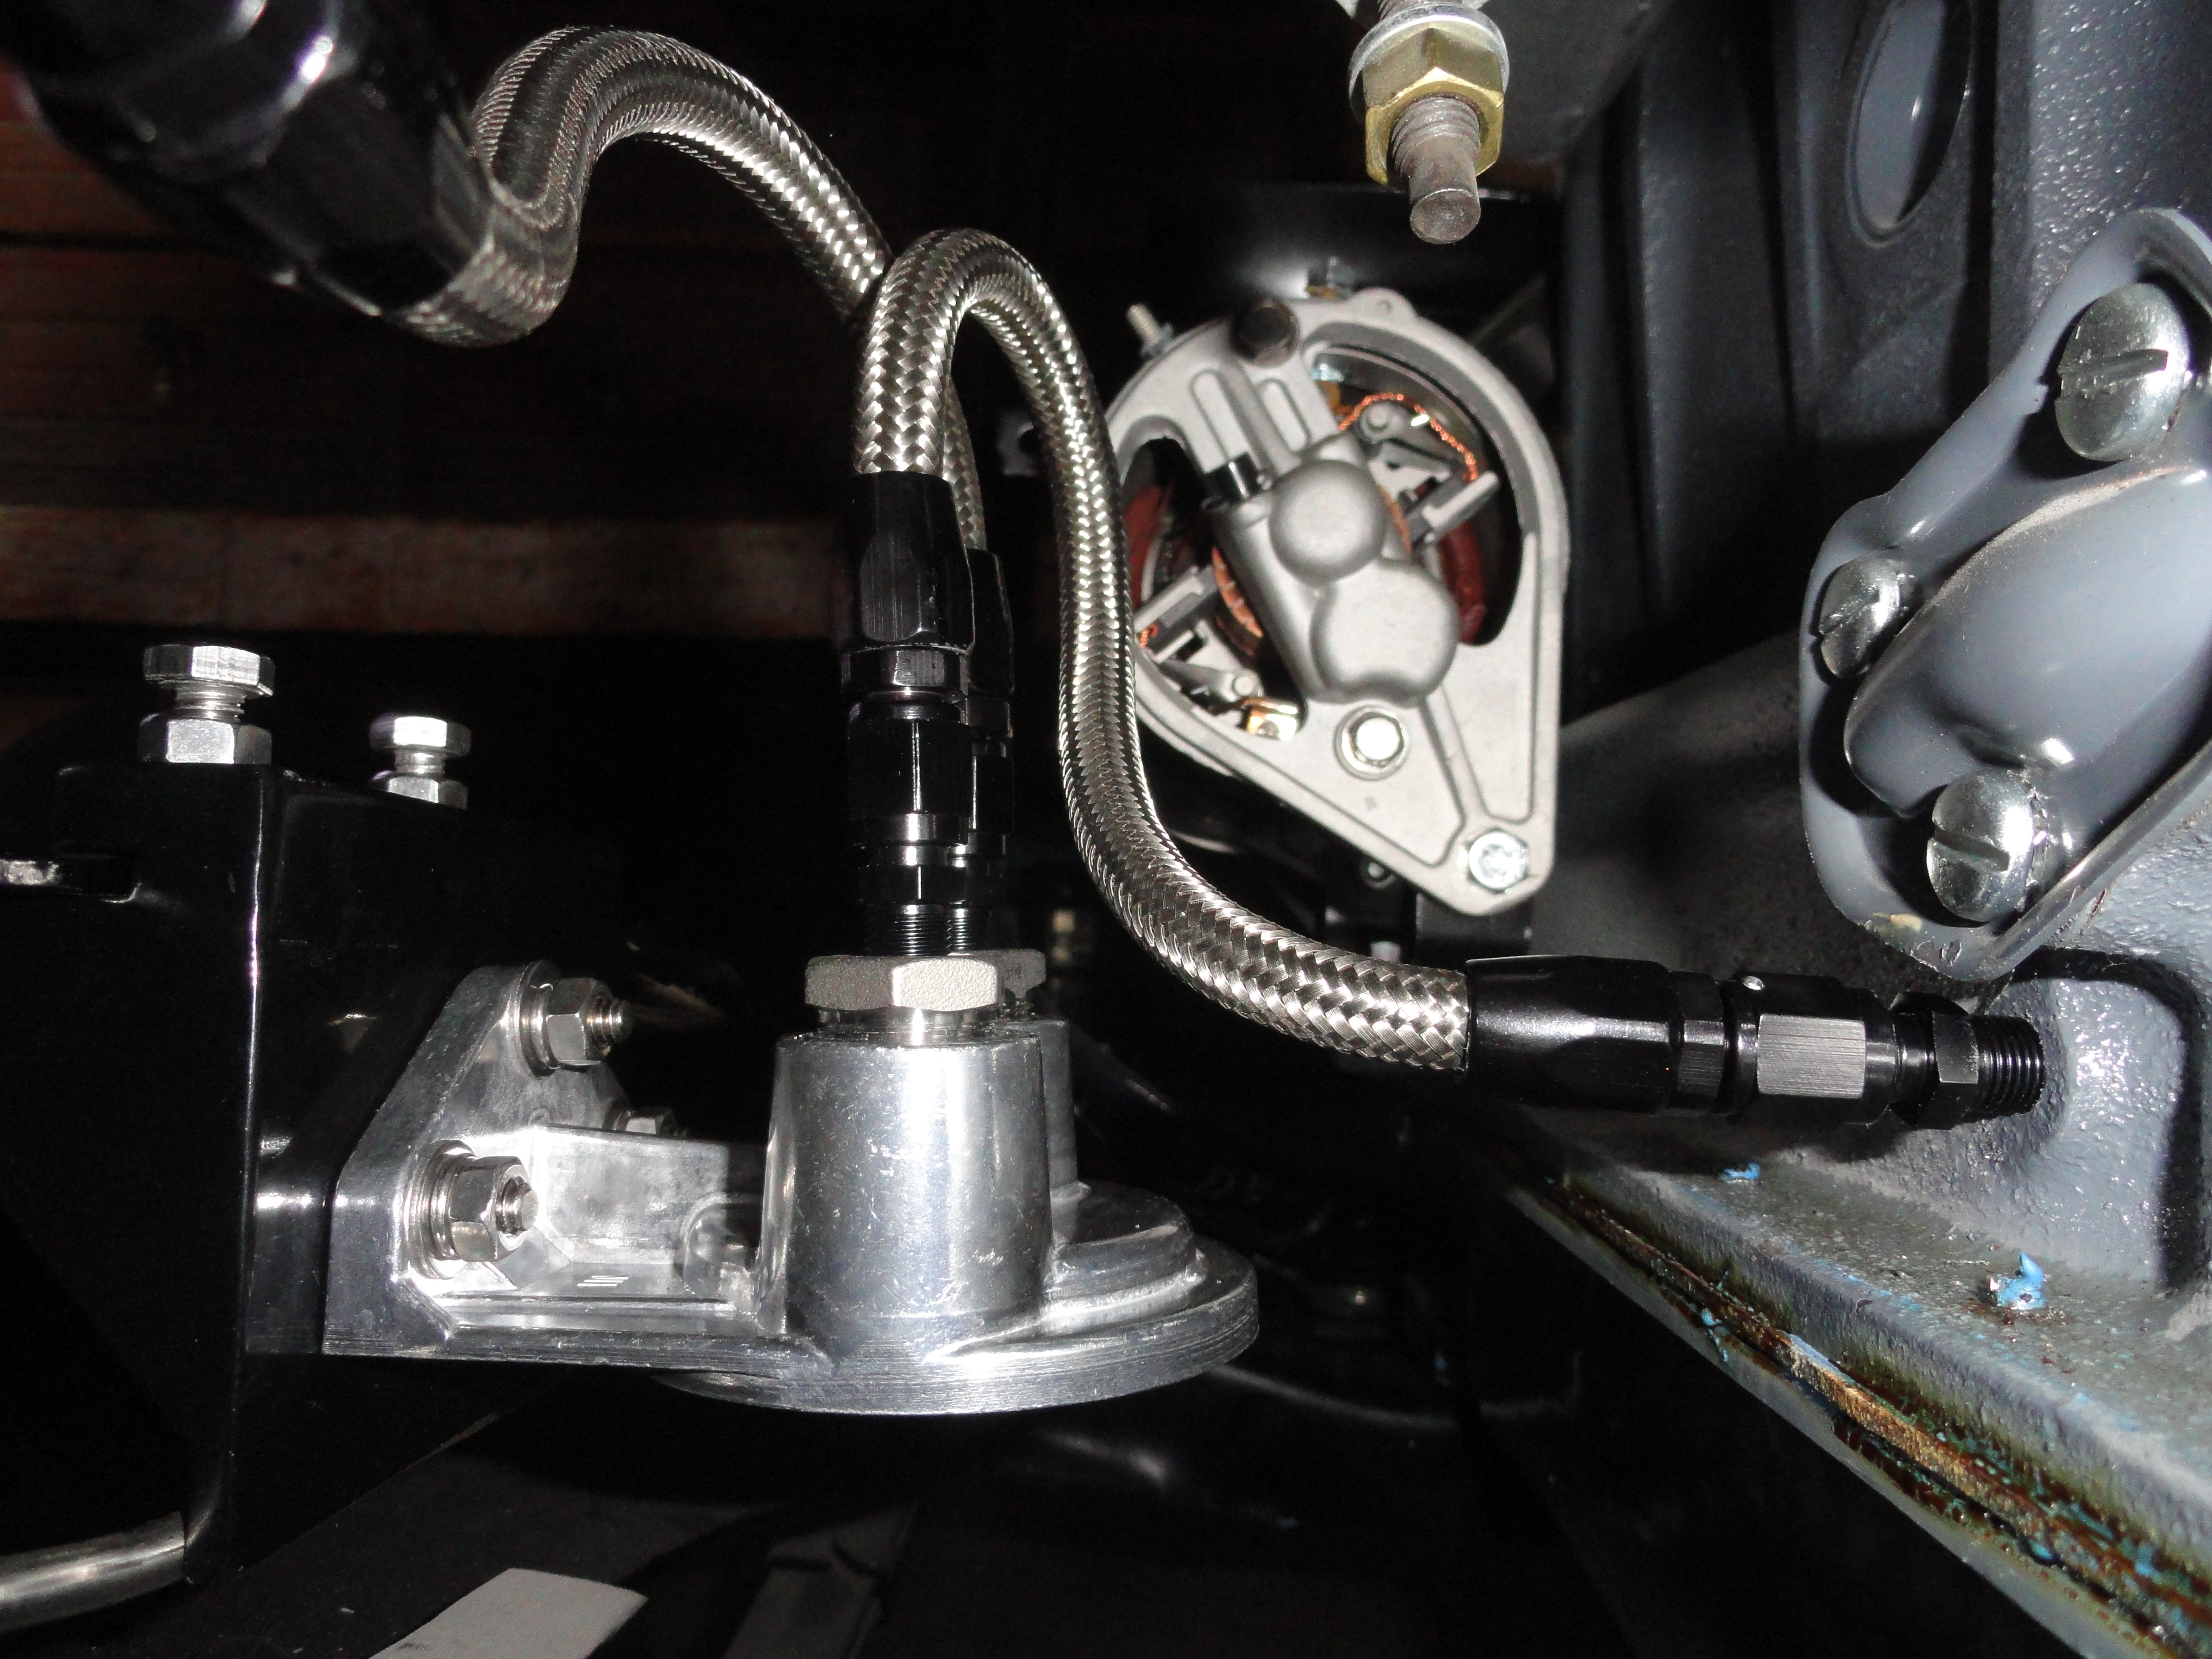
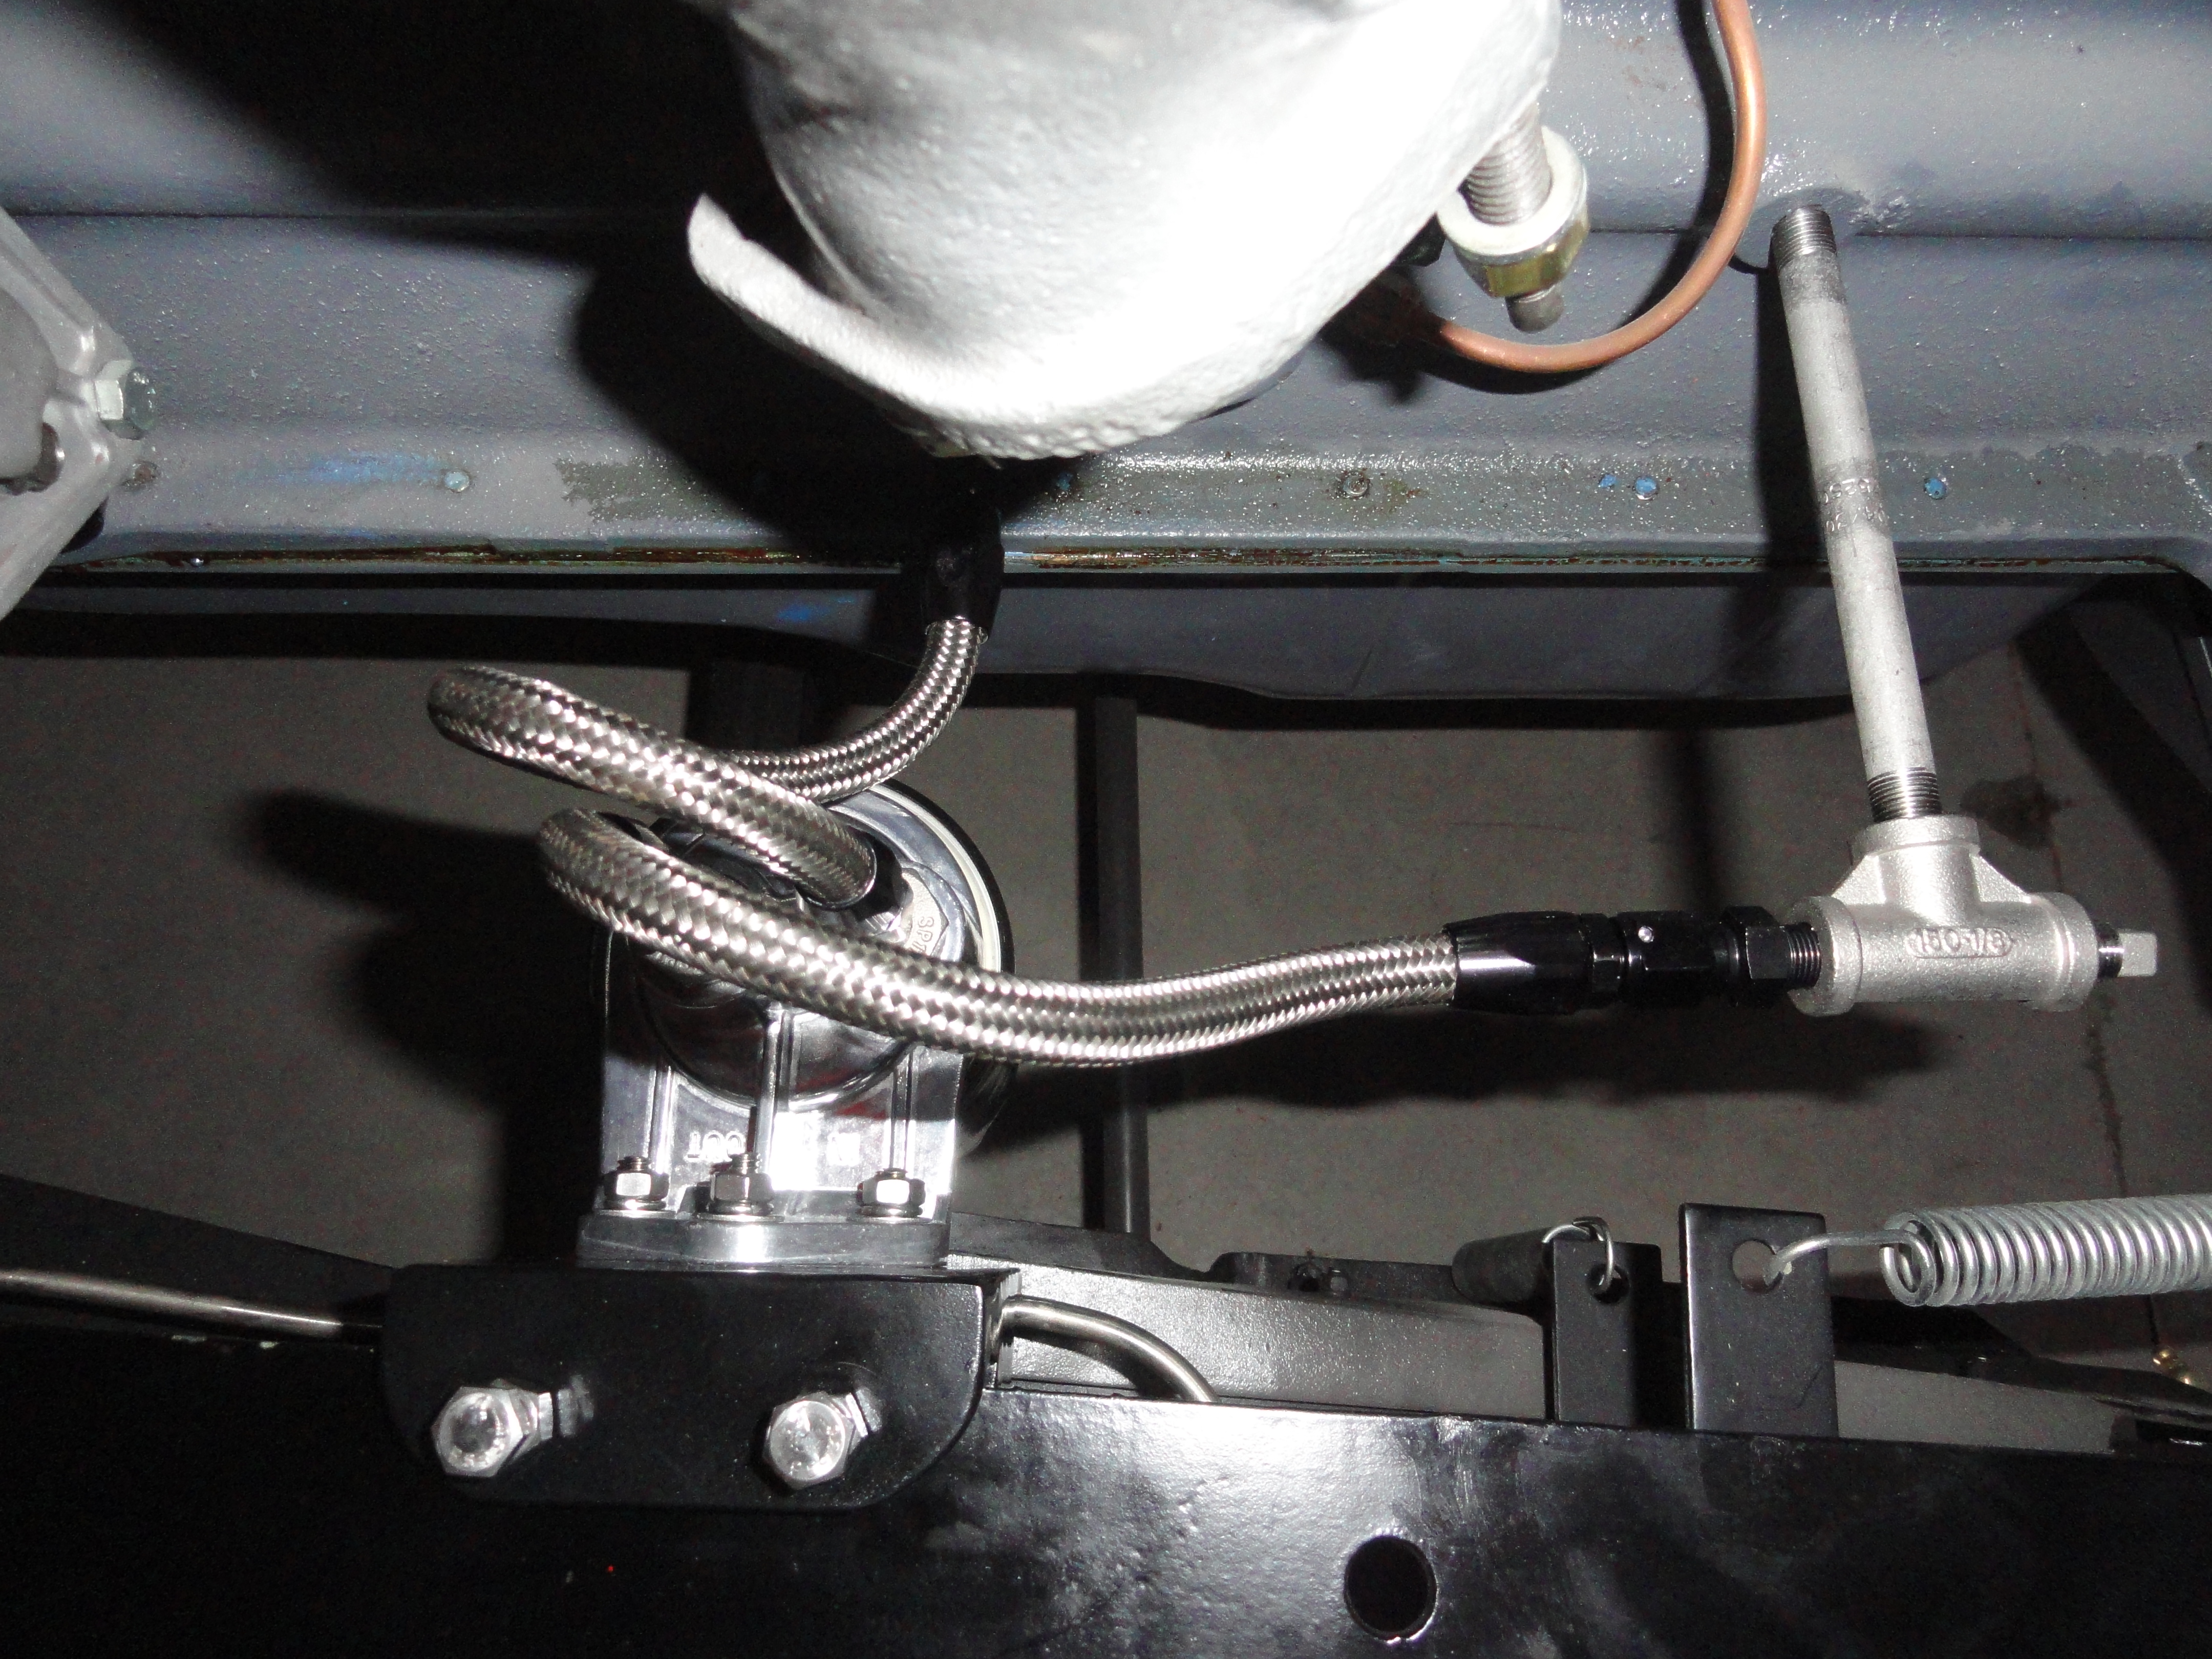
To install, once the bracket with adapter is secure, install the 4 inch stainless steel 1/8" NPT pipe directly to the engine block in the aft (oil flow OUT) port. No need to use a pipe wrench on it just yet. Install the Tee on the end of the pipe. Use teflon tape that is rated for oil, Permatex High Temp Gasket Sealer or Permatex Aviation 300 on the threads. Turn the Tee and the pipe by hand until the pipe is tight in the engine block, then using a pipe wrench, turn the Tee until it is tight and straight, parallel with the engine and frame. Do not over-tighten! Install the 1/8" NPT to -4 AN Adapter into the front of the Tee, and the 1/8" NPT plug (or your oil pressure gauge hookup) into the back of the Tee. Install a 1/8" NPT to -4 AN adapter to the front inlet on the engine block (oil flow IN). Since the Trans-Dapt is already configured, it's a simple matter of just attaching the stainless steel braided flex hose. Be sure to keep the flex line as far away from the exhaust as possible. Do not tighten the collar nut on the hoses. They break off easily if overtight. The hoses are rated at 300 degrees but the exhaust can be well over 700, so keep them away.
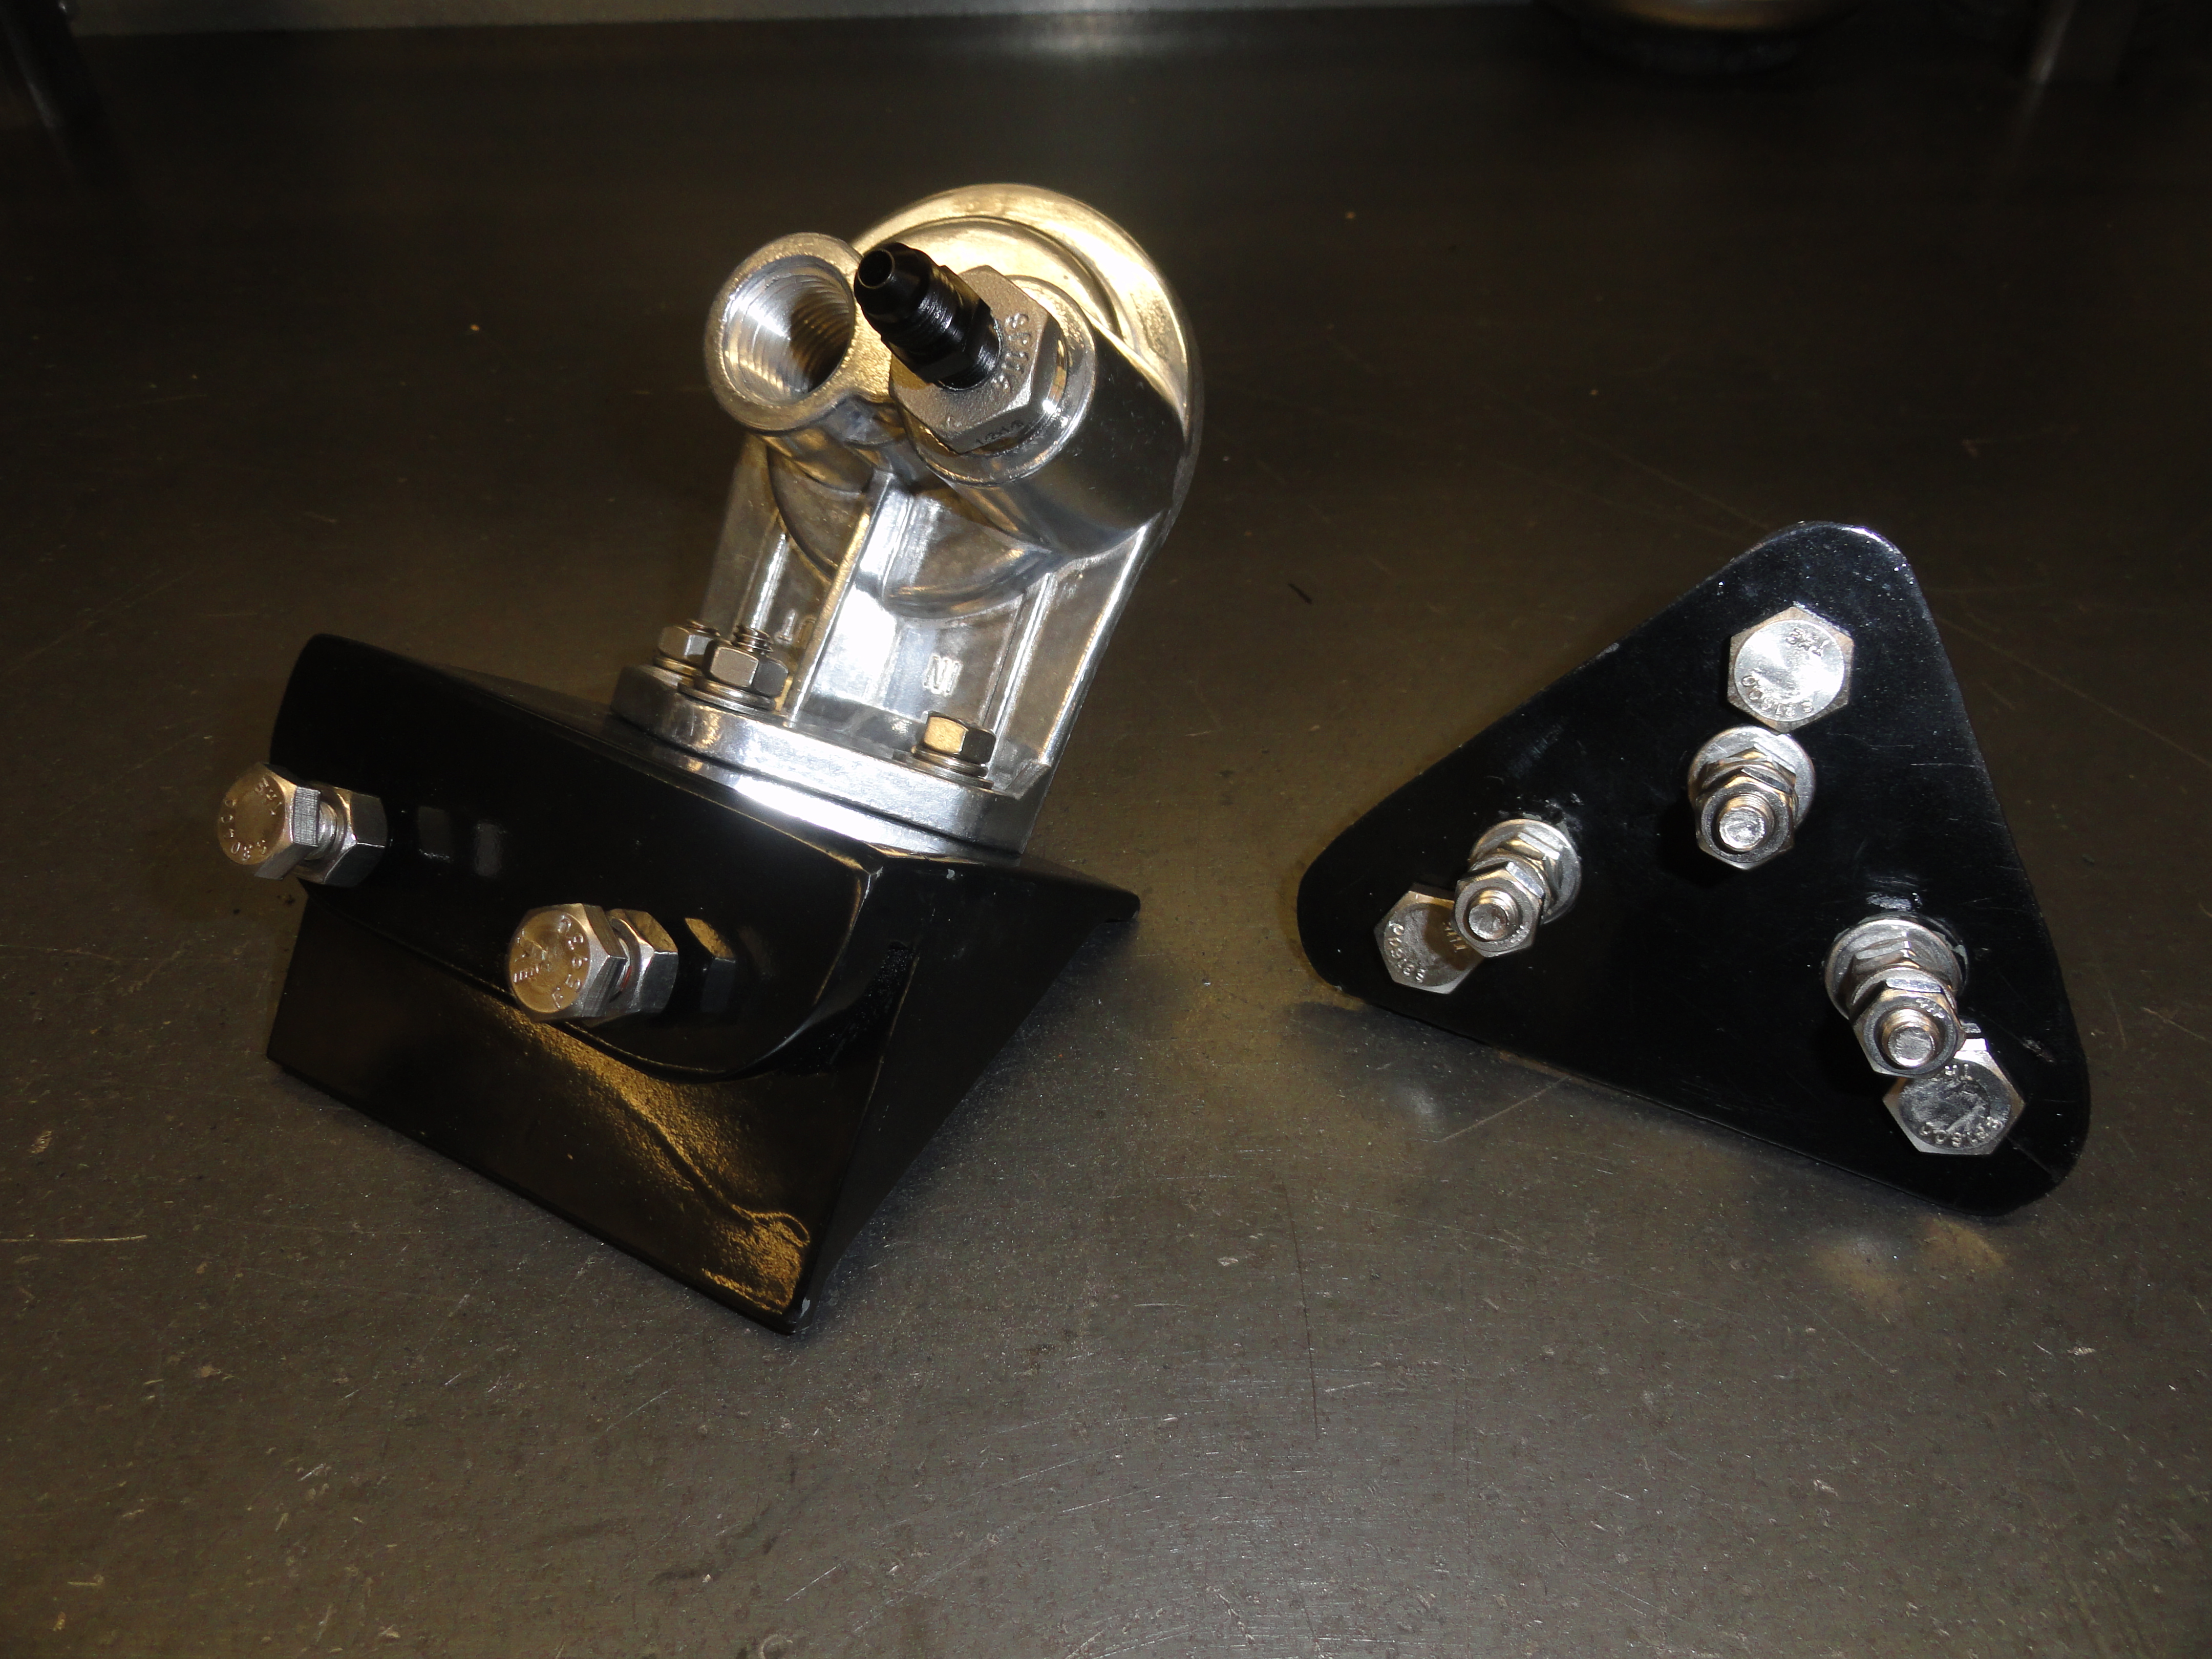
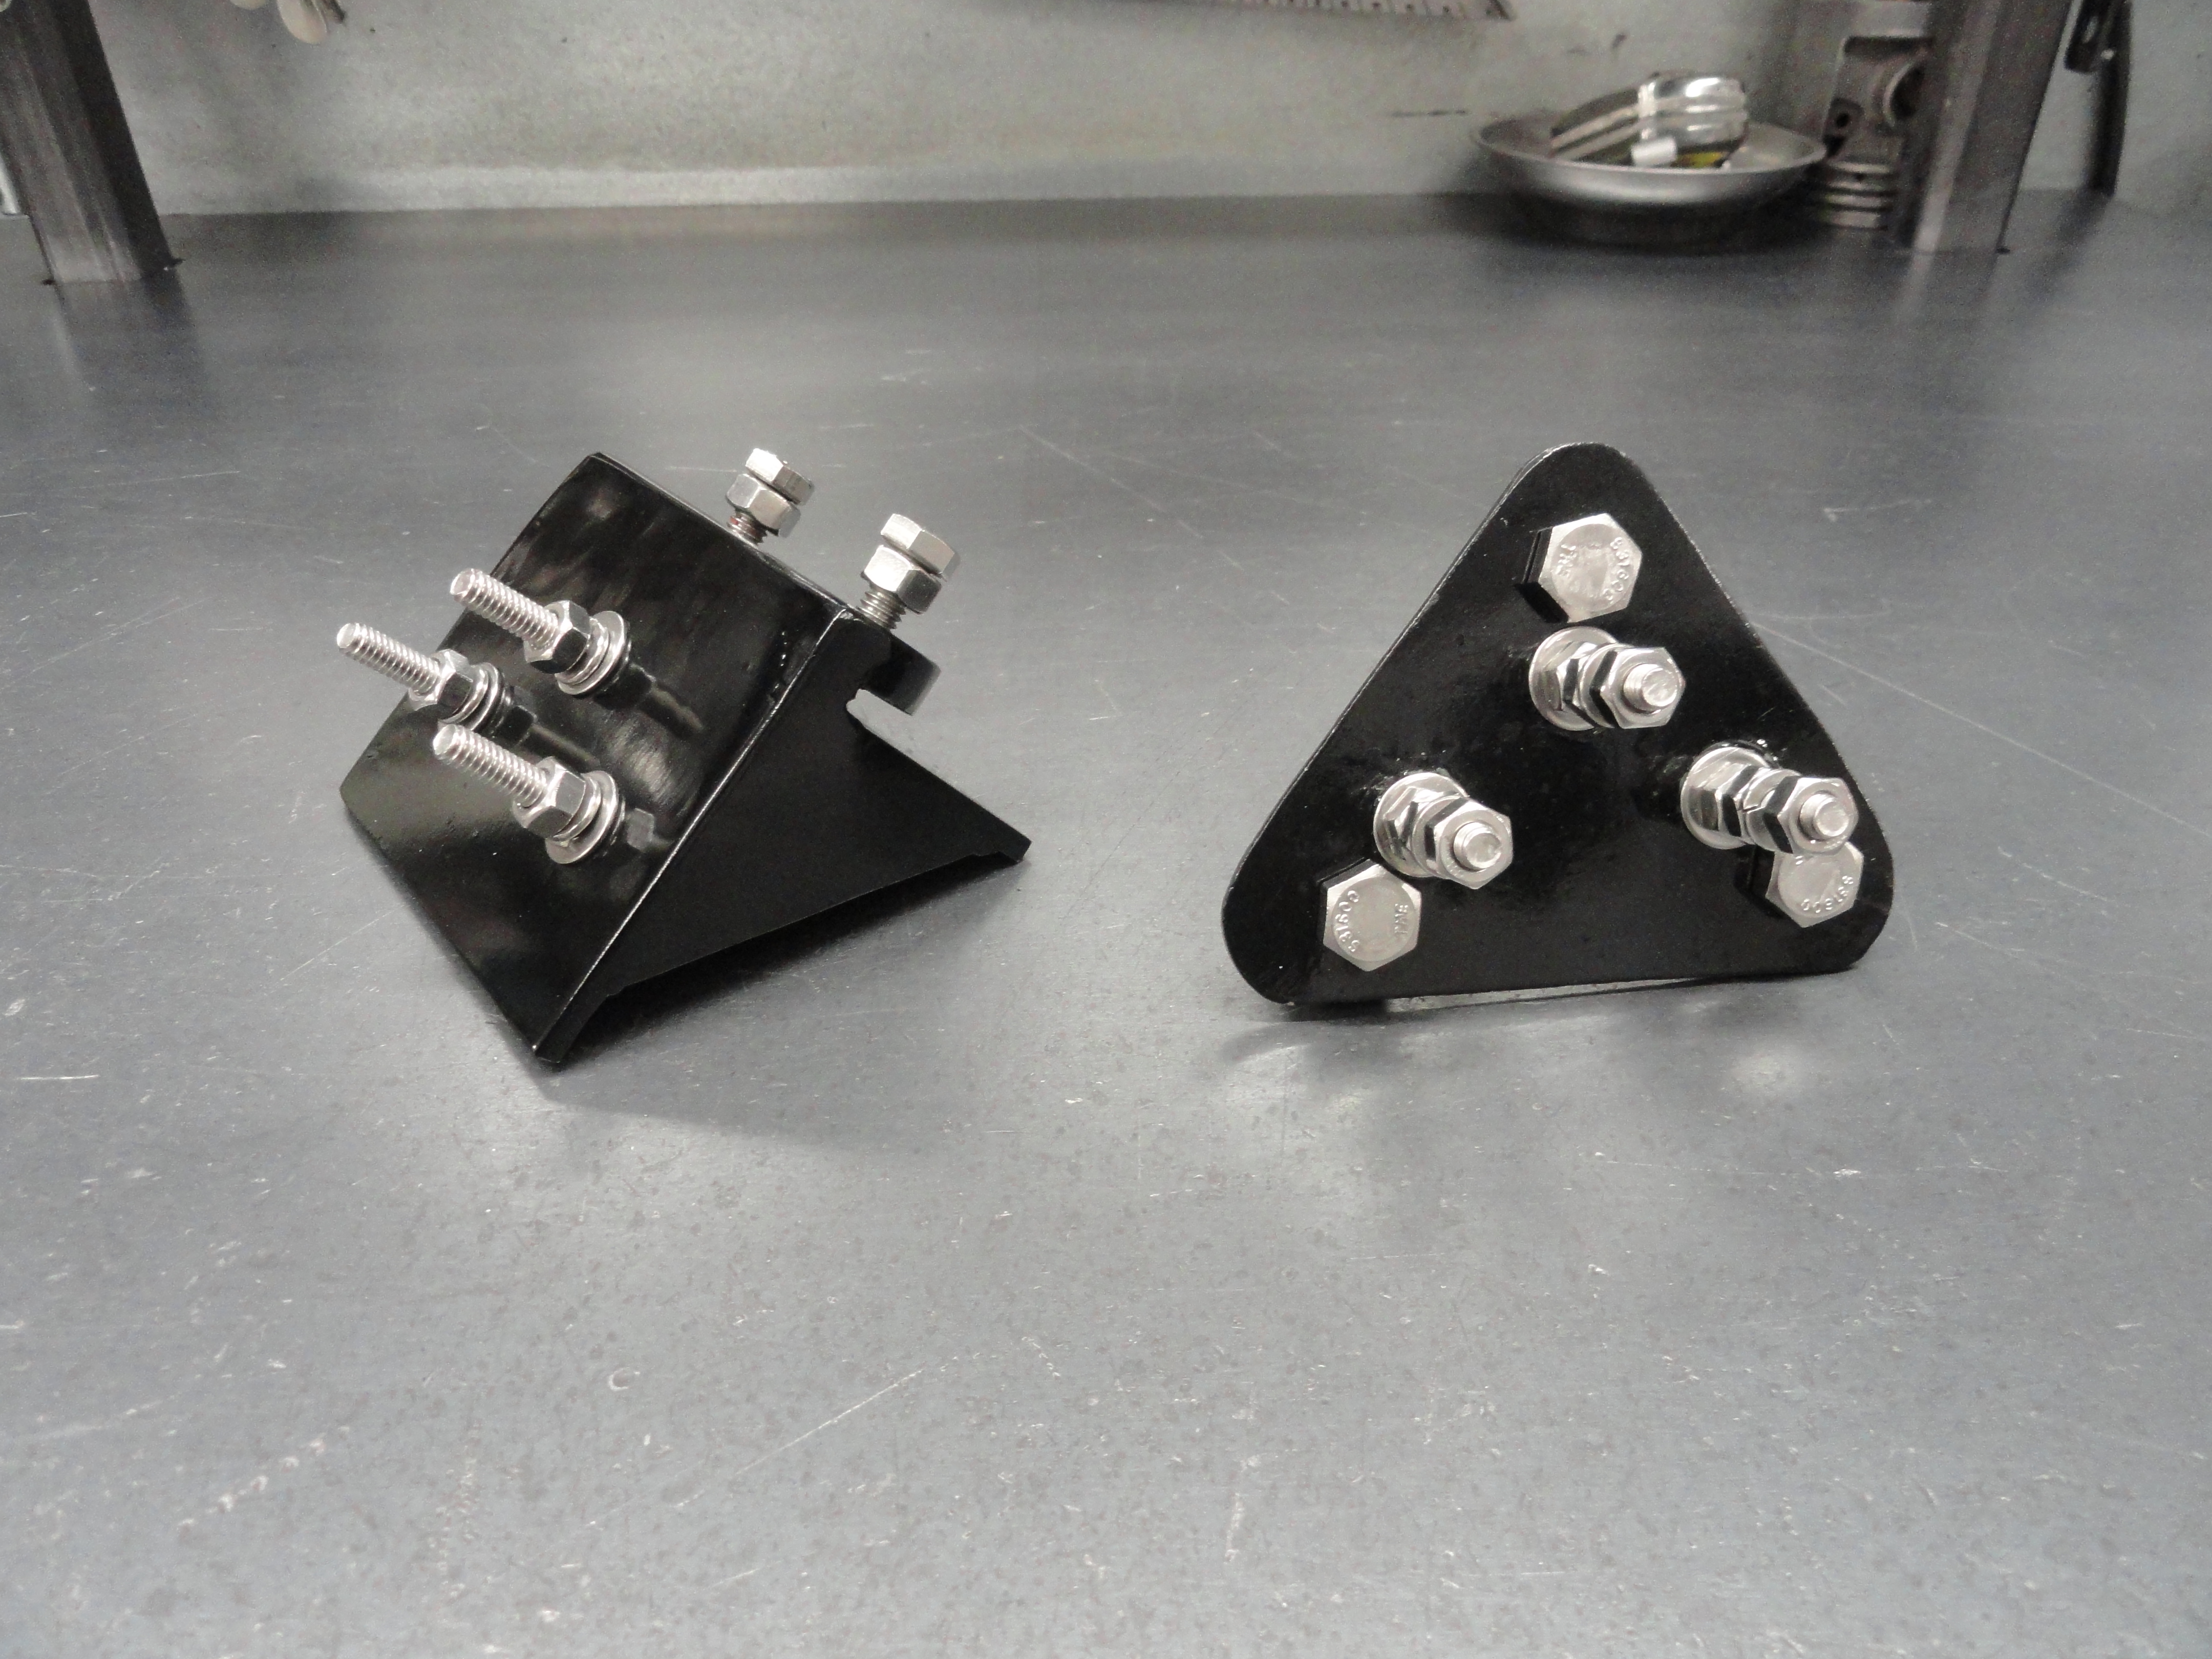
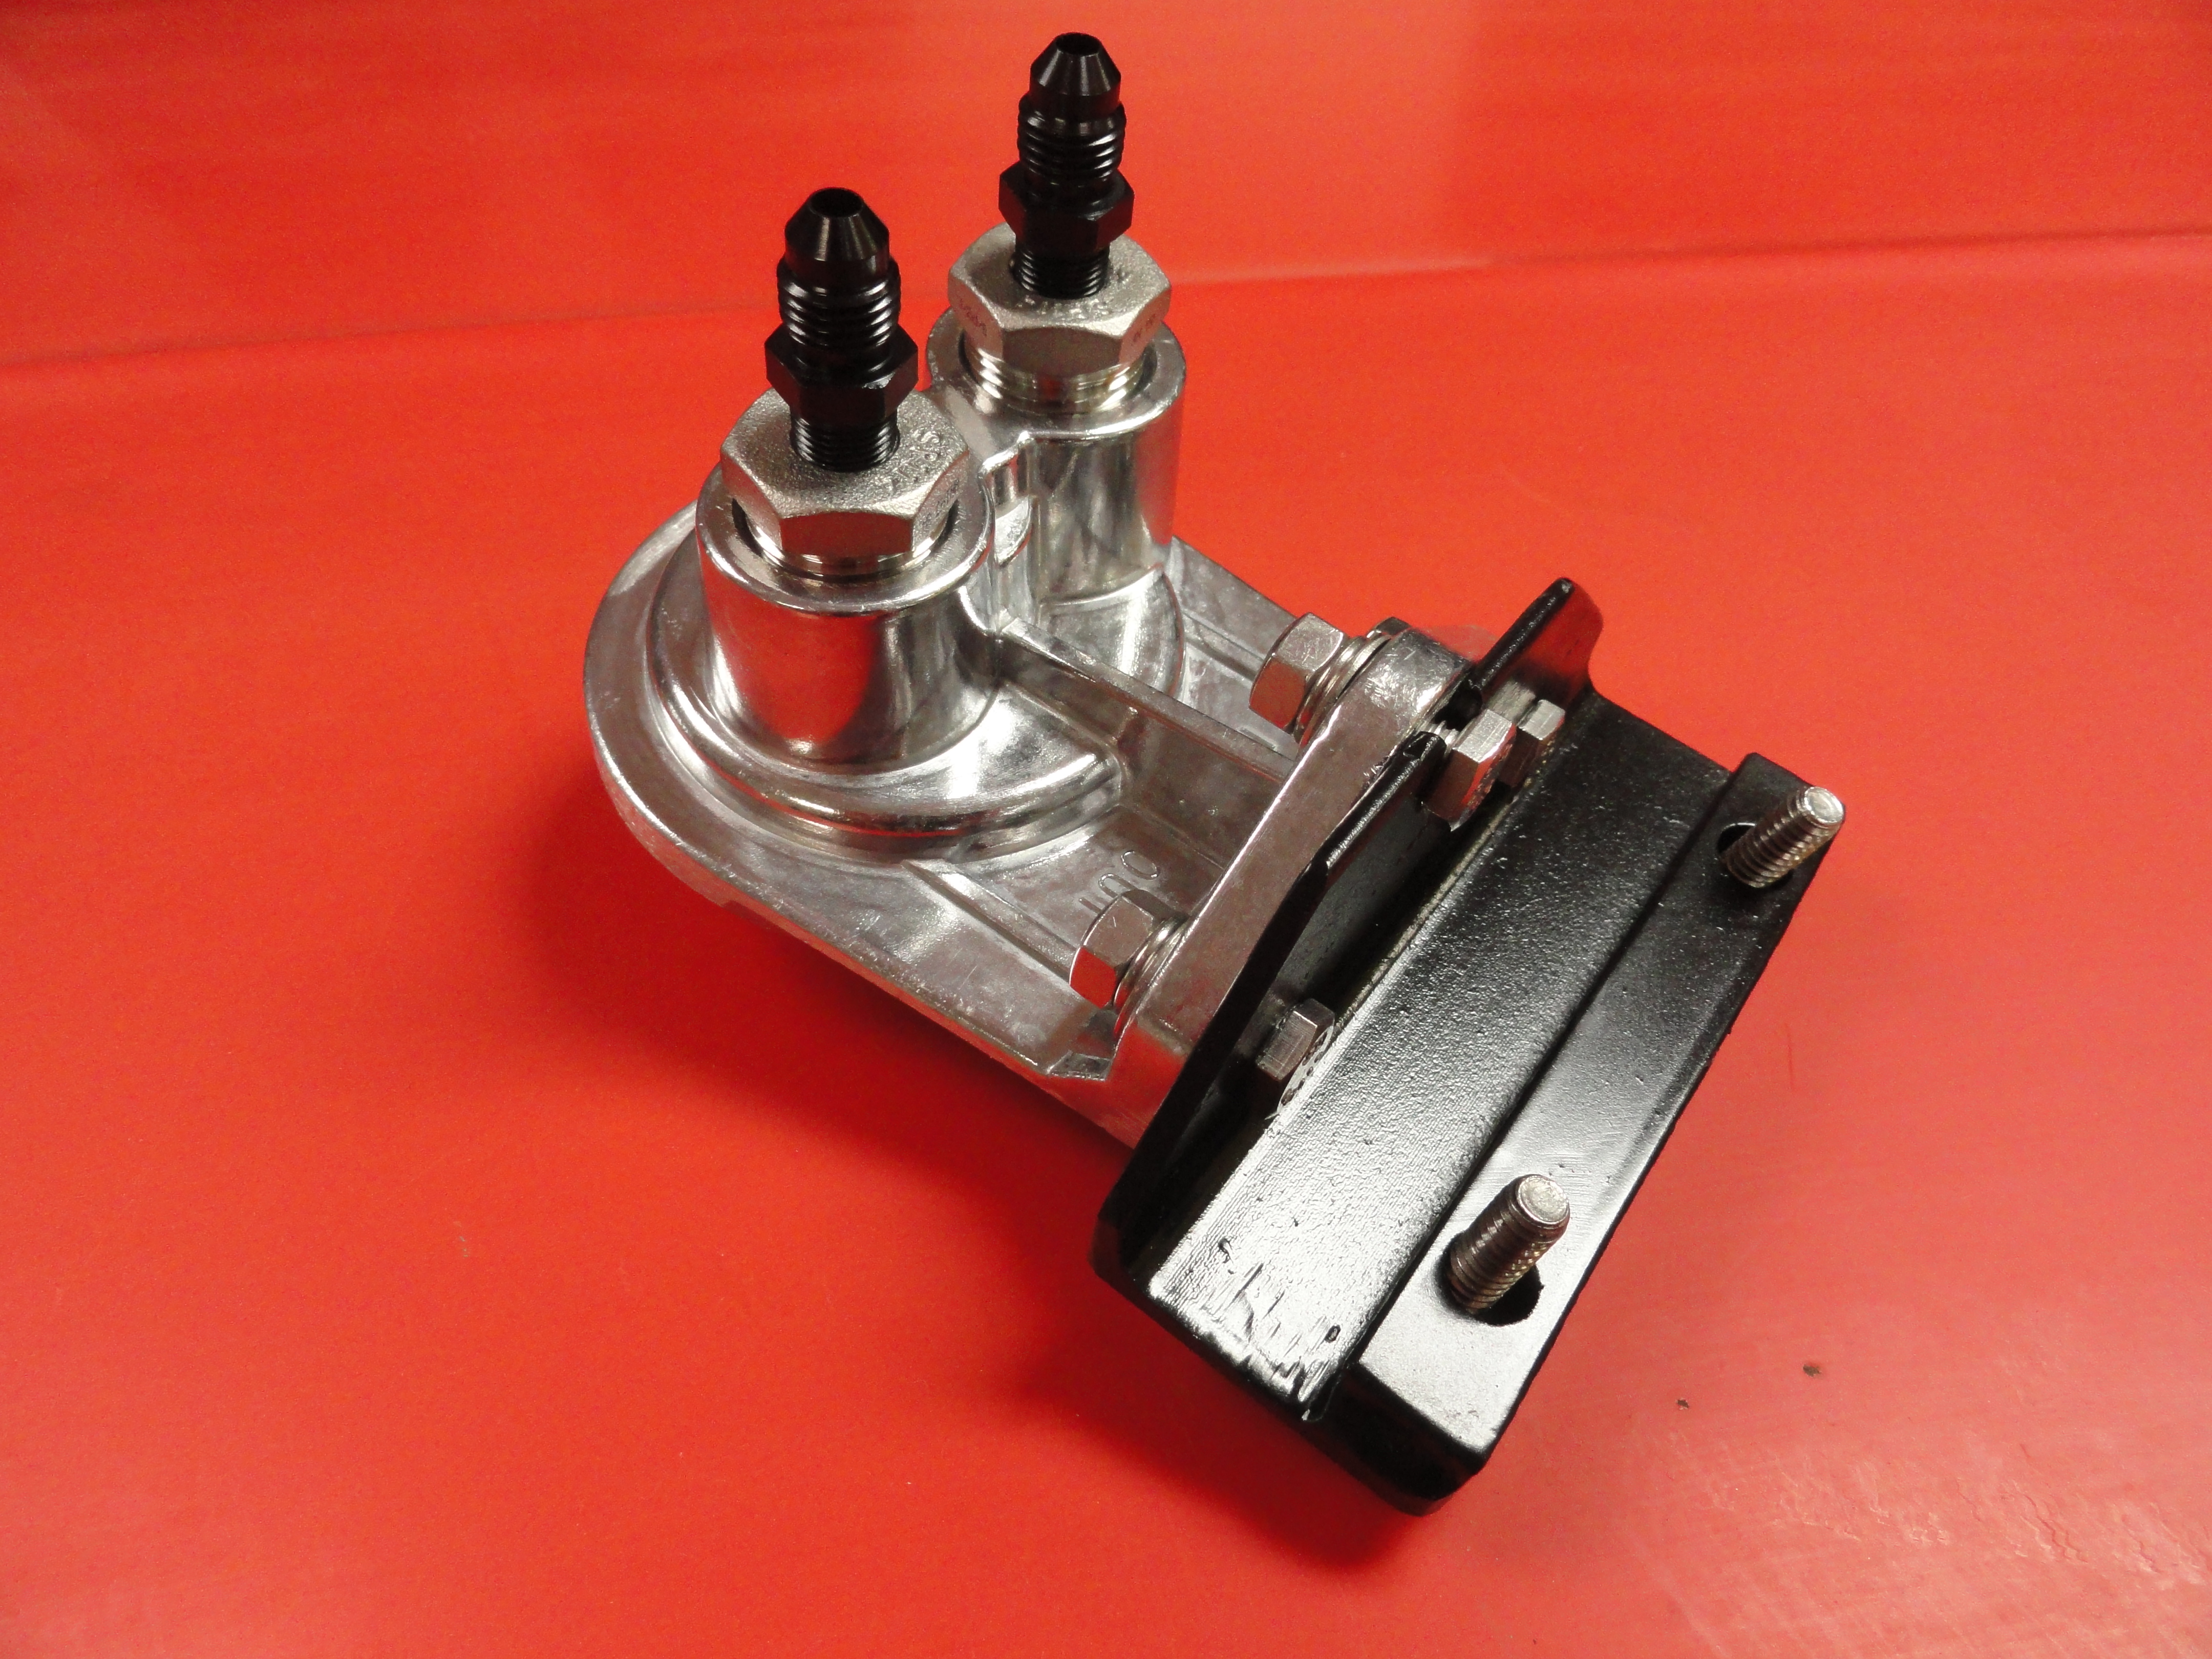
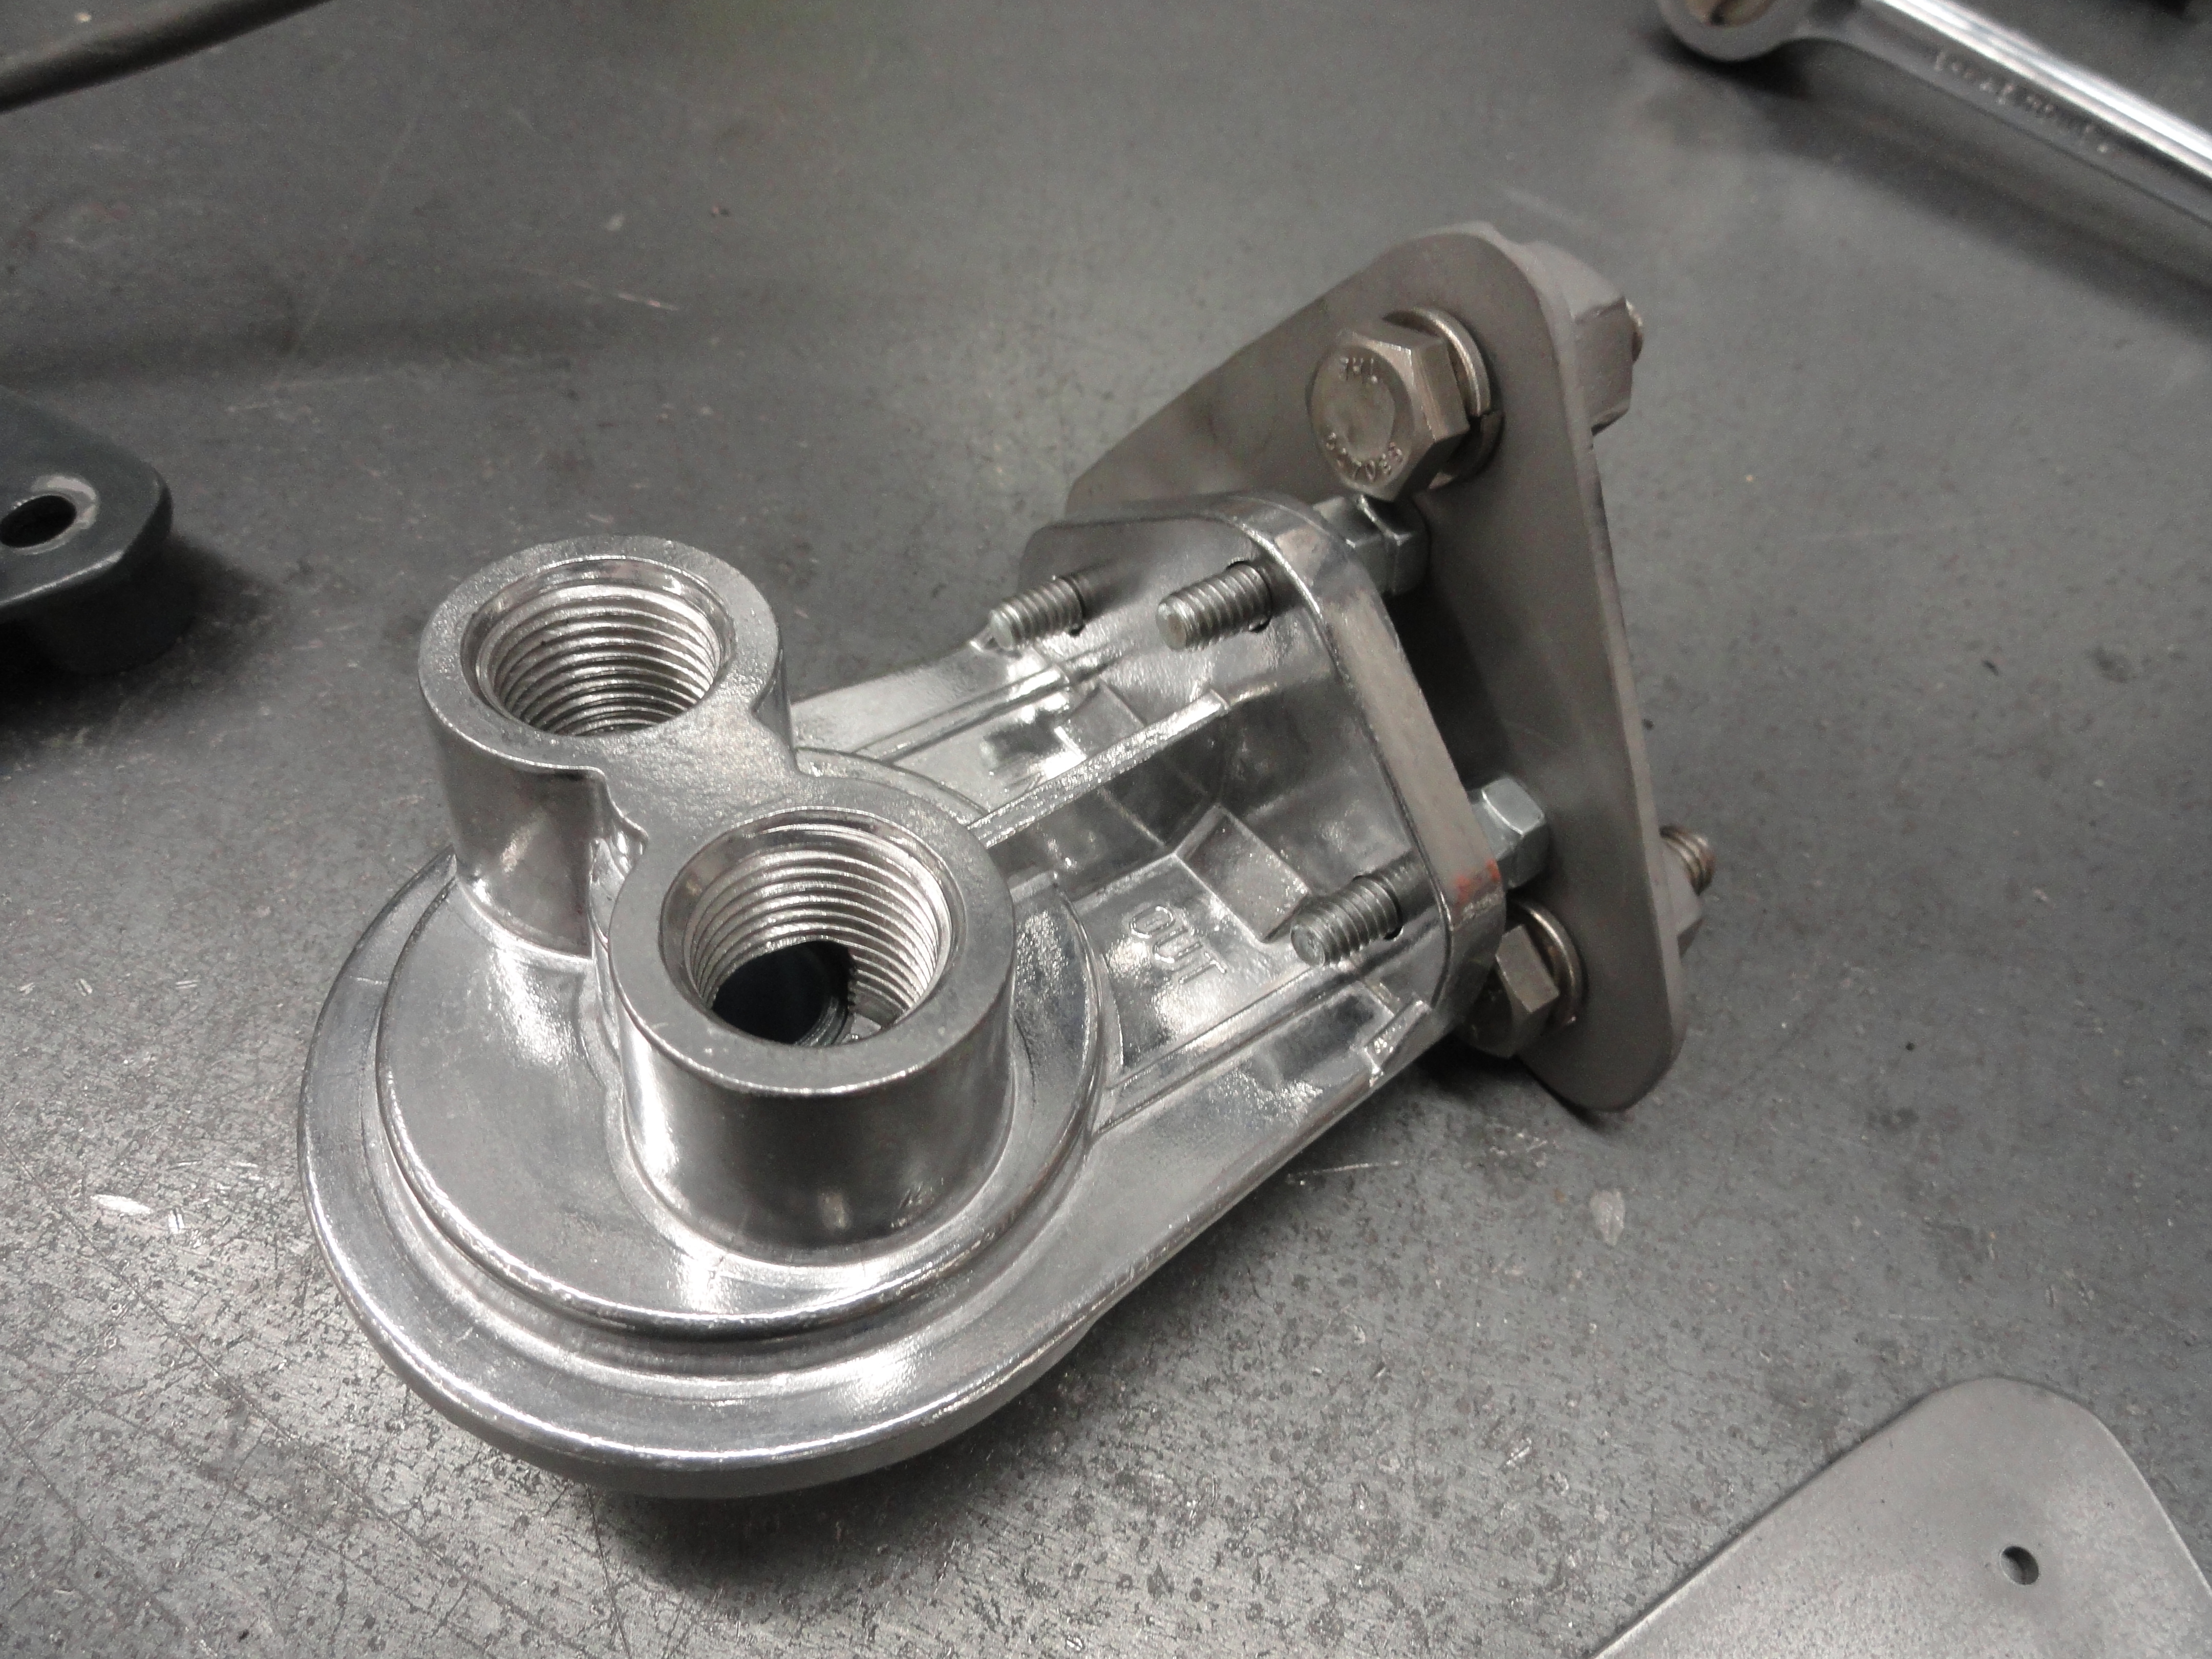
Solution Two: If you have a Triangular front engine mounting boss that is not used and the three holes are tapped for 3/8"-16 threads (stock) this bracket bolts directly to this location. Our favored Trans-Dapt 1028 Spin-On Adapter is used and is available with the modification for Bypass Filtration that reduces the outlet port to 1/16" to work exactly like the stock system or also available for full flow filtration. To efficiently get around the exhaust system, a 4 inch pipe is used with a Tee connection for connection to the Oil Pressure Gauge. All fittings except the -4AN fittings at the Adapter are Stainless Steel as shown above. This solution is for the Triangle Side Engine Mount that has ONE hole at the top and TWO holes on the bottom in a perfect triangle.
Install the bracket to the Trans-Dapt 1028 using the supplied stainless steel 1/4" bolts with lock washers. Use two 1/4-20 nuts between the adapter plate and the Trans-dapt for standoffs on each screw. This is to give the 3/8-16 bolt heads the clearance they need. Install the bottom two 3/8" bolts before you tighten the two assemblies together. Otherwise you can't get them in afterwards. To install, once the bracket with adapter is secure, install the 4 inch stainless steel 1/8" NPT pipe directly to the engine block in the aft (oil flow OUT) port. No need to use a pipe wrench on it just yet. Install the Tee on the end of the pipe. Use teflon tape that is rated for oil, Permatex High Temp Gasket Sealer or Permatex Aviation 300 on the threads. Turn the Tee and the pipe by hand until the pipe is tight in the engine block, then using a pipe wrench, turn the Tee until it is tight and straight, parallel with the engine and frame. Do not over-tighten! Install the 1/8" NPT to -4 AN Adapter into the front of the Tee, and the 1/8" NPT plug (or your oil pressure gauge hookup) into the back of the Tee. Install a 1/8" NPT to -4 AN adapter to the front inlet on the engine block (oil flow IN). Since the Trans-Dapt is already configured, it's a simple matter of just attaching the stainless steel braided flex hose. Be sure to keep the flex line as far away from the exhaust as possible. Do not tighten the collar nut on the hoses. They break off easily if overtight. The hoses are rated at 300 degrees but the exhaust can be well over 700, so keep them away.
Solution Three: If you have a Full Flow Oil Filtration System on your 1954-1962 235 or 261 full pressure oil system we use the same Trans-Dapt 1028 with either bracket above. The difference is that 3/8" NPT lines and adapters to -6 AN are used and the 1/16" restrictor is not installed.
Install the Triangle bracket using the supplied stainless steel 3/8" bolts to the triangular mounting
boss. Tighten securely. Install the Trans-Dapt 1028 leaving two nuts on the 1/4" screws for standoffs.
Tighten securely. If you are using the clamp-on bracket, slide it on the top rail of the frame just
forward of the steering gearbox and move it as far forward as you can before the downward turn on the
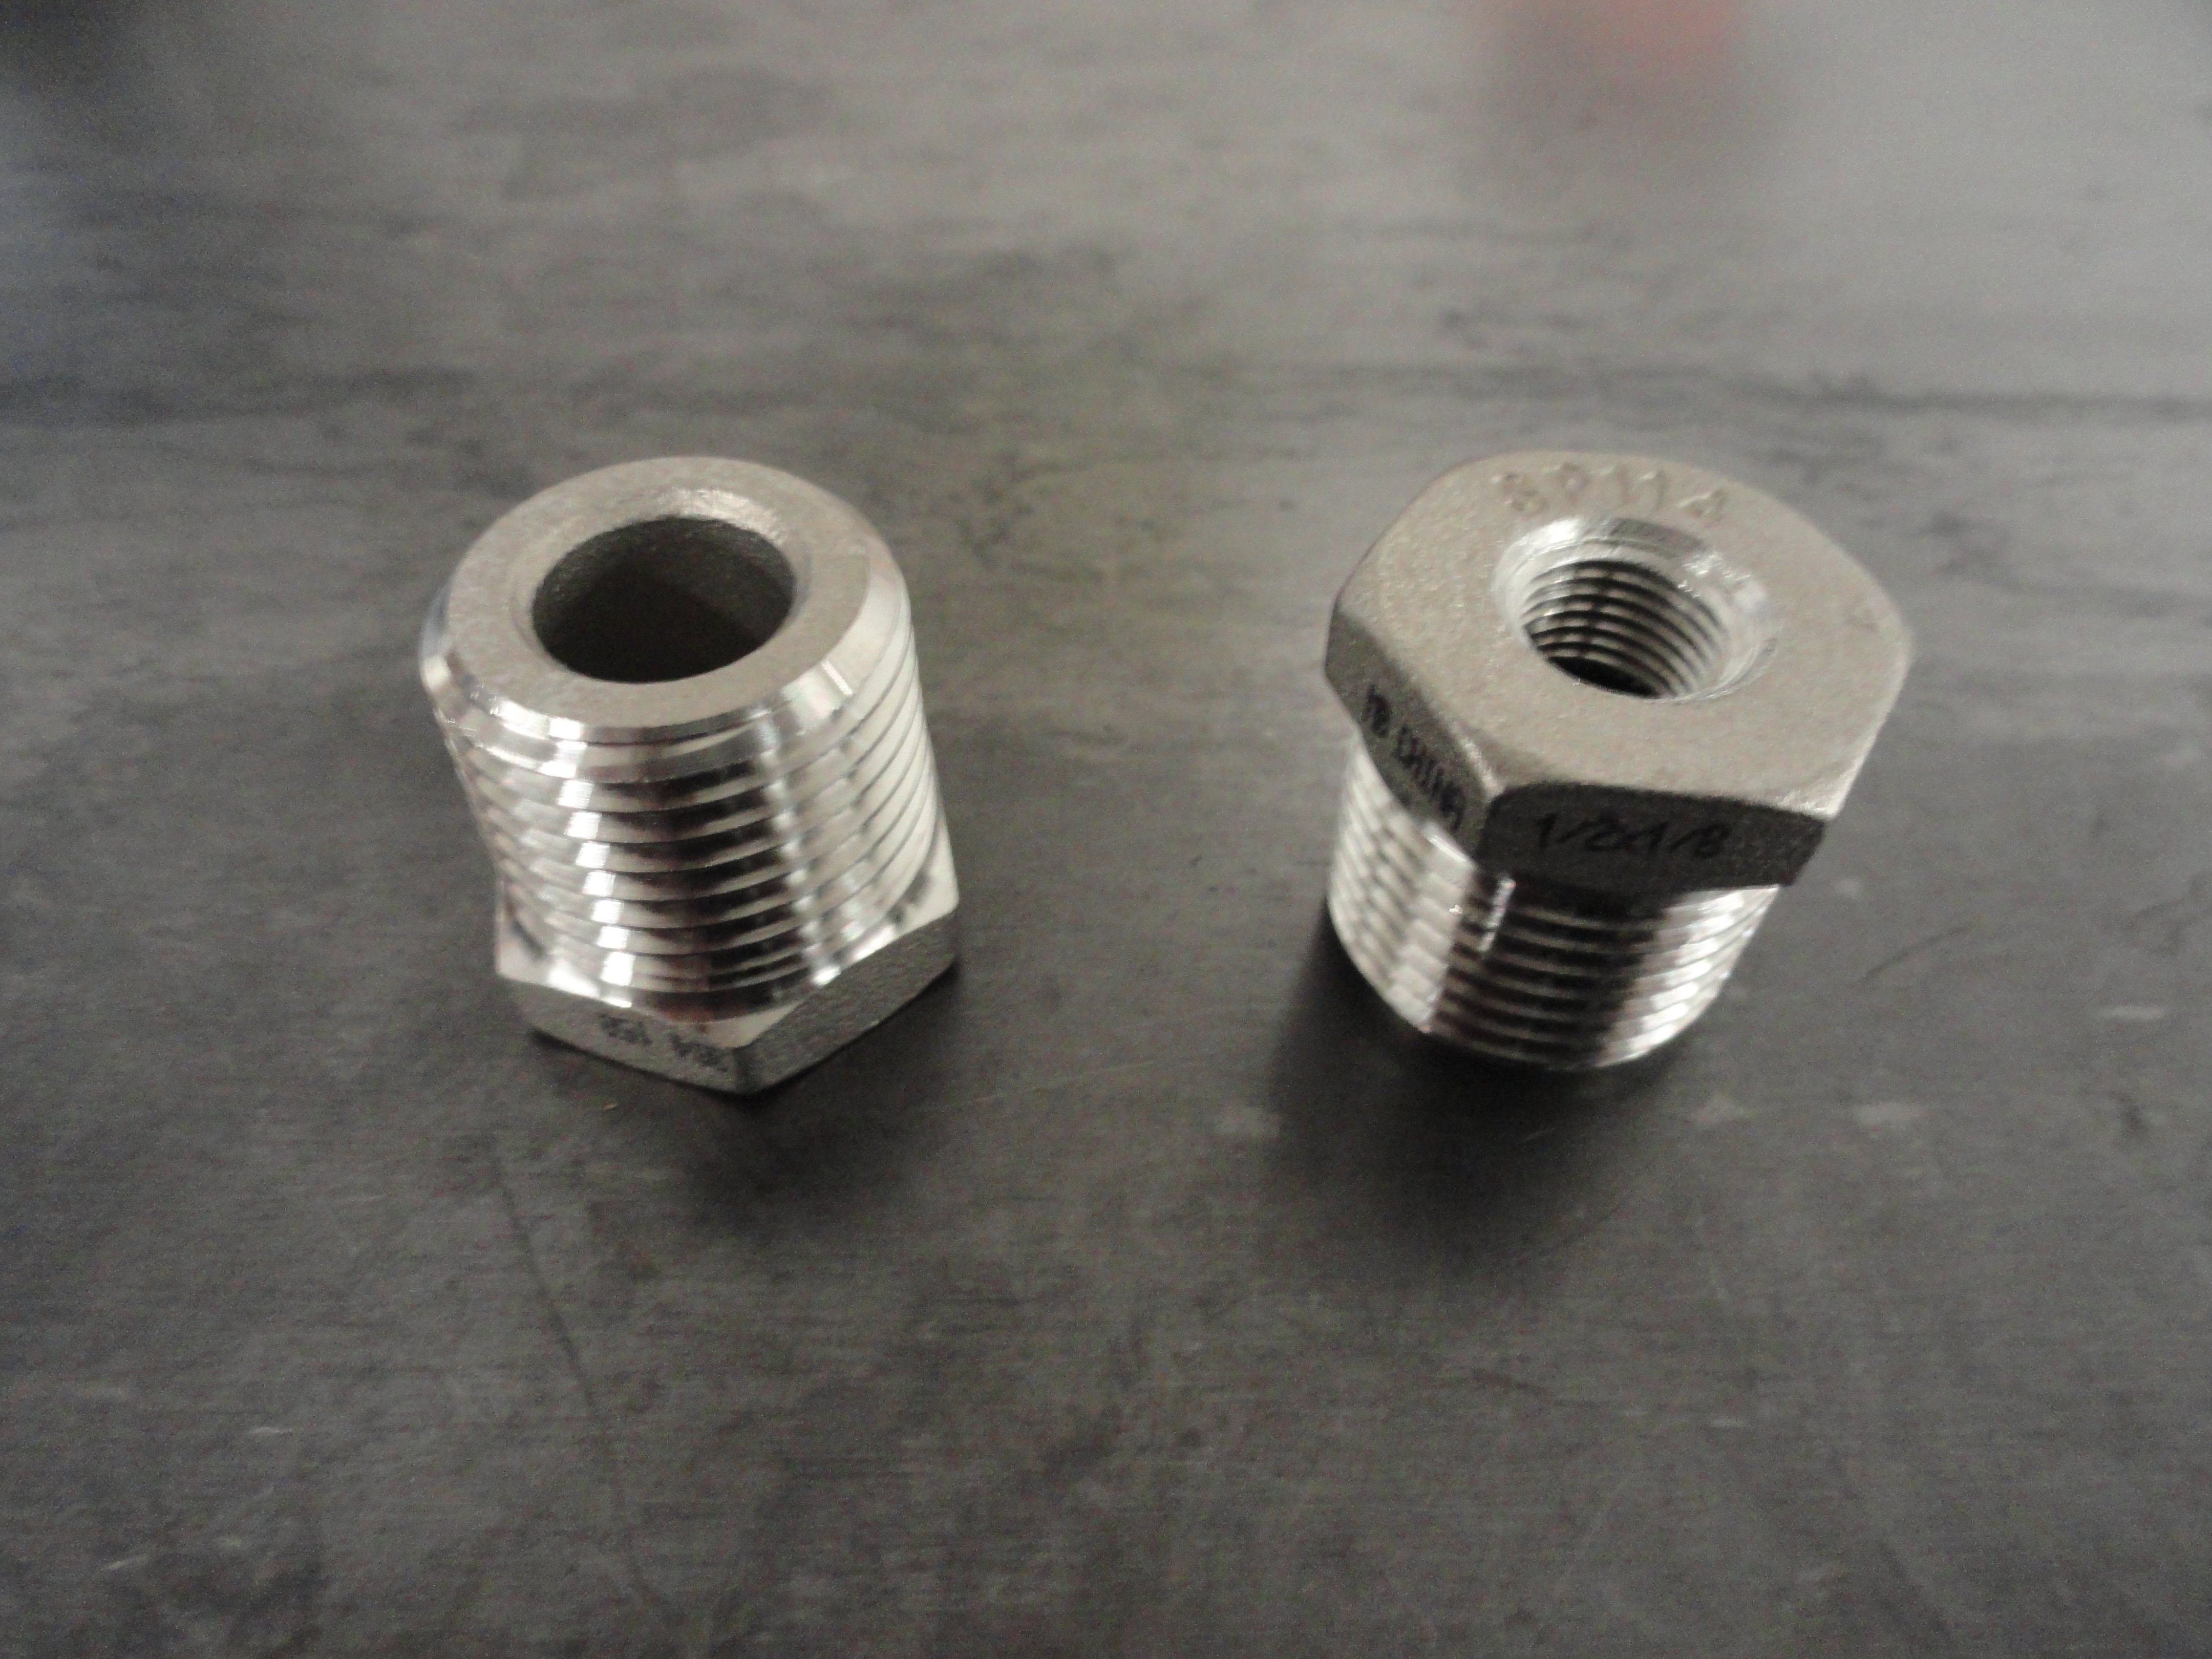
frame prevents further adjustment. If you have a 261 with the large 1/2" NPT oil in/outlets, install
the 1/2" NPT to 3/8" NPT reducers on the engine block, then on the rearmost fitting, install the 5"
Pipe and Tee Connector. Tighten so that the Tee is Parallel to the engine and frame. Use Teflon tape
approved for Oil, or Permatex High Temp Copper Gasket Sealer on the threads. Next install a 3/8" to
-6AN Adapter on the front engine block fitting and another one on the Tee. Install either the Oil
Pressure Gauge or the included plug on the back of the Tee. Install the hoses and tighten securely.
Note: If you have a 235 with 3/8" NPT in/outlets then the 1/2" reducers do not apply at the block.
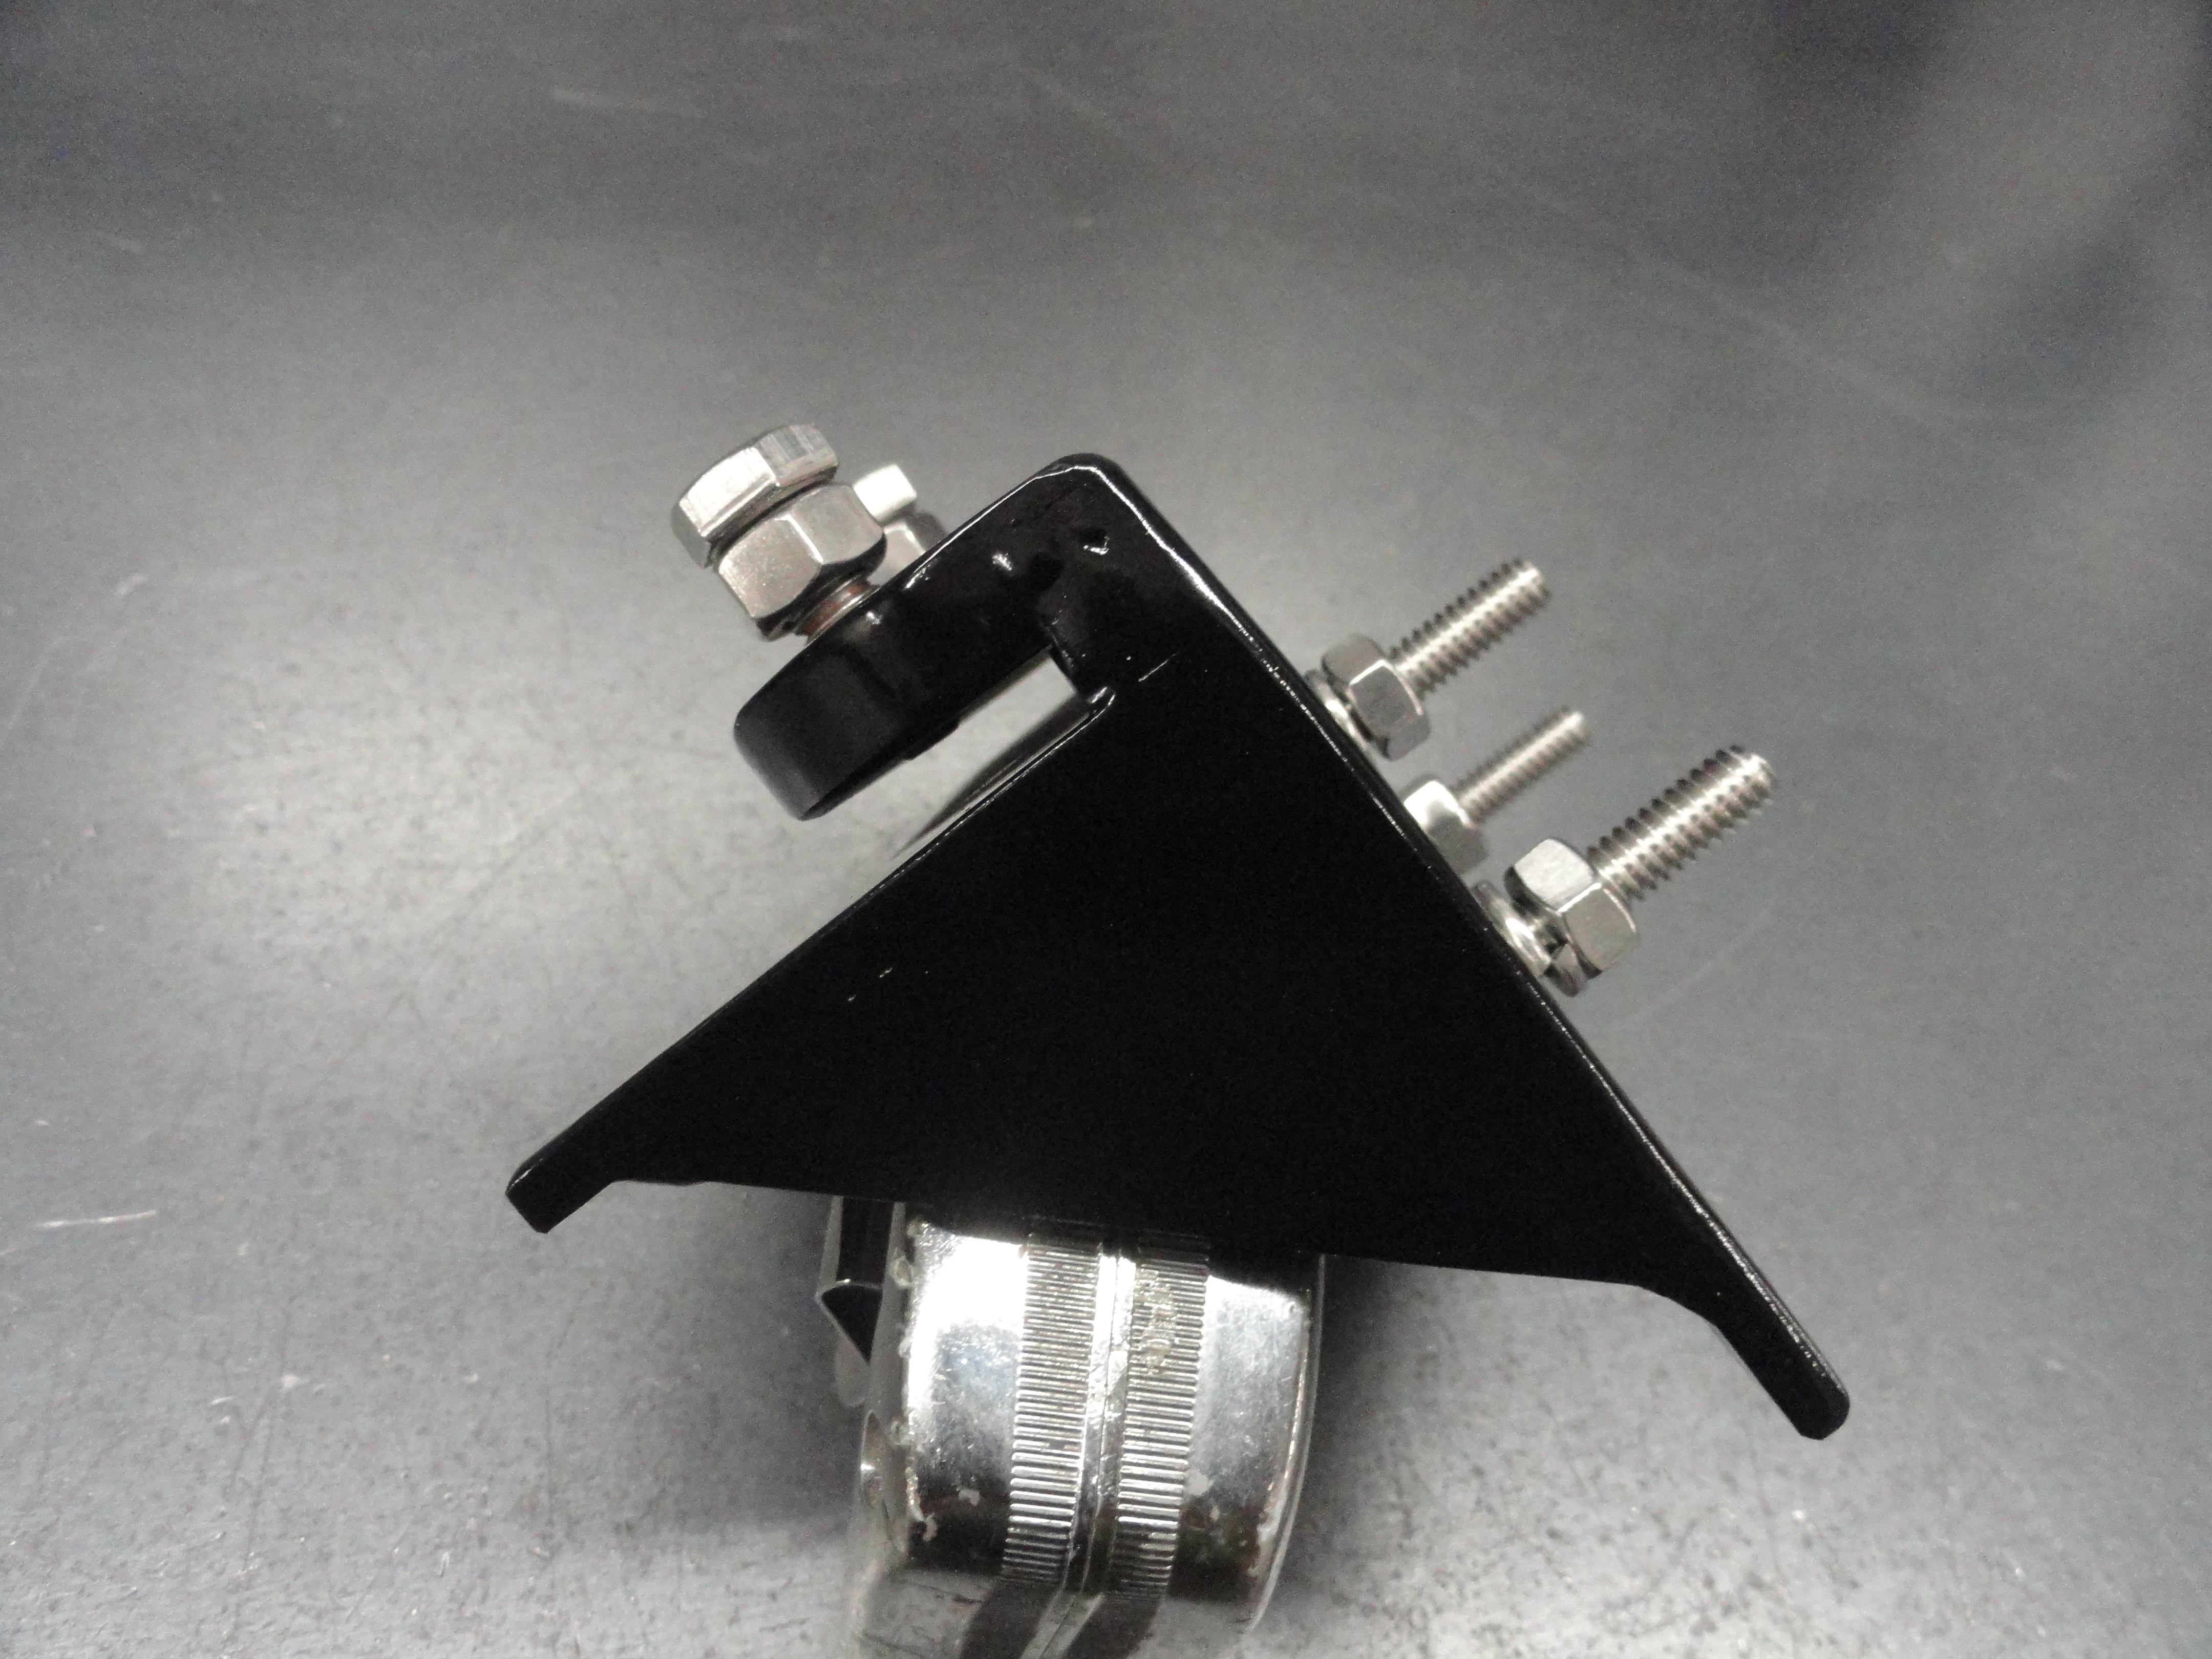
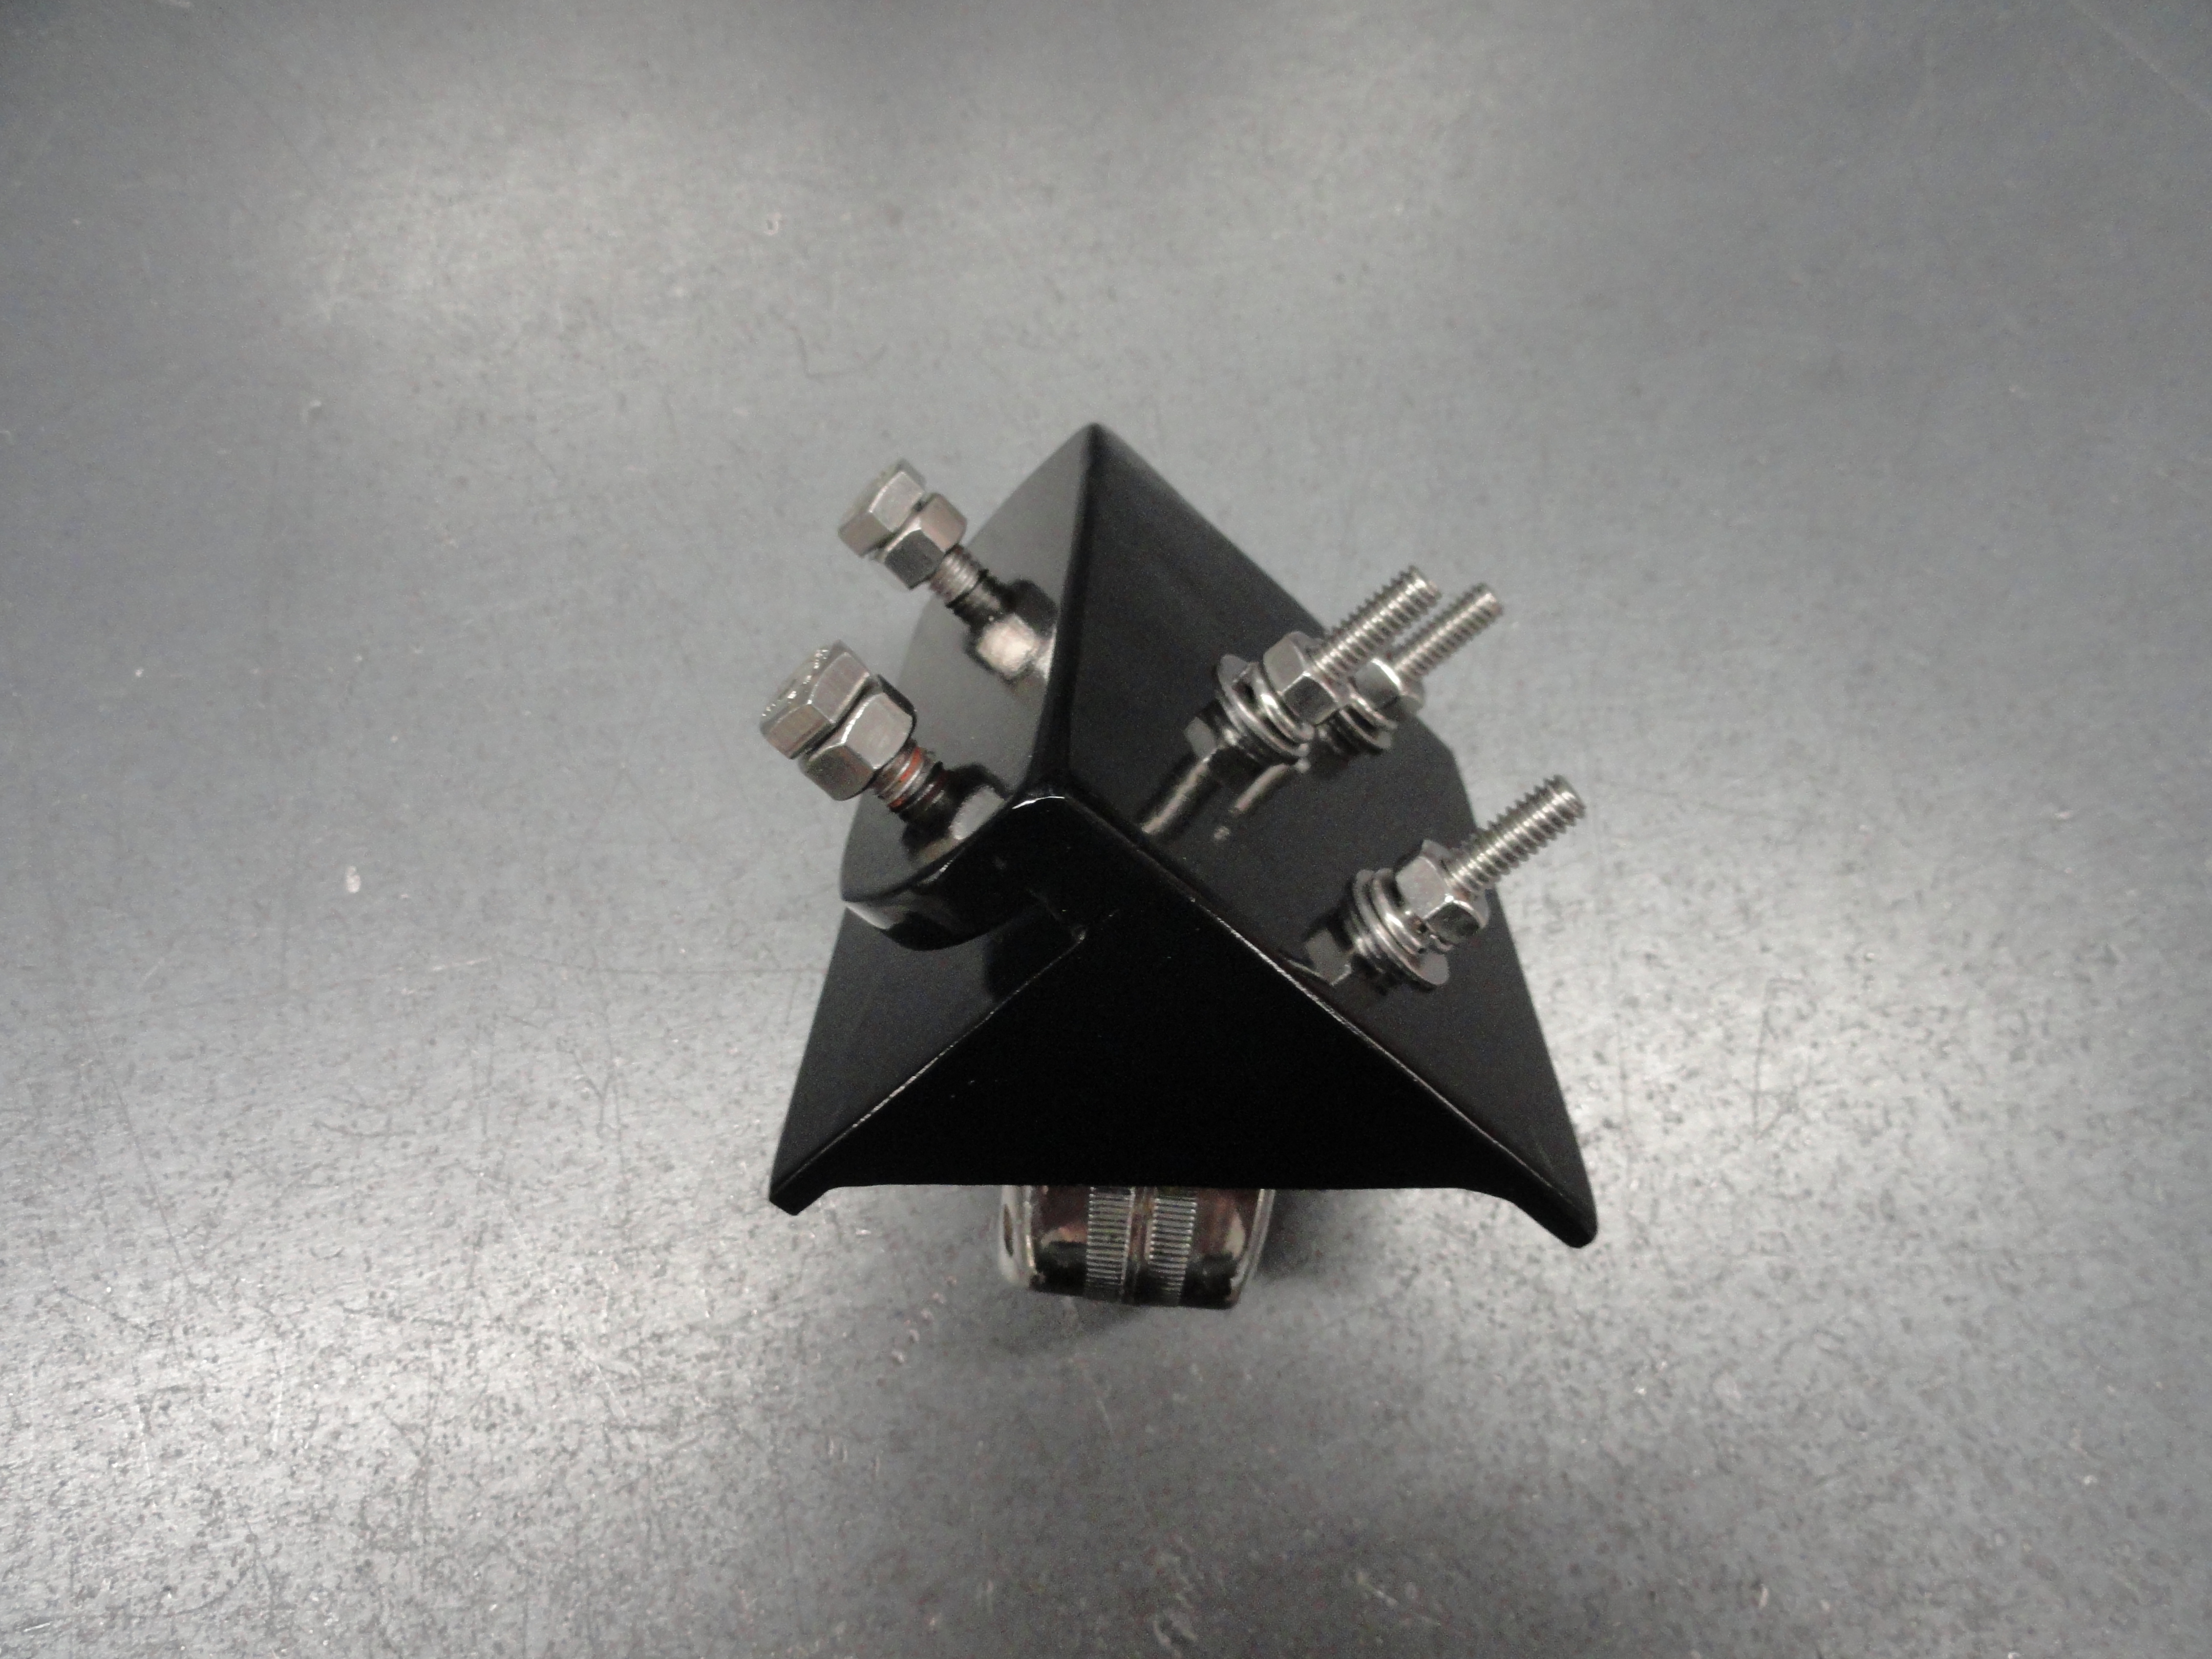
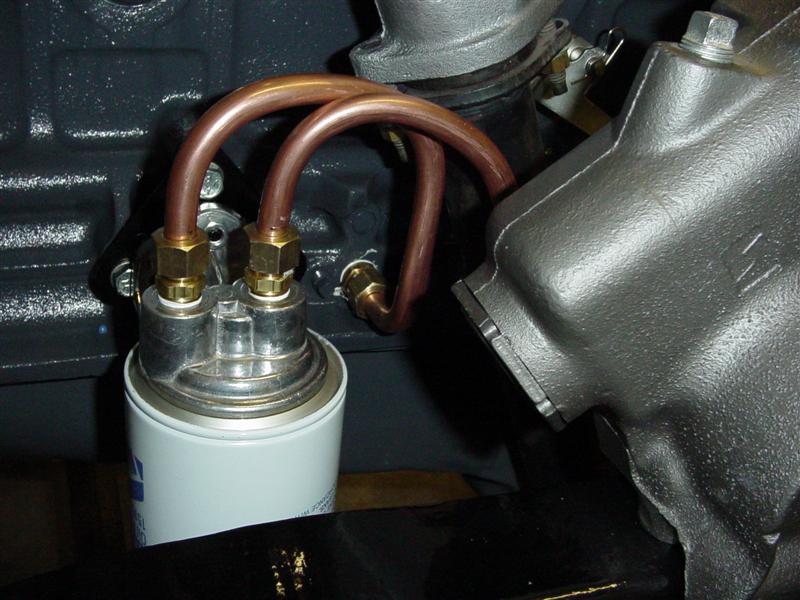
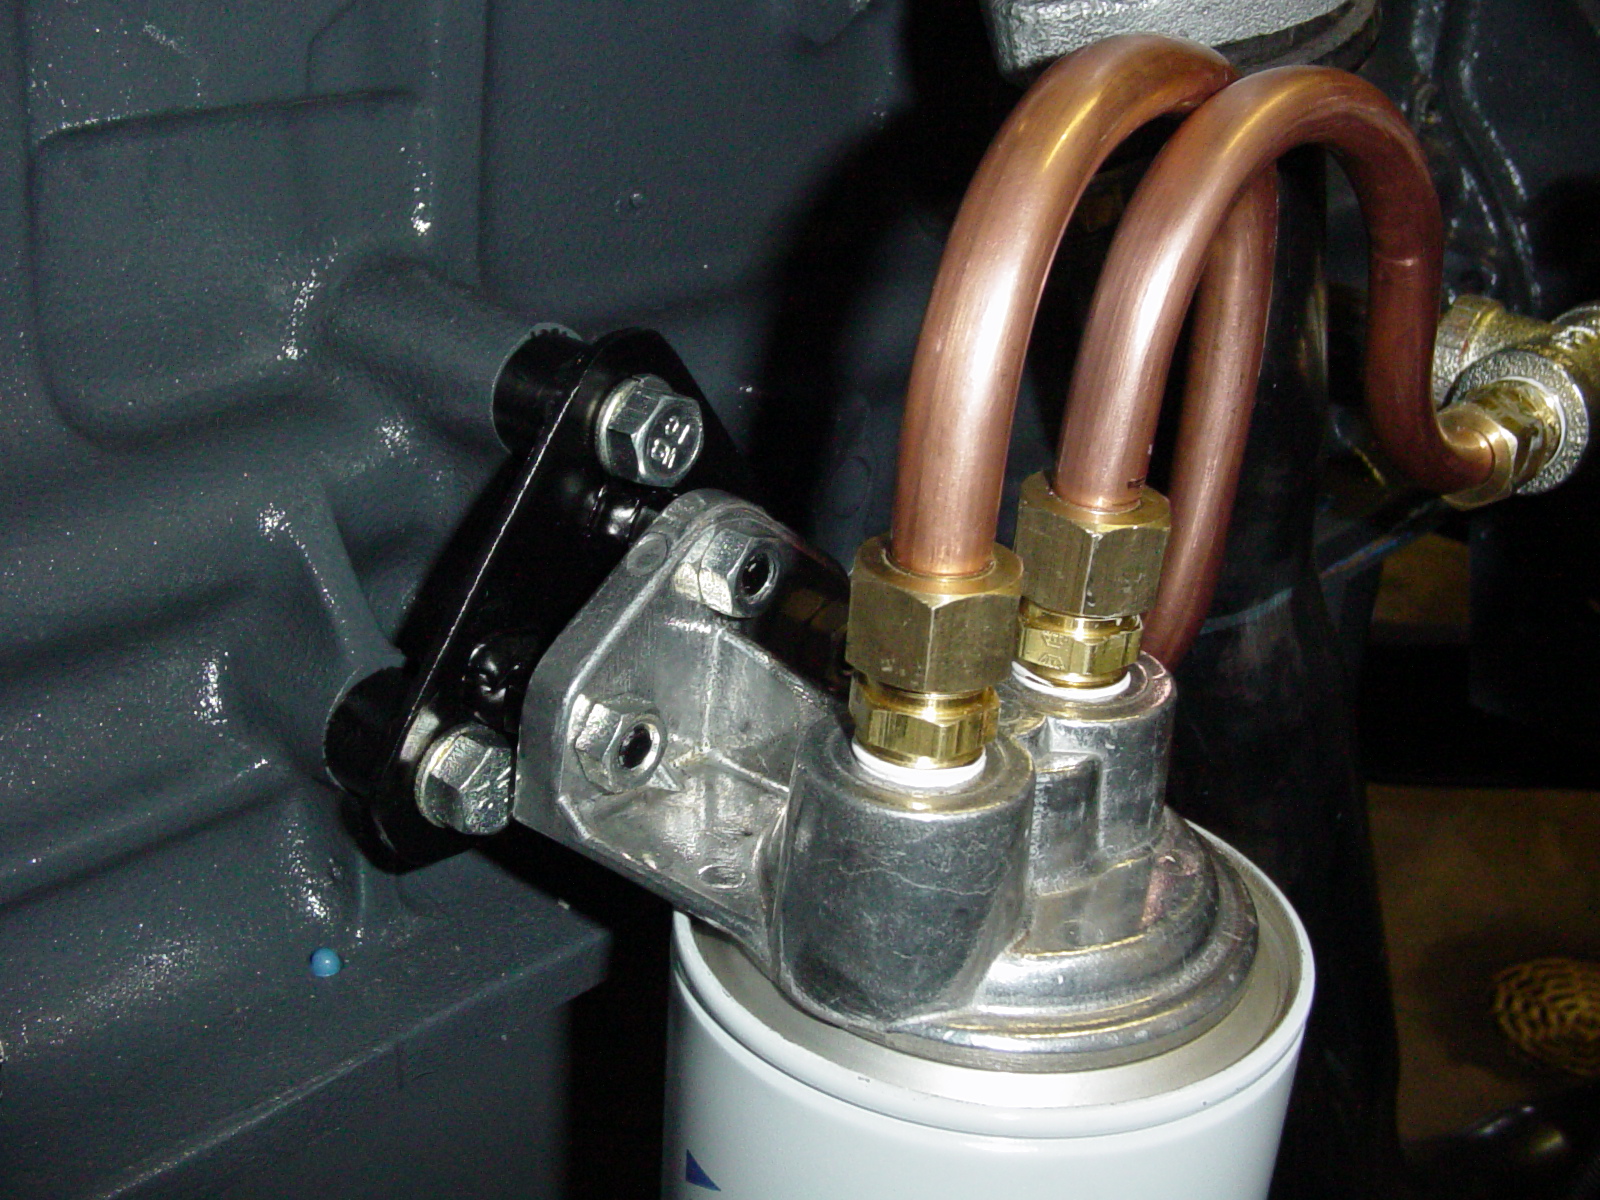
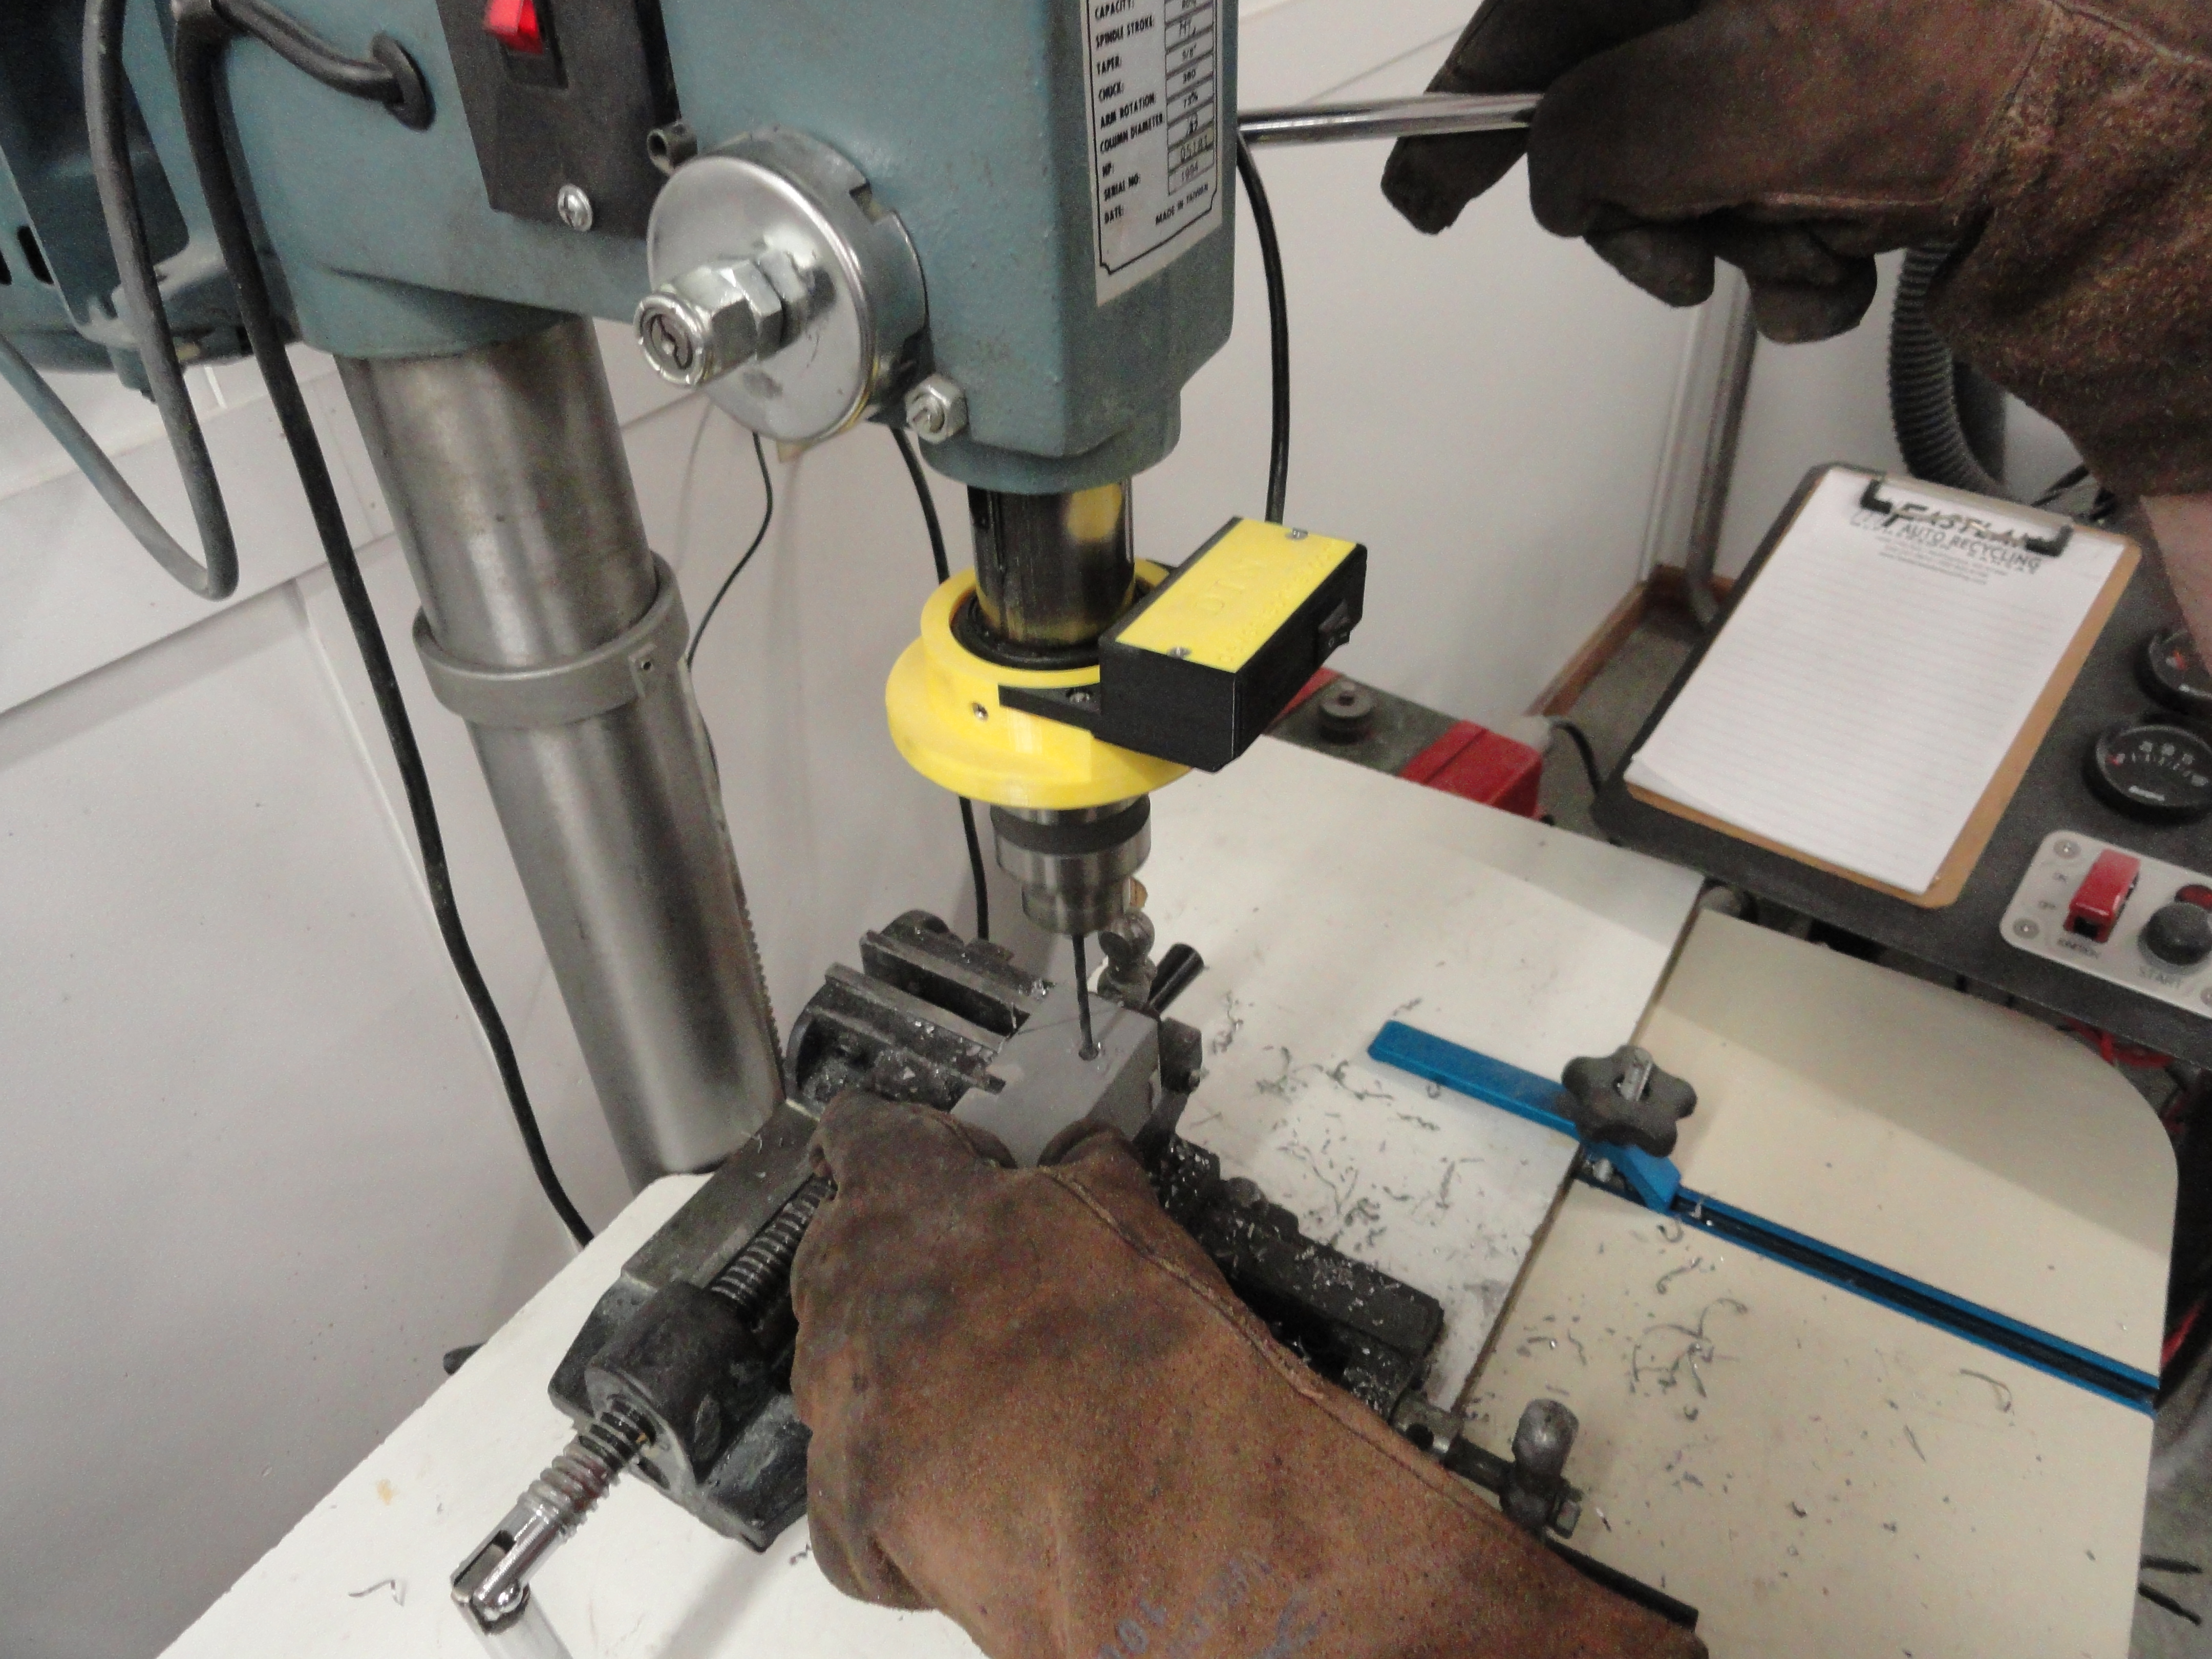
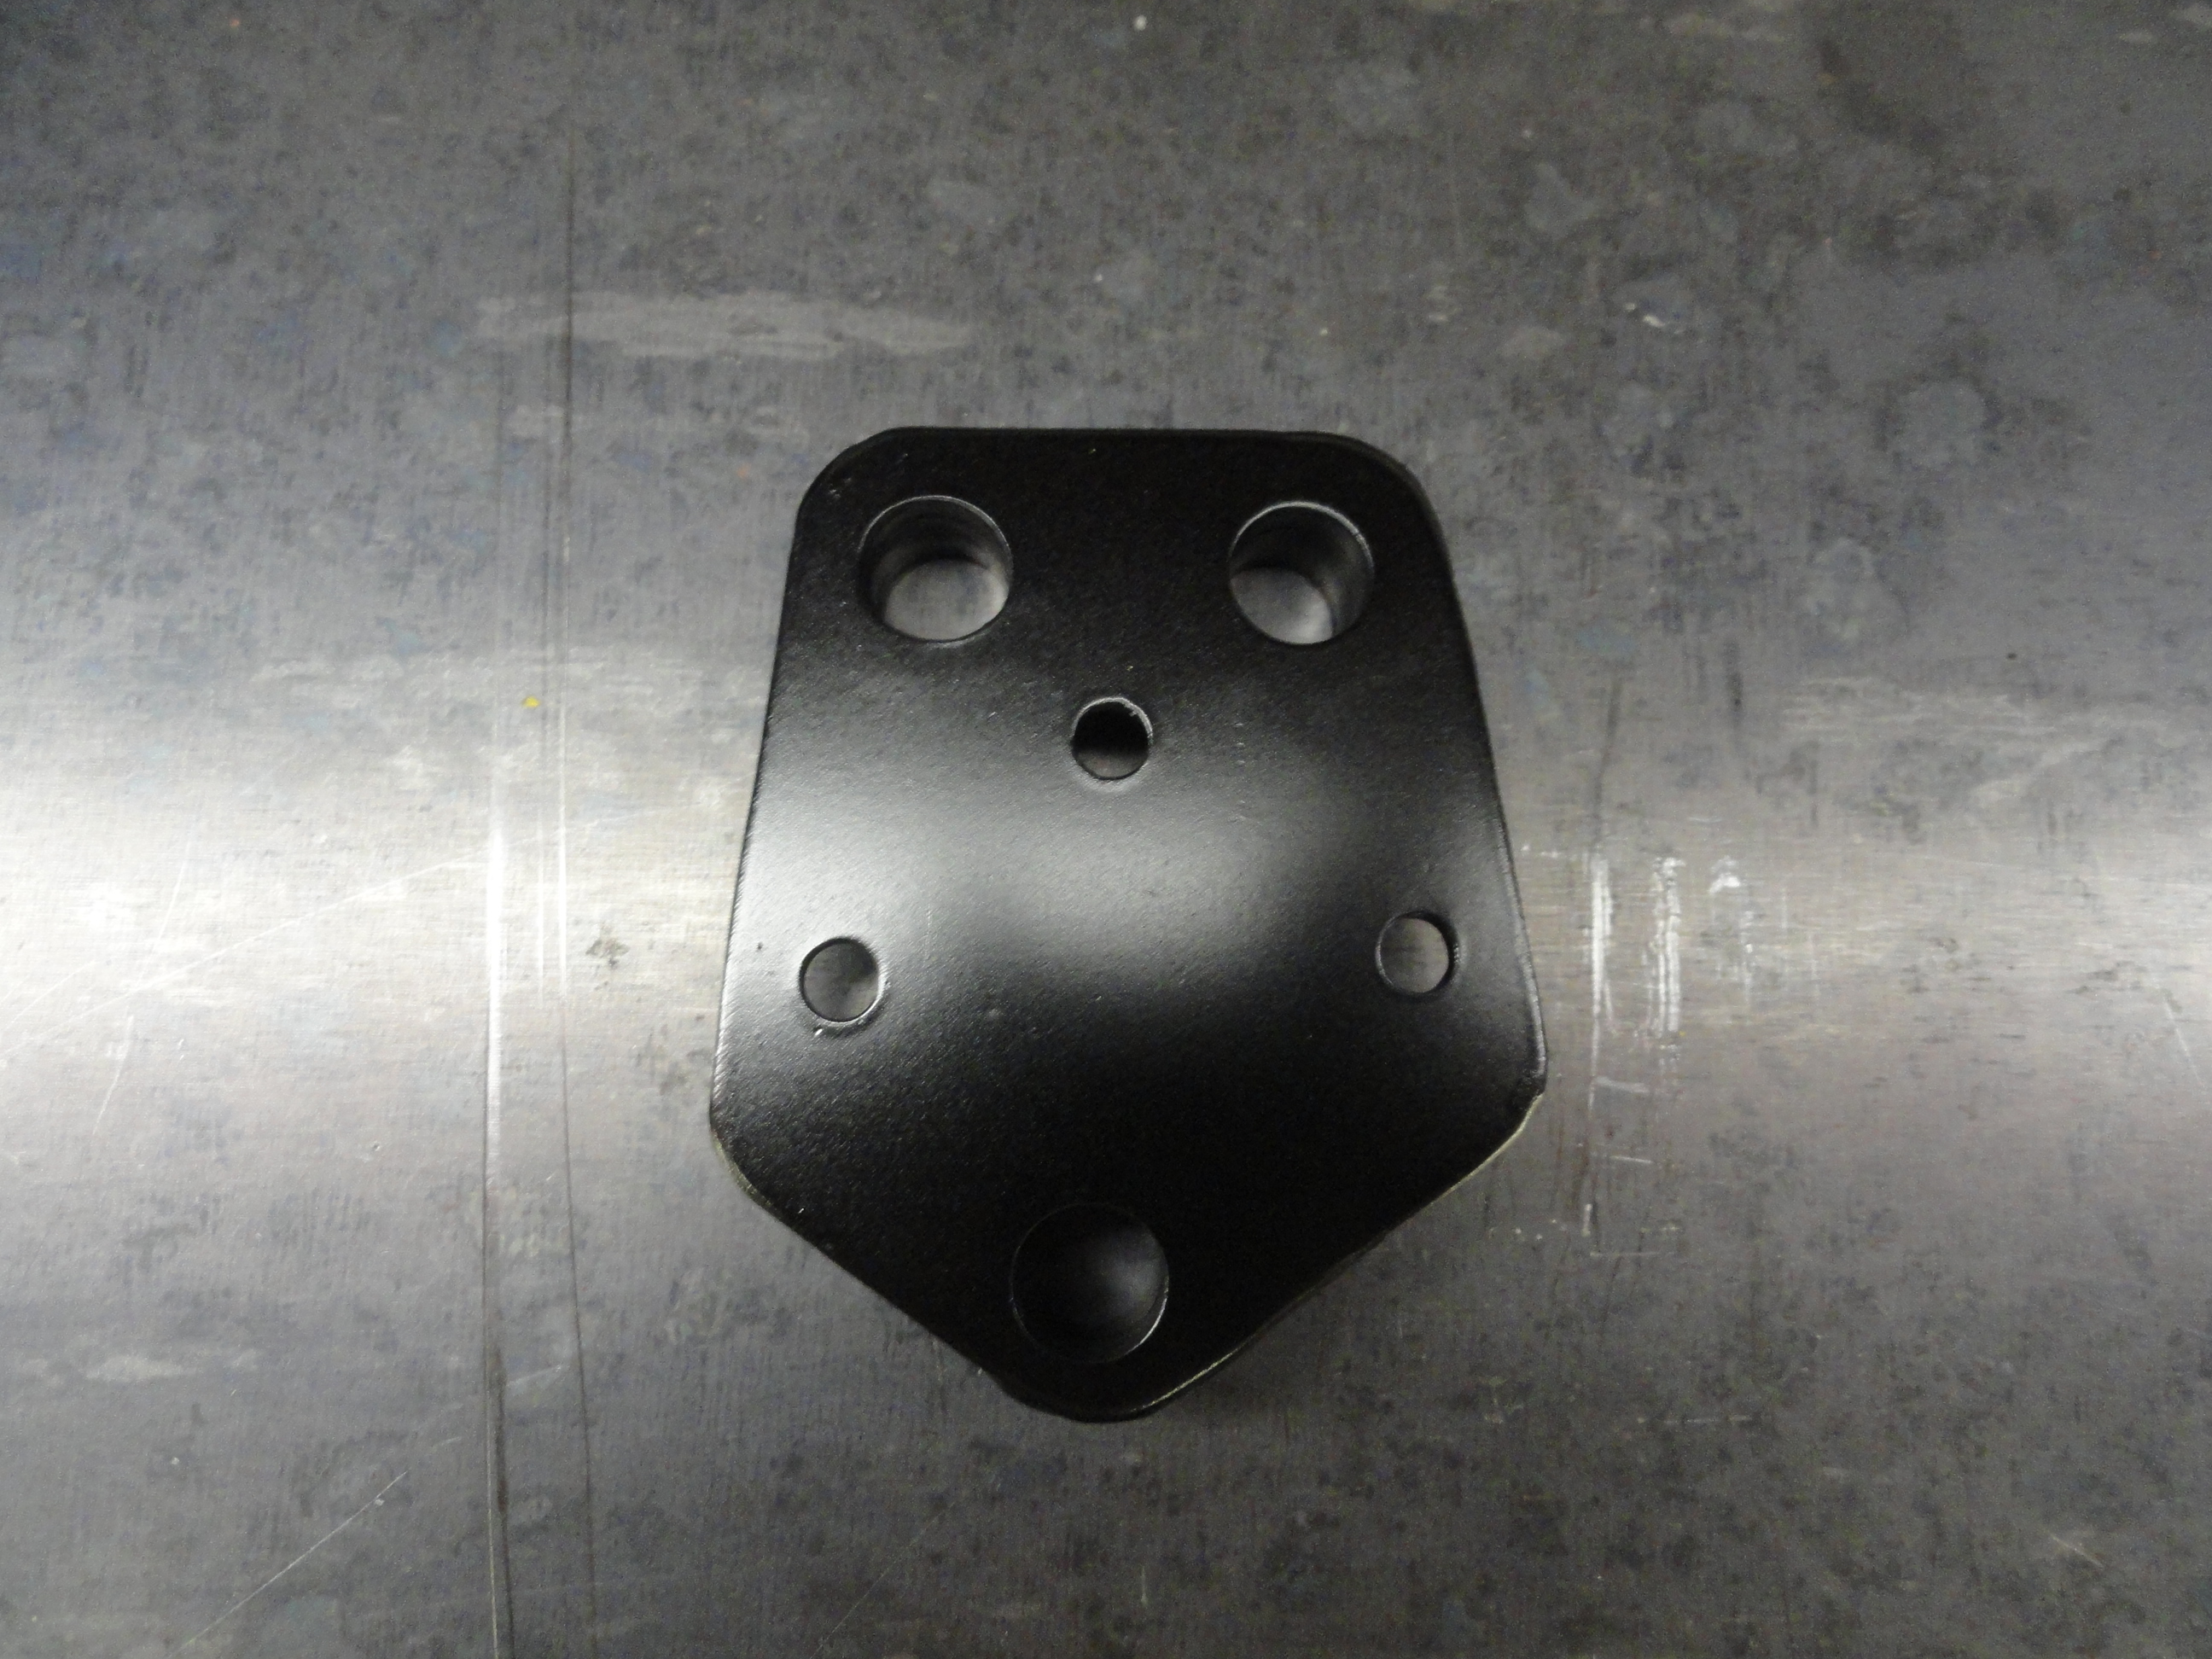
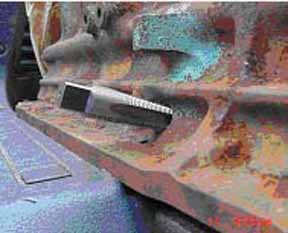
I want to explain how to install a Trans-Dapt 1028 Spin-On Oil Filter Adapter after modifying the engine block for full flow oil filtration. I found a really cool place to put the adapter. The newer 235 engines have a triangular side engine mounting boss. Three 3/8" bolts are used to hold the engine in place on a newer style truck. Since we are setting this engine up for 1947-1955, the engine will be mounted at the front on the timing plate. This leaves those three holes for us to mount our Spin-On adapter direct to the engine. This is the best way because any torquing or engine movement will not cause stress on the adapter or hoses. It would be nice if they made an Spin-On Oil Filter Adapter that just had that bolt pattern, but no, we have to make an adapter for the adapter! Not really much problem if you have rudimentary metal working tools. If you don't, you can always purchase a complete or even partial kit from us. Meanwhile, to make this thing, we need some 1/8" plate, some cardboard, some hardware and some patience. Start by placing a piece of cardboard up against these triangular bosses and hold it very firmly, take a hammer and just tap around the cardboard to get the pattern. Use a ball peen hammer to tap inside the holes so that they also show really well. Once you have the outside pattern as well as the hole pattern, cut it out with scissors and place it over your 1/8" plate.

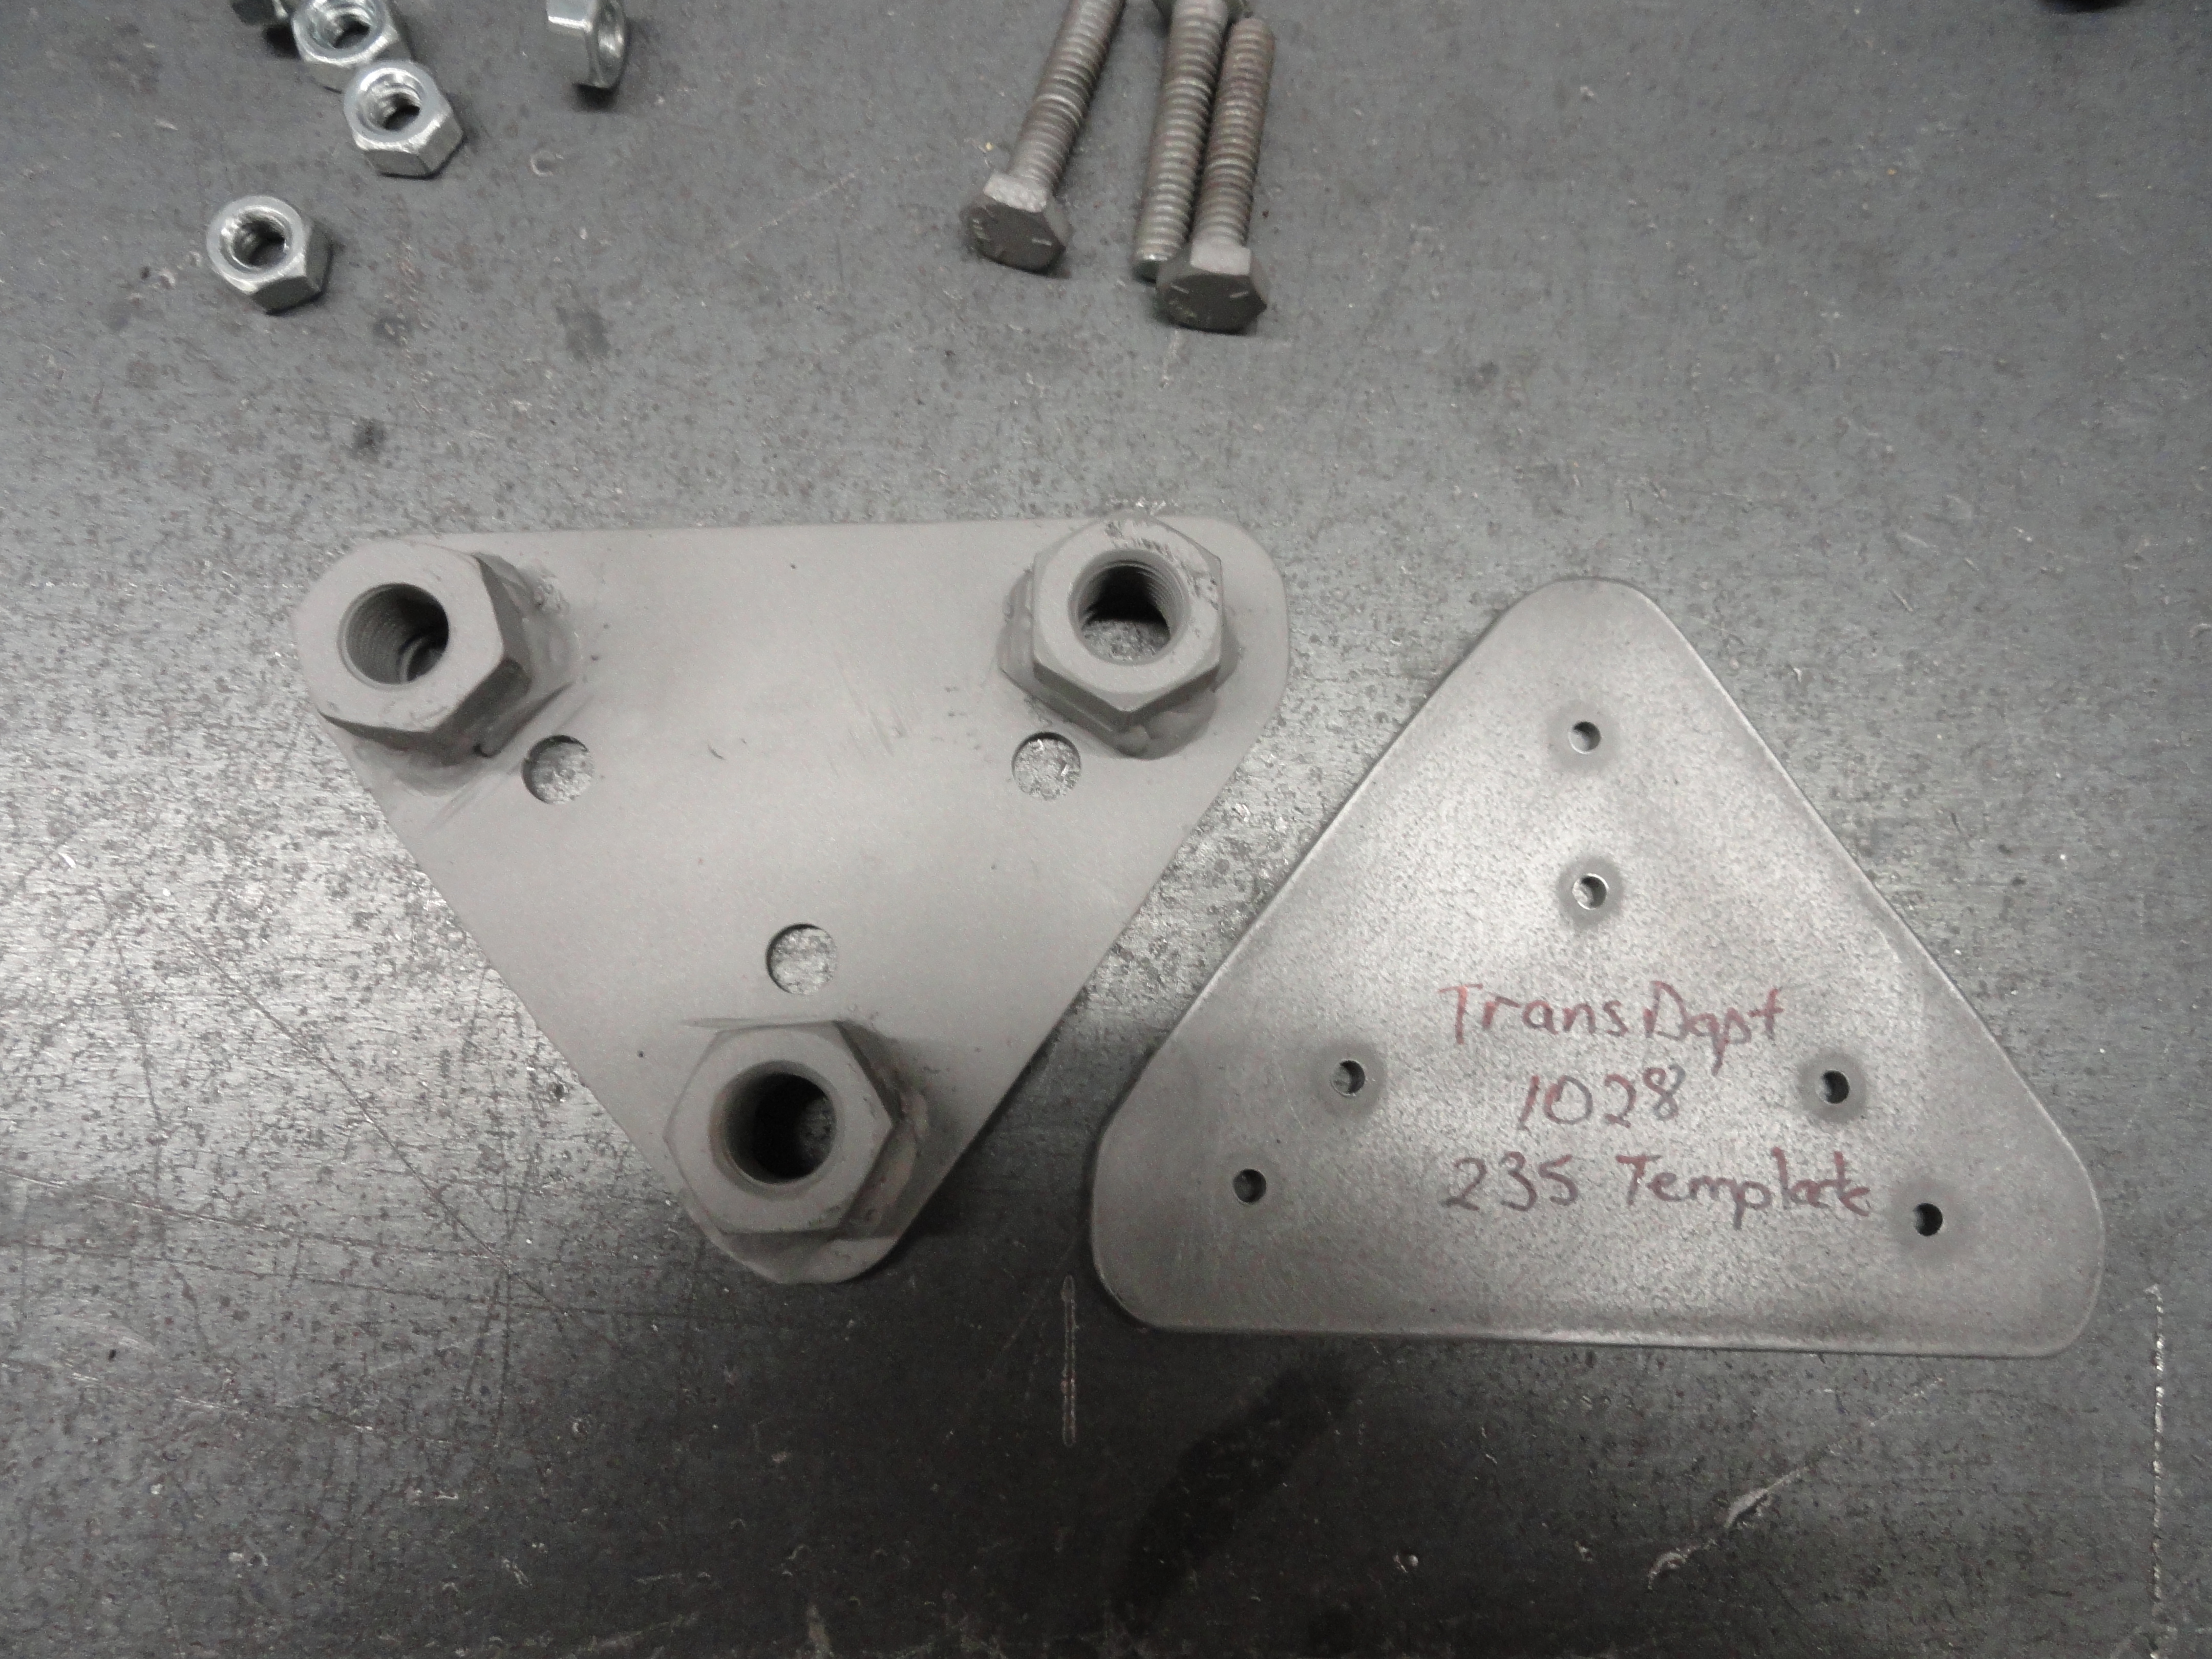
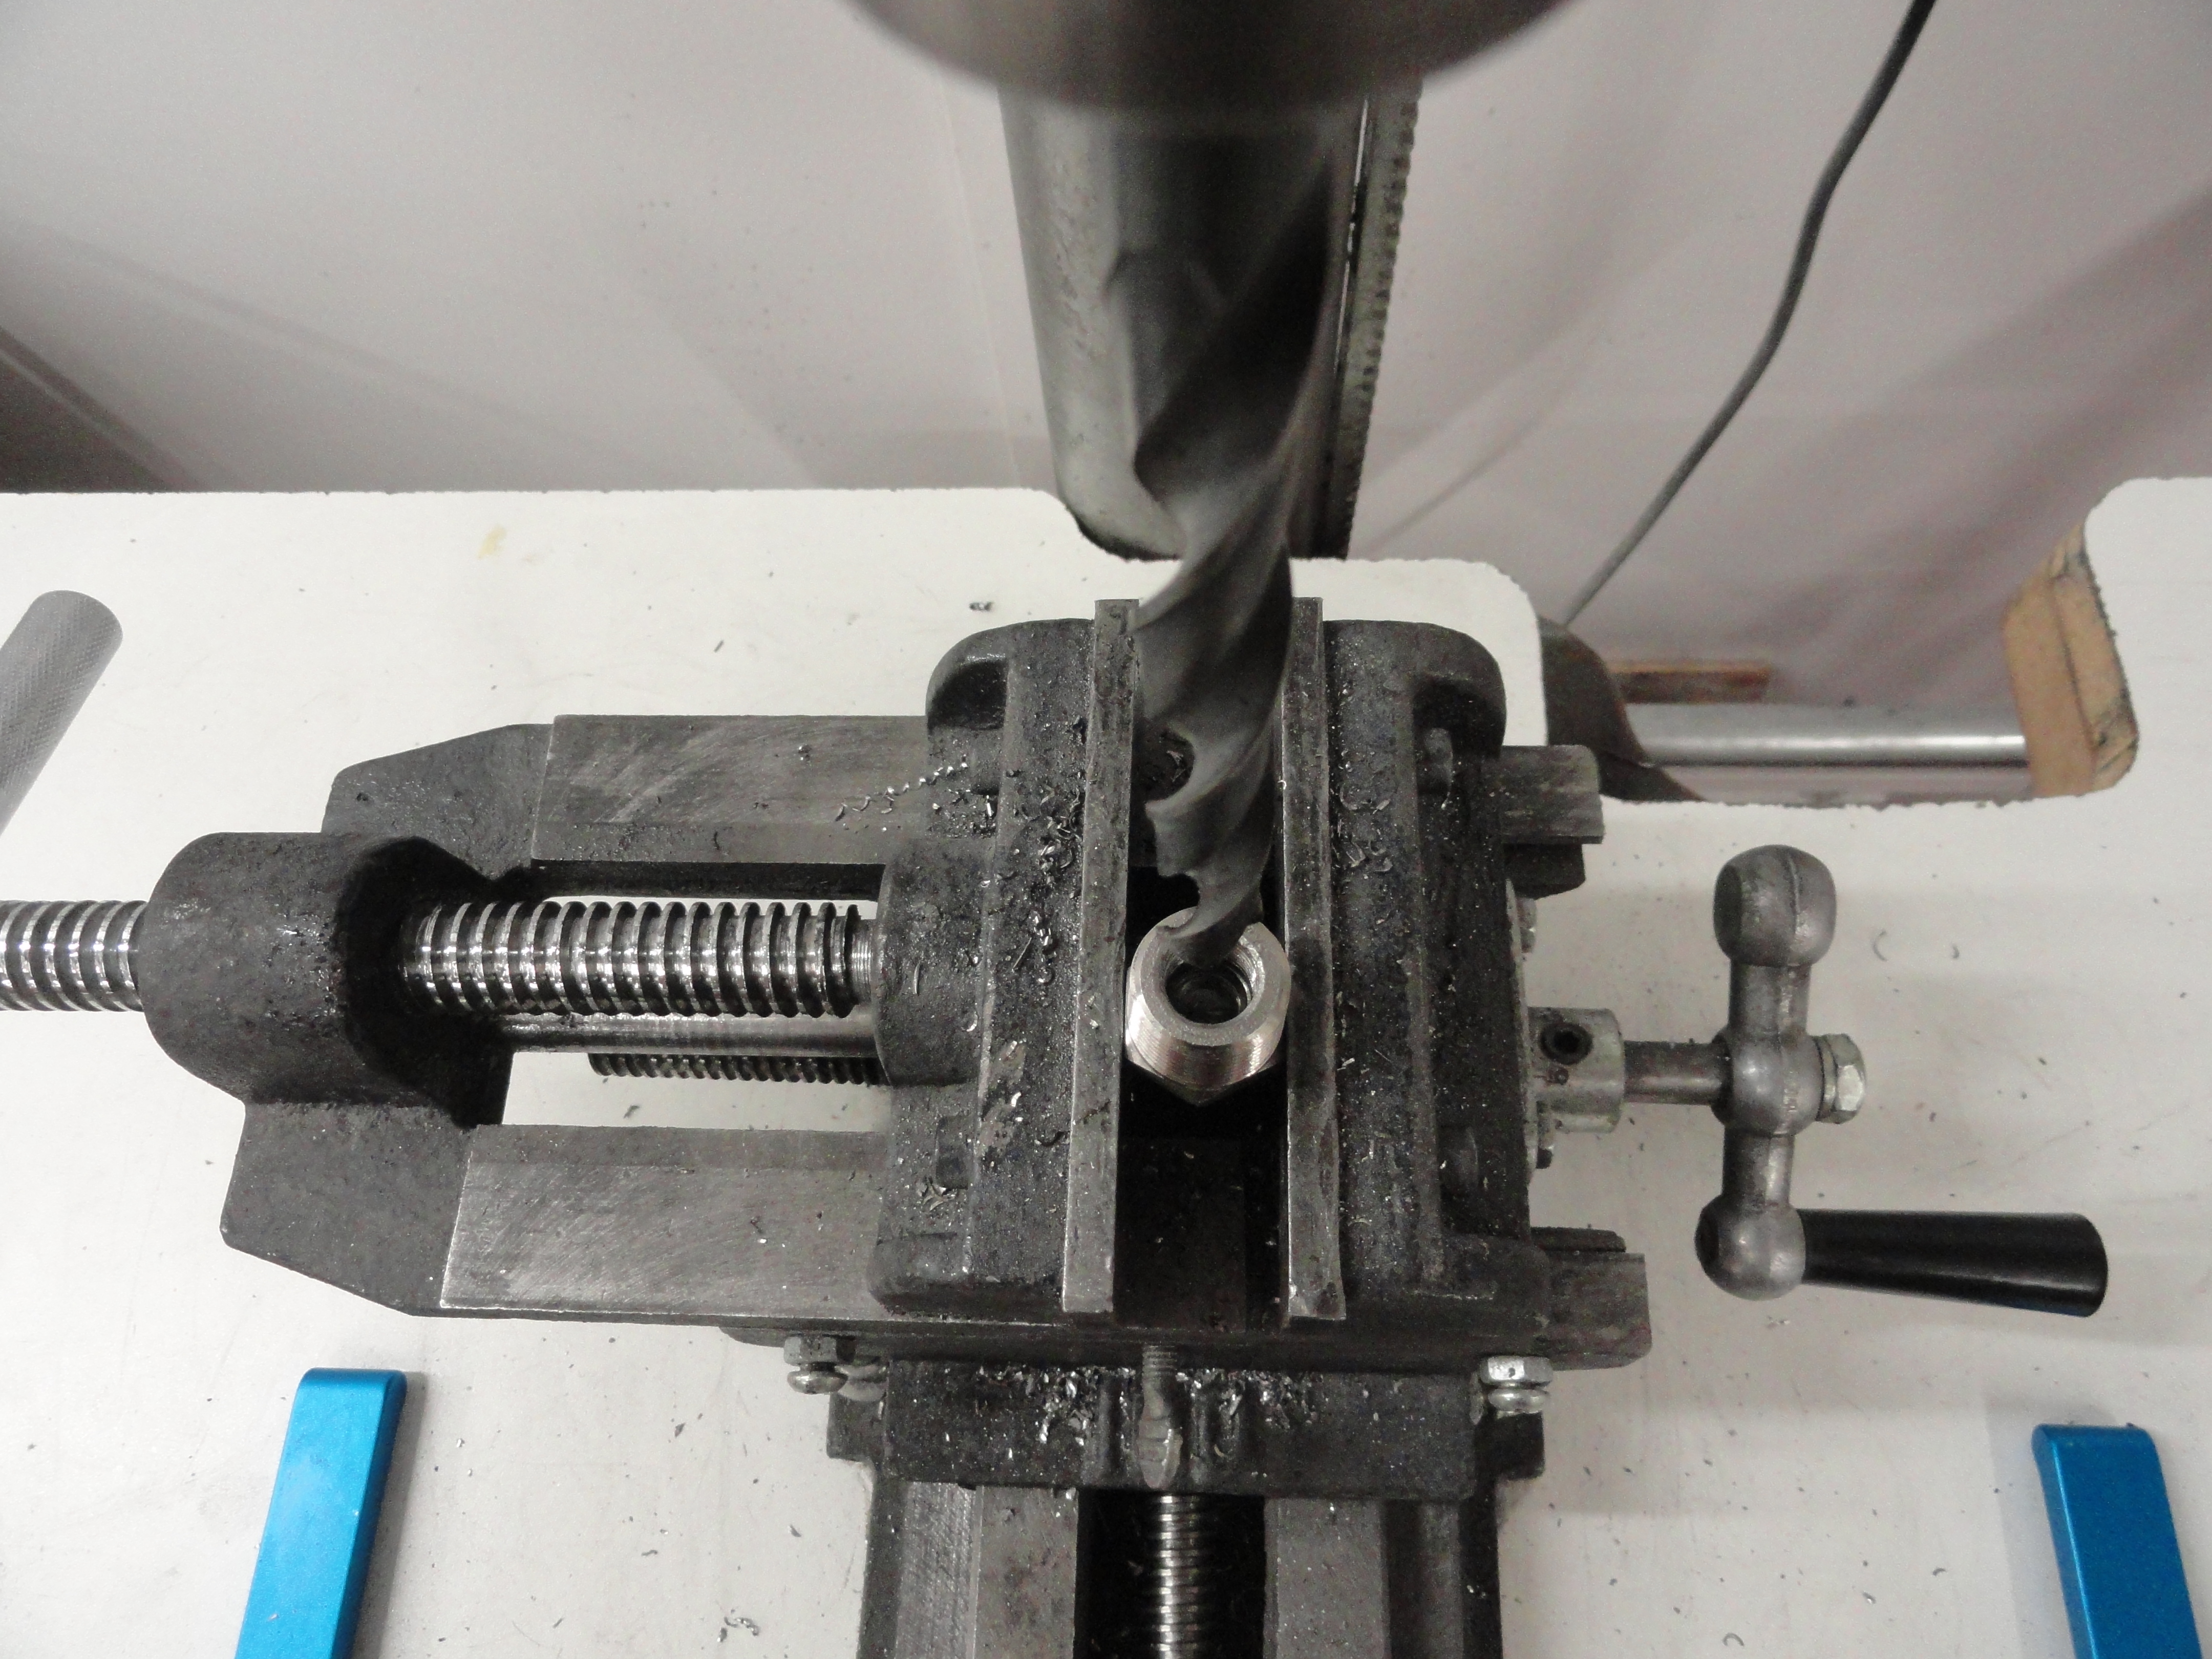
With a band saw or whatever you use to cut the metal, cut your triangle out, then position your center punch in the center of your hole pattern (I just placethe cardboard over the metal and center punch both), and drill your 3 engine mounting holes to 13/32". This is two fractional sizes larger and should forgive very slight mis-measurement. Once those holes are drilled, it's time to mark the plate for the 3 triangular adapter hole pattern. This is a little tricky, but lay it out as shown and just stay away from the larger holes as much as possible. There IS room for the heads of both patterns to NOT interfere with each other. Drill these holes out to 9/32" which is two up from 1/4". Test to make sure they line up perfectly with the adapter. I found that 3 of 7/16" lug nuts work best for the standoffs. They work perfect because of the bevel. Perfect for welding the bead around them to secure to the plate. Once you have tested your holes on the engine block and everything is right, weld the lug nuts on the plate, then test it on the engine block again. Use 3 of 3/8 x 1-1/4" Bolts for the engine block part.

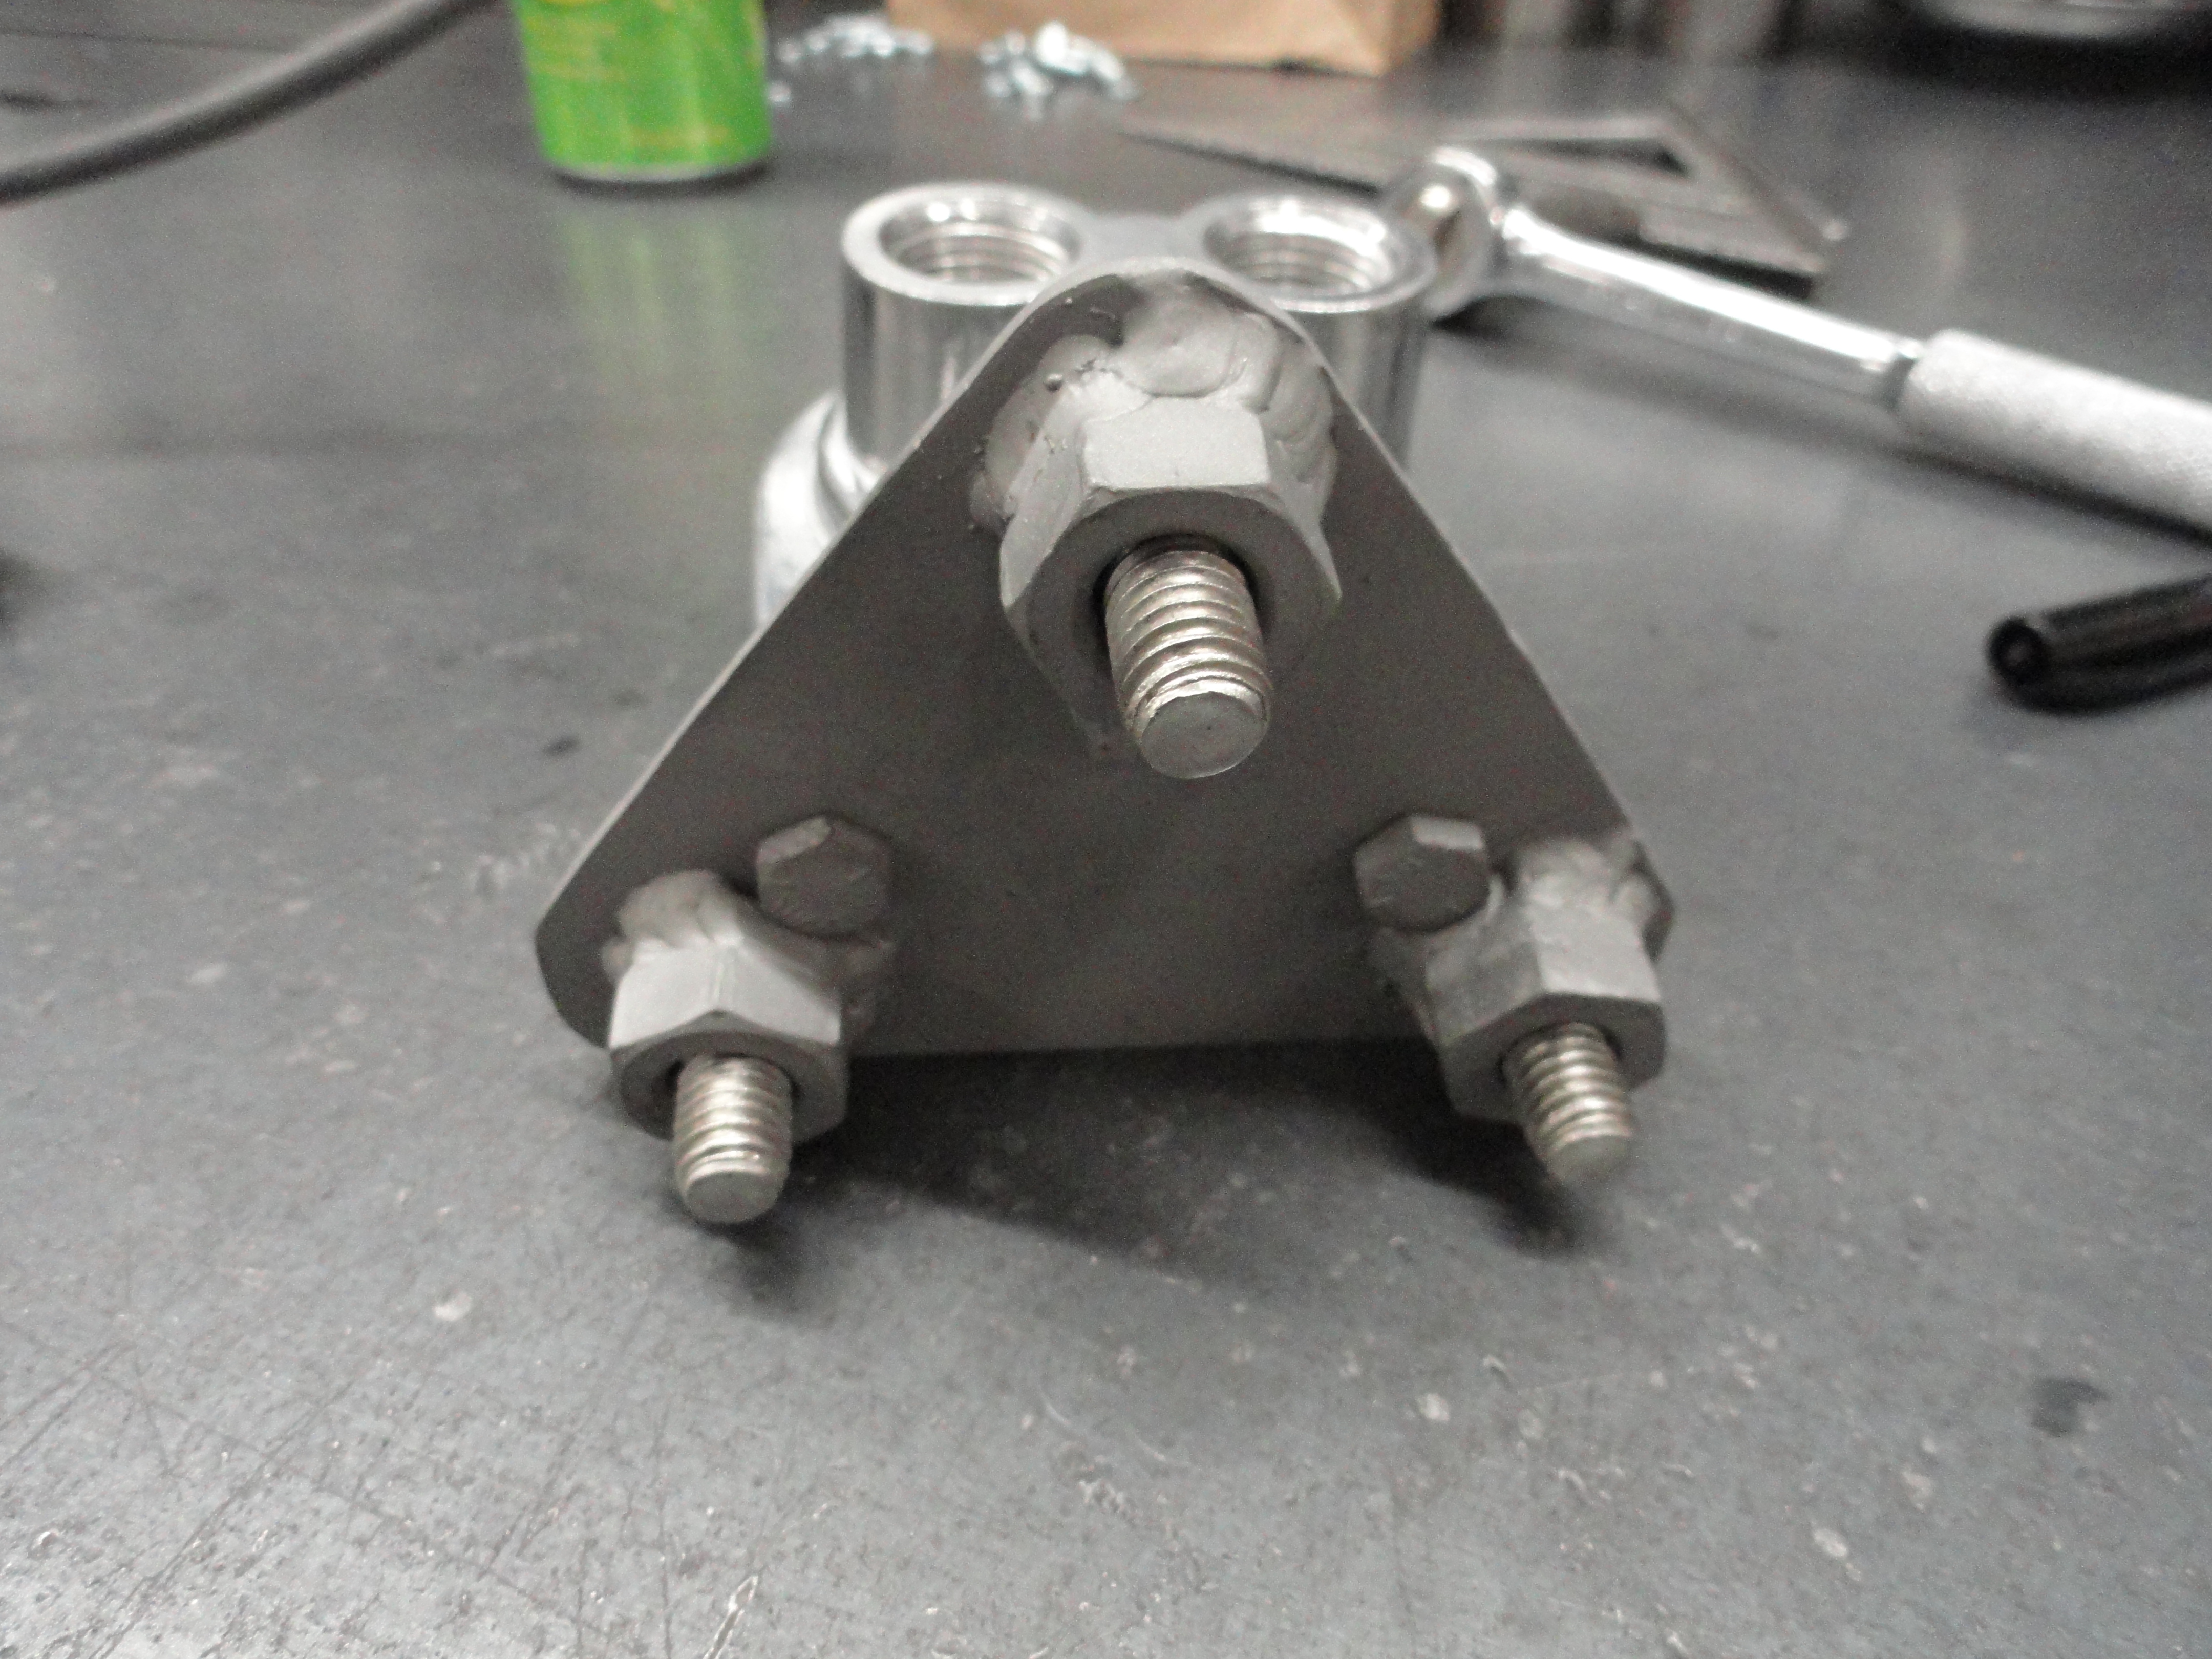
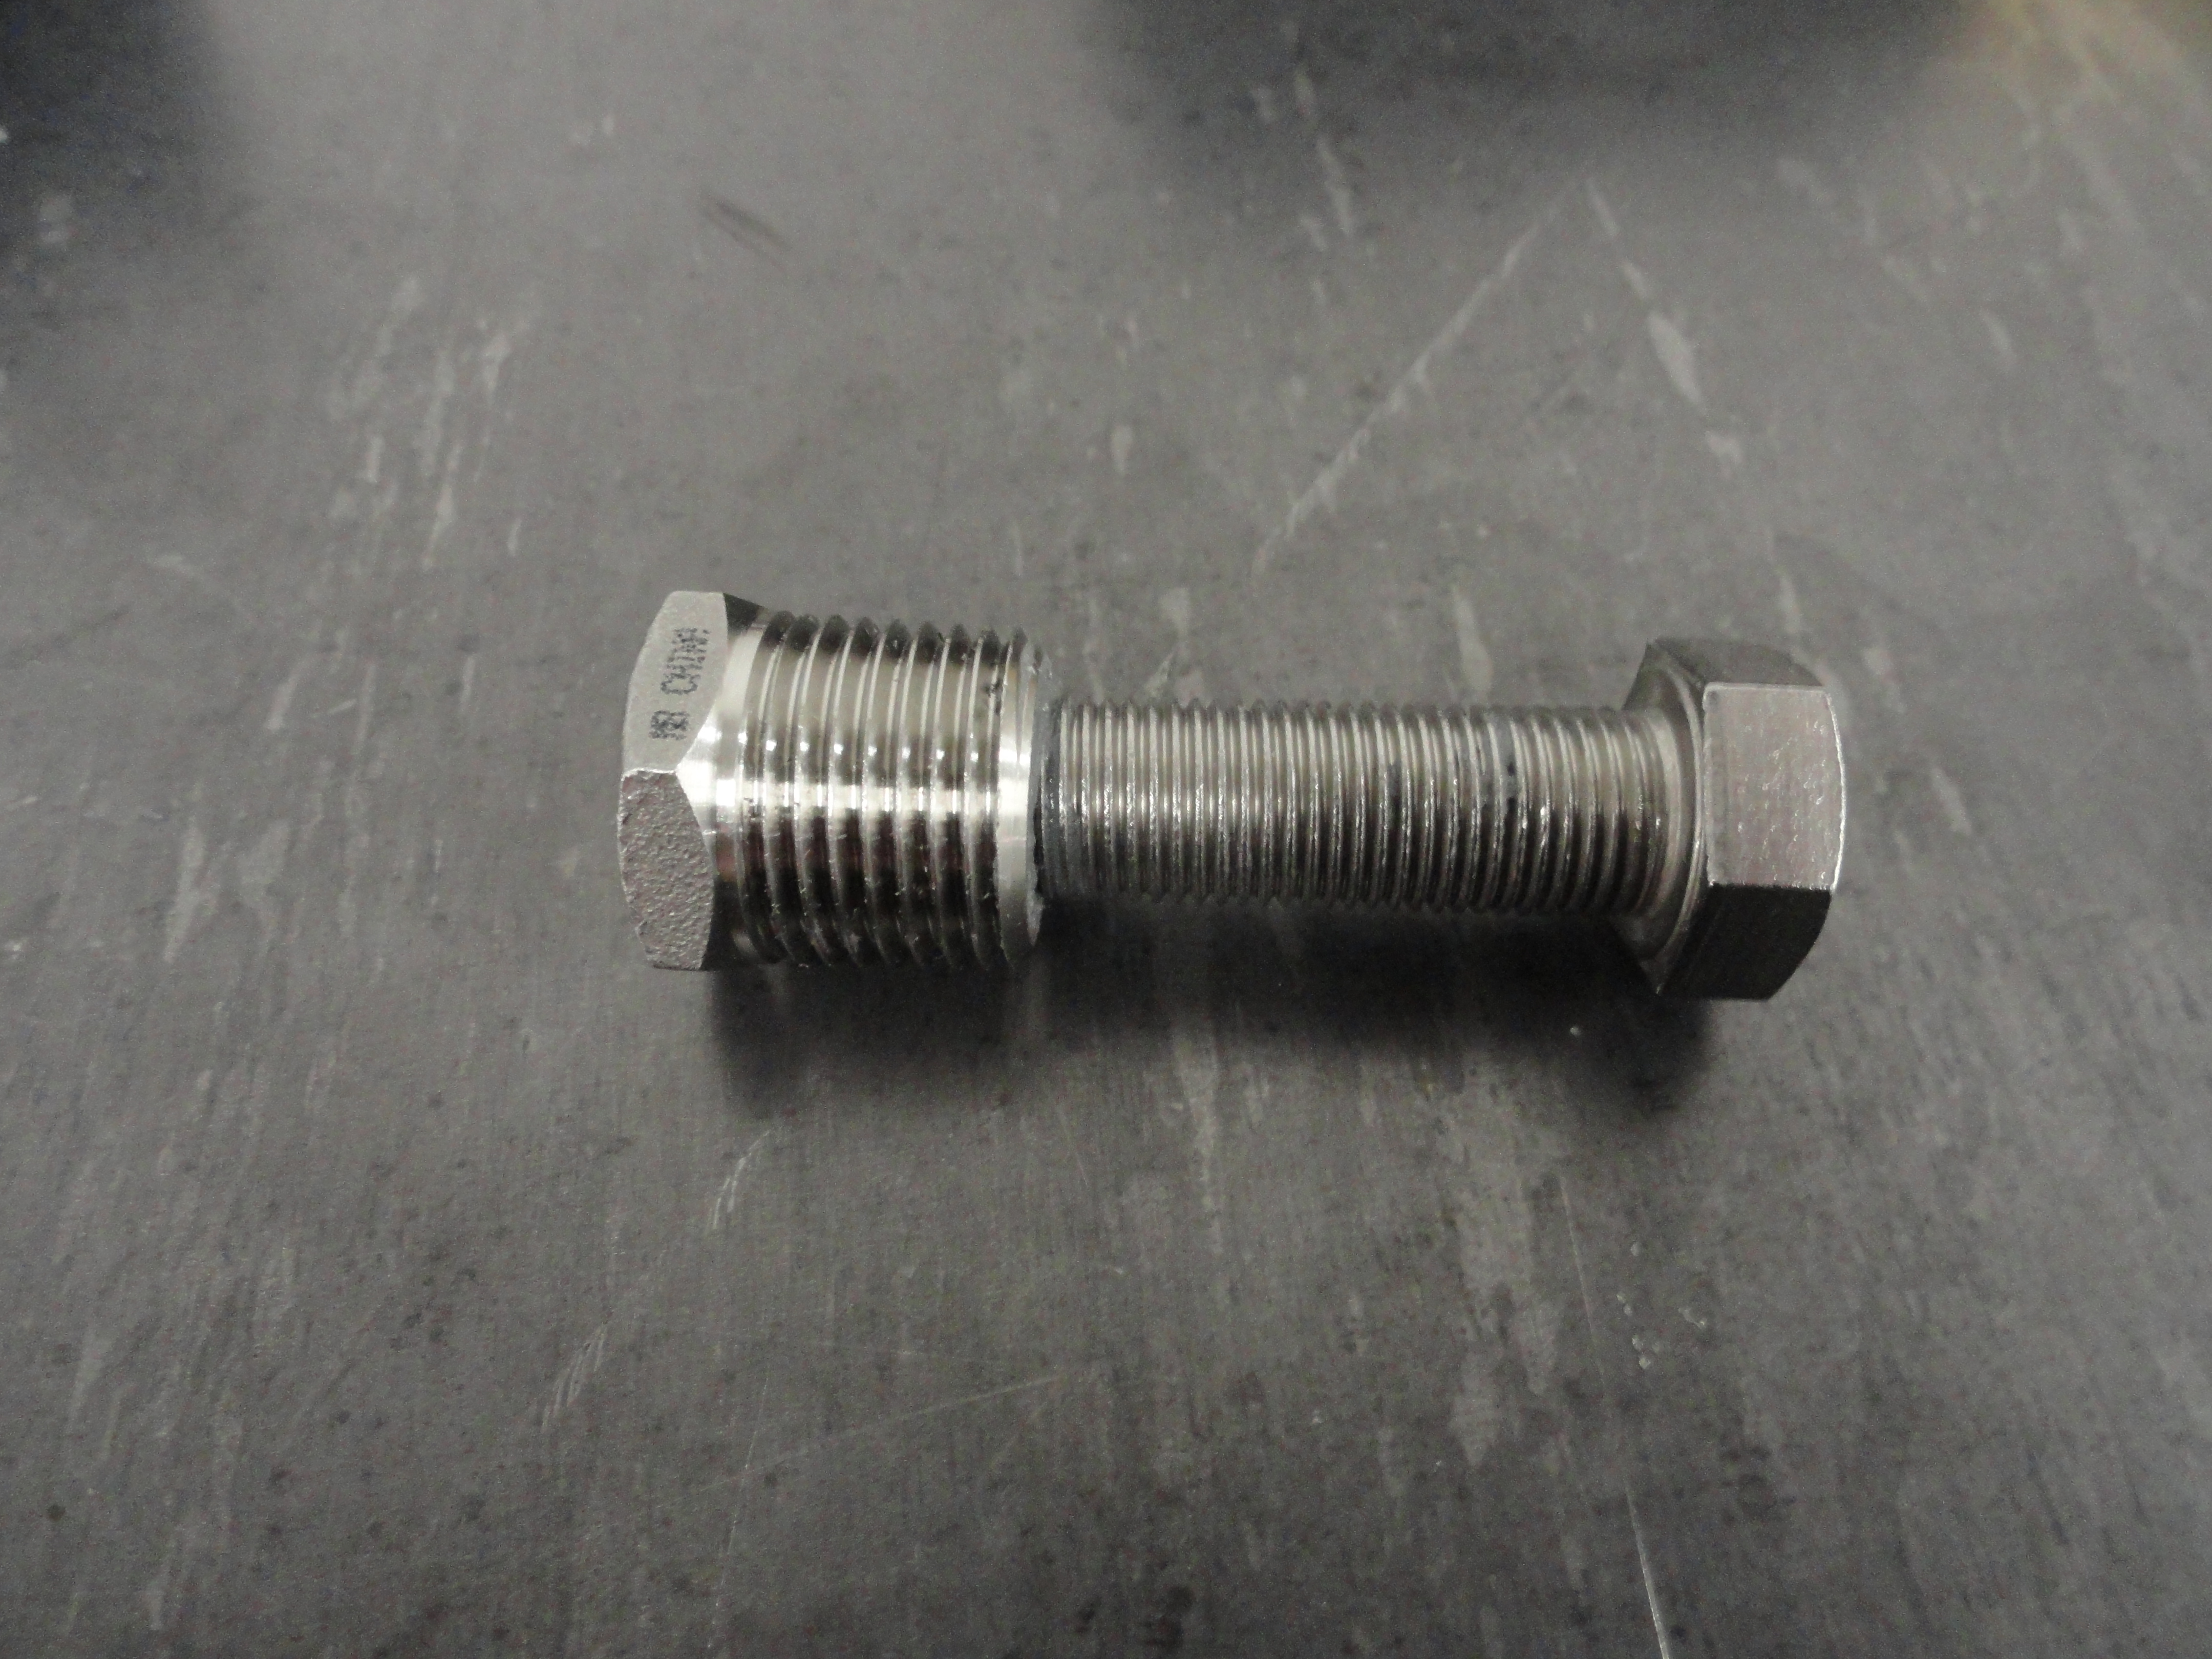
Next get three 1/4" x 1-1/4" grade 5 bolts. The problem with these bolts is they are usually not threaded all the way up, and we need them to be. So, if you can't find any bolts that thread all the way, get out your 1/4" x 20 tap and finish the job. If you use oil and take your time, the nuts will turn easily all the way down. Install these bolts in so they stick out opposite the lug nuts as shown. Run one nut all the way down and tighten the bolt to the plate. Run a second nut down on to the first nut securely. This is used for the proper standoff so the engine bolt head has room. Paint the piece to keep it from rusting. This is the perfect location for the adapter and doesn't interfere with anything when it's mounted. The last thing you will need to do is figure out the fittings you need to install the hoses. I am using 1/2" NPT (the inlet/outlet holes in the adapter) to -6AN adapters so that I can hook up 3/8" stainless braided hose.
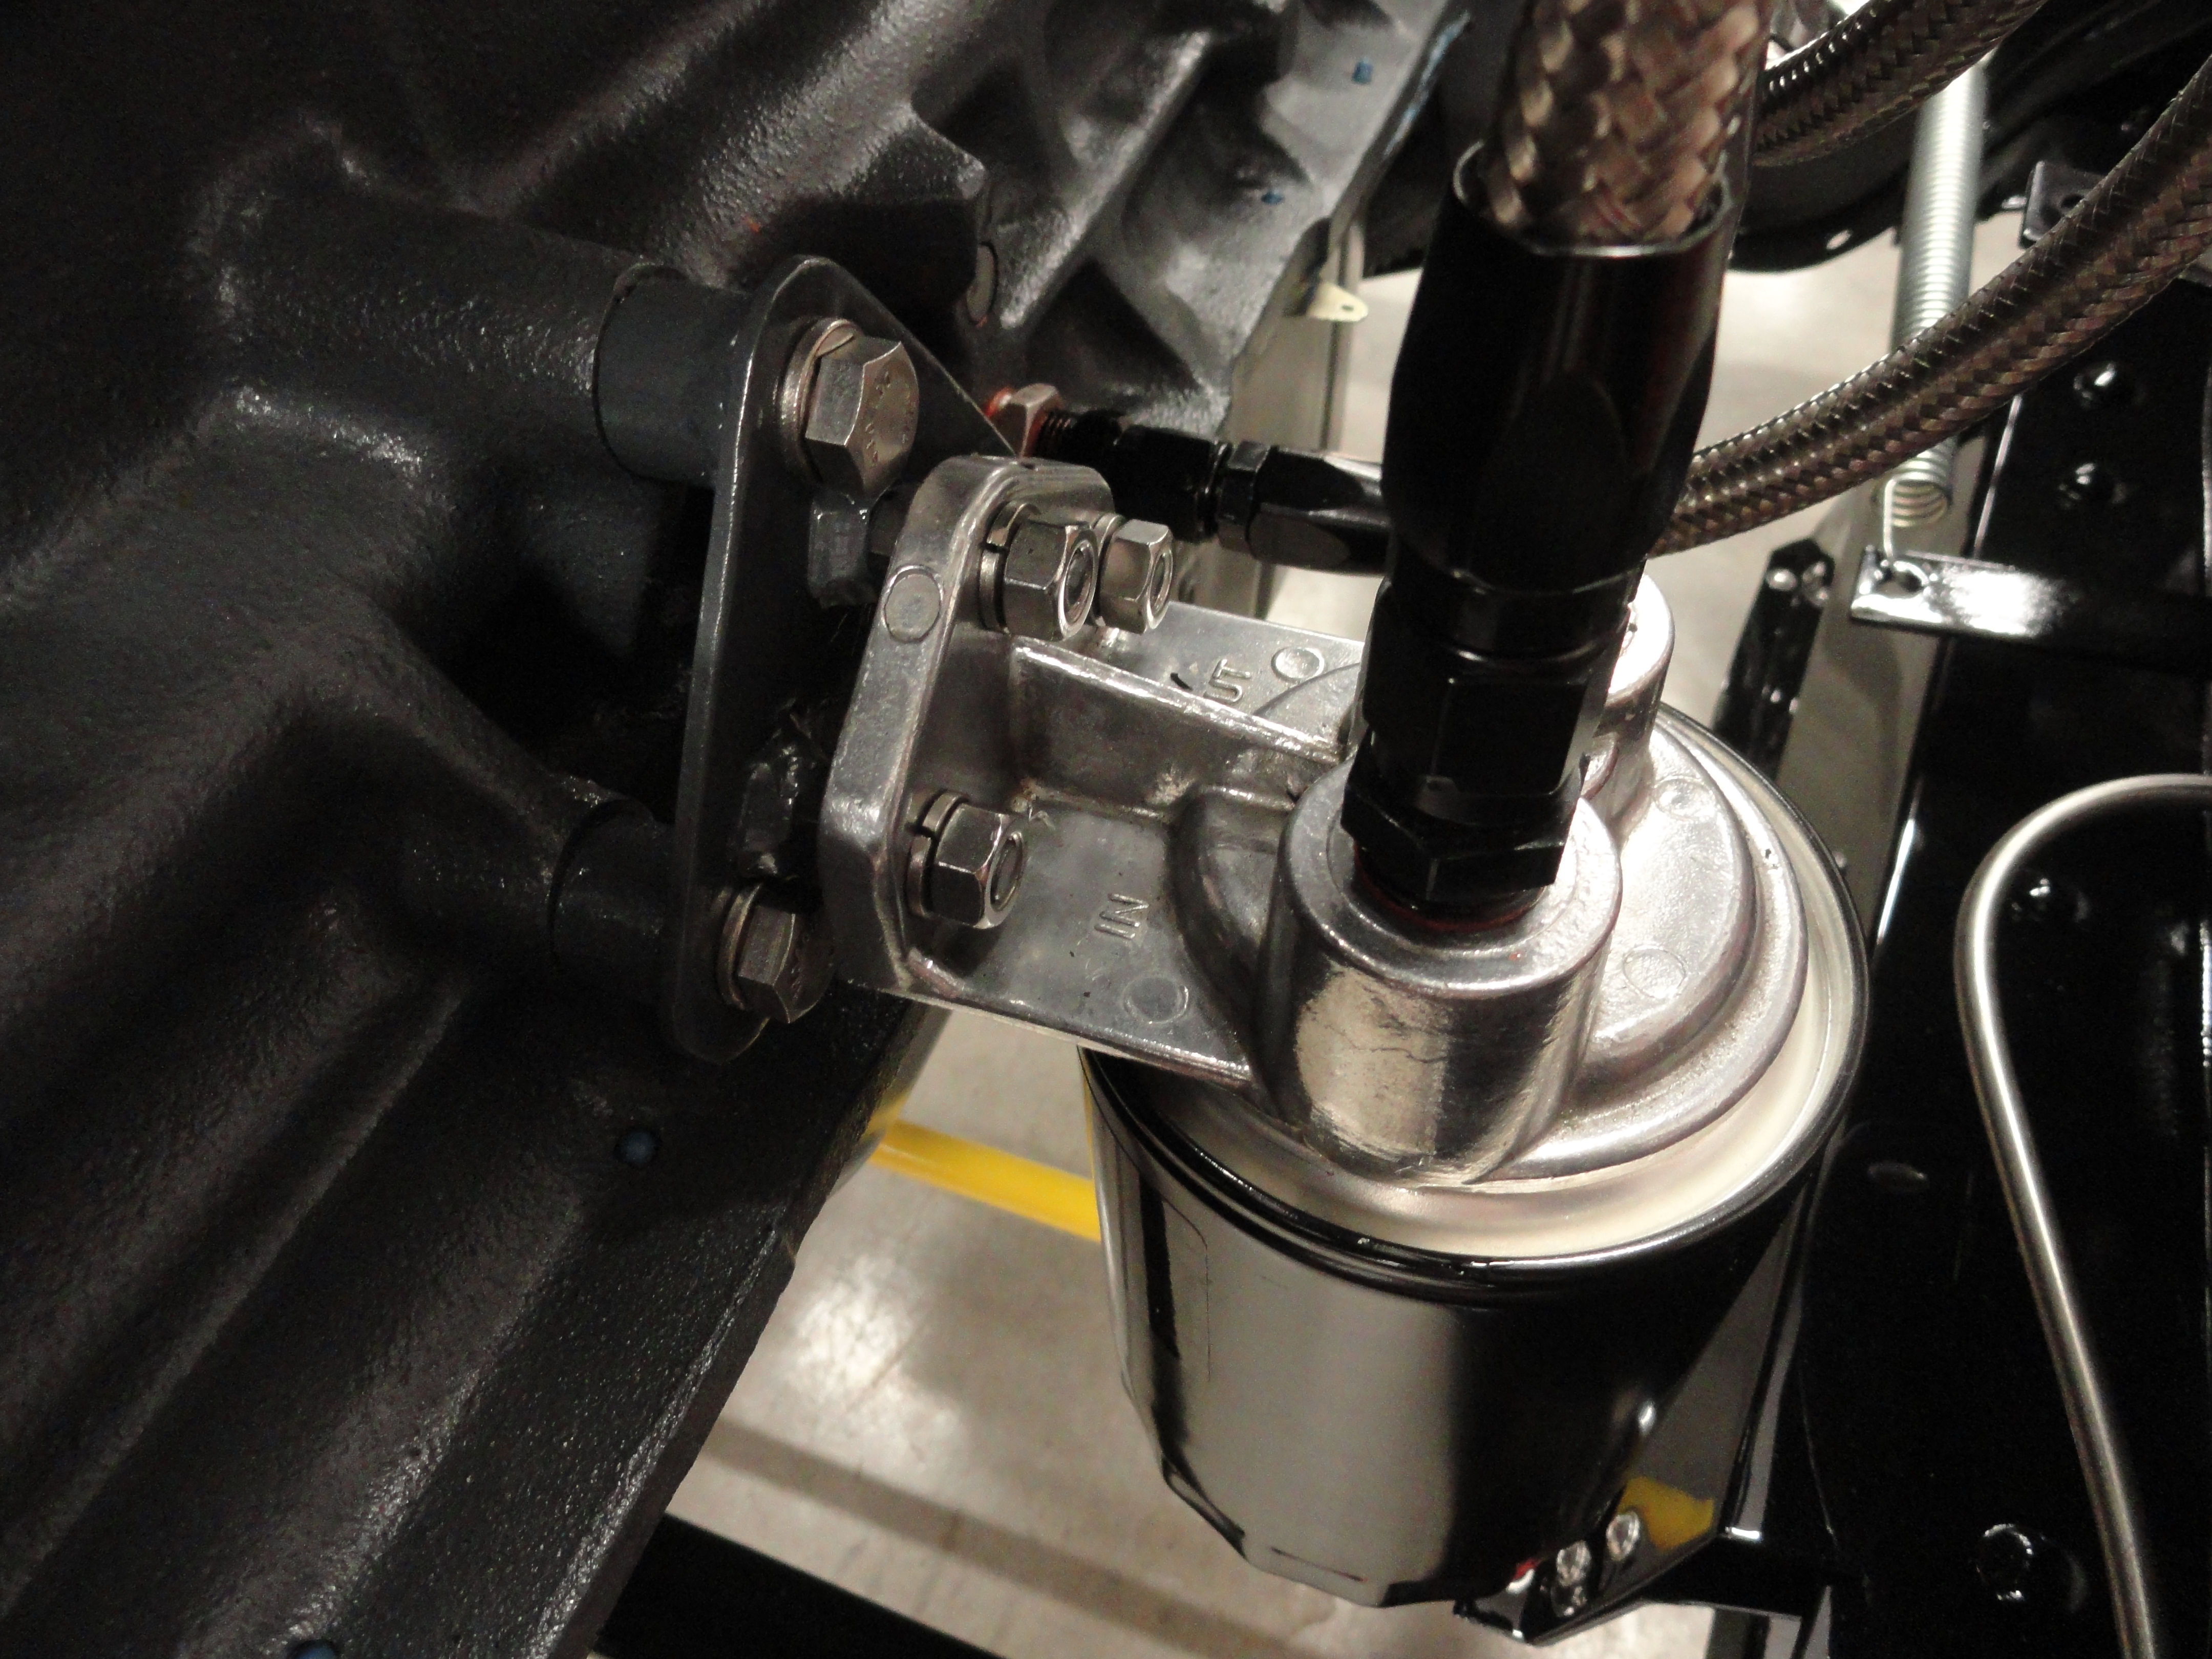
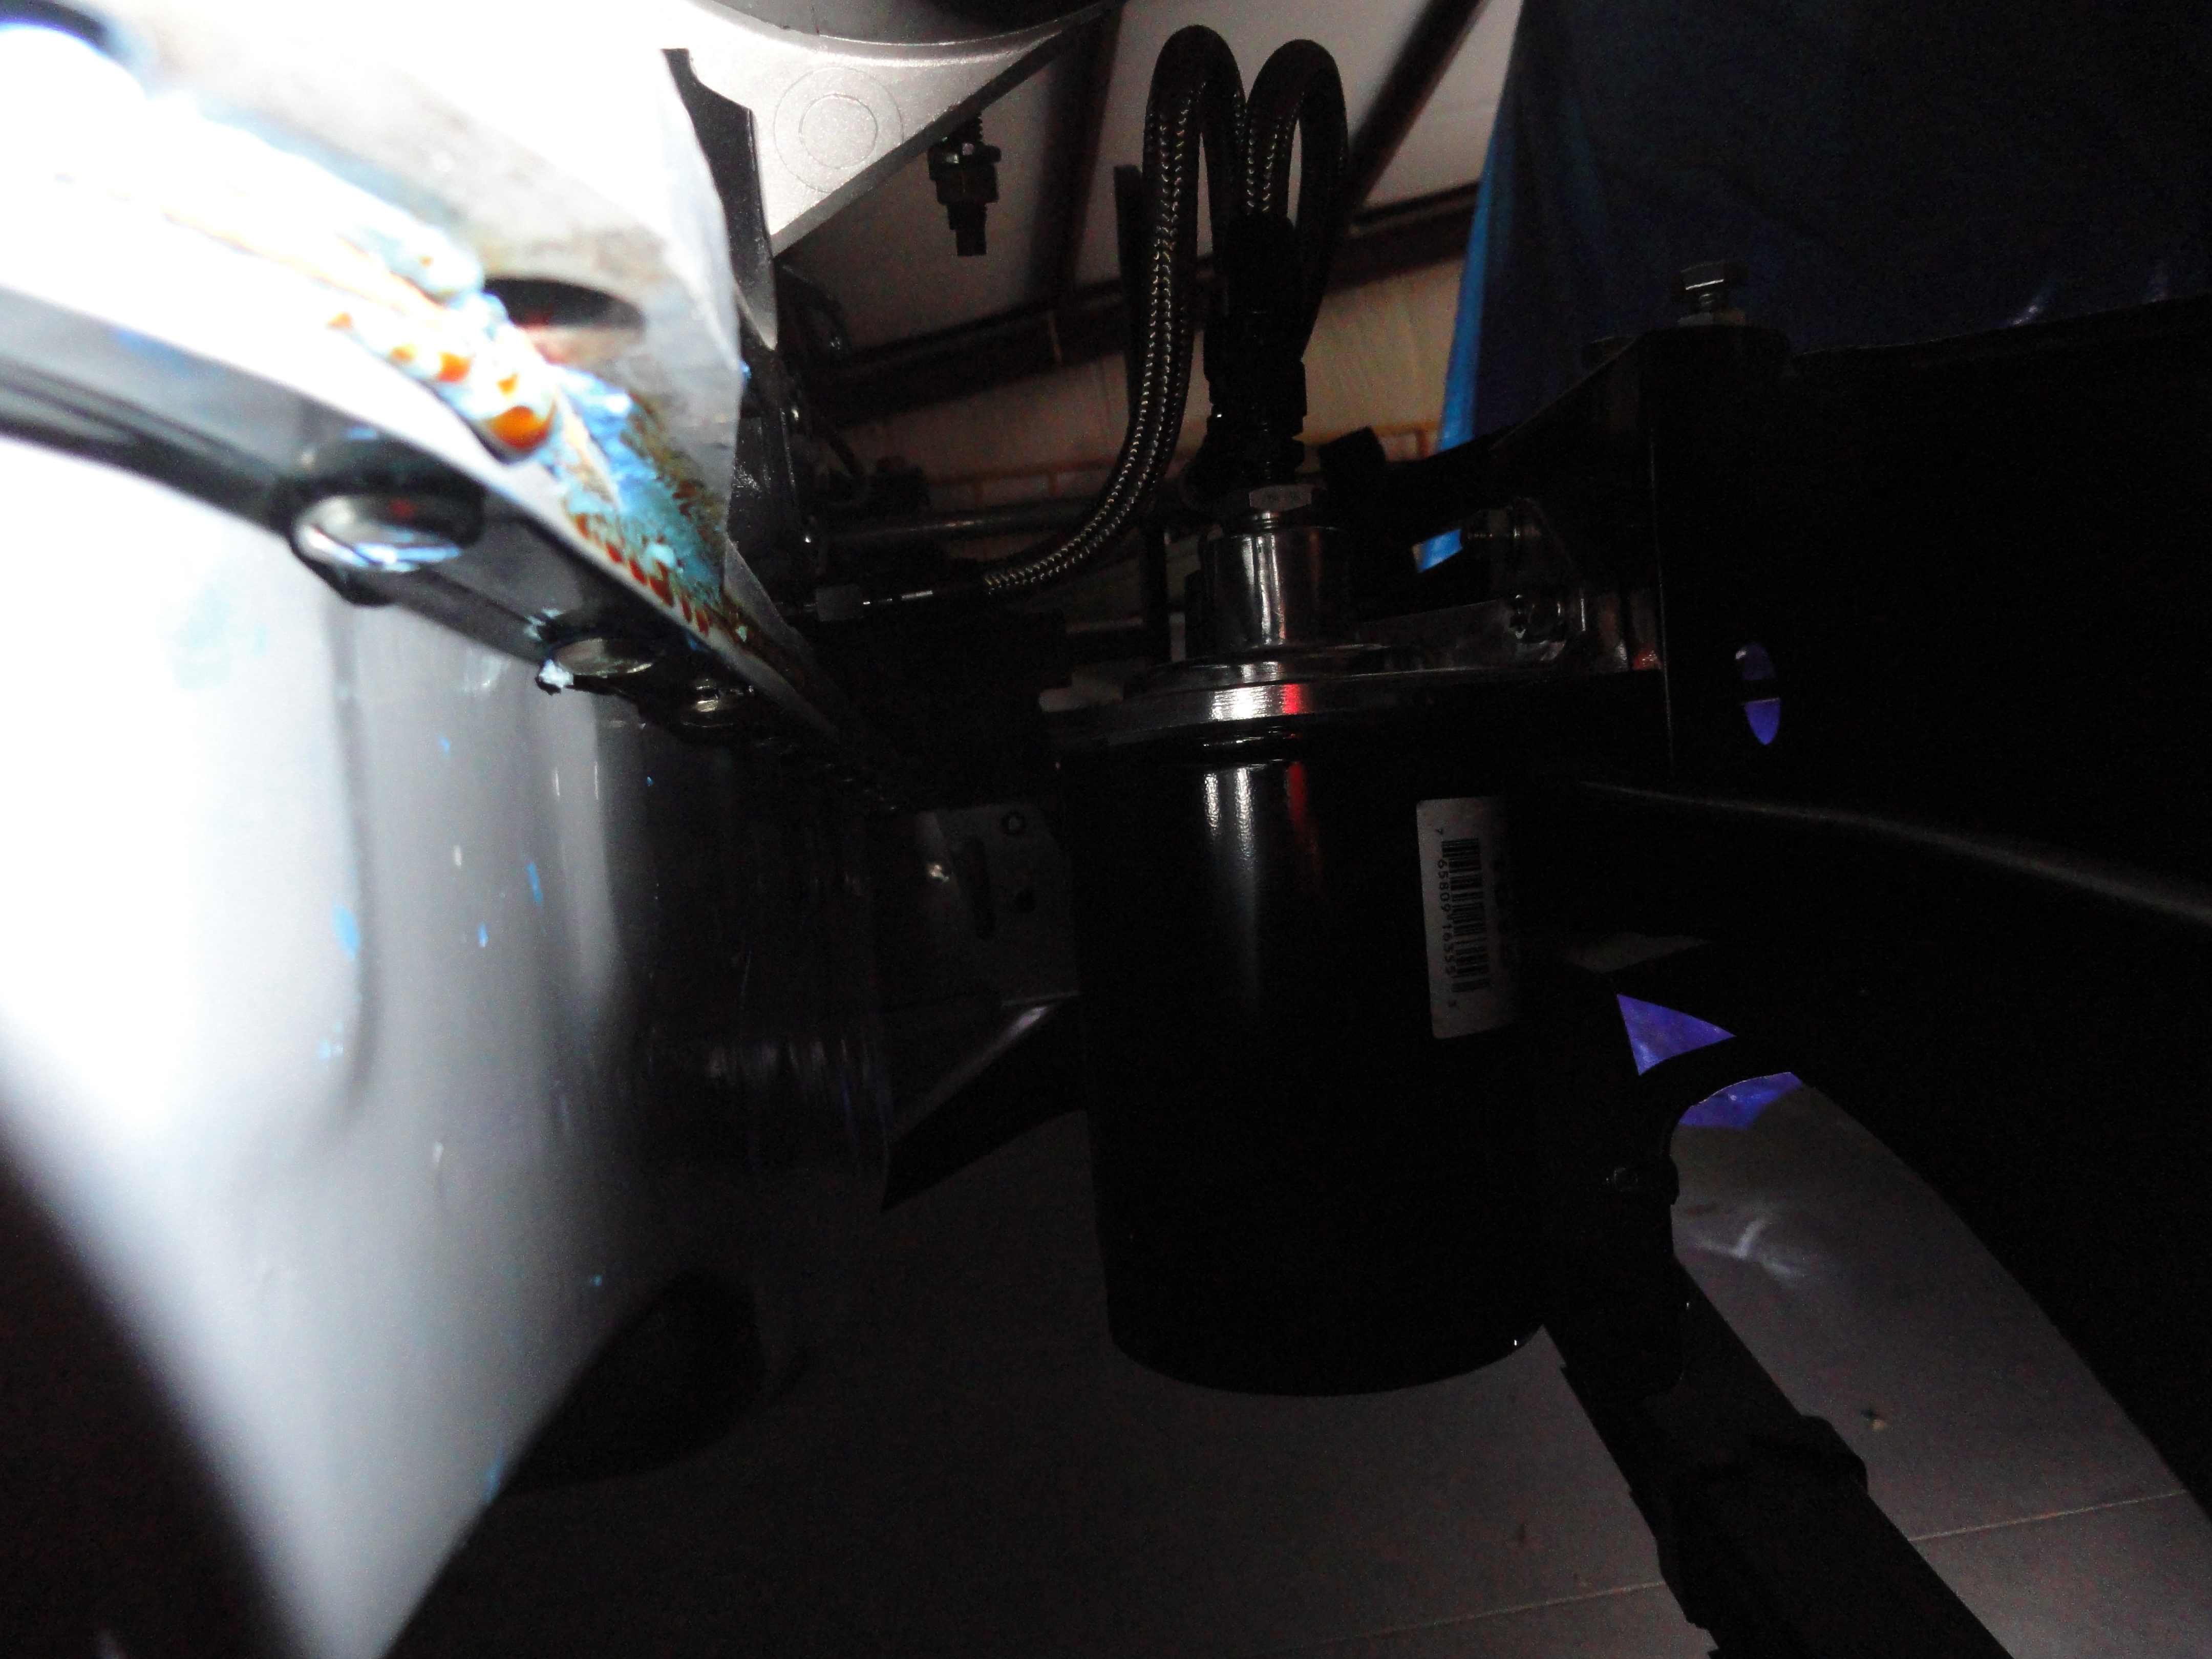
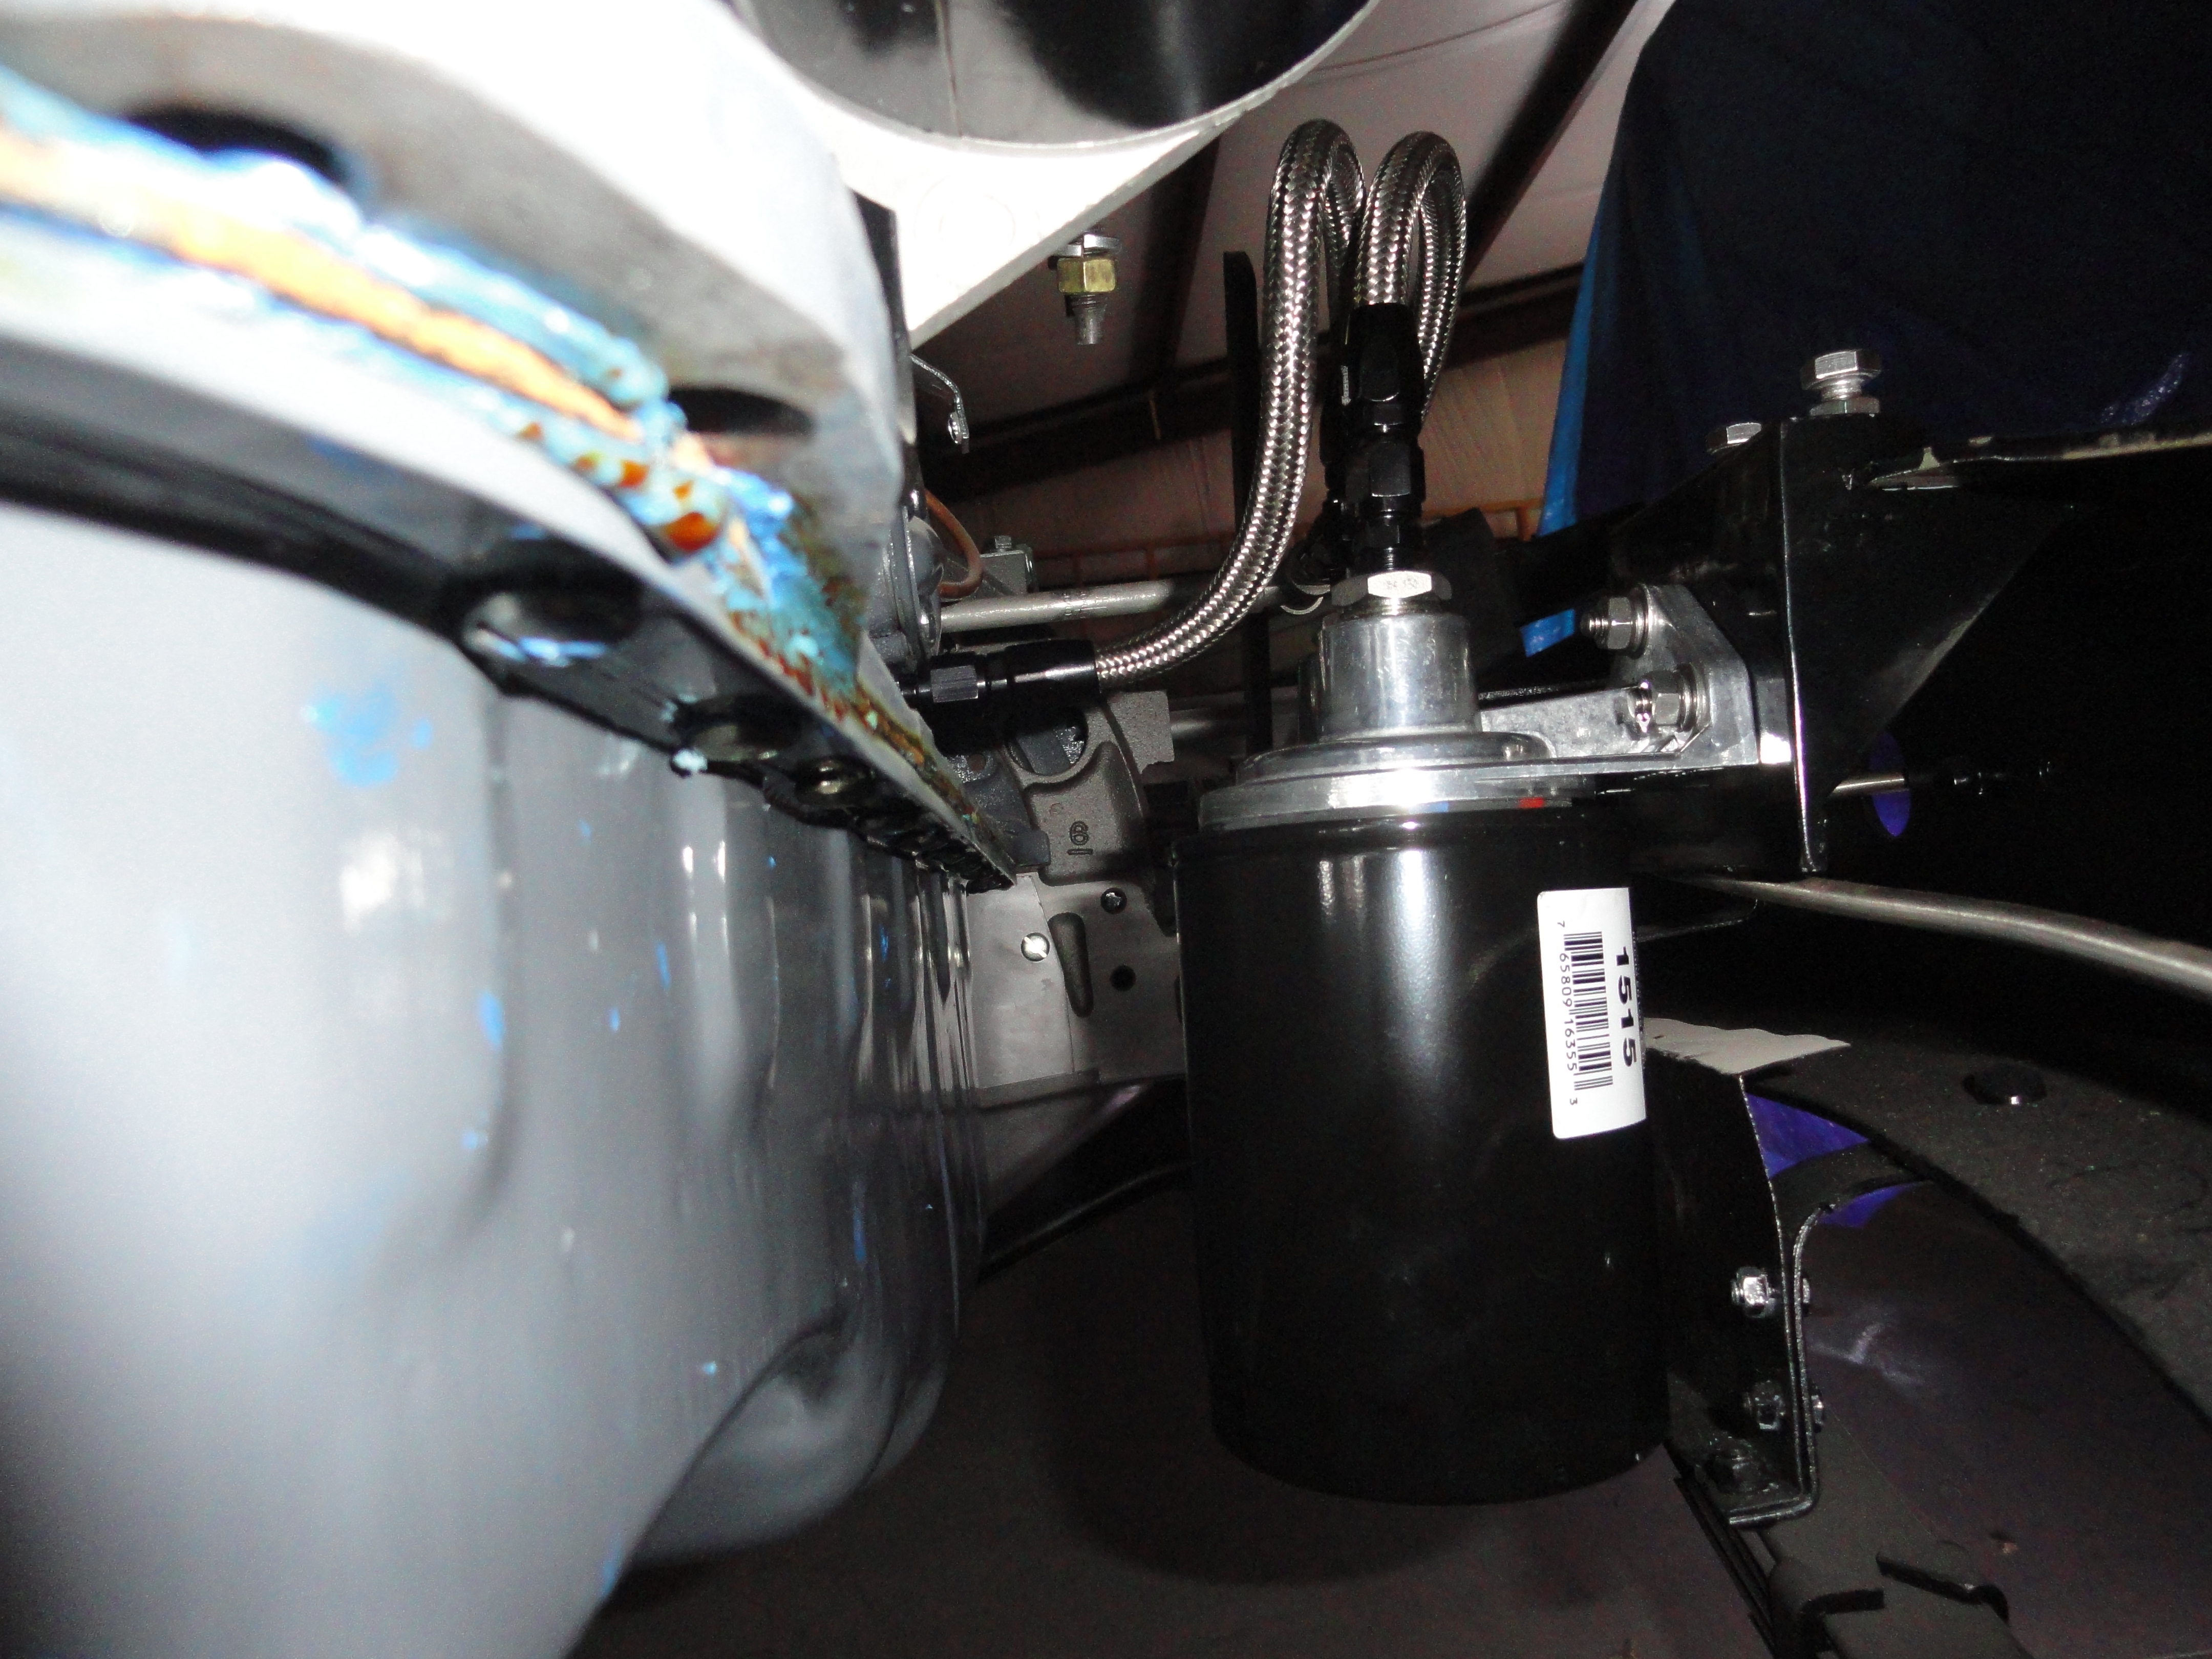
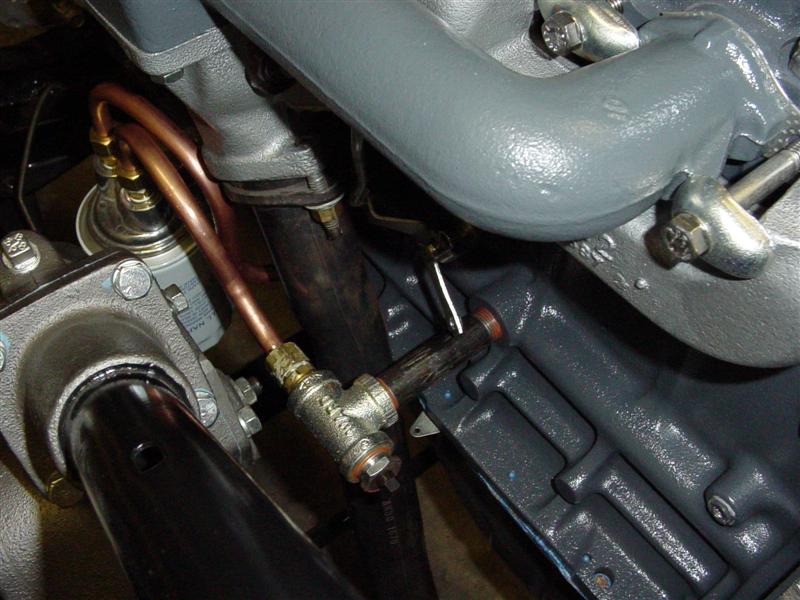
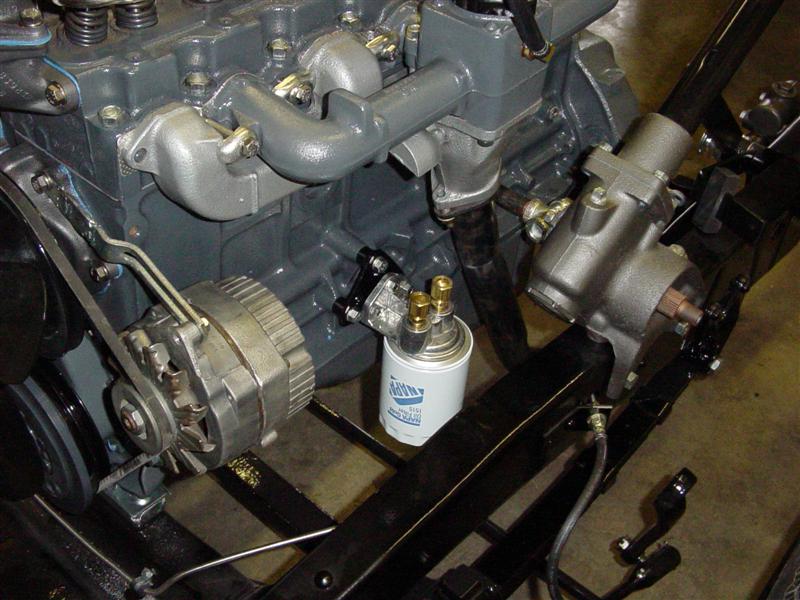
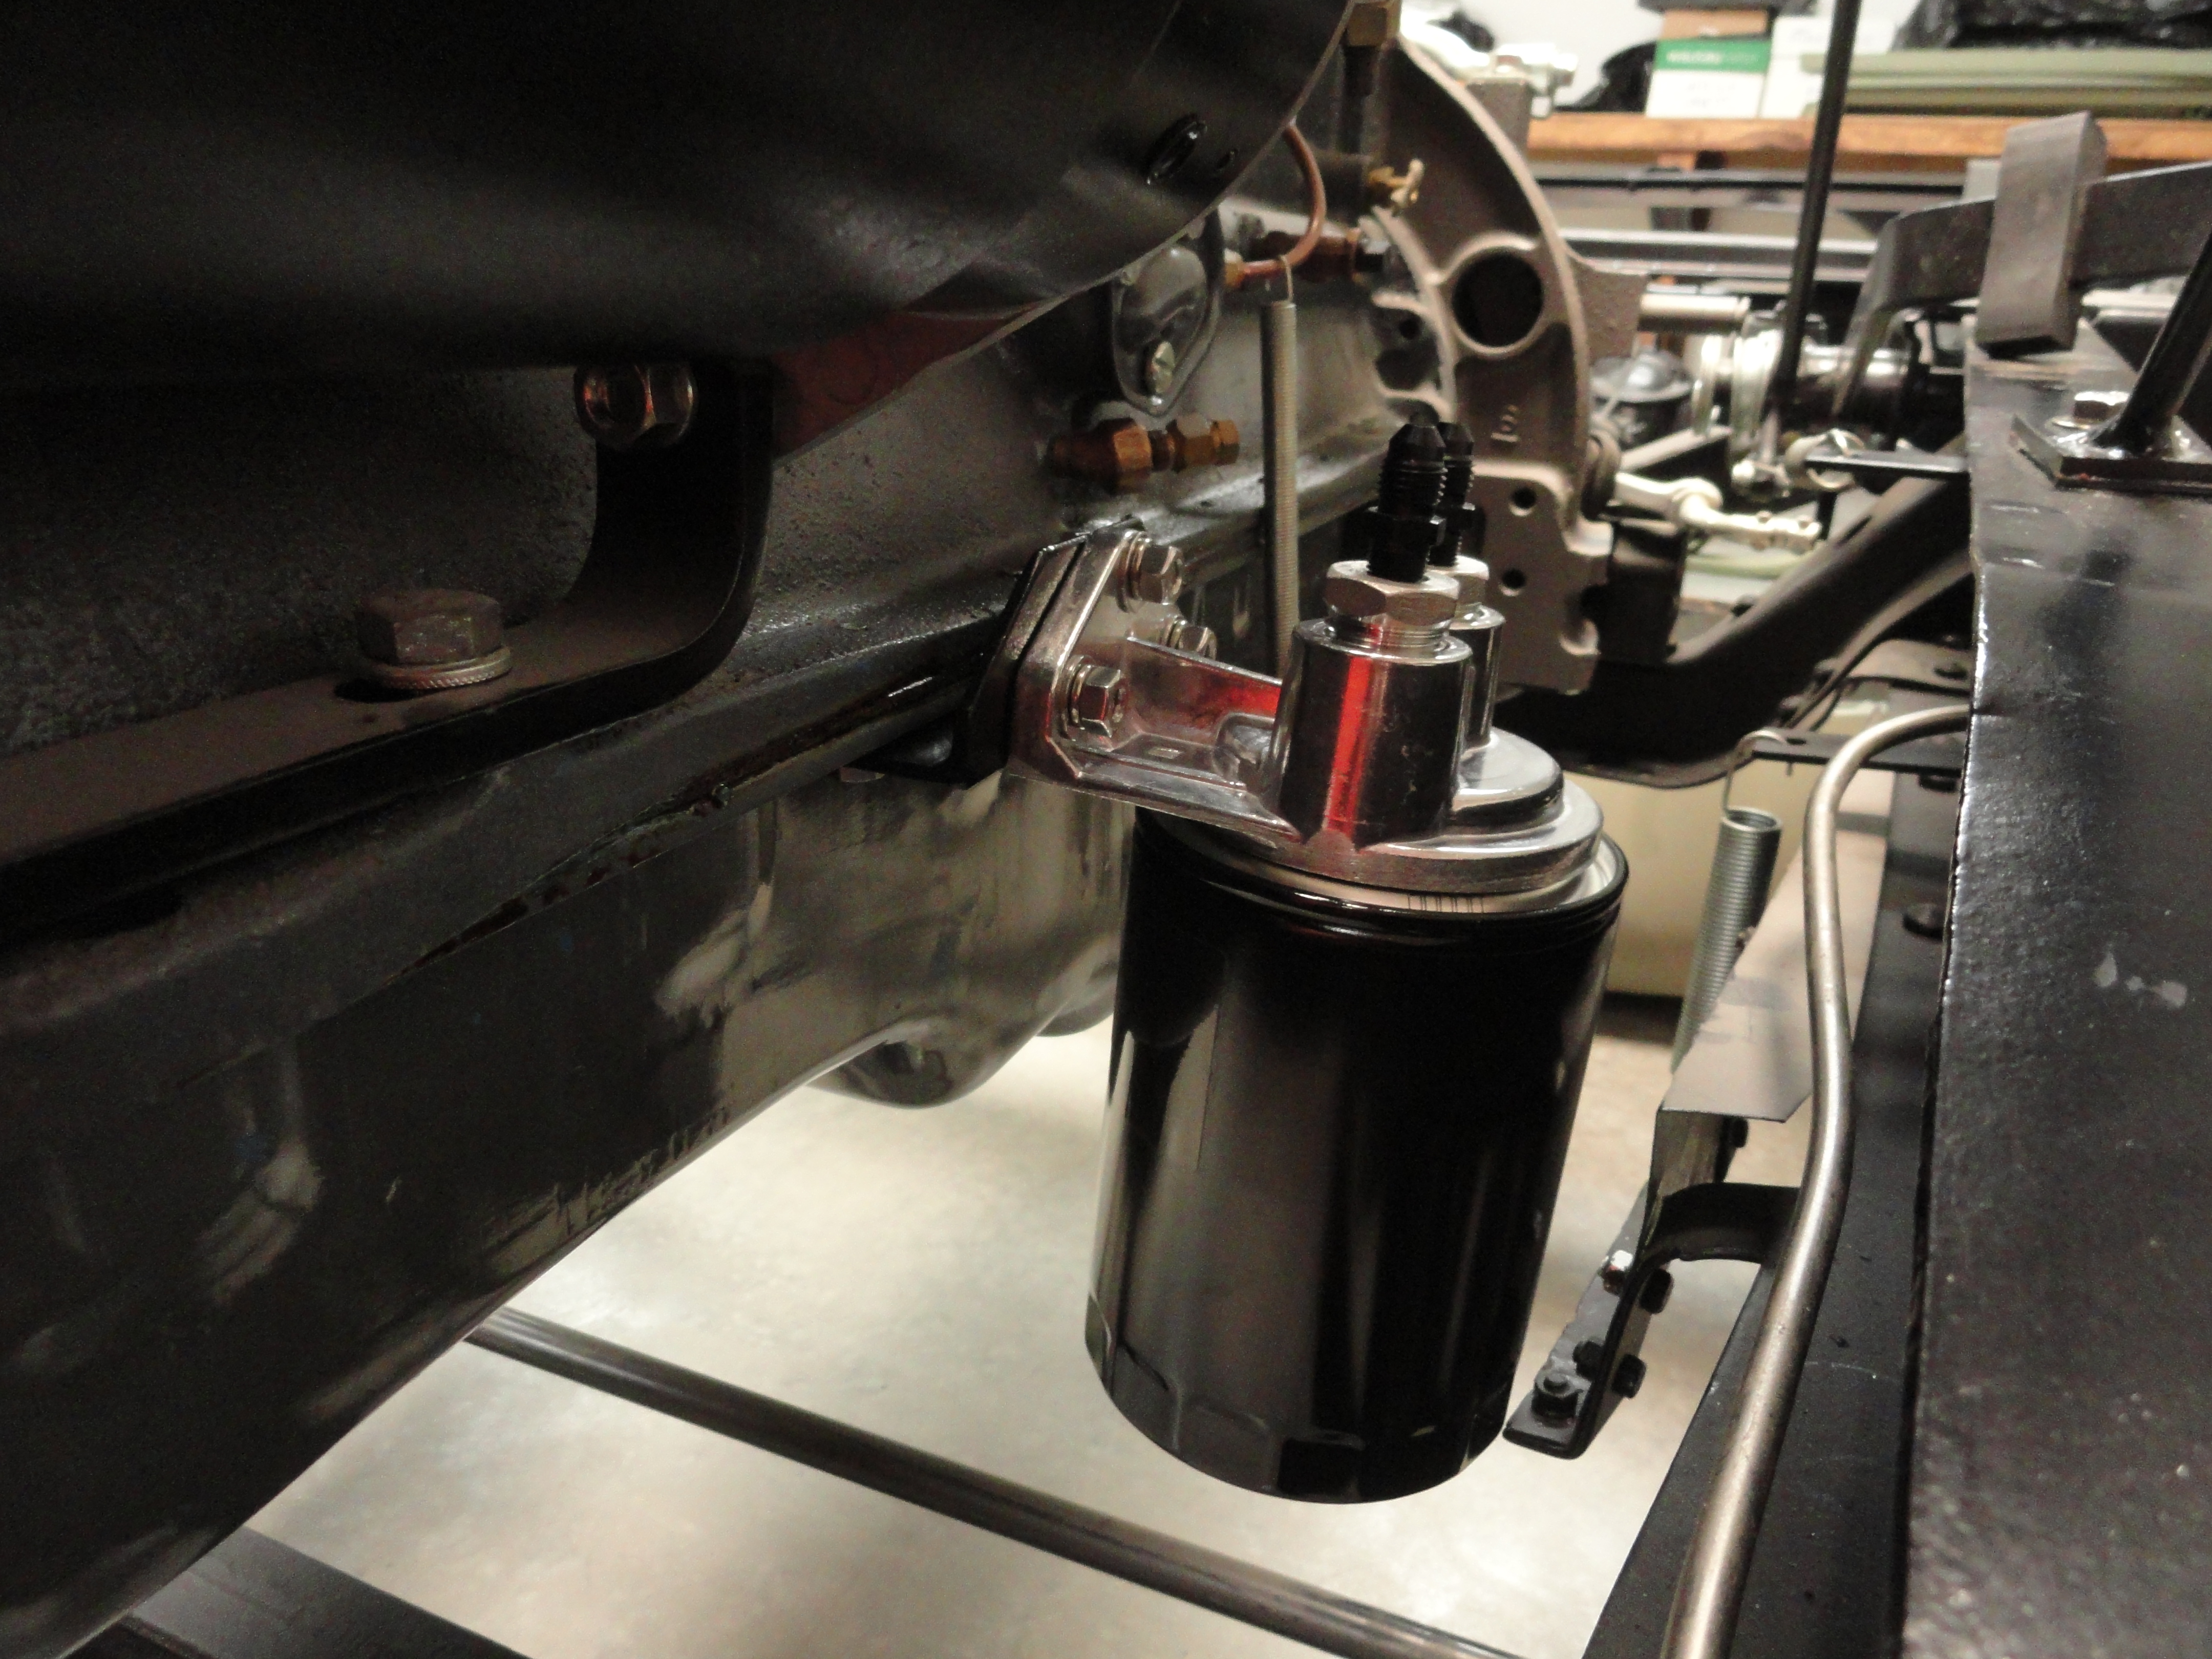
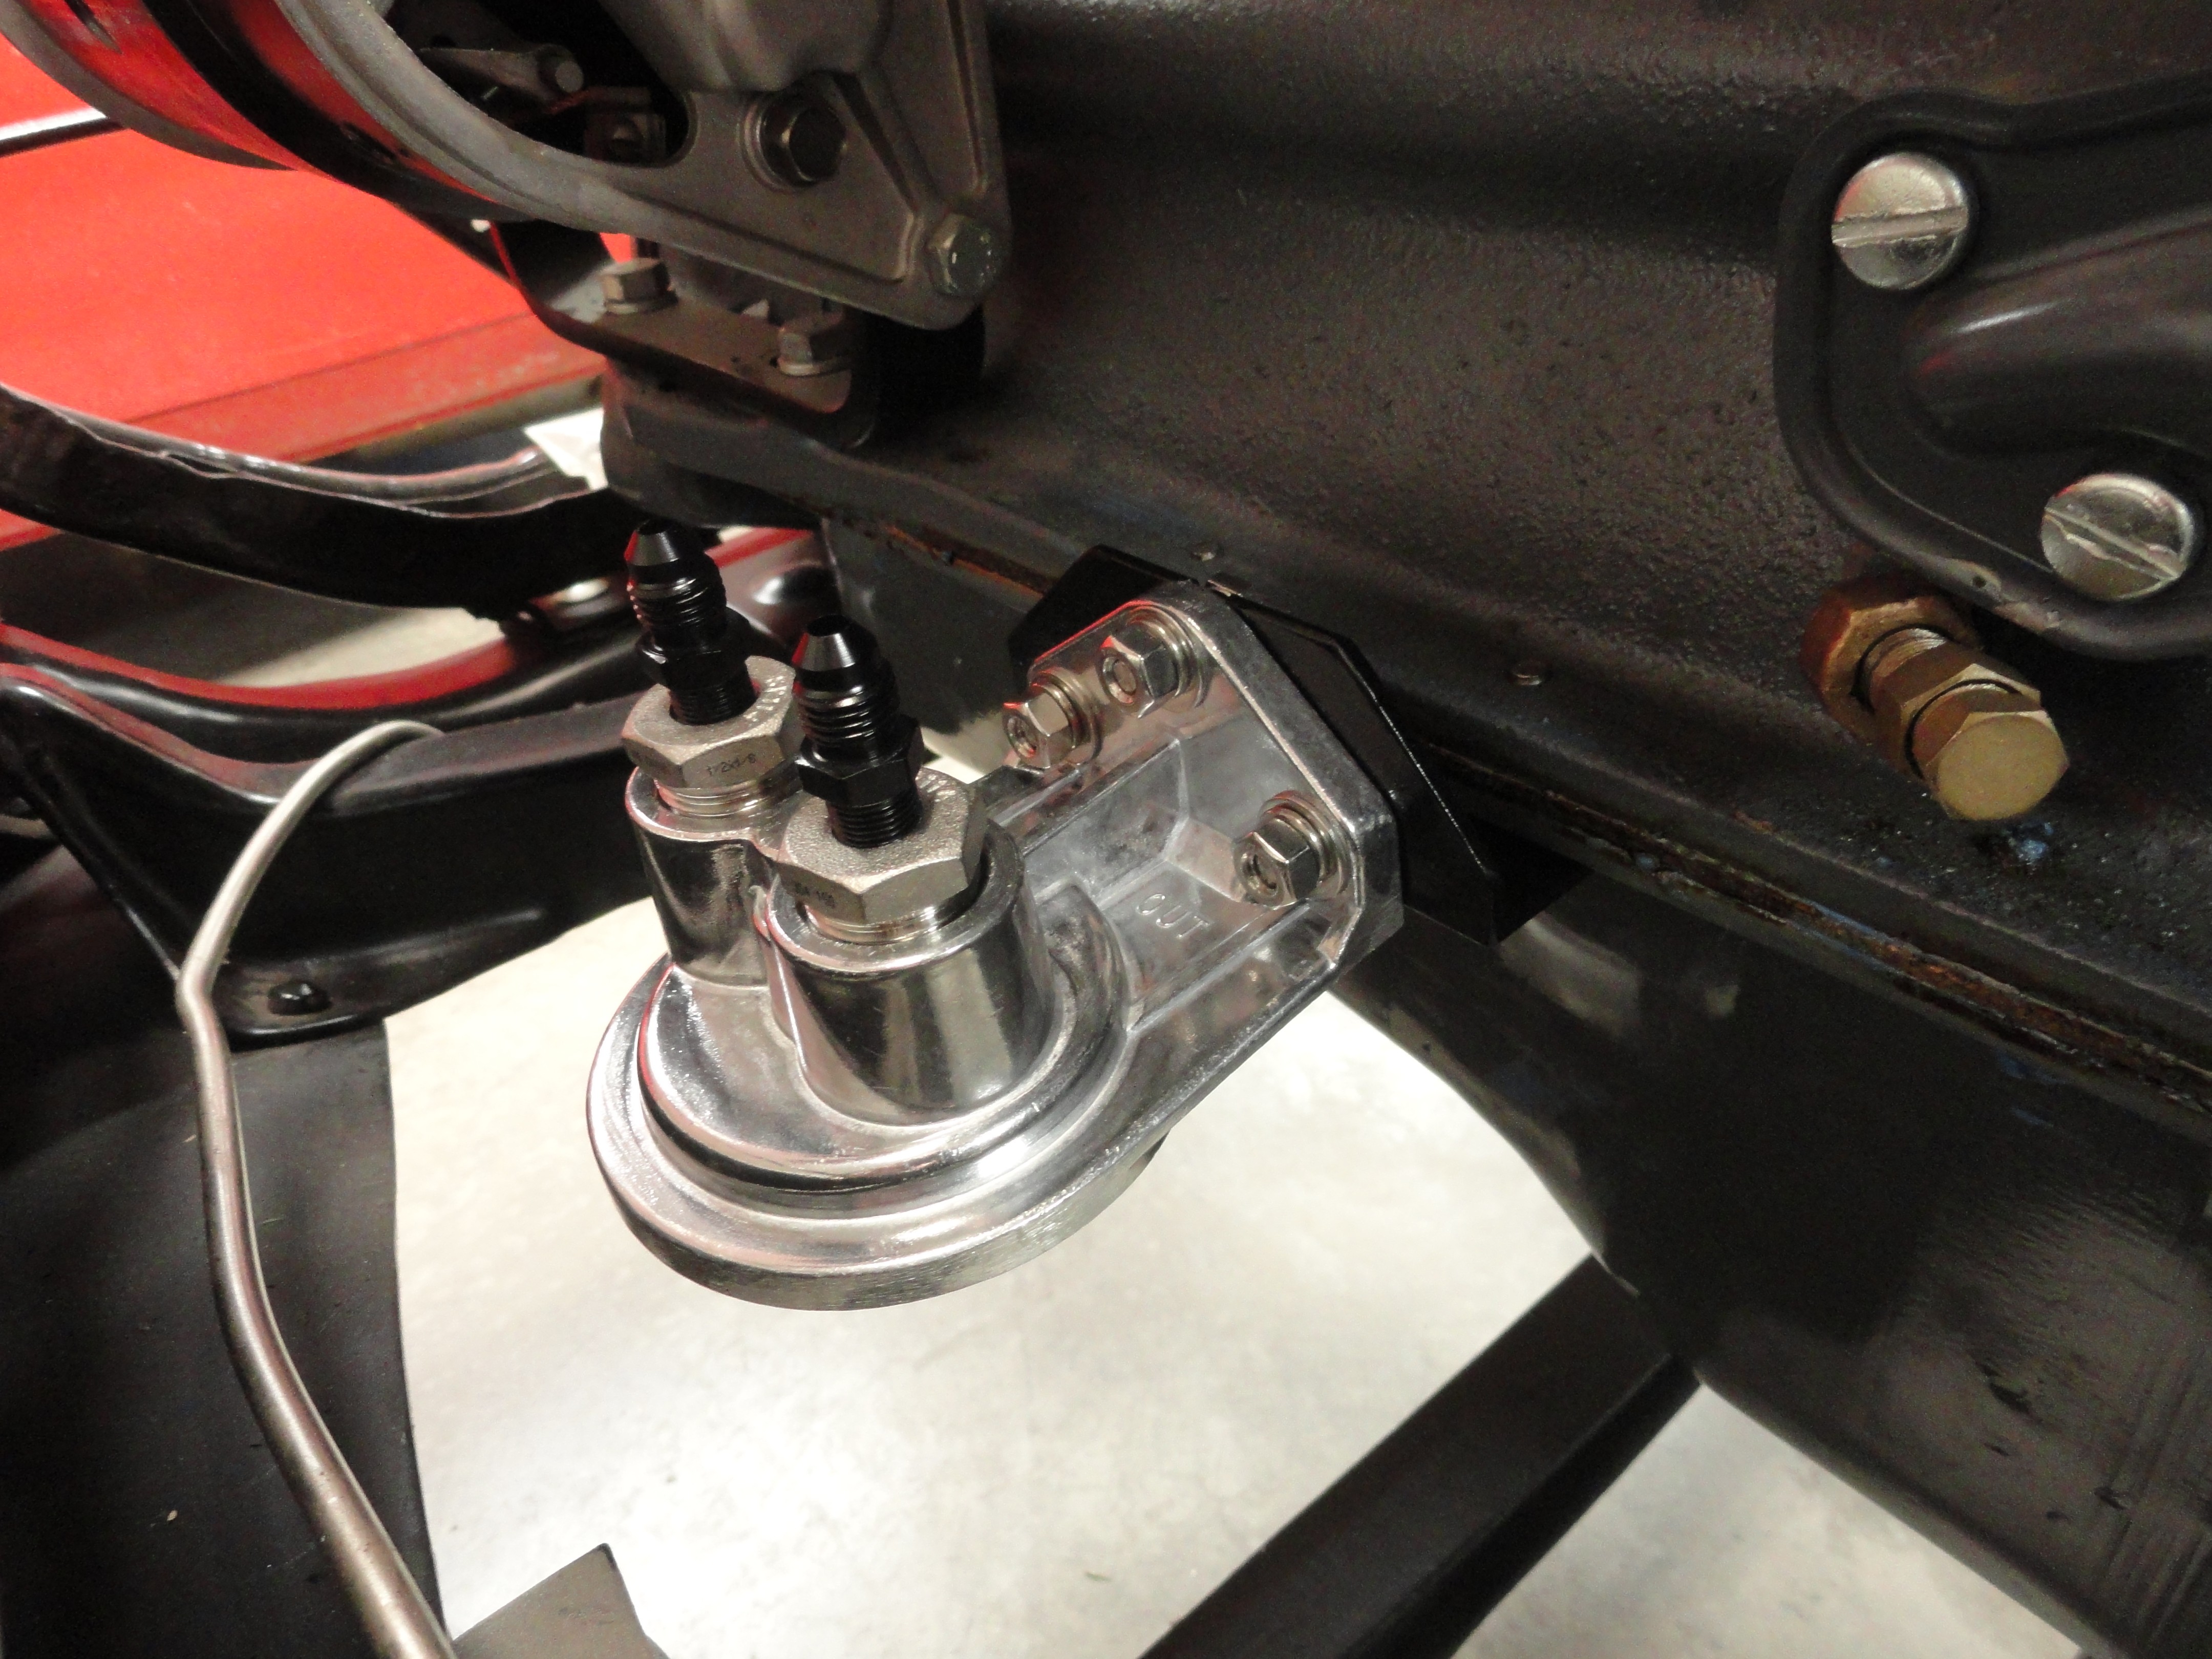
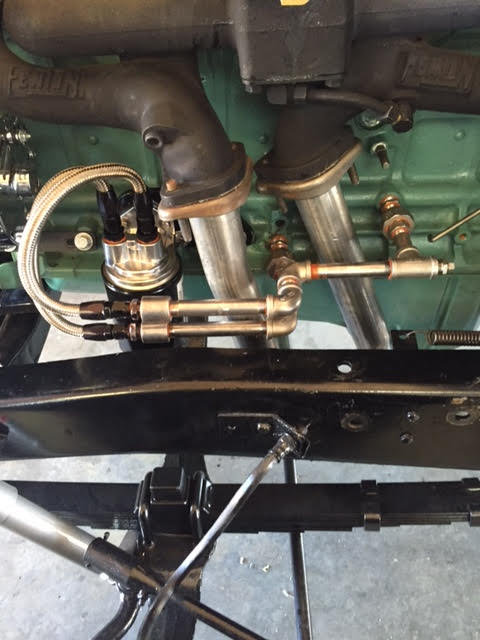
Here it is directly installed on the block. It looks like it belongs there! Installing it directly on the block will eliminate any friction (thus wear & tear) on the oil lines due to engine vibration. The 3/8" braided stainless line I got at Summit Racing. It comes in 3 foot pieces. One 3 footer is enough. The fittings are standard 3/8" -6AN fittings. An easy way to cut this braided stainless line (which is rubber with a stainless braid on the outside), is to very tightly tape in the middle of where you want to cut it, so there is tape on both sides of the cut, then use a Makita grinder to cut it. Take the cutting slow and it will be very clean and easy to put the ends on.
Note: For some years of motors, the rocker assembly is fed by a tube under the side cover up through the head into the intermediate rocker support. Later head designs did away with requirement by adding a oil passage up through the head to feed that goofy tube on the rocker shaft. Make sure your head has this feature or you will get no oil to the rockers. An air compressor set to low pressure will help you chase the passages and convince yourself you will have sufficient flow to the rockers. DO NOT drill out the oil passage restriction in the head as it is designed to maintain pressure to the lower end of the engine.
Solution Five: Every now and then we see a Triangle Motor Mount on the side of the 235 Engine that has two holes at the top and one hole at the bottom. The front hole is 2-1/2" from the bottom hole and the rear hole is 2-5/8" from the bottom hole. Special THANKS to Michael for taking the time to send in a cardboard template so we can make the correct adapter plate. This type of motor mount has 3/8" coarse threads in the mounting boss so perfect for this application.
This is for all unmodified 216 and 235 engines and 261 Engines between 1954-1957. Stock Exhaust Only!
These two engines have slightly different parts lists, so I will differentiate between them where needed. Prices are as of 8-23-15.
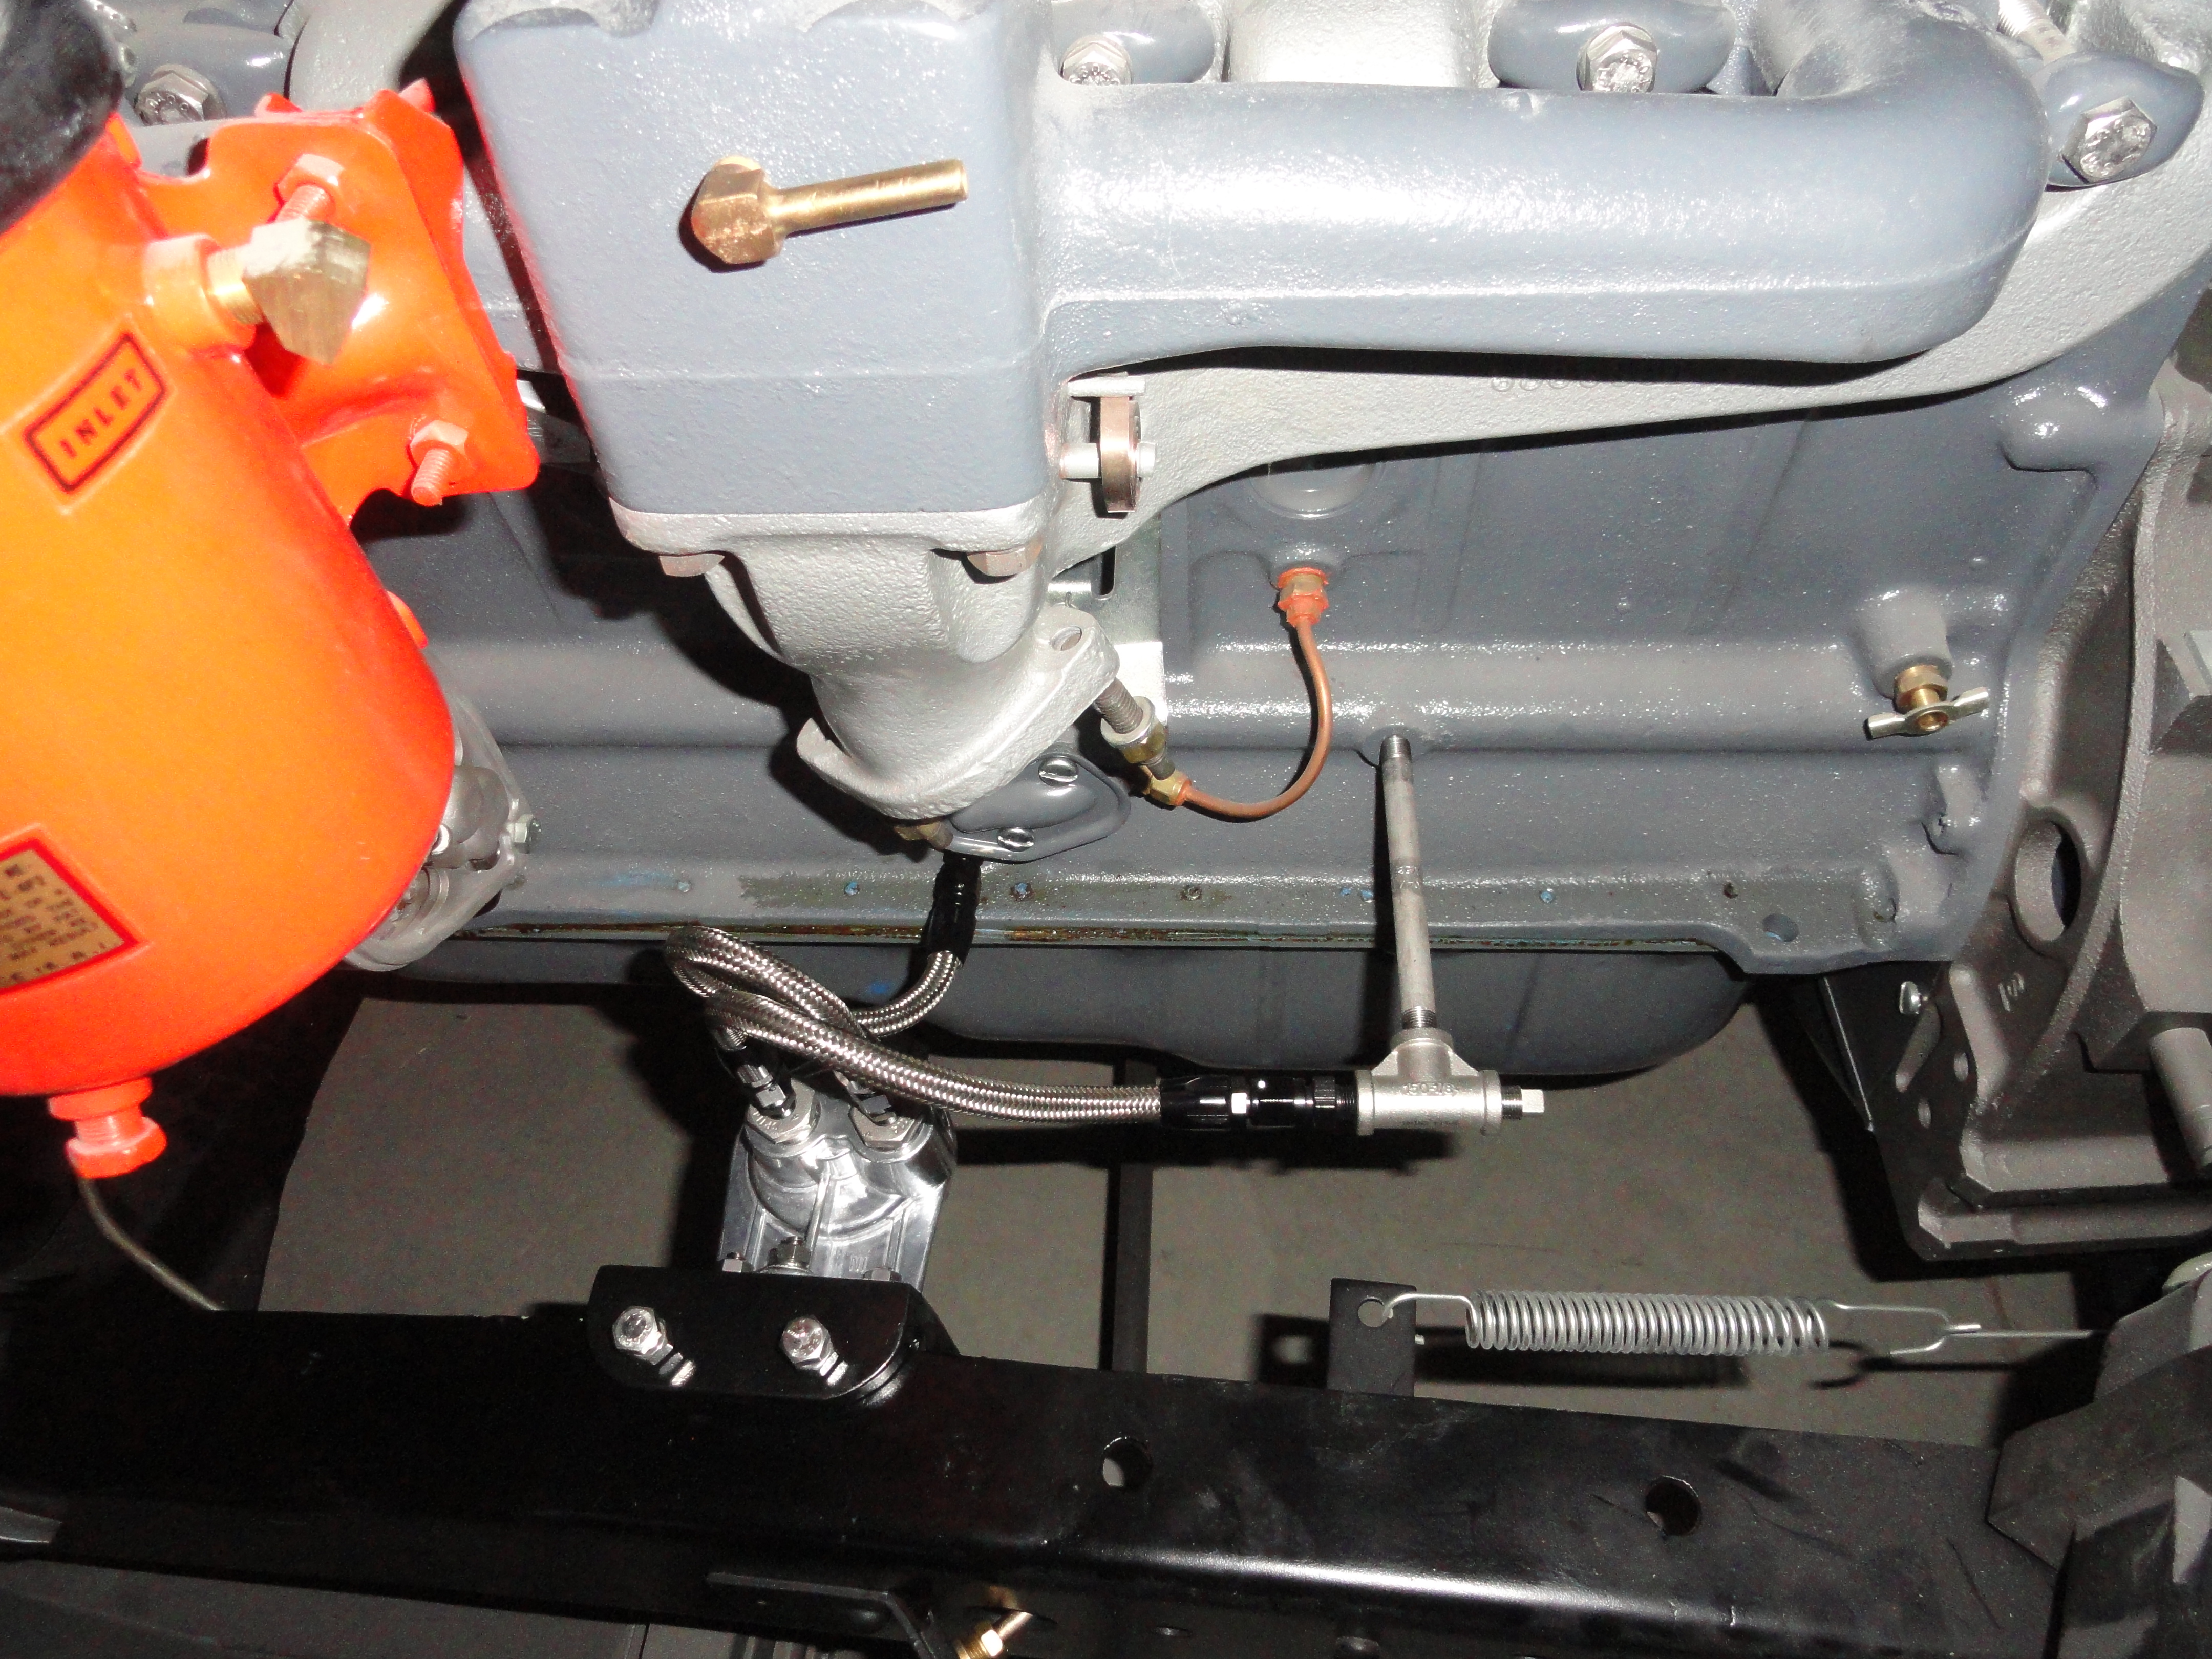
Solution Five: For people with Fenton dual exhaust manifolds, this solution includes a very special adapter that moves the Spin-on Adapter further forward. This can't be used with a Generator so only folks with Alternators can use this. The plumbing gets very complicated so the kit is more expensive. The picture right shows about the best route for use of this adapter with dual exhaust. The kit comes with everything you need in stainless steel. While more expensive, it will never rust!
The routing to get the oil to and from the adapter is complicated and requires just the right fittings so as not to interfere with the steering gearbox. In the end, the pipes come out nicely to the point where the hoses take over. This eliminates heat problems from the hot exhaust. The thing that makes this heat issue so important is the stainless braided hoses are rated to 300 degrees and the exhaust system is considerably hotter. Start at the engine block with the fittings and use teflon tape or equivalent and tighten securely as you go.
If you have modified your 235 for Full Flow or have a 261 with Full Flow, use 3/8" NPT and -6AN Parts instead of those listed here. These parts
are listed in the order of placement per the photo. Remember, these parts are for a bypass filtration system using the Fenton Exhaust. Most of the Summit
Racing parts for 3/8" are listed above, then go to McMaster-Carr and get the Stainless Pipe Fittings for 3/8" NPT for full flow.
Special thanks to Bruce Childs for a lot of the technical content in this article. To confirm for the machine shop, have them also go to Inliners.Org. Both of these instructions do the very same thing but explain it in a slightly different way. I am especially grateful for these articles because I recently had my machine shop do the machine work as described below. The cost was $100 and it was the best $100 I have spent in a long time. Here's why...
The 261 in 1958 (1958-1962) came out with a unique dowel 'switch' that allowed the engine to be either bypass or full flow. You can read all about that and much more very good information about the 261 engine here: The Venerable 261. This was the first time GM gave us full flow oil filtering. The rest of us need to do the modification below.
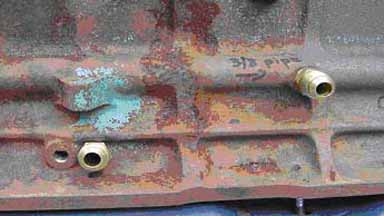
This is how I have done the full-pressure oil filter on the 235/261. I don't suggest you do this unless the motor is completely apart for a rebuild. With the drilling and tapping, there will be too many metal chips to do this on a motor that is already built.
All of the drilling and tapping will be done on the oil pump side of the block.
Step One: Get a 1/8" NPT Tap. Now, go about 1.375 in the hole (being careful not to damage the threads for the pump fittings.) Tap and install
1/8" Pipe Plug. This will plug the passage to the mains. <--
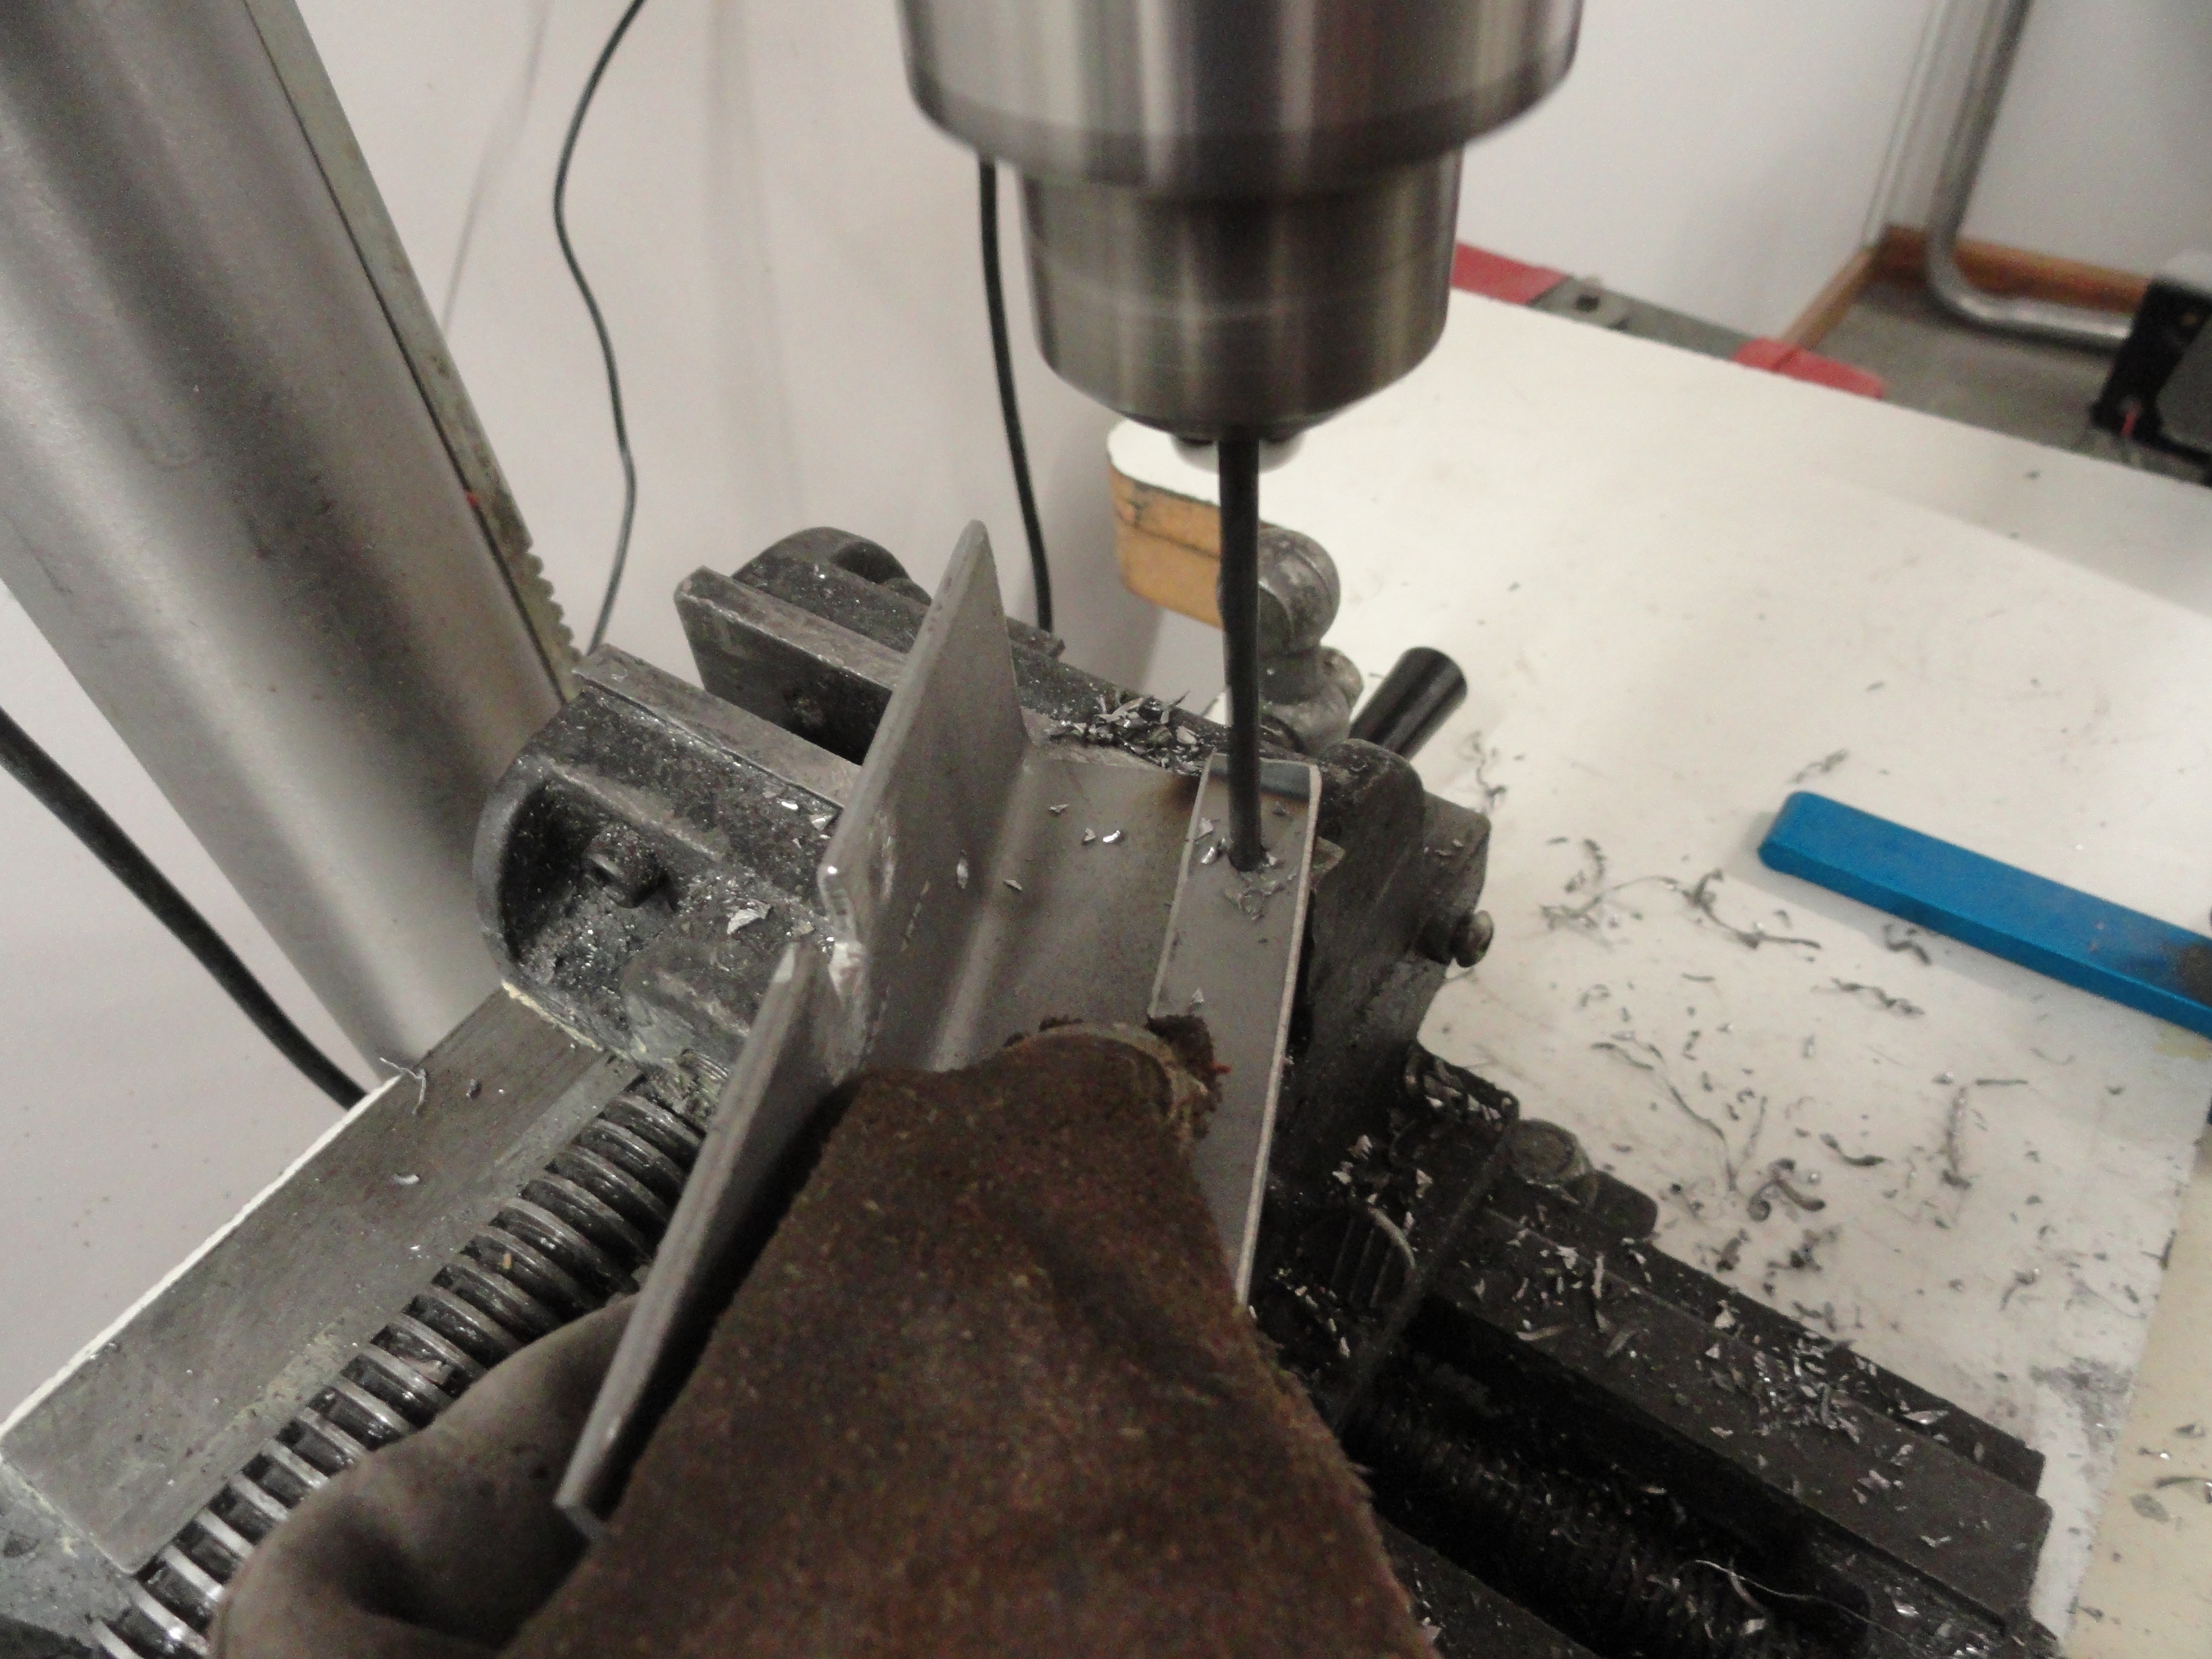
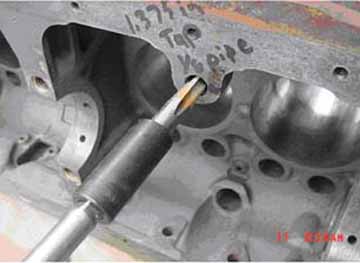
Step Two: Put the block on its oil pan flange. The next hole you will drill from scratch, and it may be a little scary for the first-timer.
Just take your time and look at the pictures. I tend to drill this hole a little on the high side so you don't get into the fitting for the oil pump.-->
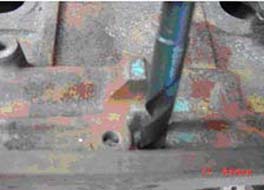
Start with a 1/8" drill bit on a slight angle (see angle of tap below.) Go to a 3/16" then to a 9/16" drill.<--
Be careful and try to keep it lined up straight with the oil pump passage. Now tap the hole with a 3/8" NPT tap being careful to keep the same angle that
you drilled on.-->

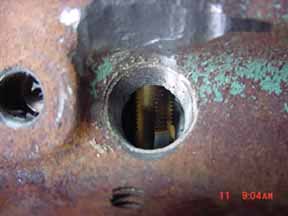
Step Three: The next hole that gets drilled is the hole that used to have the bypass filter and oil pressure gauge hooked to it. Take your time and just drill this one out to 9/16" Tap for 3/8" NPT also.
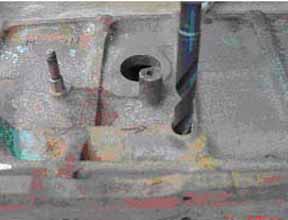
Step Four: The next hole is drilled about halfway between the last one you drilled and the flywheel end of the block. Get the hole centered on
the passage.<--
Drill it with a 21/64" drill, then tap with a 1/8" NPT tap.-->

Step Five: You may choose not to drill this one if your filter has a place for a 1/8 NPT to plumb your
gauge. I have done them both ways.<--
We use the Trans-Dapt remote filter in our shop, but others will work. There are other ways to do this, but I have found this one to look and work the best.
Total time to do the job is about 1 hour (it took me longer to do this article!) Have fun and be safe! - Bruce Childs (aka Phat)
If you have a 216 or 235 engine with a bypass system, but want the benefit of a spin on oil filter, (still Bypass but easier to change the filter), you can do one of two things. A good choice is to get the WIX Model 27455 Spin On Adapter which mounts to the intake manifold just like the bypass filter did. The WIX 51050 Filter is used with that system. This 51050 Filter has a built in .0625 reduced orifice to keep the proper oil pressure. Really it's a good kit because you just purchase it and it will work just fine. It's only drawback is it is not compatible with the thread sizes of the more popular filters.
We are developing more fun stuff for your vehicle. The Kits that are available now are Regular and Deluxe PCV Upgrade Kits, Spin-on Oil Filter Adapter Kits for both Full Flow and Bypass, our popular HEI conversion kit, Stock Heater Switch solutions and much more! Check out all of our offerings at Farm-it-Out!