Deve's Technical Network
1947-1955 1st Chevy Trucks
216/235/261 Engine Solutions & More
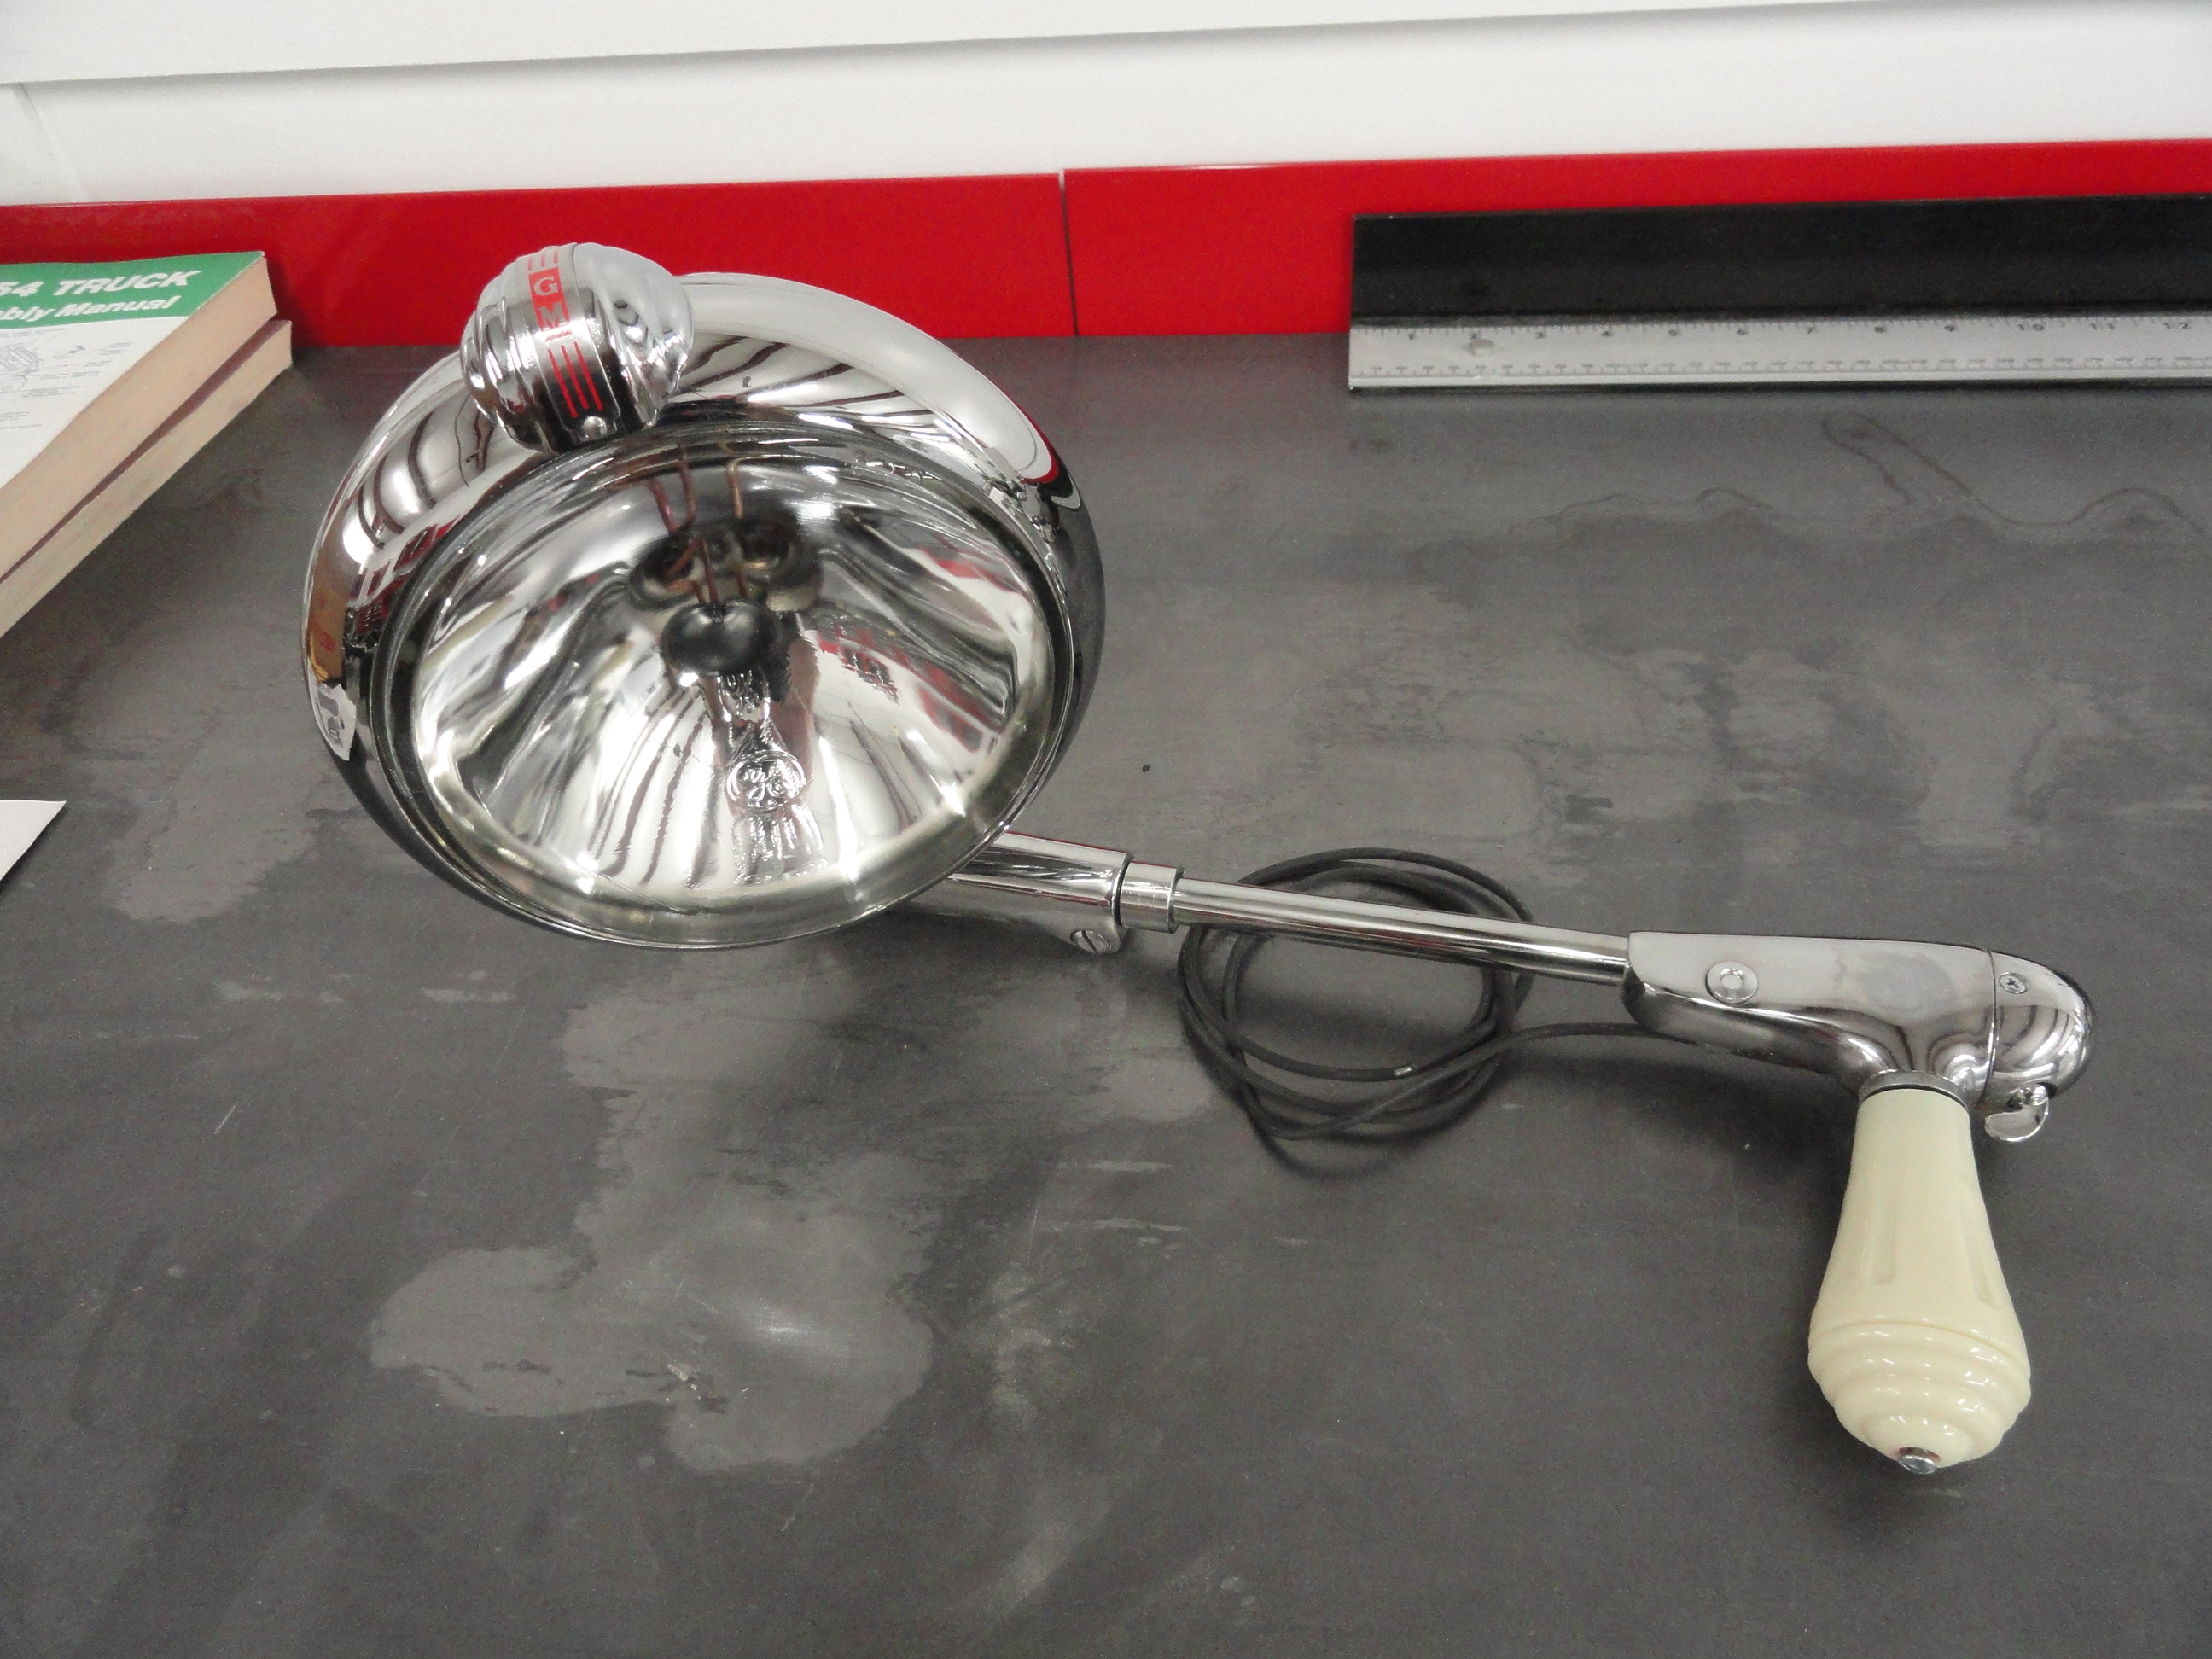
The Unity Spotlight is one of my favorite accessories. I had one on my original 1954 back in the day and I had an experience where the headlights went out and the only way I could see to get home was my Spotlight. The one I purchased even has the GM logo on the top of it. It will be a fine addition to this restoration.

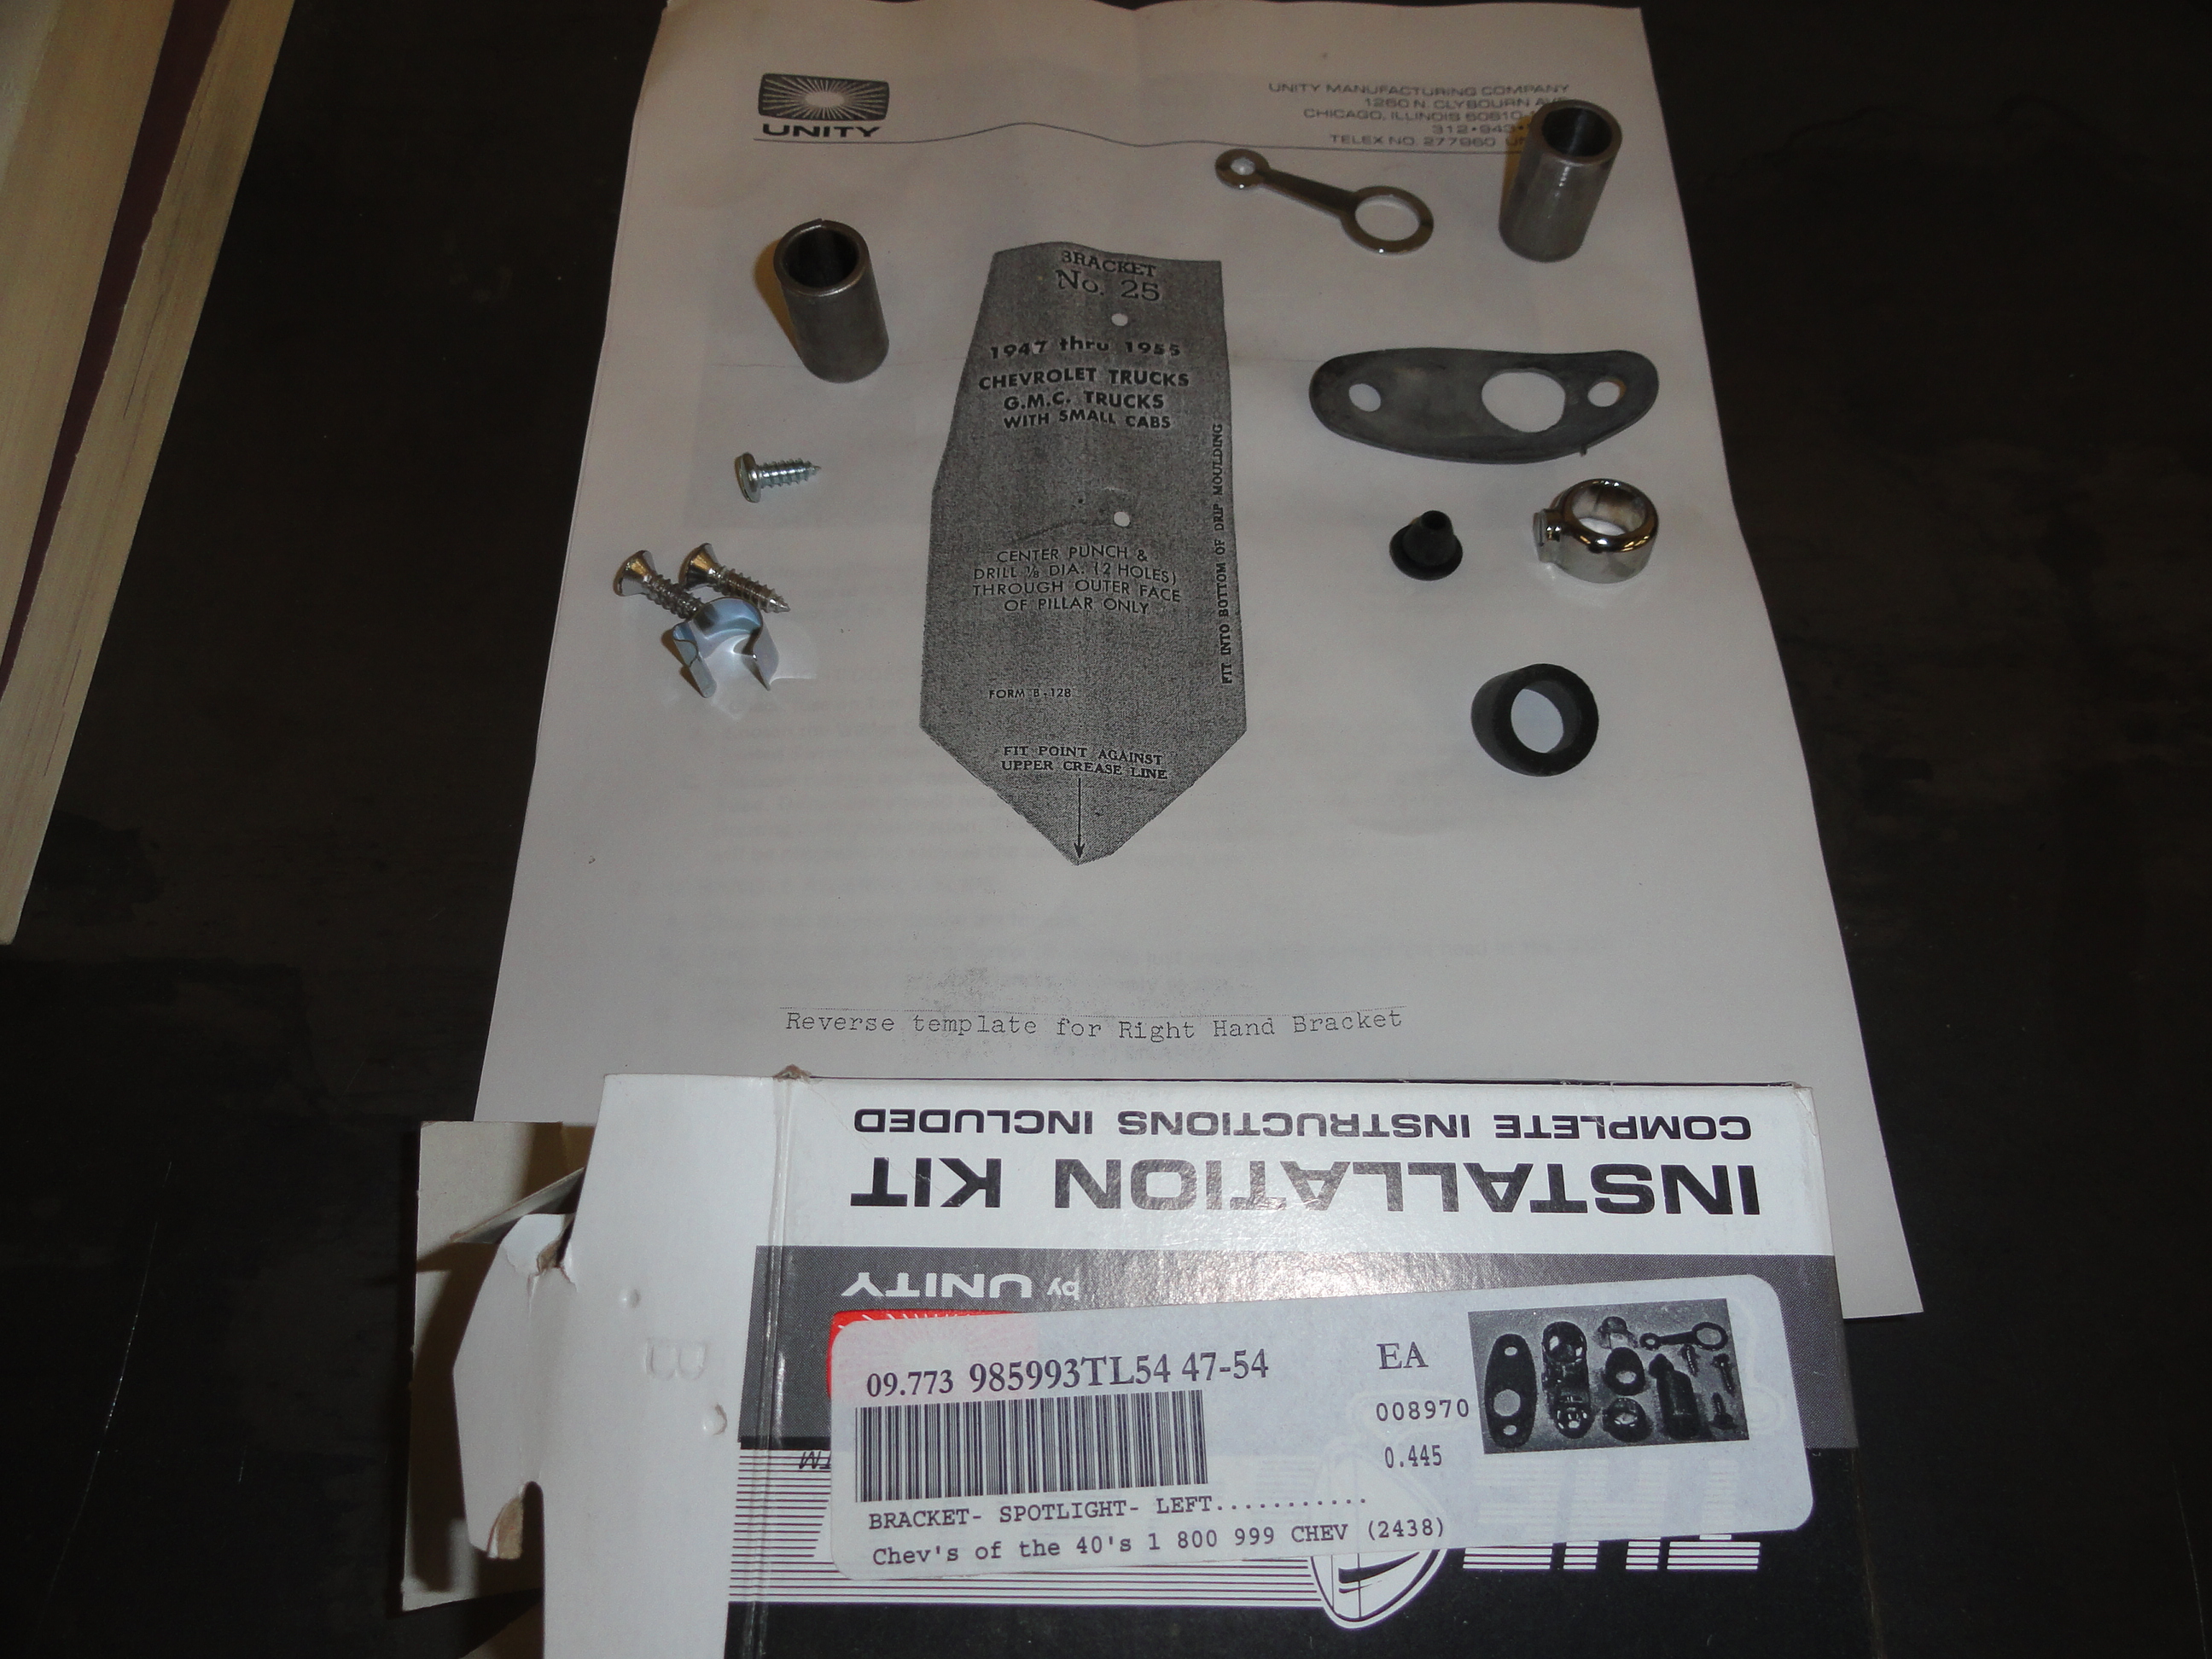
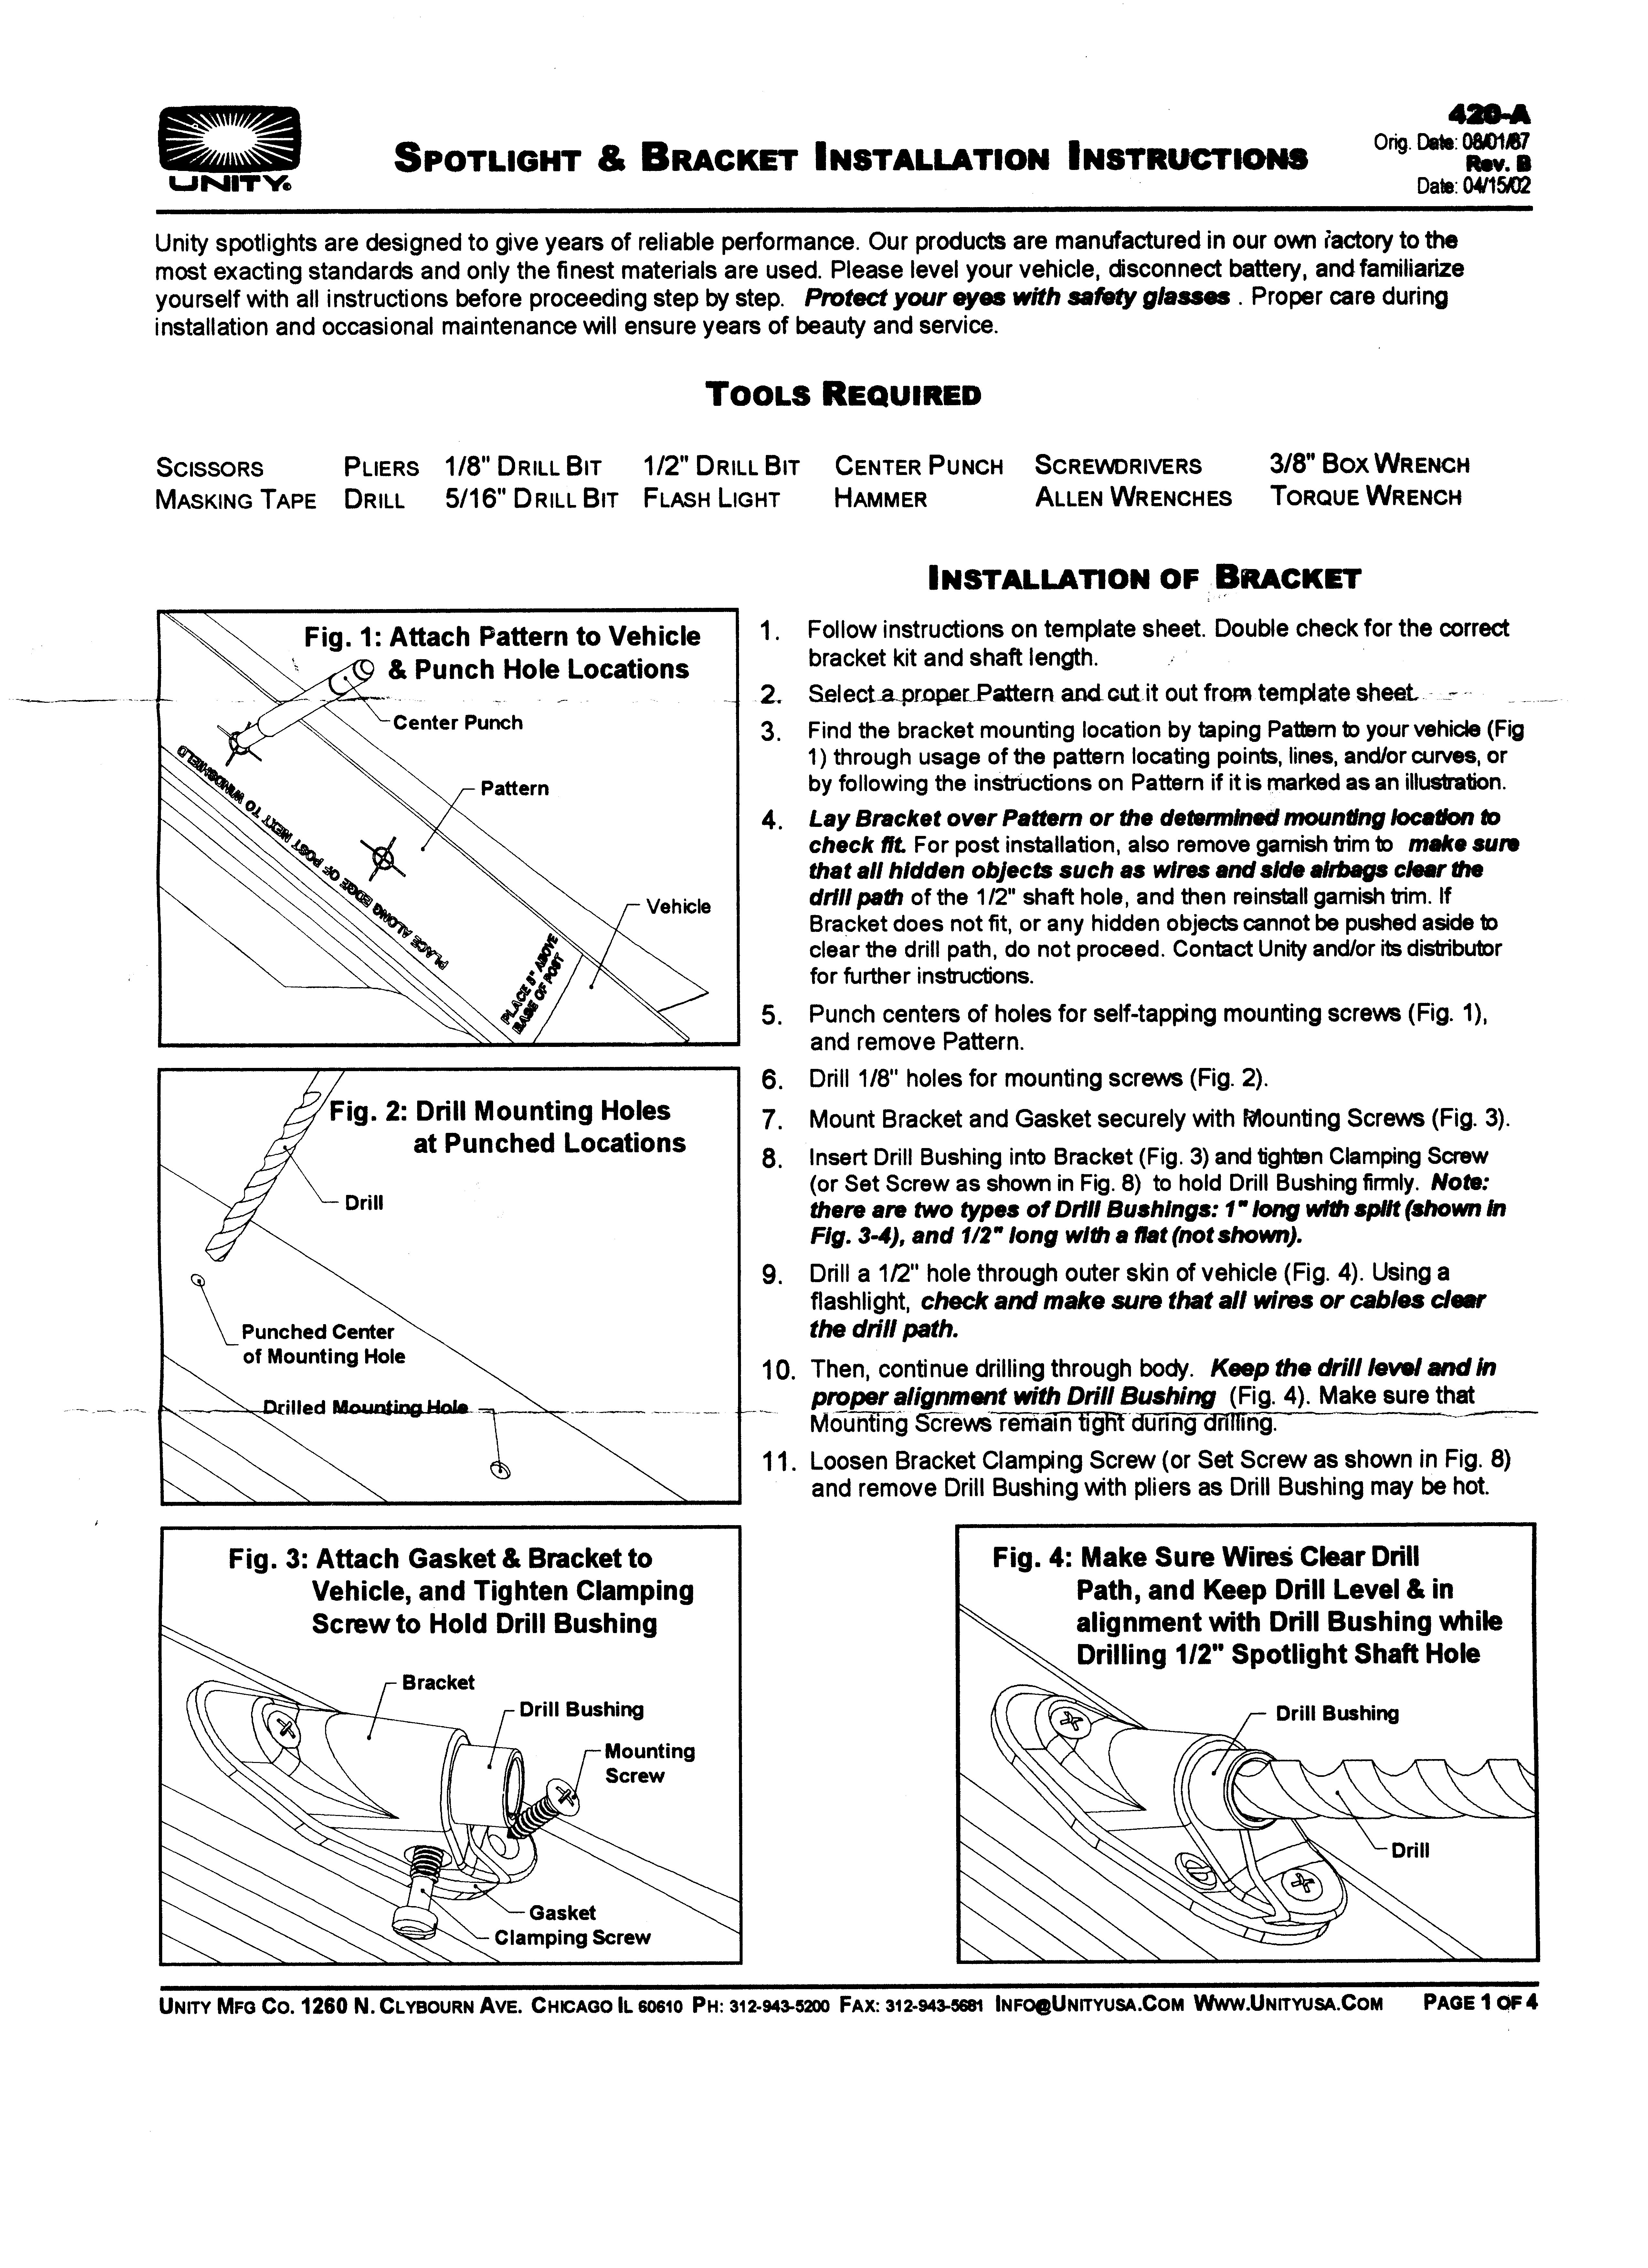
I haven't gotten very far on this installation but the cab is drilled properly per the unity template. I even installed it on my unfinished cab just to make sure. The kit included all of the parts in both pictures here. I got mine at Chevs of the 40's. These are the pictures of the parts that came in the kit.
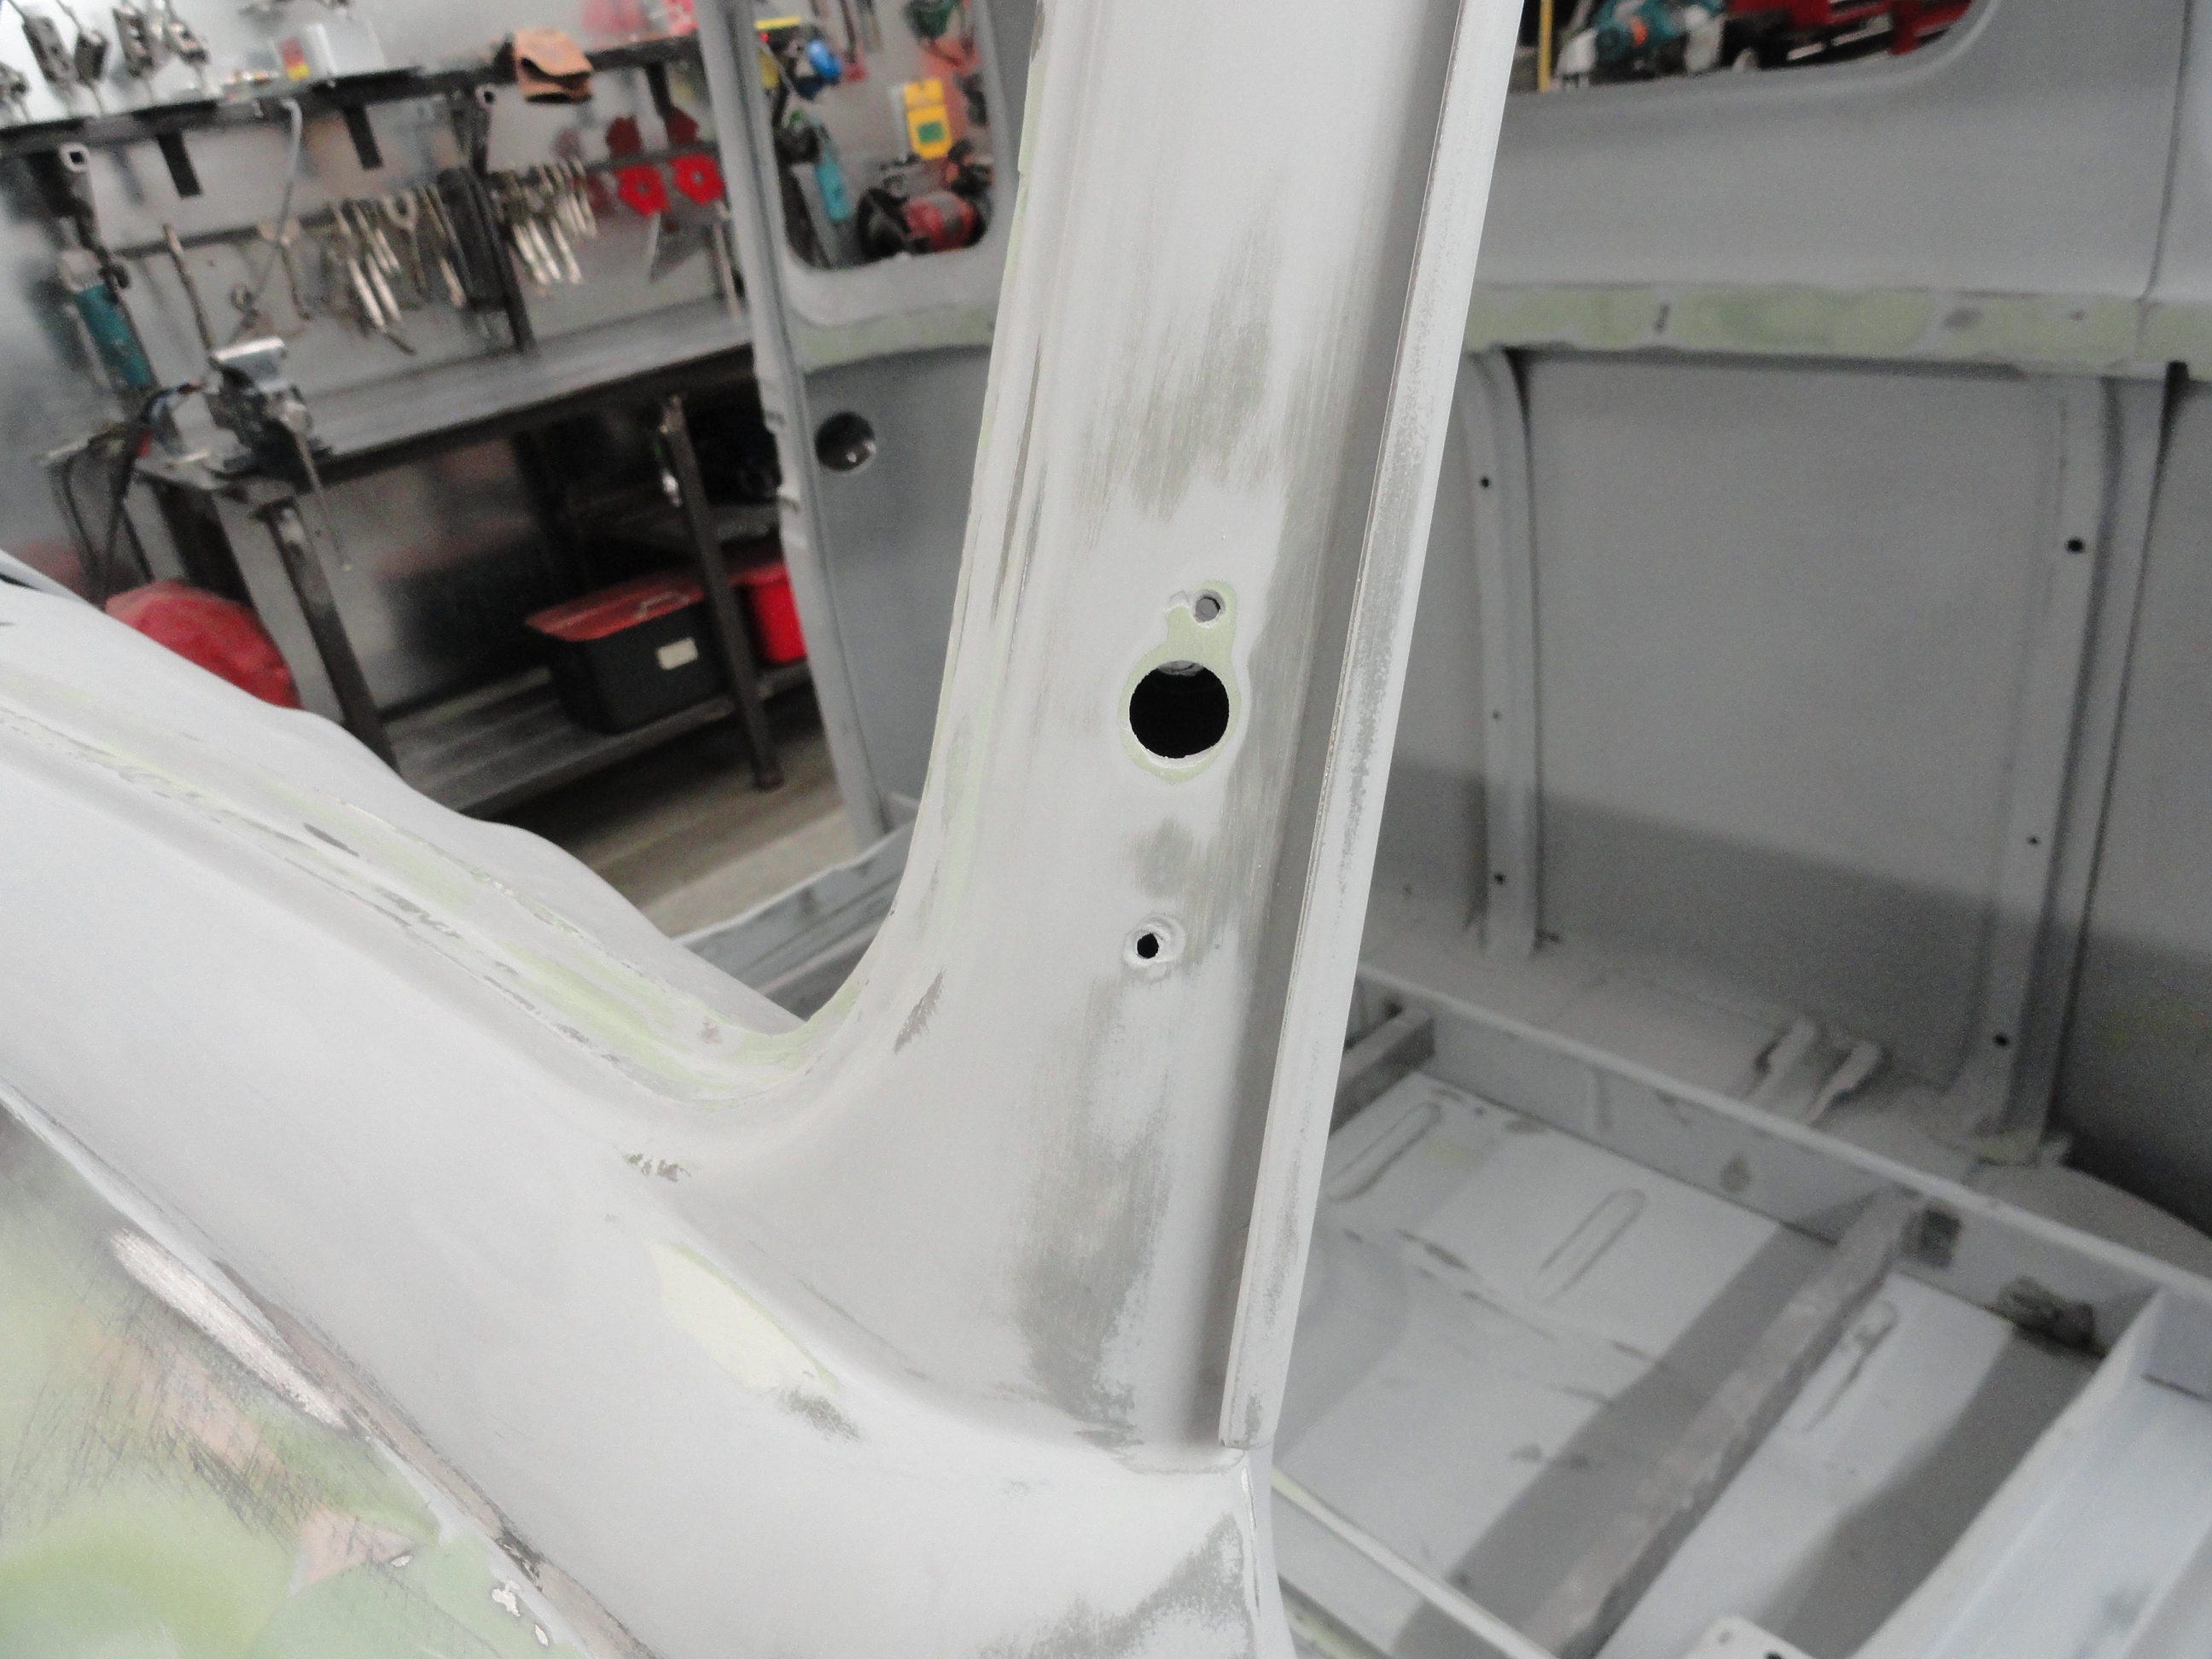
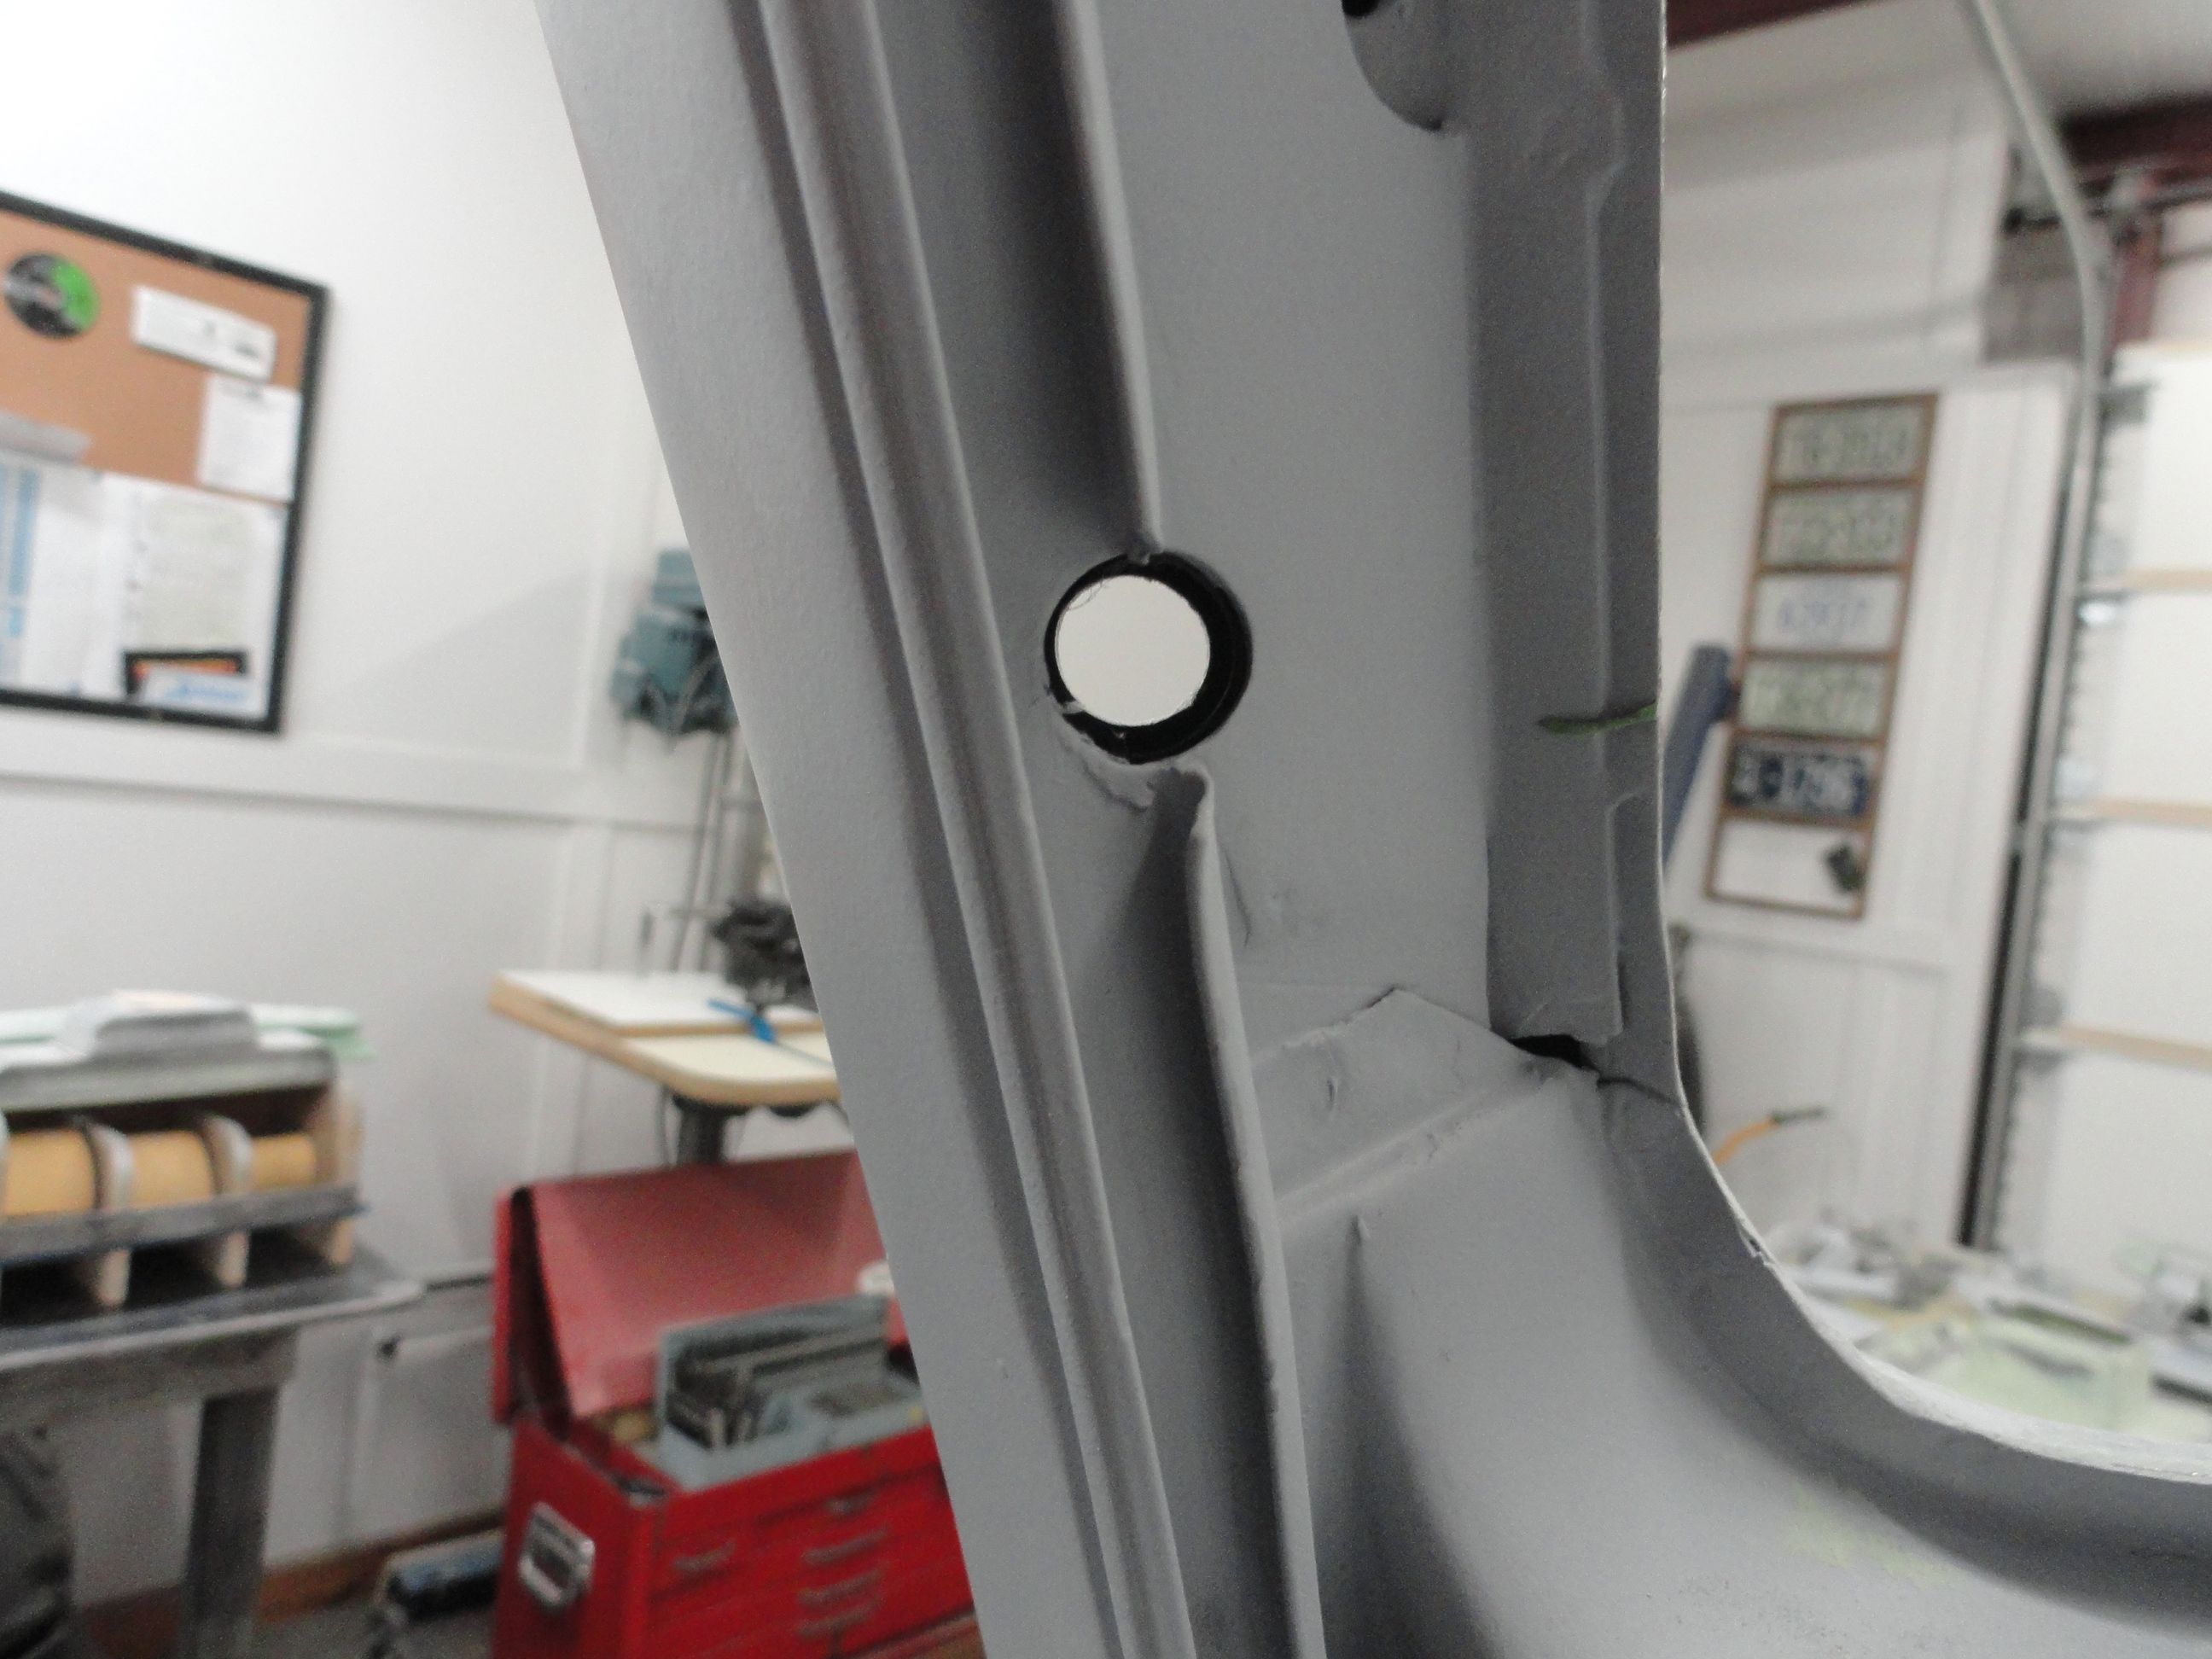
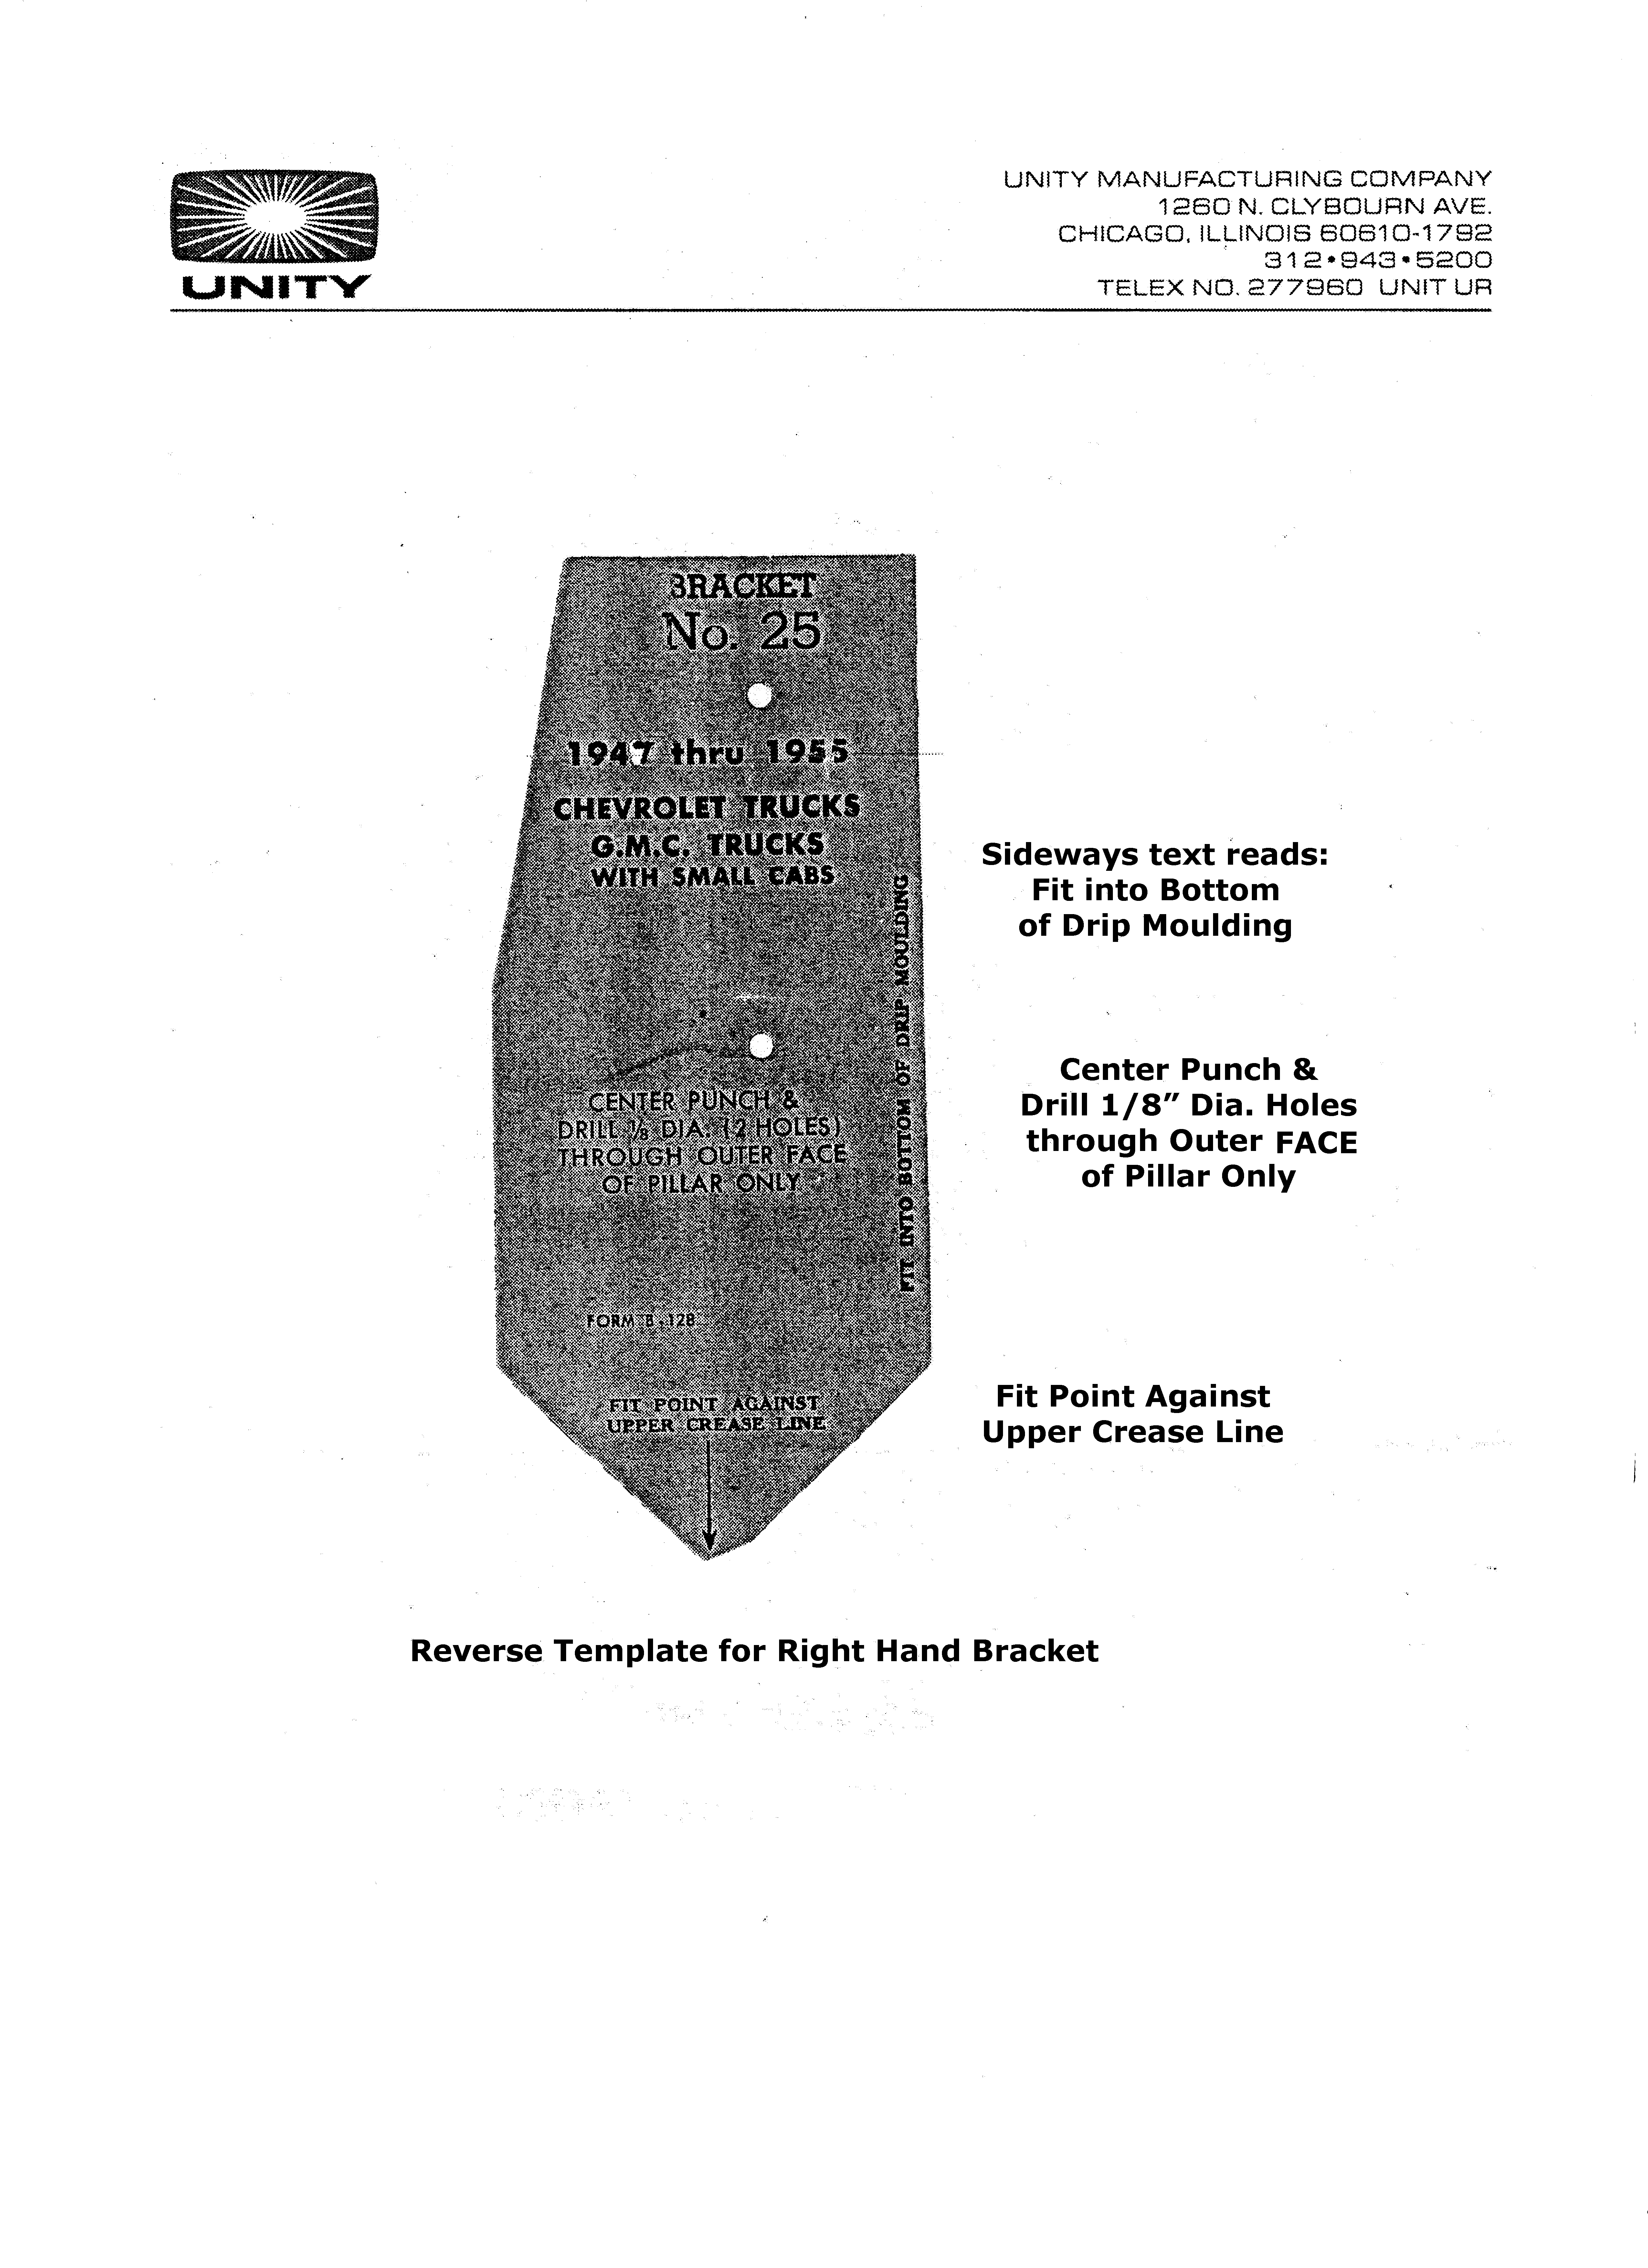
These are inside and outside pics of the holes in the cab put in the proper location. You want to be sure to print this template at 100%. Most printers are set from the factory at 97%. Not knowing this could be catastrophic! If the measurement across the top of the template is not EXACTLY 1-13/16" then fix your printer and try again. Somewhere in your printer options is an ability to change the percentage. You will be about 1/8" in error if you don't.

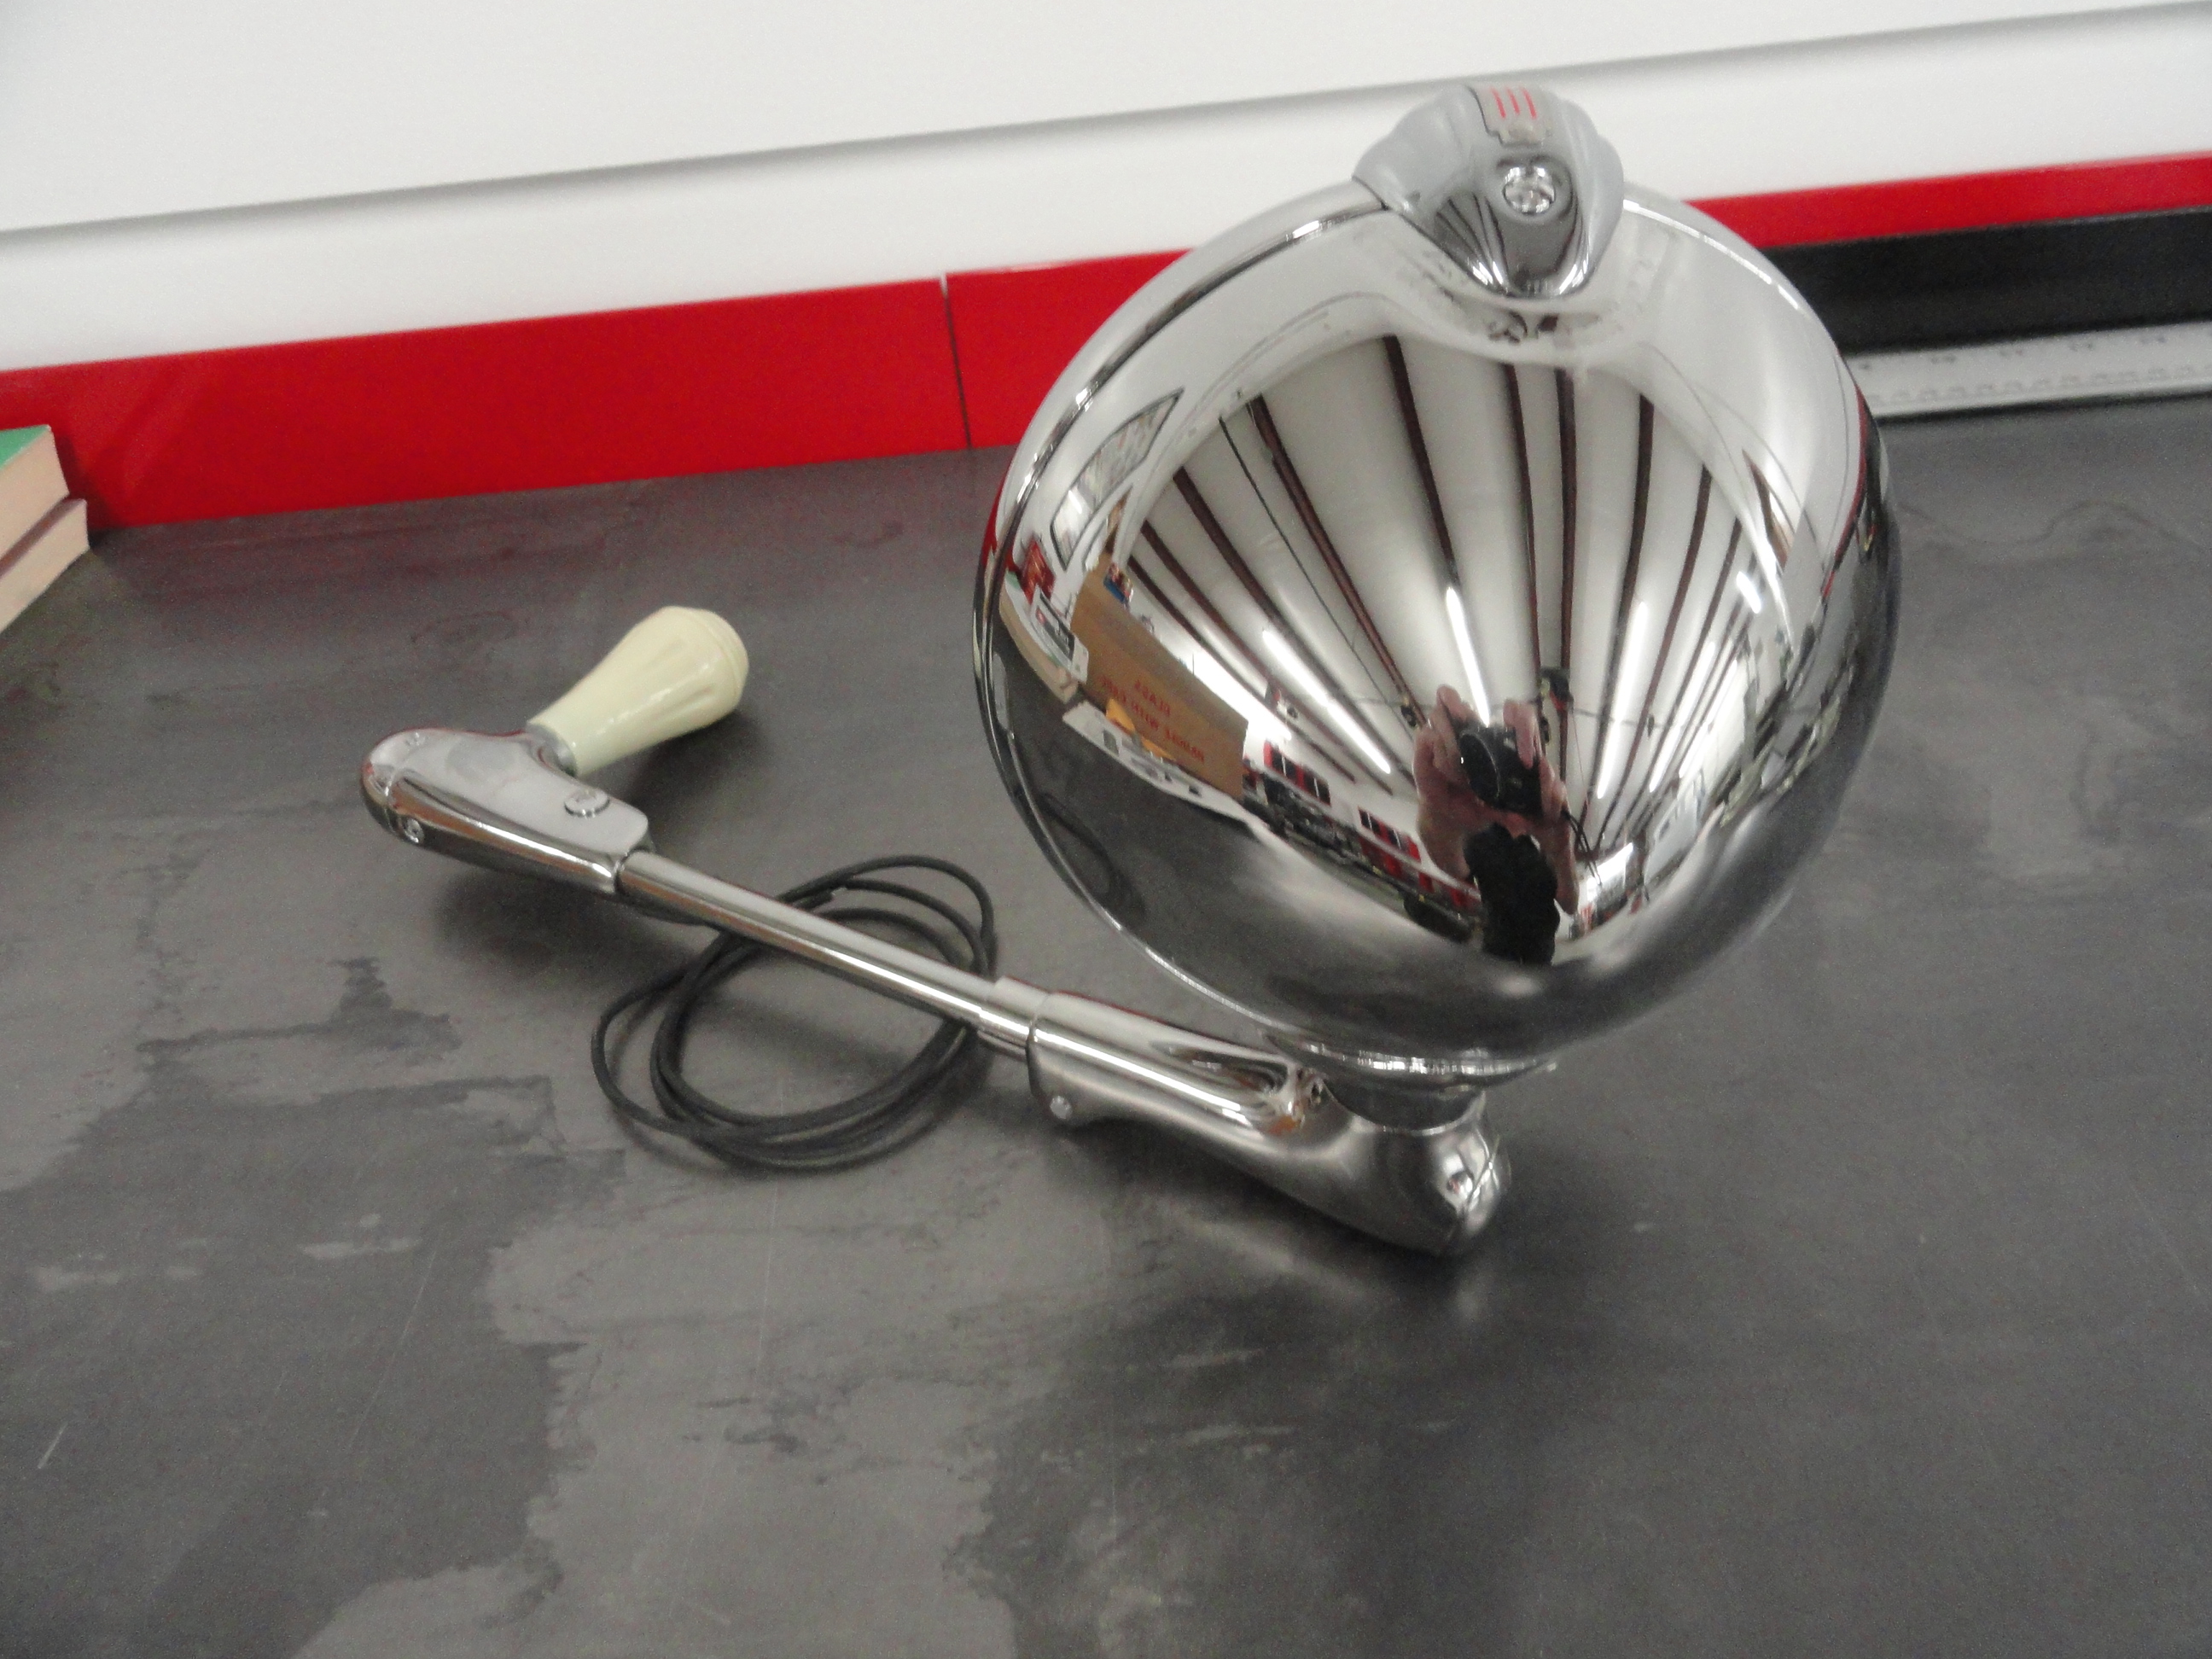
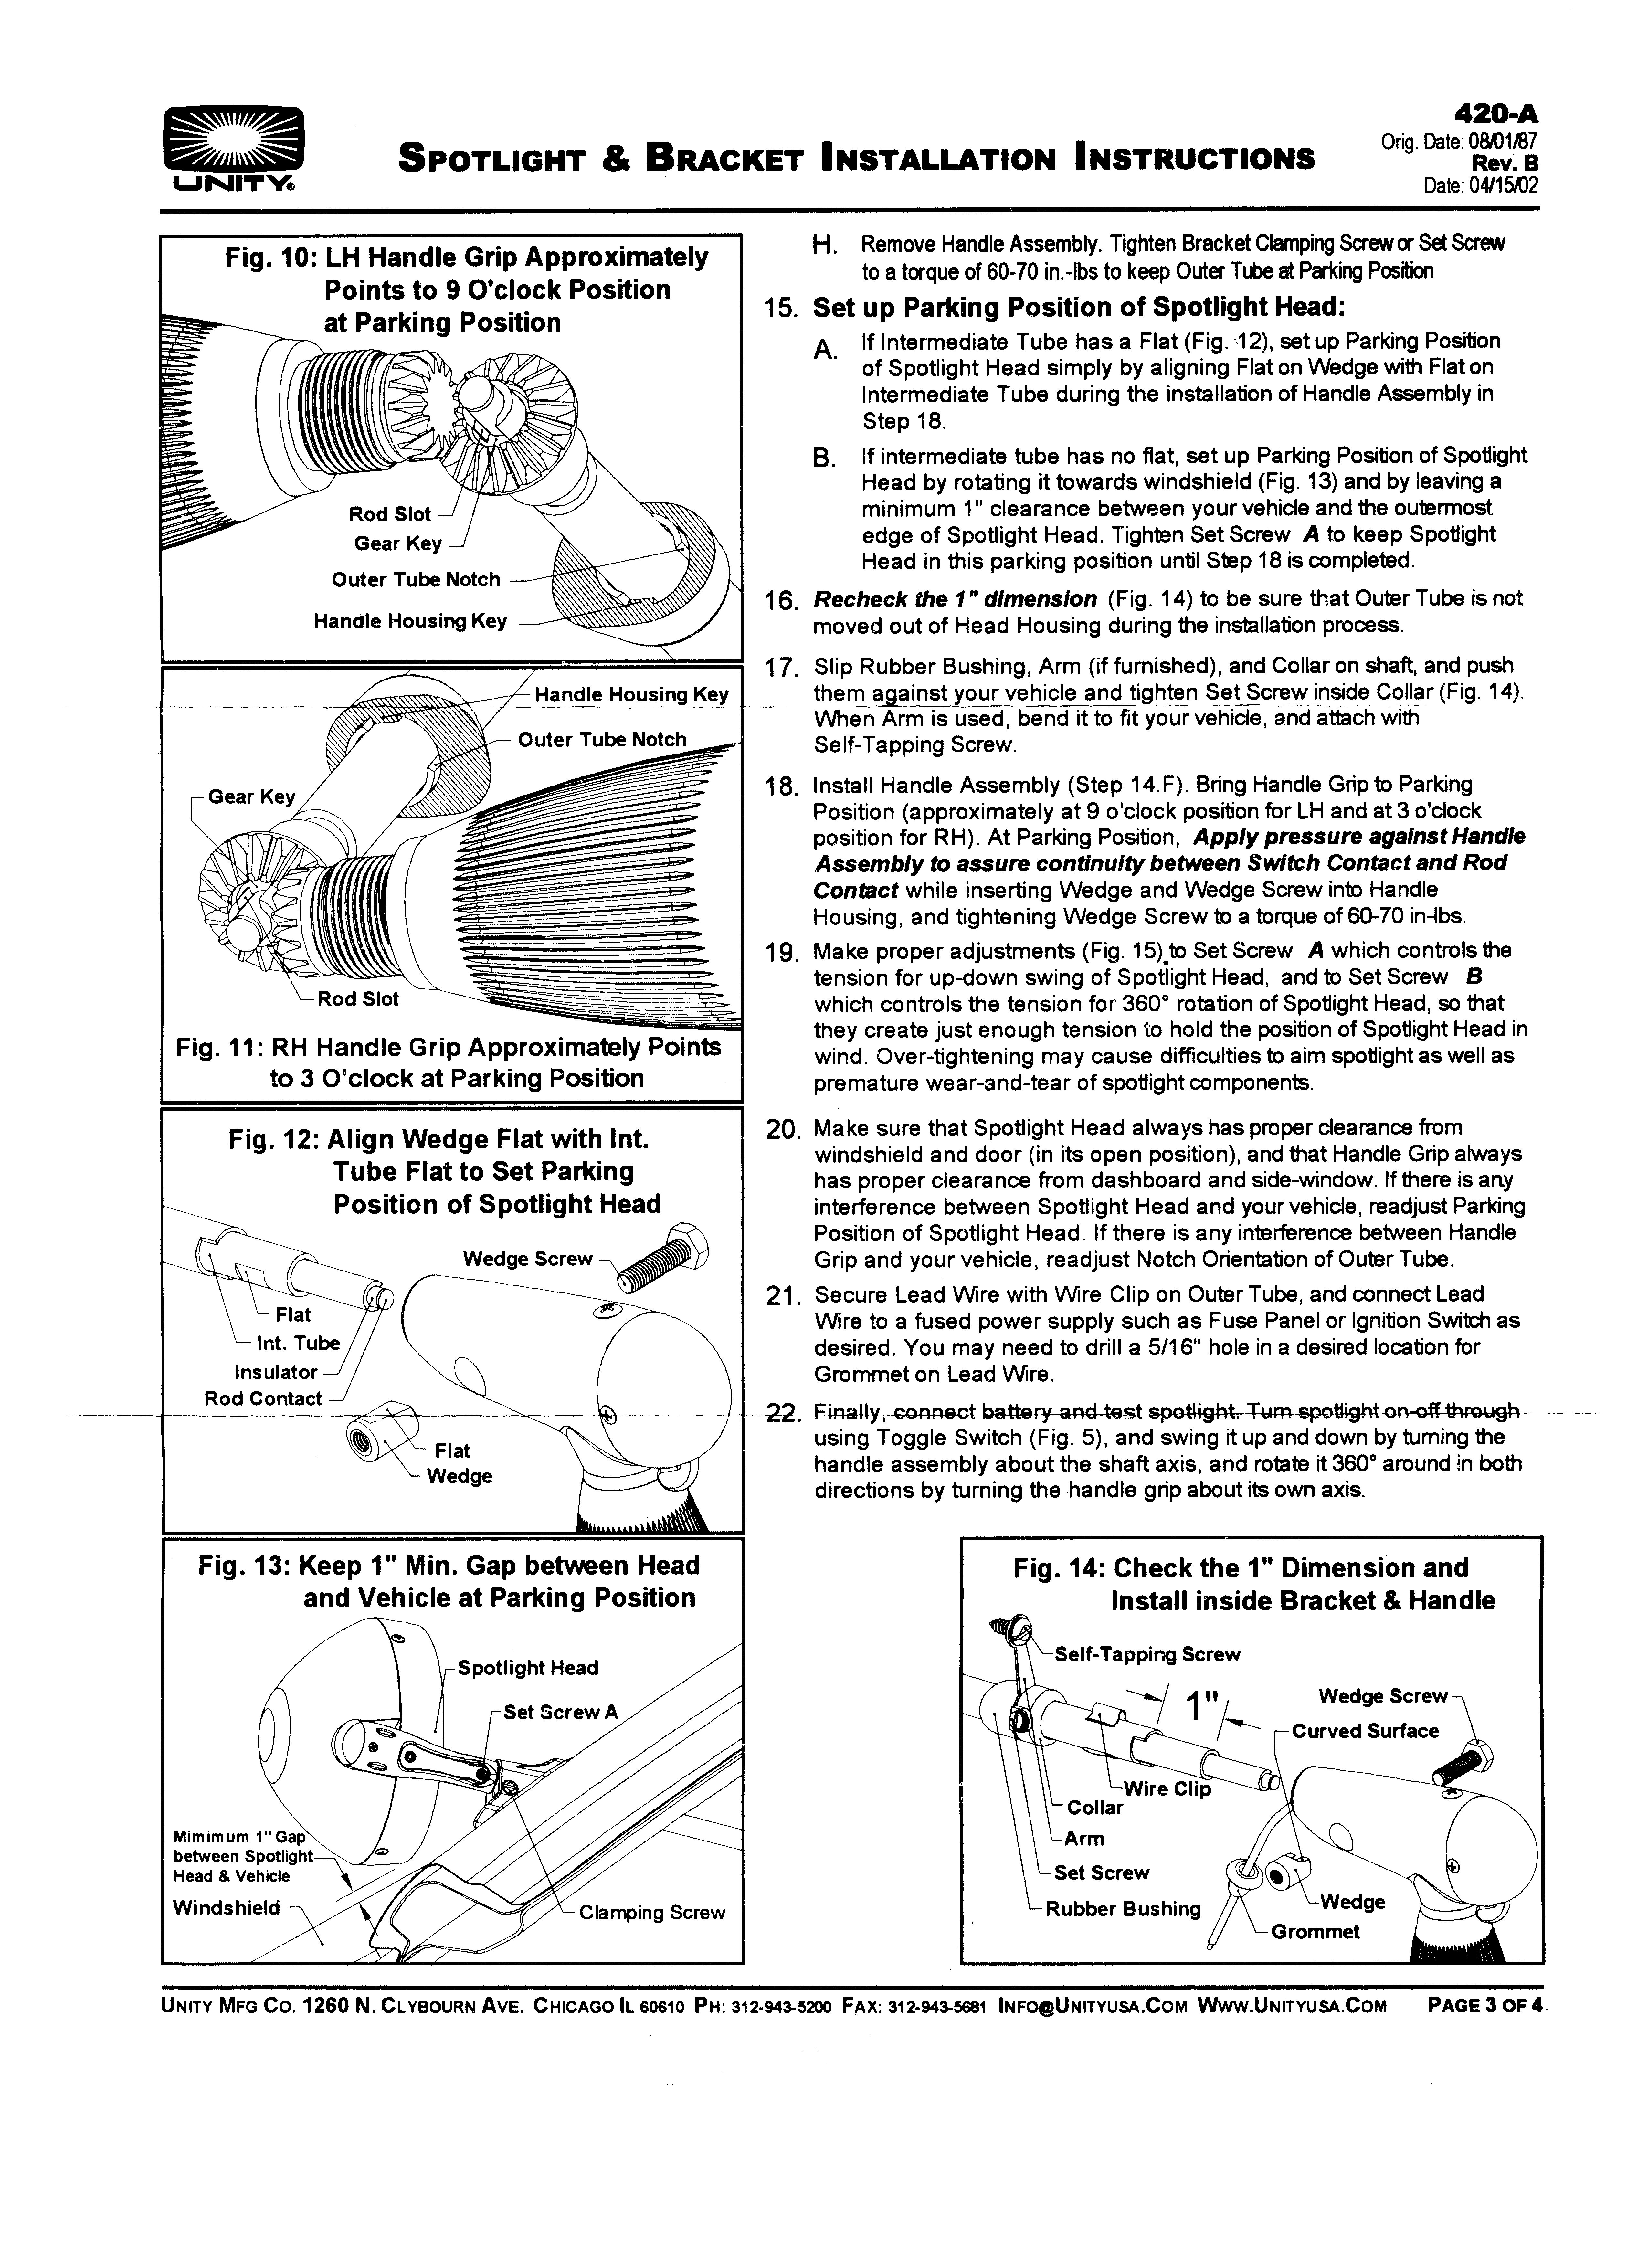
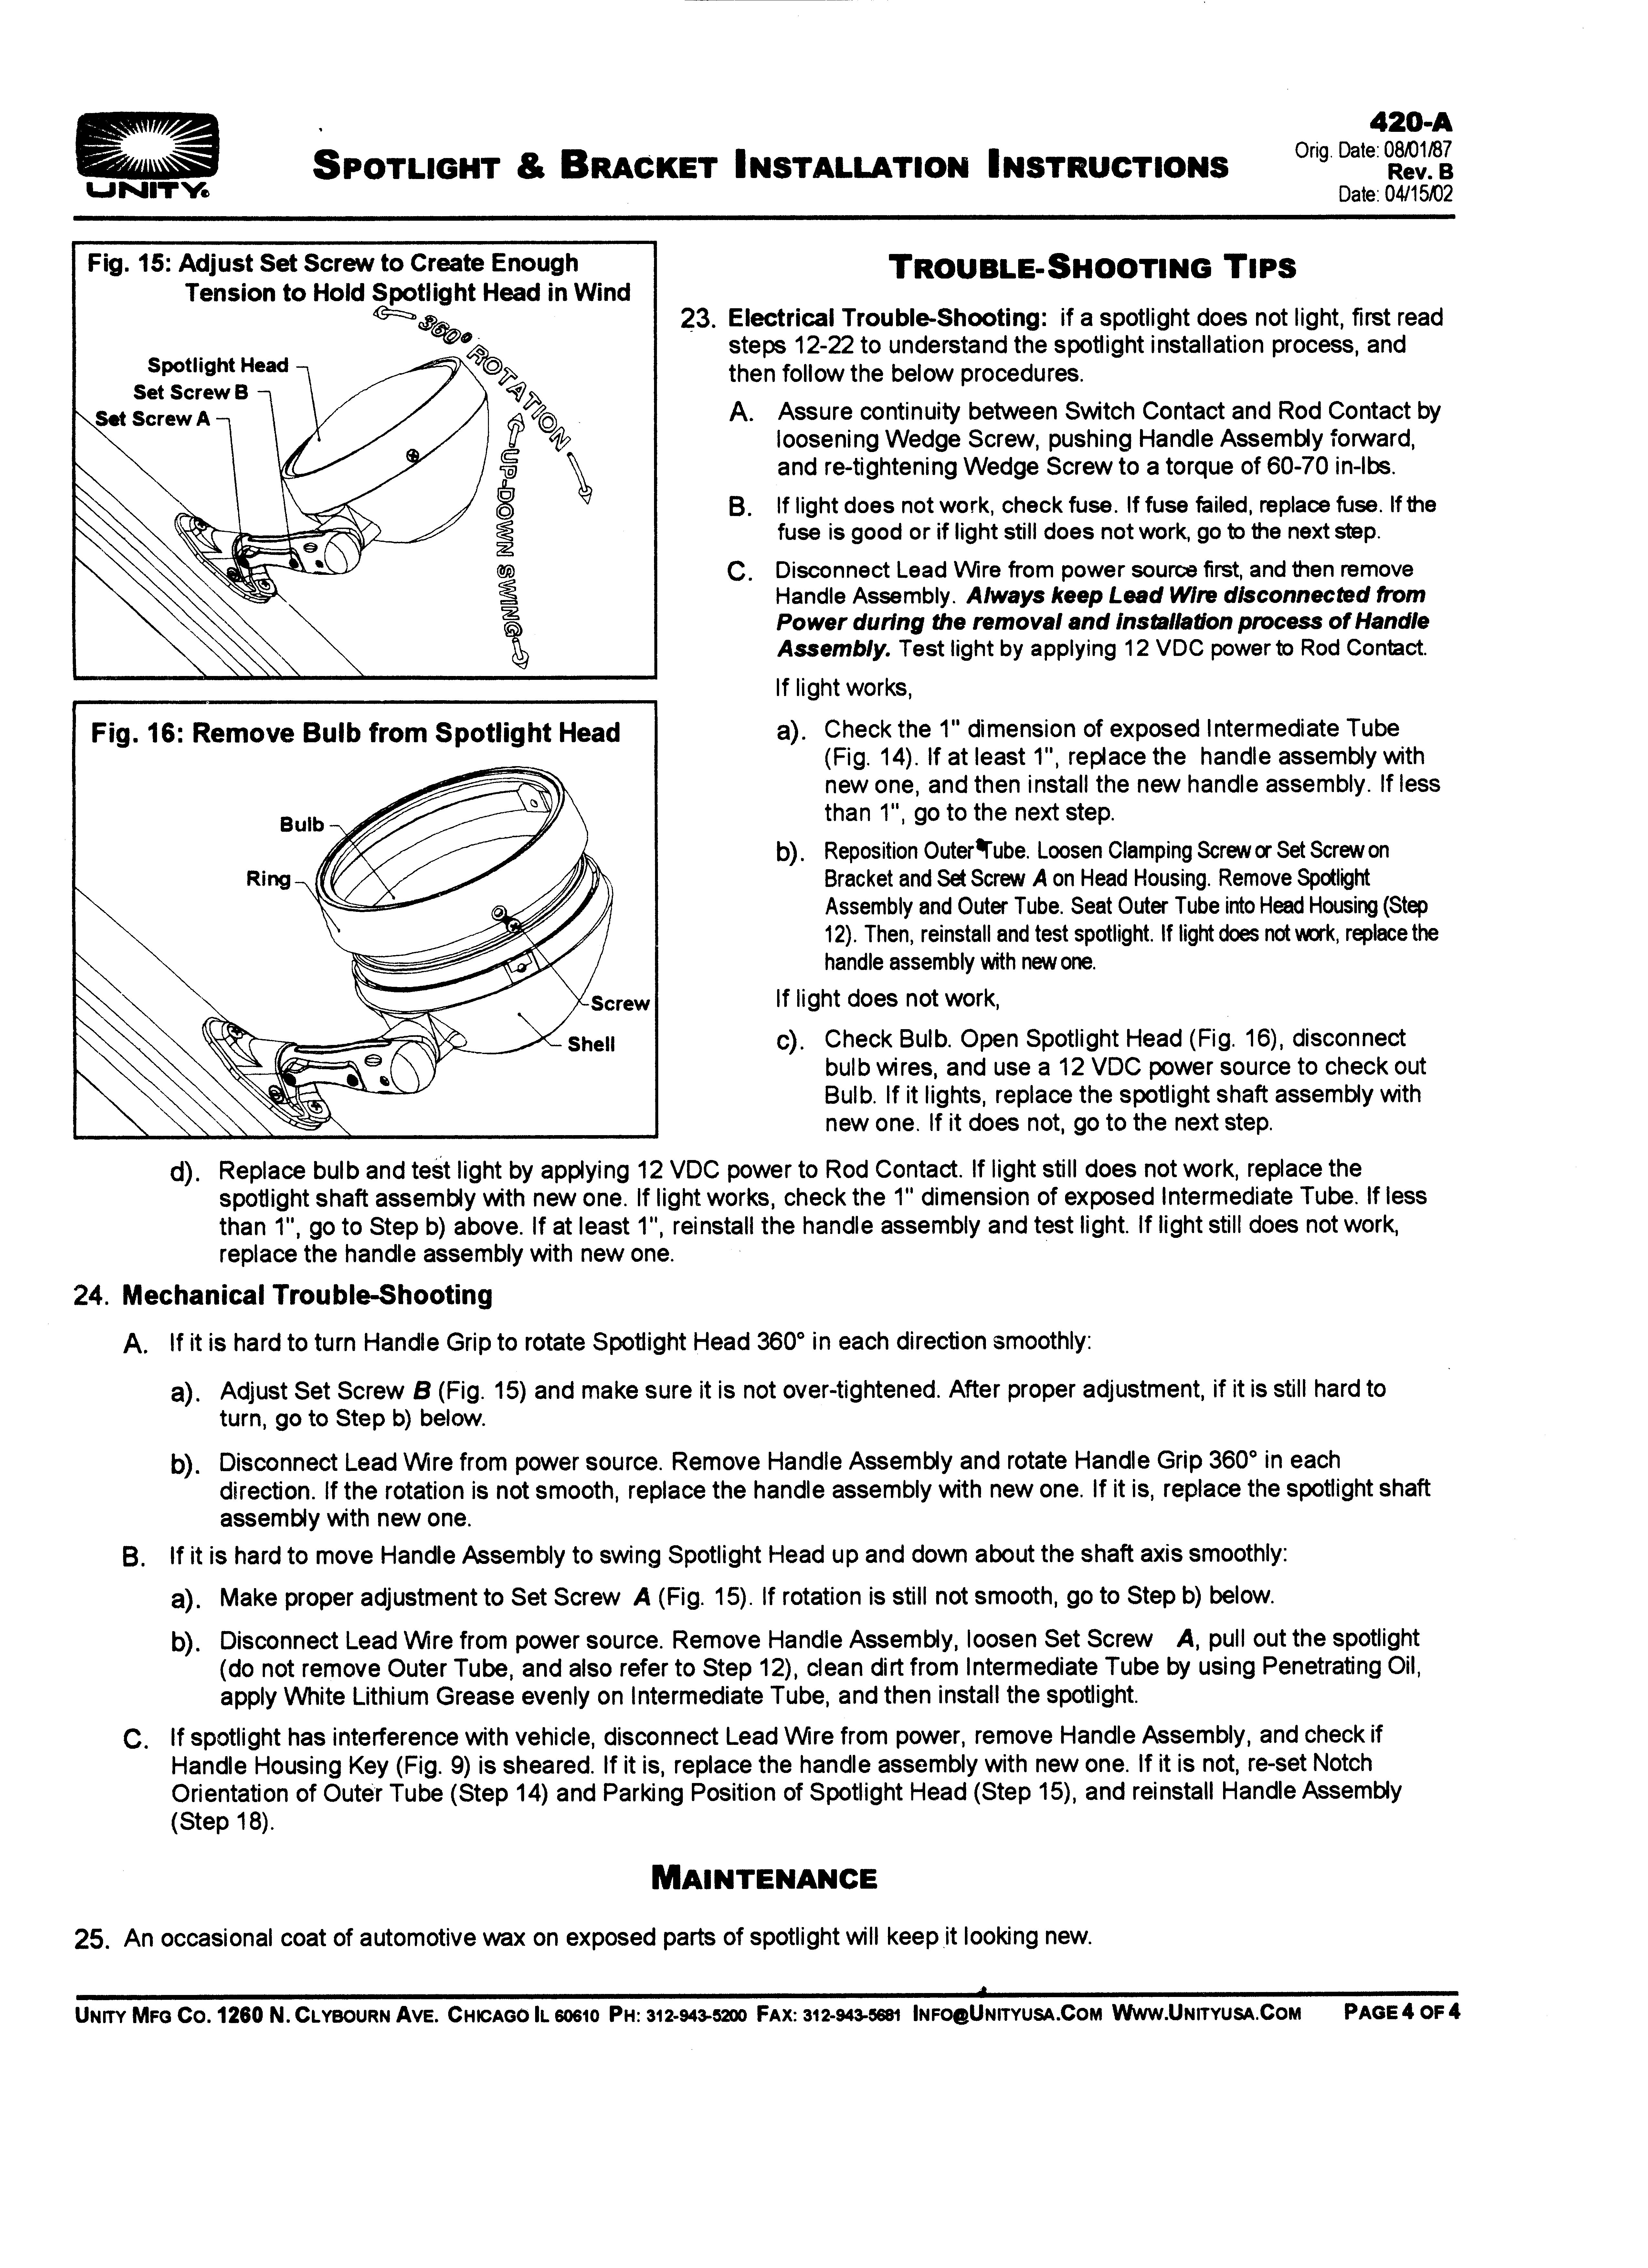
Pics of the logo and the back of the unit. I was very impressed at the quality of this kit. Below are the scans of the install instructions and the template. Just click on them to make them larger, then print per my previous instruction.

Be sure to patronize our vendors and purchase whatever you can from them. I am only putting this stuff up here for those who find a spotlight at a Swap Meet or somewhere and need more info!