


Deve's Technical Network
1947-1955 1st Chevy Trucks
216/235/261 Engine Solutions & More


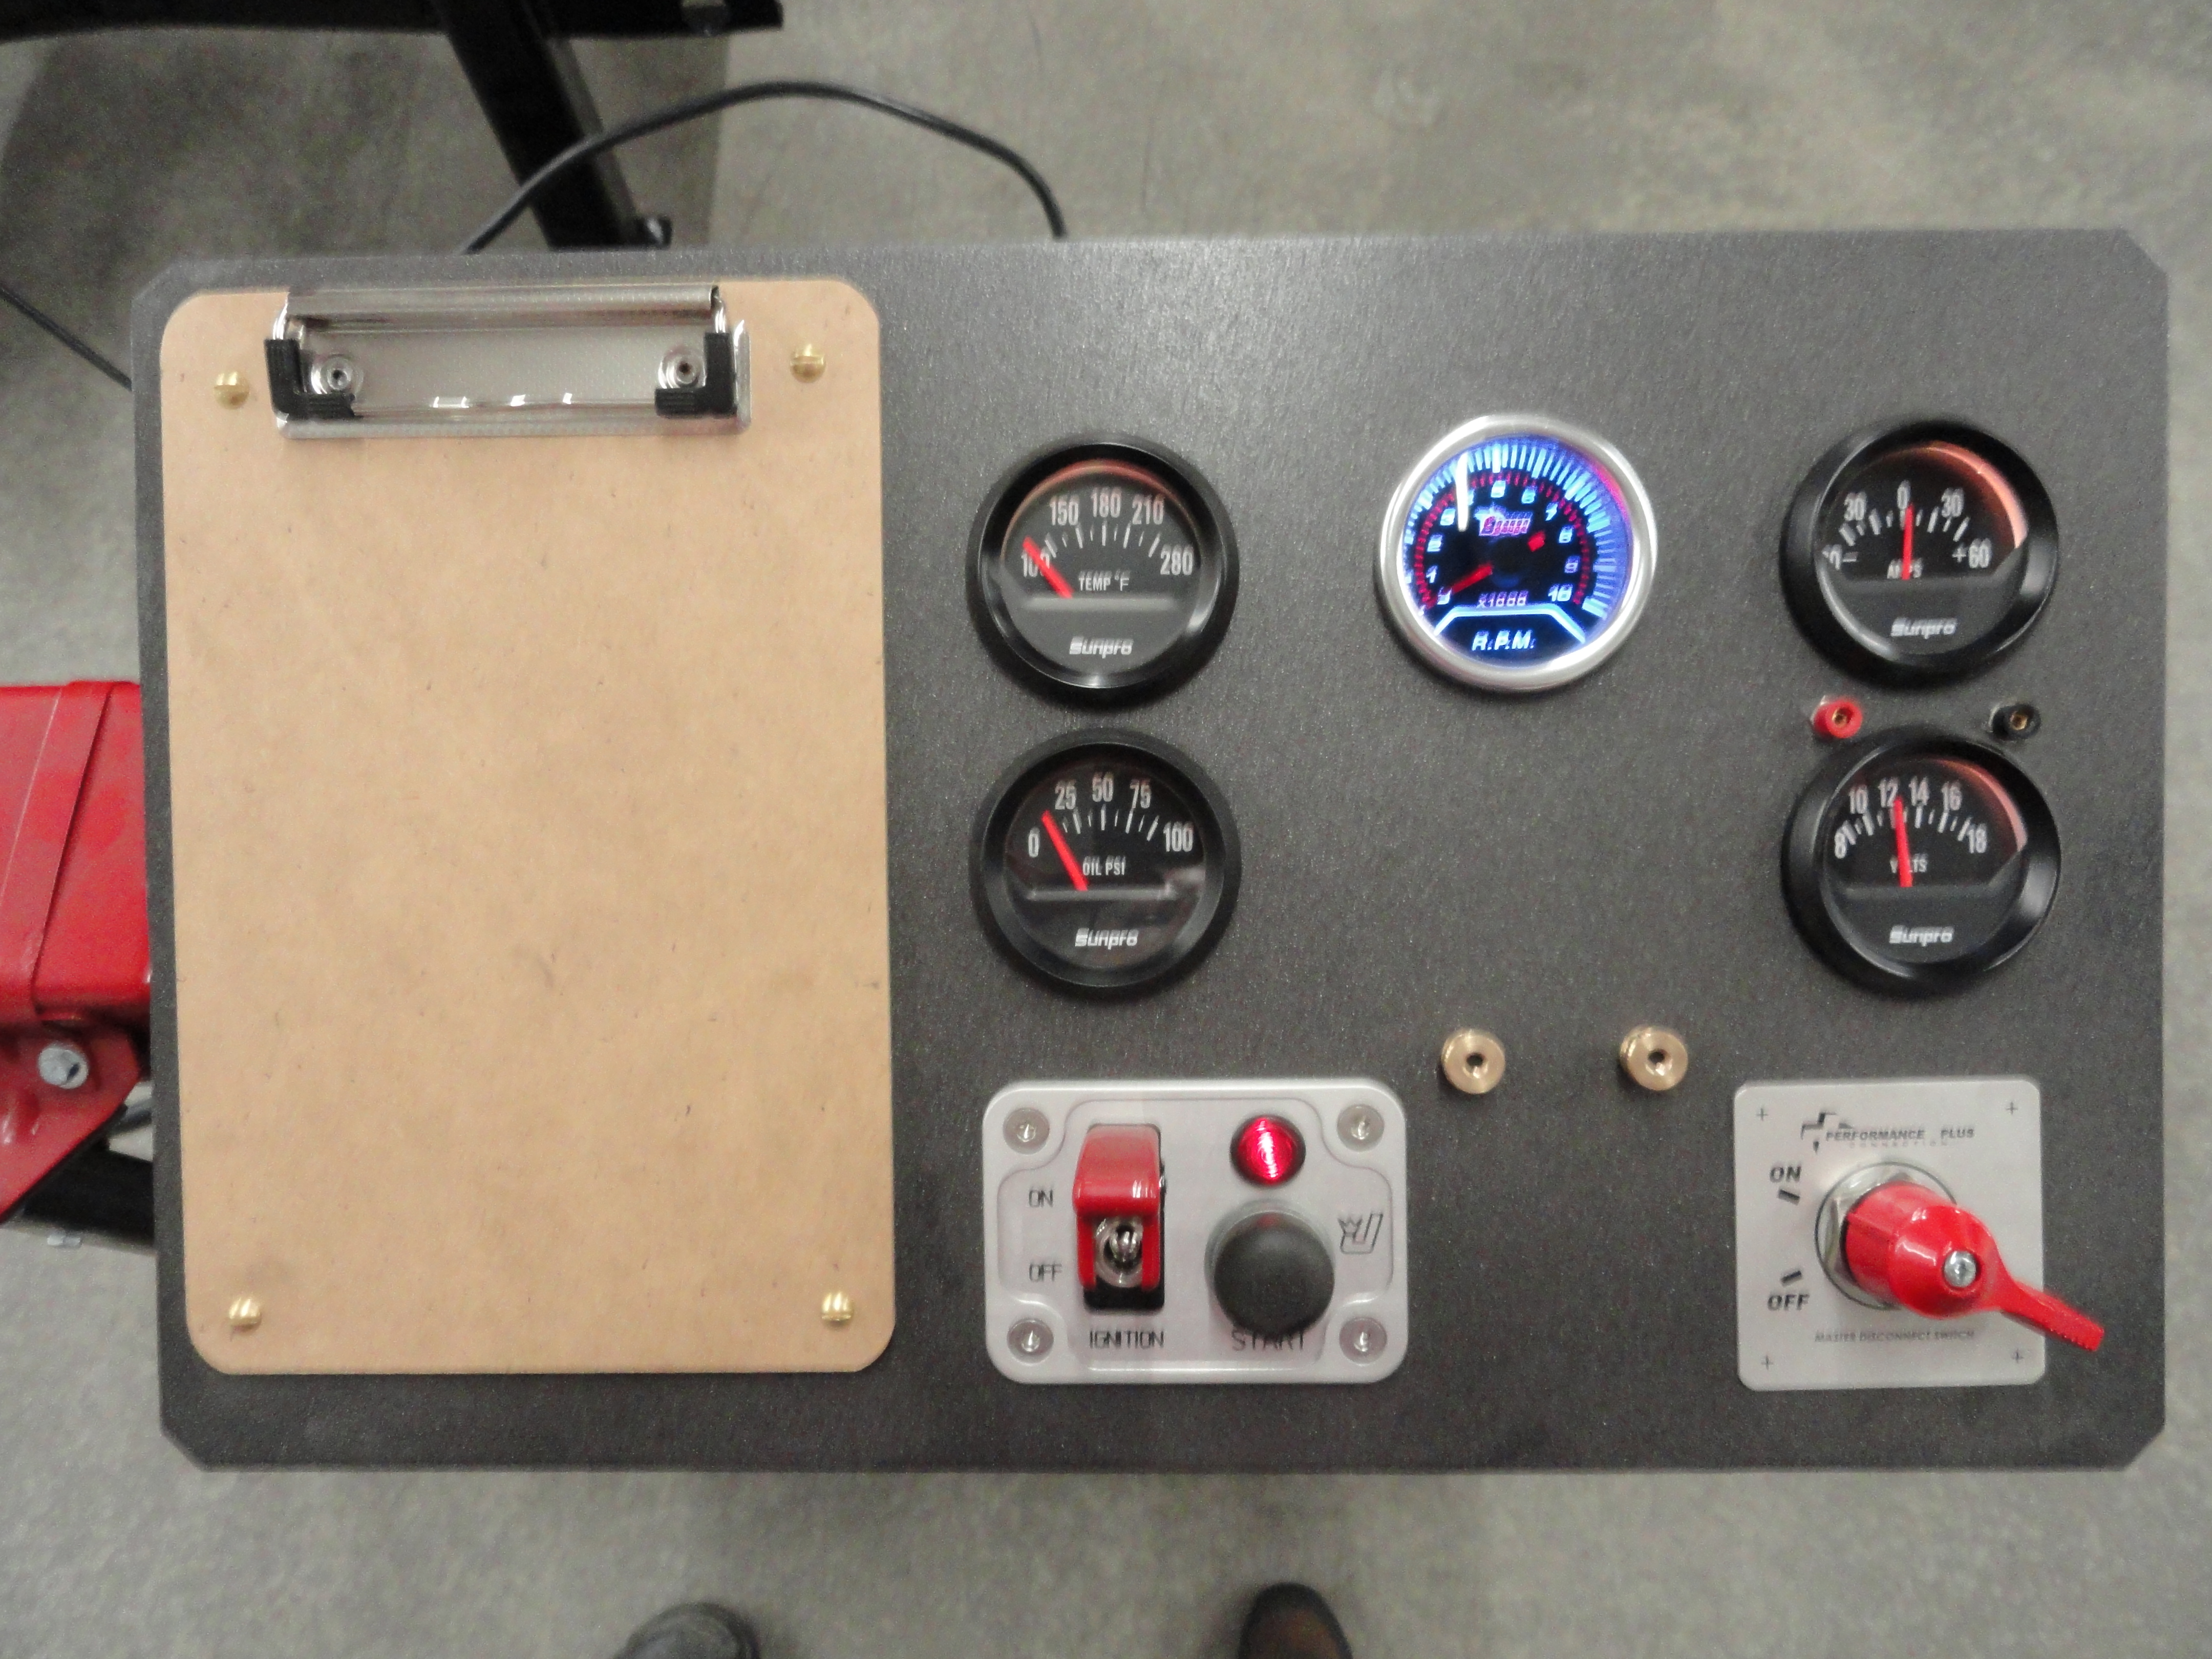
So happens that while Nate was writing this procedure, I had the need to use it on my newly rebuilt 261. As an amateur restorer, I first set out to create the engine stand (front end of a badly burned out 1954 3100) and a portable starting caddy I call The Start Kart. The cart has two battery bays, storage for the compression tester, timing light, misc fittings, etc., a one gallon gas tank with filter, a charger, an electrical strip and a complete set of gauges. Most people put all that on the engine stand, but I wanted it portable so I could roll it up to anything to diagnose problems. It was the perfect thing for this project. The wiring from the gauges to the engine is a 20 foot bundle wrapped in 3/8” fuel line hose. The engine stand has its own radiator and exhaust system complete with the hoses to run the exhaust outside. As long as I stick to straight 6’s I will be fine! Now on to the important stuff... This is a simple DIY job that’ll wake up that old worn out clattering & smoking engine in your vintage rig.
If you are rebuilding your engine and haven't started it yet, Static Timing is a very valuable tool for getting your engine in the ballpark. Get a 12 volt dash light bulb and solder a red wire to the pointed tip and a black wire to the side of the bulb. Put Alligator Clips on the ends. Now you have your basic Static Timing Light in case you can’t find one! A must-have for static timing your Vintage Rig! A Multimeter set to DC Volts will also do.
To begin with, you’ll need some basic tools:
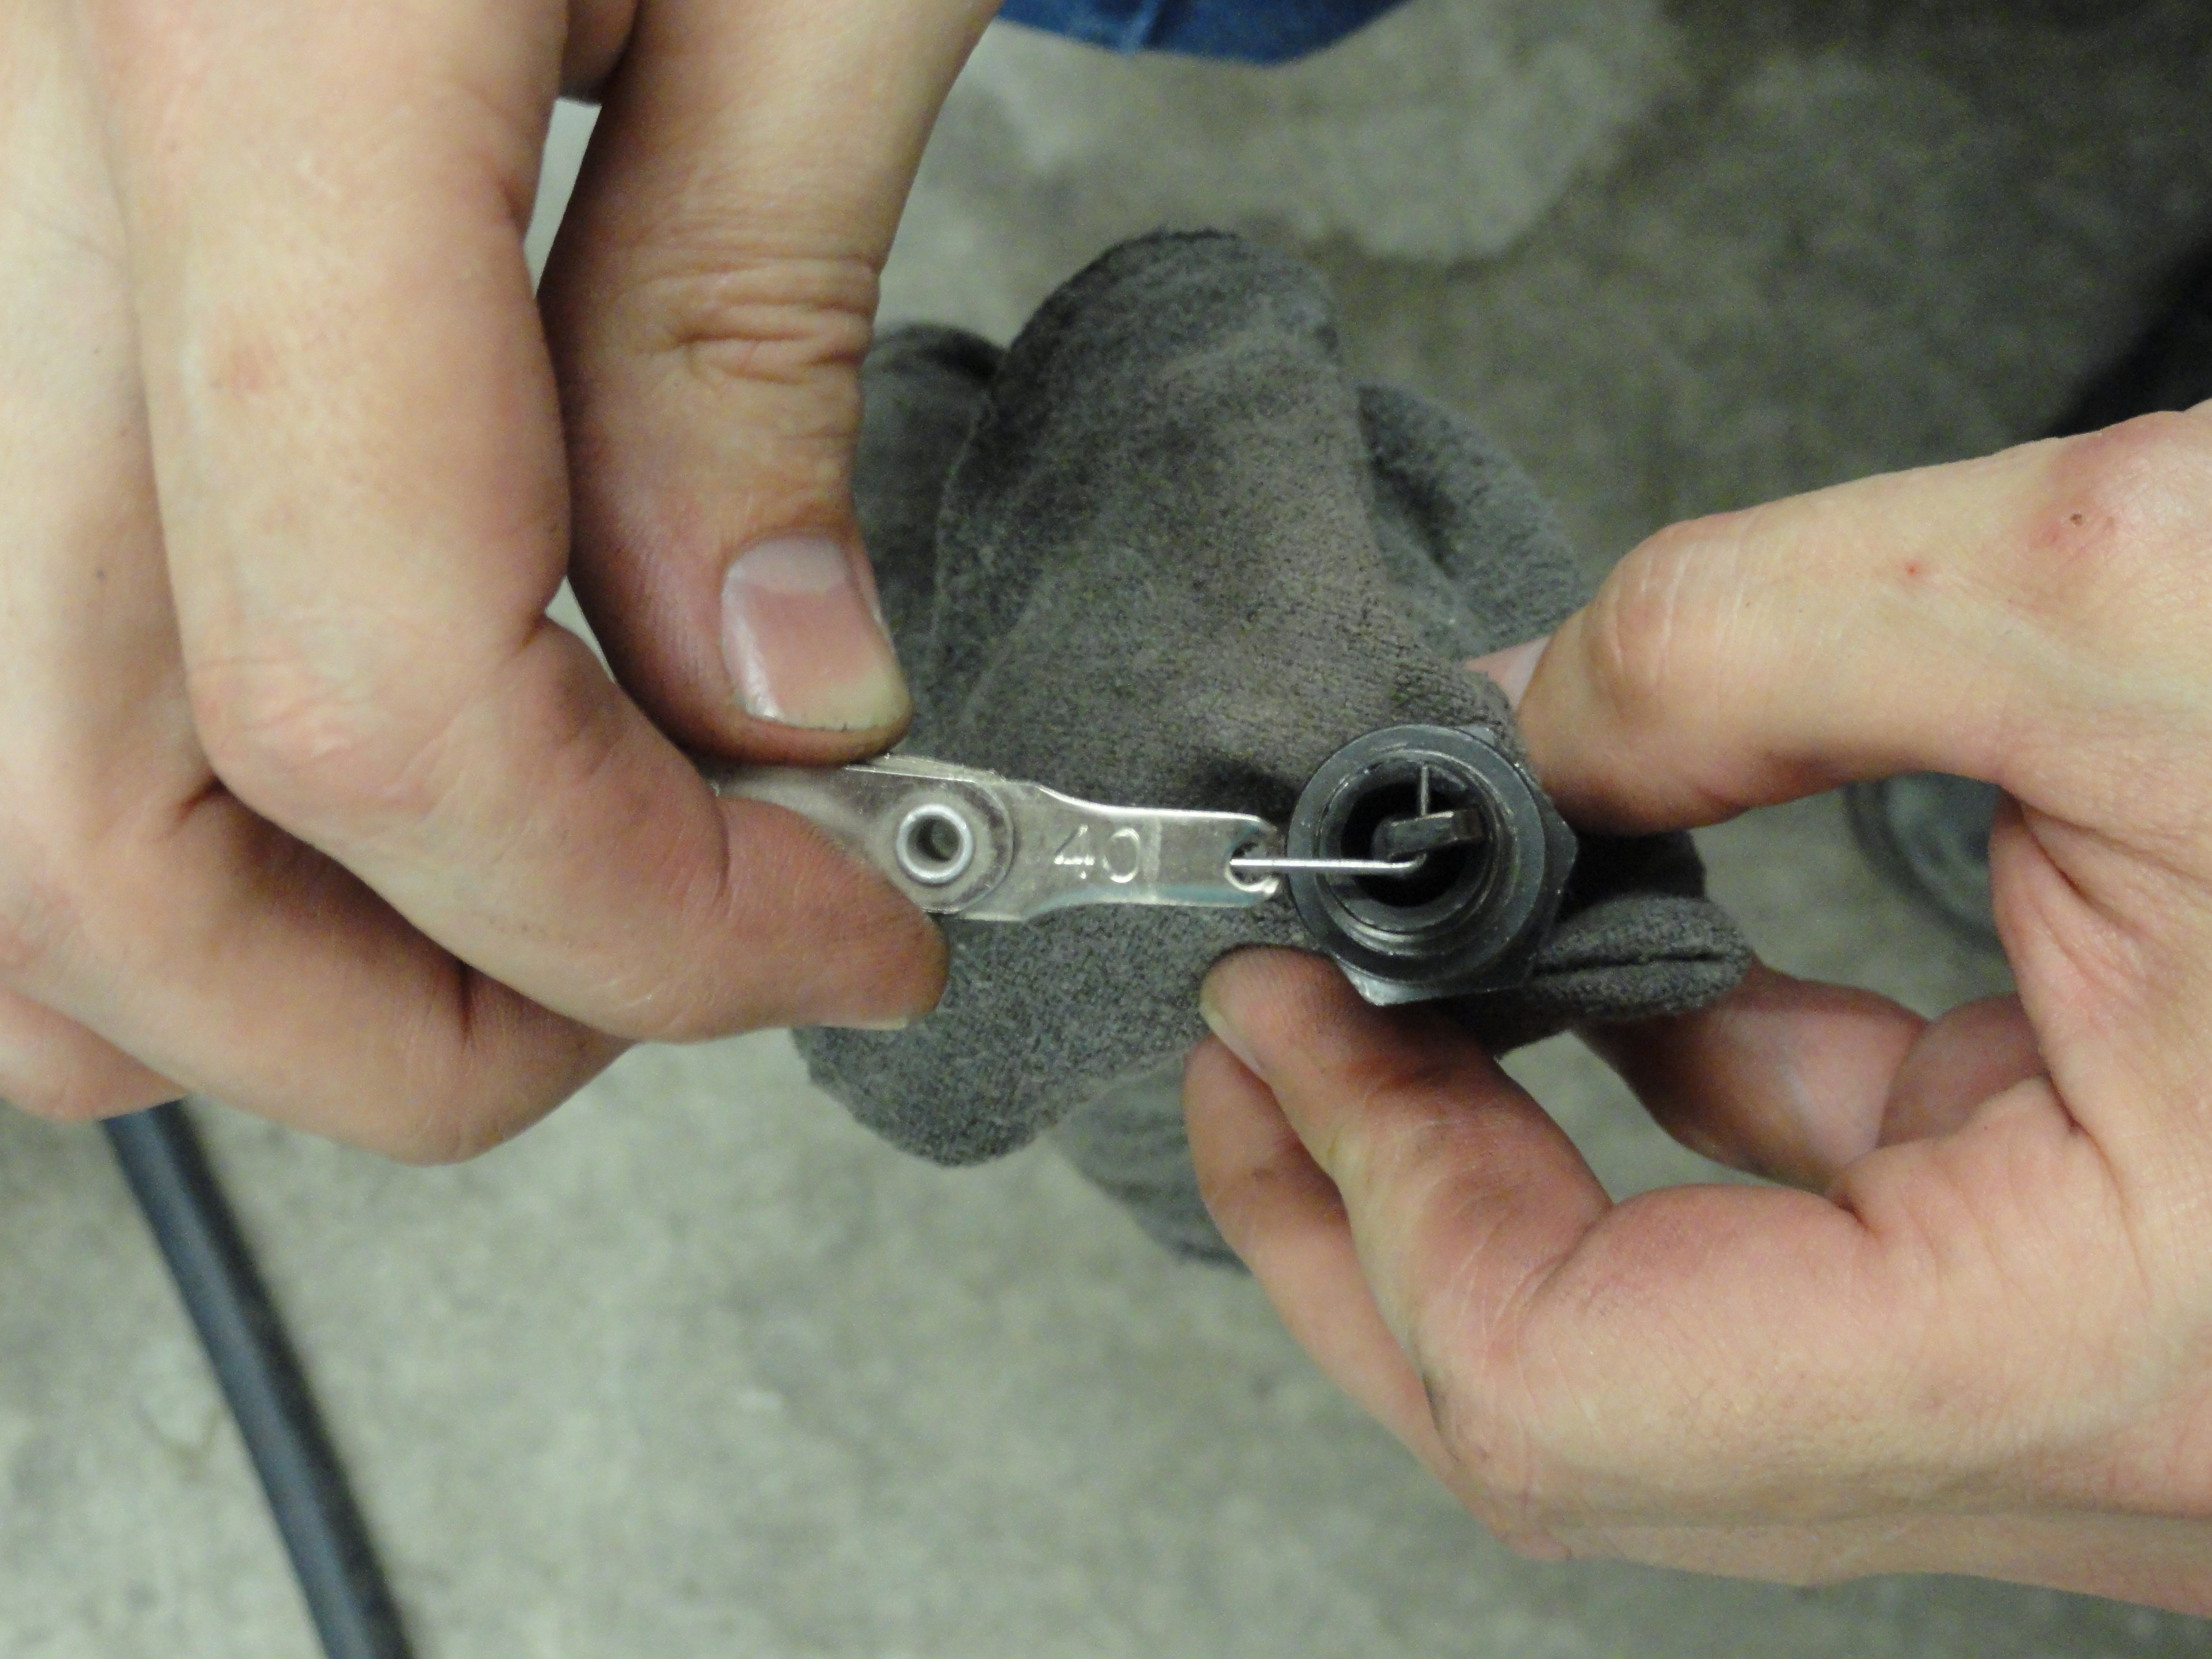
Most Auto Parts stores sell spark plug gauges for around $5, be sure to get one with .040 size stamped on it. The Counterman should show you how to use it on a new spark plug. They are never EVER pre-gapped like they tell you. Additional tools to make this job easier and turn out better are a Tach/Dwell meter and a Dynamic timing light. These are available at Thrift Stores or Pawn Shops very affordably. Do not pay more than $5 unless you personally test it first.
To begin, the cylinders are numbered from 1 to 6 from the front of the engine to the back. Remove the #1 spark plug wire from both the cap and the plug so later on you’ll have a reference point. GM L6 engines have the firing order the way the wires connect: 1, 5, 3, 6, 2, 4. This is easy if you think about Women: 15 is TOO YOUNG, 36 is TOO OLD, and 24 is JUST RIGHT. Nate-- my wife begs to differ.
Remove the spark plugs and line them up in a row the same order you removed them. If any have heavy, black & greasy encrusted deposits you should know which cylinder they came from. Hold one spark plug up so you can look across the working part. The center thing is the electrode and it’s critical this is flat across its top with sharply defined shoulders. If the shoulders (edges) of the center electrode are rounded at all, the engine will not run well. Spark plugs are cheap. Just buy the standard copper cored ones, never platinum or multi-electrode ones. They don’t work like the picture on the box.
Holding the plug inverted, slide the .040 feeler gauge between the center and curved over electrodes. What you want is the electrodes to *just* touch but no drag. Using the wire type gauge is best here. You want it as close to .040 as possible and never any less than .036 no matter what the old book says.
To change the gap just tap the plug on a hard surface, the cement driveway, etc. It’ll bend a little bit with each tap so go gently. You can use a tiny screwdriver to carefully scrape the side electrodes clean but do not scrape the center electrode as it’s easy to crack or break the ceramic insulator part.
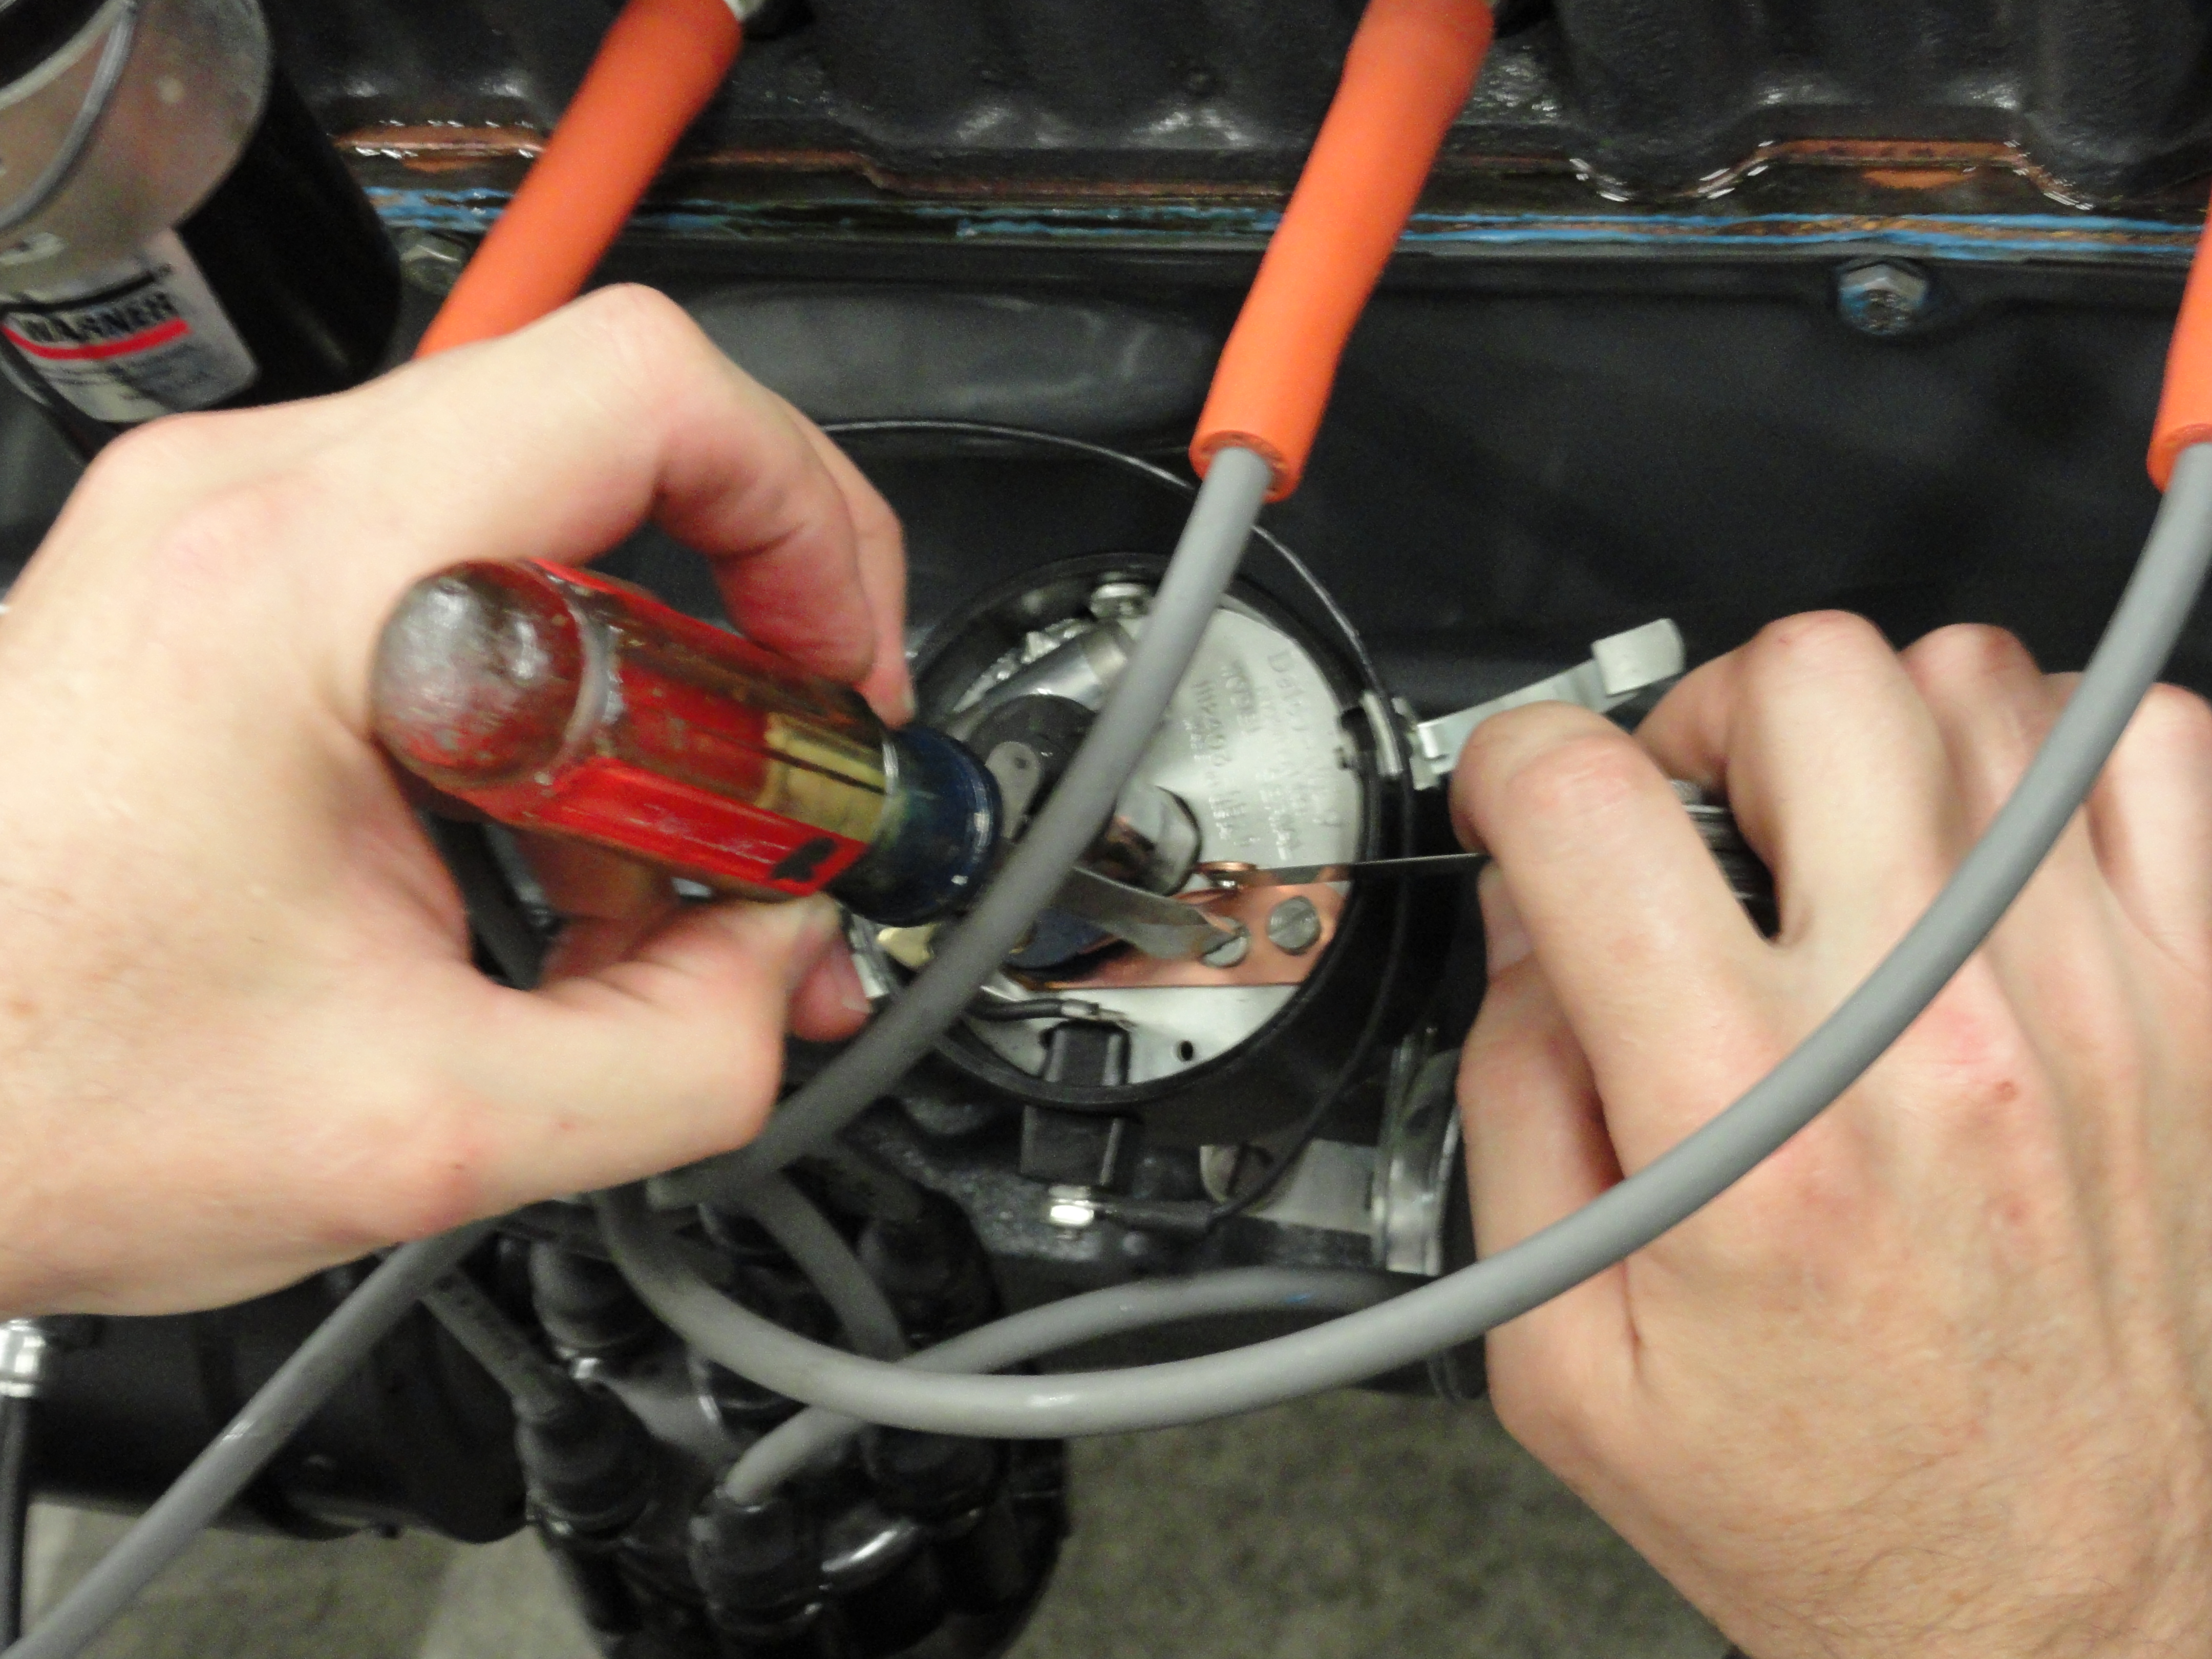
All clean and gapped (adjusted) now? Good, set them aside and remove the distributor cap. Most have metal spring clips on each side. Use a short flat-bladed screwdriver up near the top of each spring to pop them loose. Don’t allow the cap to slide off center until both clips are loose. Make a note of the empty #1 wire location relative to the clips in the distributor so you can put it back in the same place later.
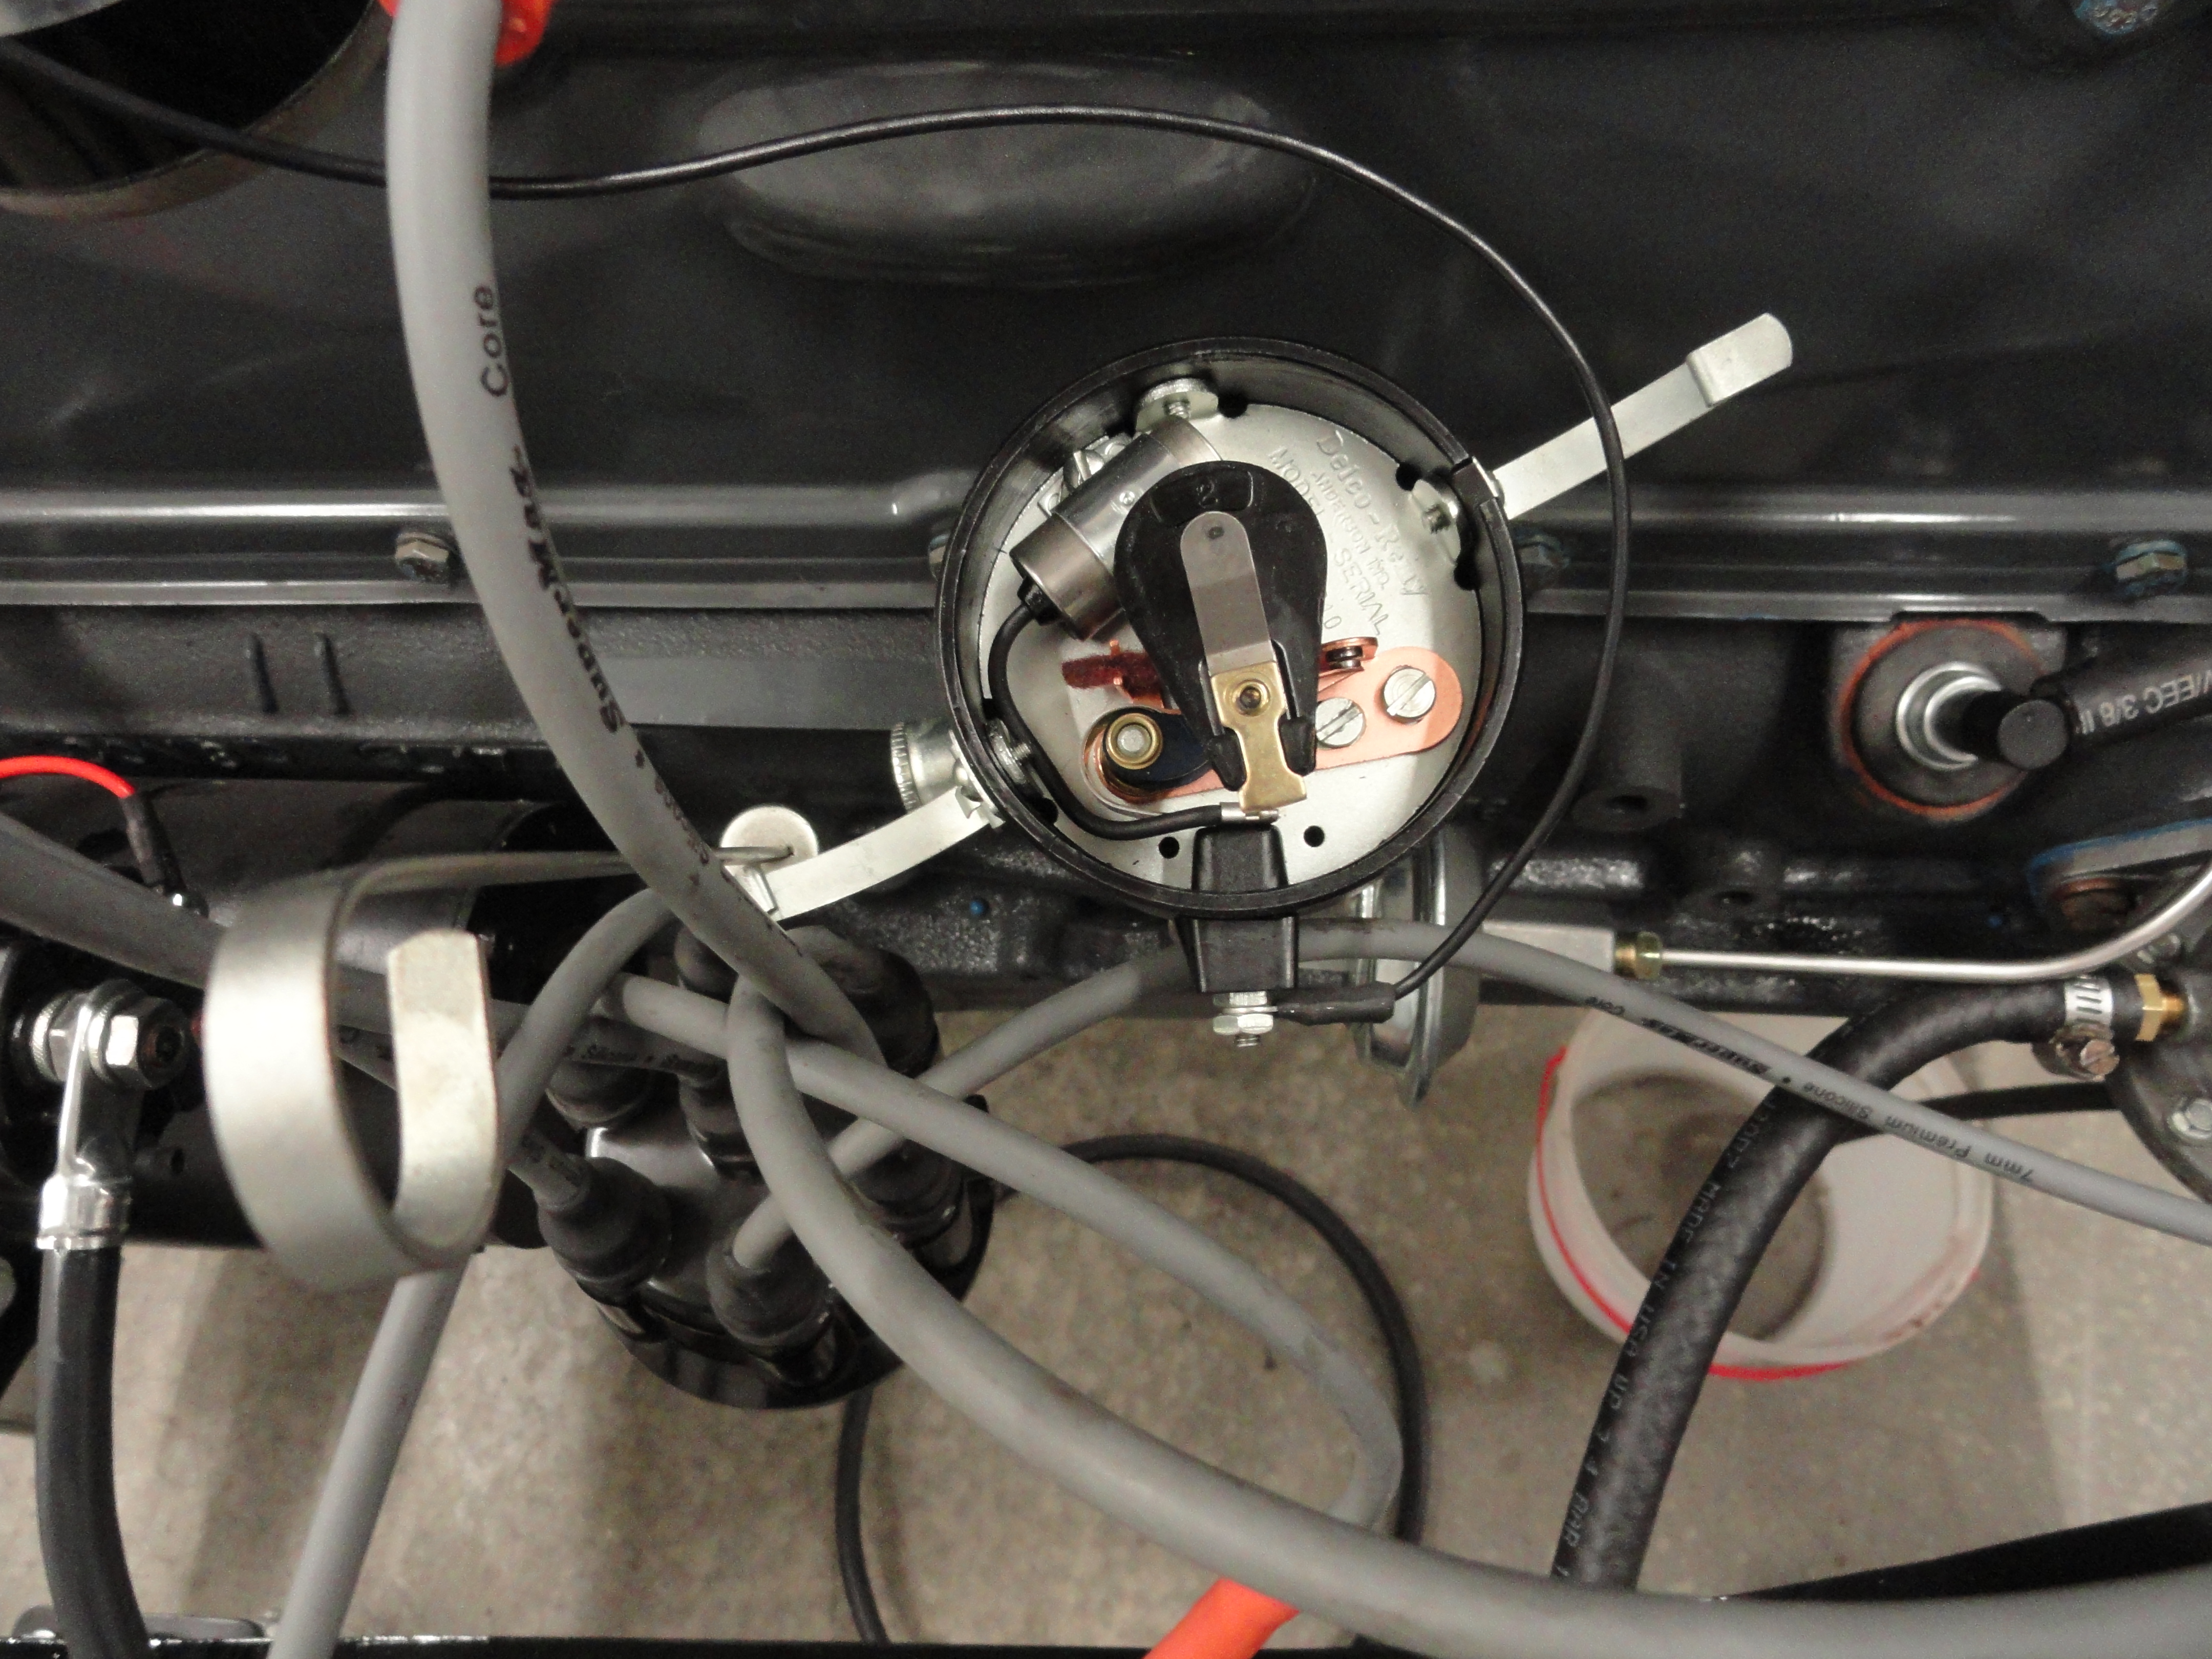
Looking in, you should see the plastic rotor piece. It may have some burn marks on the outer metal tip but this is ok. Depending on the year, either it will have a bent up metal blade in the center or it will be flat in the center of the rotor and the distributor cap will have a spring loaded carbon brush, never both.
Grab the fan pulley and rotate the engine. It’ll turn fairly easy because the spark plugs are out. the points have a little plastic rubbing block that rubs on the distributor’s center shaft. The shaft has high points called 'lobes' and what you want is to stop turning the engine as the rubbing block is on the highest point of any lobe. This holds the points wide open for adjusting. Find the .016 feeler gauge and wipe it clean with a clean and dry cloth or towel, then see how loosely it fits between the open points. There is one screw you can loosen to allow the points to move and be adjusted by placing a screwdriver tip between the notch in the base of the points and the distributor’s plate. Take a moment to find this and gently twist the screwdriver to open or close up the points until the .016 feeler blade just barely slides in between them, then snug up the screw and test the gap again as it occasionally moves when you tighten the screw. All set?
Take the distributor cap in your hand and just turn it over with the remaining wires attached so you can find the Number One wire again. Place it back on the distributor, twist it until the clips line up and you feel the cap click into place on the distributor. Don’t clip it on yet. Make note of where the empty #1 plug wire connection is in the cap and rotate the engine until the rotor is pointing at that position, then place the cap and snap the clips back into place.
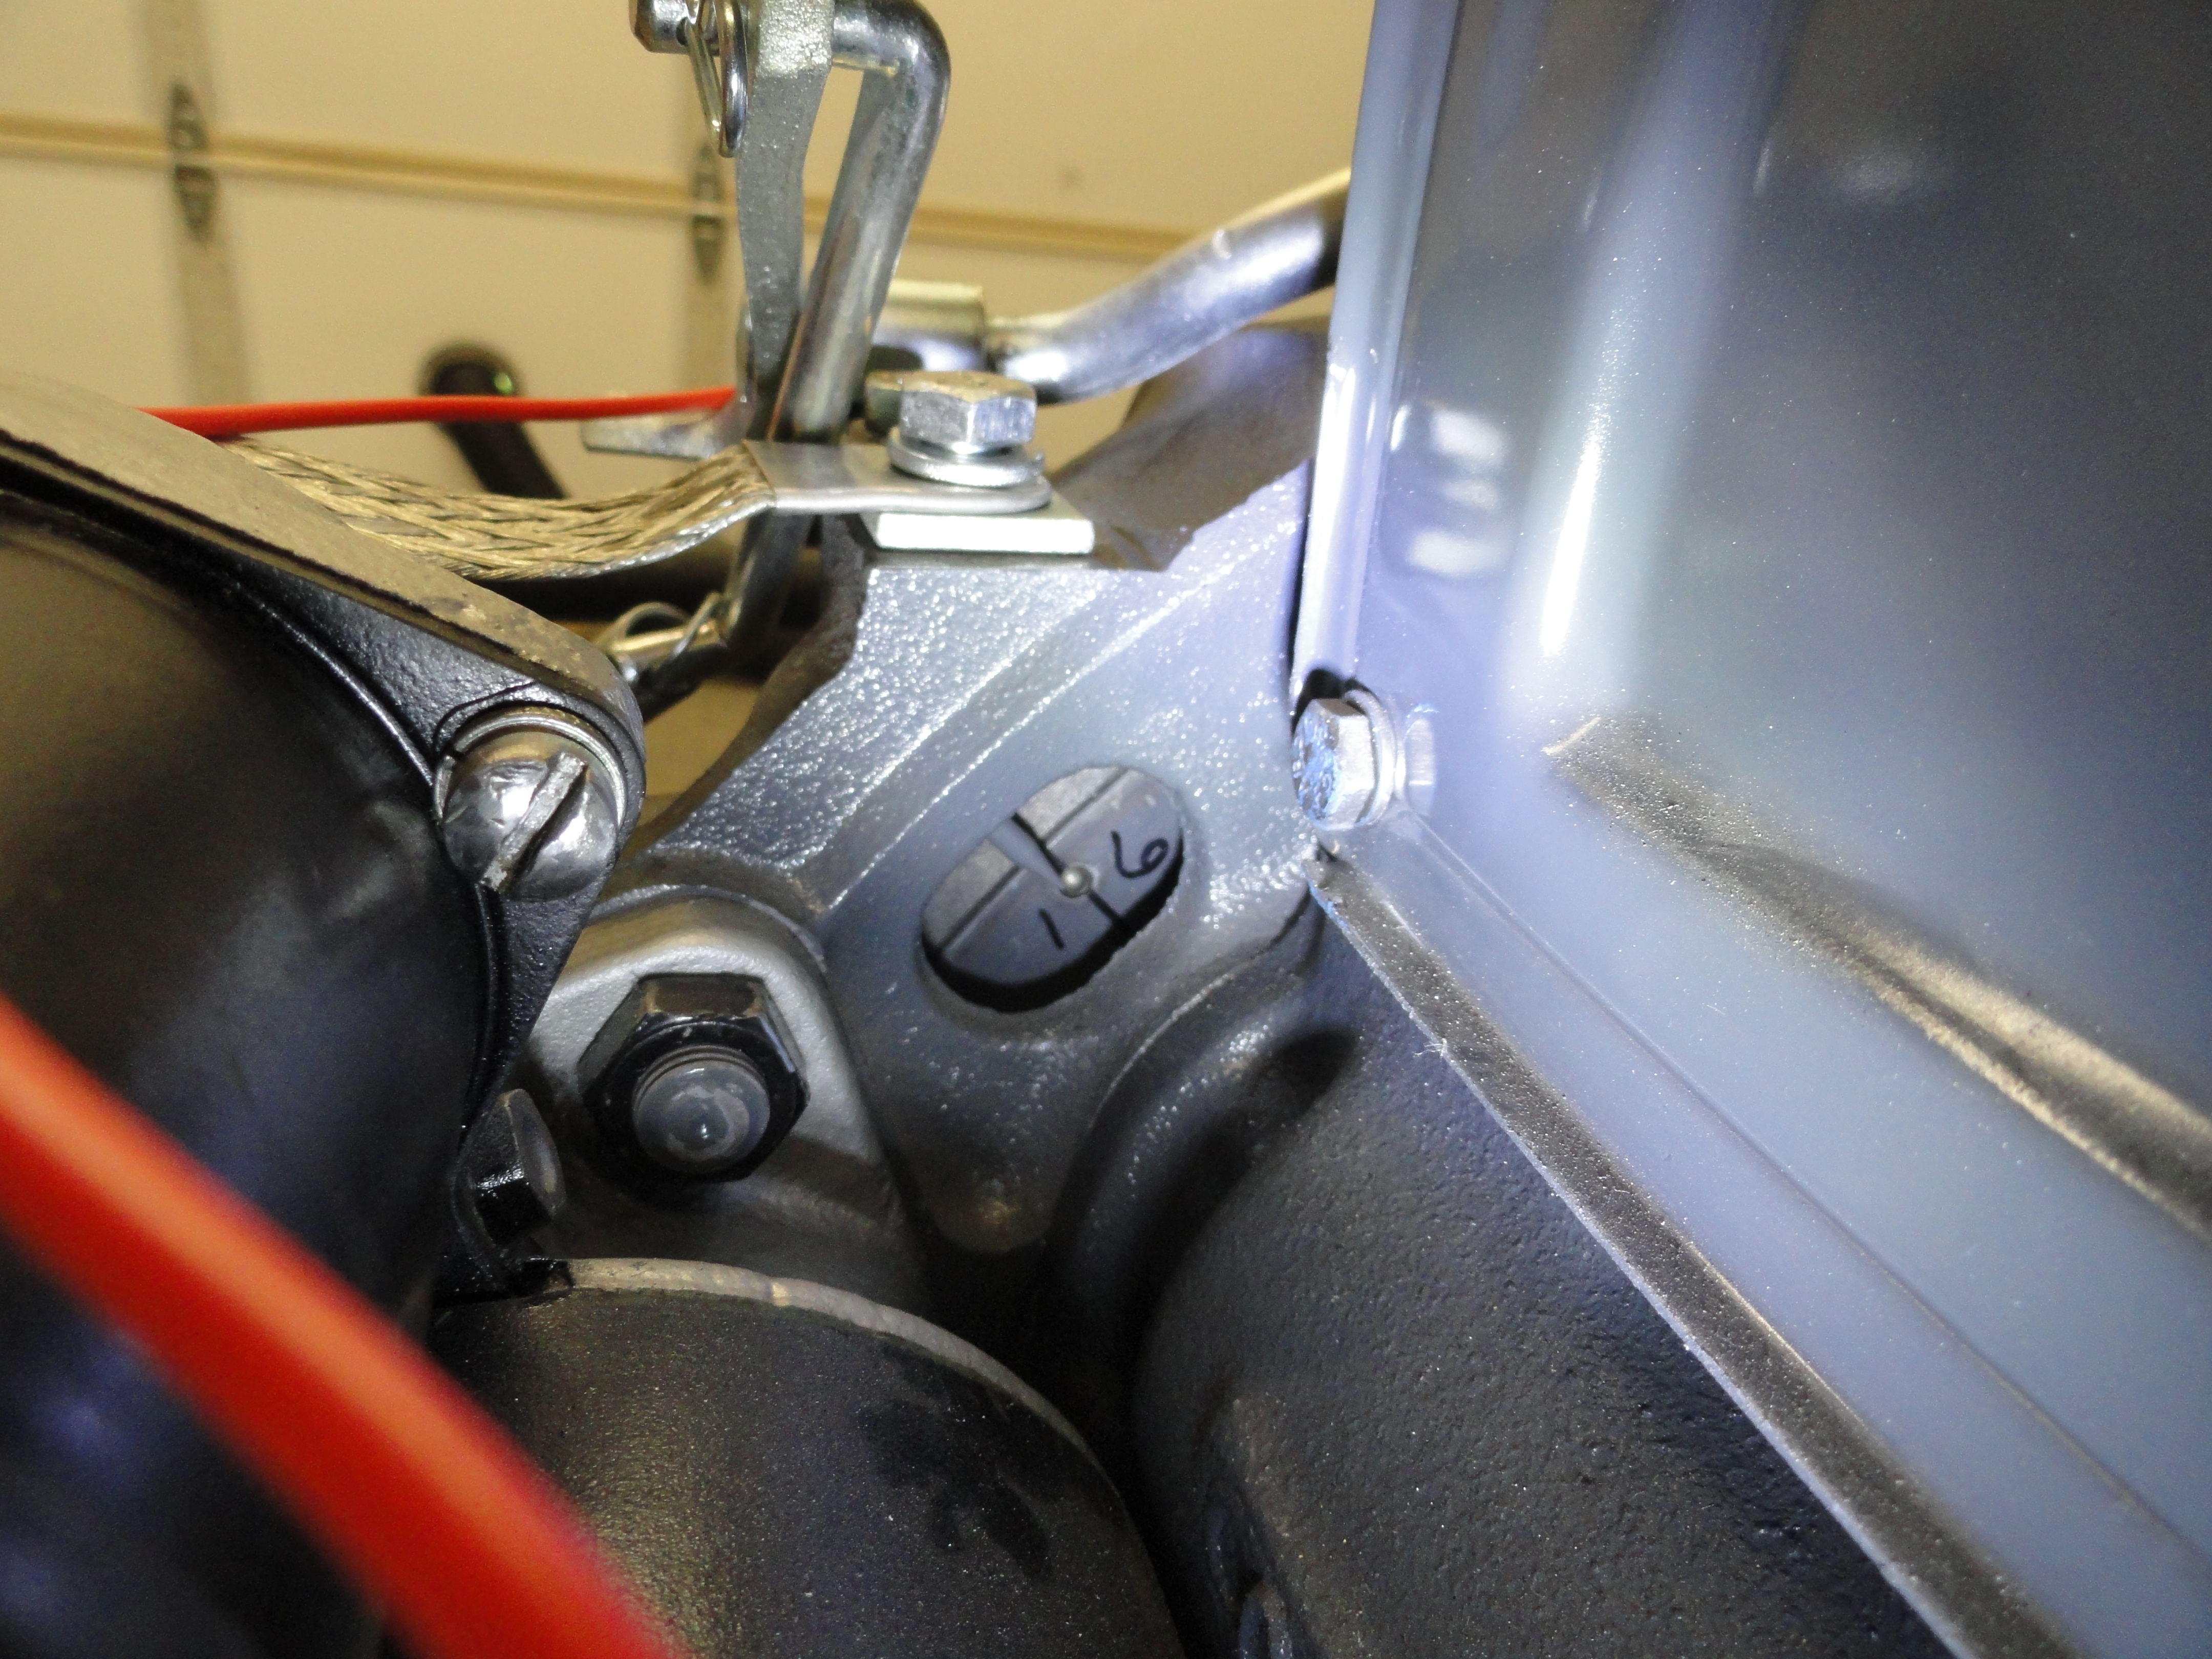
Now look above and behind the starter at the engine and you’ll see a small hole about 1 inch in diameter. inside that hole is the flywheel and hopefully you will be able to see a small ball bearing (like a bb) that’s pressed into a hole in the flywheel. There is also a sharp pointer in the upper edge of the hole pointing down. these are timing marks so you must wipe them clean with rags until you can clearly see both the pointer and the ball bearing. I like to make a circle around the ball bearing pressed into the flywheel with chalk or a white crayon. Swmbo’s white finger nail polish, etc.
Turn the ignition key to the on position. Now connect your static timing light to the wire leading between the distributor and the ignition coil, then connect the other end to the engine somewhere where it will get a good ground. With the key in the on position, see if the light lights up. If it never lights up you have an electrical problem somewhere. you need to find that before proceeding. It could be the light, the way it is connected, the coil, the condenser, the points, the cap, the coil or wire or several other things a mouse has eaten through while the car sat idle in the barn.
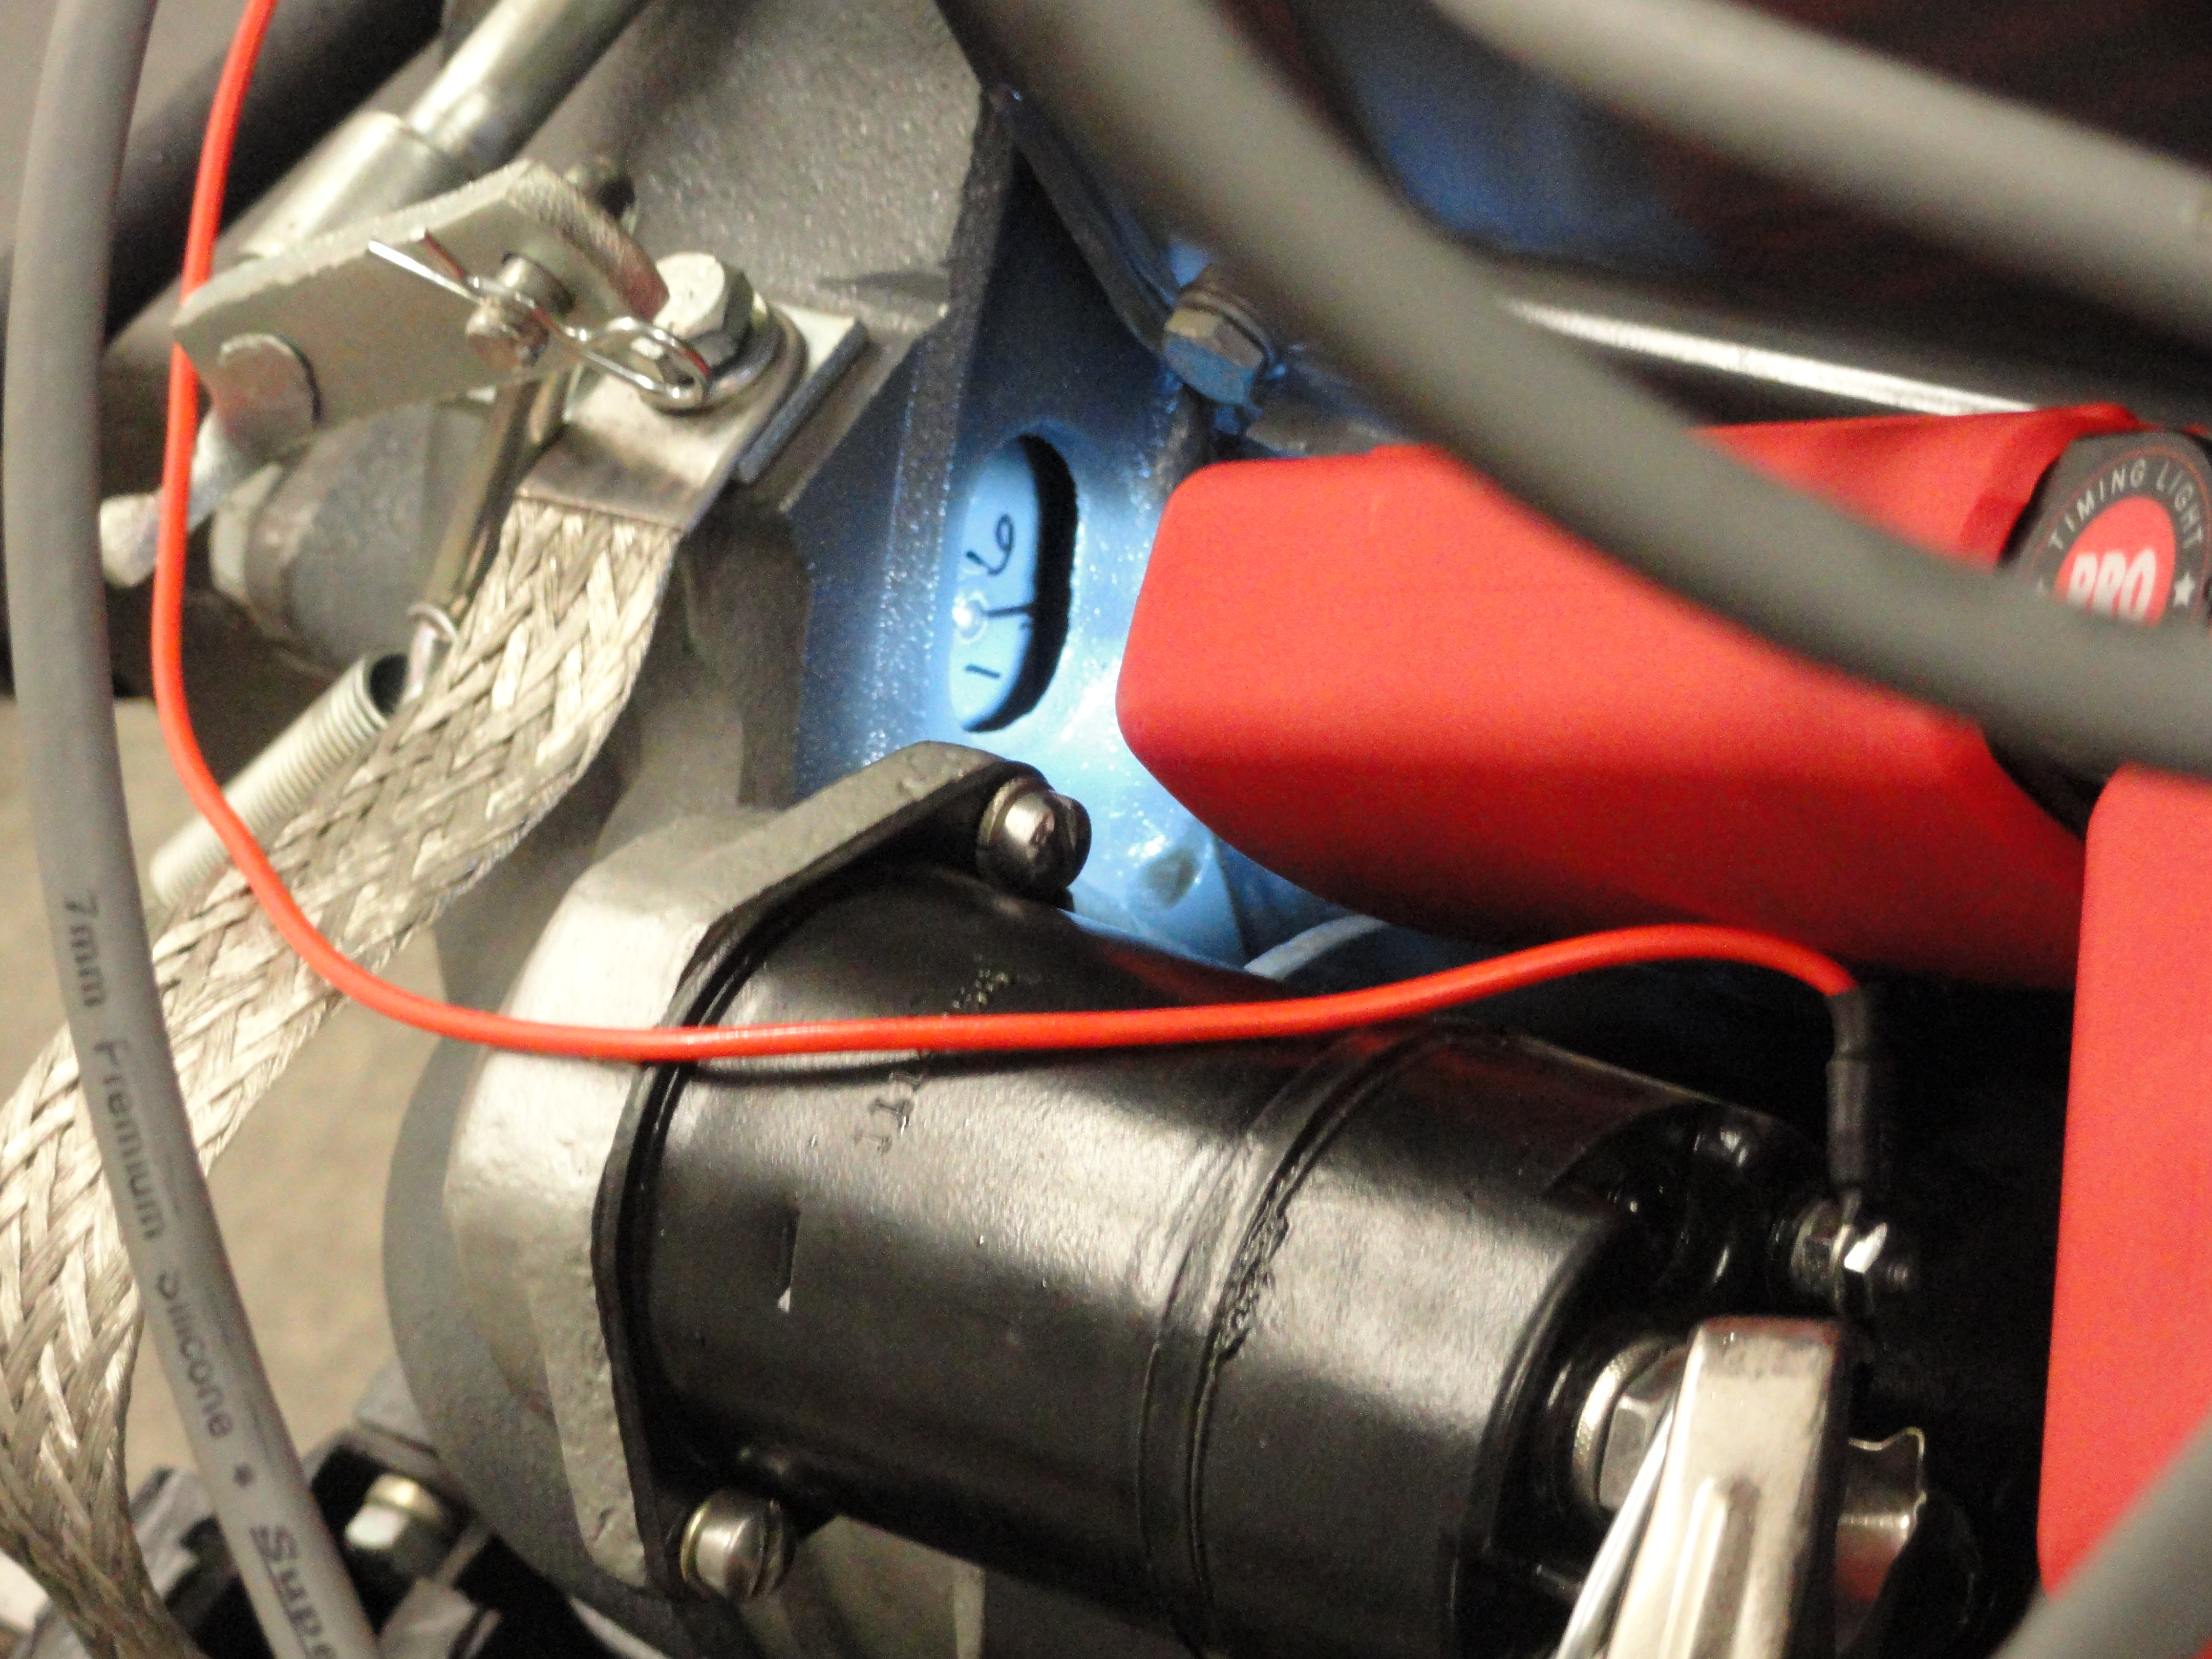
What you want to do is this turn the engine backwards (counterclockwise) until the BB disappears then very slowly rotate it clockwise, watching both the test light and the pointer in the hole. You want the light to come on just as the BB lines up on the pointer, but it rarely does so if they line up but no light, stop it there and loosen the pinch clamp at the base of the distributor where it connects to the engine. just loosen it a tad, the original screw takes a flat blade screwdriver. Once it's loose you can twist it slowly until the light *just* comes on, then snug up the screw again and test the timing by rotating the engine again.
(Note this is using a static timing light for this. I typically check with a dynamic timing light I have that requires you to pull a trigger while rotating the engine which requires three hands which I don’t have so I keep the button depressed with a rubber band.) I know this takes time and effort but *you* can do this, be patient!
Once it’s timed, replace the gapped spark plugs and re-connect the plug wires going 'round clockwise beginning with #5, then #3, then 6, 2, 4 and you’re done. Go try to start it. It should roar to life and idle well. If nothing else, at least remove and re-gap the old spark plugs to .040. You’ll be amazed at how much better it'll run and you can brag to neighbors about how you tuned it up yourself and maybe even make a few dollars tuning up and re-awakening other oldies! --Nate
Safety Note: I have a friend who nearly had his face blown off because he had a spark plug too close to the hole it came from when he
tried to crank the engine. Make sure the ignition is off or the distributor cap is removed before attempting anything that requires removal
of a spark plug! Safety always first!!
If you have the desire to know the overall health of your engine, a good place to start is with checking the compression. A few things contribute to low compression such as piston ring wear and valve adjustment. There is another How-To on the website by our very own Nate on how to adjust your valves. Do that first! It will make a huge difference in the way your engine runs. Purchase a compression gauge kit, I got mine from Harbor Freight and it is one of the better tools you can get from there. I am very pleased. It comes with all of the connectors, fittings, and then some that you need. I paid around $20.

With the ignition switch off (make sure its off), remove all the spark plugs and the distributor cap. Prop the throttle wide open to get the most accurate reading. Screw the fitting into the #1 spark plug hole until the rubber o-ring squashes just a bit. Turn the engine over (with the starter) long enough for the compression gauge to register the compression number of the cylinder. Keep cranking until the gauge needle stops rising - This is important. Record the number, release the gauges pressure (small push button on the gauge) and do it again to make sure it's reading very close. Do this on every cylinder one at a time. On the 261 engine I recently worked on, the numbers were #1 - 140 • #2 - 137 • #3 - 138 • #4 - 137 • #5 - 137 • #6 - 138. They need to be within 5% of each other and your numbers may vary. Any numbers above 95 psi means the engine is ok and will run well. Compression as low as 65 psi should be okay, but may smoke and idle poorly. As you can see with a new engine, they are in the 130 range.
More great information available at devestechnet.com. Discuss these issues and more at forums.devestechnet.com.