


Deve's Technical Network
1947-1955 1st Chevy Trucks
216/235/261 Engine Solutions & More
The Road Draft Tube survived many years as Chevy's way of eliminating crankcase gases, so most of us don't consider changing anything, but it has its drawbacks. It's dirty, it leaks small amounts of oil on your clean driveway, and it's hard to clean properly. Enter the Positive Crankcase Ventilation system! PCV is really simple. It simply means pulling the unwanted and unclean gases out of your crankcase using the engine's vacuum pressure. This very same system is being used today. Because the 216/235/261 engines were the last to not have PCV from the factory, it is not hard to adapt them. In actual fact, there was a stock PCV system available on some AD models in 1954, but good luck finding one!
The road draft tube has a curved outlet that was designed by GM to invoke the Venturi Principle at a speed of 28 miles per hour. This means that for the stock road draft tube to pull crankcase gases out of the engine, you had to be going 28 mph first. By having the advantage of hindsight, we now know that was a bad idea. Crankcase gases begin accumulating when the engine is started. This is why the 216/235/261 engines were the last to not have PCV.
In engineering a solution for these particular engines, we had to keep in mind that most car buffs do not want to cut holes in their vintage valve covers, air cleaners or even road draft tubes. We can make it so we do not have to, thanks to the 1-1/4" hole machined for the road draft tube! Since PCV requires us to seal off the engine for best PCV Valve performance, removing the road draft tube (a source of leakage) and sealing it with a freeze plug, grommet and precision valve gives us everything we need. By using the correct valve to control the vacuum leak, we can divert a small amount of the engines vacuum for crankcase gas removal.
The stock engine puts out about 18-20 inches of mercury in total vacuum. The V-237 we have chosen for the job pulls only 2 inches of mercury. For those of us who think in PSI, that is between approx. 8 and 10 total PSI with the V-237 PCV Valve pulling only 1 PSI. This slow pull of 1 PSI is enough to efficiently evacuate crankcase gases providing the system is sealed. This means no leaky valve cover, side cover, oil pan gaskets and even a good seal at the dipstick tube while using a vented and filtered valve cover cap like the Stant 10064.
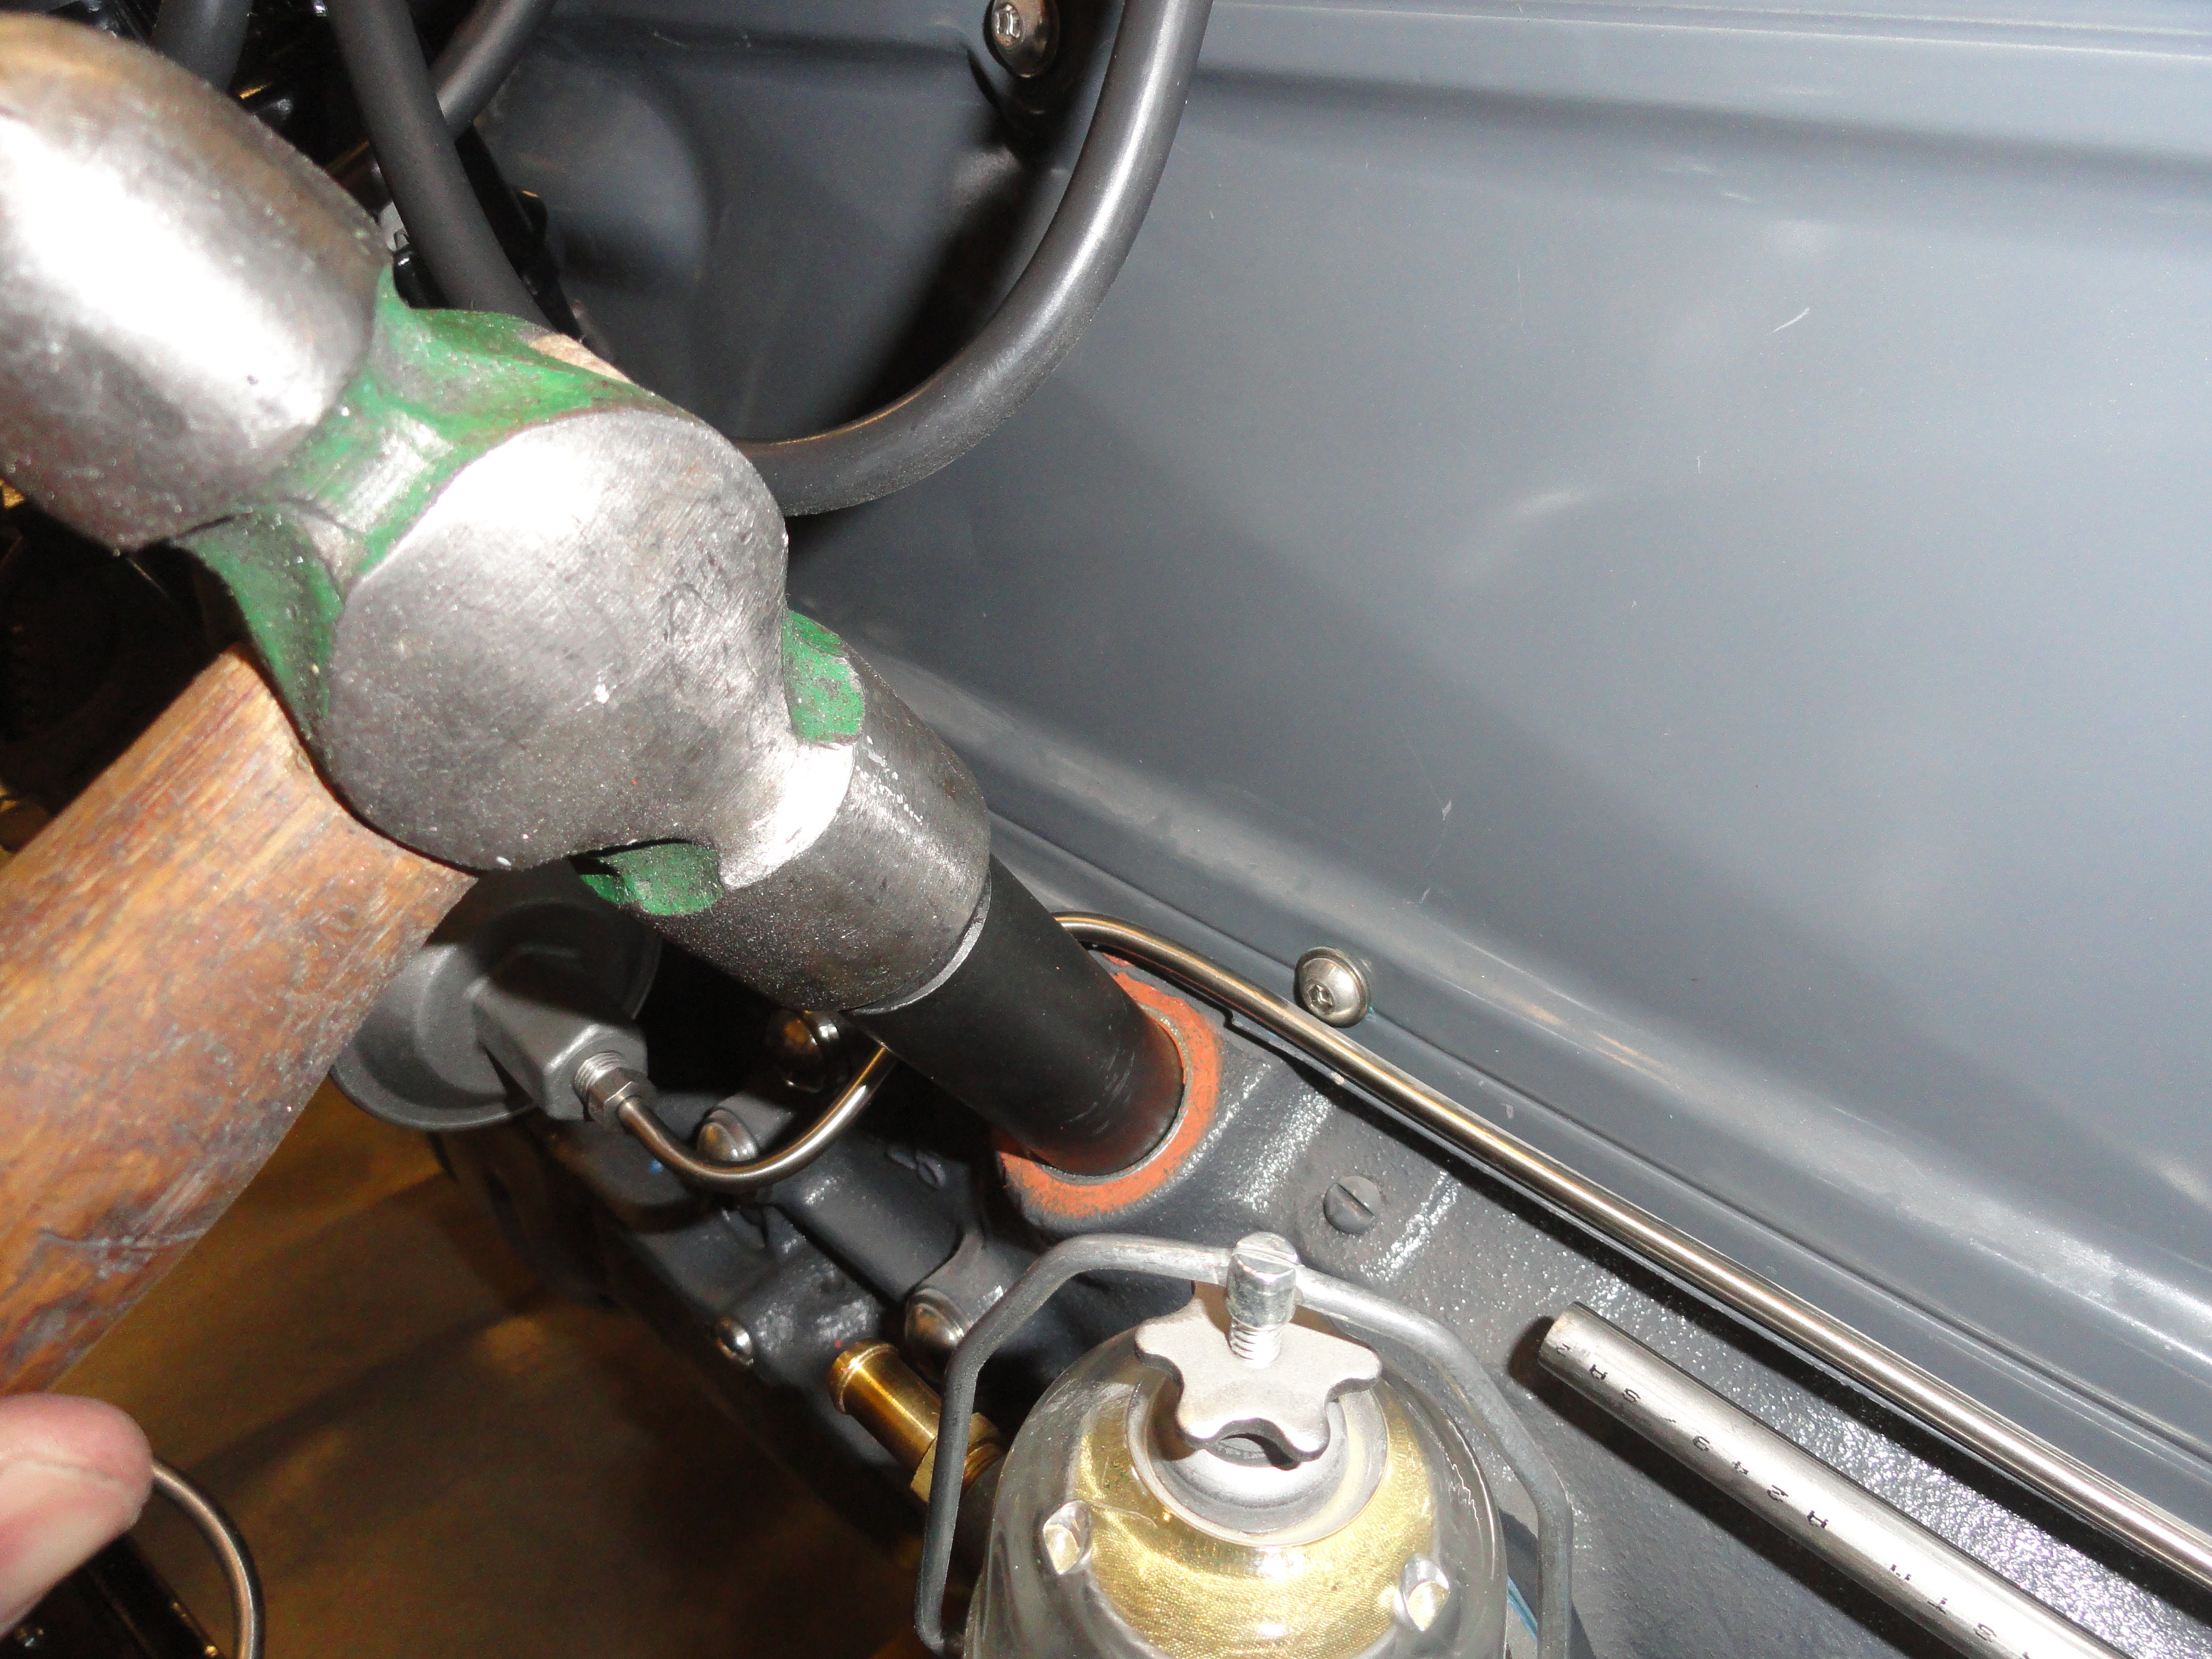
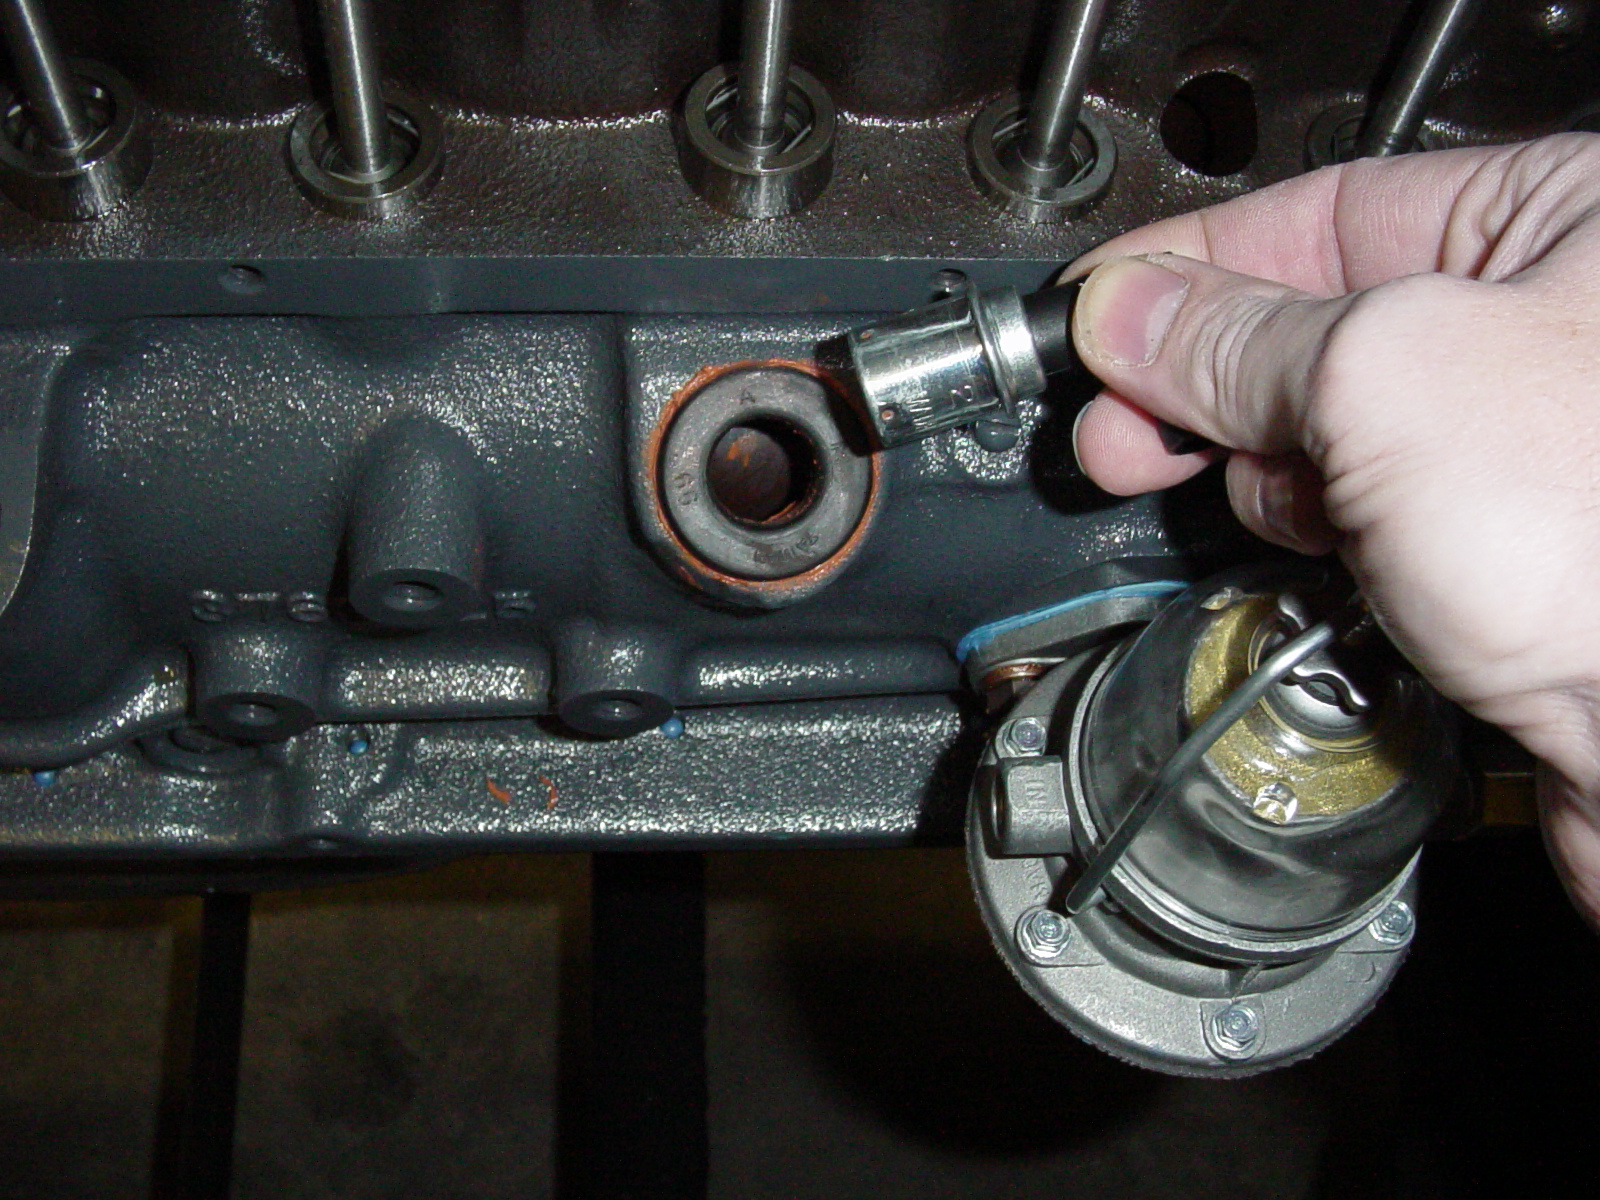
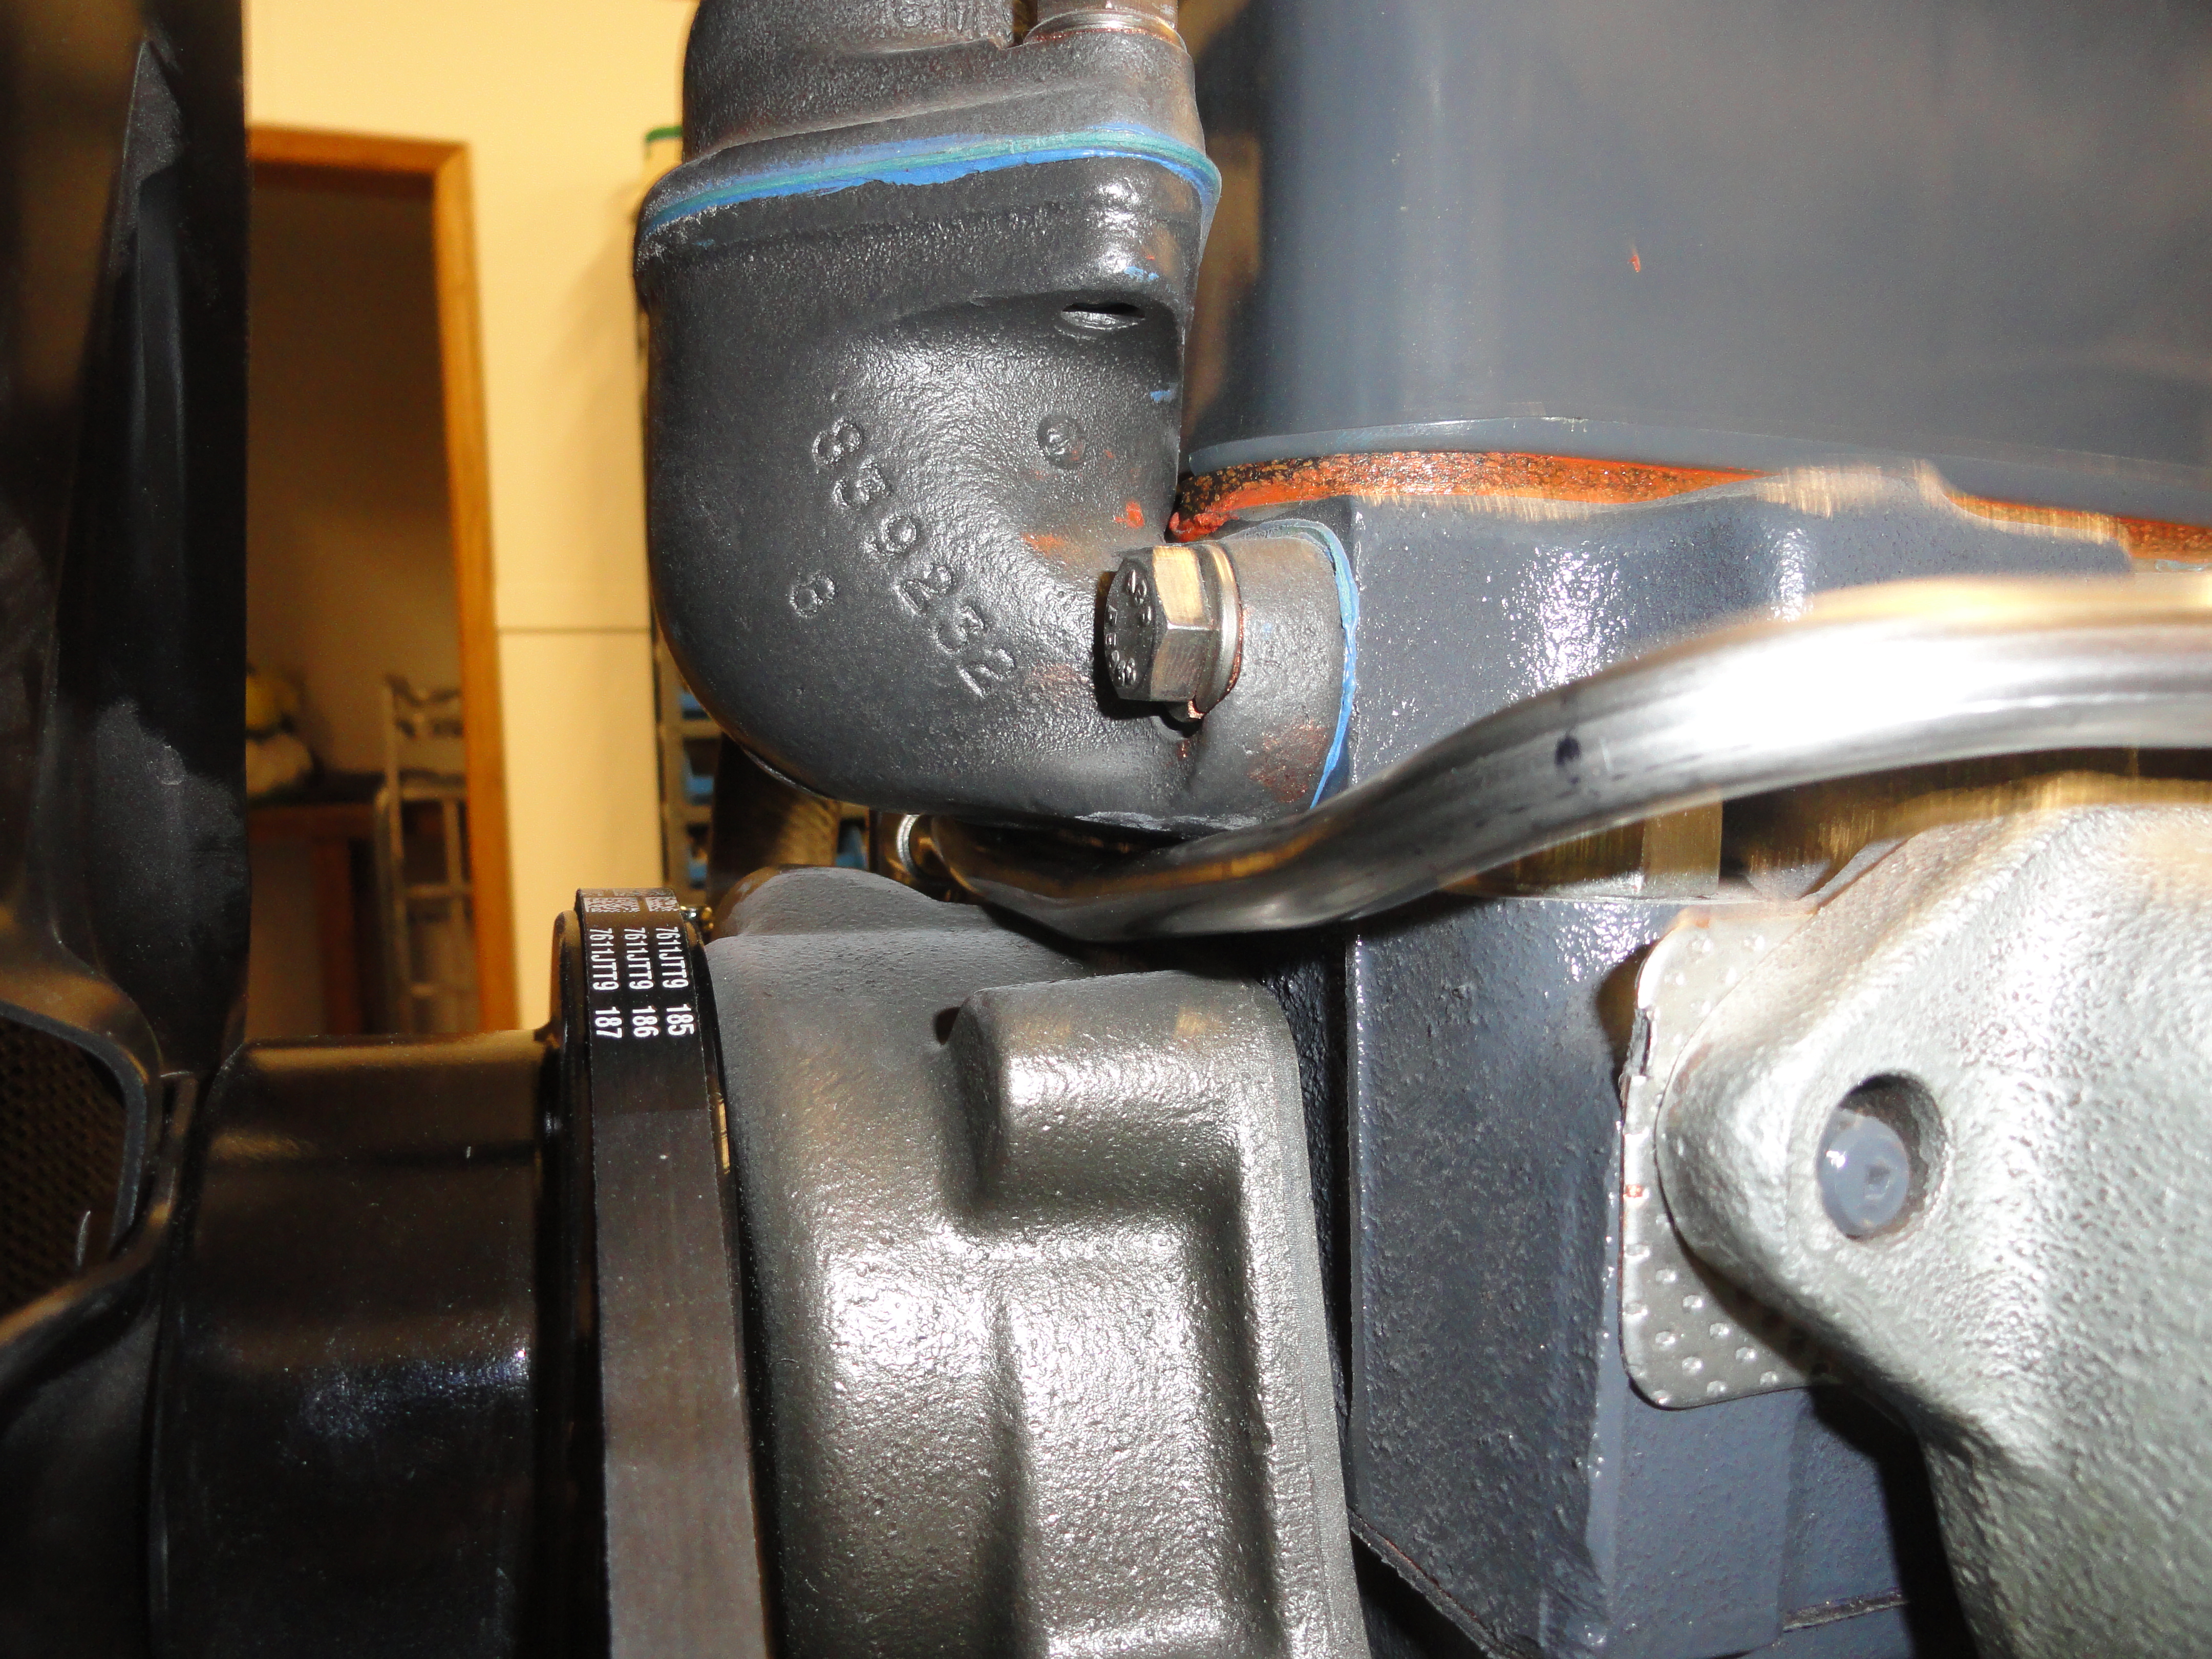
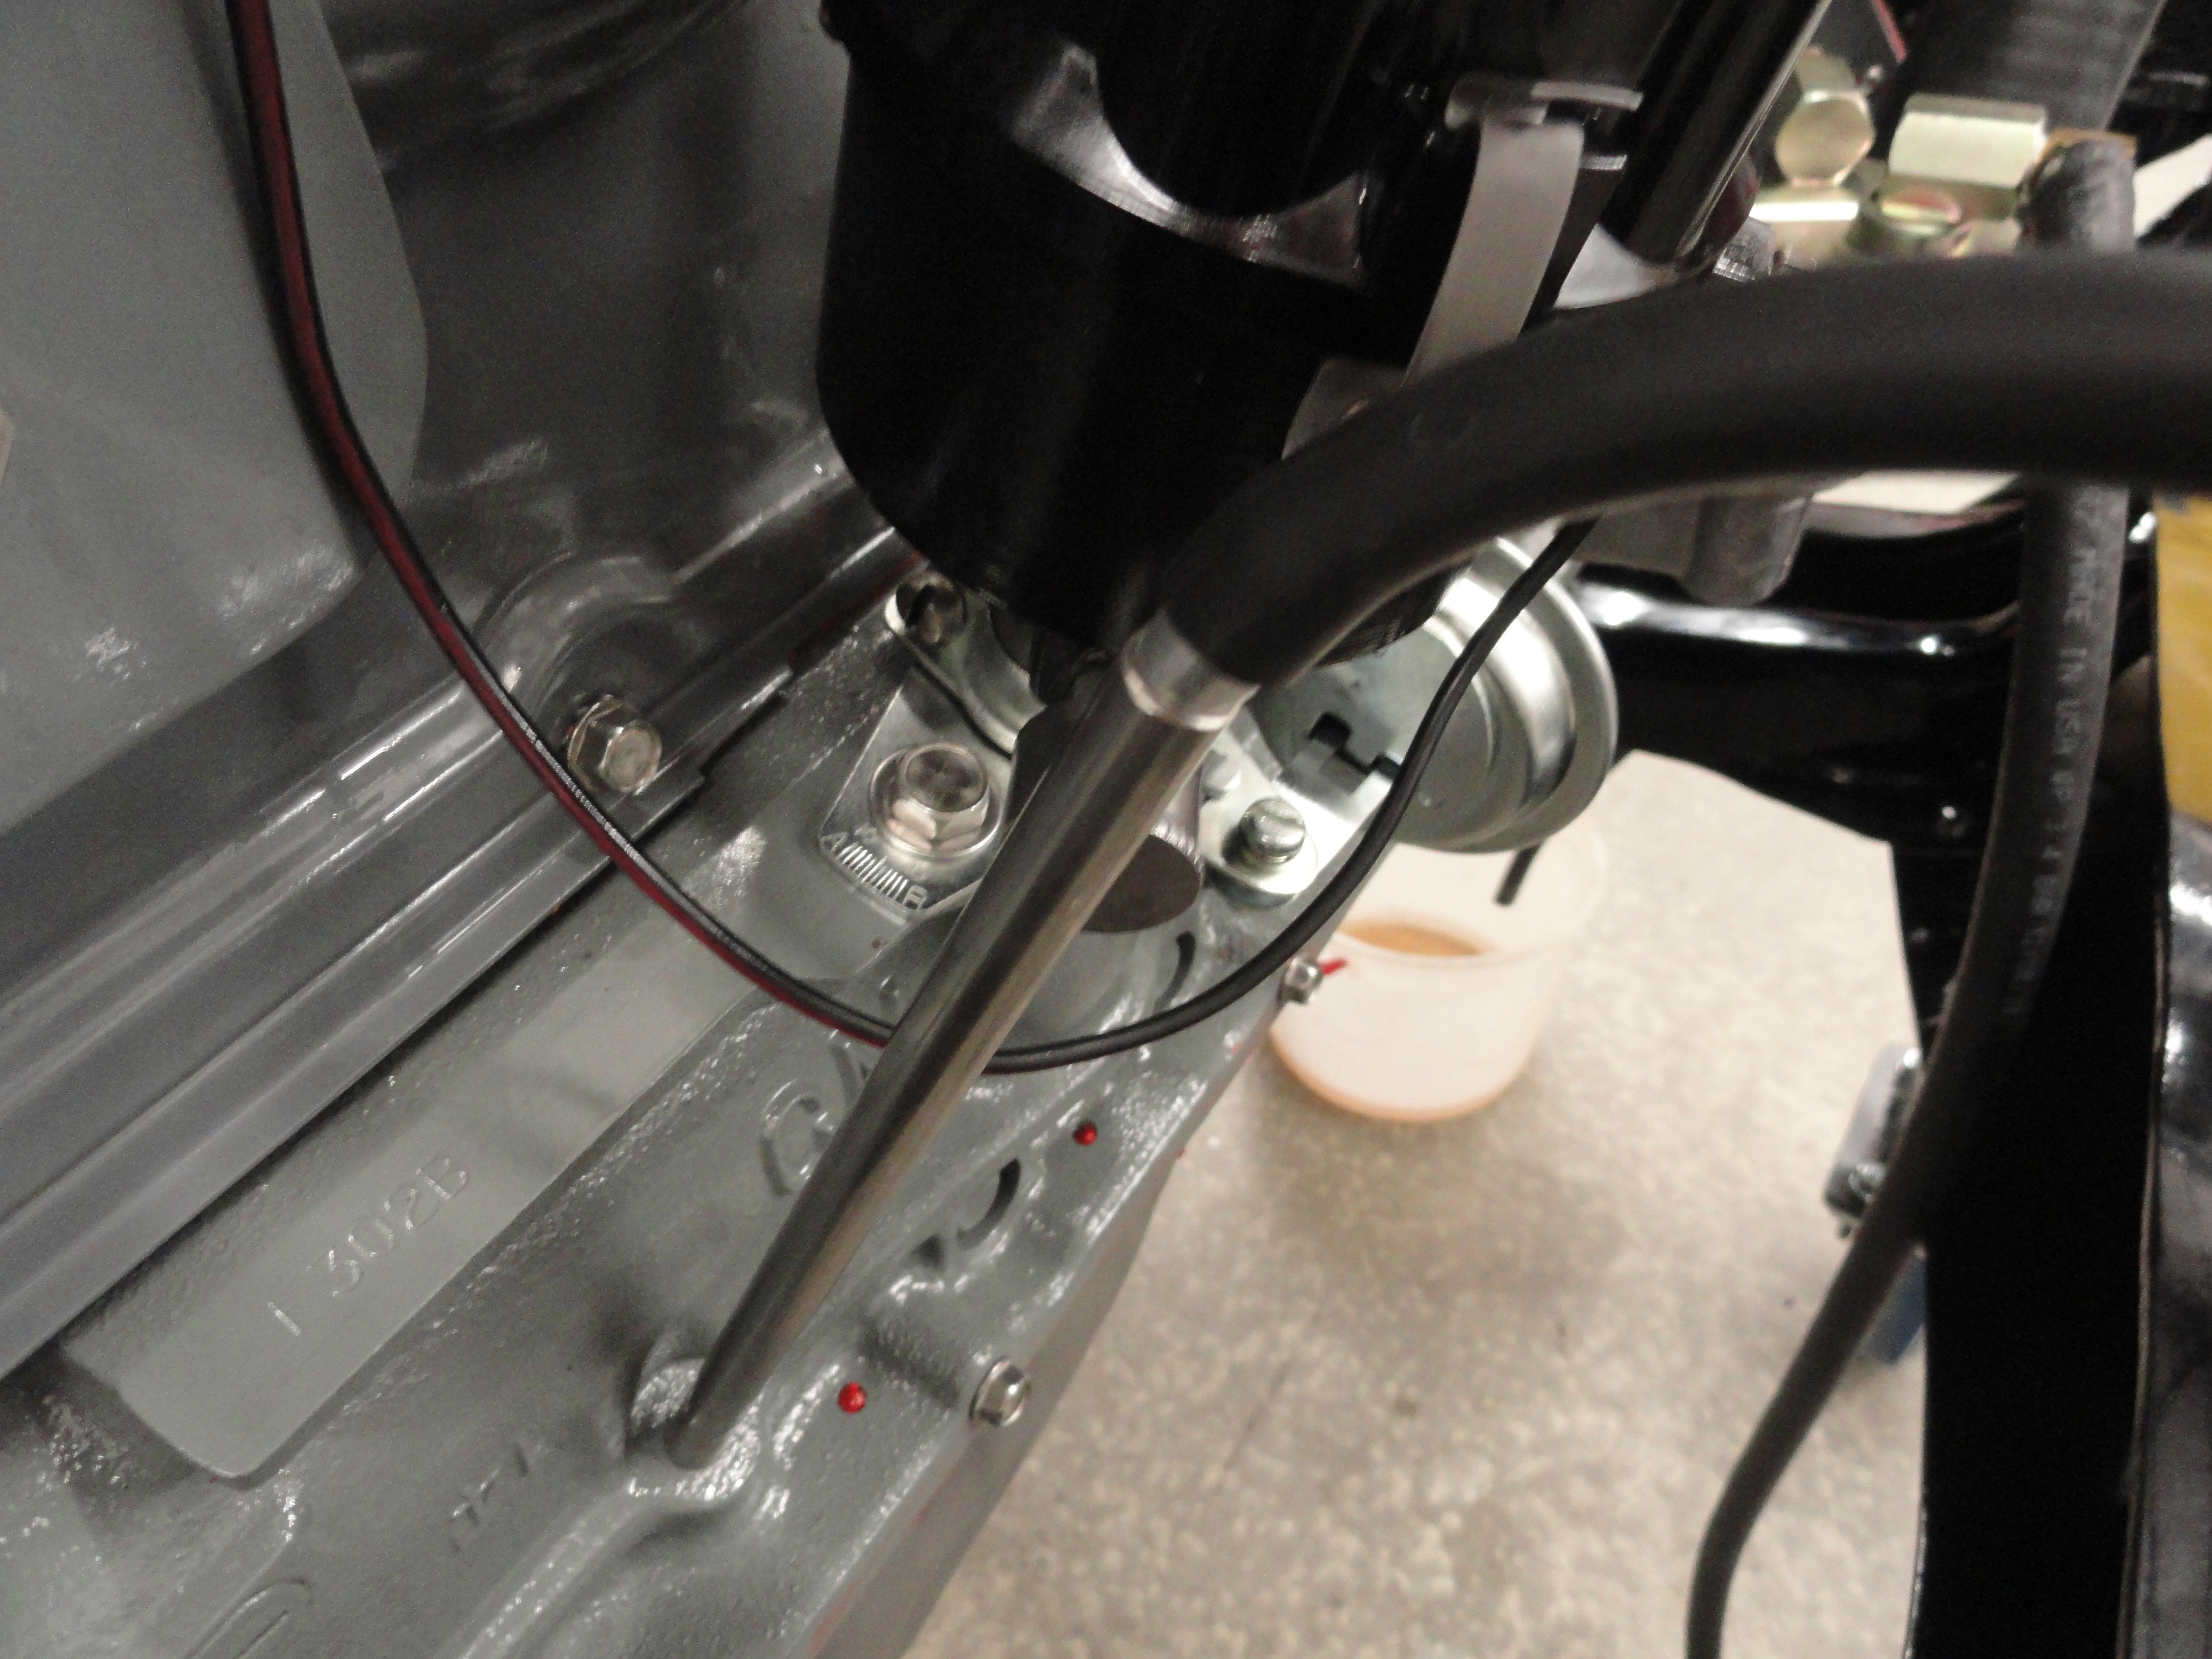
In the case of the 216, 235 or 261 engine, remove the road draft tube which is just press fit and the bracket holding it in place then install a 1-1/4" Cup Style Freeze Plug (such as the Dorman 555-024) with a 3/4" hole in the center big enough to accommodate the PCV Valve. The plug fits in really snug so it's perfect. Install it with the cup up so the grommet can be set inside of it next. Do your best to get the hole in the very center and without distorting the freeze plug. Easier said than done, but if you use a step drill bit, or step up slowly to 3/4" you can be pretty exact. Install this freeze plug about 1/32" below the surface of the block. Shown is tapping it in with a 3/4" socket which fits the application perfectly. You then install the grommet (such as the Mr. Gasket No. MRG-6379), which is available at any good local automotive parts store, right inside the cup of the freeze plug. I used Permatex High-Temp Copper Gasket Sealer on the inside of the freeze plug (using your little finger, you should be able to get to it) and around the grommet to better hold it in place. It's the perfect fit, so it's not going anywhere anyway. At this point, you simply push the PCV Valve in and this step is complete.
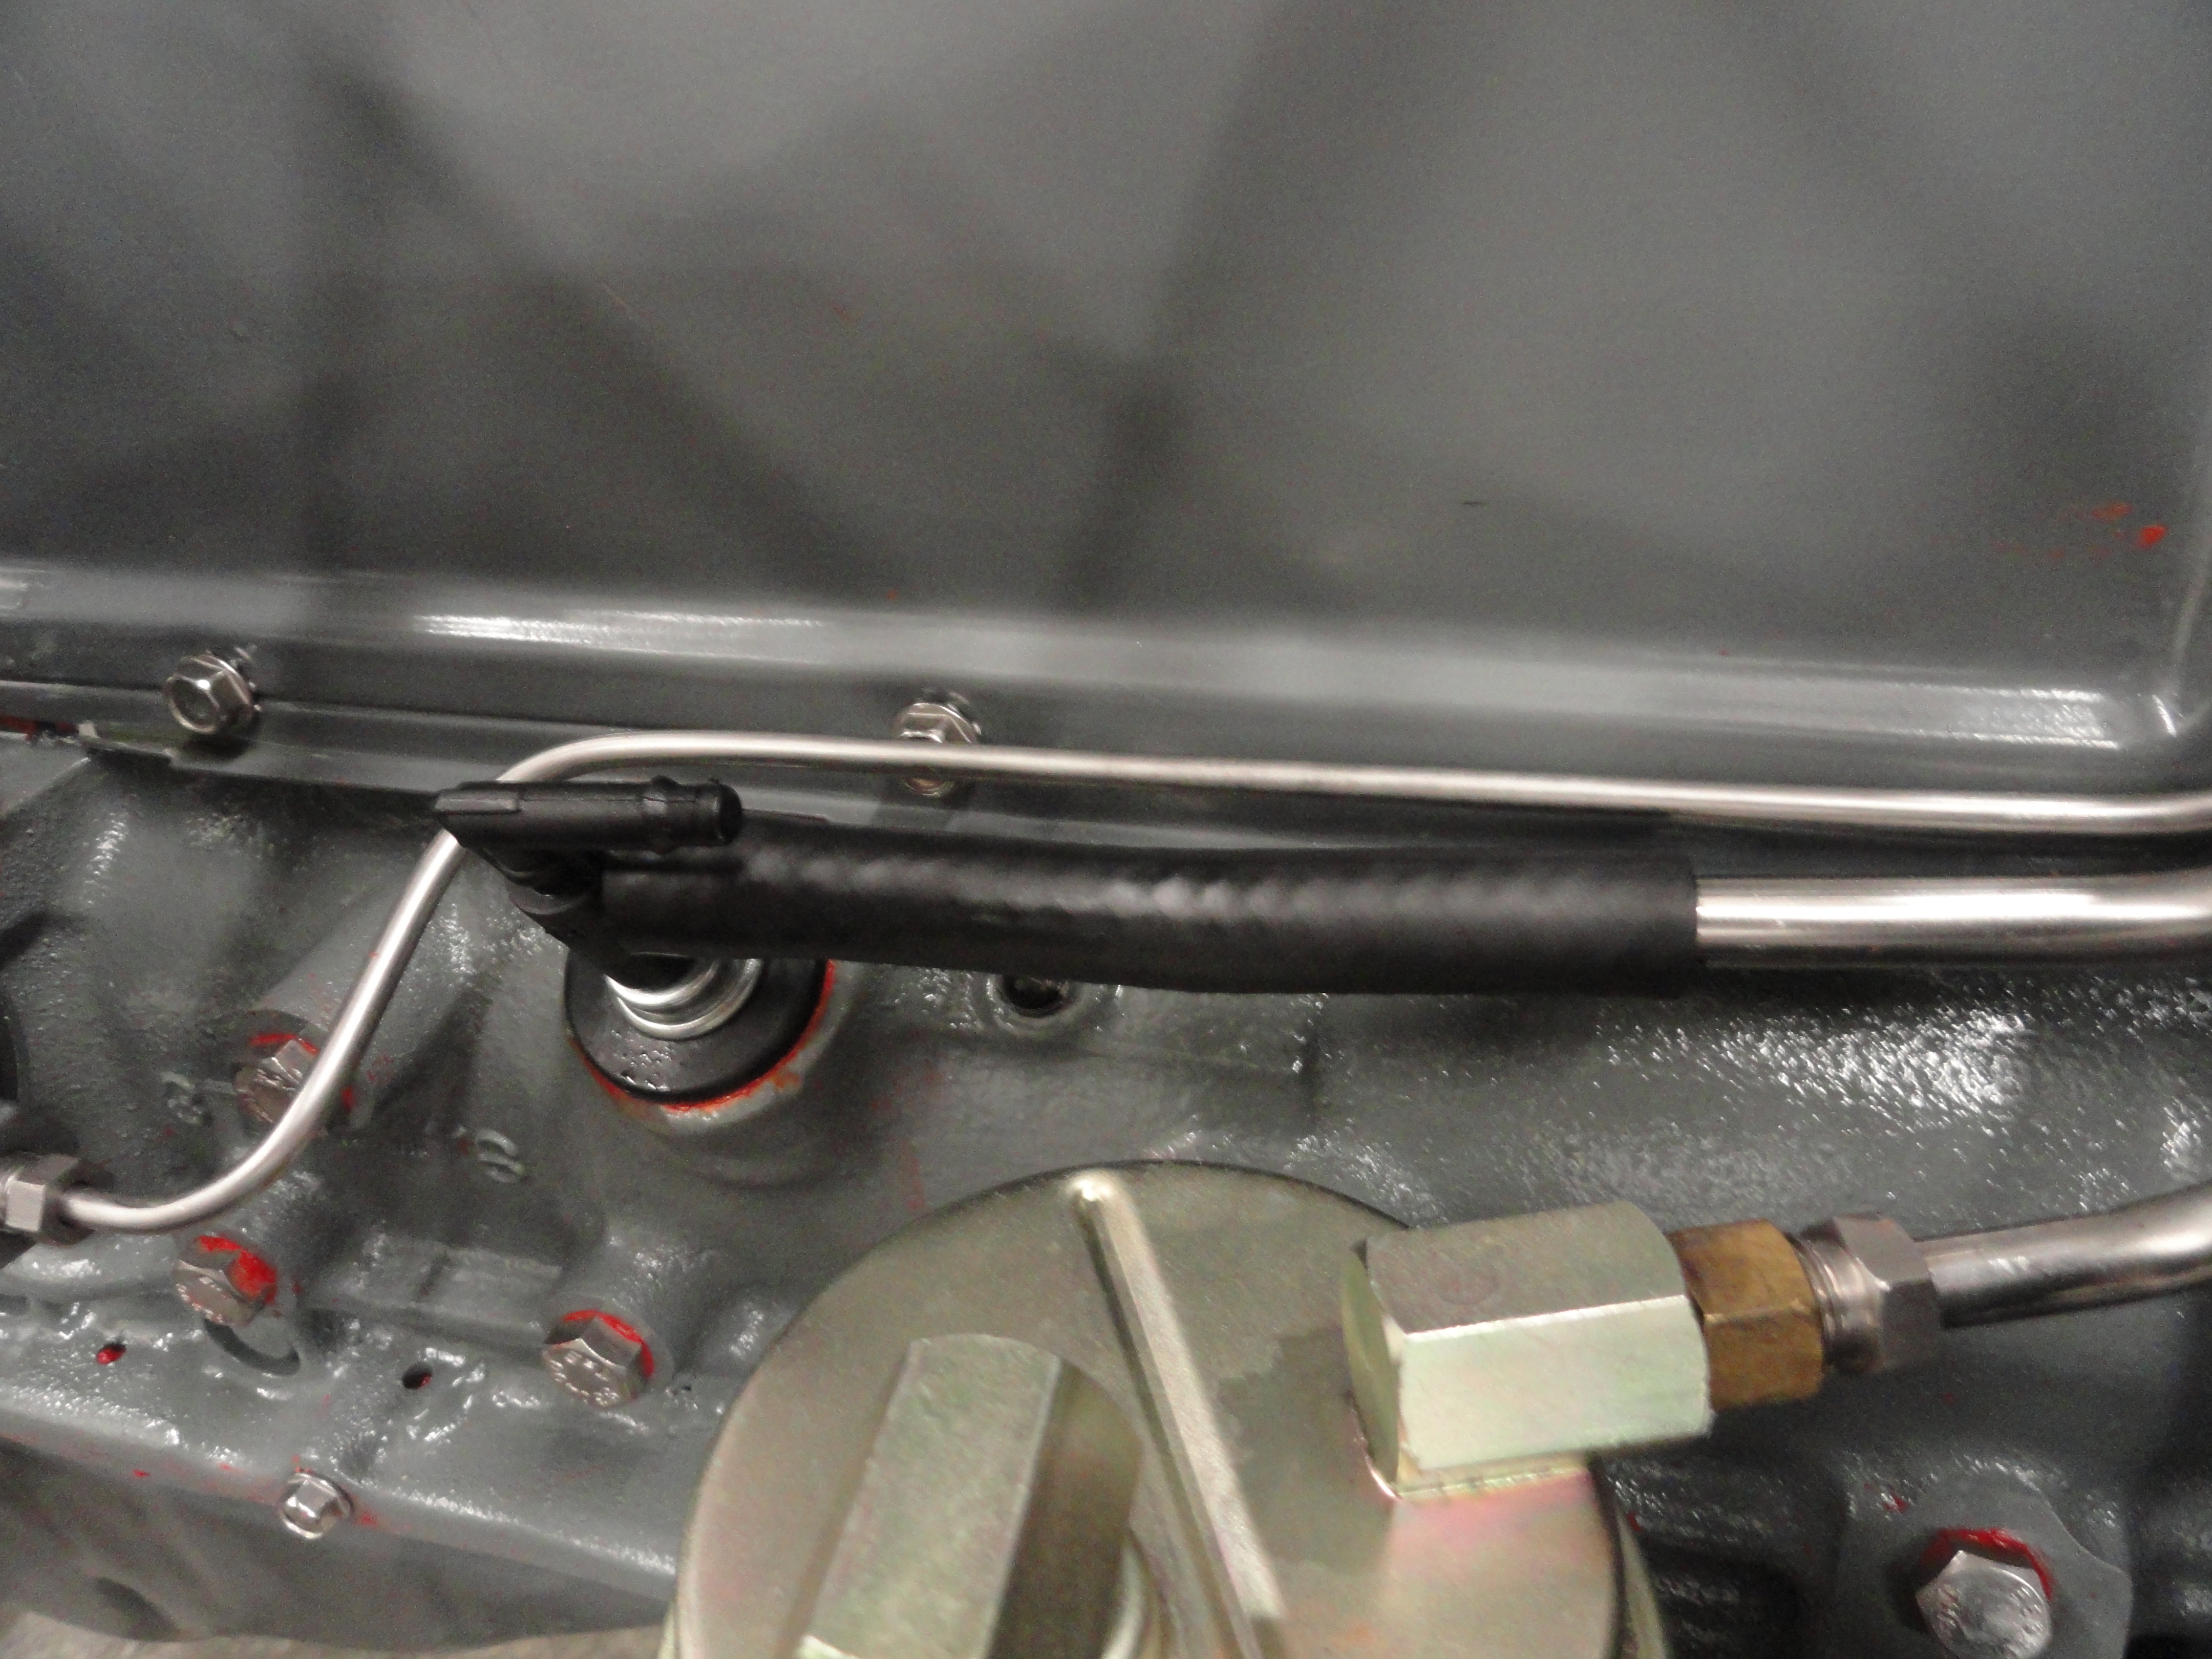
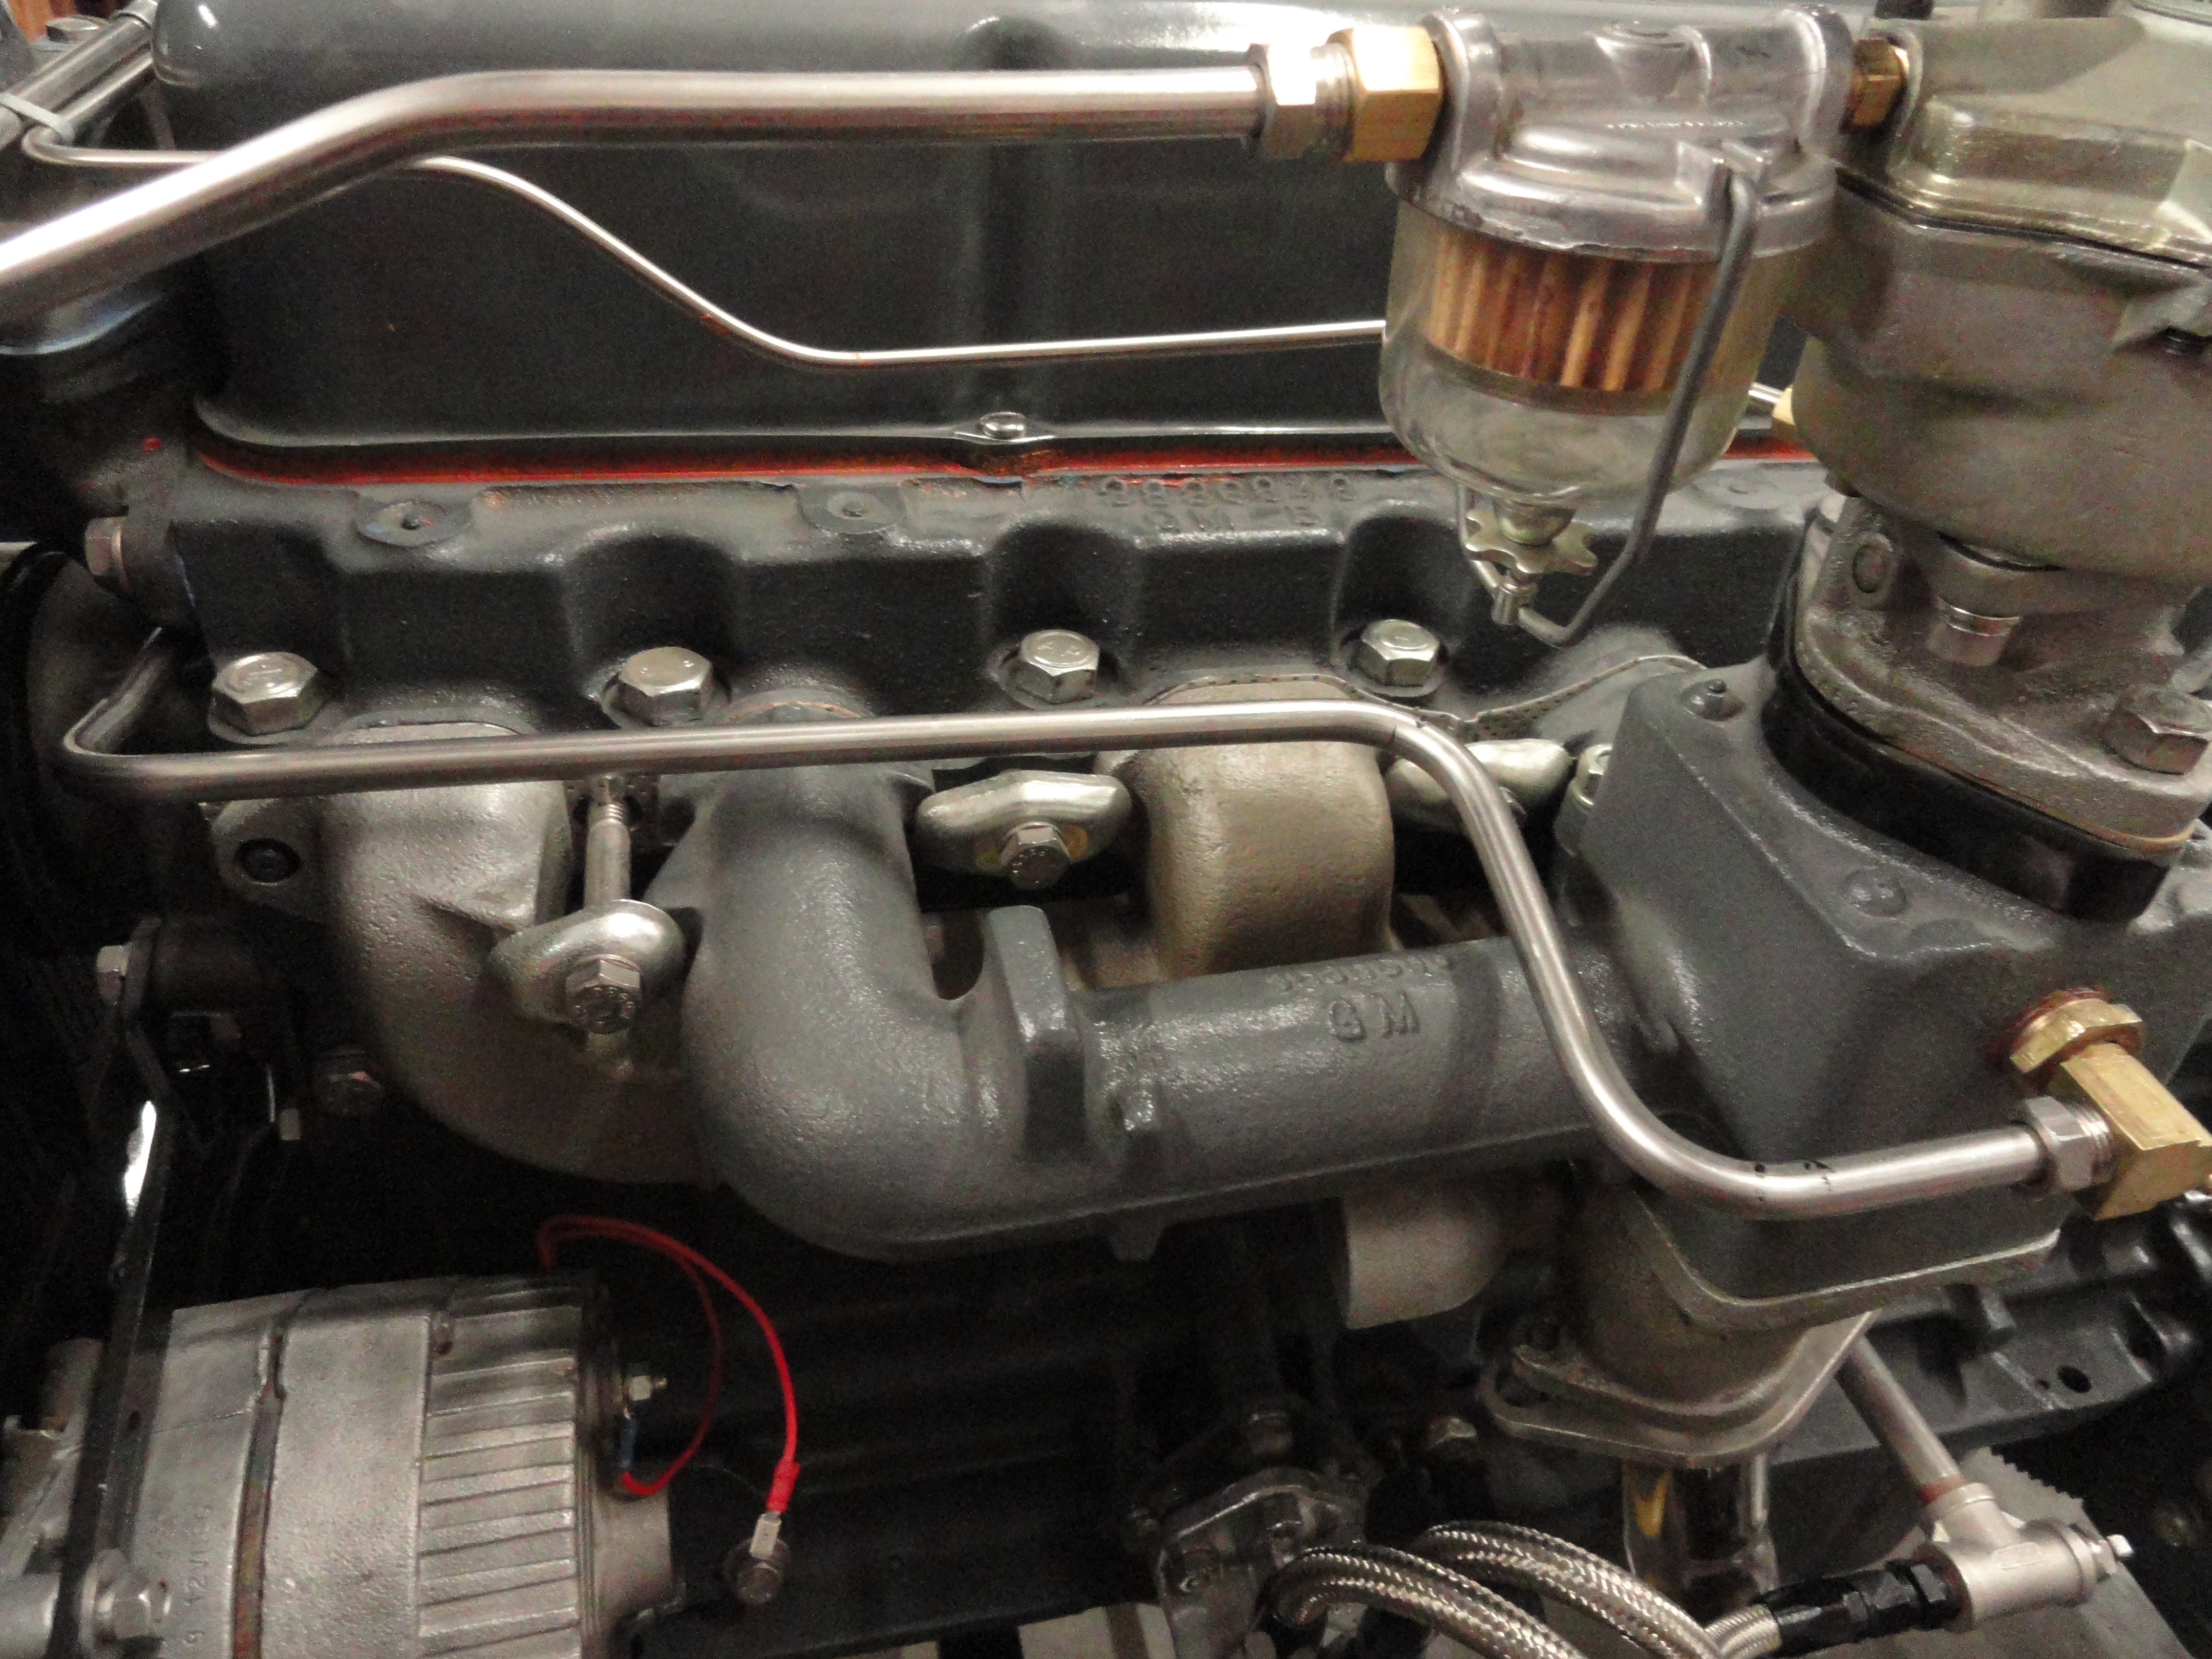
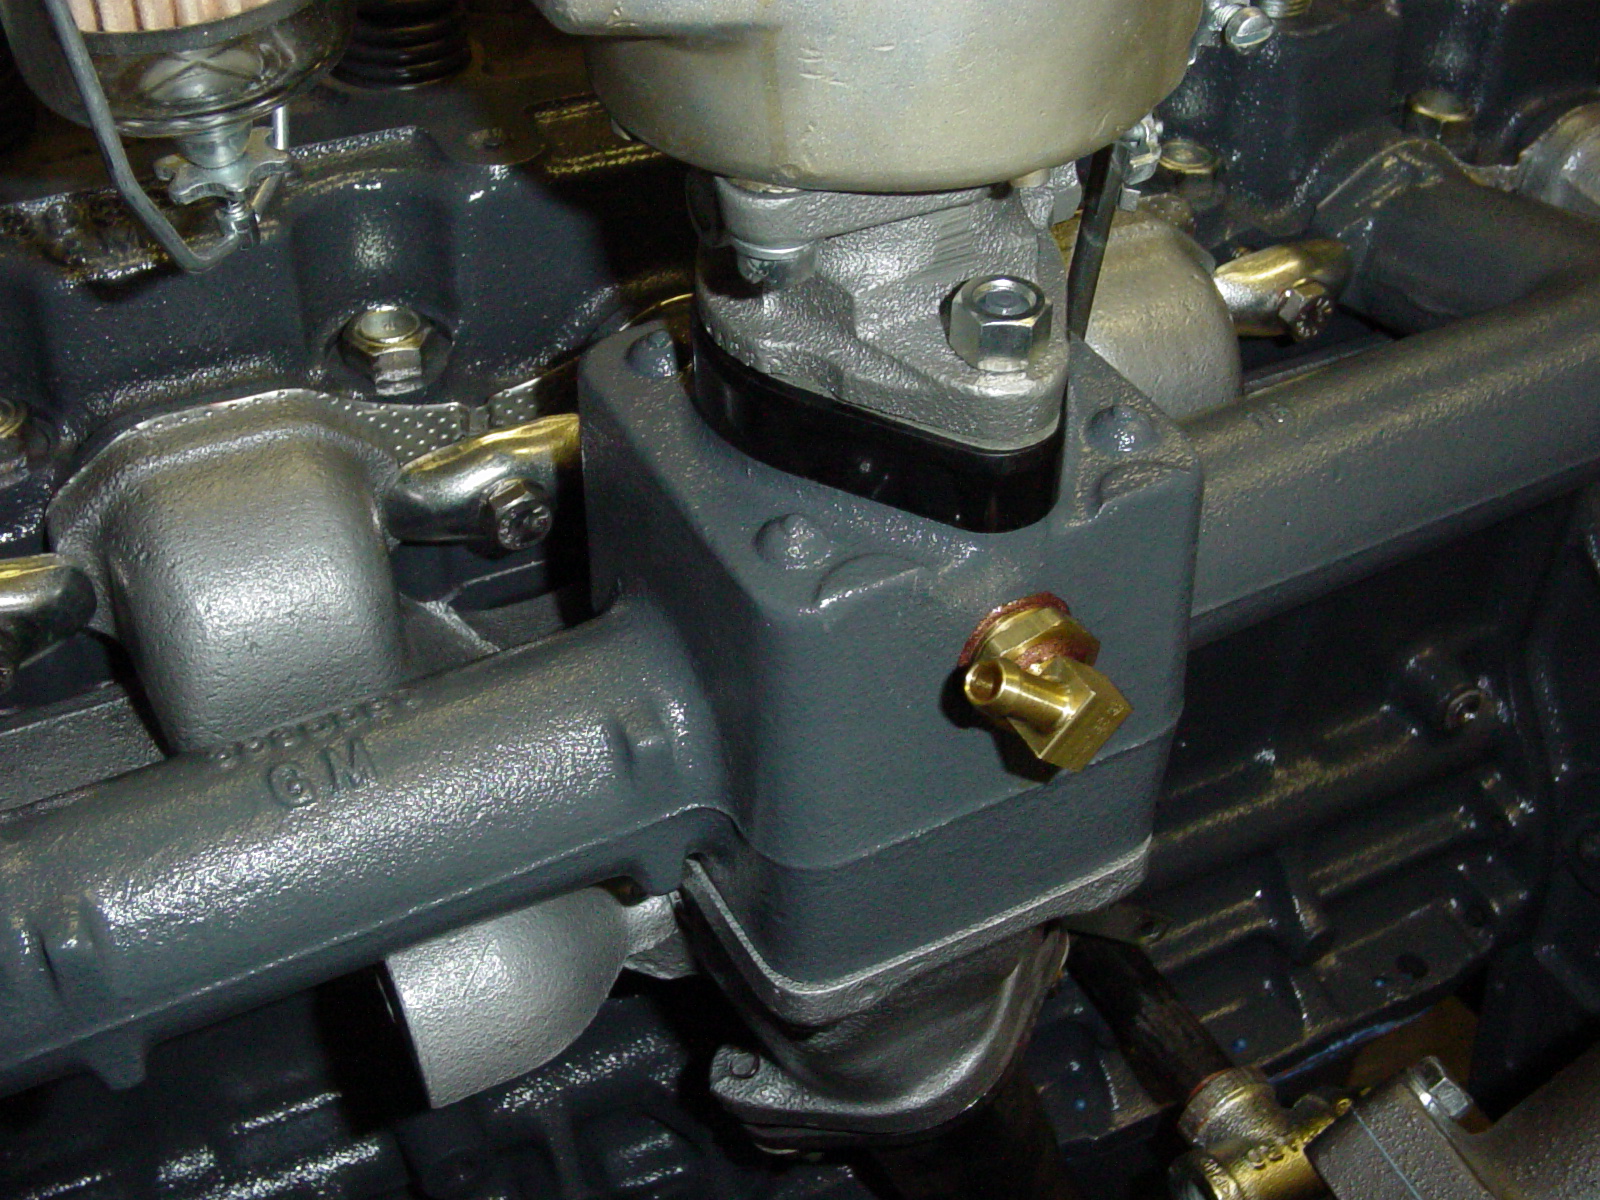
The Valve is Standard Brand V-237 and we are using 3/8" PCV/Fuel Line hose. I needed about 4 feet. The concept is to connect
the PCV Valve via the hose to the intake manifold's vacuum inlet on the other side of the engine. How you go about doing this is up
to you. I prefer making a hard line from the intake port to about 3 inches from the PCV inlet and then run a 5 inch long 3/8"
soft line to connect them together. It works just as well to run soft line the whole way.

If you are using that for windshield wipers or brake booters, remember by installing this PCV system, you are closing the rather
large vacuum leak that was present via the original road draft tube and replacing it with a much lesser air draw. This means PCV
should not affect these sub-systems. In addition, this valve will not suck any oil into the intake manifold since it is
designed for the vacuum properties of this engine.
Because the air flow is from top to bottom, you will need to install a filtered and Vented Cap such as the Stant 10064 on your Valve Cover. These are readily available at any auto parts store. Ask for the twist-on type for your valve cover. Air flow is from the vented and filtered cap, down through the engine, and out to the intake manifold. I wanted a clean installation, so I purchased new fittings to accommodate the 3/8" hose. Simply hook up the PCV Valve via the hose to the intake manifold, and you have just installed your very own PCV system! The experts tell me this is much, much better for your engine, and will extend the life of it. They also say you need to lean the fuel mixture out a little during setup. I have tested this system, and am very pleased with the results. This modification is cheap and doesn't hack up your truck in any way, so there is no harm in trying it. As always feedback is very much appreciated.
My engine shop expert helped me pick out three PCV Valves that were appropriate for this test. One services large block V8's, another small block V8's and V6's and another Inline 6's. This is a moot point however because of the unique properties of this installation. The optimal vacuum in inches of Mercury is 1 to 3. This is the overarching factor and we must follow the rules of physics. We will test PCV Valves until we get a valve that will give us 1 to 3 inches!
The test is performed with a standard Automotive Vacuum Gauge available at your favorite Auto Parts supplier. We will use the cone-shaped attachment that comes in the kit and do the testing through the dipstick tube. While I am thinking about it, it's a good idea to make sure your engine dipstick has a rubber washer where it comes in contact with the dipstick tube. This helps seal the engine to prevent a vacuum leak. If you can't find a rubber washer, use a 3/8" rubber wiring grommet. For this test we also want to make sure the engine is properly tuned. Our test platform is a 1959 235 engine on a test stand that is tweaked for maximum performance.
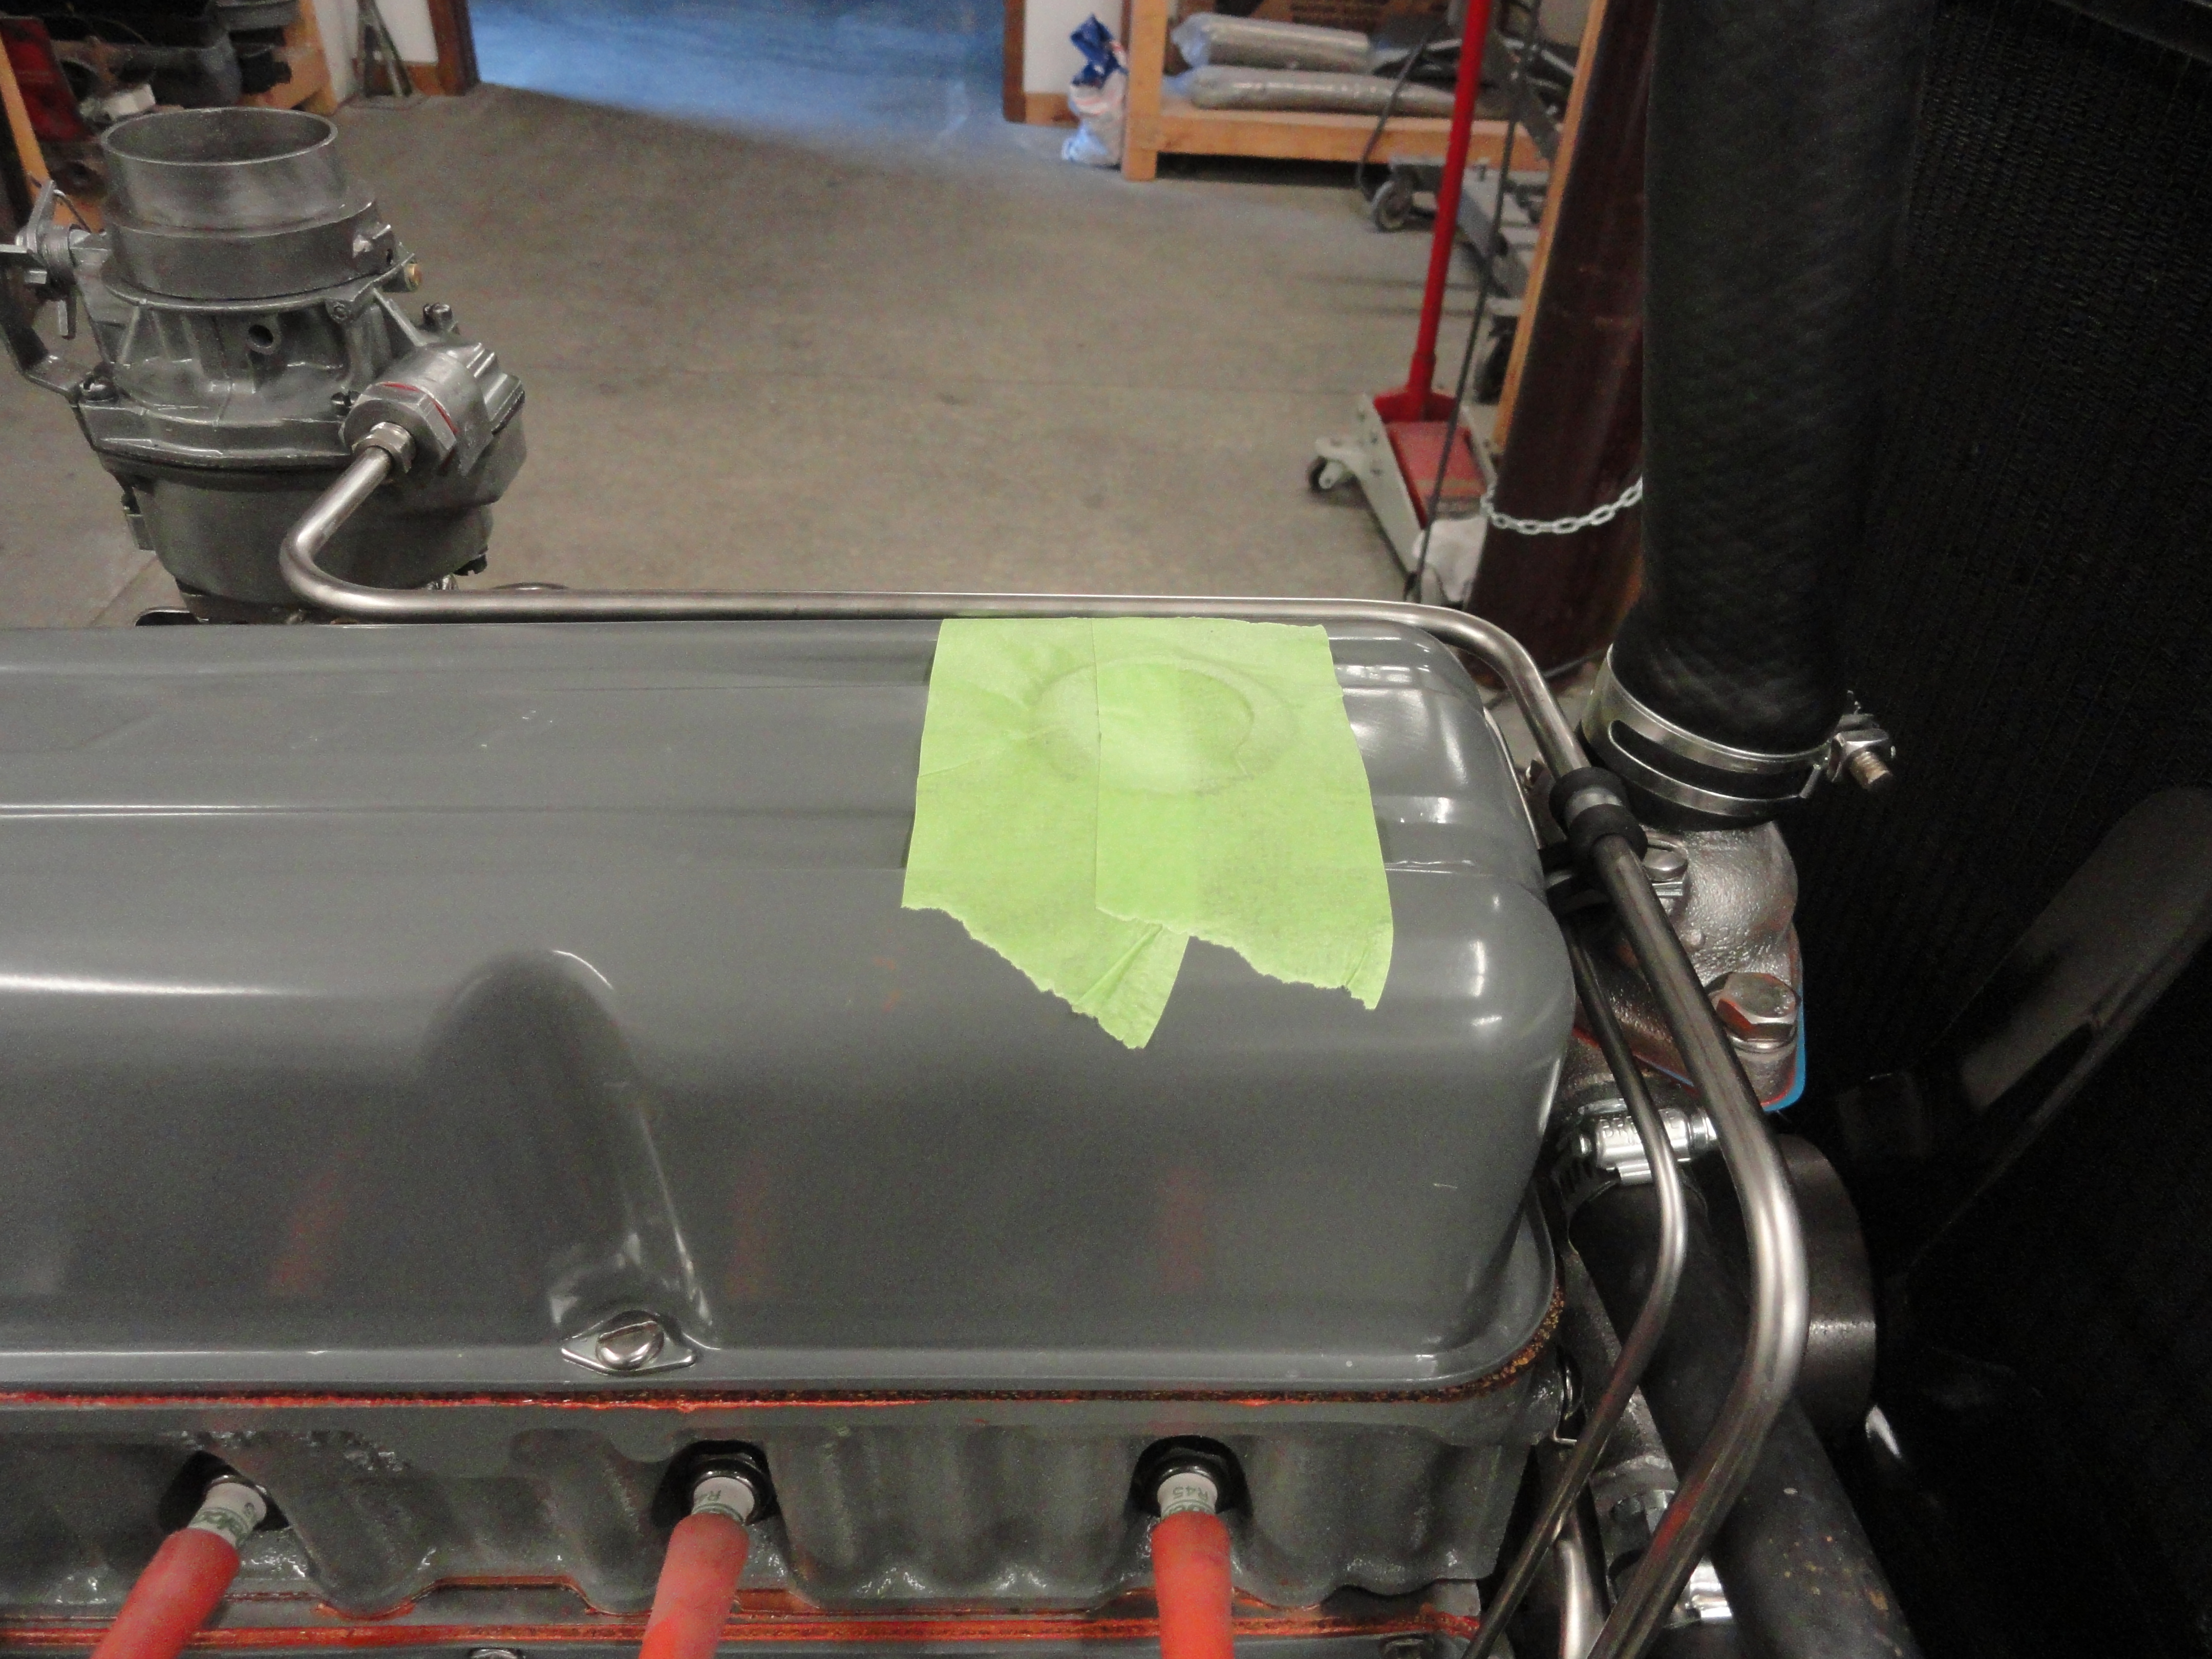
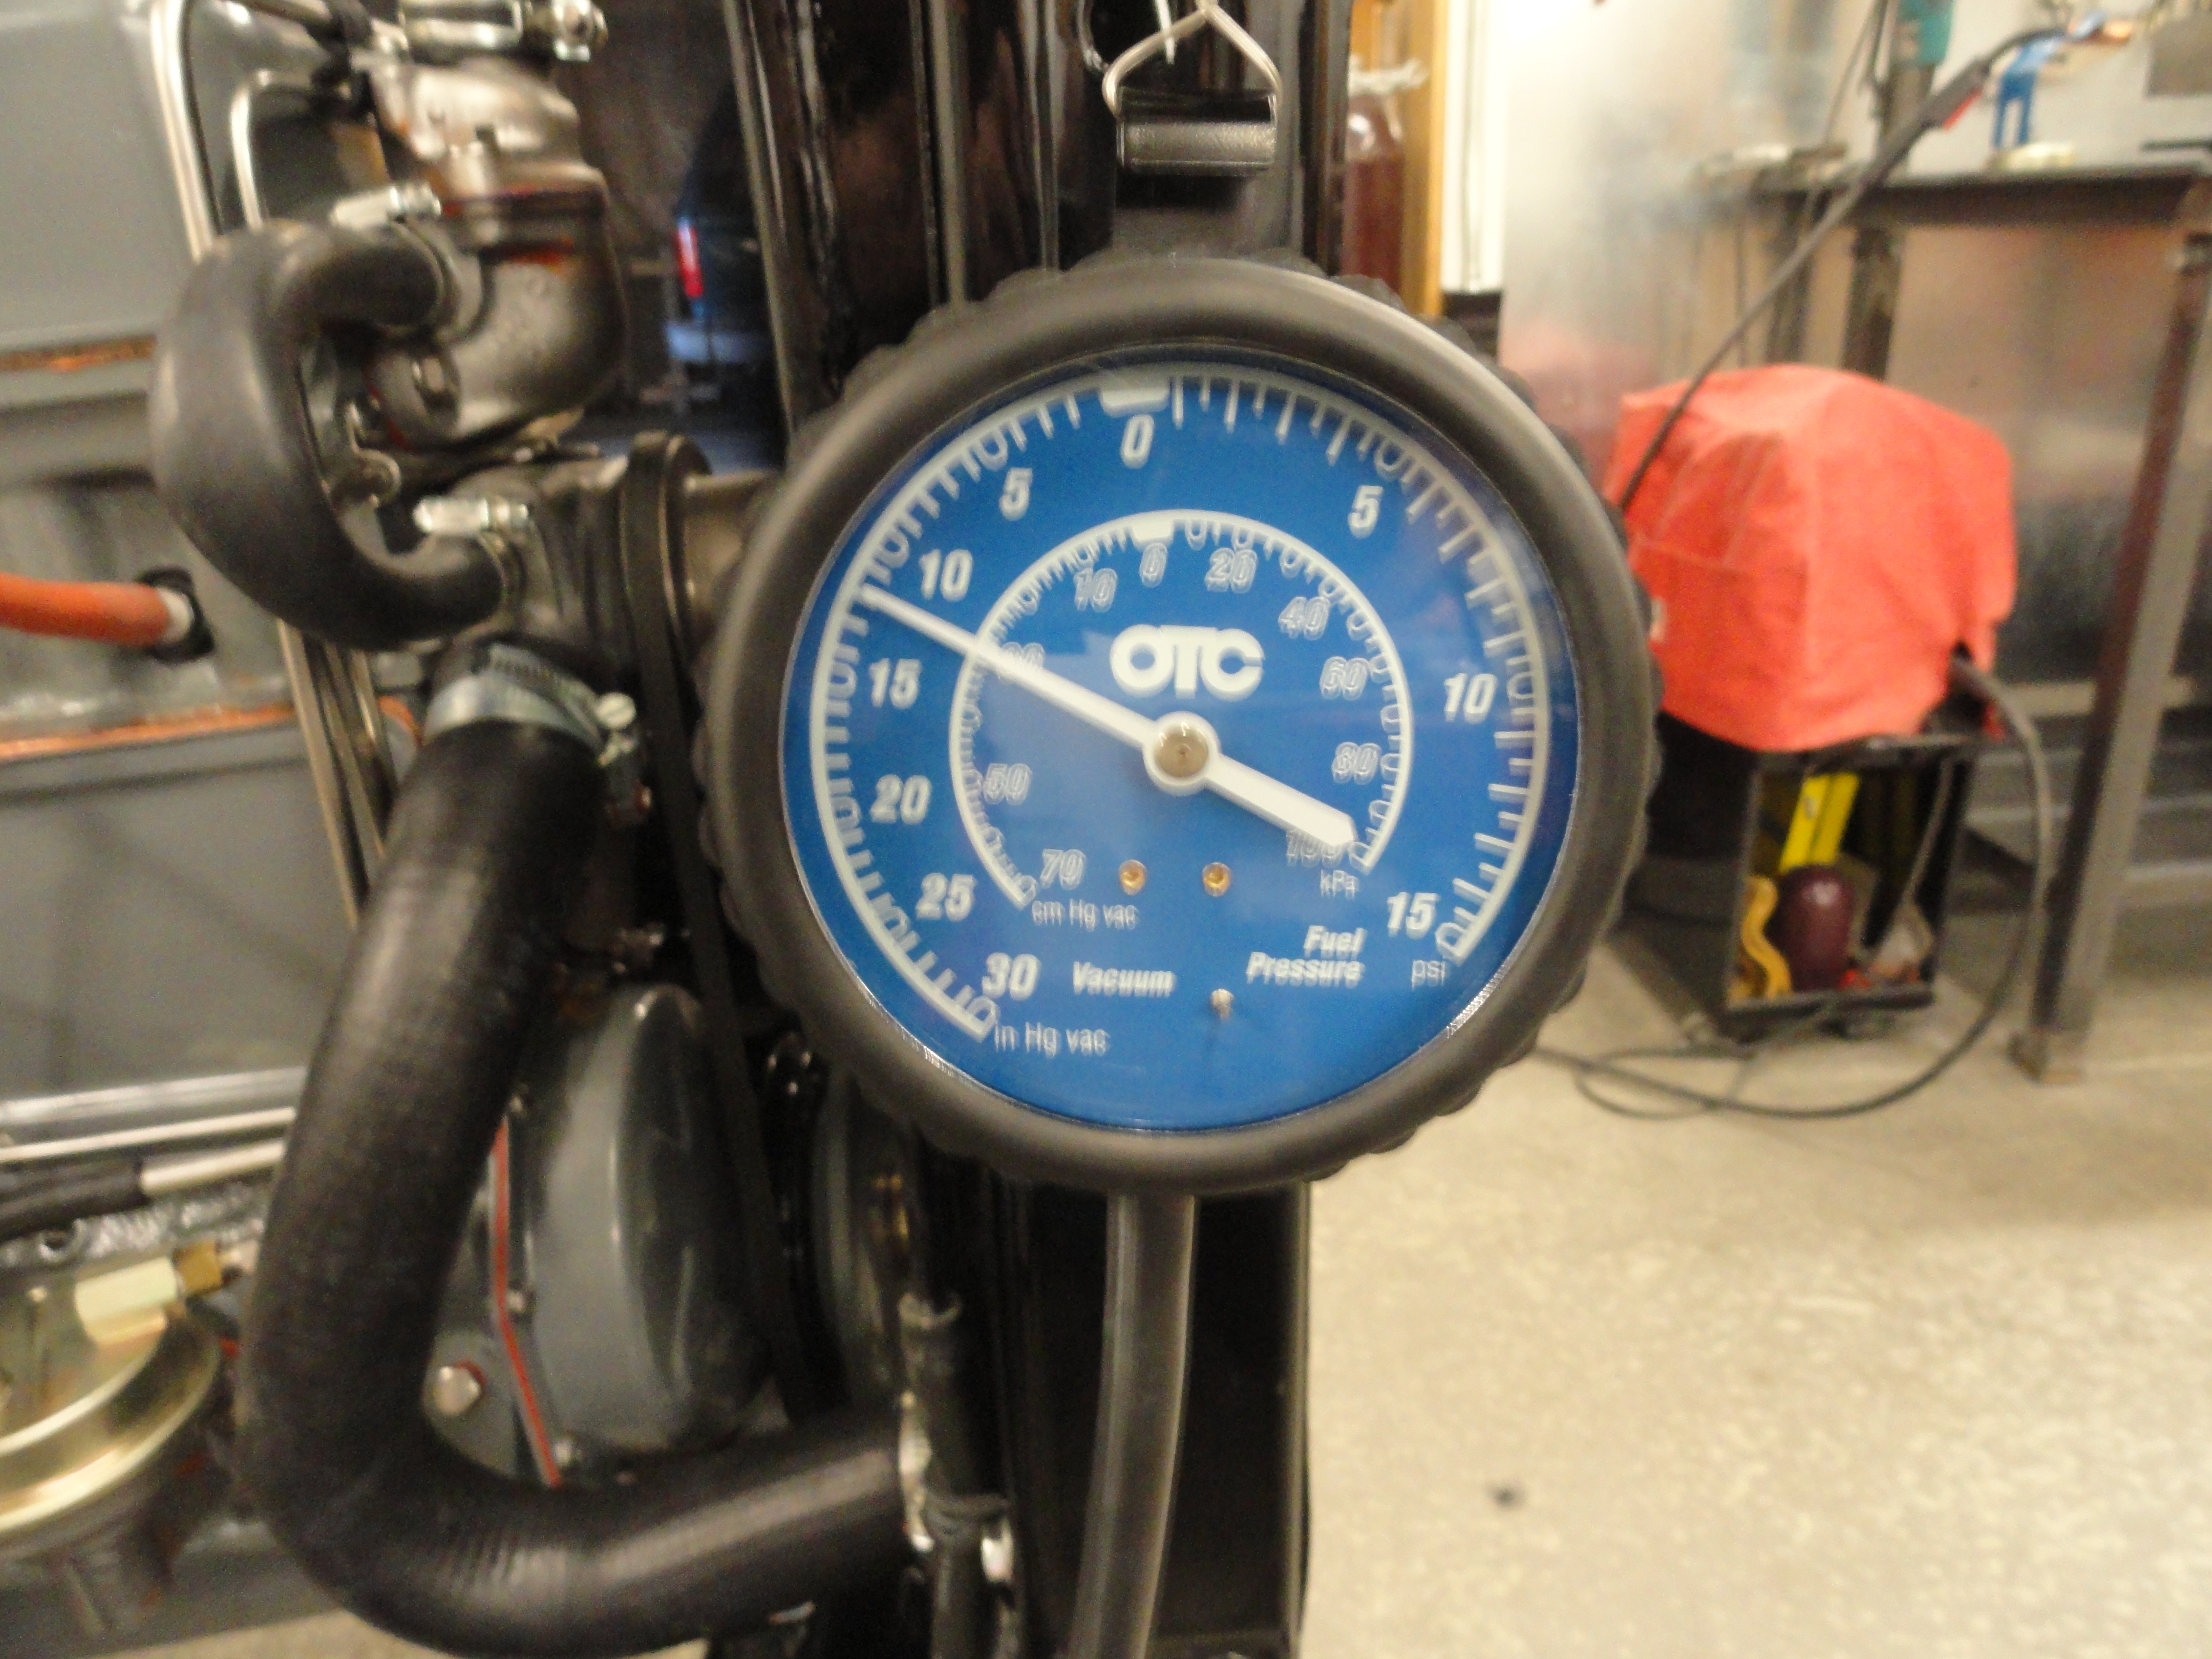
Firing up the engine and ensuring we have no leaks around the dipstick tube, we tape up the valve cover cap inlet so this test can be performed with a sealed engine. The first candidate is the Standard Motor Products V-112. This is a very common Valve and as we can see from the Vac gauge reading, TOTALLY inappropriate for our purposes. We do not wish to suck all the oil out of the crankcase! This one is reading about 12 inches of Mercury. Our window is between 1 and 3. We are testing all three Valves at 800 RPM (Idle). So much for the V-112!

The second candidate (left) and the one I started off with years ago and has given me very reliable service is the Standard Motor Products V-178. This
Valve is pretty close. To be honest, I wasn't aware of the differences in Valves years ago and just got relatively lucky. As we can see from the Vac gauge
reading, it's above our target but not too far off. This will make a good one to change over to if for some reason you feel the recommended one is not
evacuating crankcase gases well enough. I have had reports using this Valve that it sucks a small amount of oil into the intake if your engine is badly
worn.
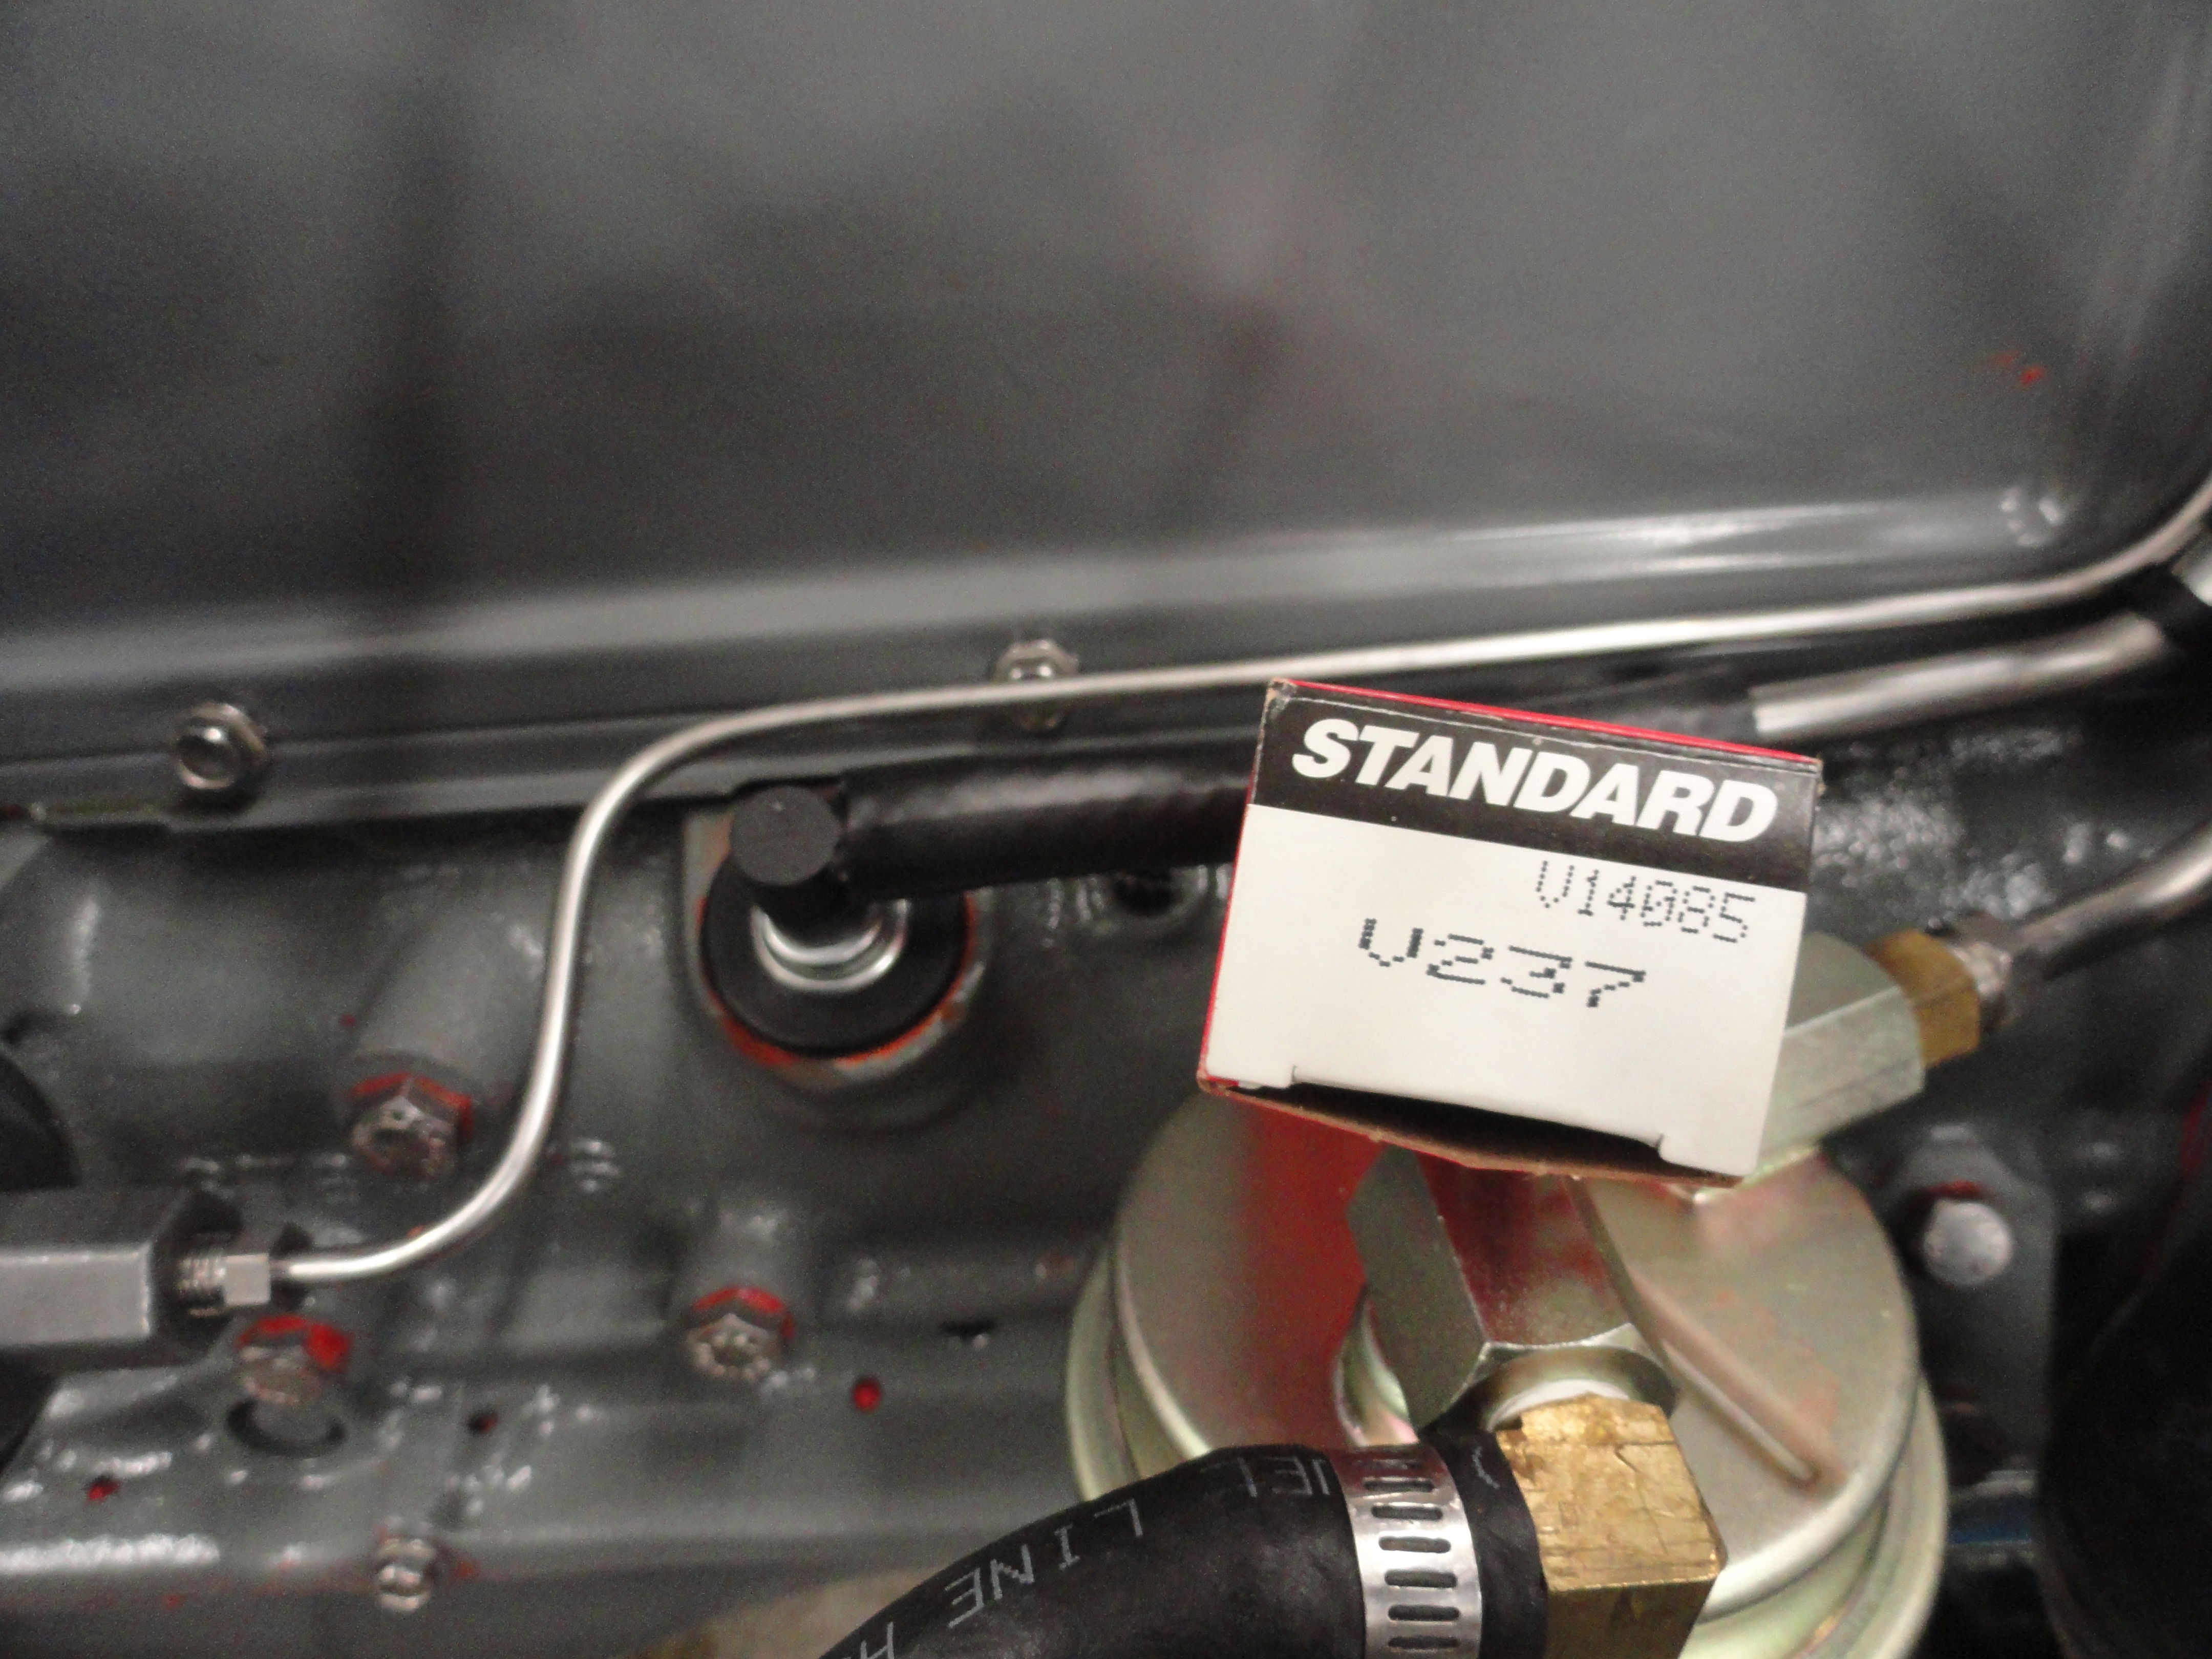
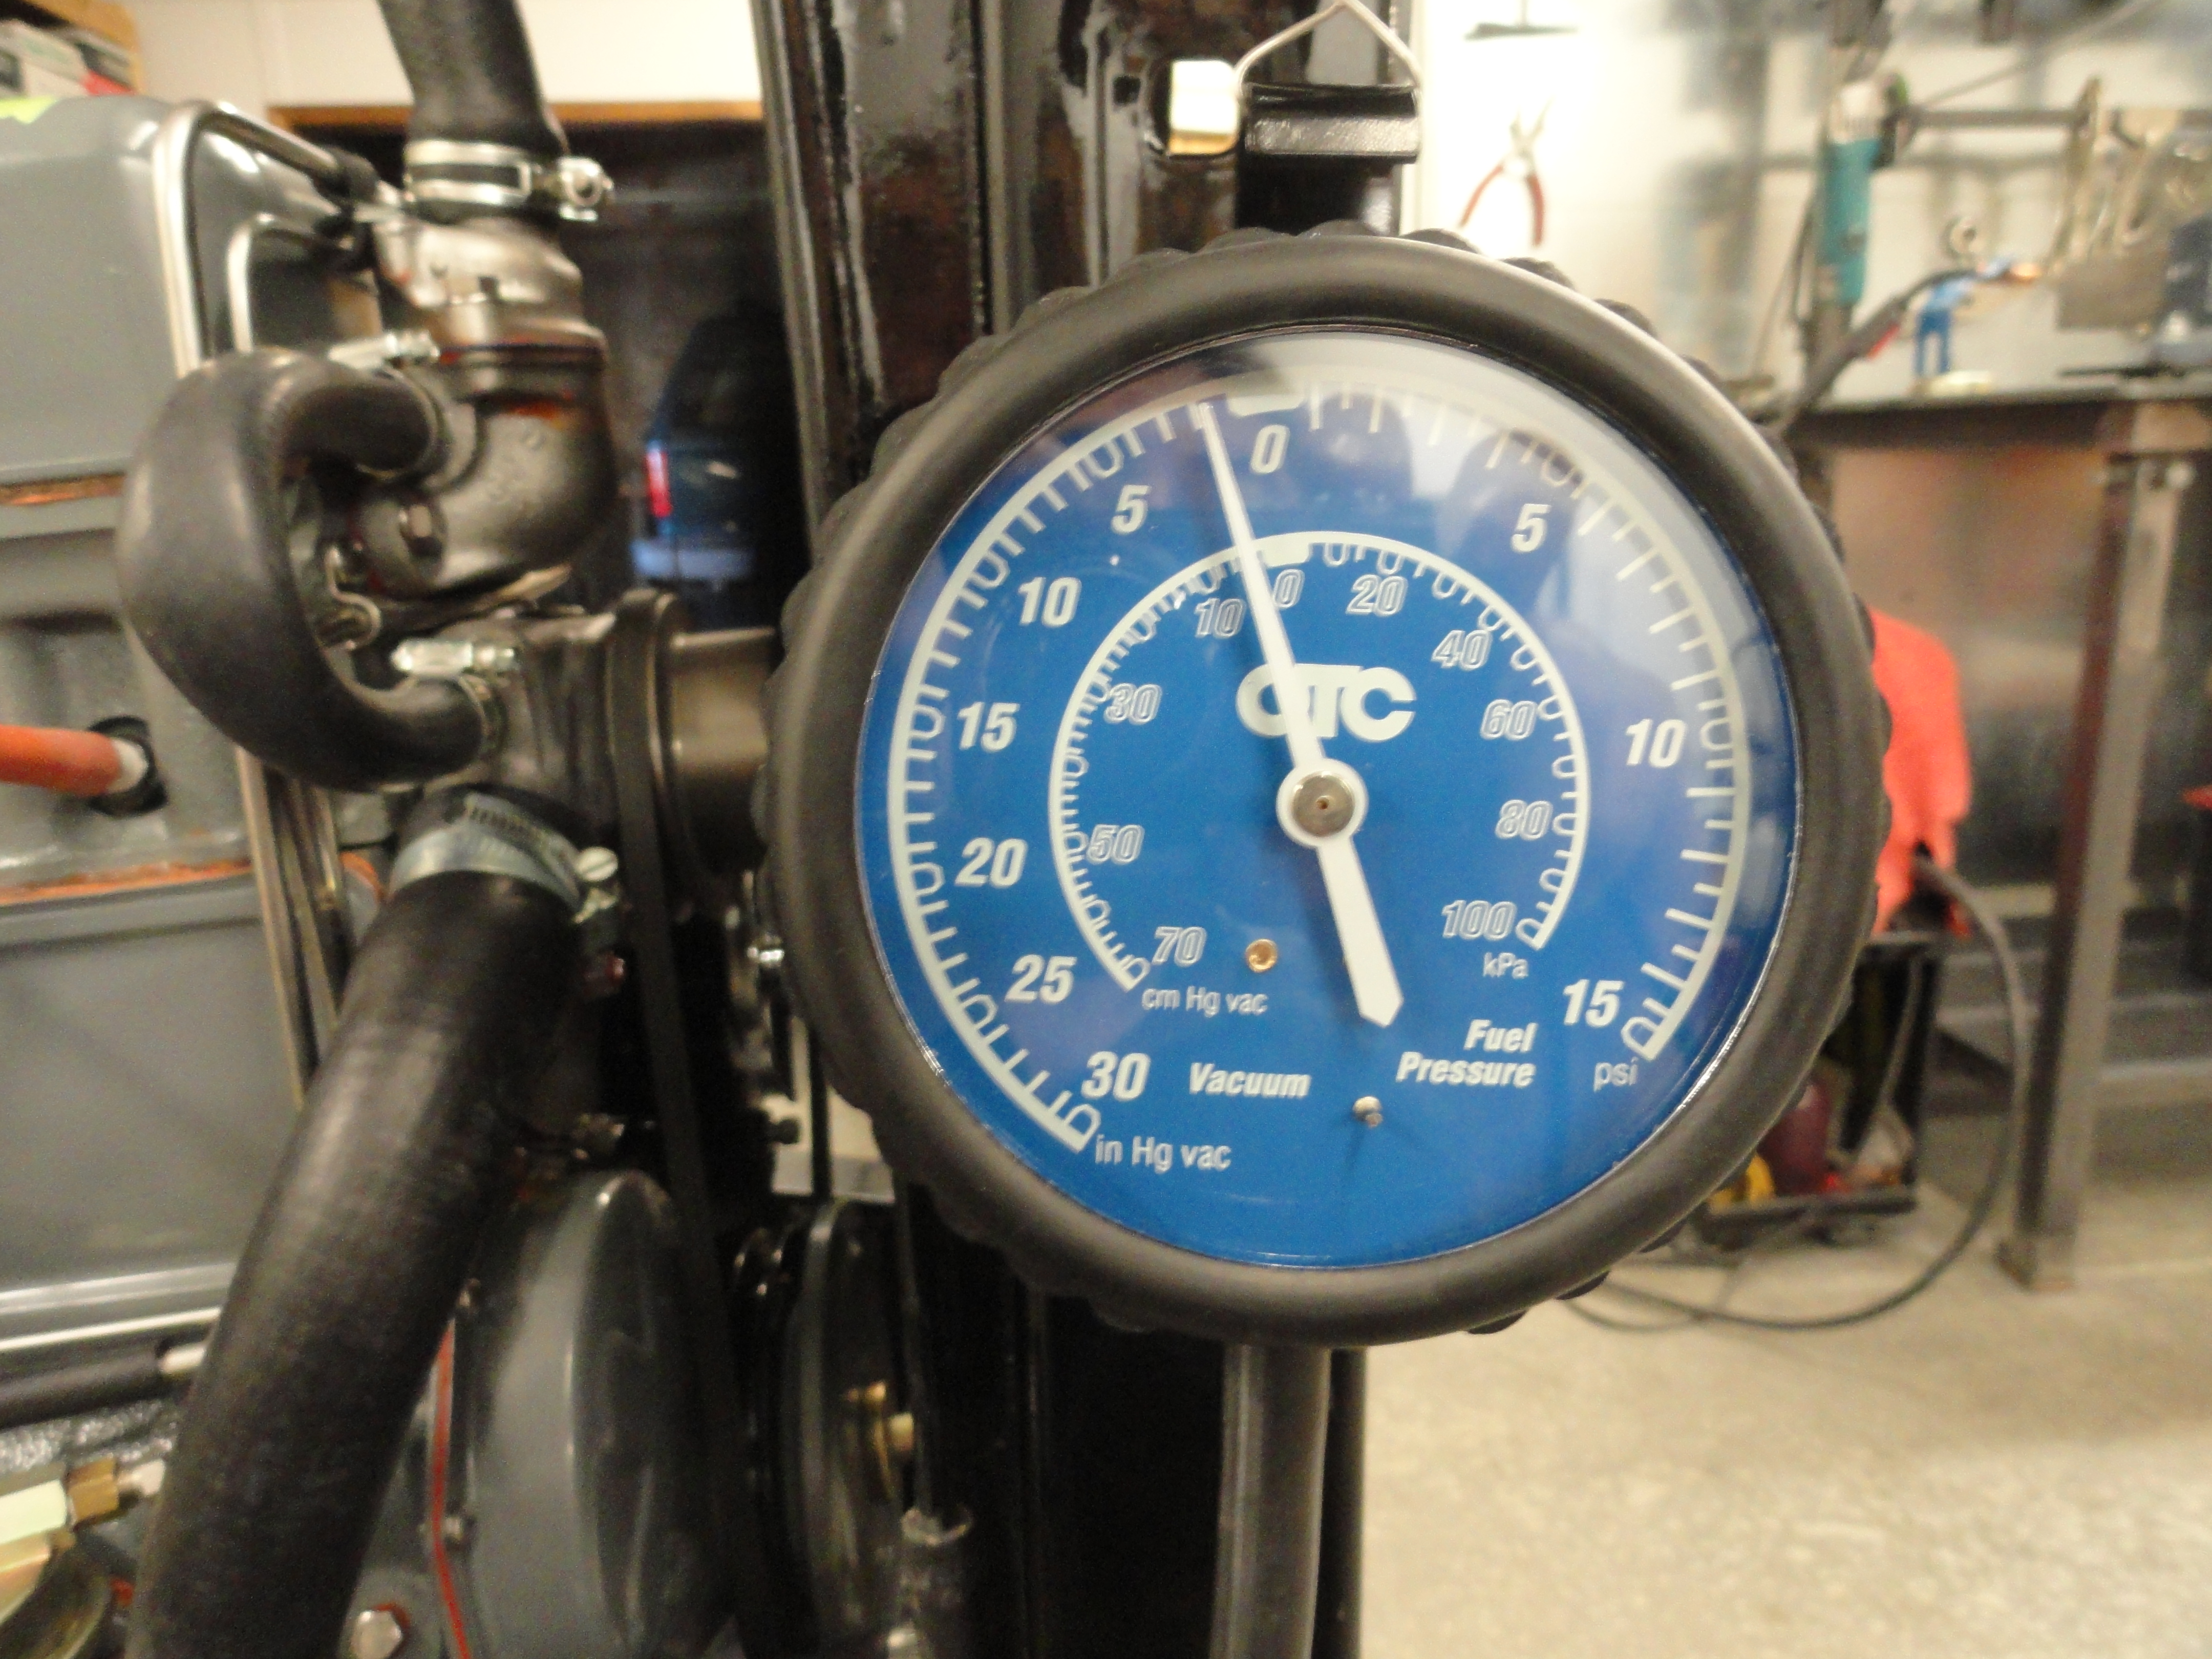
The third and recommended candidate (right) is the Standard Motor Products V-237. Get the Standard Motor Products one so you do not have barbs on both
ends of the Valve. You want it to sit in the grommet with no barbs on the engine side. If your Valve comes with a plastic barb on one side that has
two outlets, large and small, PLUG the small one. It comes with its own plug for this purpose. As you can see, it reads about 2 inches on the Vac Gauge
which is exactly where we want it. Without experts telling me how to test, and what to test, this document would not be possible. We are all very
grateful for these guys sharing their knowledge.
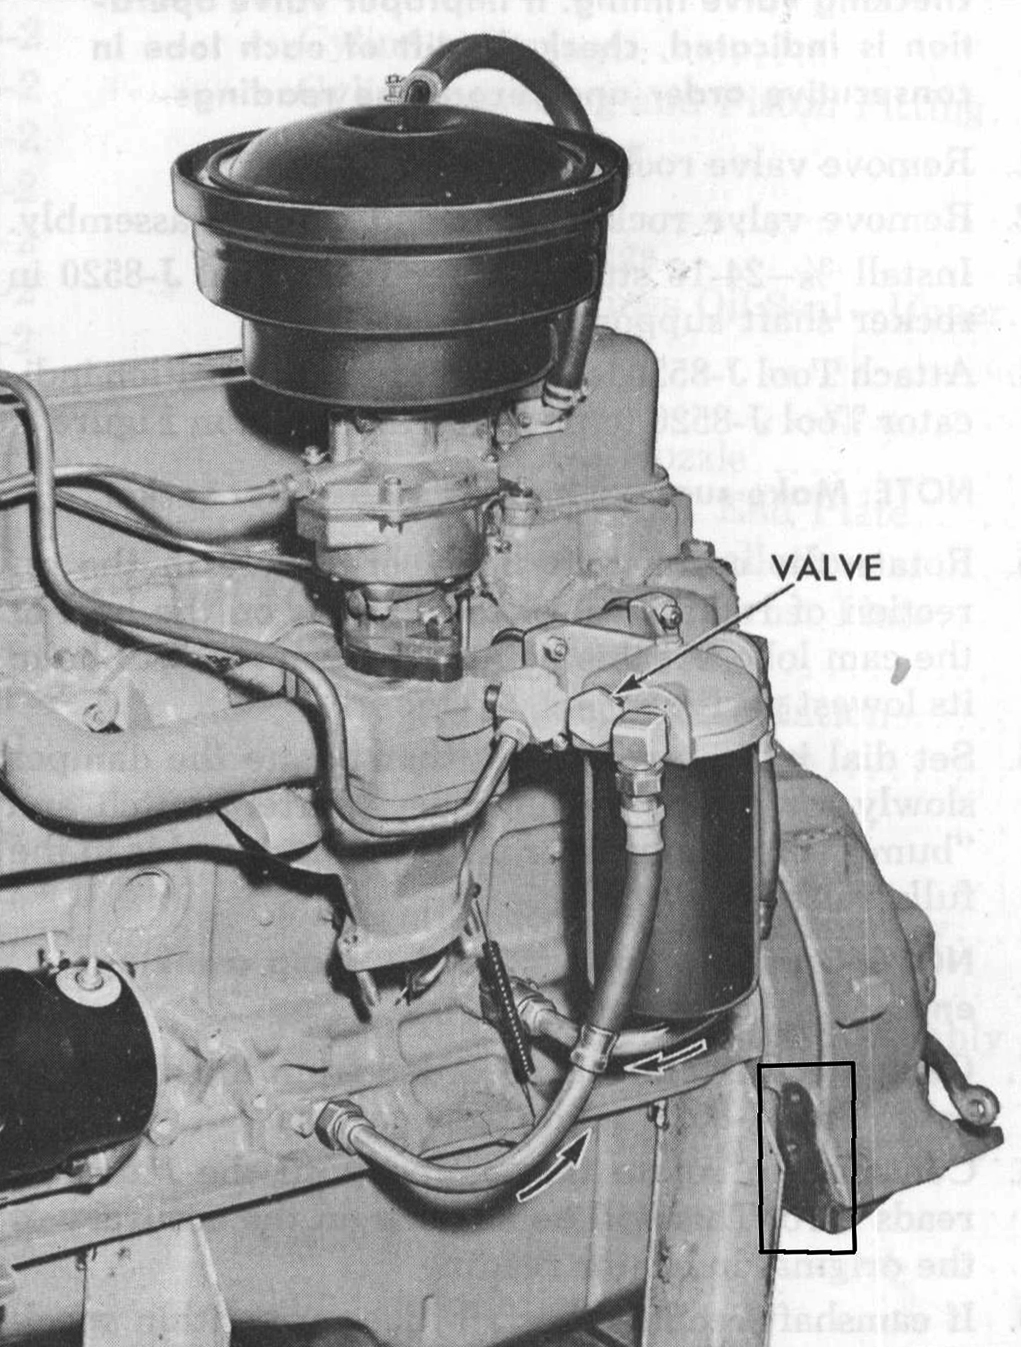
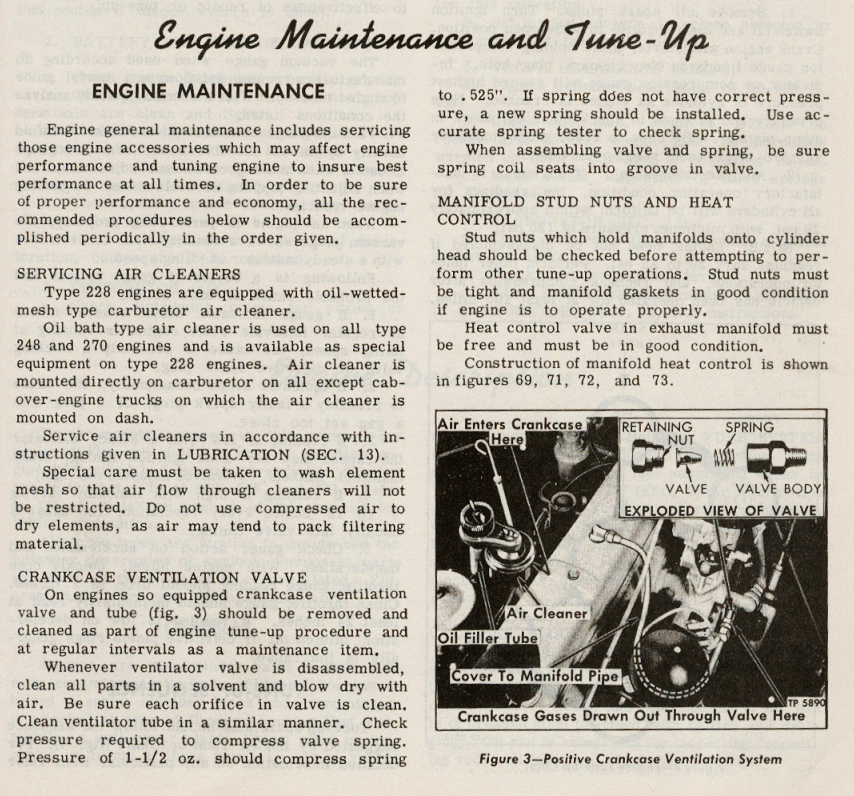
Here are two pages from the GMC manual that show that in 1954 GM actually made a stock PCV system for the 235. From personal experience, I know that the 1954 235 engine was unique in that it had 4 slits in the valve cover that exposed the engine to all matter of under-hood grime. I am not sure if the ones that were equipped with PCV originally had those slits closed?
We are developing more fun stuff for your engine. The Kits that are available now are Regular and Deluxe PCV Upgrade Kits, Spin-on Oil Filter Adapter Kits, and of course our popular HEI conversion kit. Check out all of our offerings at Farm-it-Out!