


Deve's Technical Network
1947-1955 1st Chevy Trucks
216/235/261 Engine Solutions & More

I am in the middle of a full frame up restoration, so the cab is on a special cart and I am in the midst of doing the body work. I said to myself, "SELF... if there is any welding that needs to take place, you gotta do it now so we can get some paint on this thing". That was thought #1, but it couldn't just end there. I have always thought it kind of a waste to have all of that space under the bench seat and not be able to easily get to it. Most truck owners store the jack under there, or maybe some things they don't need to get to frequently. This will change all that.
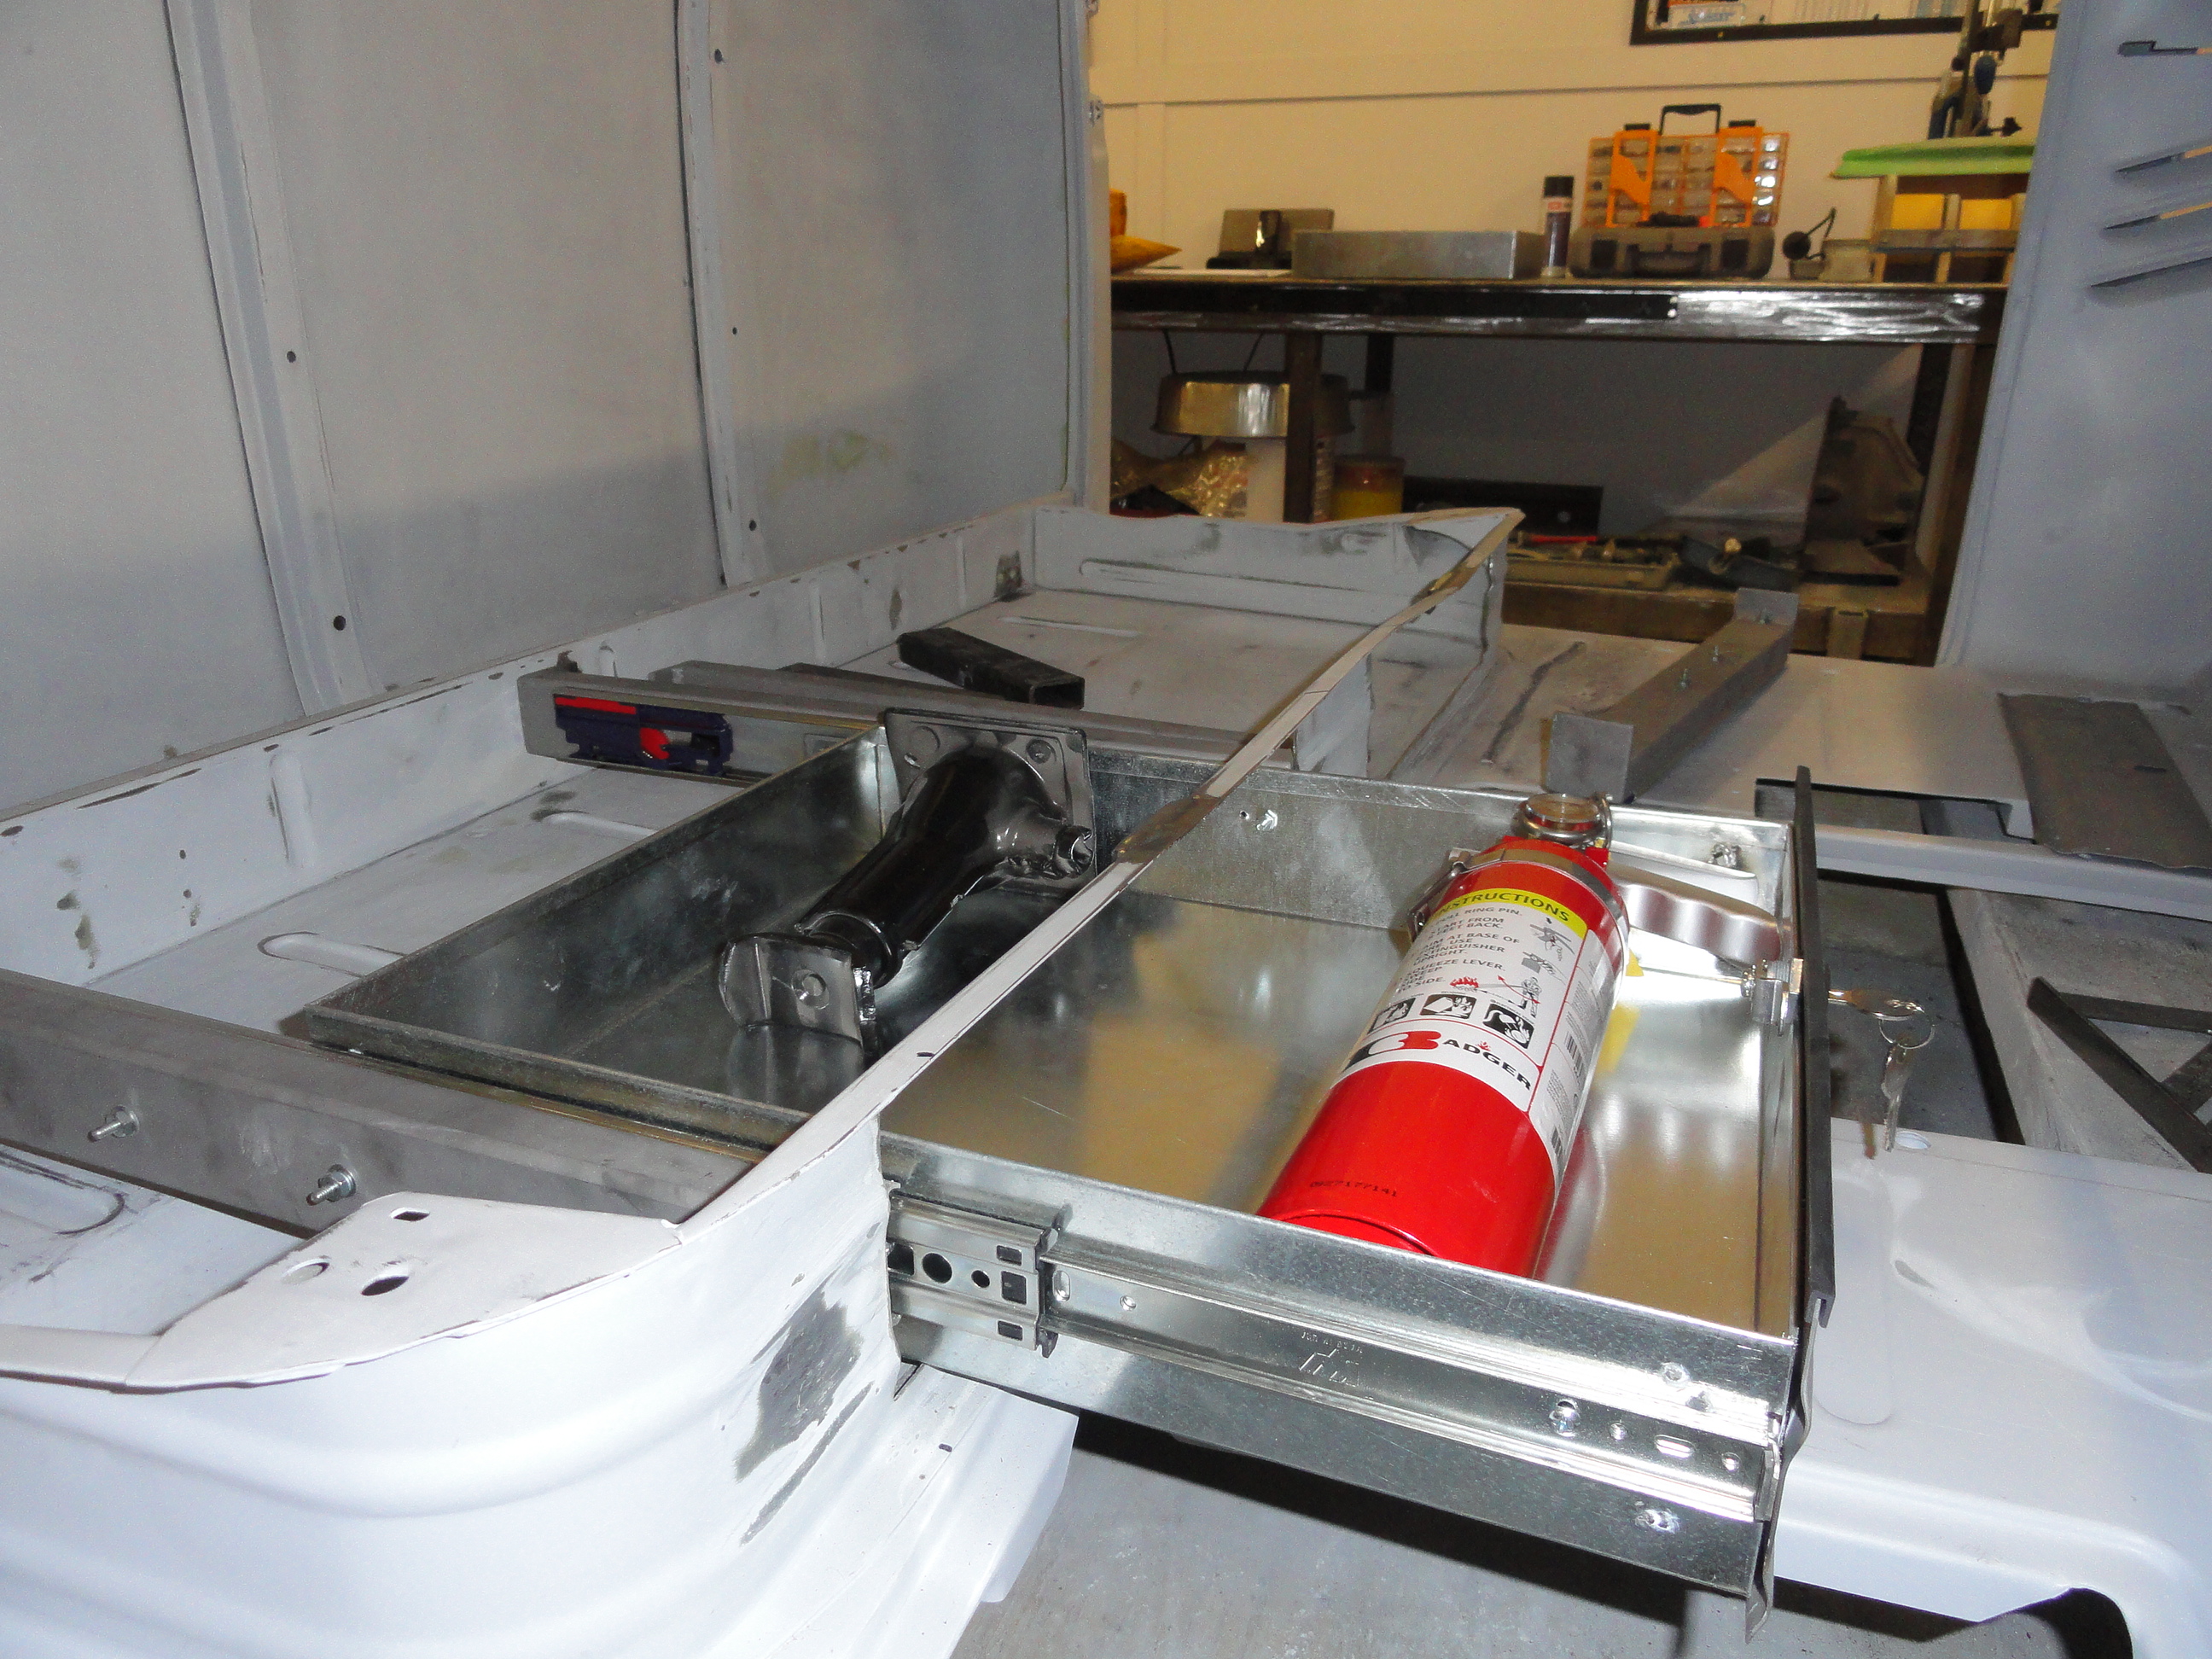
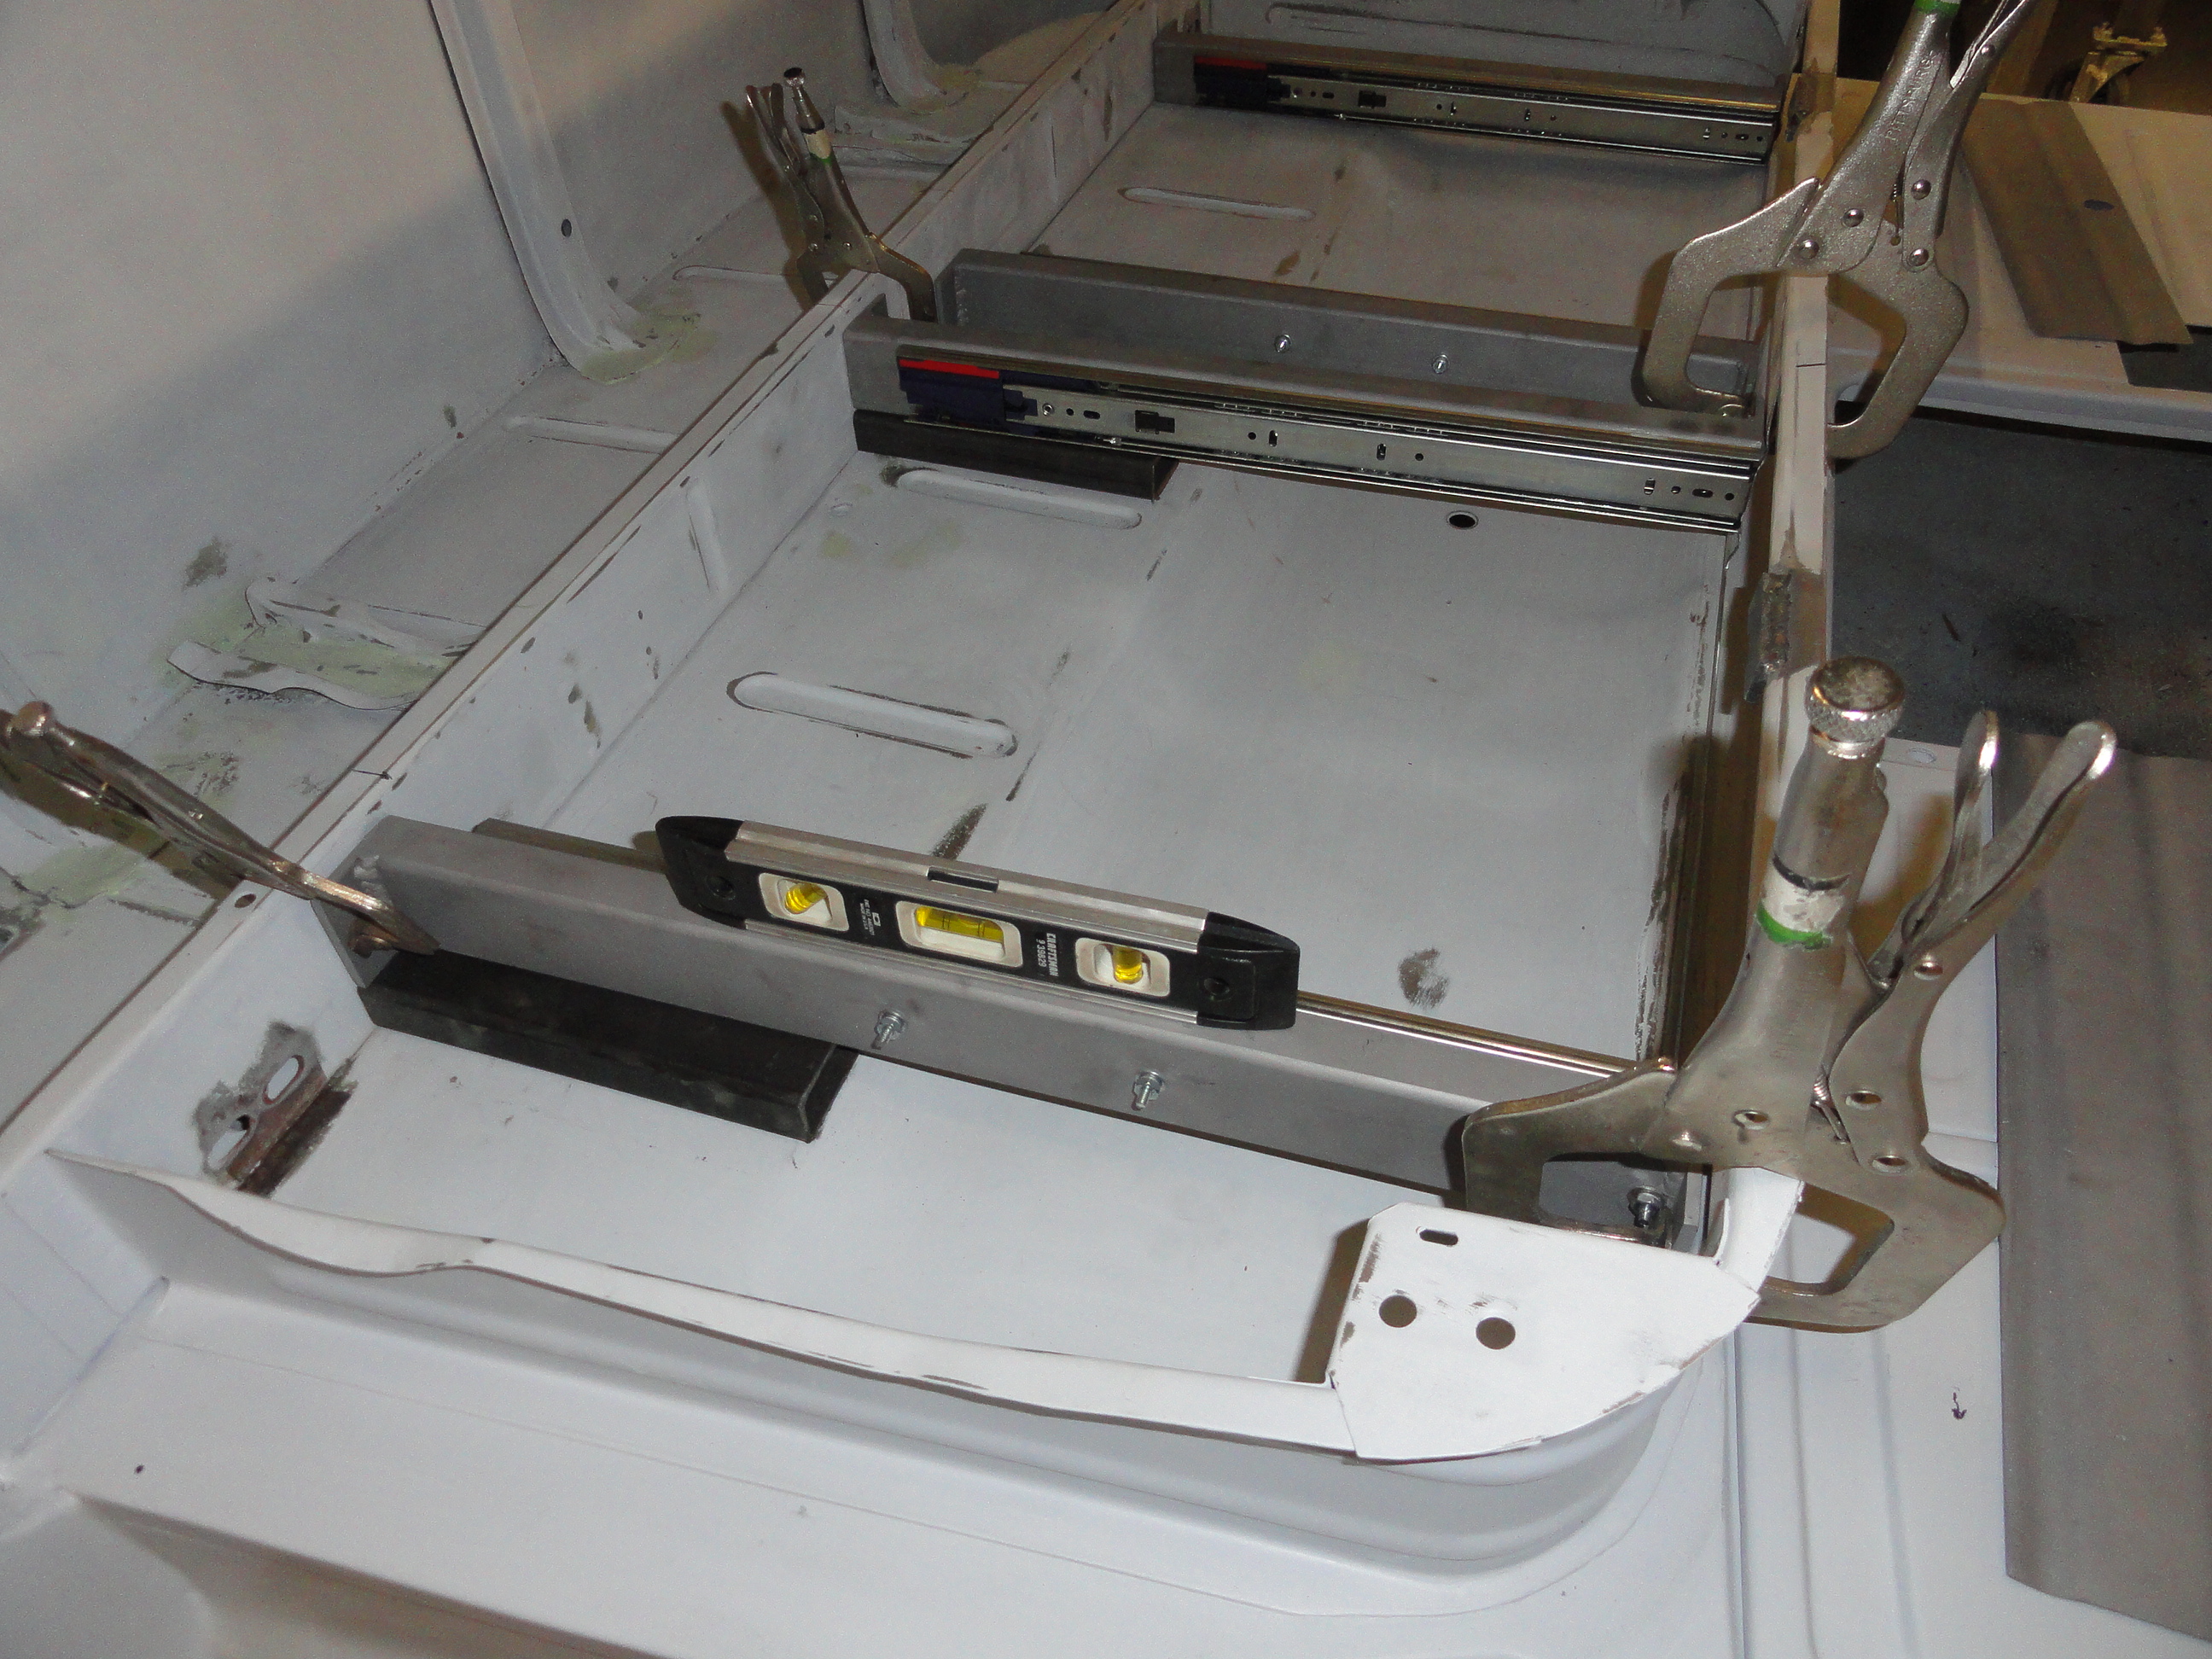
So the wheels started turning and I came up with this. I wanted maximum depth so I cut the openings 4 inches high leaving 3/4" off the floor so the floor mats wouldn't rub. The 4 inch drawer height happens to be the perfect height for the trucks jack and even a normal size fire extinguisher. Other considerations in deciding the width of the drawers were the floor shifter and leaving about 4 inches of unmolested steel in the center of the pedestal to retain its strength. I decided on 16 inches wide by 18 inches deep for the drawers.
Source Drawers out to local HVAC contractor.
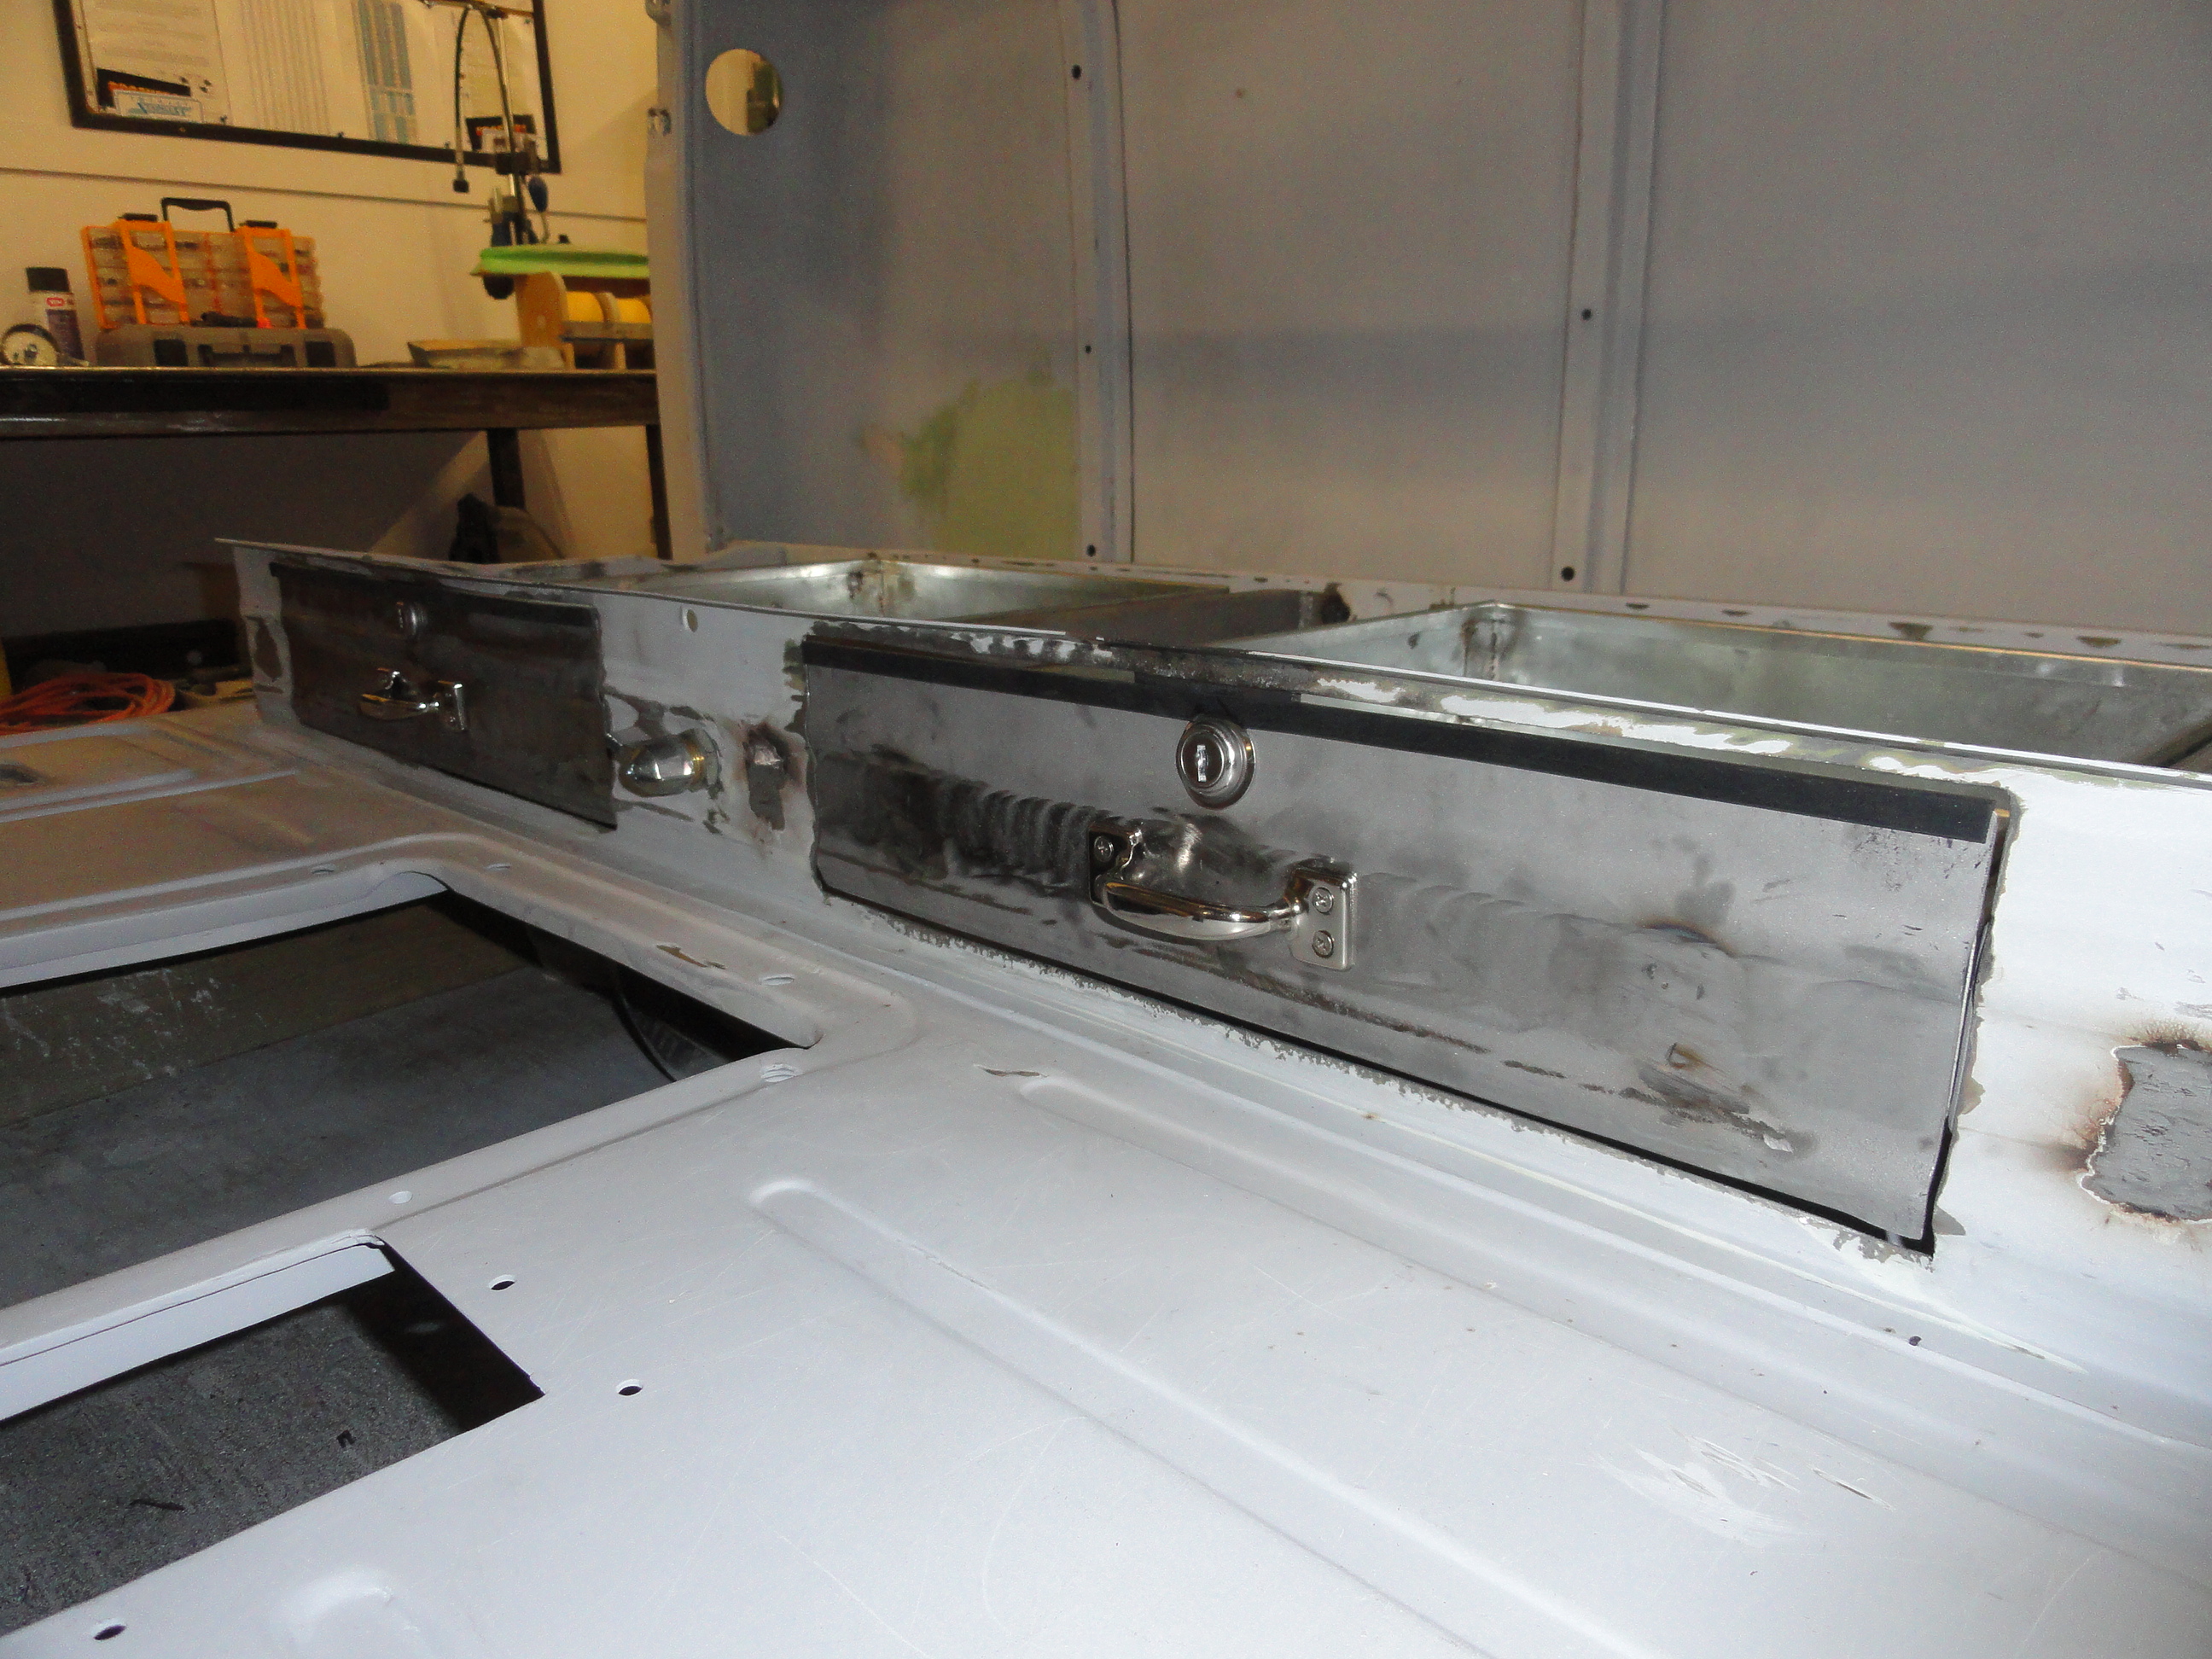
Locks, Sash Handles, Drawer Slides and Hardware source to local hardware store.
The plan is to put foam in each drawer to capture and secure the heavier items. There are a few considerations when choosing the proper drawer slides. You want them to be heavy duty and slide very easily, but you do not want a situation where the drawer is slamming against the stops during driving and creating noise. To eliminate the shuffling when closed I went with Slow-Close Drawer Slides that are rated at 150 pounds per drawer. The slow closers really nicely hold the drawers in place when closed.
Now, we don't want a situation where you are slamming on the brakes... picture this in your mind.... the drawer slides open real fast and jambs against the gas pedal and keeps the brake pedal from going down. NoSir, I don't think so! We need to secure those drawers so they simply can't come open during driving. I solved this by putting toolbox locking mechanisms on the drawer face. Due to the slow closers, handles were also necessary. Since the pedestal sits inward from the actual bench seat a bit, you can't see them unless you get out of the truck and look.
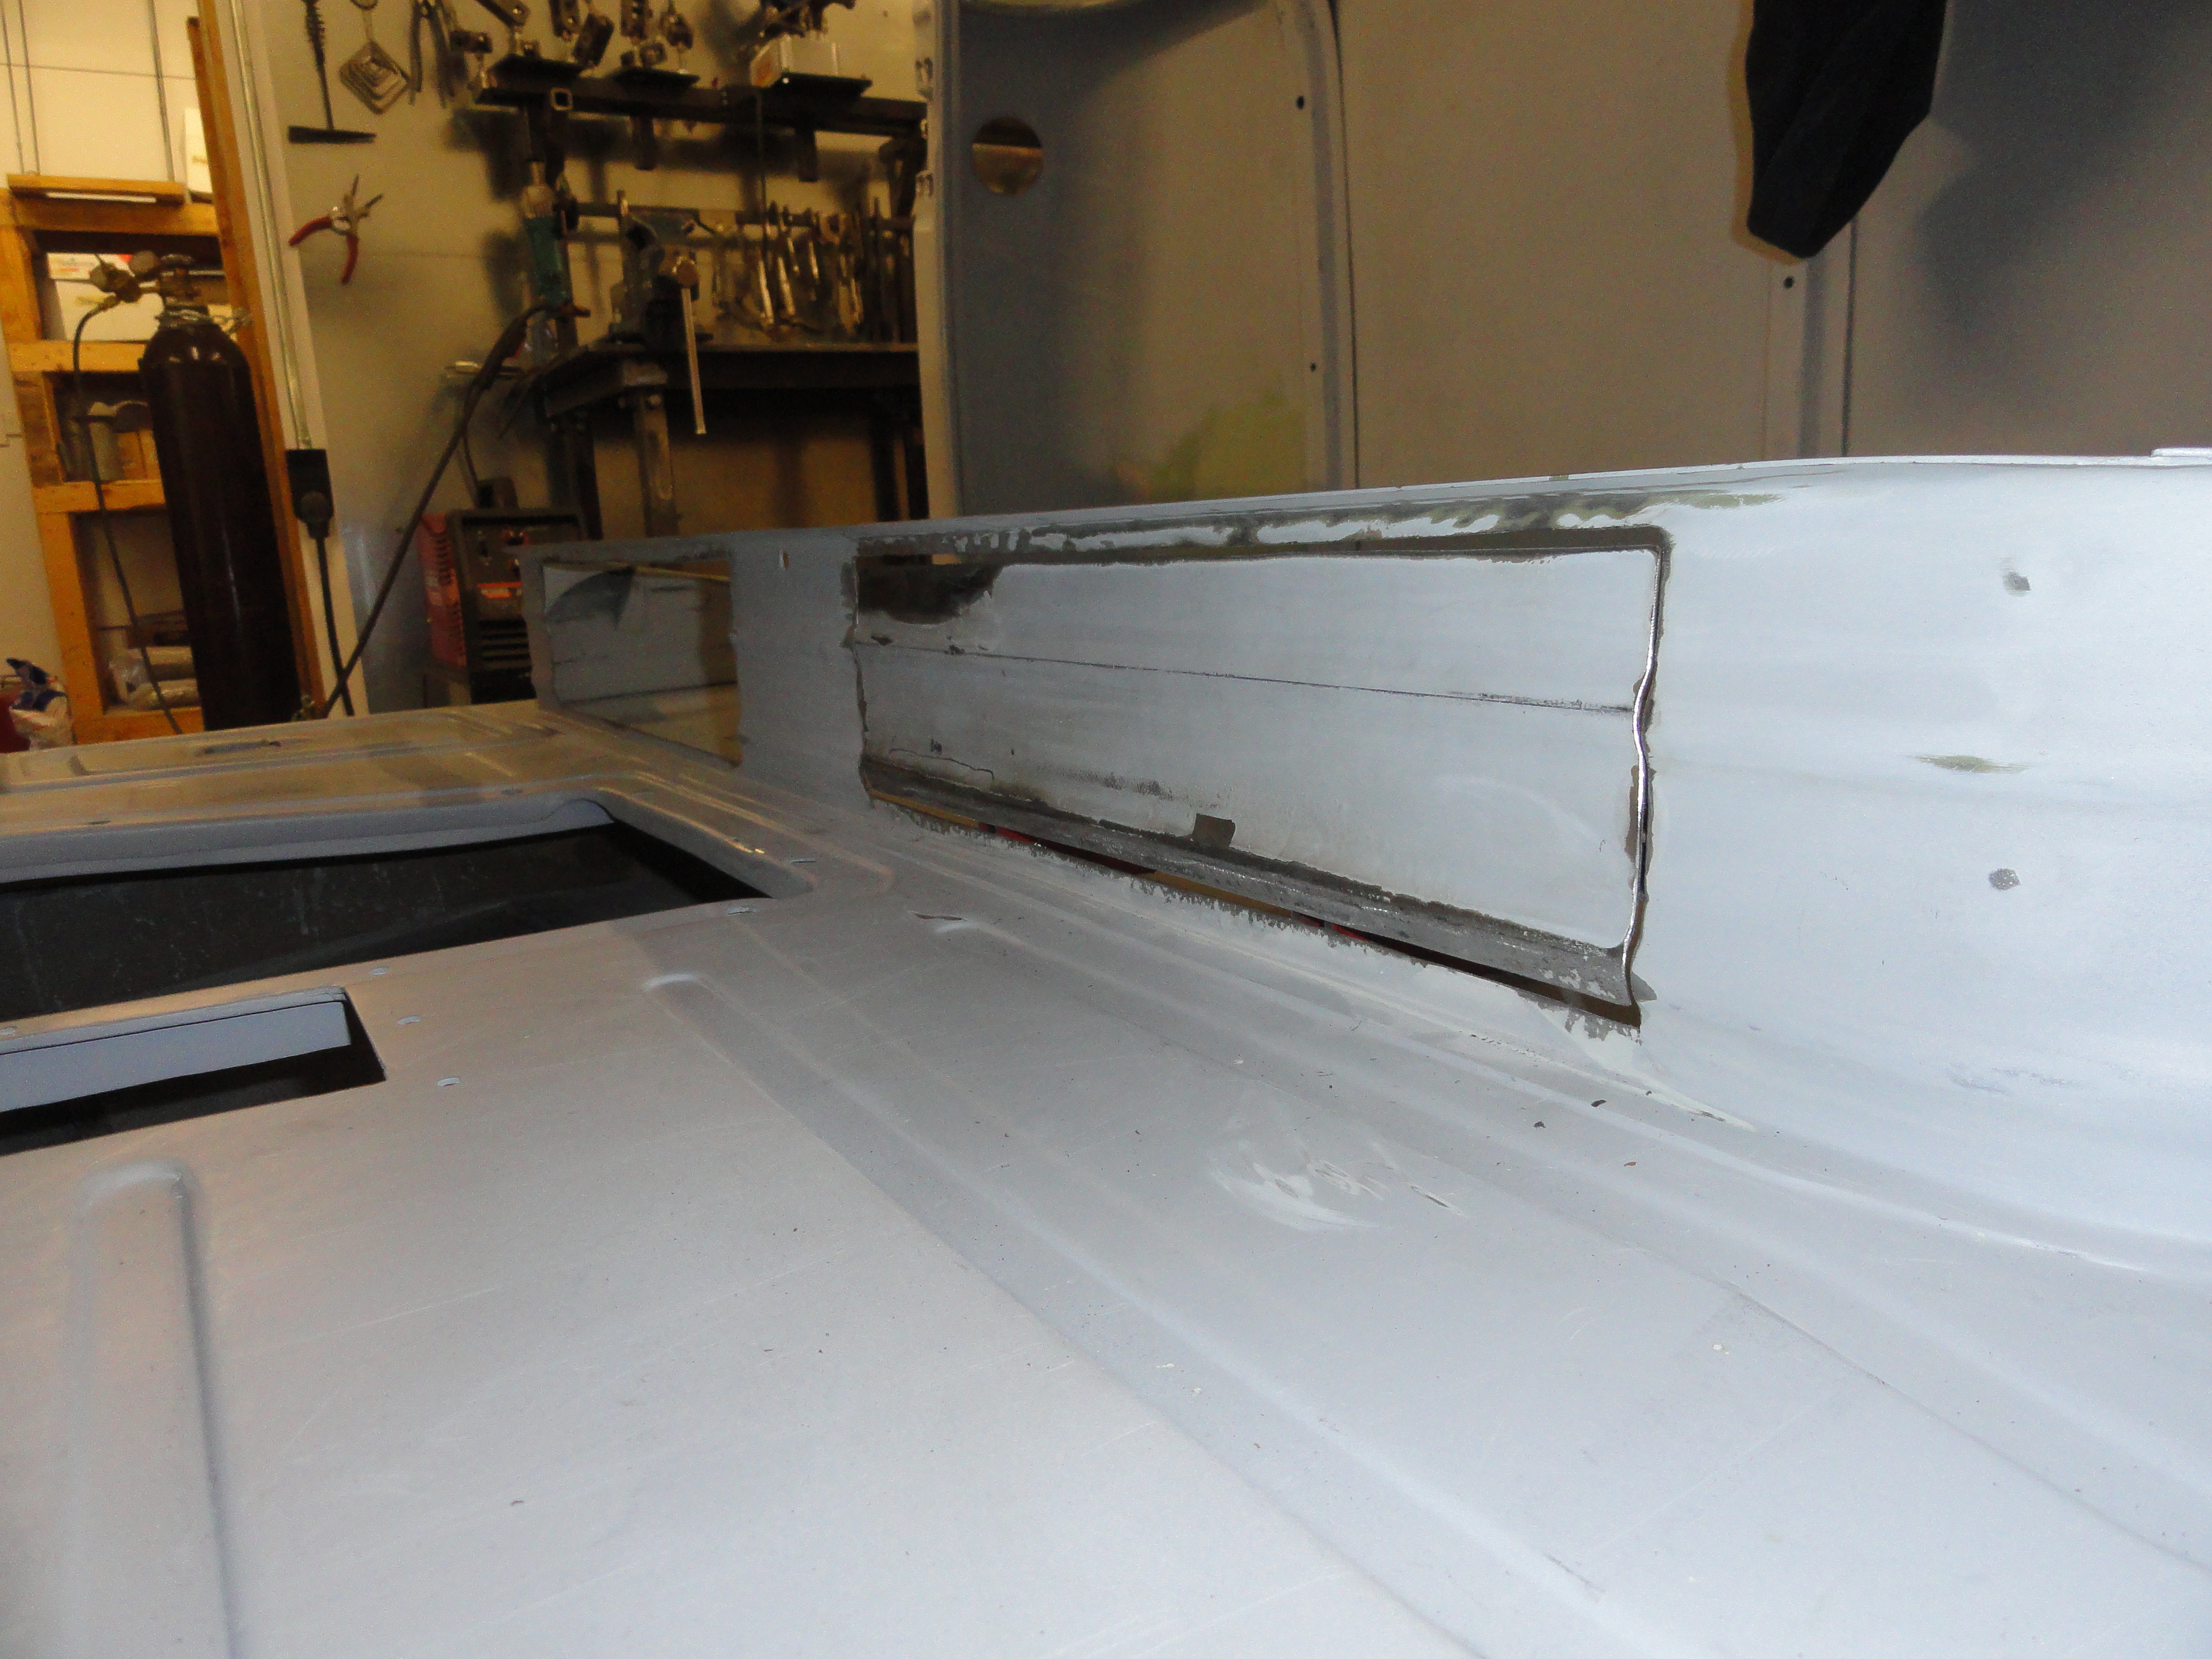
I decided on using the seat pedestals metal cutouts for the drawer facing so that when they are closed, everything looks like it belongs there. To do this, use a very thin grinding wheel and stay on the line you drew straight so that you don't have a very nasty looking opening to try and fix. If you take it slow and steady, it will come out fine.
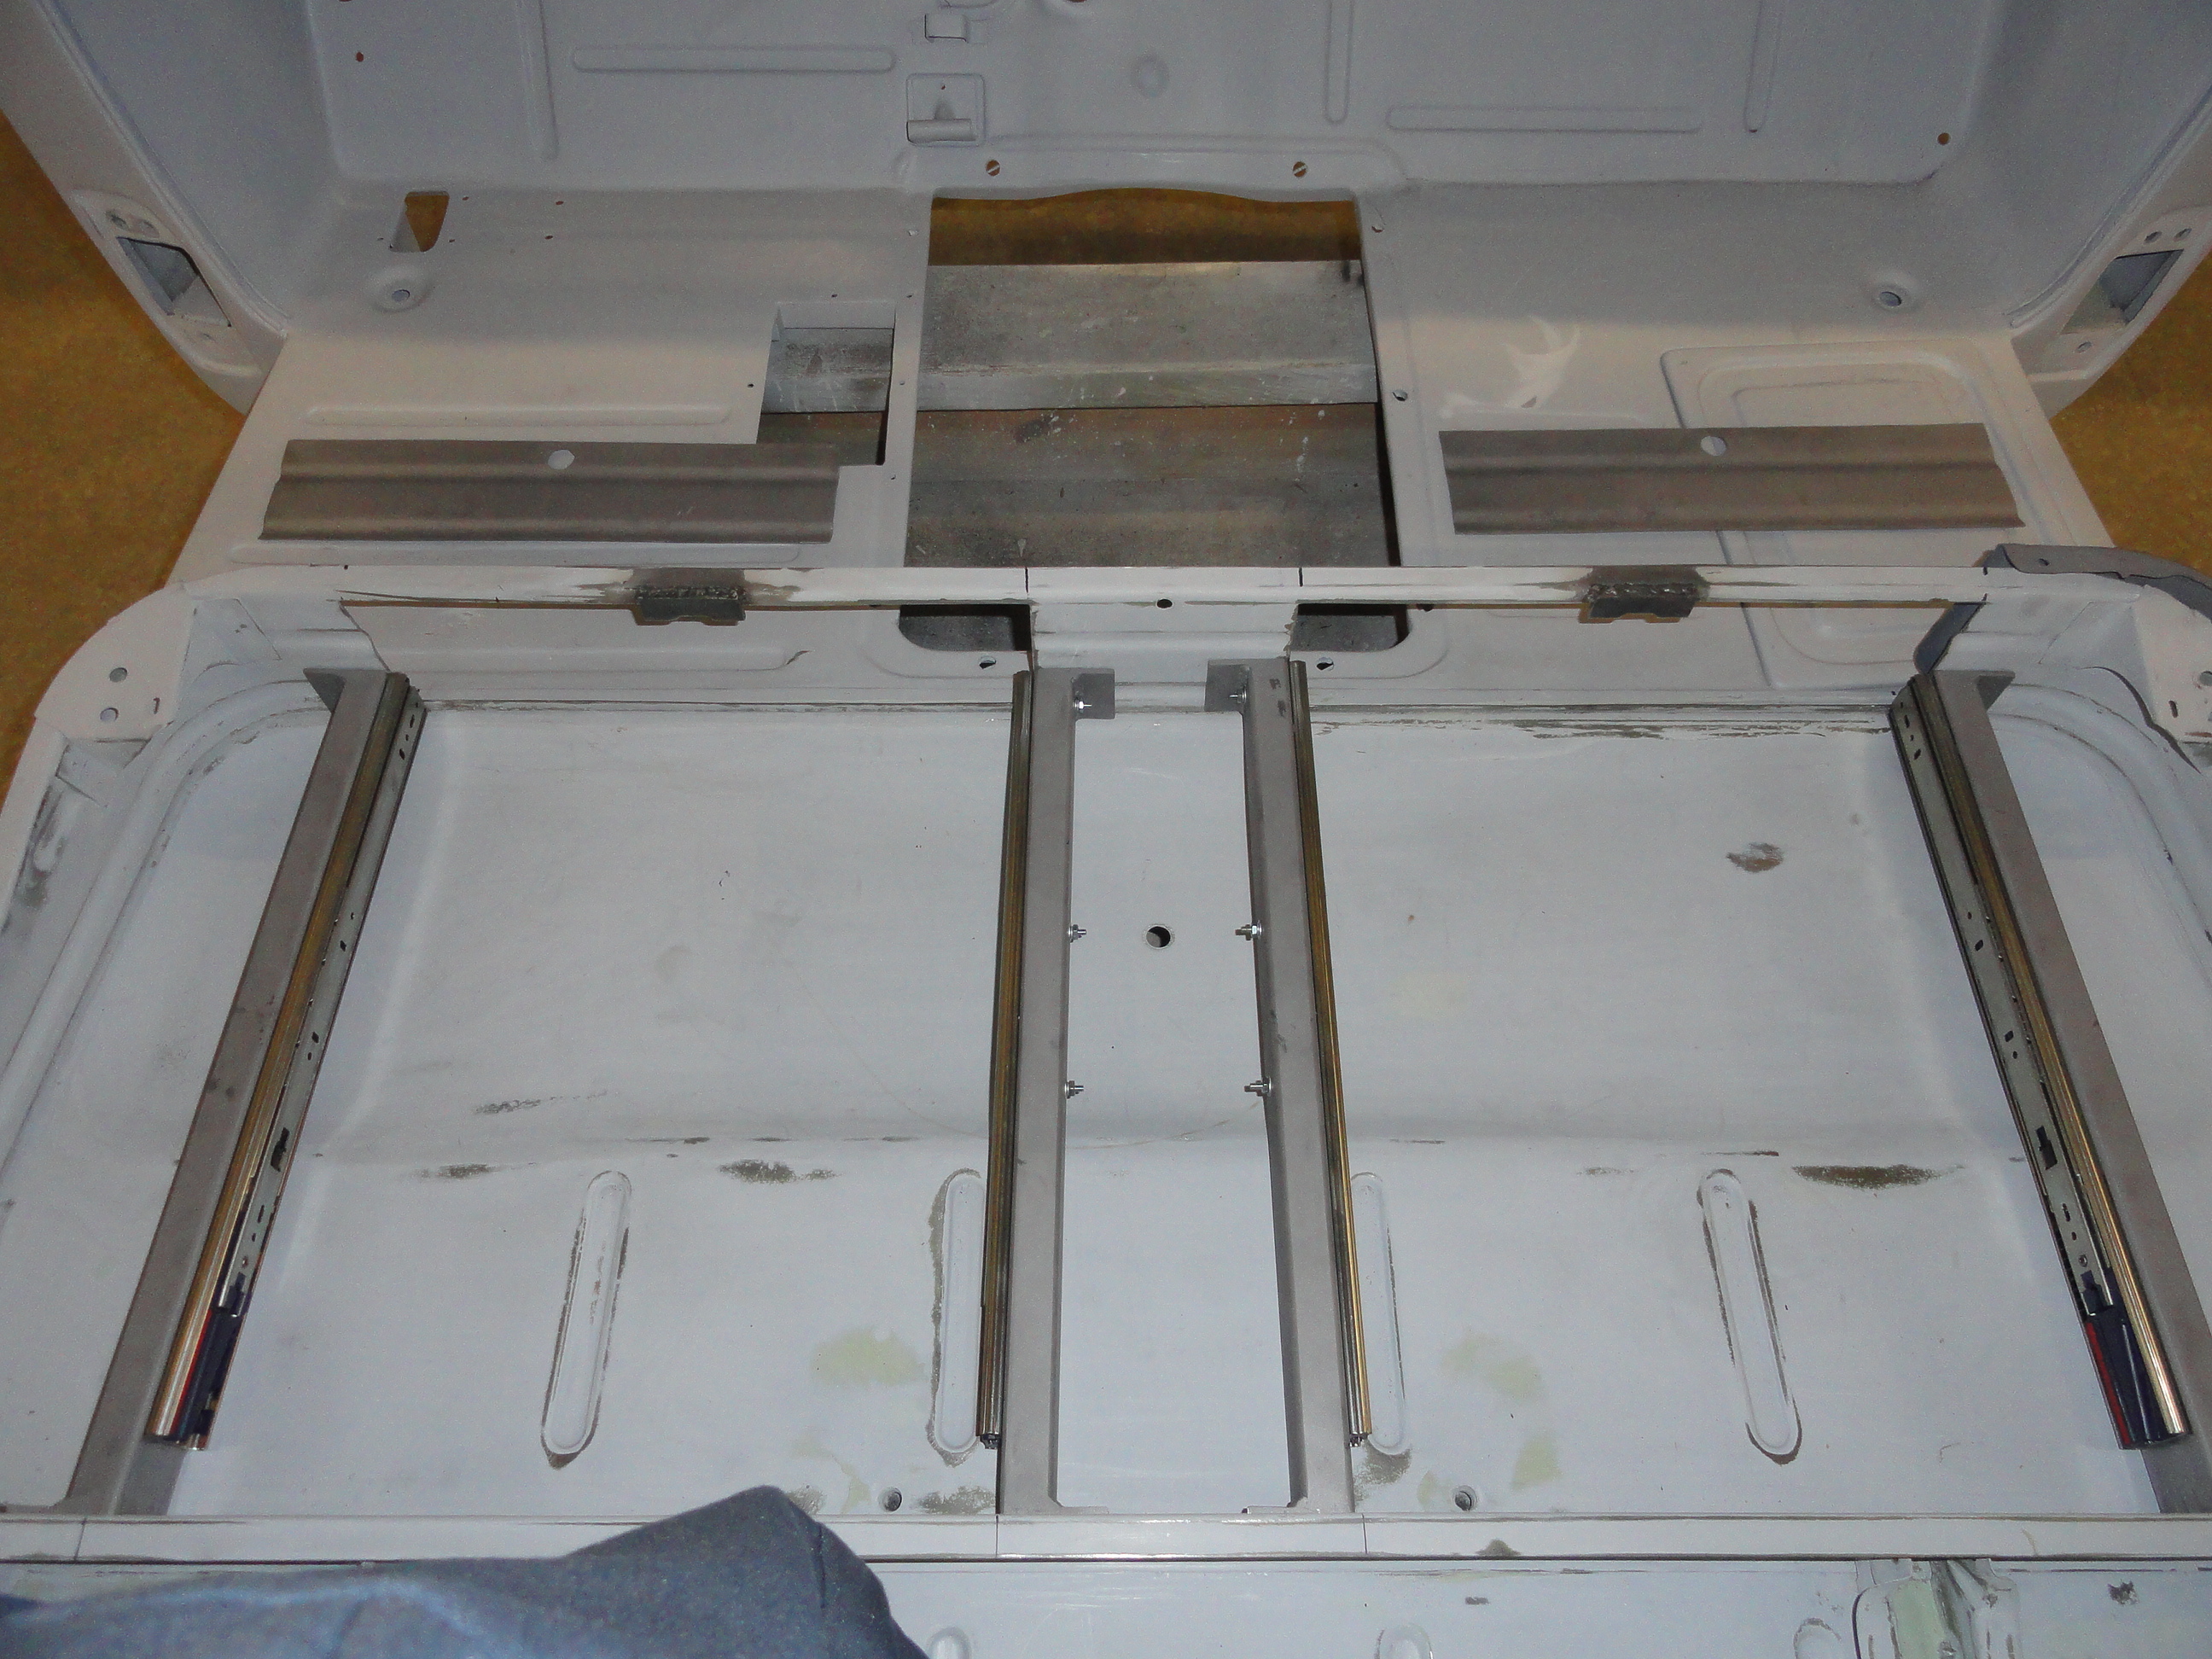
I made the drawer slide mounts out of 1 by 2 rectangular steel tubing. I then made 2 inch square ends to weld on to the rectangular tubing for either bolting front to back on the pedestal or welding them in place by spot welding. I drilled 2 3/8" holes for each spot-weld through the pedestal so it looks really nice. It's very tedious work because you can't mess up the dimensions one little bit. Since it's metal, it is not forgiving and your drawers will be either too tight or too loose if you don't measure a few times before welding. As any drawer installer person knows, when installing the drawer slides, even though you leveled the mounts perfectly, install the slides tilting inward by about 1-2 degrees. That is about the thickness of the screws you use to mount them, not very much at all. This makes them almost close themselves when the drawer is extended, but you want just a slight tendency for them to close, not full on closing.
The drawers themselves are made out of 24 gauge galvanized tin. This made for some irregular painting prep, but was necessary since the place to go get tin drawers made up is your local plumbing and heating contractor. They have all the bending and cutting equipment already since they make duct work everyday. I ended up sandblasting the drawers in my blast cabinet to eliminate the galv and then sanded each surface smooth with 220 grit. Epoxy primer will stick very nicely I think. The cutouts for the drawer fronts are 4 x 16 inches but the drawers are only 3 inches tall. That seemed to work out the best.
So in review.. I used the following dimensions for each part:
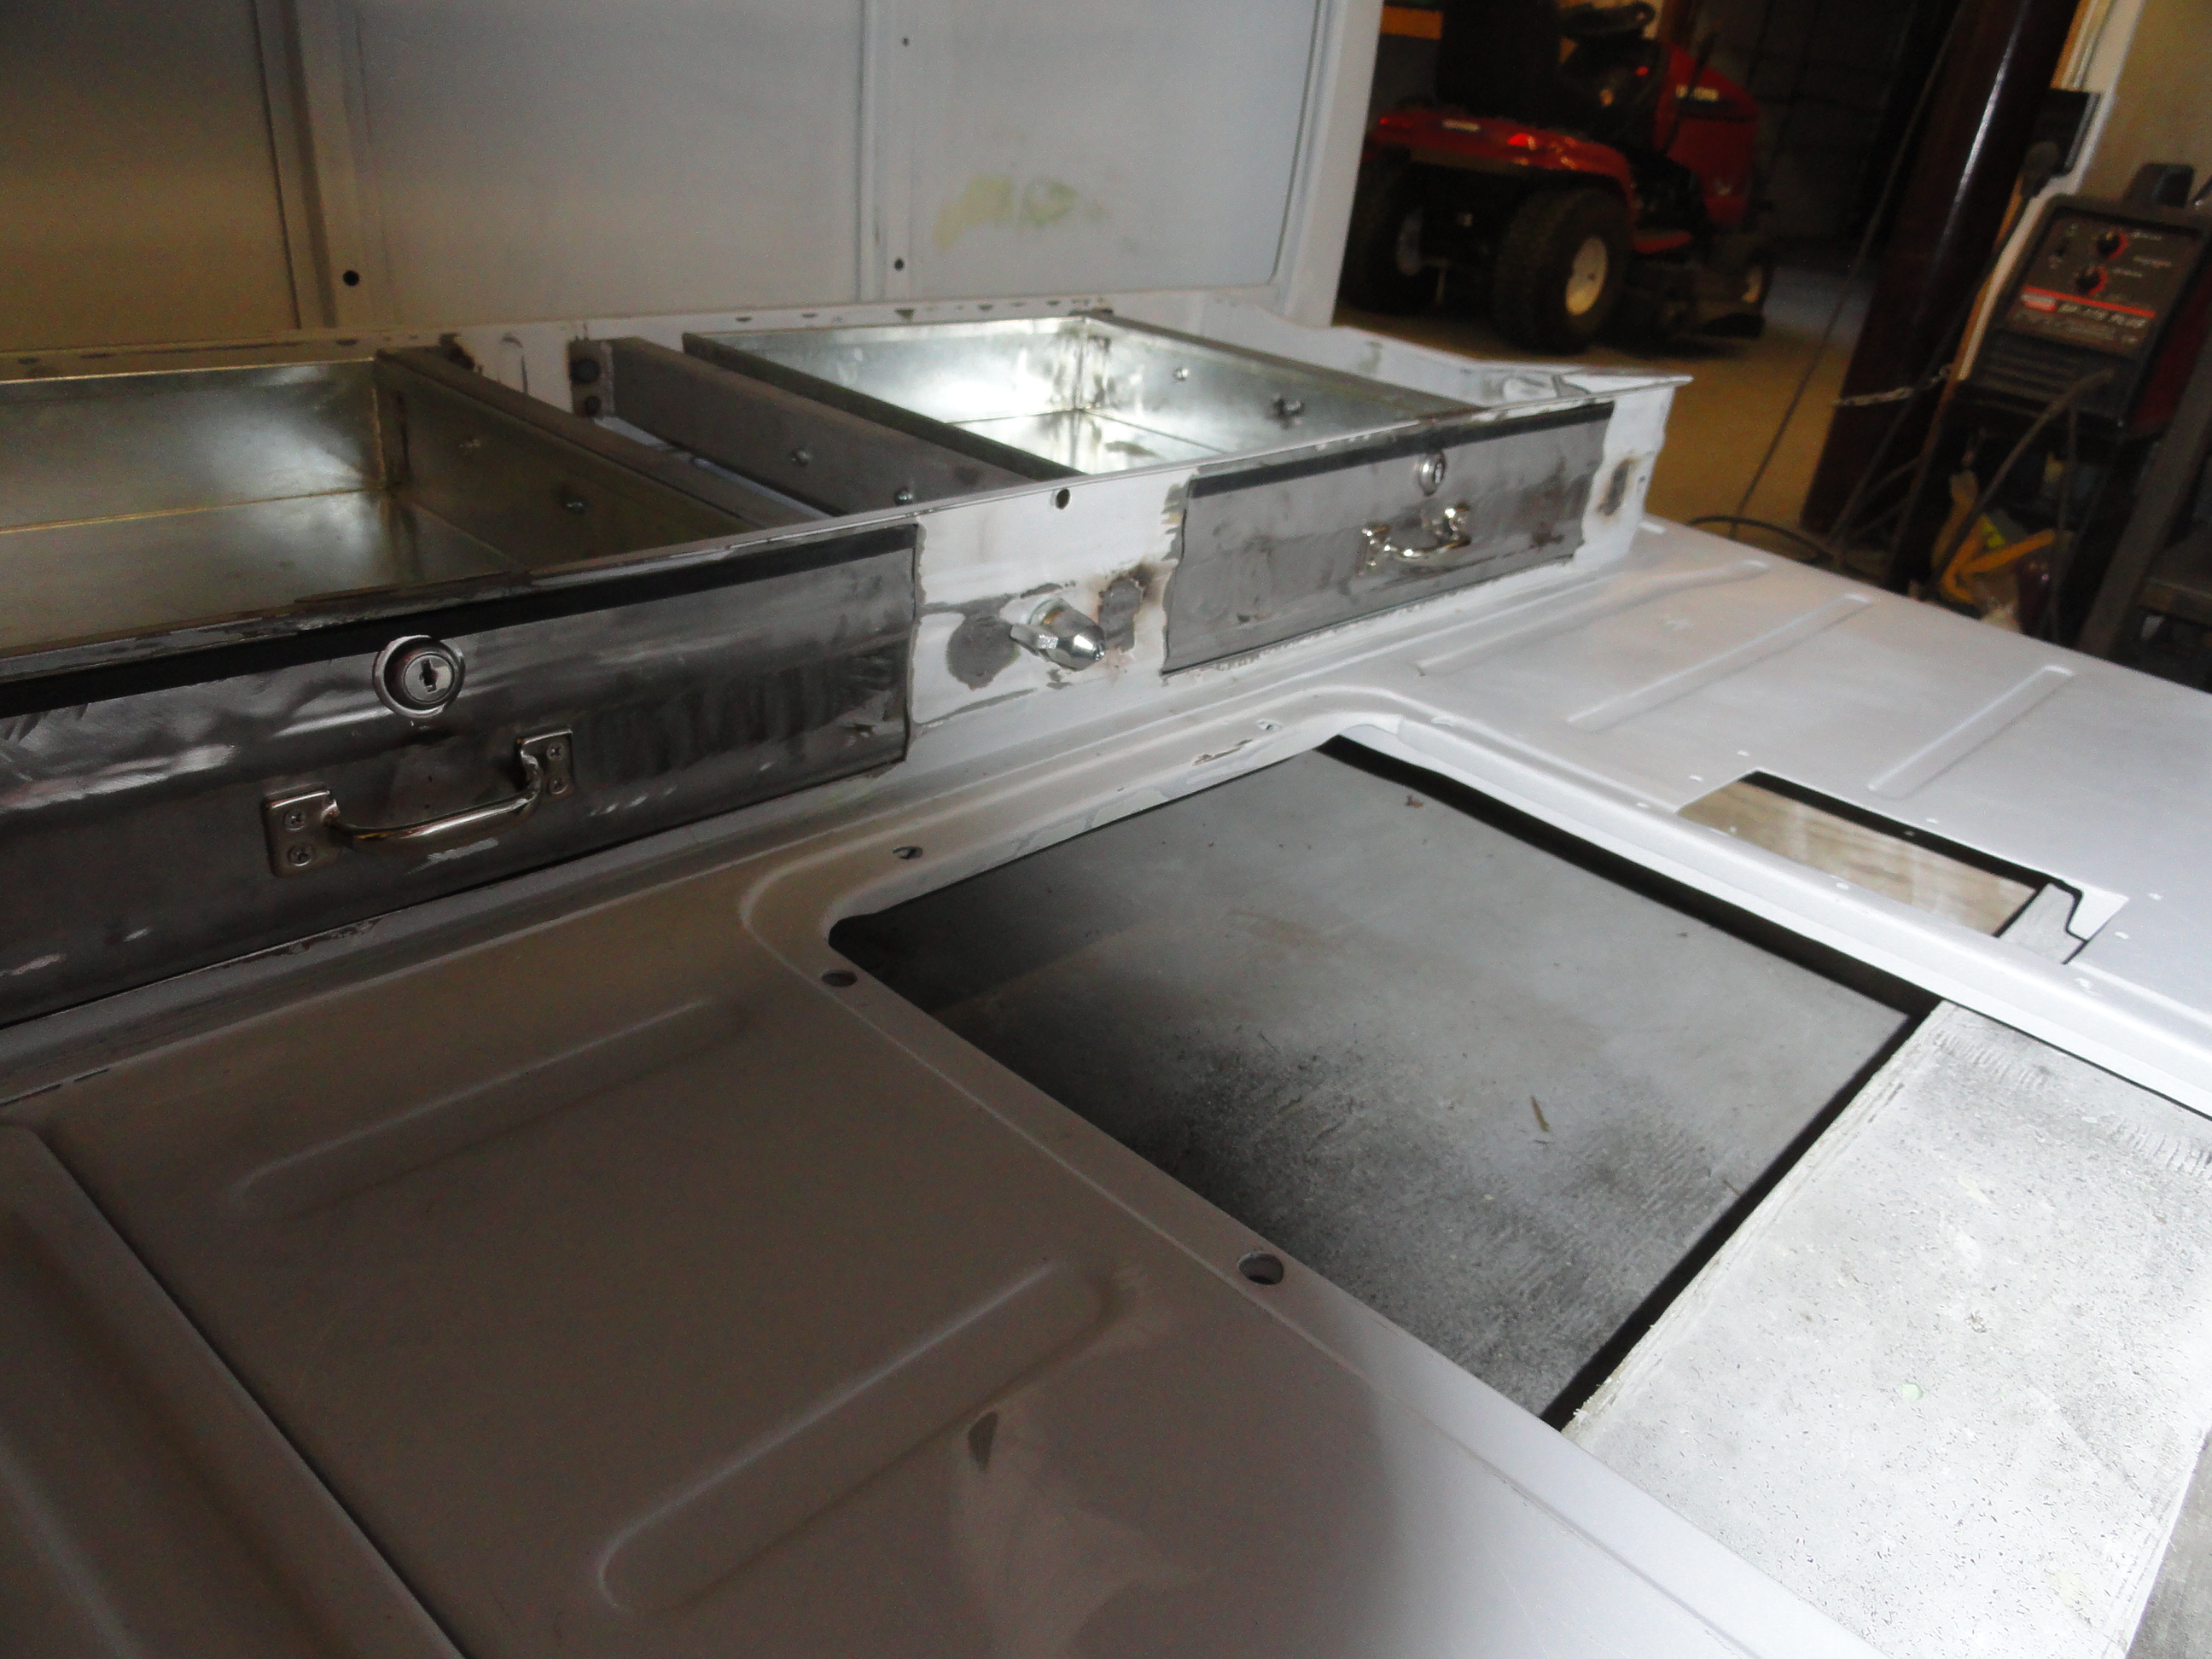
I decided since I have a floor shifter and about 6 inches of separation between the drawers, to put a master power cutoff switch in the center. Nobody will notice it and it's relatively easy to get to that way. If I had any words of caution it would be to be VERY careful how you cut the openings out if you plan on keeping the cutouts and use them for the drawer face. Anything we can do with this project to make it better?